


In the online business, owners often focus on acquiring new customers and getting more orders to increase revenue. But for a second thought, what if you could increase the revenue with the existing number of orders you get regularly?
That’s basically increasing the average order value on e-commerce. The technique is to motivate the customers to spend more per order.
Starting with the basic concept, this article will discuss how to increase the average order value on a WooCommerce website.
Quick Overview
How to calculate and increase average order value in WooCommerce.
What is AOV?
Customer’s spending of each order.
Average Order Value = Total Revenue ÷ Number of Orders
How to?
✅ Bundle: Pair popular product with less popular products.
✅ Upsell: Offer a high value / expensive version of the product.
✅ Cross-sell: Suggest complementary products that go well with the item.
✅ Discounts and Sales: Offer special discounts and sales campaign.
✅ Back Orders: Accept back orders for the products that are currently out of stock.
✅ Loyalty Programs: Reward points for every dollar spent by a customer.
To implement these strategies, you can run Targeted Ads, Email Marketing campaigns, and Content Marketing.
What is Average Order Value (AOV)?
In simple words, your Average Order Value is the average amount a customer spends per transaction on your website.
For example, say you receive an average of 20 orders per day with a $2,000 revenue. That means customers spend an average of $100 for each order. That’s your average order value.
Now imagine if you could increase the average order value to $120. Without gaining a single new customer, your daily revenue would climb to $2,400. Basically, more revenue from the same traffic.
Before you can improve the AOV, you need to know where you stand. Find your current average order value using your e-commerce platform’s analytics. Most platforms like WooCommerce, Shopify, and BigCommerce have this metric readily available in their dashboards.
Once you have your number, set a realistic goal. Aim for a 10-20% increase initially. A small bump in your AOV can lead to a significant difference in annual revenue.
How to calculate average order value?
You can calculate it with a simple formula:
Average Order Value = Total Revenue ÷ Number of Orders
Increasing your AOV is one of the most effective ways to boost profitability. Think about it: every dollar you add to an order goes straight to your bottom line without the extra cost of customer acquisition. It makes your marketing campaigns more profitable, your business more sustainable, and your growth more scalable.
How to Increase Average Order Value in WooCommerce (Key Strategies)
Increasing your AOV is not about pushing customers to spend more money. Instead, it’s about providing value, creating opportunities for them to discover new products, and making the shopping experience more convenient and rewarding. Here are some of the most effective strategies you can implement to encourage customers to add a little more to their cart.
✅ Product Bundling
One effective way to increase your average order value is by pairing your top-selling items with products that are either less popular or newly introduced.
Create “bundles” of related products and offer them at a slightly discounted price compared to buying each item individually. This creates a sense of value and convenience.
Let’s say a gaming headphone is the top-selling product in your store. But products like a mouse or a keyboard don’t get much traction.
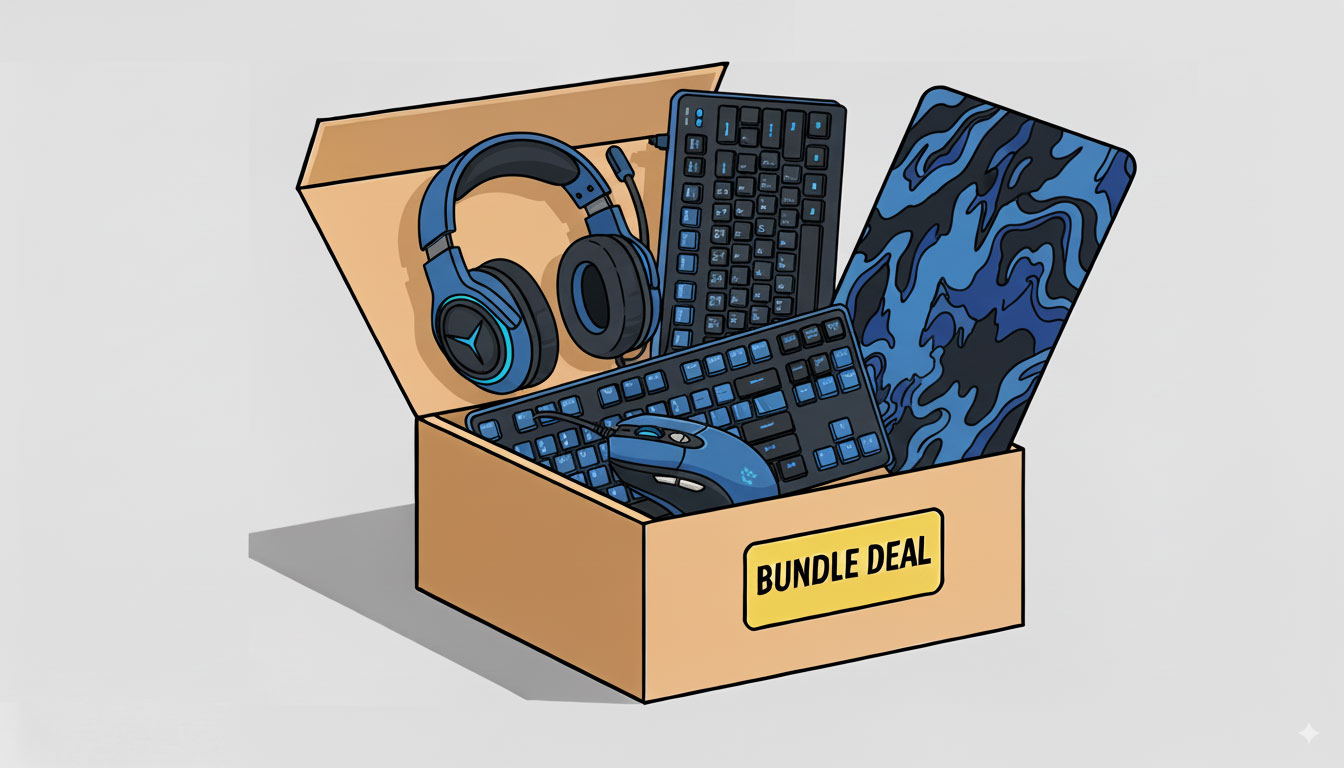
Rather than selling them separately, you can bundle the gaming headphones with a keyboard+mouse combo pack.
To push the bundle sale, you can also offer a special discount. For example, instead of selling the headphones for $170, the keyboard for $80, and the mouse for $70 separately (a total of $320), you could offer the full combo for just $300. Customers will see it as a great deal, and you’ll raise your average order value at the same time.
✅ Upselling and Cross-selling
Two of the most effective strategies to increase average order value are upselling and cross-selling.
- Upselling: Attract customers to purchase a more expensive or upgraded version of the product they are considering. It’s like offering a premium model, a larger size, or a version with more features.
- Cross-selling: Suggest complementary products that go well with the item in the customer’s cart. A customer buying a camera? Recommend a camera bag, an extra lens, or a tripod.
With WooCommerce builders like ShopEngine, you can easily add these features to your online store.
How to set up upsell products in WooCommerce
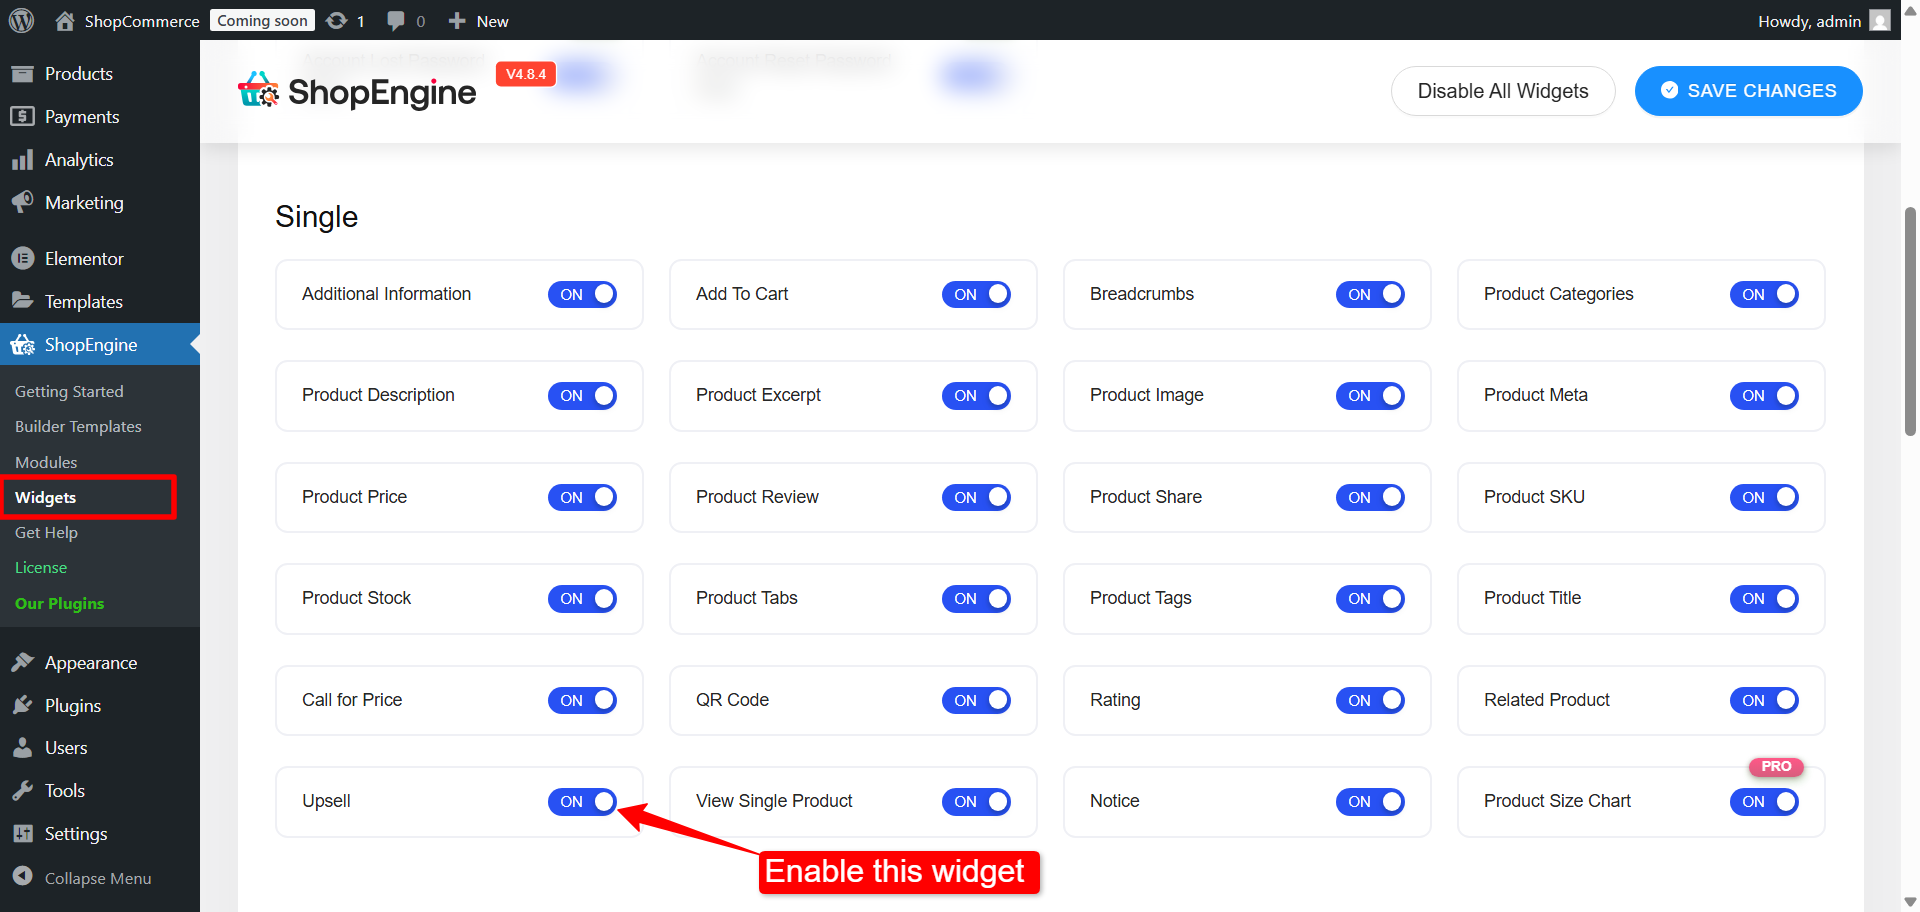
Once you install and activate the ShopEngine Pro plugin on your website, go to ShopEngine → Widgets from your WordPress dashboard, and activate the Upsell widget. You will find this widget under the Single category (for single product pages).
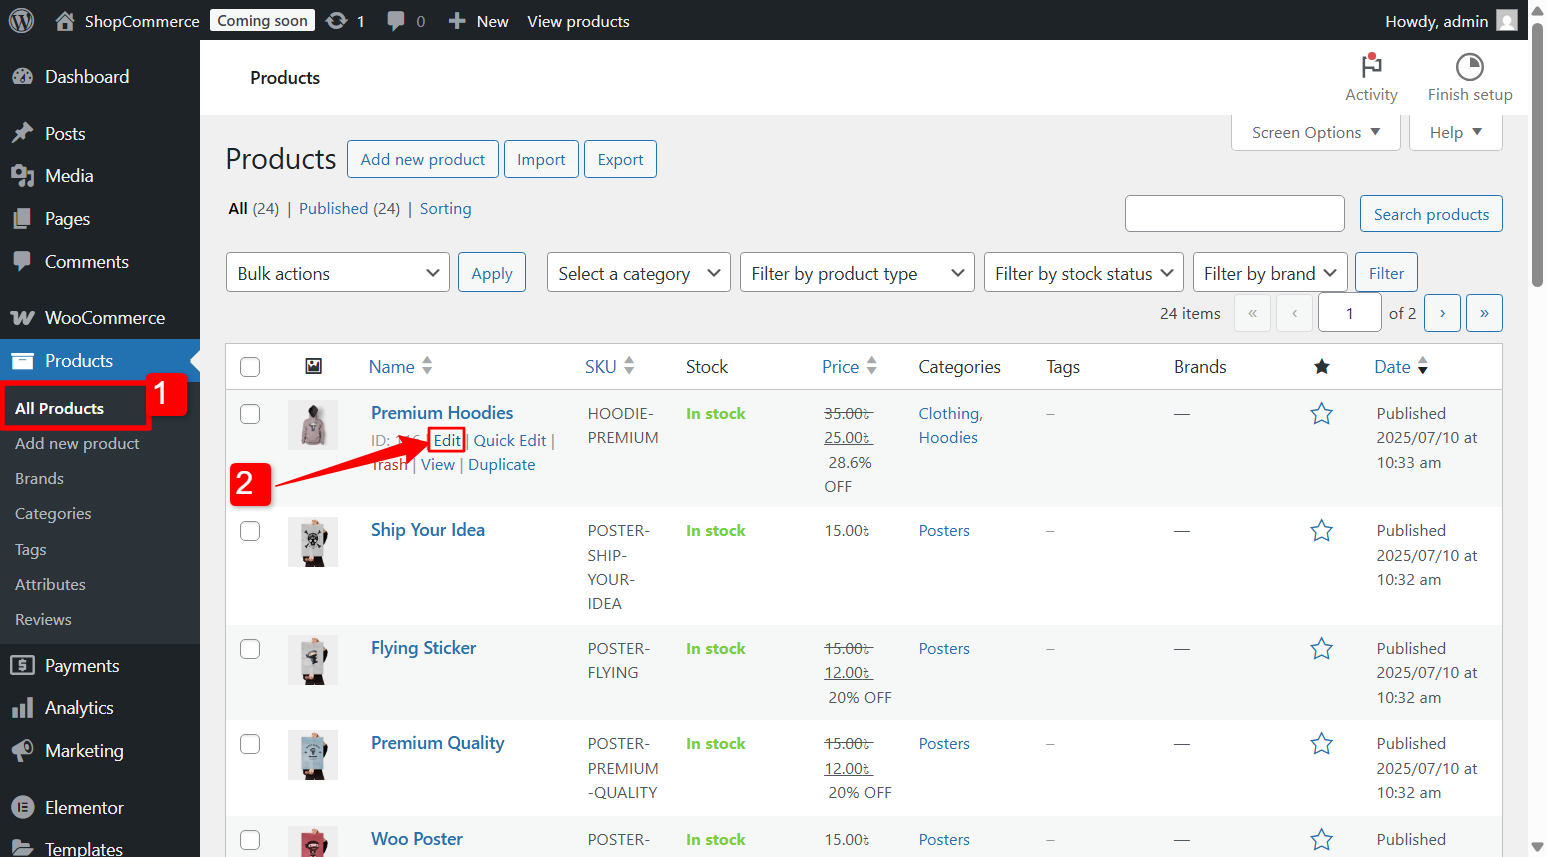
Then, you need to set up the products in WooCommerce for upselling. From your WordPress dashboard,
- Go to Products → All Products.
- Click the Edit option for the product you want to configure.
- Scroll down to Product Data.
- Switch to the Linked Products tab.
- Here, in the Upsells field, add the products you want to upsell.
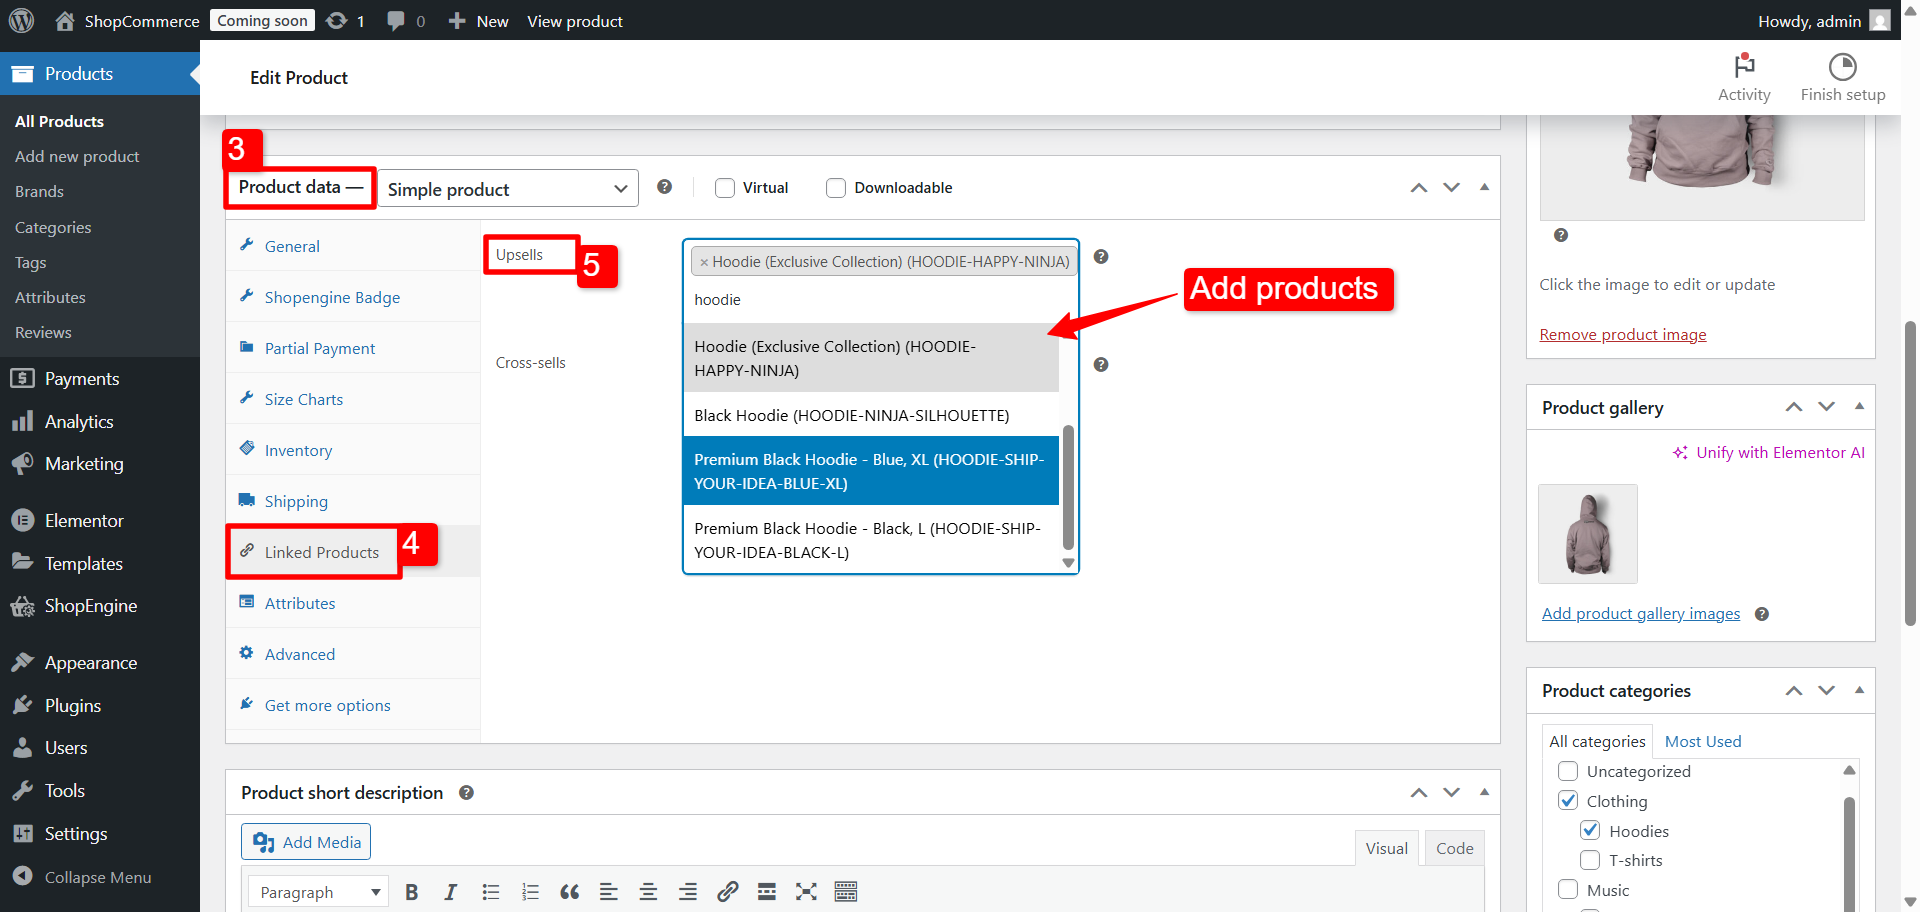
Now, in the single product page template, drag and drop the Product upsell widget into the editor. With ShopEngine, you have the following features:
- Enable Slider: Enable this one to show upsell products in a slider.
- Flash Sale: Turn this option on if you want the products on sale to show the sale badge.
- Sale Price: Turn it on if you want to show the sale price as well, along with the normal price.
- Cart Button: Turn on this option so people can add the upsell products to their shopping cart.
- Products to Show: Set the total number of upsell products you want to show on the product page.

You can also show the upsell products in a slider. Controls like Slides per view, Loop, Autoplay, Slide Speed, and Arrows are available.
Read more: How to set up upsell products in WooCommerce

How to set up cross-sell products in WooCommerce
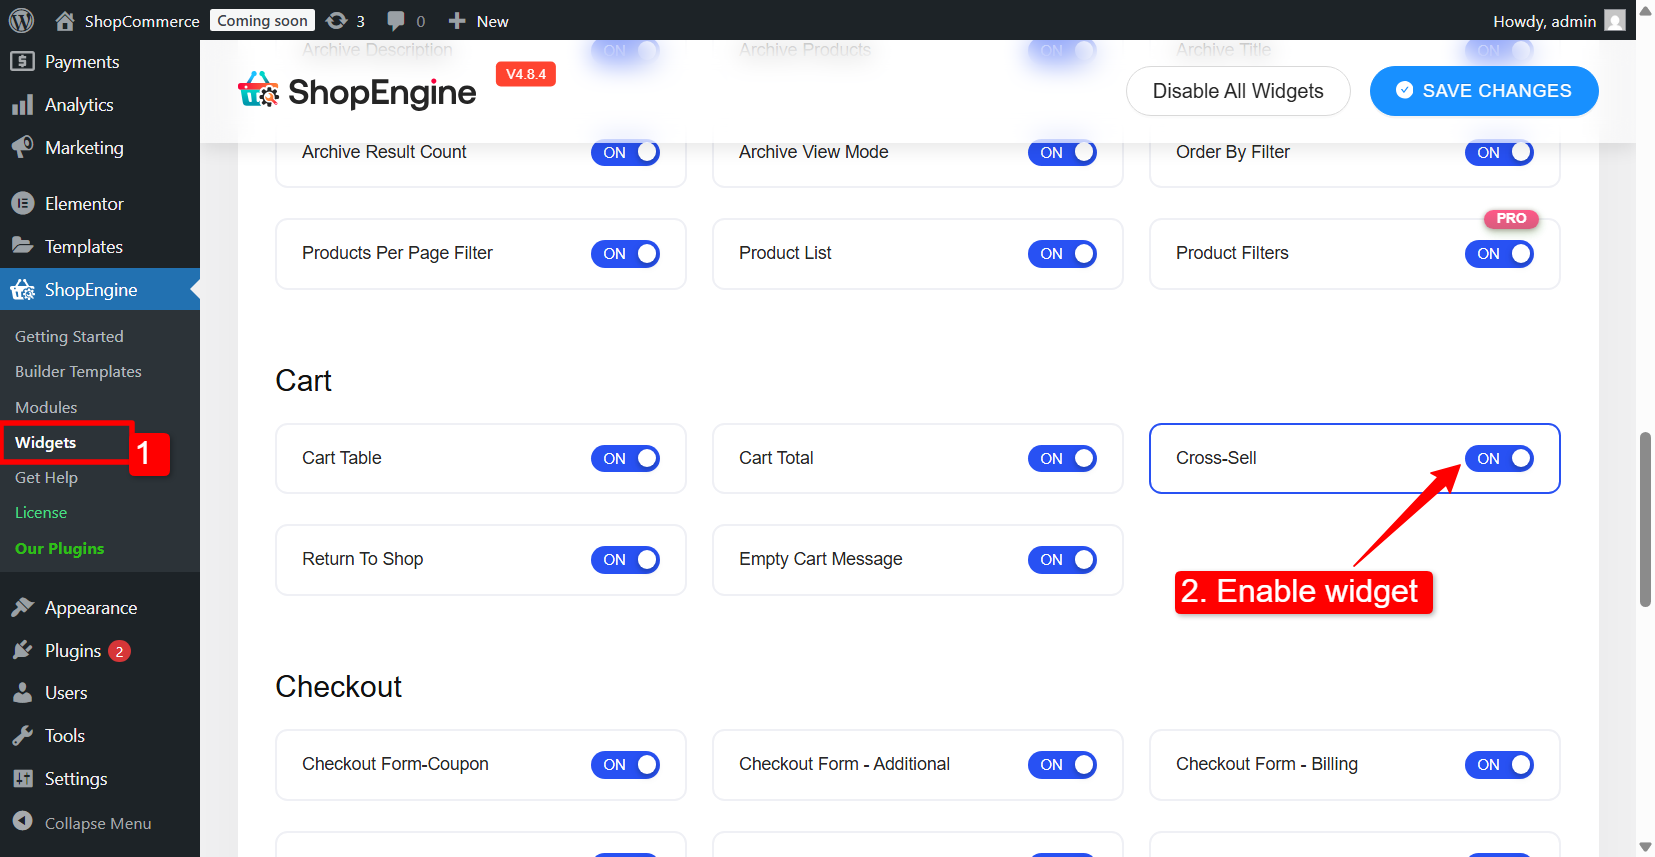
To use the cross-sell feature from ShopEngine, you need to enable the cross-sell widget.
For that, go to ShopEngine → Modules, find the Cross-sell widget, and enable it.
Next, it’s time to set up your products in WooCommerce for coss-selling. Just head over to your WordPress dashboard:
- Navigate to Products → All products.
- Find the item you want to set up and click Edit.
To edit the product for cross-selling
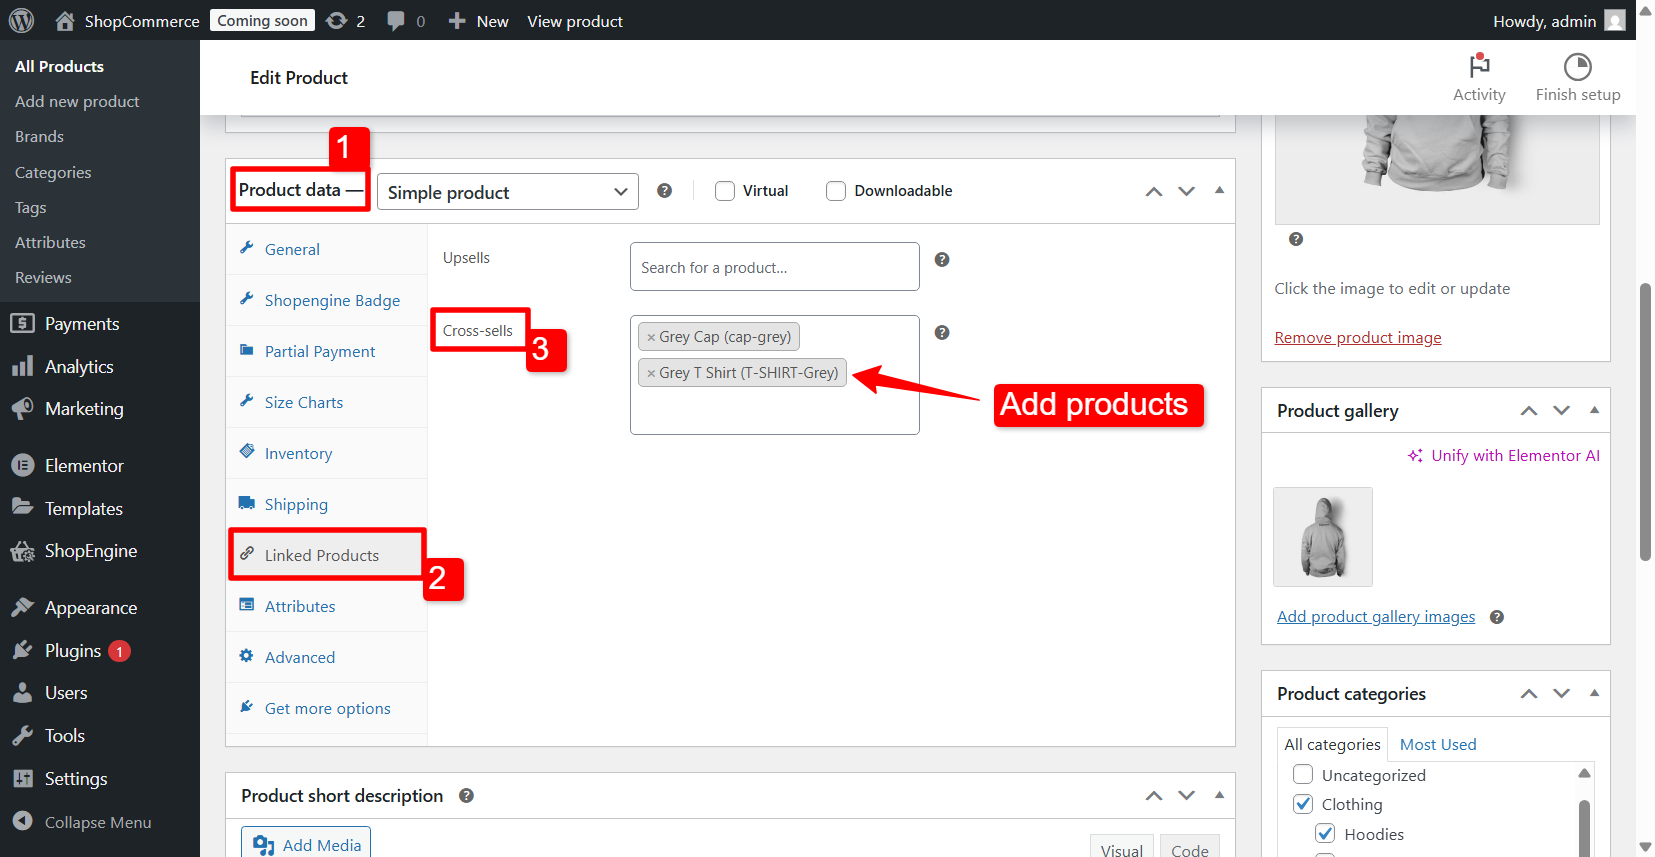
- Scroll down to the Product Data panel on the page.
- Open the Linked Products tab.
- In the Cross-sell field, add the products you’d like to suggest as cross-sells.
Now you can show the cross-sell in the WooCommerce cart page. For that, you need to edit the cart page template. If you haven’t created a cart page template, here is how to create a WooCommerce cart page template with ShopEngine.
To edit the template, simply go to ShopEngine → Builder Template, find cart page template, and click on the Edit with Elementor to customize the template in Elementor editor.
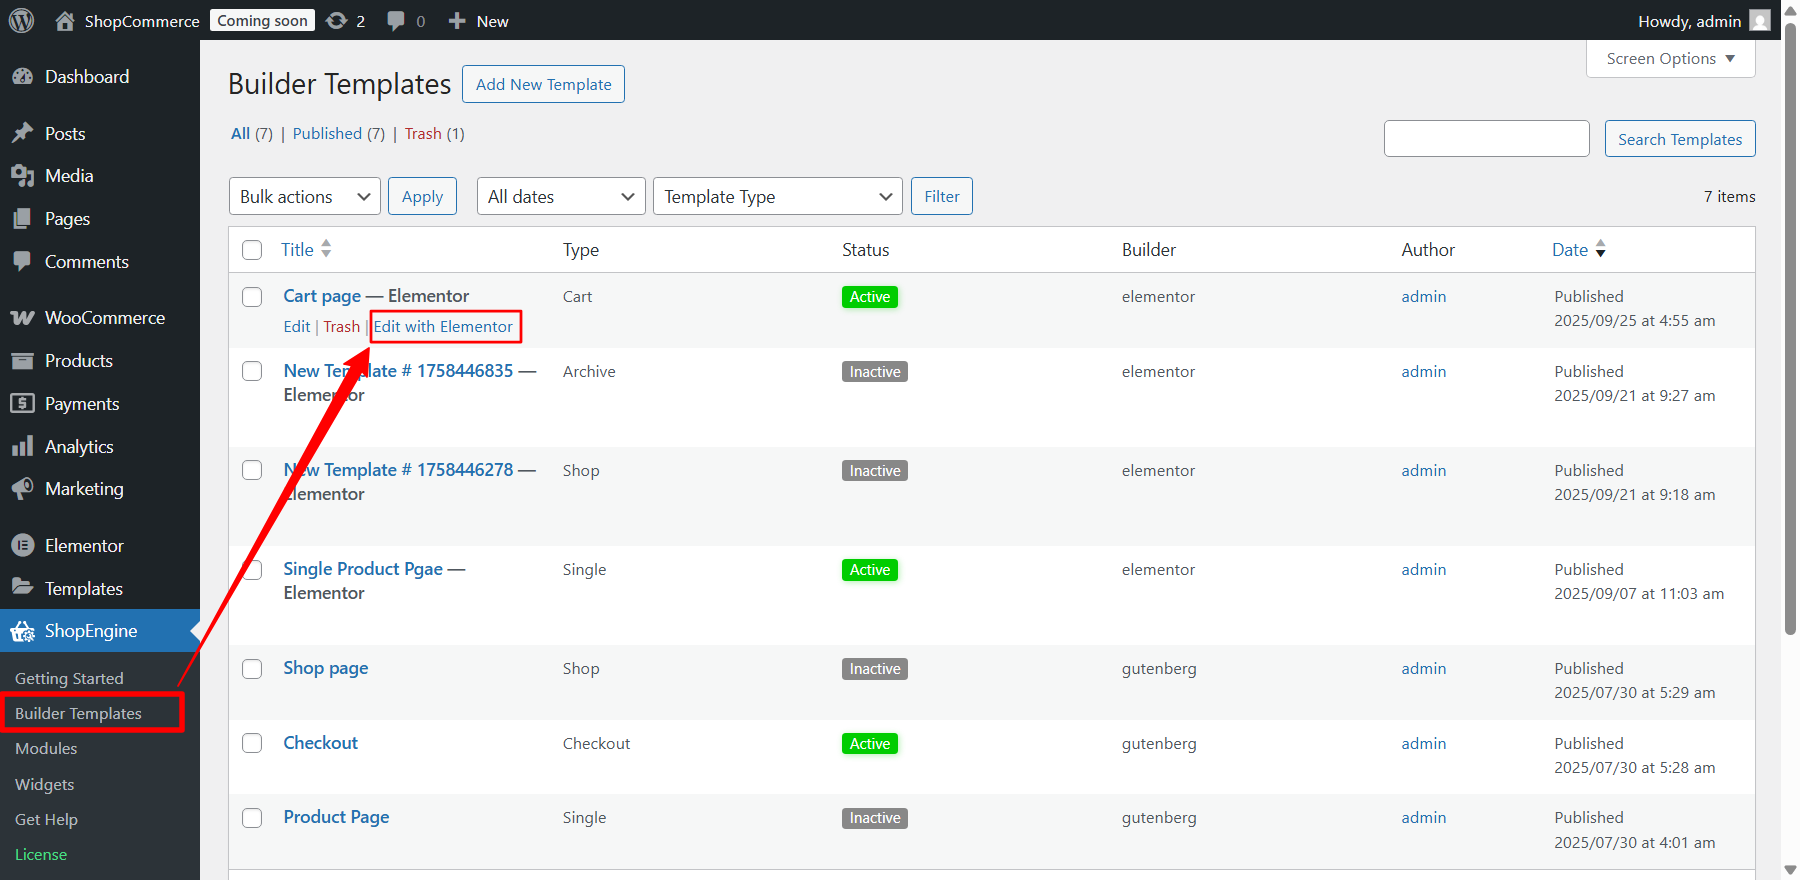
In the Elementor editor, drag and drop the cross-sell widget into the design section. You will see a series of products appear on the screen. For ShopEngine cross-sell widget comes with the following options:
- Enable Slider
- Flash Sale
- Sale Price
- Cart Button
- Products to show
✅ Discounts and Sales
A strategic sales campaign in WooCommerce can be a powerful way. Instead of a blanket 10% off, try offers that encourage a higher spend, such as:
- “Spend $100 and get 20% off your entire order.”
- “Buy two, get one free.”
- “Get a free gift with any purchase over $75.”
Besides, you can offer special discount coupons to the customers. For example, if you offer a coupon that activates after they spend $100, many will add extra items to their cart just to get that discount, even if they weren’t planning to buy them initially.
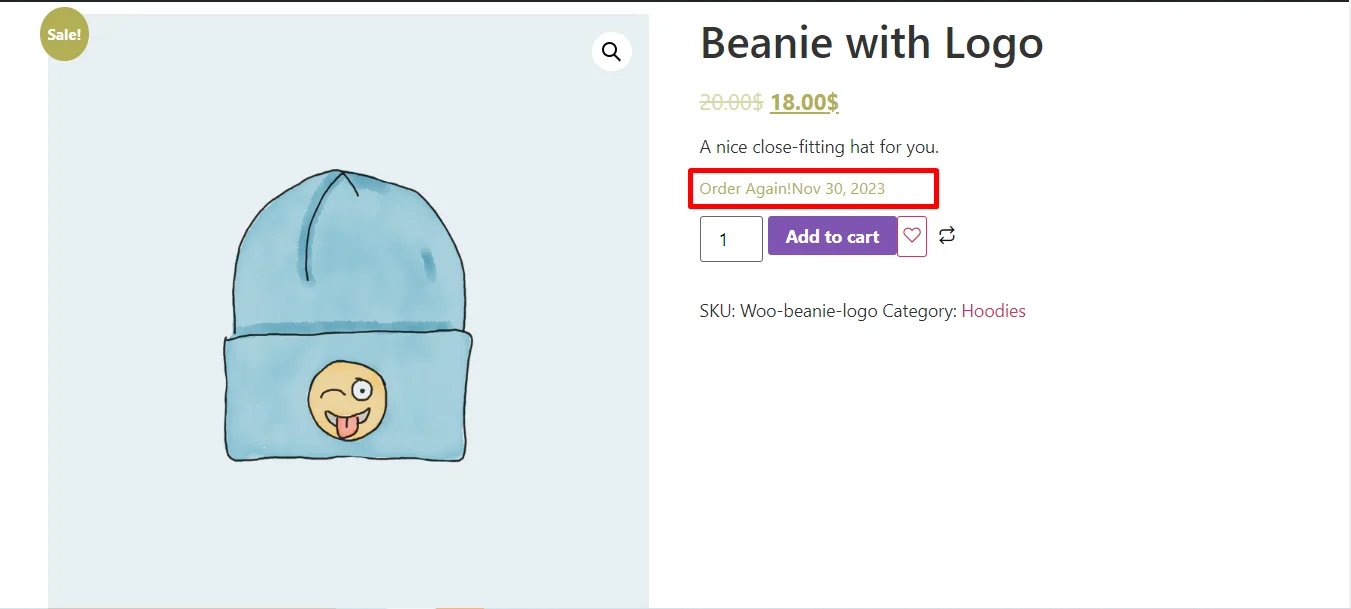
✅ Limited-time Offers and Trigger Urgency
Create a sense of urgency to motivate customers to add more to their cart now rather than later. Limited-time sales, flash sale countdowns, and “low stock” alerts can all prompt customers to complete their purchase and consider adding more items to reach a certain threshold.
You can also use the Flash Sale Countdown to create urgency. With ShopEngine, you can configure the countdown with the following options:
- Select a sale event (campaign).
- Enter the campaign title
- Set the start date and end date for the campaign.
- Select the category.
- Add product list.
- Set the discount and discount type.
Learn more about how to set up Flash Sale Countdown in WooCommerce with ShopEngine.
✅ Accept Back Orders
Let the customers order a product even when it’s out of stock. Think of a scenario where a customer wants multiple items from your store, but one isn’t available; they might drop the whole order or just buy one. That’s a missed opportunity.
With WooCommerce backorders, they can still place the order, and once the product is restocked, you ship it right to them.
To enable backorders for WooCommerce products,
- Go to Products → All Products from your WordPress dashboard.
- Click on the Edit option for the product you want to accept backorders.
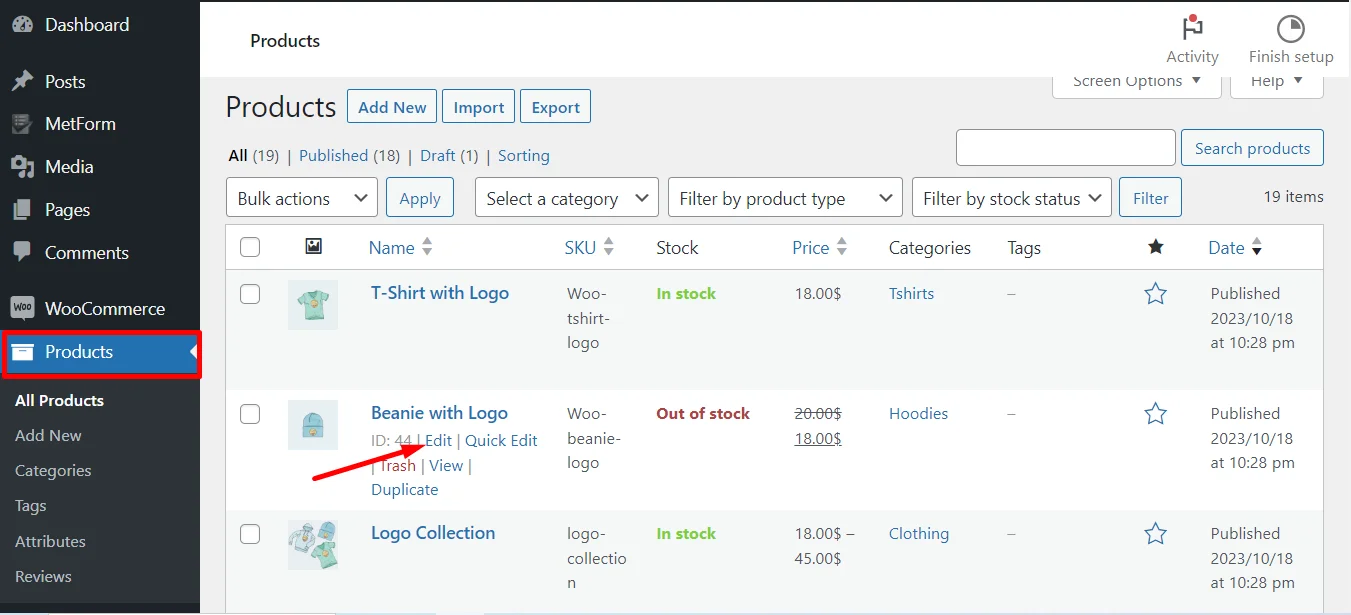
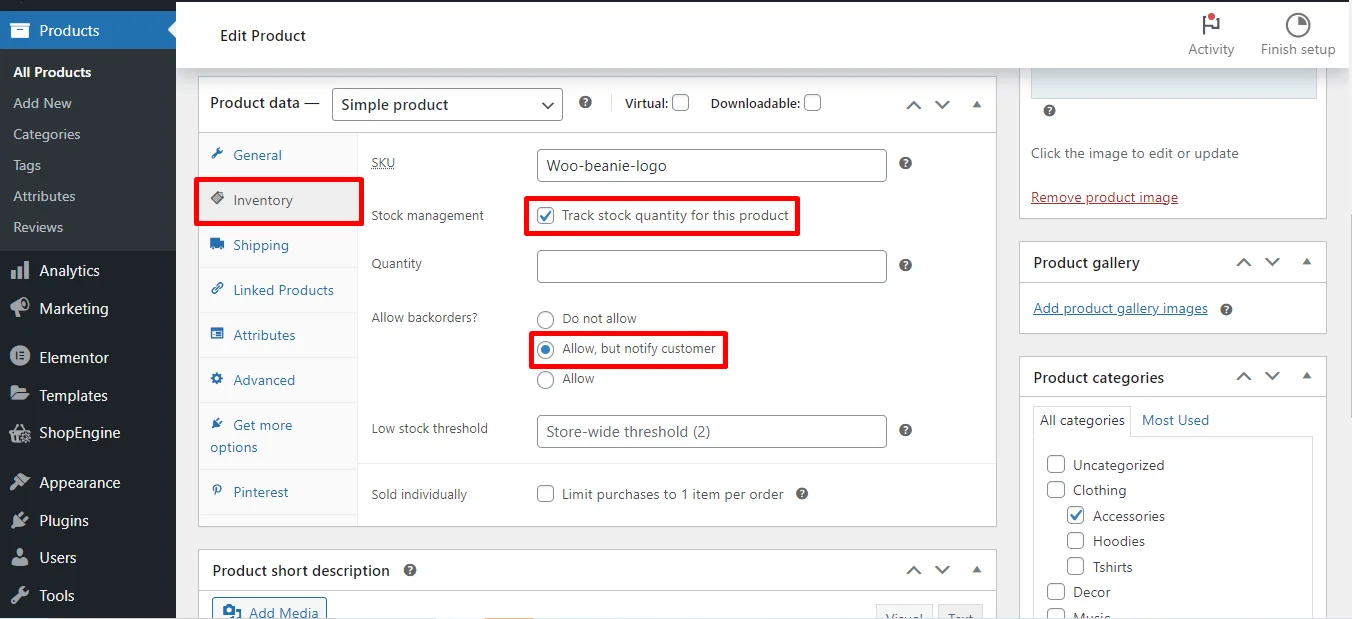
- In the “Edit Product” page, scroll down to the Product Data box, and open the Inventory tab.
- Make sure the “Track stock quantity for this product” option is checked under Stock management.
- Enter the quantity of the product available in your inventory.
- For backorder management, you can have the following options: Do not allow, Allow, but notify customer (that product is in backorder), and Allow (directly).
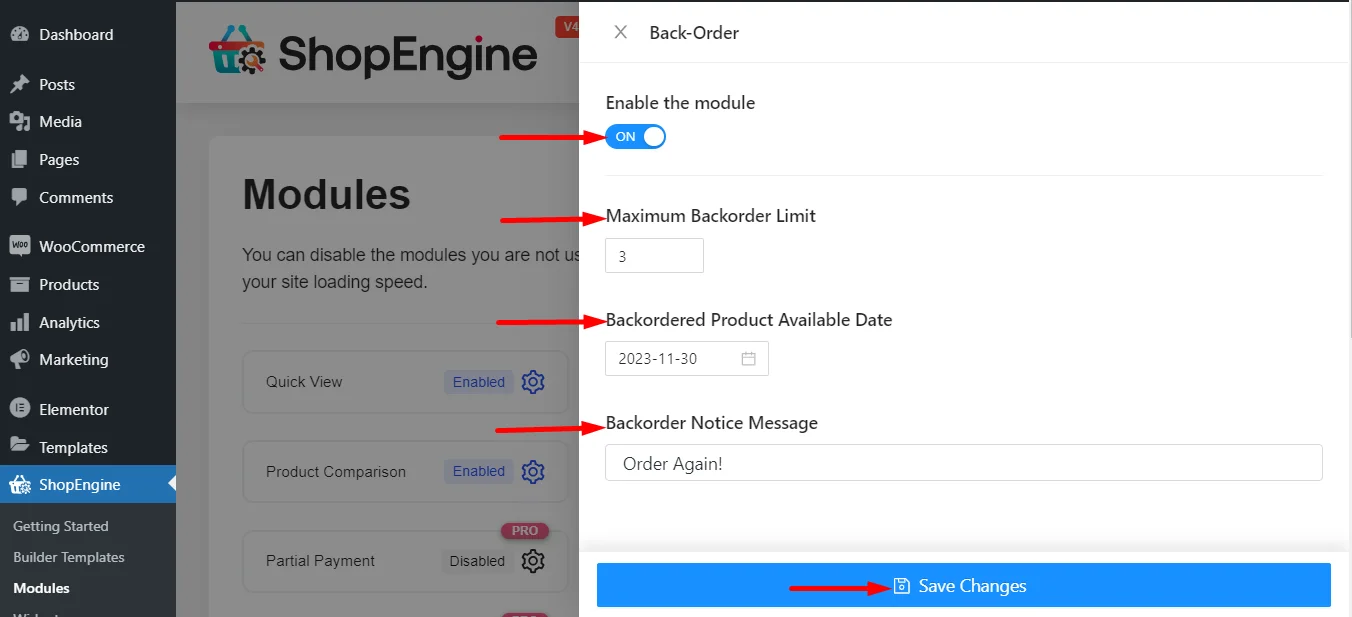
Using ShopEngine’s back order module, you can access the advanced option for back orders. You have the option to set the backorder limit, show the possible availability date, and send a message to the customers.
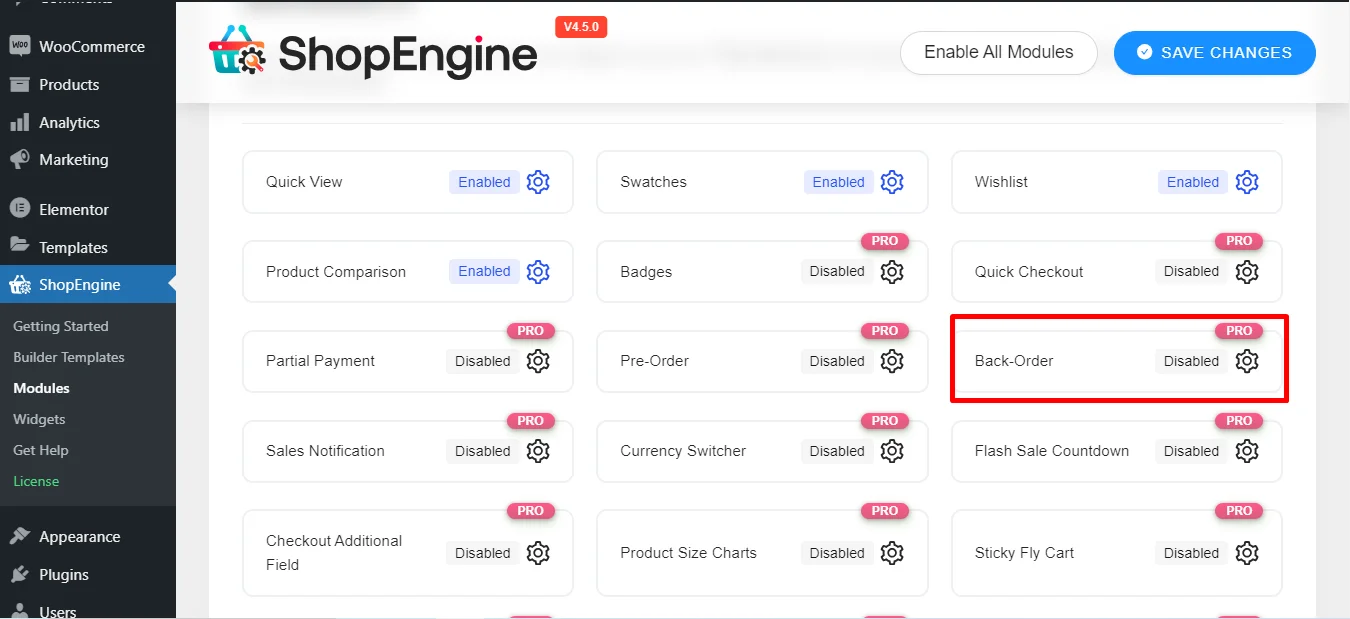
Firstly, enable the Back Order module from ShopEngine. For that,
- Go to ShopEngine → Modules from WordPress dashboard.
- Find the Back-Order module and click on the settings icon (⚙︎).
In the module settings, you can start by enabling the module. Next, enter the number you want to set as the maximum backorder limit.
After that, pick a probable arrival date to display as the backorder product availability date. You can also add a custom backorder notice message so customers know what to expect.
Once everything looks good, just hit Save Changes to apply your settings.
Here is a preview of how the products on back order look on the user end. From here, users can easily place an order by just clicking Add to Cart.
✅ Loyalty & Rewards Programs
Reward your customers for their loyalty. A points-based system where customers earn points for every dollar spent can encourage them to spend more to reach a certain reward tier or redeem a discount. Exclusive access to new products or sales for loyal members also works wonders.
How Much Impact Does Marketing Spend Have on Average Order Value?
Marketing spend and average order value have a symbiotic relationship. Smart marketing doesn’t just attract new customers; it can also be used to drive up the value of each transaction.
- Targeted Ads: You can run ad campaigns specifically promoting product bundles or higher-end items.
- Email Marketing: Send out targeted emails to your customer base with offers like “Free shipping on orders over $50” or “Get a bonus item with your next purchase.”
- Content Marketing: Create blog posts and guides that showcase different product combinations or highlight the value of premium versions. For example, a fashion blog might feature a complete outfit, prompting customers to buy multiple items instead of just one.
By strategically allocating your marketing budget to AOV-focused campaigns, you can see a significant return on investment.
Conclusion
Users will only spend an extra penny if they are getting a value and a good experience. So increasing your Average Order Value is all about providing more value, convenience, and incentive for them to do so.
By implementing strategies like bundling, upselling/cross-selling, and utilizing smart discounts, you can transform your e-commerce store. Start by picking one or two of these strategies, test them out, and watch your revenue grow, one order at a time.

Leave a Reply