Want to give a more modern touch to your website?
Well, replacing a traditional horizontal menu with a vertical one can instantly give your WordPress site a chic and modern look. On top of that, a vertical menu can enhance the user experience as well.
But how to create vertical menu in WordPress?
Well, there are several ways you can add a vertical menu to your WordPress site.
In this blog, we will show you how to make vertical menu in WordPress and also you can create vertical mega menu.
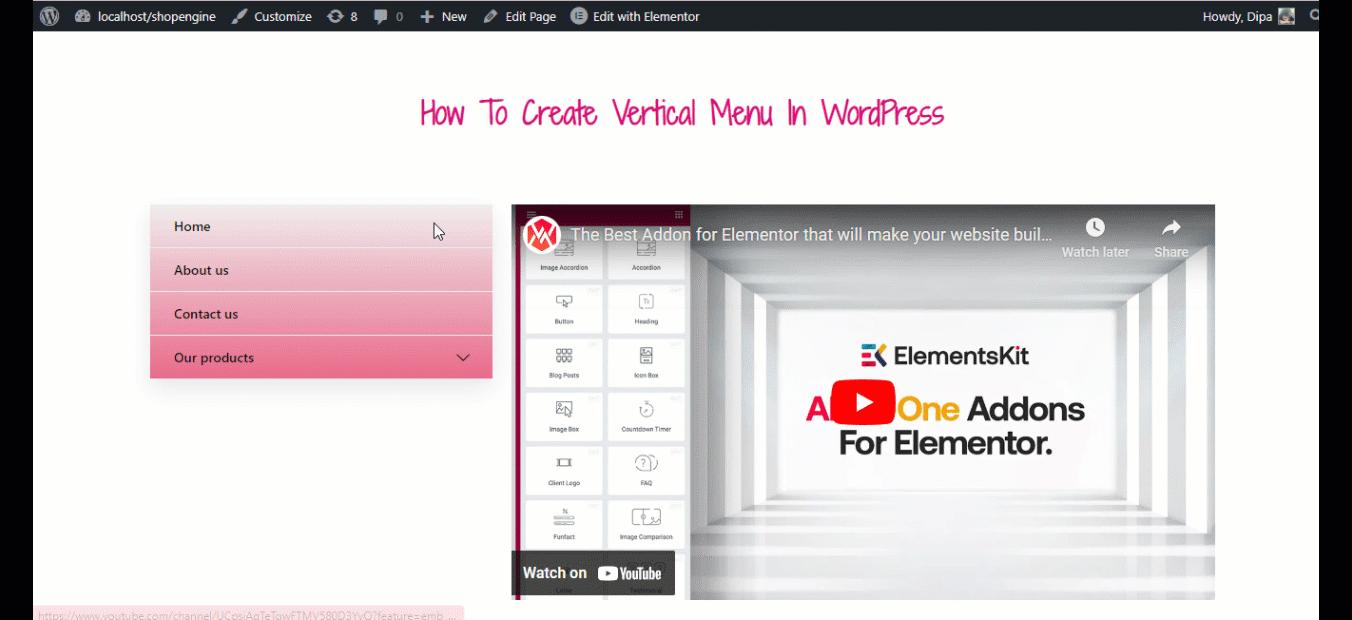
What is Vertical Menu in WordPress?
A vertical menu in WordPress represents a collection of links arranged in a vertical order rather than the traditional horizontal one. Nowadays, this type of WordPress vertical menu has recently become extremely popular as it is more user-friendly, especially on mobile devices.
- These menus are visually better looking
- Easy to navigate menu
- Maintain the responsiveness of the website on mobile devices
- You can add more top-level menus in the vertical menu than horizontal
- Works great on eCommerce websites

How to Create Vertical Menu in WordPress using Elementor and ElementsKit
Here is the step-by-step guide on how to make vertical menu in WordPress. You will need a page builder- Elementor and vertical menu WordPress plugin – ElementsKit. You can easily create WordPress vertical menu if follow the steps below:
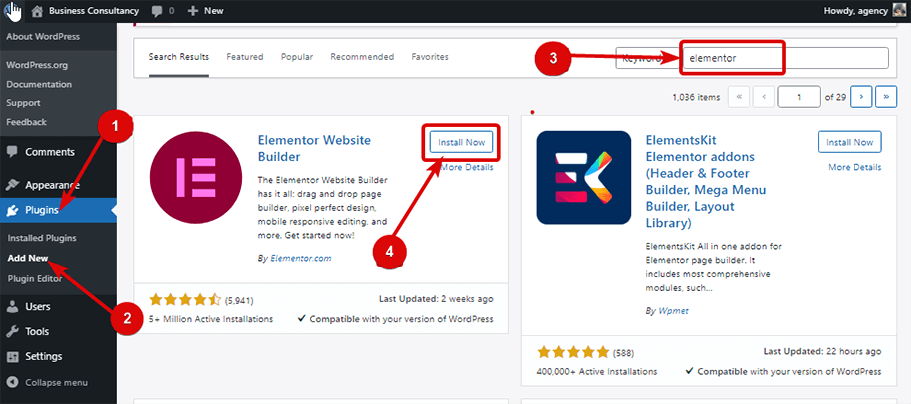
Step 1: Install Elementor and ElementsKit
To install, login to your dashboard and
- Navigate to : Plugins ⇒ Add New
- Search for Elementor / ElementsKit (one at a time)
- Click on Install Now
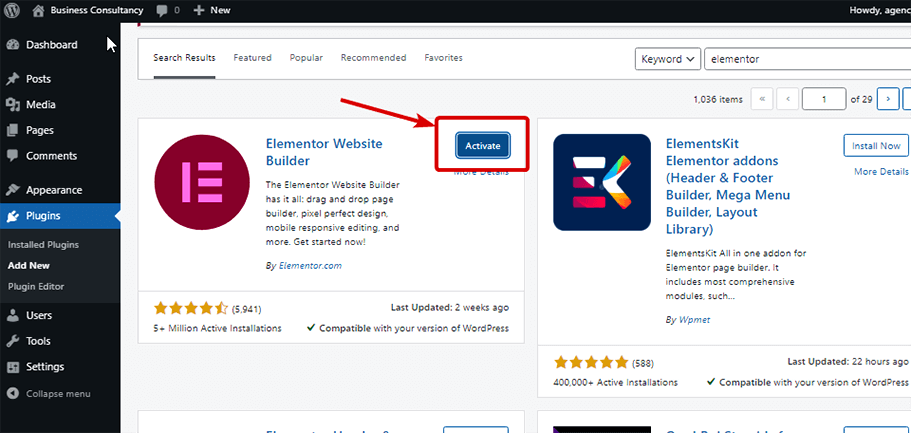
After installation, click on the Activate button to activate.
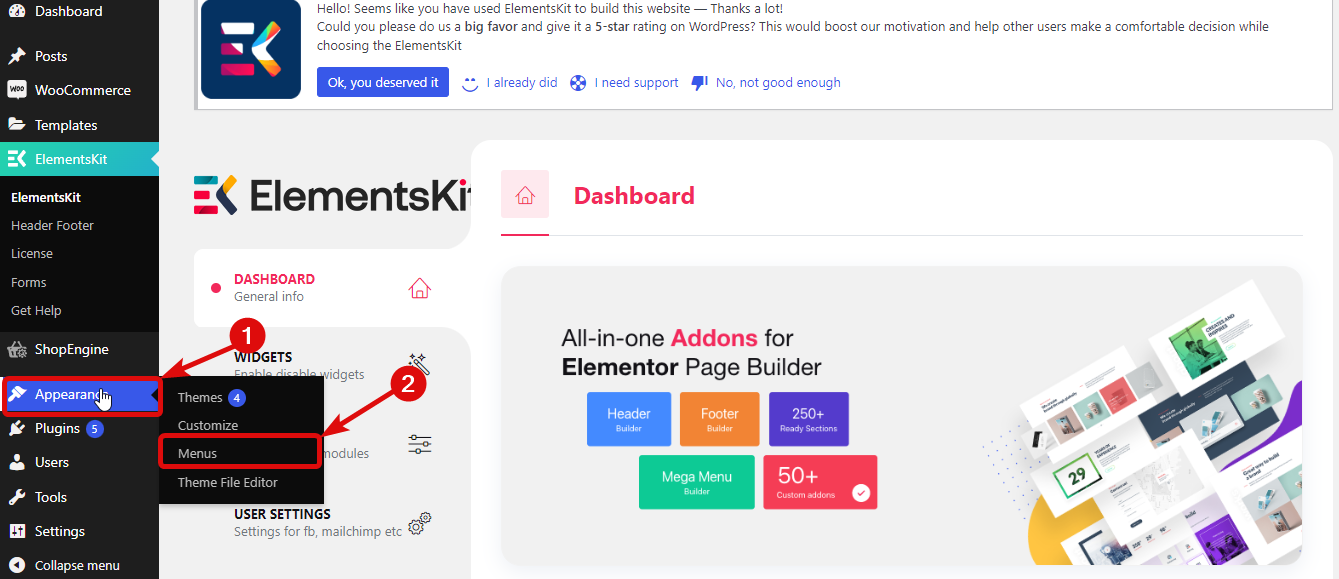
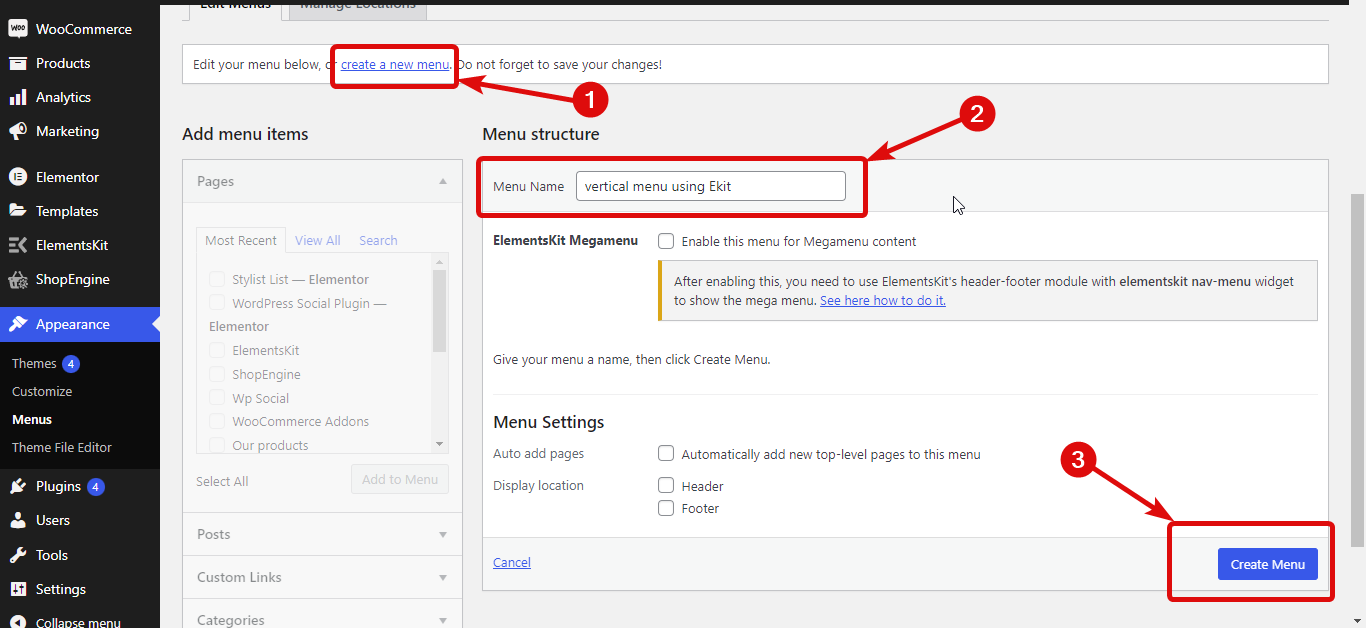
Now let’s create a menu. For this, navigate to Appearance ⇒ Menu.
After you are on the menu page, you need to
- Click on Create a new menu
- Provide a name under the Menu Name option
- Finally, click on Create Menu to create the menu.
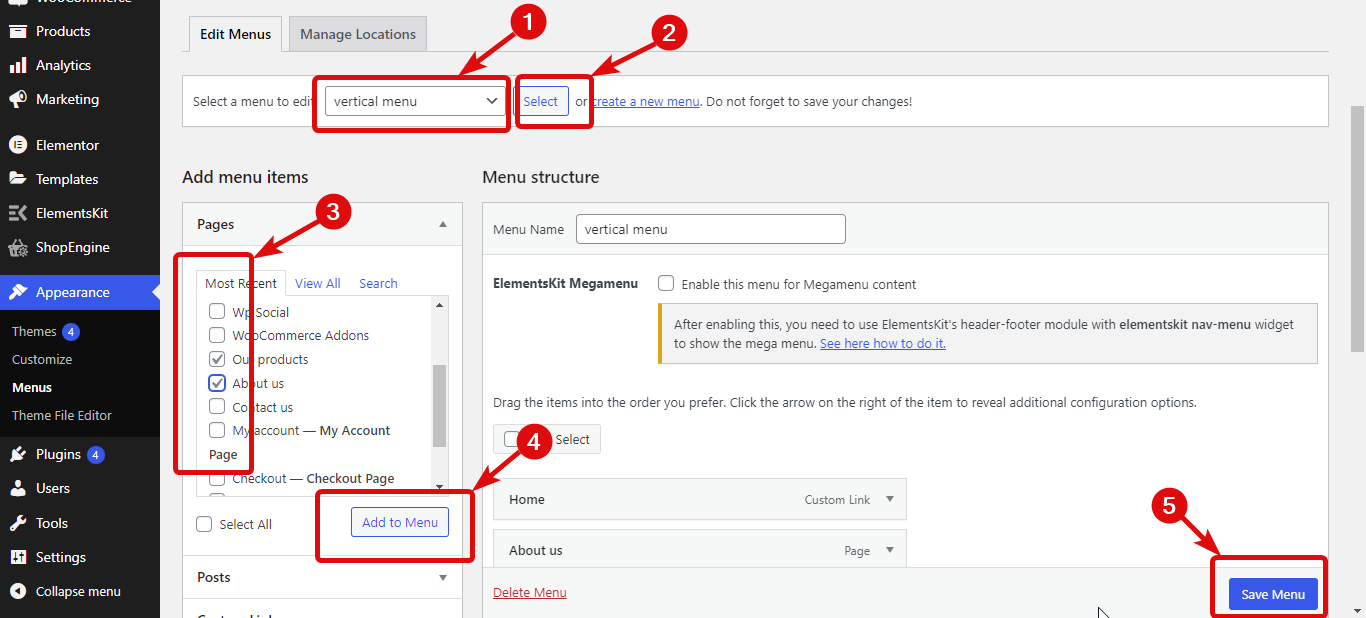
Now you need to :
- Select the menu from the drop down
- Click on Select
- Click on the checkbox of the menu you wish to add
- Click on Add to Menu to add to the menu you choose
- Finally, click on Save Menu to update
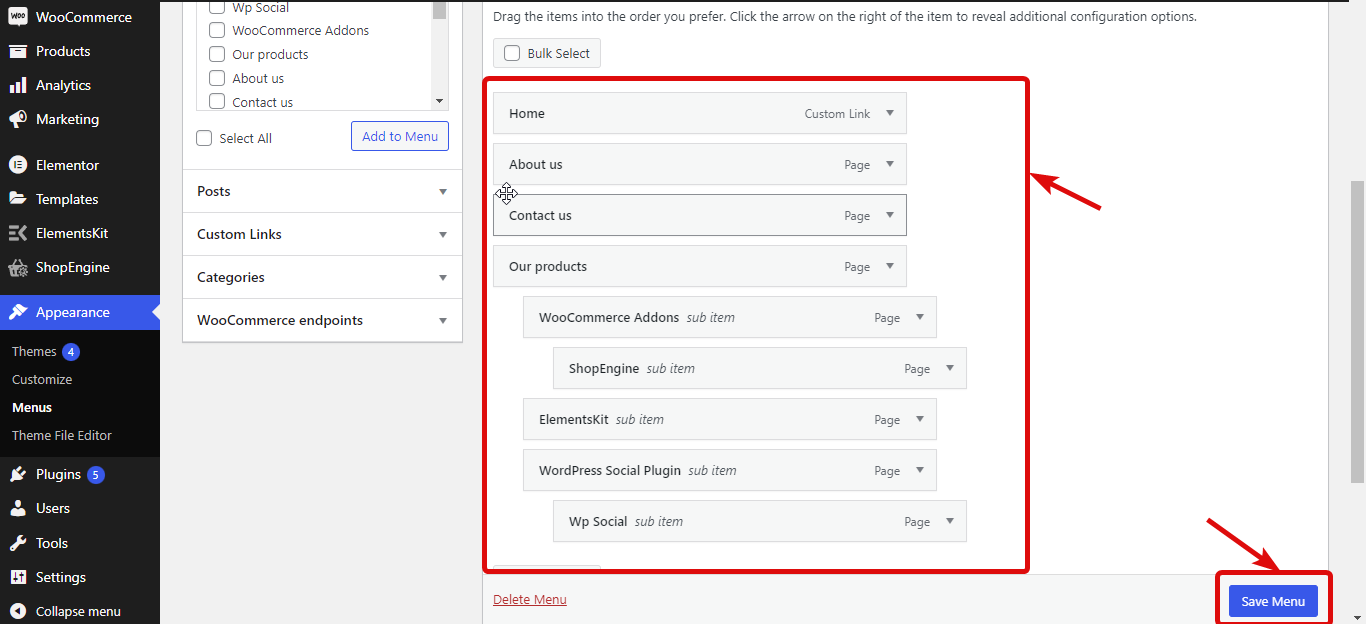
If you have multi-level menu, then you can reorder the menu items and click on Save Menu to update.
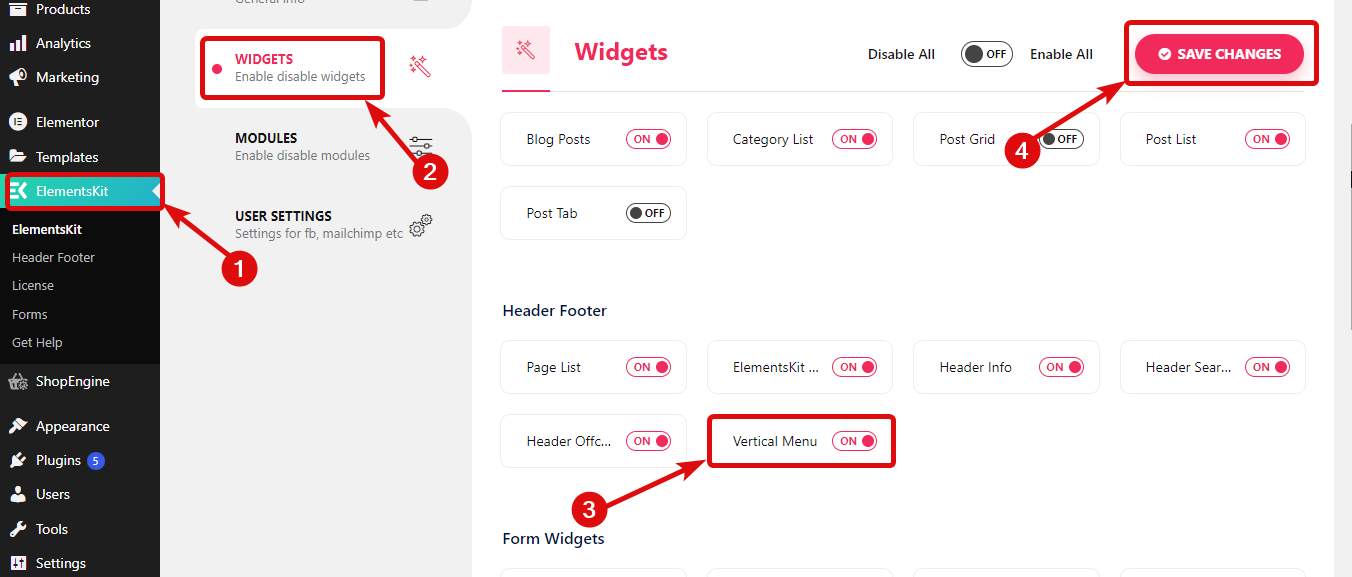
Navigate to ElementsKit ⇒ WIDGETS ⇒ Vertical Menu widget, turn on the widget and click on Save Changes.
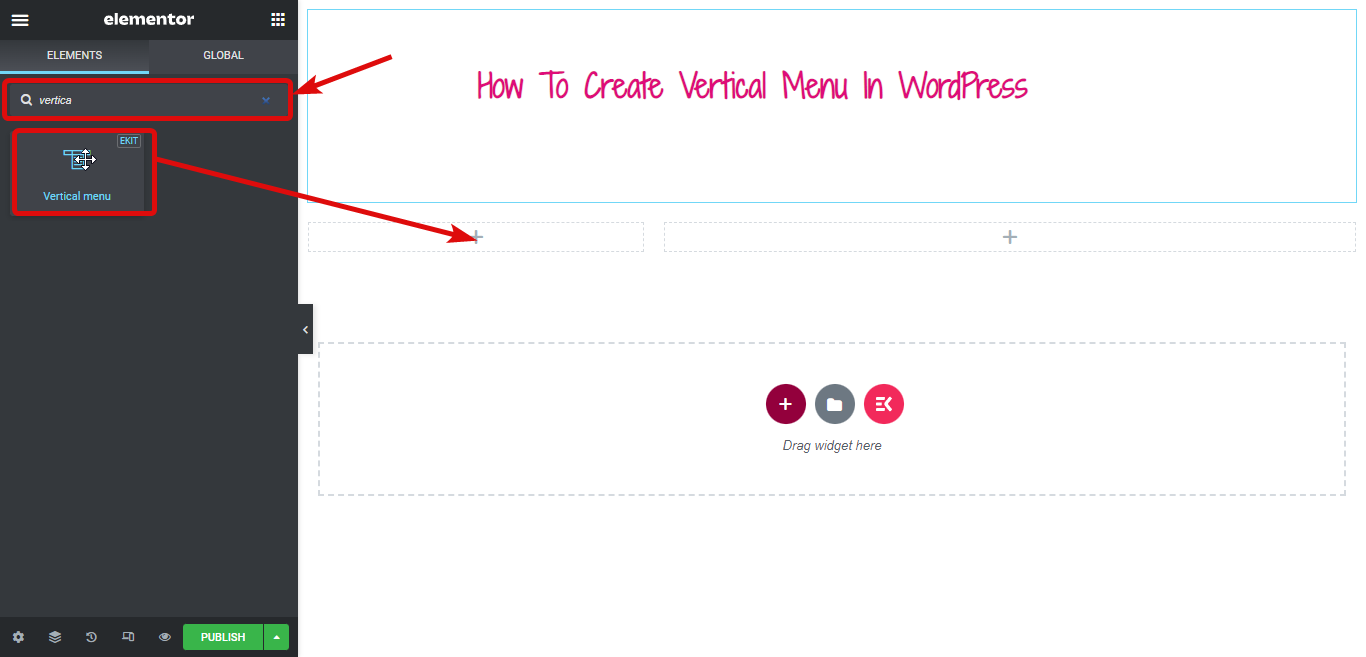
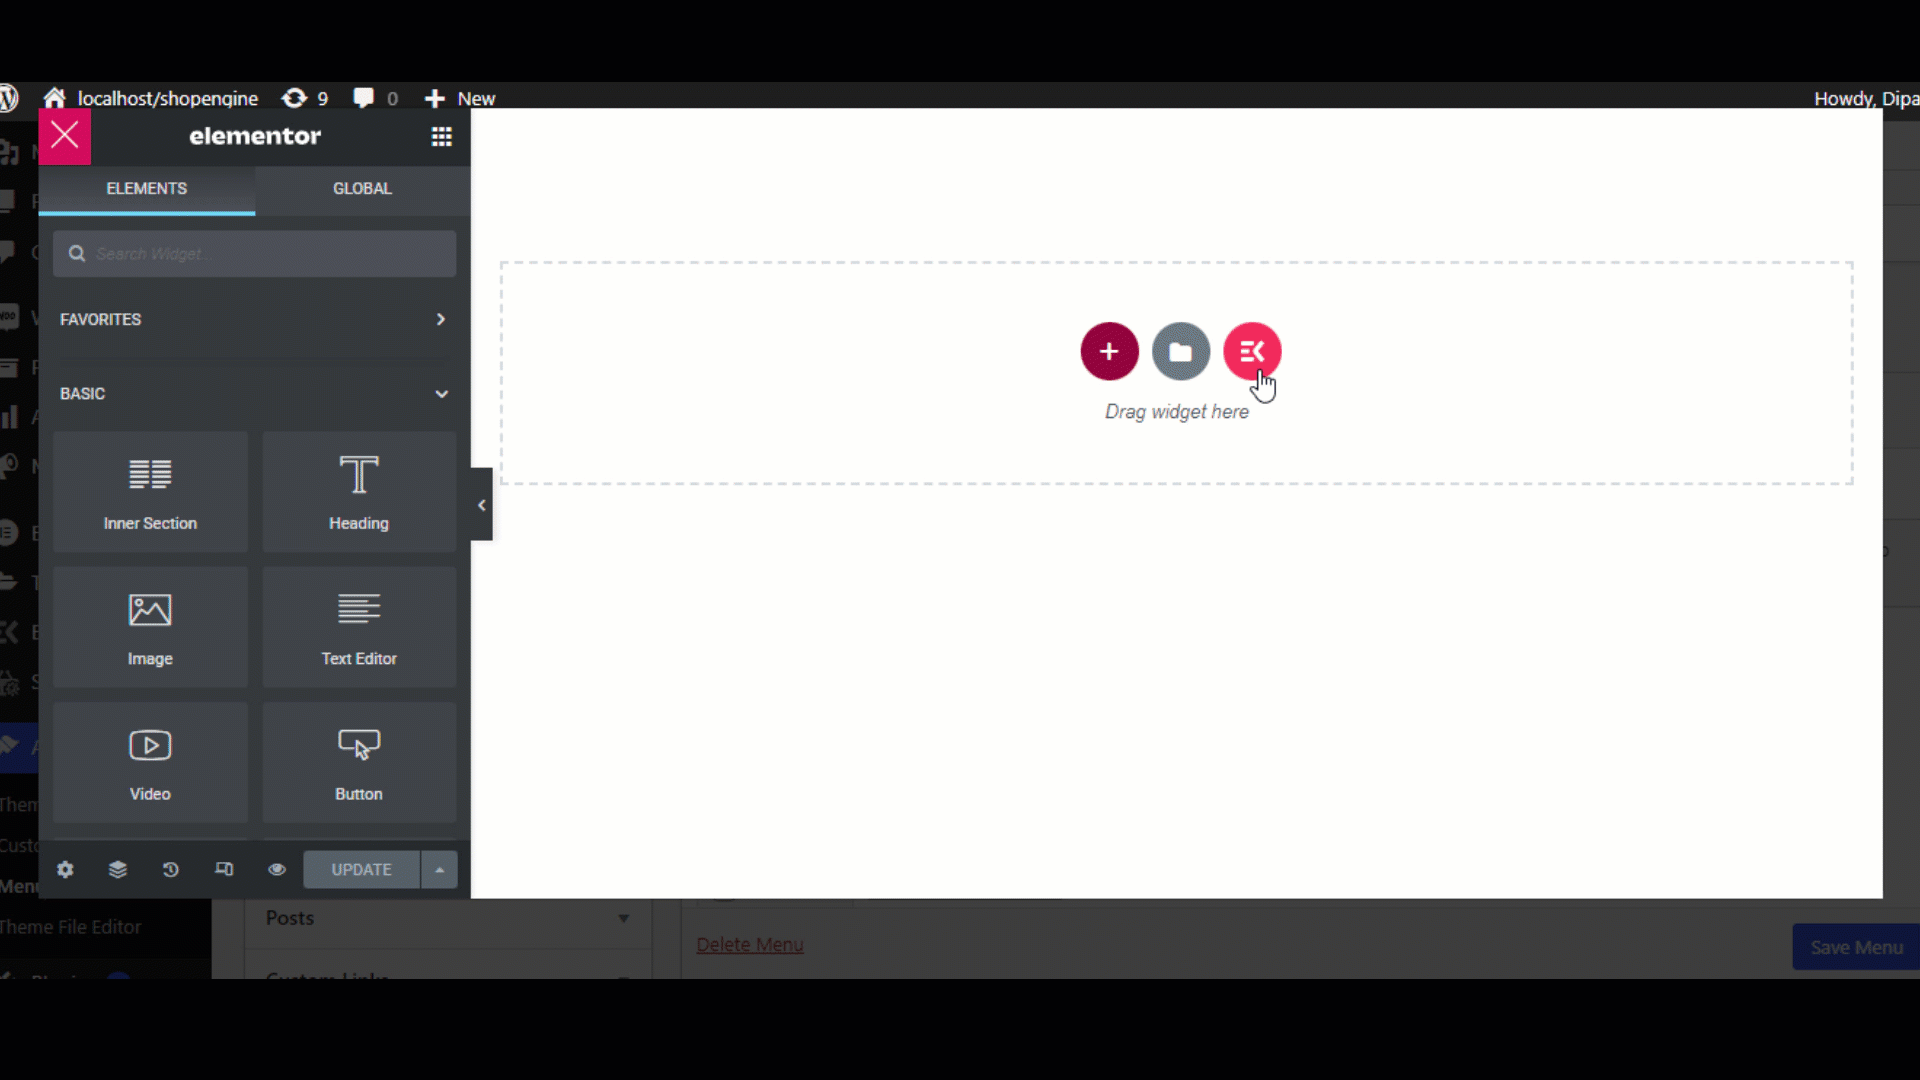
Step 4: Drag and drop the widget
Edit the page with Edit with Elementor option. Then search for the Stylist List widget with the Ekit icon and simply drag and drop the widget on the page.
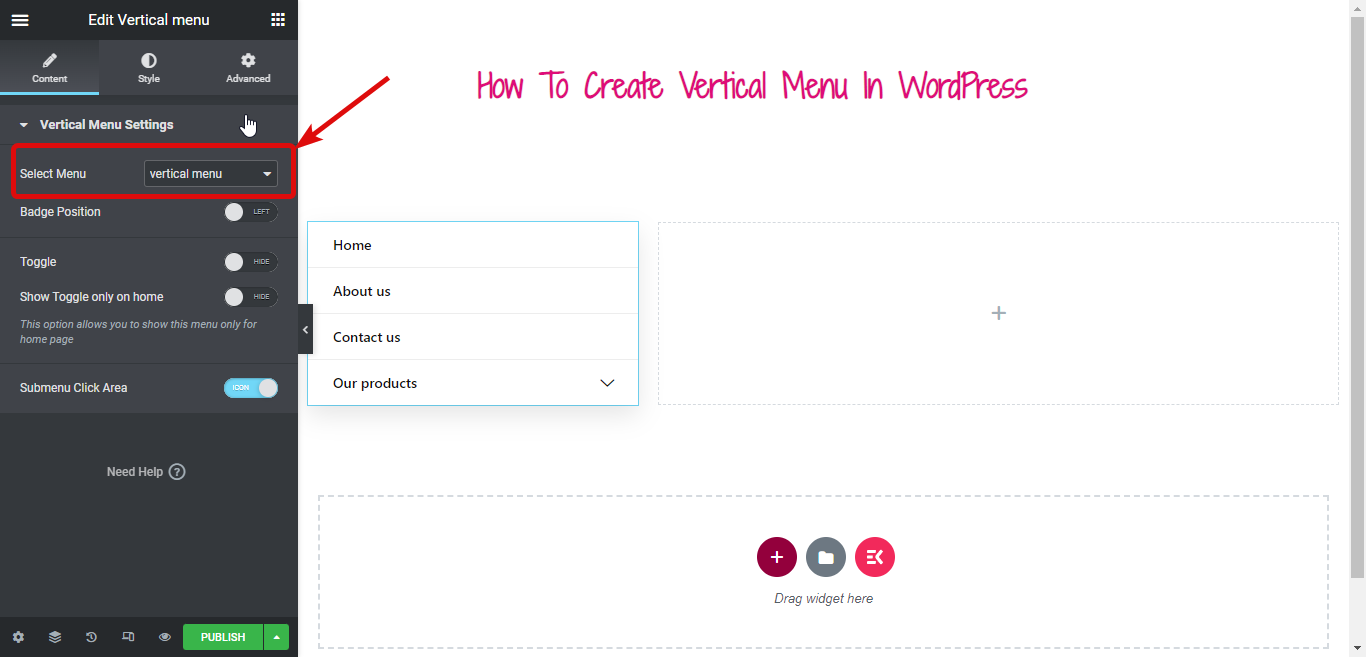
Now it’s time to add the menu you just created or the one you preferred to your vertical menu. You can do that from the Select Menu dropdown.
If you want to turn your Elementor vertical menu into a collapsible button, you need to turn on the Toggle button.Once you turn on you can change the title of the toggle button and can also choose to add icons on both left and right side.
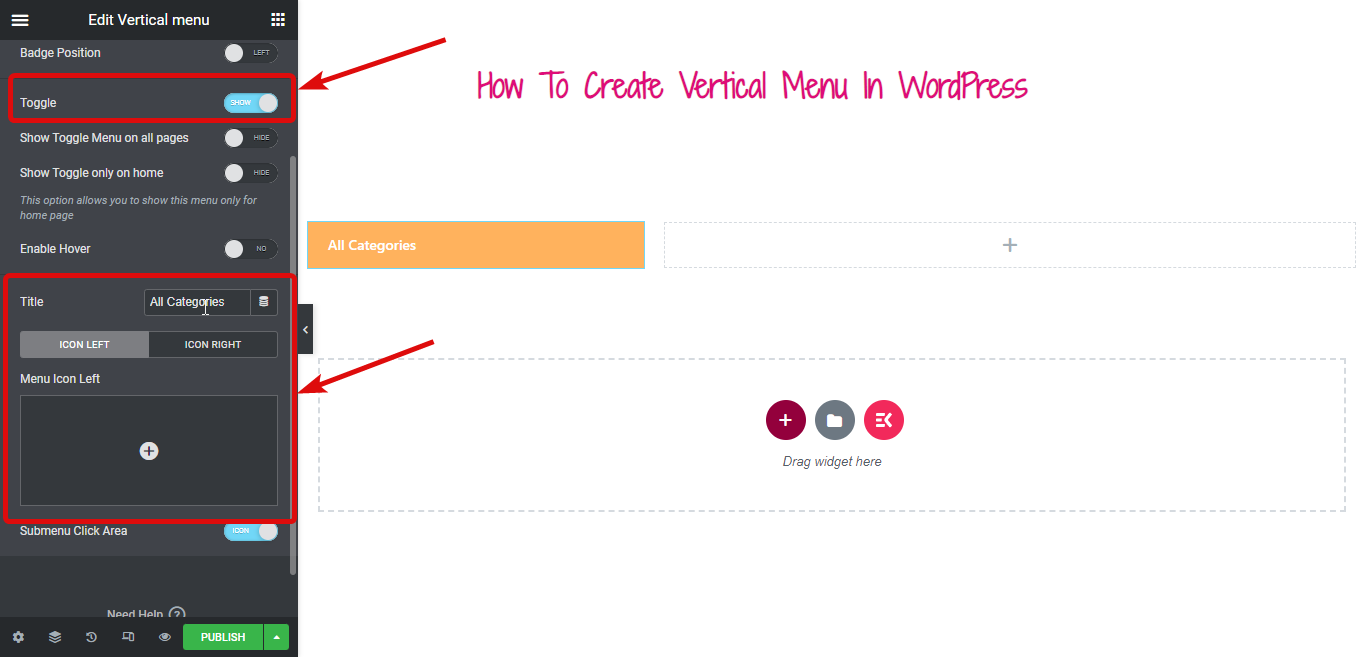
Turn on Enable Hover option and activate the toggle on hover (by default it works on click.)
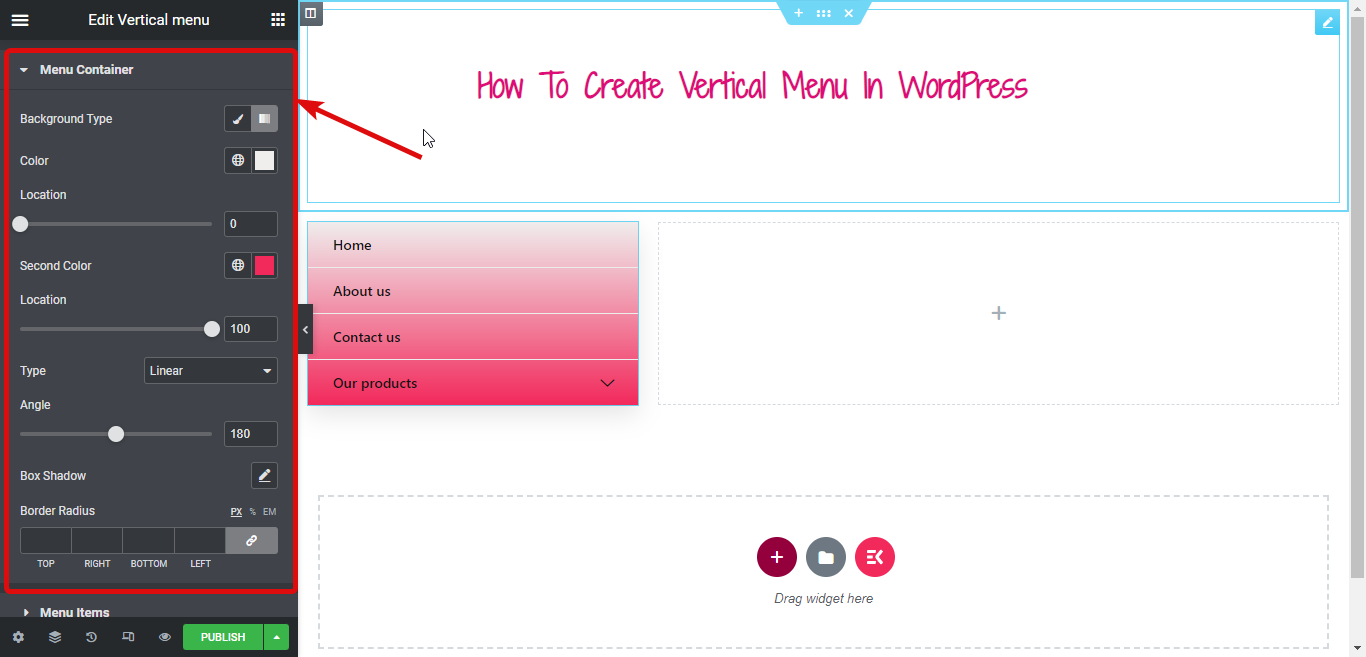
Step 6: Customize Style of Vertical Menu
Now it’s time to change the style of your vertical menu. For that move to the style tab.
Expand the Menu Container option to alter the Background Type, Color, Location, Second Color, Box Shadow, Border radius and so on.
Similarly, you can change many style options under Menu Items and Sub Menu Items.
Once you are done with all the customization, click on publish and see the preview:
ElementsKit equips you to build a complete WordPress website. Check the blog on
How to create single page website with one page navigation In WordPress
To follow this tutorial, you need to make sure the vertical menu widget you turned on earlier is still turned on.
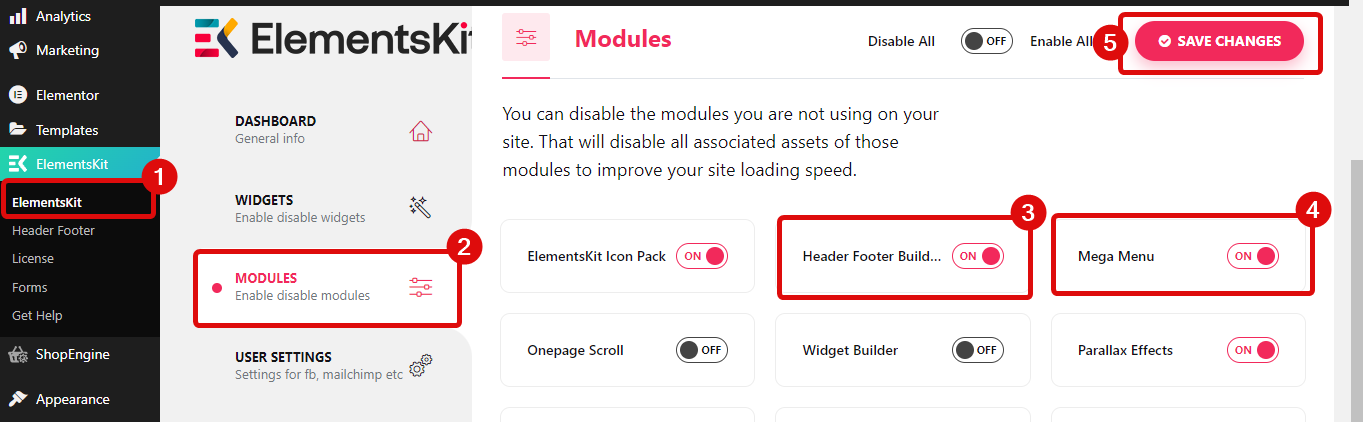
Step 1: Turn on the necessary ElementsKit modules
Navigate to ElementsKit ⇒ Modules, turn on both Mega Menu and Header Footer Builder, and finally click on Save Changes to update.
Now make sure you create a menu for your vertical menu by following the steps shown above.
Once you are done preparing your menu, check the ElementsKit Megamenu option to enable the mega menu feature. Once you check this option, you will see the mega menu option if you hover over the menu.
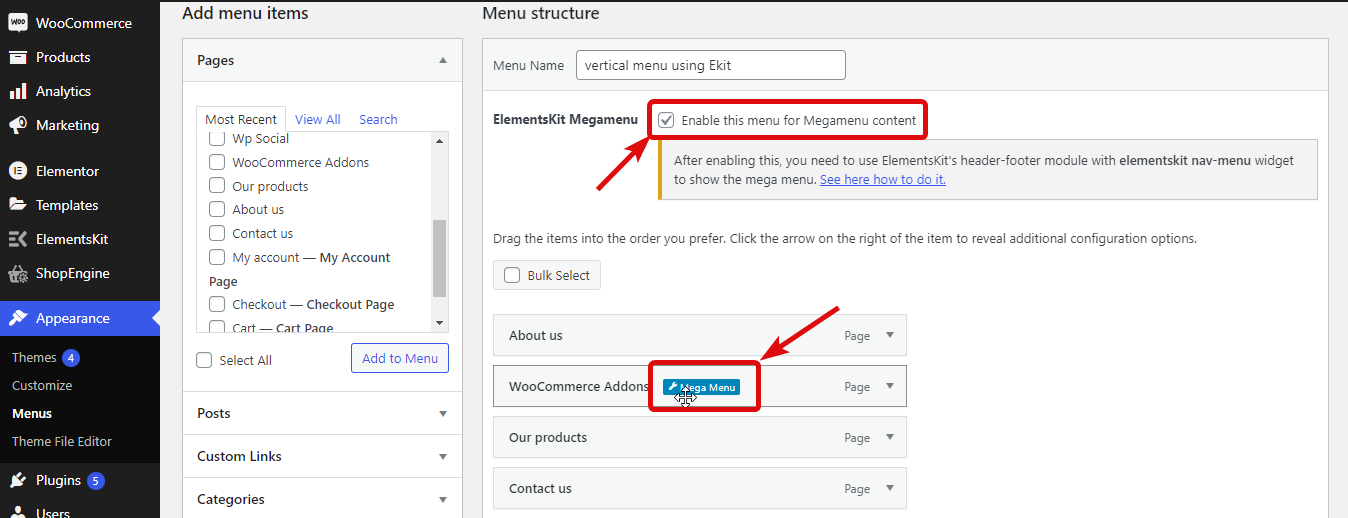
Now to convert a simple menu into a mega menu, hover on the menu and click on the mega menu option. Then turn on the Mega menu toggle button and click on Edit Mega Menu Content.
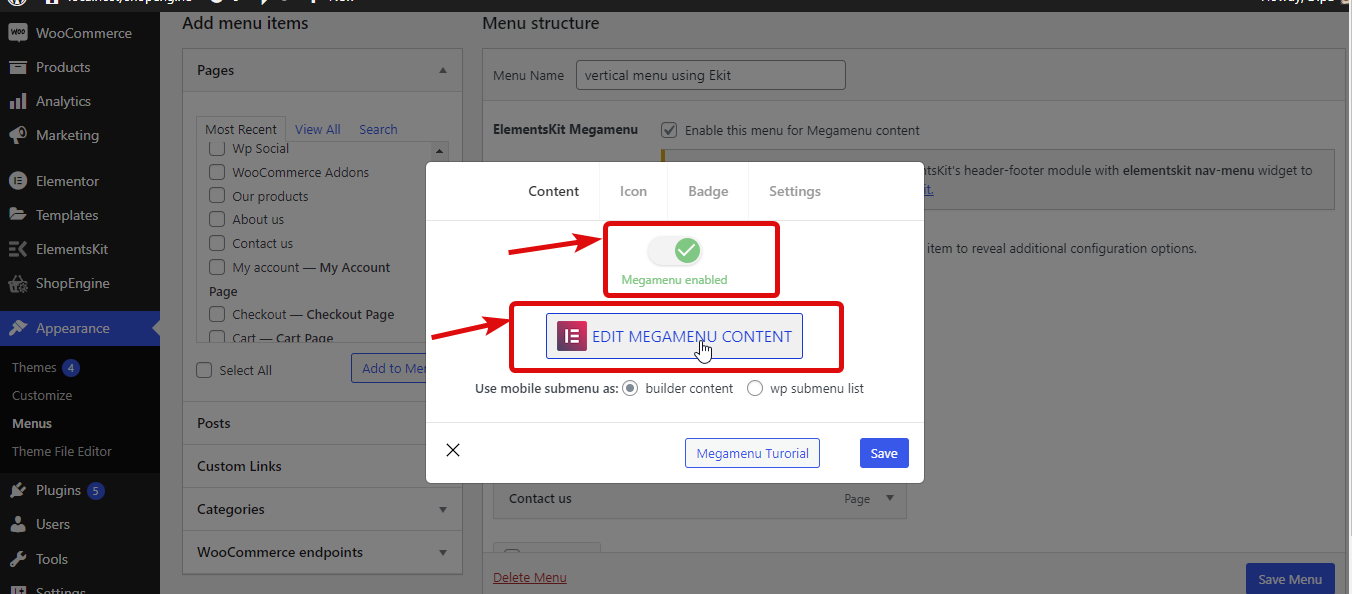
Now click on the Ekit icon, move to the section tab, search for the mega menu then choose the premade mega menu template you like. Once you insert it, you can edit it according to your needs.
Once you are done, click on update to save the menu. Repeat the same process on all the menus for which you wish to create a mega menu.
And that’s it you have made your mega menu. You can use the ElementsKit header footer builder to add a mega menu to your website.
For more details about the mega menu builder of ElementsKit, check our blog How to Build a Mega Menu With Elementor and ElementsKit. You can also watch the whole process in the video below:
Final Words
ElementsKit makes creating a vertical menu in WordPress an extremely easy task to execute. While a horizontal menu is great, sometimes having a change in the menu can uplift the appearance of your website. Especially if you have an eCommerce site then you should try the mega menu feature of ElementsKit.
I hope you found the blog helpful, if you have any questions regarding the vertical menu WordPress plugin do feel free to let us know.
Leave a Reply