


Are you looking to build a website for your business but don’t have the time to create a big one? Or not ready to commit to long-time website maintenance?
Then you should go for a Single Page Website with One Page Navigation. Single page website gives out all information in an attractive way and gives your website a stunning look so your users can engage more.
In this blog, you will not only learn How to create single page website with one page navigation in WordPress but also how to add a contact form in a pop-up as a bonus.
Most people leave the website if they don’t find a proper way to contact the owner, so this bonus tip will really add extraordinary value to your website.
Let’s not waste any more time and start the process of creating a stunning-looking website with a Elementor one page navigation. You can check out the final look of the site from the button below:
One page navigation like the name suggests is a navigation menu specially designed to navigate to different parts of a single page website. One page navigation with a smooth scrolling effect makes navigating to different sections an easy and user-friendly experience.
“Simplicity is the ultimate sophistication.” — Leonardo da Vinci
And this simplicity gives Single page websites the edge they need over others. A one-page website is great for small businesses such as Wedding planners, Photography, Small Salon, Restaurant, etc.
However, if you have a big eCommerce business that sells too many products or provides multiple services and needs to cater to a bigger audience then Single page website is not for you. So, let’s jump to the main process without wasting time.
In this blog, I am going to show you not just how to build a website but a modern-looking one page navigation in WordPress that will impress your potential clients. For this tutorial, I am going to use the Popular Website builder CMS (I know it says in the title!)
Further, I am going with a visual page builder – Elementor to get the ultimate flexbility for applying one page scroll navigation in WordPress. This is a popular drag-and-drop website builder choice
So, let’s get started…
Step #1: Install required WordPress Plugins to create Elementor One Page Scroll
Once you have WordPress installed on your system. You need to install the following WordPress plugins to create
a website Elementor one page scroll:
- Elementor (Free version)
- ElementsKit (Free and Pro version both)
- MetForm (Free version)
Once you are done installing and activating the required WordPress plugins, it’s time to build the site.
Step #2: Create a website using ElementsKit premade page
ElementsKit provides many premade pages and templates and sections so people can build a website with any design, layout, and style they want that too without coding. For this blog, I am going to use the Wedding planner landing page by ElementsKit.
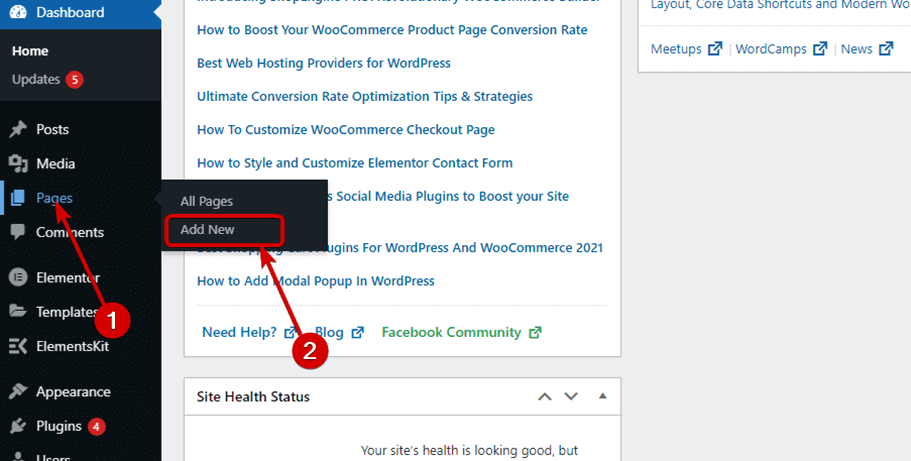
To create your website, From the WordPress Dashboard, Go to Pages ⇒ Add New
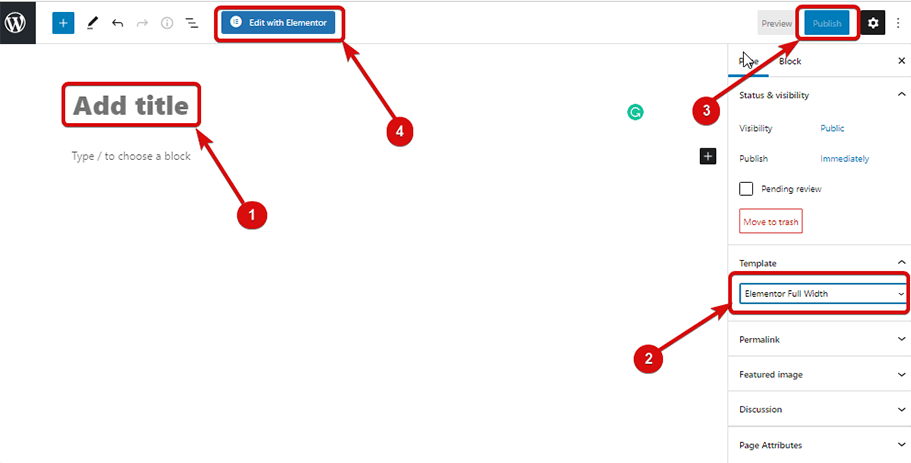
- Give a title such as Home, choose Elementor Full Width from the Template options
- Click to Publish and after publishing click on Edit with Elementor
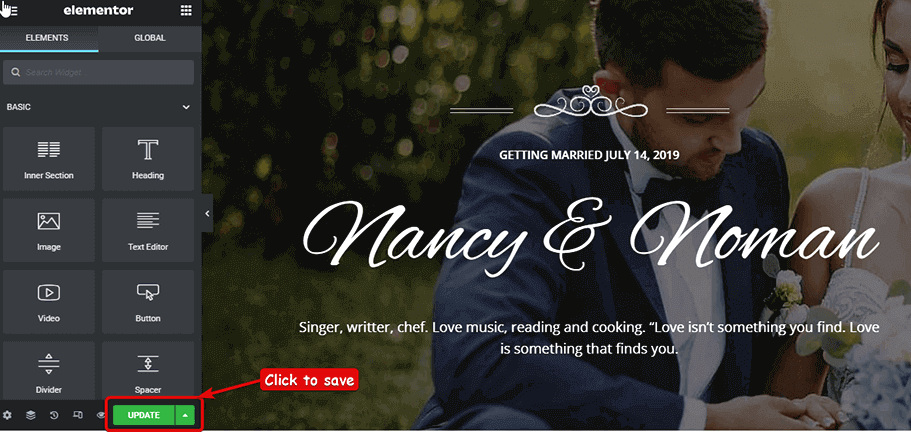
- Click on ElementsKit Button (EK) once the Elementor Builder Window opens
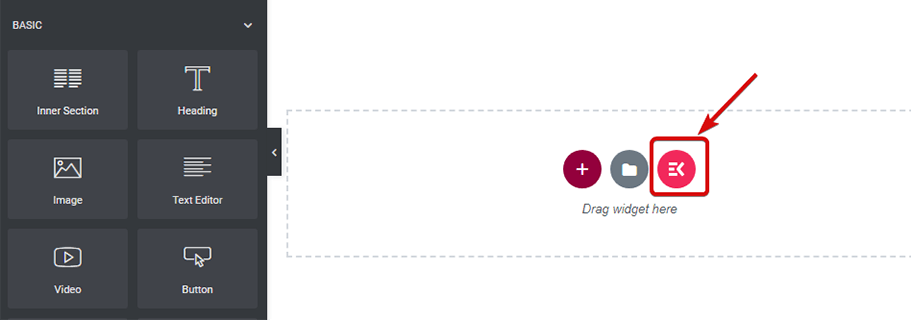
- Go to the Page tab, Search for Wedding Page and click on insert
Now click on update to save
Now that we have our website it’s time for the fun part that is adding Elementor one page scroll navigation. ElementsKit Onepage scroll navigation is easier to use and gives your site a stunning look. You are very unlikely to find another one page scroll Elementor addon as good as ElementsKit.
Now, let’s look at the step by step process of adding one page scroll navigation link to your WordPress site:
3.1 Turn on Onepage Scroll Module
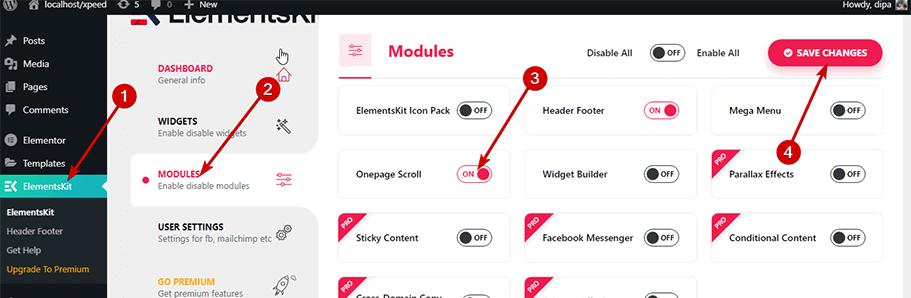
To add Elementor scroll navigation to your WordPress site, first, we need to turn on the Onepage Scroll Module.
- Go to: WordPress Dashboard ⇒ ElementsKit ⇒ Modules
- Turn on Onepage Scroll
- Click on Save Changes to update
3.2 Enable One Page Scroll from page settings
- Click on the Settings icon on the bottom left corner of the Elementor Panel
- Open the ElementsKit Settings tab
- Enable Onepage Scroll option
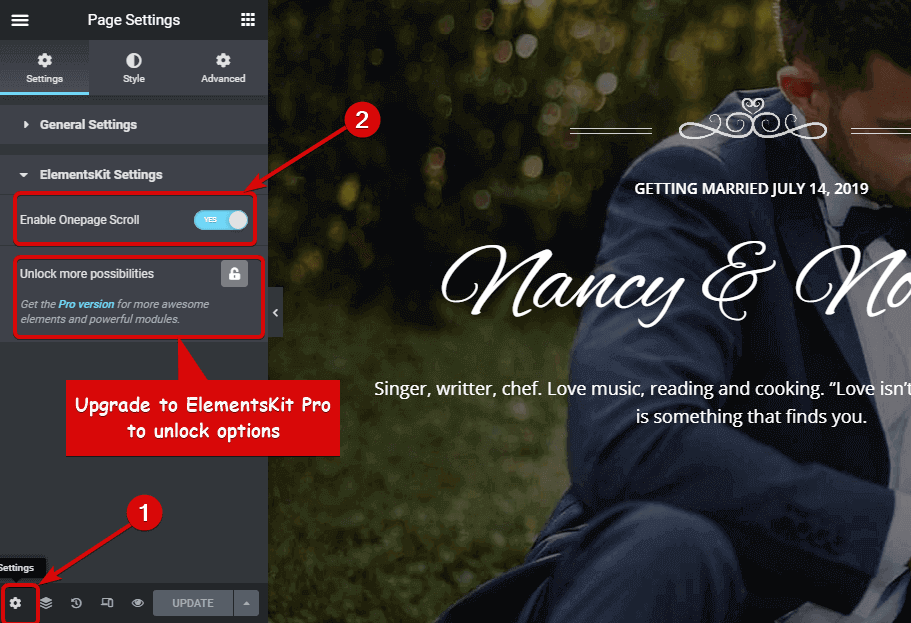
Note: If you can not find the Onepage Scroll Setting option then you probably have not activated your ElementsKit Pro
Now, it’s time to choose the navigation style. ElementsKit gives you multiple options for Elementor one page menu navigation. For example, under the circle, you get Scale-up, fill in, fill out, etc. For square pattern, you will have options like scale-up and as part of Line you will get options like the line to grow, line fill, line shrink, etc.
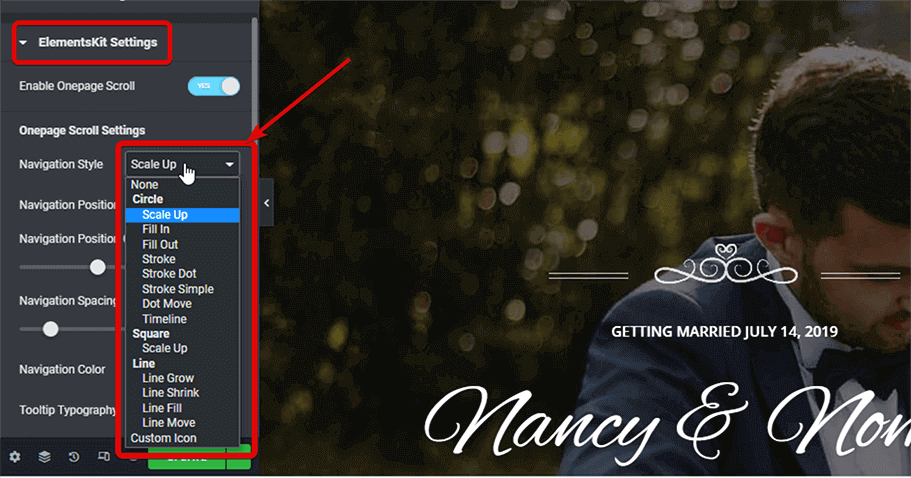
You can choose any style you like, for this blog I am going to choose the custom icon. Once you choose a Custom icon, you will get an option to choose an icon for the One Page Scroll Navigation Style option. You can choose an icon either from the icon library or upload a custom SVG icon.
To choose a custom icon
- Choose Custom Icon option from navigation style dropdown
- Hover on the navigation icon and click on the Icon library
- Search and Insert the Icon you like
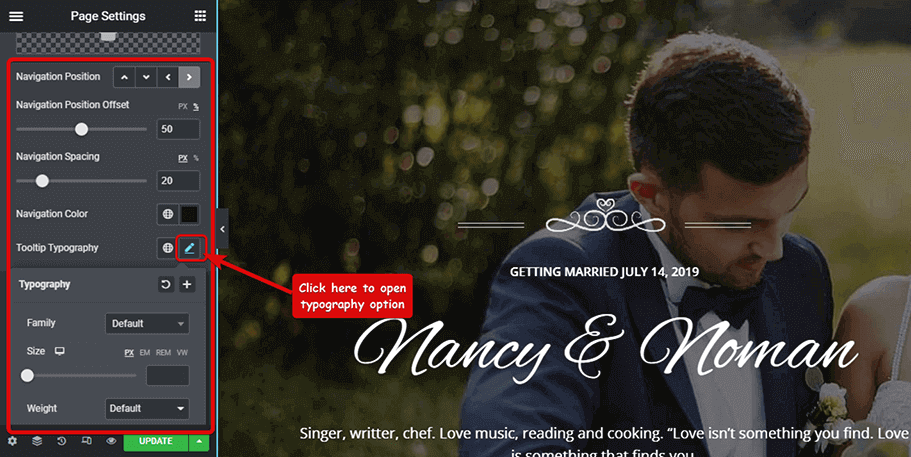
Once you choose a navigation style, you will get access to the following settings:
- Navigation Position: You can set the navigation position as top, right, bottom, or left.
- Navigation Position Offset: Here you can choose the navigation position offset value.
- Navigation Spacing: Choose the space you want between each navigation icon.
- Navigation Color: Pick a color for the navigation icon.
- Tooltip Typography: Here you can choose family, font size, weight transform, style, decoration, and line-height for the tooltip.
Now that all the settings are done it’s time to add the sections you want to appear on the navigation. To do so
- Hover on the section and click on the Edit Section icon
- Go to the Advanced tab
- Expand ElementsKit Onpage Scroll option
- Turn on enable the section to make the section visible
- Turn on enable dot option to add this section as one of the navigation links
- Provide a name for the tooltip text. Tooltip text will show up when someone will hover on the link
- Finally, click on update to save
You can repeat the same process mentioned above to add all the sections you want to the navigation.
Note: You can add a section to navigation, not the inner section. So, you will not find the ElementsKit Onpage Scroll option under the advanced tab for the inner section or any other widget.
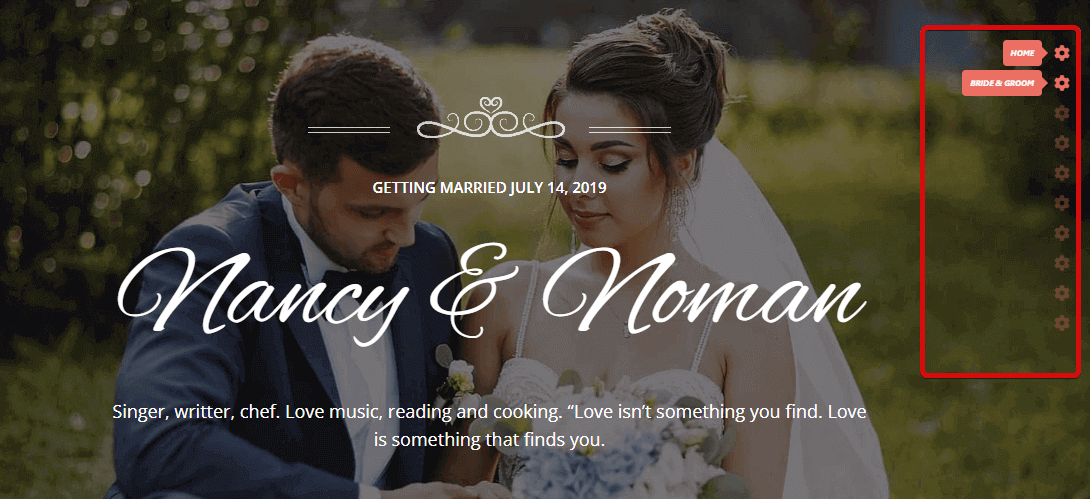
After you make all the navigation, update and click to see the preview of one page navigation in WordPress and also to check the navigation menu links.
Well, you have a website one page navigation in WordPress now but you still need a header footer to complete your website. Header and Footer sections of a website are very important to display your logo and important information so your customers can easily see it.
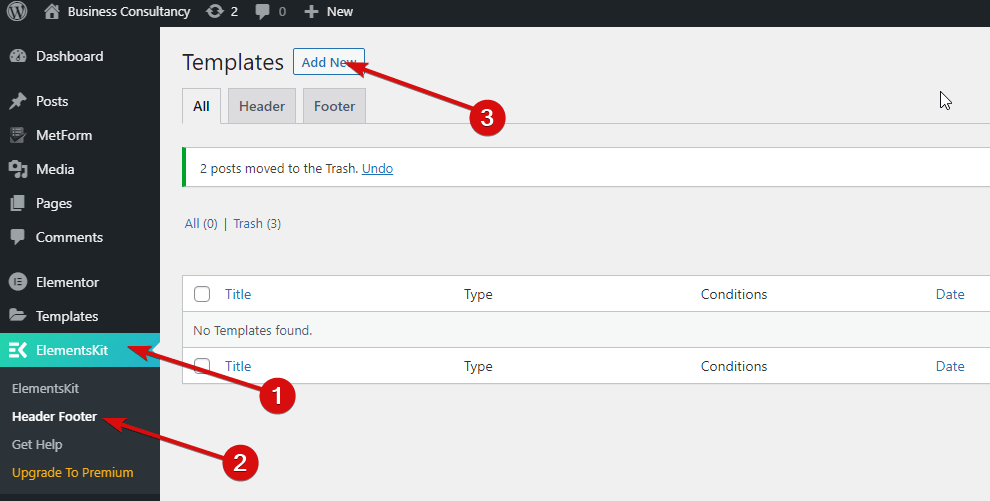
ElementsKit provides you with many premade Header and Footer sections to choose from. To use ElementsKit Header Footer:
- Go to ElementsKit ⇒ Header Footer ⇒ Click on Add New
- Choose Type as Header, Conditions as Entire Site, Turn on the Activate/Deactivate option and finally click on Save changes.
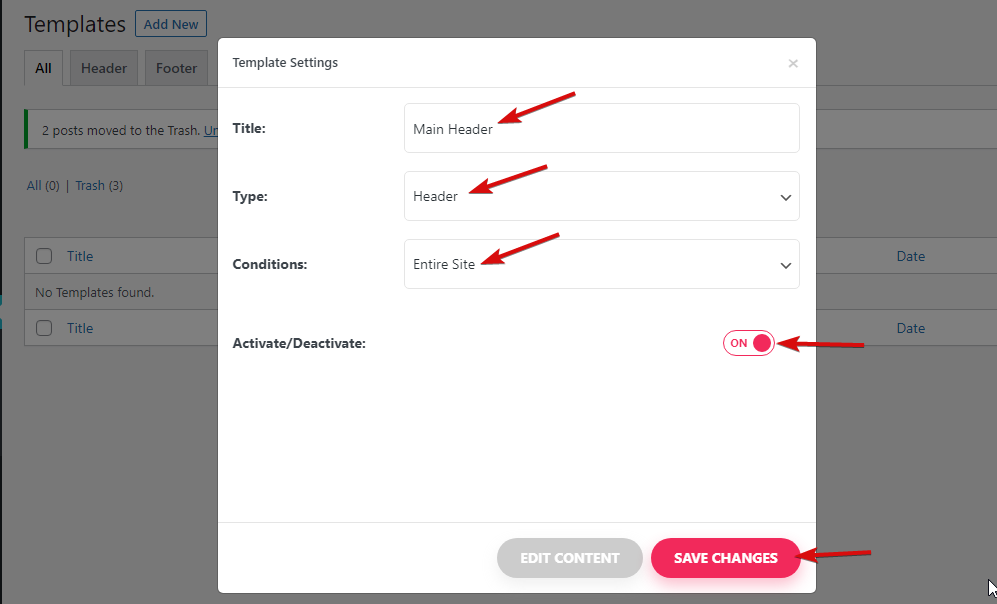
- Now to add header section, click Edit on the menu you created
- Click on Edit Content
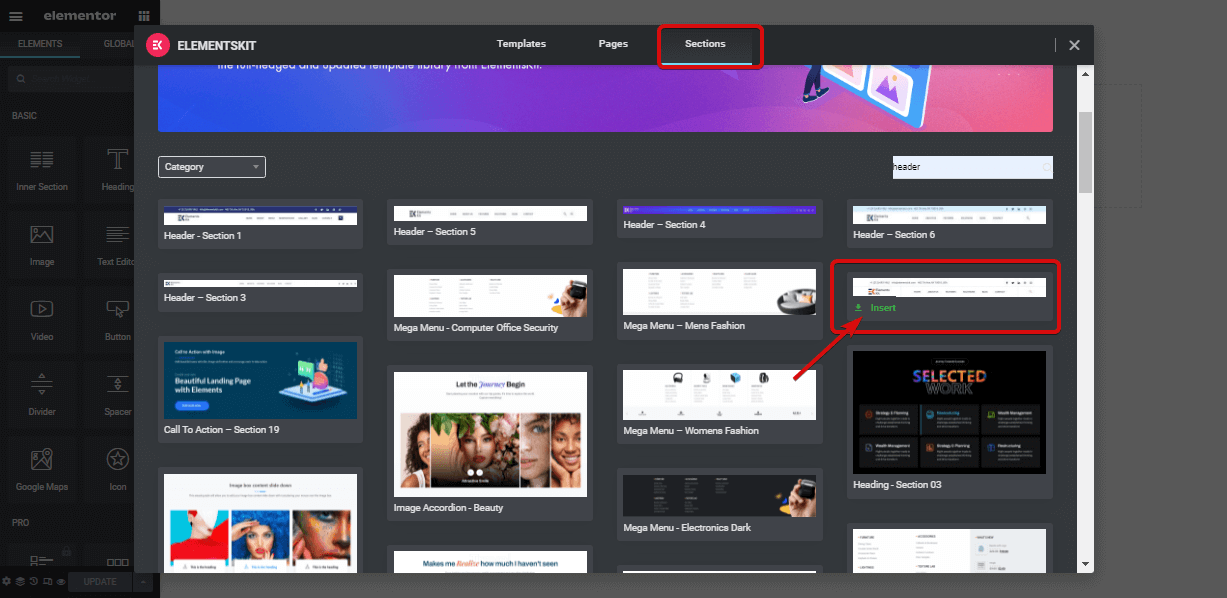
- Click on the EK button and go to the Sections tab
- Choose header design you like and click insert
You can follow the video below to create a beautiful header footer for your website.
Note: You can follow the same steps as Header to create a Footer section for your website using Premade sections by ElementsKit.

Step #5: Add Contact form as Modal Popup (BONUS)
It’s time to add a contact form to your website so it’s easier for your potential clients to communicate with you. Adding a contact form using a popup would give your one page website a more attractive look along with the much necessary form you need.
To add a modal popup, I am going to replace the RSVP button with a popup modal and add a contact form to it.
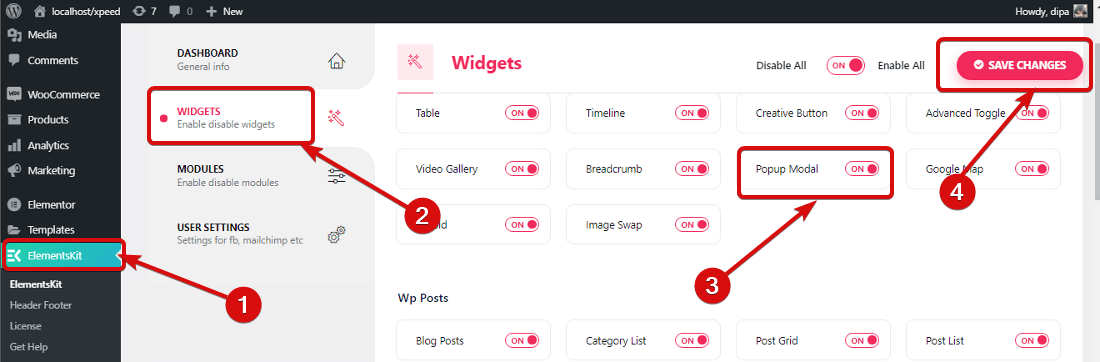
- Go to ElementsKit ⇒ Widgets ⇒ Turn on Popup modal ⇒ Click on save changes
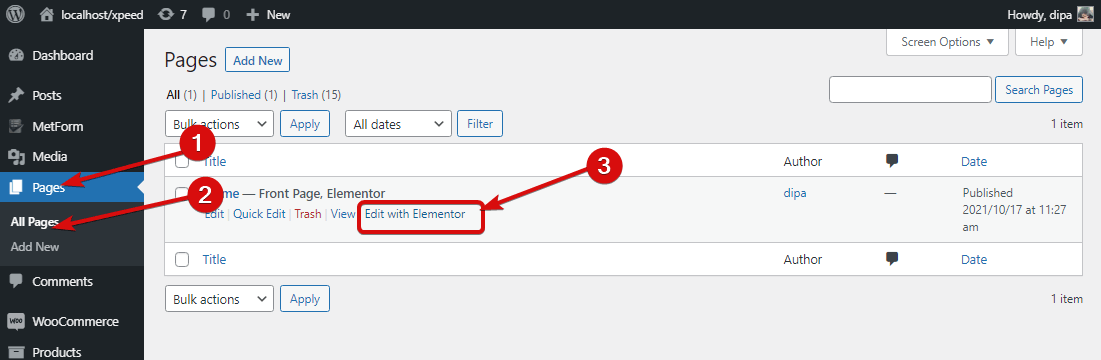
- Go to your All Page ⇒ home page (or whatever you named you page) and click on Edit with Elementor
- On the edit mode, scroll to the RSVP section and delete the RSVP button
- Drag and drop modal pop up on the place of RSVP button
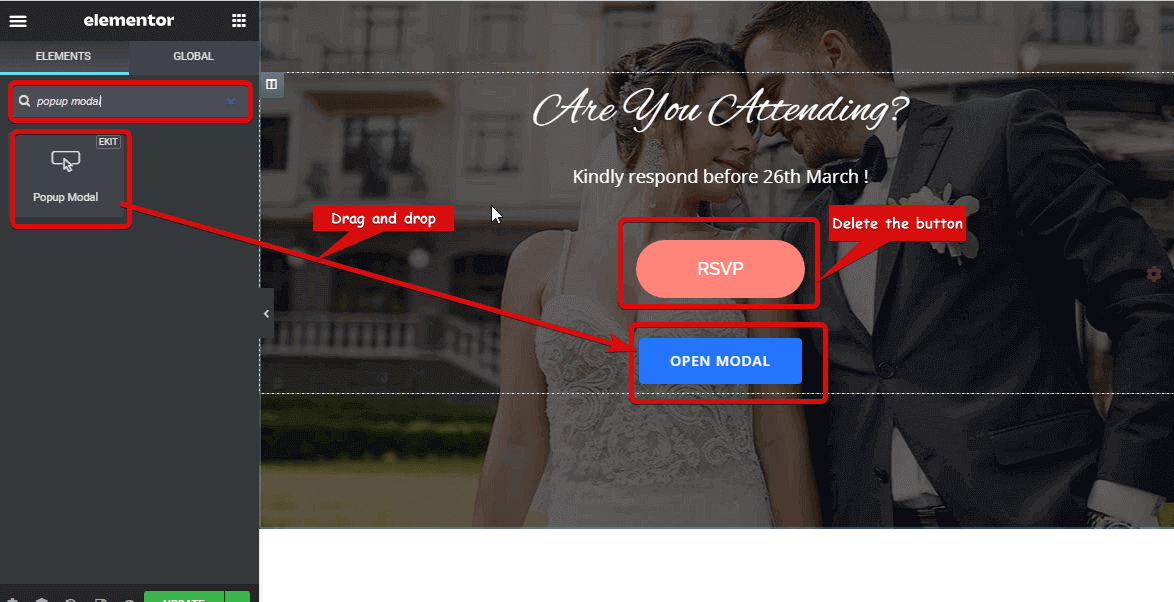
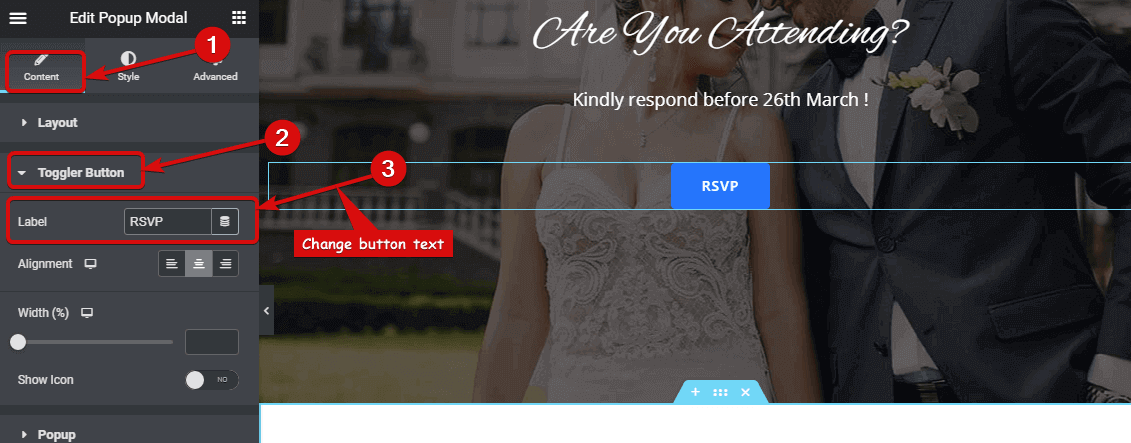
- To change the modal button text go to Content ⇒ Toggler Button ⇒ Label and change “Open Modal ” to RSVP (or anything you want)
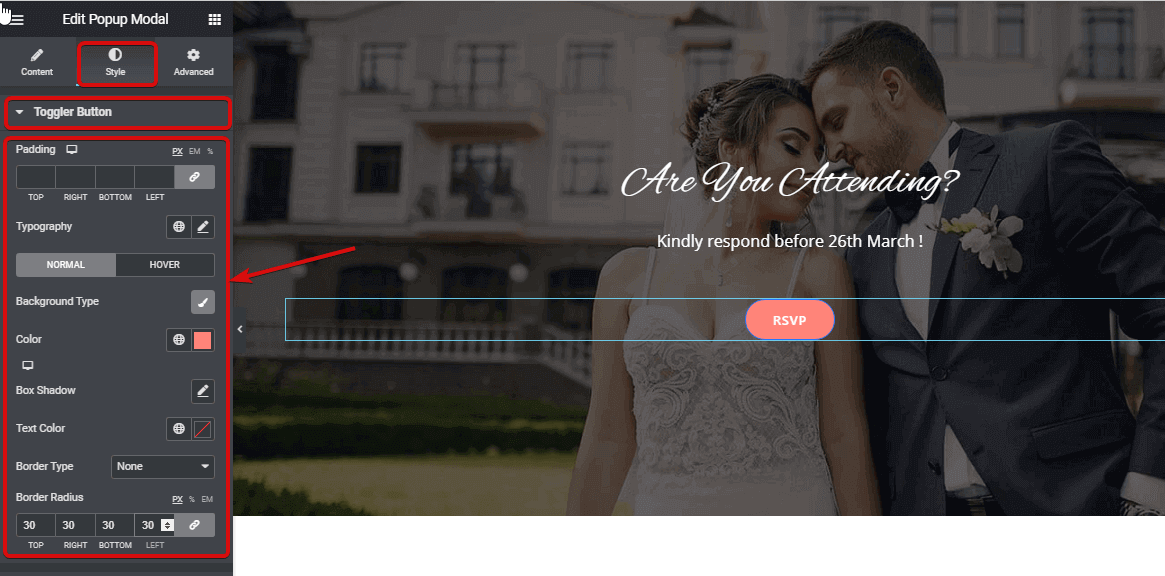
- Go to the Style tab ⇒ Toggler Button to change the button background color, text color, border radius, and other settings for both normal and hover view.
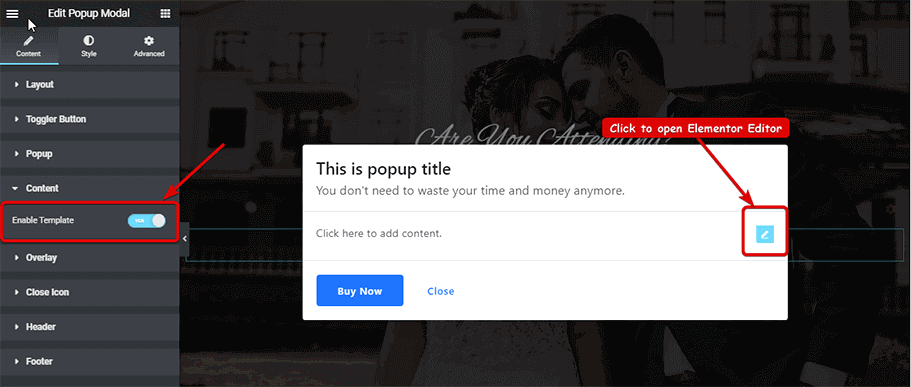
- Now go to Content and turn on Enable Template mode so we can add our Contact form.
- Click on the popup button. Once open click on the edit icon on the body to open Elementor editor
You can check out more details on our blog on different ways to utilize pop up modal widget by ElementsKit on your WordPress site
- Search for Metform, drag and drop the widget
- Click on the Edit form to choose the Contact form
- Choose the form you want from the list and click on save & close
- Finally, click on update to save
Note: I had already made the RSVP form using Metform and also changed the color and style a bit to match the landing page template we are using. You can check out the blog on how to create and style contact forms using Metform.
You can also check out the video below for instructions on how to build a custom contact form using Metform.
Well, everything is done. Now down to the final step, the easiest and most exciting one. After you complete all the customization and steps mentioned above click on the Update button to save everything and click on the Preview button to see your site.
Provided you have followed all the steps correctly, you should get a single page website with one page navigation in WordPress like the one below:
Want to know more about ElementsKit? Check out the latest update on ElementsKit to know more about this awesome Elementor addon.
You shouldn’t think of getting a one page website for your business just because your business is small. There are plenty of other benefits to having a one page website especially a one-page WordPress website. Let’s have a look at some of the pros:
- Firstly, it’s mobile-friendly. That’s a crucial thing to consider when it comes to website SEO( Search Engine Optimization). As of 2021, 70% of US citizen uses a mobile device to search on the internet. Data like these are the reason why Google prioritizes a mobile-friendly website. With single page design, your website gets on Google’s good books from the start.
- Most people prefer a website that’s plain, beautiful, and to the point rather than an unnecessarily lengthy one.
- Google counts Domain and page-level link authority to a degree of 40%. This is another area where your one-page site will have an advantage.
- Single-page websites load faster than websites with tons of pages. Considering the fact people nowadays have an unlimited options, having a fast-loading site is really non-negotiable.
- One page sites are easy to maintain.
- Since a single page website has all the information on one page, scrolling navigation makes it much easier to navigate and a smooth scrolling effect makes the user experience a soothing one.
I can go on for some more time, but I think the above information does convey the message that if your business is small, then you can get big in fact really big benefits using the small website with one page navigation.
Final Words on Elementor One Page Scroll Website
Give yourself a pat on the back! Because you have successfully created a modern-looking beautiful website with one page navigation using Elementor and ElementsKit. Using a single-page website customers can easily navigate to different sections of your website to learn about your business. And that one-click modal popup with contact form makes communication really just one click away!
If you are impressed with what you have built, then get ready to get surprised even more because ElementsKit opens limitless possibilities for WordPress and Elementor users to experiment and build an awesome-looking website. So, do make time to check out other advanced widgets and modules of ElementsKit.
To learn more about website building using WordPress, Elementor and the magical ElementsKit follow us on our social media accounts.

Leave a Reply