Wondering why there are animated particles that move on other websites? Well, that is called a WordPress particle effect. Don’t worry; you can also take your WordPress website to new dimensions with stunning particle effects. Learn how to create a particle effect in WordPress using our ElementsKit Particle Module. It doesn’t need your coding skills!
What is the WordPress Particle Effect?
Particle effect is visual animation and dynamic elements made with JavaScript and CSS. This is also called particle animation in WordPress. They enhance websites by adding interactivity and captivating touches.
These effects include small, animated particles. They move, rotate, and interact with user actions, creating an engaging experience. It immerses users in the website’s content.
Particle effects can be used to enhance the design, highlight important elements, and bring life to:
- Backgrounds
- Headers
- Sliders
- Any other section of a WordPress website
They provide a unique and visually appealing way to grab viewer’s attention and make a lasting impression.
You can incorporate particle effects in WordPress using plugins, themes, or custom code. These effects transform static pages into interactive experiences that captivate visitors.
In this guide, we will walk you through the easiest way on how to add a particle effect in WordPress using our ElementsKit Particles Module.
Understanding ElementsKit Particles Module
There are various particle effect plugins available in the market nowadays. But why choose ElementsKit Particle Module as a WordPress particle effect plugin among the many?
Why Choose ElementsKit Particles Module for Particles Effect in WordPress?
ElementsKit particle module is a drag-drop module and one of the Pro features of ElementsKit. With this feature of ElementsKit, you can easily design specific sections of different pages. This new and professional feature of ElementsKit allows you to add creativity to your WordPress site.
Now, you can elevate the aesthetics of your website by customizing each section with beautiful backgrounds. It is an excellent choice because of its excellent features, including:
- Particle Animation
- Customization Options
- Interactive Behavior
- Multiple Particle Layer
- Easy Integration
- Performance Optimization
- Responsive Design
Overview of Each Feature
Particle animation:
Choose from particle animations like snowflakes, bubbles, and fireflies. These dynamic effects add movement and liveliness to your website.
Customization options:
Customize particle attributes like size, color, speed, and density to align with your website’s design and branding. It is applicable to various sections of your website, including headers, backgrounds, hero sections, and more.
Interactive behavior:
It defines interactive behaviors, engaging users with dynamic browsing. It has a user-friendly interface that allows you to customize and control the particles effortlessly.
Multiple particle layers:
Overlay different particle effects on many layers, adding depth and complexity to your visuals.
Easy integration:
You can enable the module and configure its settings without complex coding skills. It allows you to customize and control the particle effortlessly through its intuitive interface.
Performance optimization:
The module optimizes performance, ensuring smooth user experiences without compromising loading speed. It ensures the particle effects have no negative impact on your website’s speed. Code is lightweight and optimized for efficient execution, providing a seamless user experience.
Responsive design:
Particle effects from ElementsKit Particles Module adapt to different screen sizes and devices. You can keep captivating particle effects across different devices and screen sizes. It creates a consistent and visually appealing experience for all visitors.

Step-by-Step Guide on How to Create a Particle Effect in WordPress
Let us now begin with the step-by-step process on how to create a particle effect in WordPress using the ElementsKit Particles Module.
2 main steps:
- Install ElementsKit Pro and activate the Particles Module.
- Customize your particle animation in WordPress to meet your requirements.
Step 1: Activate particles module in your WordPress website
Your first step in learning how to add a particle effect in WordPress is to activate the Particles Module from the Pro version of your ElementsKit plugin.
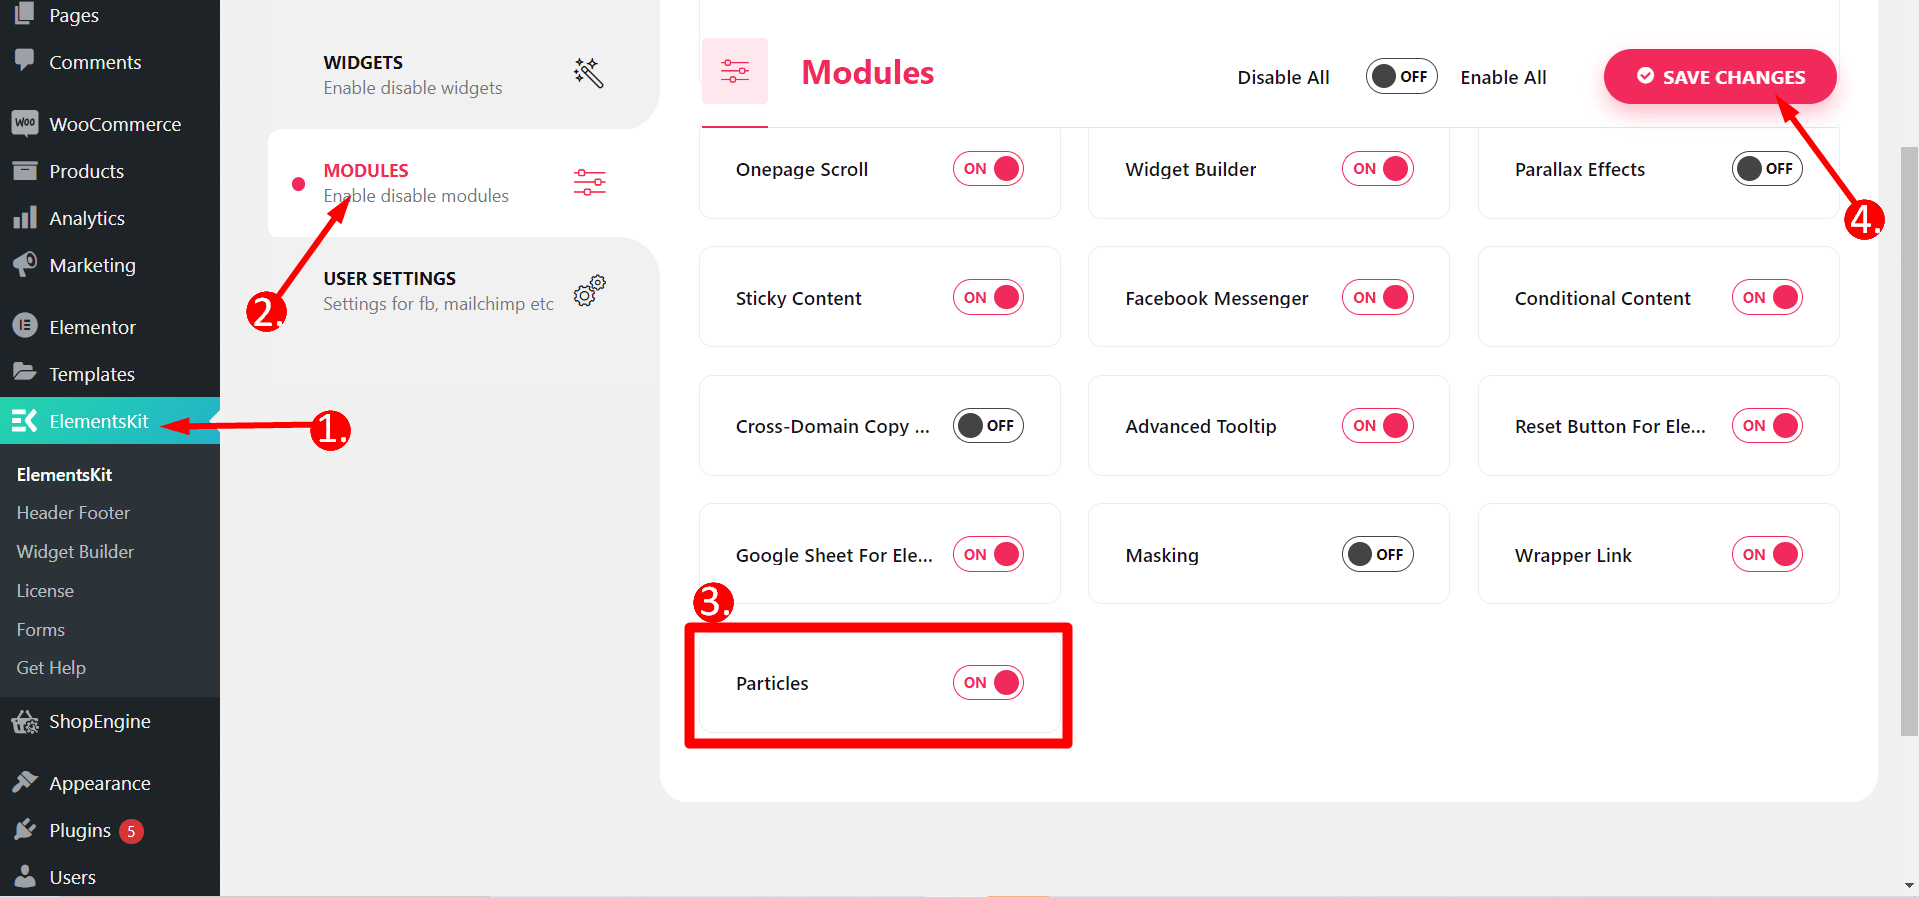
👉 To activate the Particles module, follow these steps:
- Access your WordPress Dashboard.
- Locate ElementsKit.
- Navigate to the Modules section.
- Find the Particles module.
- Save the changes once you have enabled it.
Step 2: Edit your page using Elementor and start customizing your particle effect
👉 To begin your WordPress particle effect’s customization, select the desired page for editing. You can also create a new page and change it using Elementor.
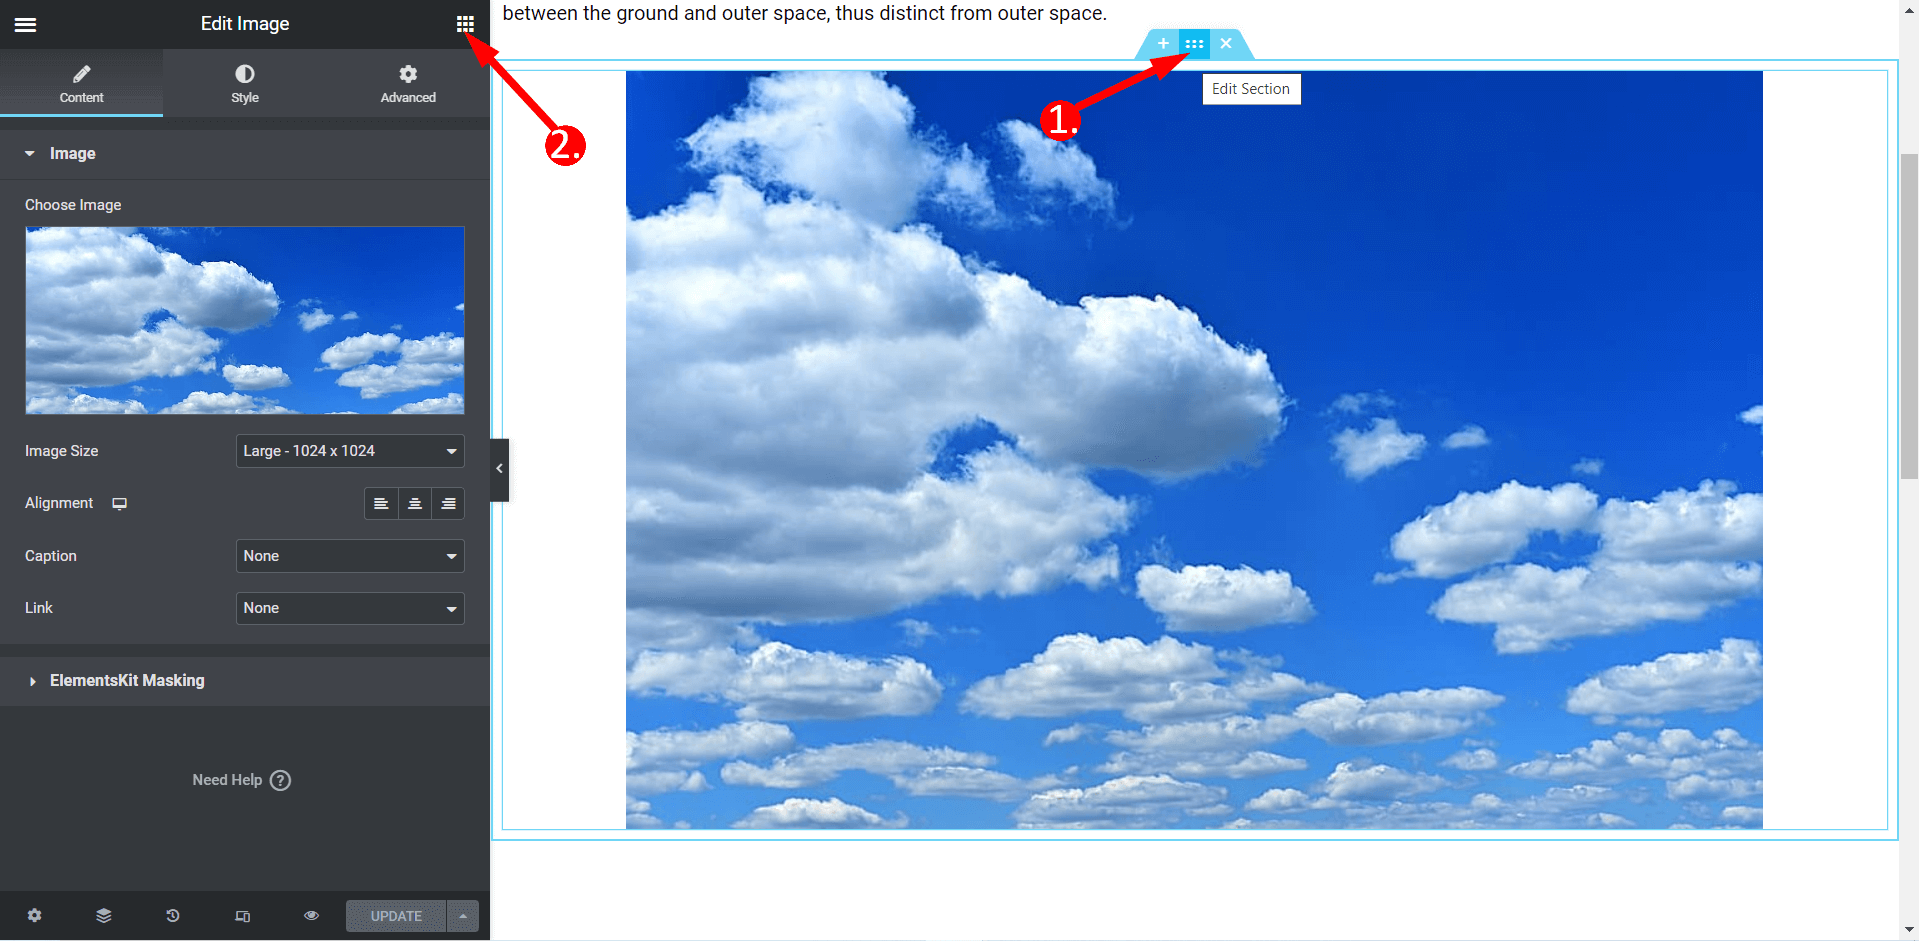
To edit a specific section of the page, follow these steps:
- Choose the section you wish to change.
- Click on the “Edit Section” option.
- Next, navigate to the “Advanced” settings to customize the selected section further.
👉 Enable ElementsKit particles
- Locate the feature bar for ElementsKit Particles
- Toggle the switch to the “YES” position.
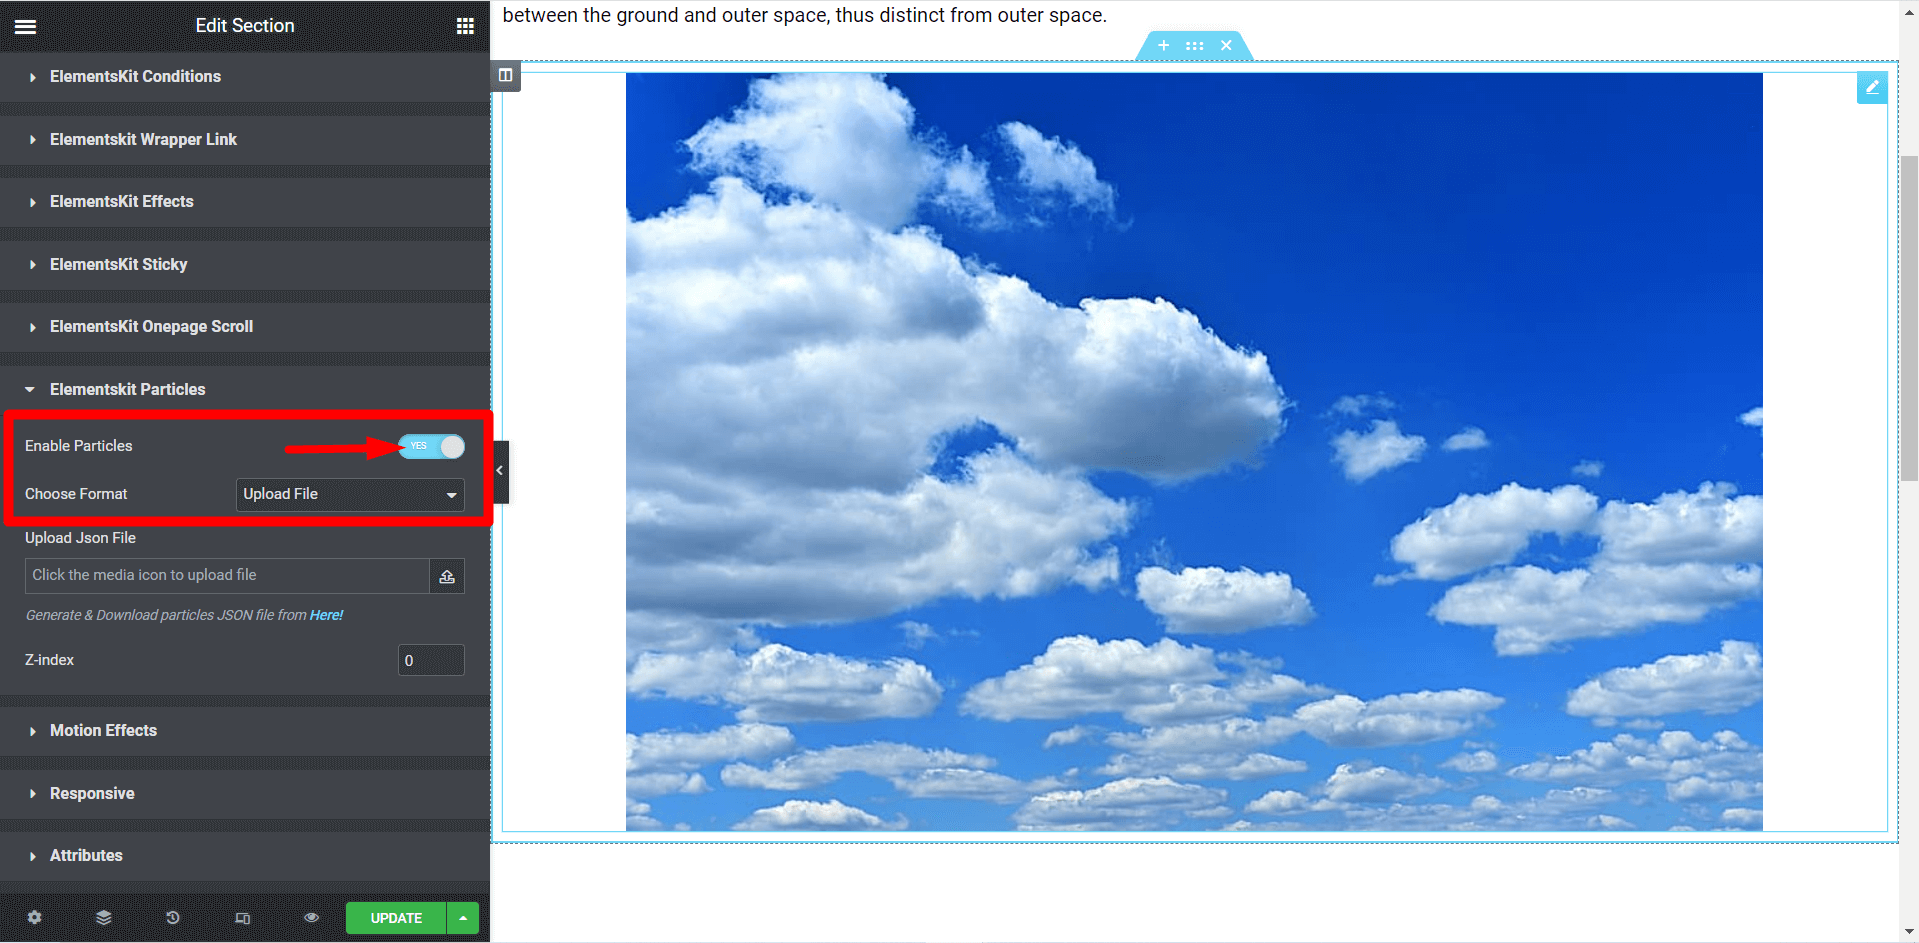
👉 Select your format
3 available formats to select from:
- Preset
- Upload File
- Enter JSON Code

👉 Selecting the “Preset” format
The Preset format offers five styles. Each type provides unique and distinct effects:
- Default
- NASA
- Bubble
- Snow
- Nayan

👉 Selecting the “Upload File” format
🗸 You need to generate a JSON file to choose the Upload File format. By clicking the provided link, you will be guided through the process.
🗸 Once the JSON file is ready, upload it in the designated field labeled “Upload JSON File“.
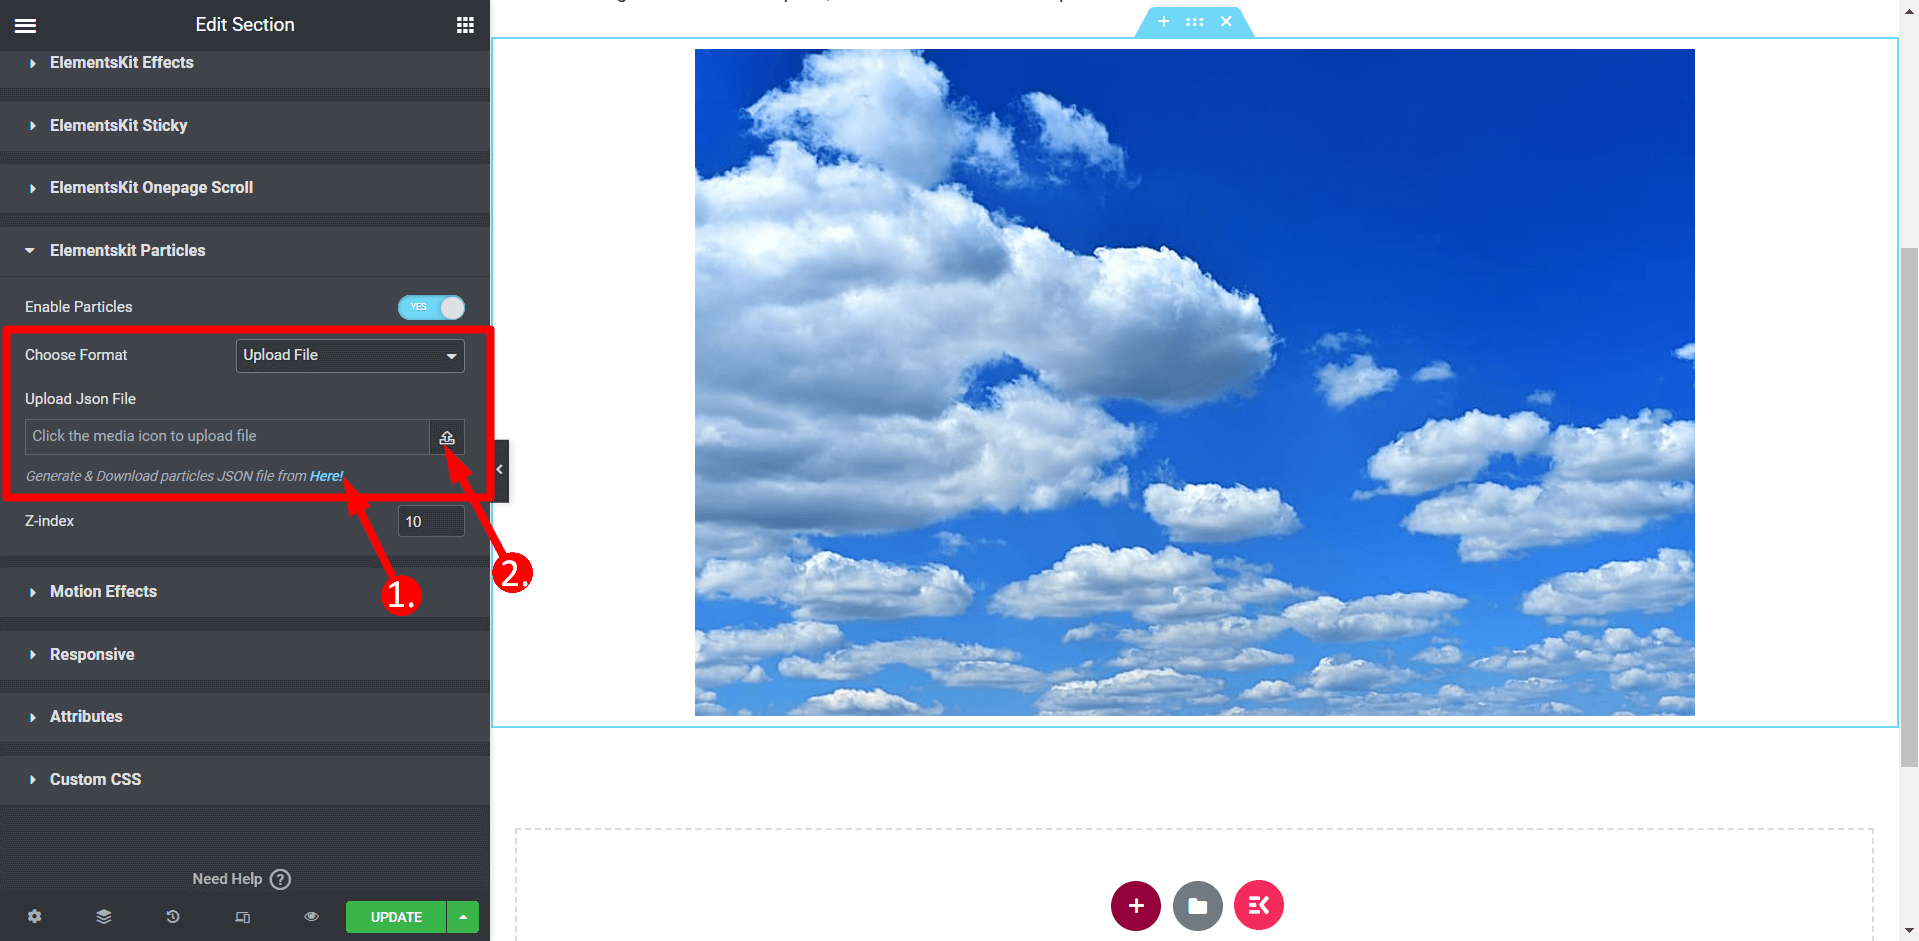
👉 To download the JSON file, you need to:
🗸 Click the link to customize your sections using particles according to your preference.
🗸 Once you have finished customizing, you can download the current configuration (JSON) file.
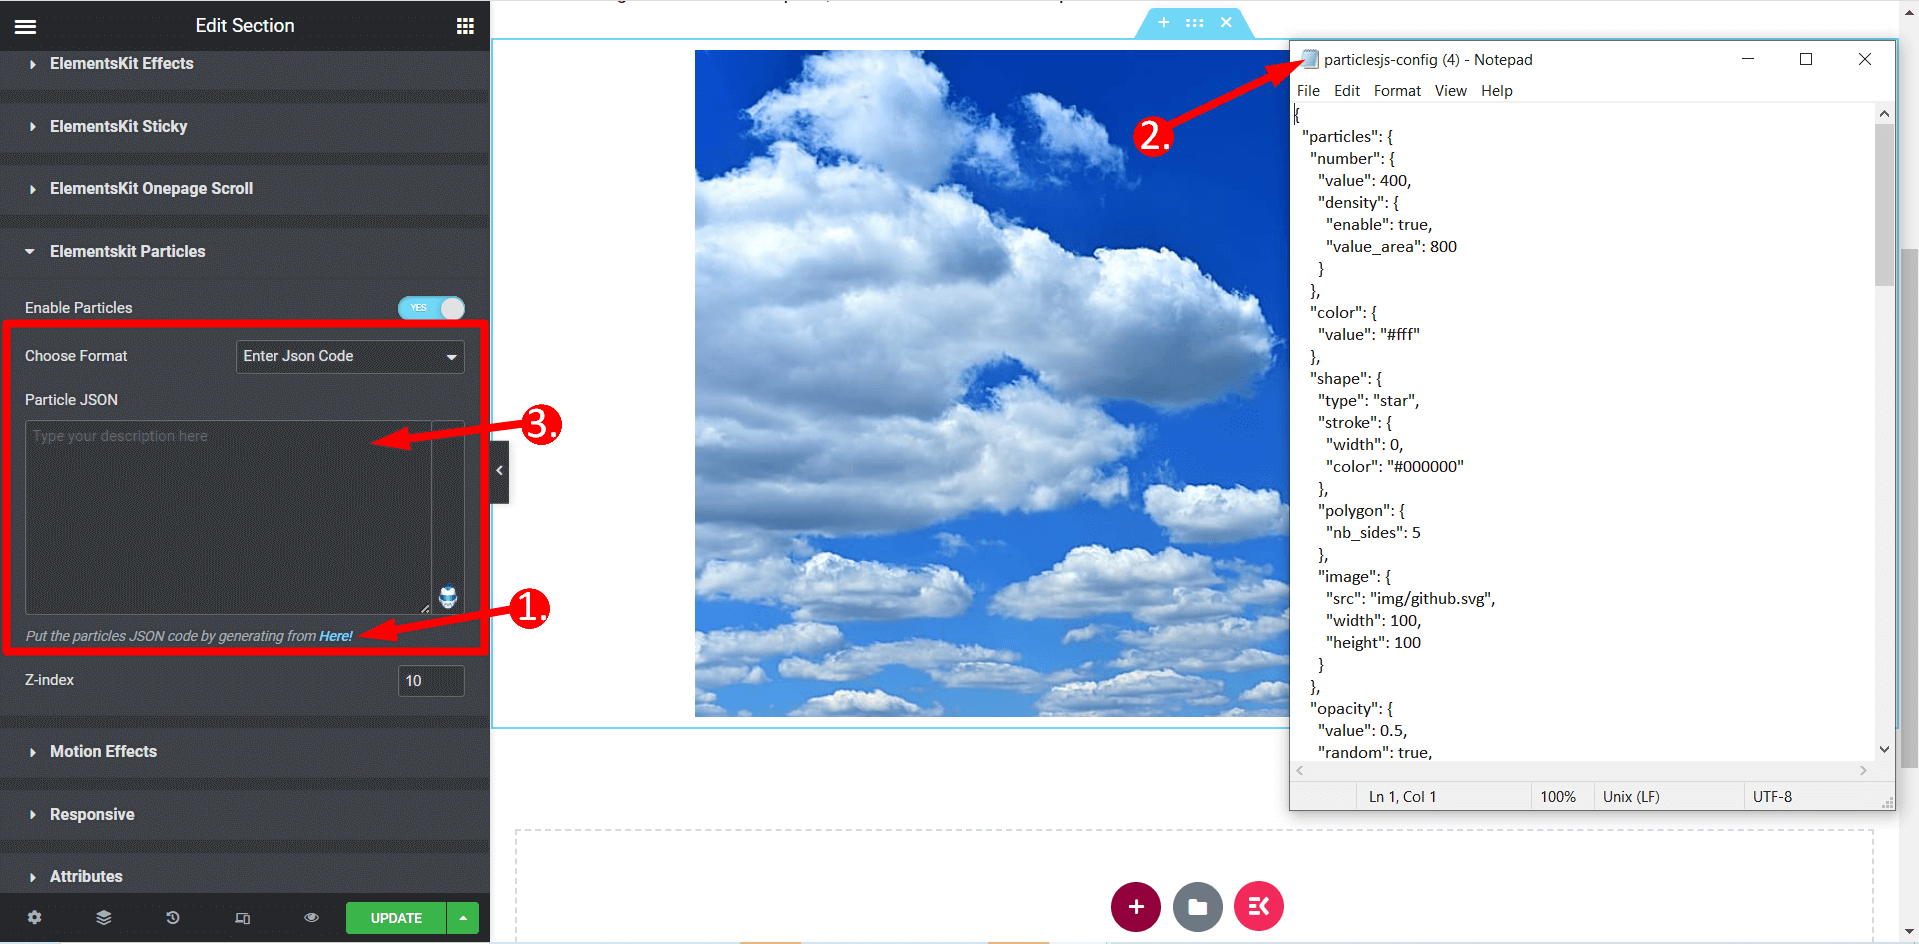
👉 Selecting “Enter JSON Code” format
🗸 To choose the “Enter JSON Code format”, you must generate a JSON file following the same process mentioned above.
🗸 Open the file using any text editor or Notepad, then copy the code from within.
🗸 Paste the copied code into the designated field labeled “Particle JSON.”
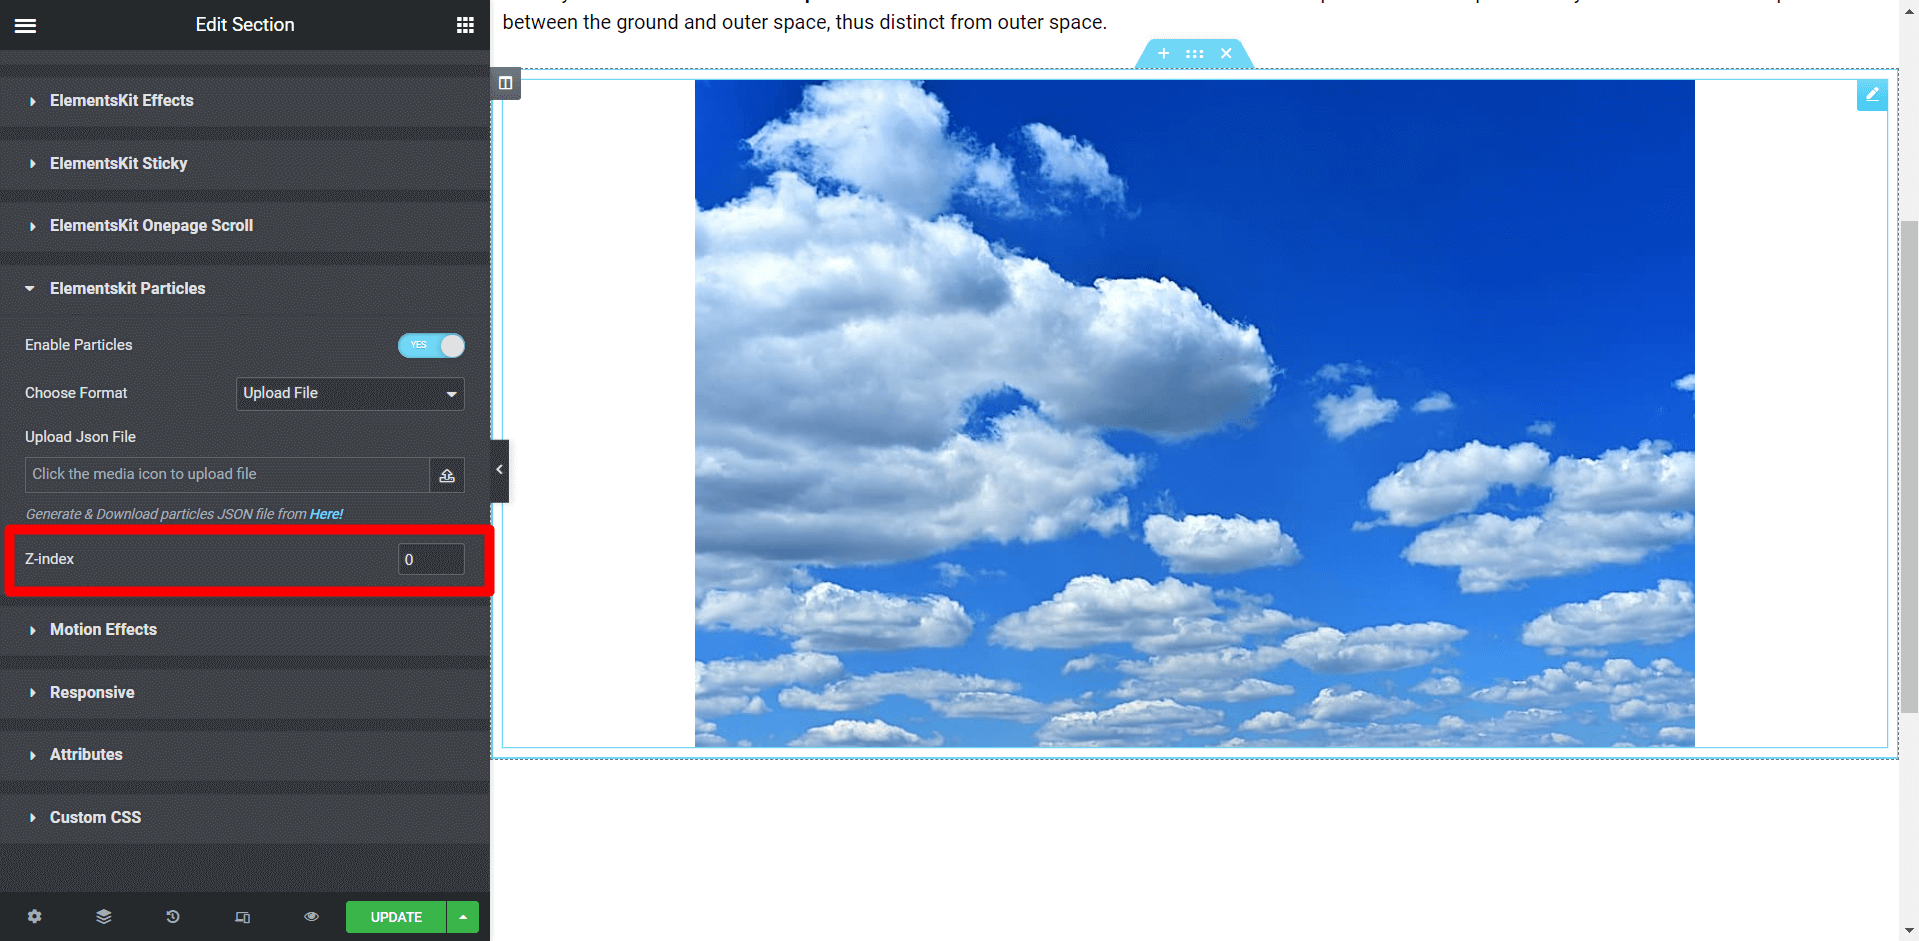
👉 Z-Index
In this setting, you can specify a value to position the particles according to your requirements.
👉 Final Result
Here is the final output resulting from our customization:
Troubleshooting Common Issues/FAQS
Performance issues and solutions:
The ElementsKit plugin is evolving to meet the needs and preferences of its users. ElementsKit releases updates twice a month for an optimal user experience. These updates ensure compatibility with the latest WordPress versions and introduce new features.
The team ElementsKit listens to user feedback, analyzes feature popularity, and enhances. ElementsKit provides a smooth experience by adding new features and addressing conflicts. It allows you to use your WordPress website’s latest tools and functionalities.
Finding support and resources for troubleshooting:
With ElementsKit, enjoy unparalleled support and a wealth of resources to guide you at every stage. Enjoy our extensive knowledge base, offering helpful articles, tutorials, and guides.
Furthermore, our dedicated support section connects you with our expert team for any help. We have a very responsive support team to provide a timely and reliable service. You can always use our invaluable resources to maximize the potential of ElementsKit. You can always contact Wpmet support team and they will assist you in finding solutions to your issues.
👀 👀 👀here!!!!!!!! ElementsKit Lite is Not Working – Fix the Issues
Getting Started with Particles Effect
Incorporating particle effects into your WordPress website brings many benefits. WordPress’s dynamic and animated particle effects captivate visitors, enhancing the user experience. Particle effects in WordPress offer versatility with various styles. It includes snowfall, sparkling backgrounds, and vibrant bursts of confetti. It ensures compatibility with the latest WordPress versions and adds user-requested features.
Additionally, ElementsKit provides extensive support resources. It includes a knowledge base and a dedicated support section. The support team will guide you in unlocking the full potential of particle effects in WordPress.
Don’t be afraid to unleash your imagination and let your ideas flourish with ElementsKit, your number one Elementor addon. Embrace the ElementsKit’s Particle Module by leveraging the steps on how to create a particle effect in WordPress, and watch as your website comes to life with dynamic and stunning elements. Imagination is the only limit, so dive in and embark on an exhilarating adventure of creative expression with the Particle Module.
Leave a Reply