


Imagine waking up one morning only to find your website disappeared without a trace due to a technical glitch, malicious attack, or server failure. The repercussions could be catastrophic, ranging from lost revenue and traffic to damaged reputation and irate visitors.
Fortunately, there is a simple yet immensely valuable solution to this potential nightmare: regular backups of your WordPress site. A comprehensive backup strategy not only protects your digital investment but also grants you the peace of mind to rest easy at night, knowing your website’s integrity is in good hands.
In this article, we will discuss the importance of backing up your WordPress site and guide you through a step-by-step process to create foolproof backup routines. This article includes both ways of how to back up a WordPress site, manually and using a plugin. Let’s get into the details.
Quick Overview
This tutorial includes process to backup WordPress websites.
Method 1: Use a WordPress plugin
Install plugin → Configure → initiate backup
Method 2: Backup from cPanel
☑️ Log in → WordPress installation folder.
☑️ Create a backup folder and move files.
☑️ Compress and download files.
☑️ Export WordPress database.
Why should you keep a backup of your WordPress site?
You have invested a good amount of time to build a WordPress website that resonates with your business. Therefore it is essential to implement a backup strategy that suits your website’s needs.
Regularly scheduled backups, preferably stored offsite (on a different server or cloud storage), and automated backup solutions are recommended for ensuring the safety of your WordPress site. Here are some of the key reasons why maintaining backups is crucial:
- Protection against data loss: Websites are vulnerable to various threats, including hacking attempts, malware infections, accidental deletions, and server failures. If any of these events occur and you don’t have a backup, you risk losing all your valuable website data, including posts, pages, images, settings, and customizations.
- Easy recovery: With a backup in place, you can quickly restore your website to a previous working state in case of any issues. This is particularly helpful if you face a security breach or encounter a significant technical problem, as you can roll back to a stable version of your website.
- Time and cost savings: In case of data loss or website issues, restoring from a backup is usually faster and more cost-effective than trying to troubleshoot and recover the site without a backup.
- WordPress updates and plugin conflicts: WordPress regularly releases updates for its core software, themes, and plugins. Sometimes, these updates can cause conflicts and lead to unexpected errors or even a broken website. If you have a backup, you can update your site with confidence, knowing you can revert to the backup if anything goes wrong.
- Migration to a new server or domain: If you plan to move your WordPress site to a different hosting provider or change the domain name, having a backup makes the migration process much smoother. You can restore the backup on the new server or domain, avoiding the need to rebuild the site from scratch.
- Sense of security: Knowing that you have a website backup provides peace of mind. Running a website involves many risks, and having a safety net in the form of a backup ensures that you can recover from almost any disastrous situation.
- Development and testing: Backups are valuable for developers and designers who want to experiment with new website features, themes, or plugins. Before making significant changes, they can create a backup and easily revert if things don’t go as planned.
How to backup WordPress site
Backing up your WordPress site is crucial to ensure you can restore your website in case of data loss, security issues, or any unforeseen problems. There are multiple ways to backup a WordPress site, and I’ll provide you with some popular methods:
- Use a WordPress backup plugin.
- Manually backup WordPress via cPanel.
- Create a backup of WordPress site with Hosting Provider Tools.
Please note that the process of backing up may vary slightly depending on your hosting environment and the backup method you choose. It’s essential to follow the specific instructions provided by your backup plugin or hosting provider. Always double-check your backup files to ensure they contain the necessary data before making any changes to your live site.
Method 1: How to use a WordPress backup plugin
The simplest way to backup your WordPress site is to use a WordPress backup plugin. Backing up your WordPress site with a plugin is a simple and effective way to ensure you have a copy of your website’s data, files, and database. Which you can use to restore your website in case of any unforeseen issues or data loss. Here we will show you the step by process for how to back up a WordPress site using a plugin.
There are several backup plugins available for WordPress, both free and premium. You can compare the features and find a WordPress backup plugin that suits your website.
However, for this guide, we’ll use UpdraftPlus as an example, as it’s widely used and offers a free version with essential features.
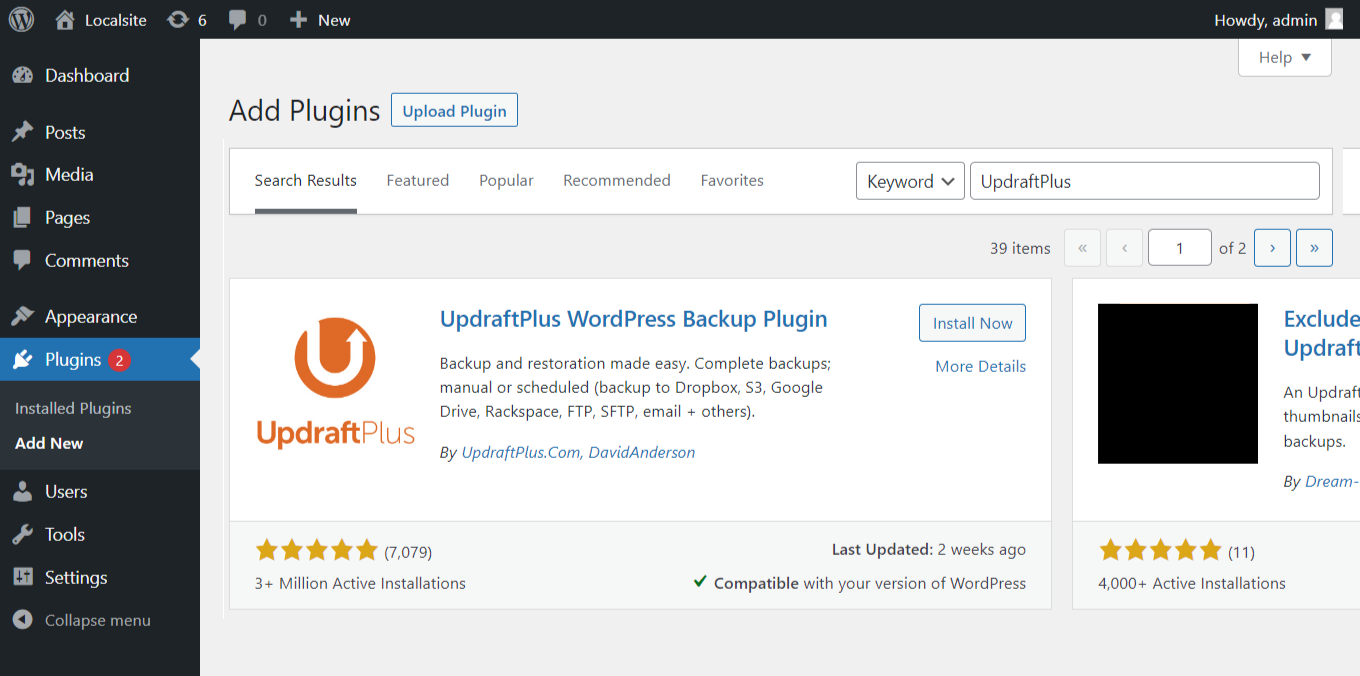
Step 1: Install the plugin
The first step is to install the UpdraftPlus, a WordPress site backup plugin. For that,
- Go to the Plugins > Add New from your WordPress dashboard.
- Find the UpdraftPlus from the directory.
- Install and activate the plugin.
After the installation and activation are done, move ahead to the next step.
Step 2: Configure UpdraftPlus
Once activated, you’ll find the UpdraftPlus plugin listed in your WordPress dashboard. Click on “Settings” under UpdraftPlus.
In the settings section, you can choose how often you want to create backups (e.g., daily, weekly, monthly) and where you want to store the backups. UpdraftPlus allows you to store backups in various locations, such as:
- FTP server
- UpdraftPlus Vault (a paid service)
- Select your preferred backup schedule and storage options.
- Remote storage services like Dropbox, Google Drive, Amazon S3, etc.
Select your preferred backup schedule and storage options.
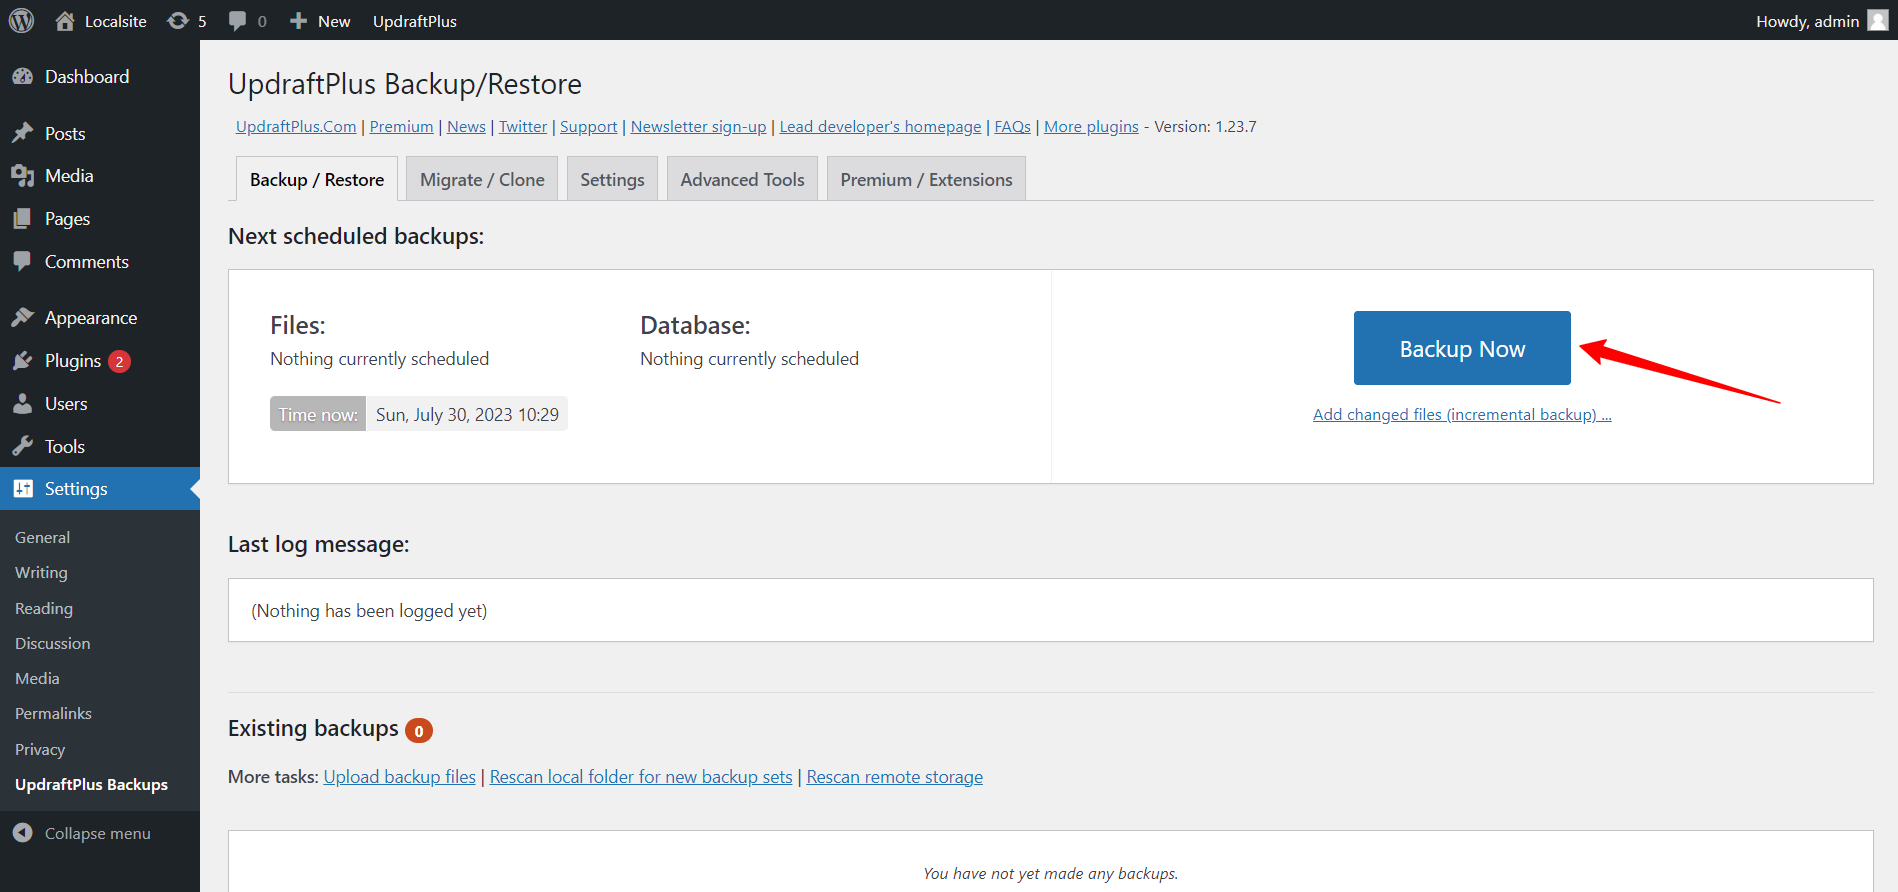
Step 3: Initiate the WordPress backup
After configuring the settings, click on the “Save Changes” button to save your settings. Then, click on the “Backup Now” button to initiate the backup process.
Step 4: Wait for Backup Completion
The plugin will now create a backup of your WordPress site. The time it takes depends on the size of your site and your server’s performance. It’s best to avoid making significant changes to your site during this process.
Now the backup of your WordPress is ready. In order to restore your site from a backup, go to the backup / Restore tab and click on the Restore button next to the backup date you want to use. You will see another popup where you can choose which components to restore.
Click on Restore and wait for the process to finish. You will see a message saying your backup has been restored.
Also Read 👉 How to Increase WordPress Memory Limit
How to backup WordPress site without a plugin
If you don’t want to use a plugin to back up your WordPress site, you have a few options. You can either use the built-in backup tools from the hosting providers, or manually back up your site files and database from the website cPanel.
In terms of web hosting tools, different hosting services provide different approaches and tools. Therefore, it is best to check the resources from your hosting provider to make a backup of WordPress sites using their tool.
So, now we will show the method to manually back up your WordPress website seamlessly.
Method 2: How to manually backup WordPress site from cPanel
To manually backup your WordPress site from cPanel, follow these step-by-step instructions:
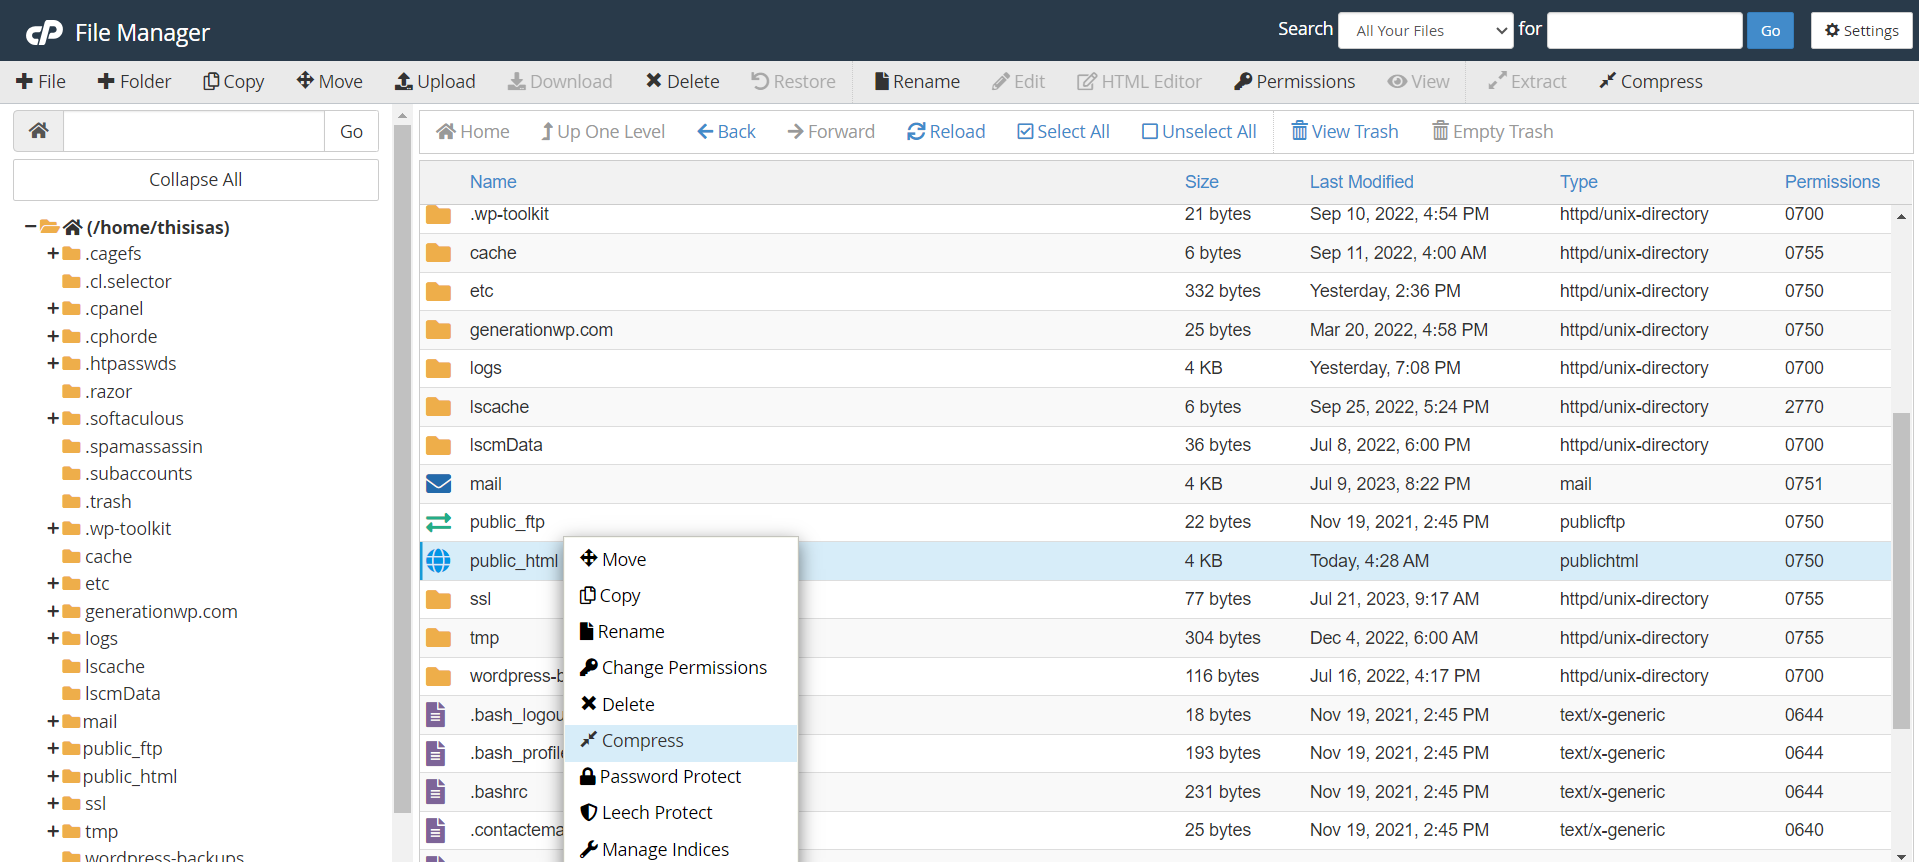
Step 1: Log in to cPanel and Locate the “File Manager”
Go to the cPanel login page of your hosting service and enter your username and password to log in. Once logged in, you should see various sections in cPanel. Look for the “Files” section and click on “File Manager.”
In the File Manager, you will see a list of directories and files. Navigate to the root directory where your WordPress installation is located. This is often the “public_html” folder or a subdirectory within it.
Step 3: Select all WordPress files and folders
Once you are in the WordPress installation directory, select all the files and folders. You can do this by clicking the checkbox next to the “Name” column at the top of the file list. This will select all the files and folders in the current directory.
Step 4: Create a backup folder and move the selected files
It’s a good idea to create a separate folder to store your backups. To do this, click on the “New Folder” button in the top menu and give the folder a name (e.g., “backup”).
If you created a backup folder in the previous step, click the “Move” button in the top menu, and then select the backup folder you just created. This step is optional, but it helps keep your backups organized.
Step 5: Compress the files and download the backup
Select all the WordPress files and folders again, and then click on the “Compress” button in the top menu. Choose the compression format you prefer (e.g., zip), and the File Manager will create a compressed file containing your WordPress files.
Once the compression process is complete, you should see a new compressed file in the same directory as your WordPress files. Right-click on it, and then click on “Download” to save the backup to your local computer.
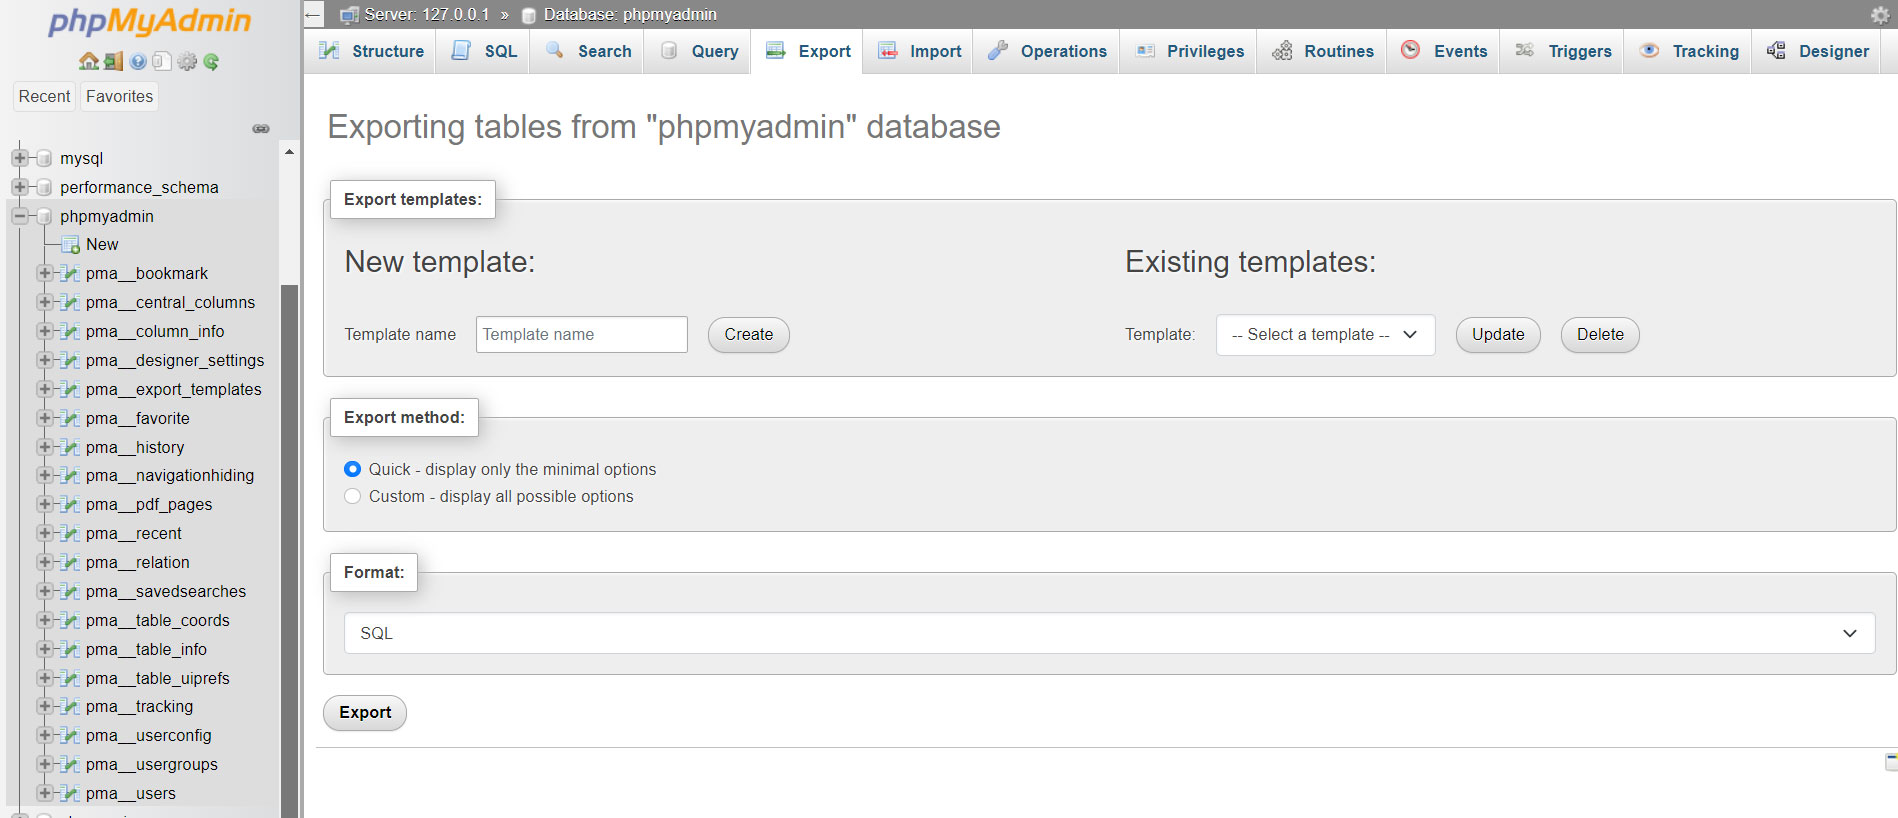
Step 6: Export the WordPress database
The file backup created in the previous steps contains your WordPress site’s files. If your WordPress site uses a database (which is typically the case), you’ll need to export the database separately. To do this, go back to the cPanel home and look for “phpMyAdmin” under the “Databases” section. Access phpMyAdmin and select your WordPress site’s database. Click on the “Export” tab, choose the export method (usually “Quick” or “Custom”), and then click “Go” to download the SQL database file.
Finally, now you will be able to manually back up your WordPress site from cPanel. Remember to store the backup files in a safe location, either on your local computer or on cloud storage, to ensure you can easily restore your site if needed.
Method 3: How to back up your WordPress site using FTP
Backing up your WordPress site via FTP (File Transfer Protocol) is a reliable method to ensure all your website files are safely stored. This approach involves downloading your site’s files directly to your local computer, providing an extra layer of security. Here’s how you can do it:
Step 1: Prepare for the backup
Before initiating the backup process, ensure you have the necessary tools and information. This preparation will facilitate a smooth and efficient backup experience.
- FTP Client: Install a reputable FTP client like FileZilla or Cyberduck on your computer.
- FTP Credentials: Obtain your FTP hostname, username, and password from your web hosting provider. These are essential for accessing your website’s server.
Step 2: Connect to your website via FTP
Establishing a connection to your website’s server allows you to access and download your site’s files. Follow these steps to connect using your chosen FTP client:
- Launch the FTP Client: Open the installed FTP client on your computer.
- Enter FTP Details: Input the FTP hostname, username, and password into the corresponding fields within the FTP client.
- Establish Connection: Click the ‘Connect’ button to initiate the connection to your website’s server.
Accessing the correct directory ensures you back up all necessary WordPress files. Typically, these files reside in the ‘public_html’ or ‘www’ folder on your server.
- Locate the Root Directory: In the FTP client, navigate to the root directory containing your WordPress files.
- Identify WordPress Files: Look for folders such as ‘wp-admin’, ‘wp-content’, and ‘wp-includes’, which are integral to your WordPress installation.
Step 4: Download your WordPress files
Downloading your WordPress files to your local machine creates a backup that you can store securely. Ensure you have sufficient storage space to accommodate all your website files.
- Initiate Download: Right-click on the selected files and choose the ‘Download’ option to transfer them to your local computer.
- Select All Files: Highlight all files and folders associated with your WordPress site.
Step 5: Backup Your WordPress Database
While FTP handles the backup of your site’s files, your content is stored in a database that requires a separate backup. This process involves exporting the database via your hosting control panel.
- Access phpMyAdmin: Log in to your web hosting control panel and open phpMyAdmin.
- Select Your Database: Choose the database associated with your WordPress site from the list.
- Export the Database: Click on the ‘Export’ tab, select the export method (preferably ‘Quick’), and click ‘Go’ to download the database file to your computer.
By following these steps, you can manually back up your WordPress site using FTP, ensuring both your files and database are securely saved. Regular backups are essential for safeguarding your website against data loss and facilitating easy recovery in case of issues.
When to back up the WordPress site?
Backing up your WordPress site regularly is important to ensure you have a recent copy of your website’s data and files in case of any unexpected issues or disasters. The frequency of backups depends on how often your website content is updated and how critical your site’s data is to you. Usually, it is crucial to create a backup of your website before making major changes like upgrading to the latest WordPress version or switching hosting services.
Here are some general guidelines for when to back up your WordPress site:
- Before Major Updates or Changes
- Before Installing New Plugins or Themes
- Before Making Significant Content Changes
- Before Running Maintenance or Security Scans
- Before Migrating or Changing Hosting Providers
Moreover, you can consider performing daily, weekly, or monthly backups. The frequency depends on how frequently you publish new content or update existing content. If your website experiences high traffic or frequent content updates, consider more frequent backups.

To conclude
In conclusion, backing up your WordPress site means safeguarding your hard work and data. A reliable backup strategy provides a sense of security, ensuring that your website’s data, content, and configurations are safe from unforeseen disasters, cyberattacks, or accidental errors.
Throughout this guide, we have described how to back up WordPress sites in different ways. We have explained both ways including manual backups using cPanel and using a WordPress backup plugin. Each approach offers its own advantages and caters to different user preferences.
Whether you are a beginner or an experienced WordPress user, taking the time to implement a backup strategy is one of the best investments you can make for your website to improve its security and protect your digital assets!
Leave a Reply