Commencer #
Le Widget Instagram vous permet d'afficher votre dernière Instagram publications sur vos sites WordPress. Voici un article complet pour expliquer chaque méthode en détail. Suivez le processus étape par étape pour vous connecter au flux Instagram.
Générer Instagram ID utilisateur et Jeton d'accès #
Voici comment générer un identifiant d'utilisateur Instagram et un jeton d'accès.
First browse to this link: developers.facebook.com/apps. Note that you need to be logged in here with your Facebook credential. Or, it will automatically synch with your Facebook account, if you stay logged in.
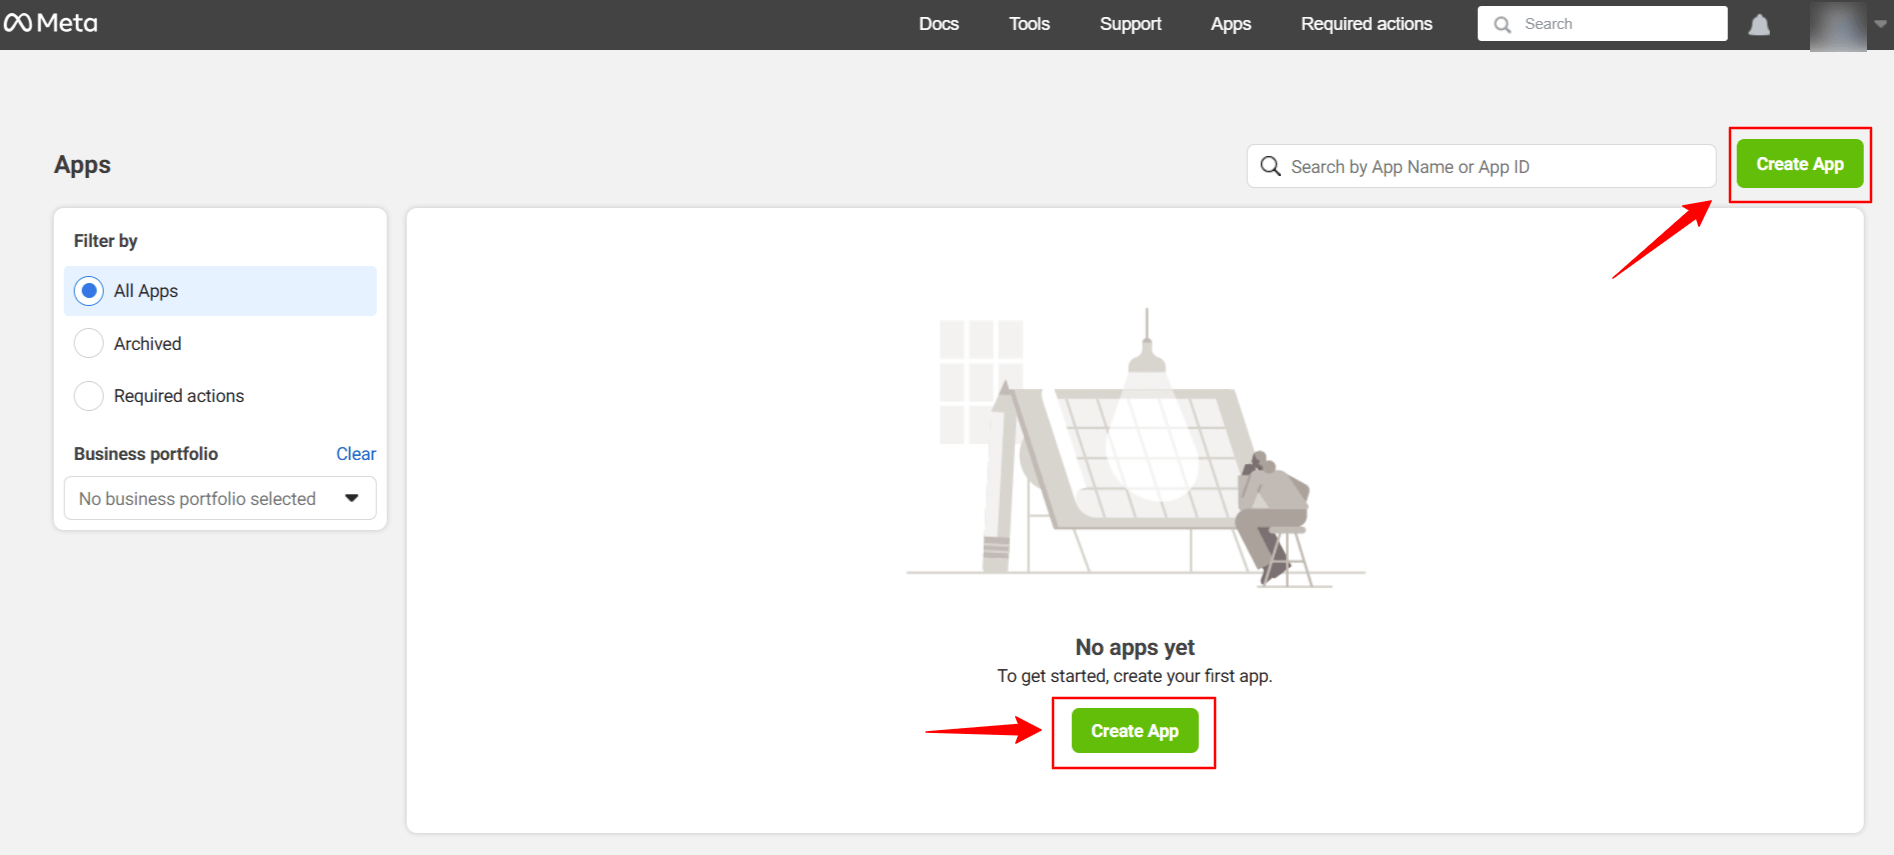
Cliquer sur Create App. Doing this, a page will load an interface with different tabs.
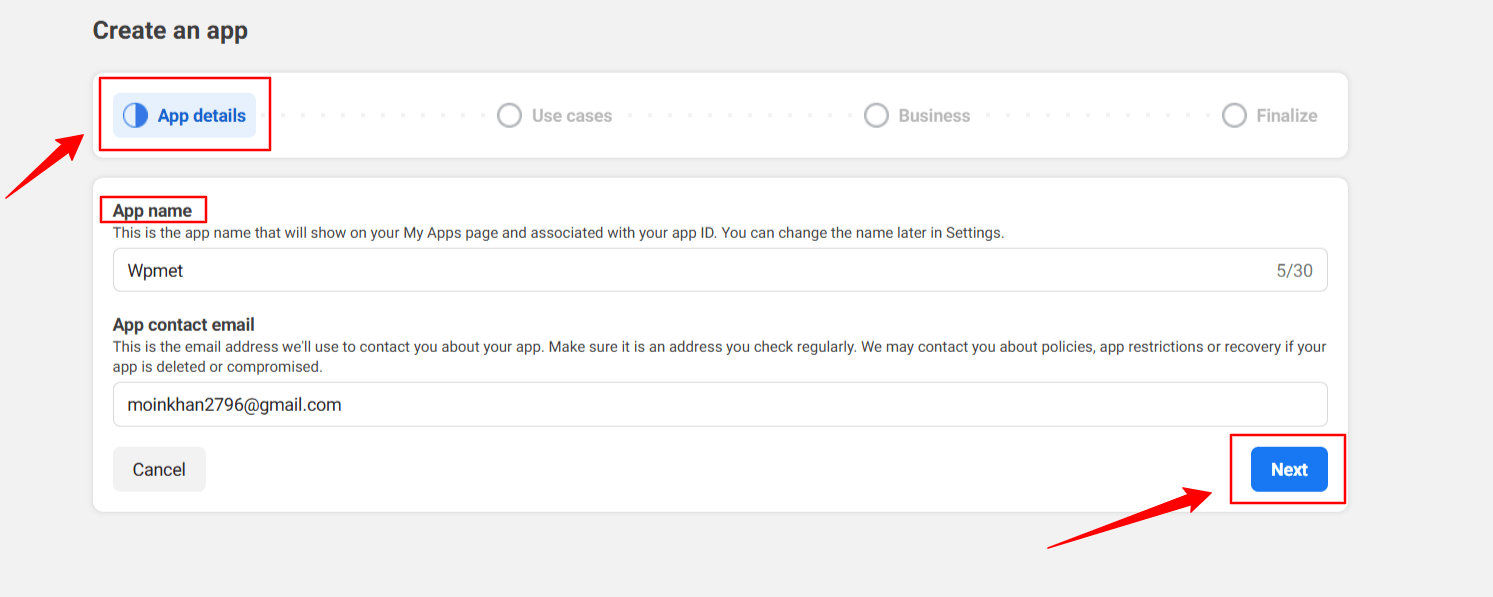
Give a name to the app, for this demo tutorial, I enter the app name as Wpmet. Ensuite, frappez le Suivant languette.
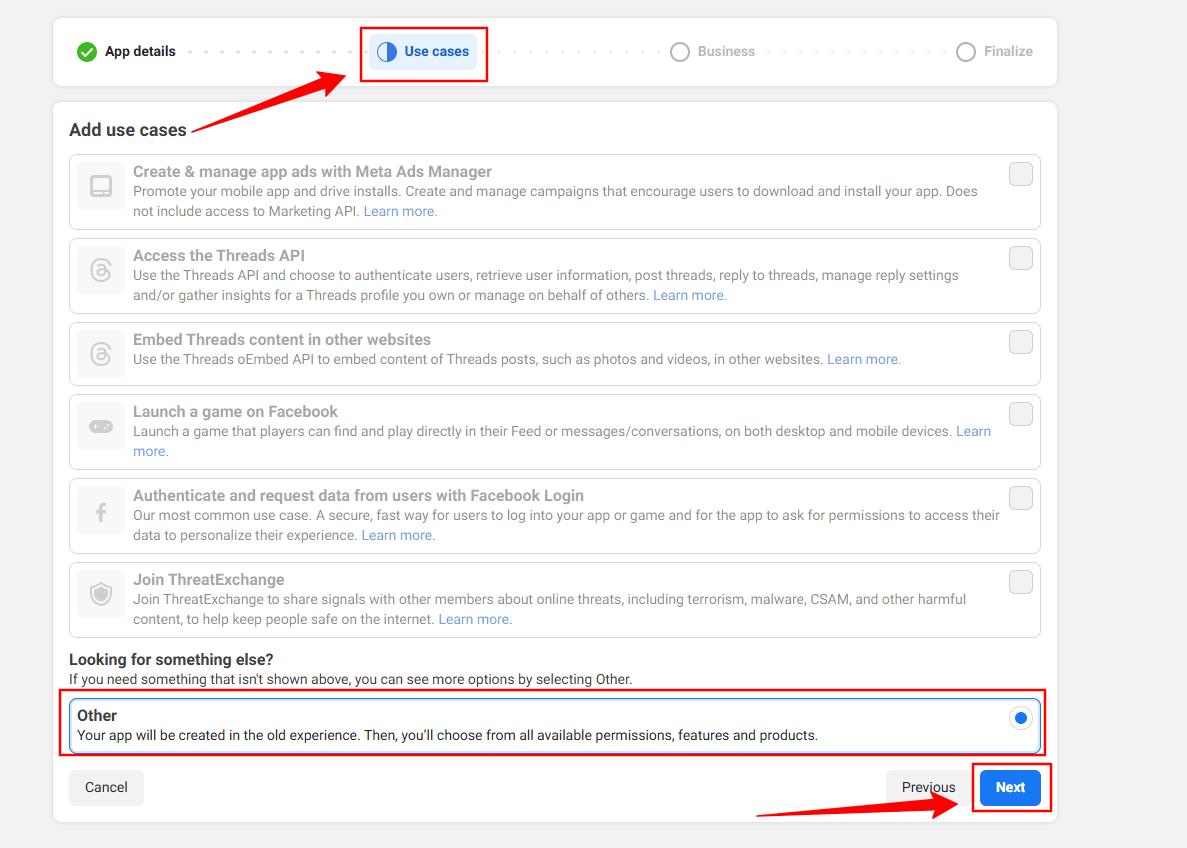
Then, select the “Other” option from the Use Cases tab. And, hit the Suivant bouton.
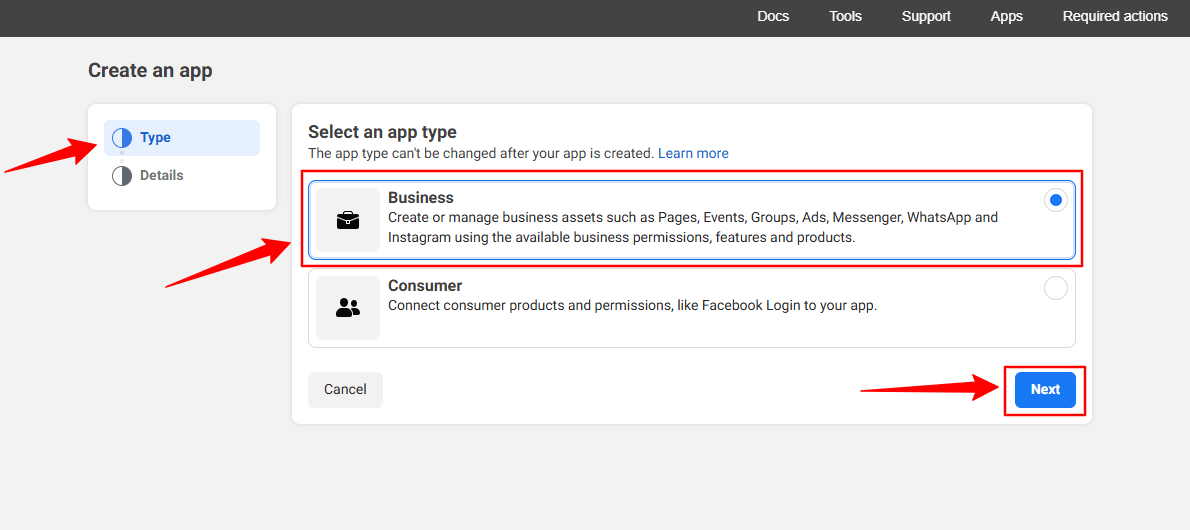
In the next screen, you’ll see two options. First, select Entreprise du Taper languette.
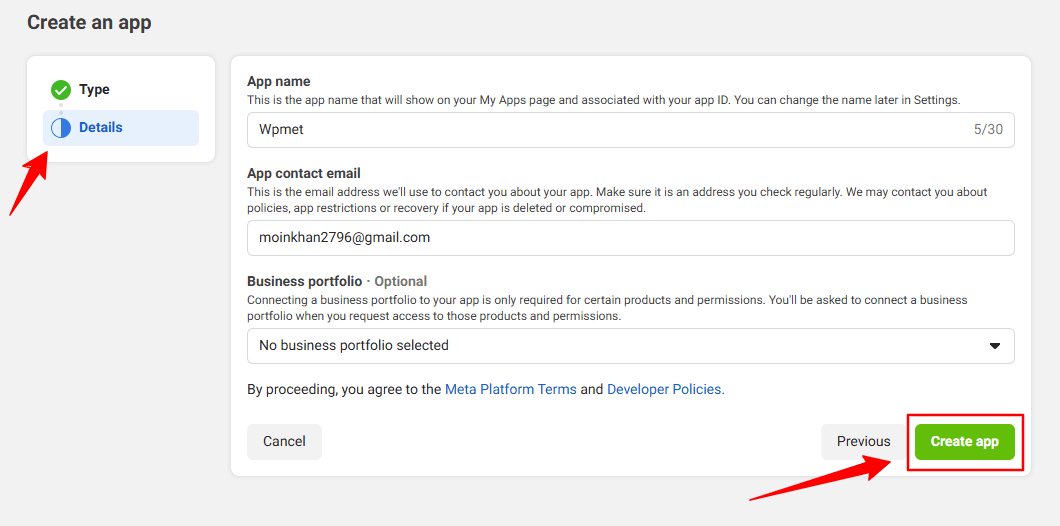
However, you don’t have to put any information in the Détails option, just click the Créer une application bouton.
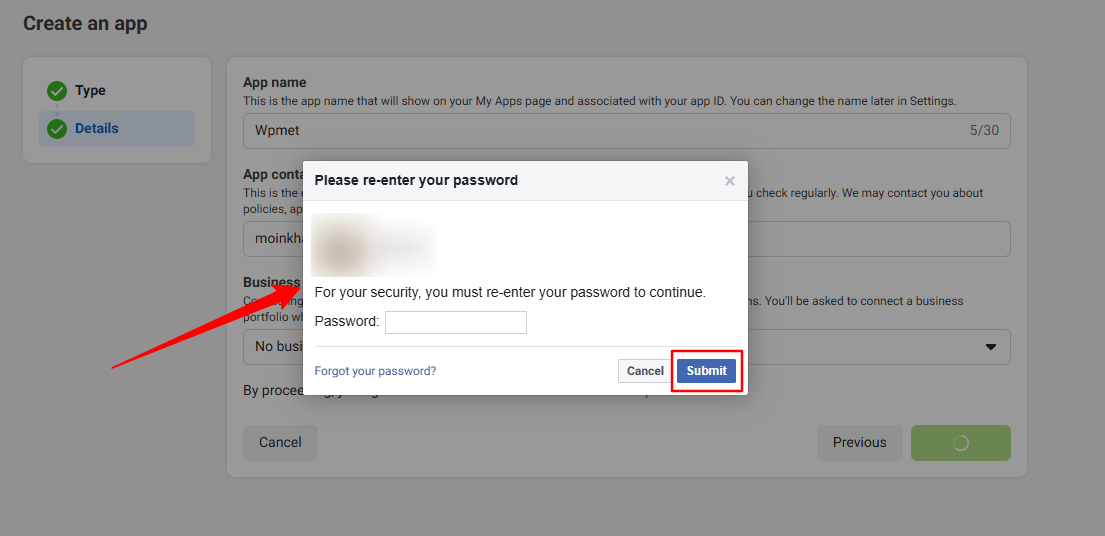
You may need to re-login with your Facebook credentials. Once, you’ve successfully login with your Facebook details, you’ll see all the apps.
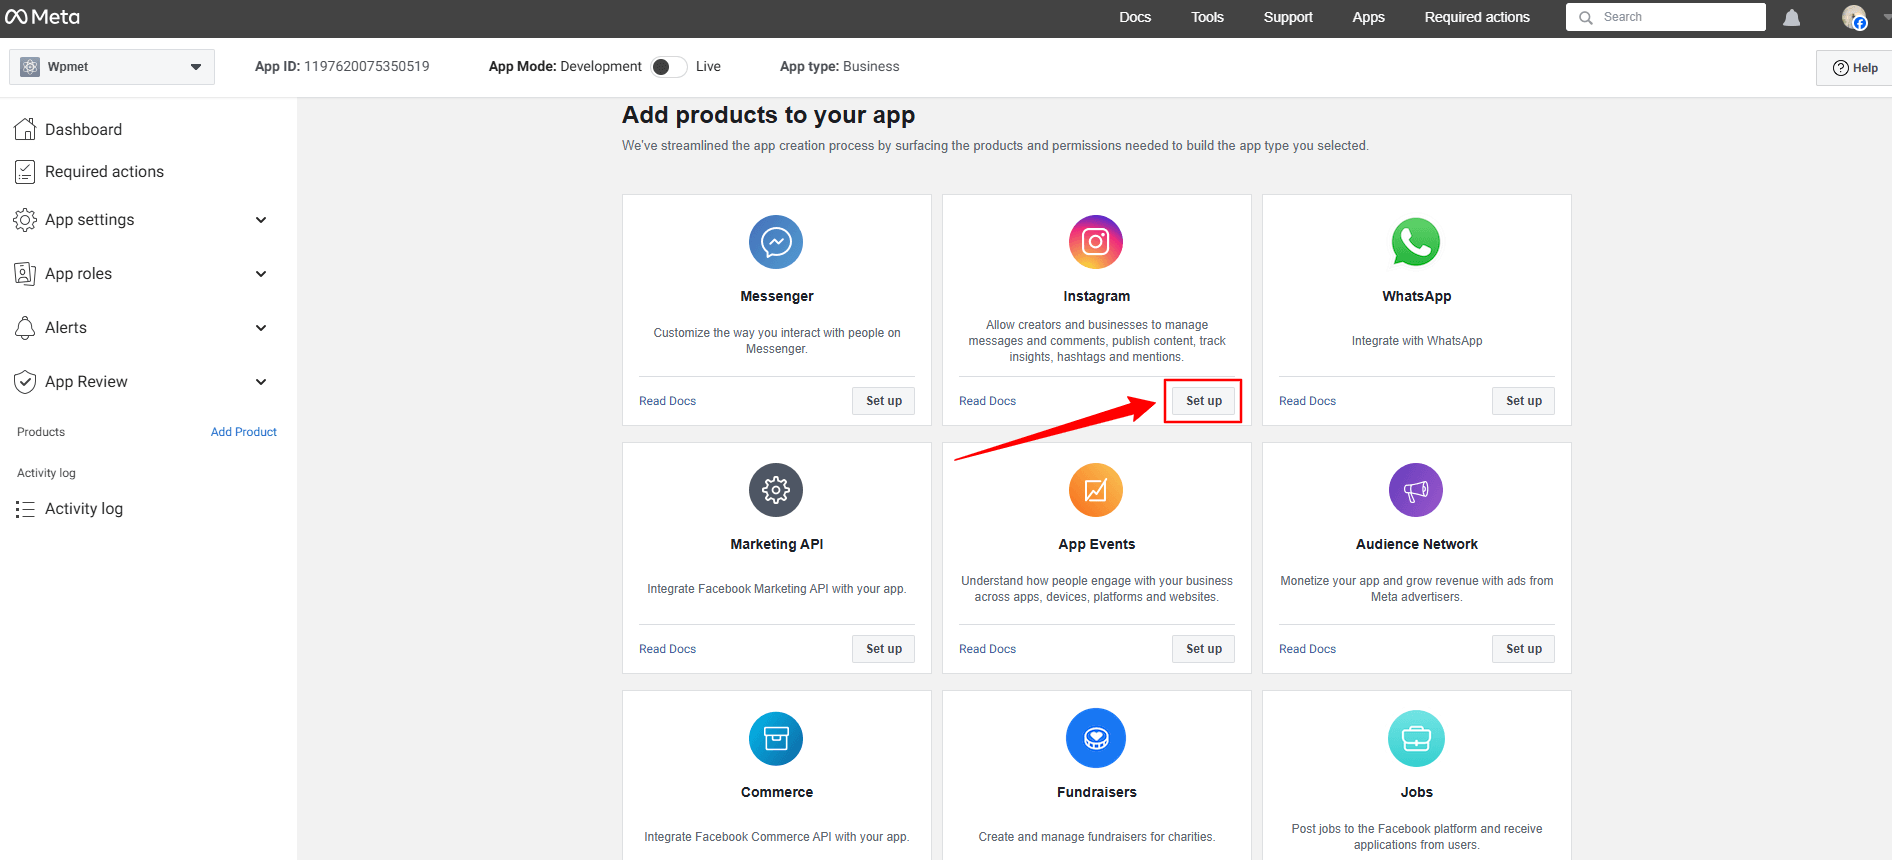
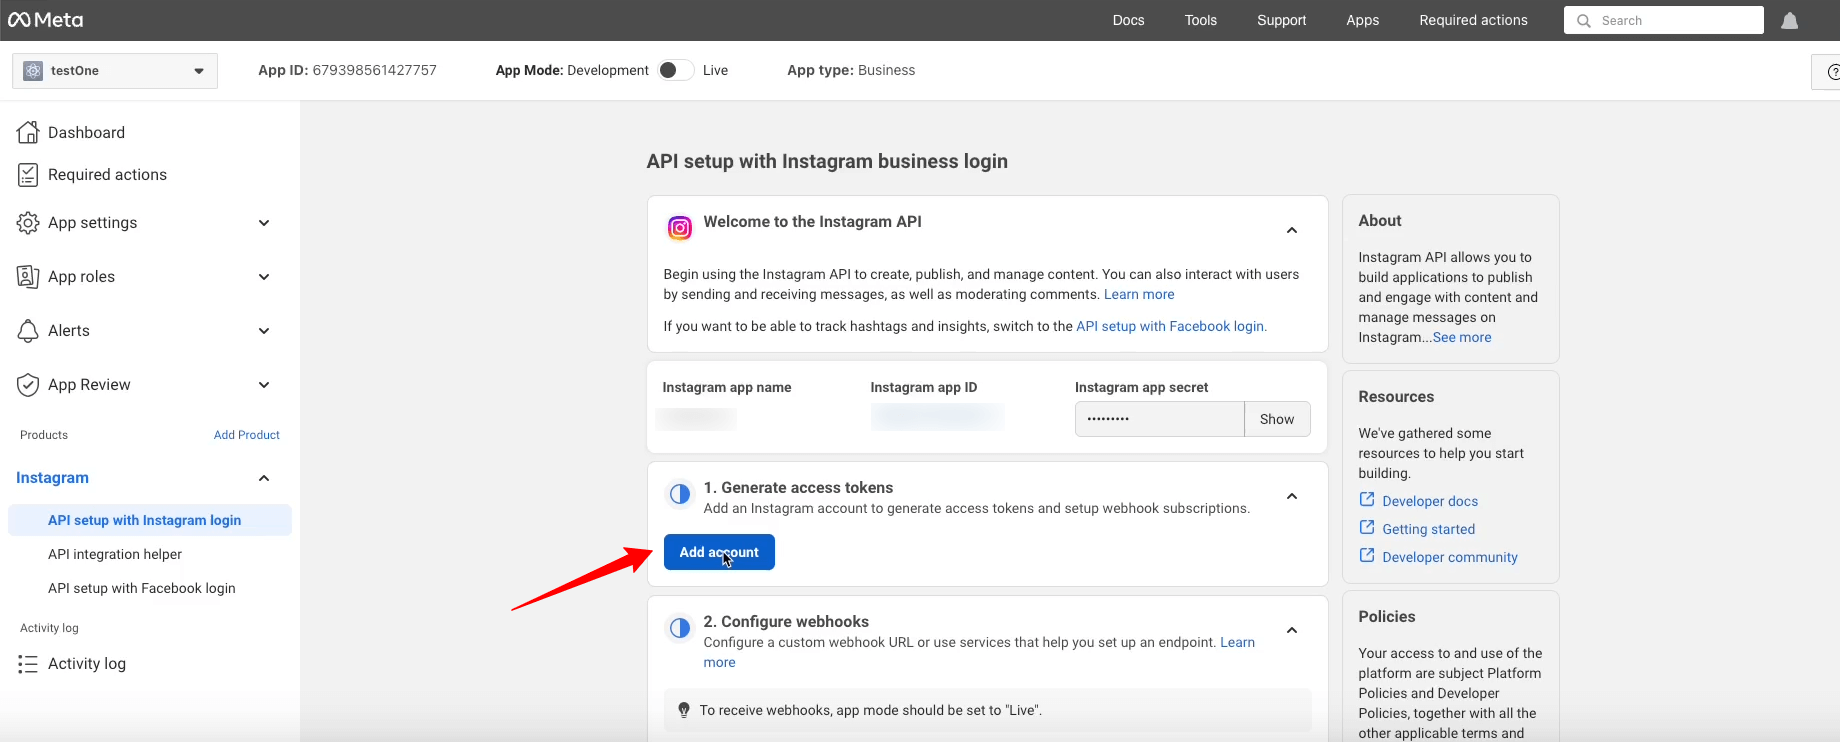
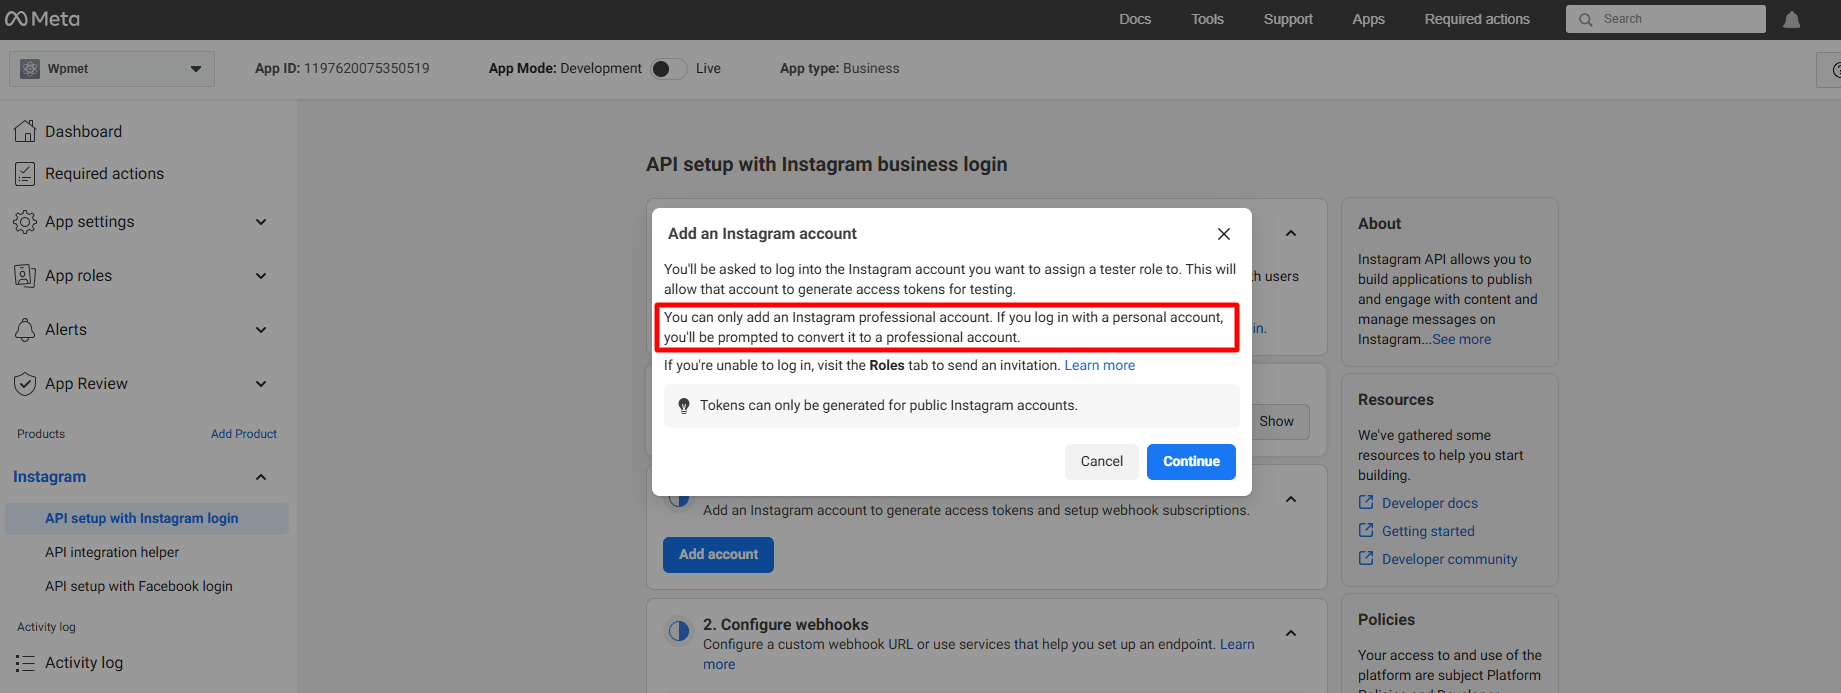
Look for the Instagram app, click the Set up option. Now, a page will load before you, where you can add Instagram account from the Generate Access Token option by clicking the Add account button. However, when you’ll click this button a popup will appear saying only a professional account can be used.
Here’s the professional account requirement popup.
But, here we won’t proceed with this. Rather, we’ll add a regular account. To do this, go under the App Roles dérouler.
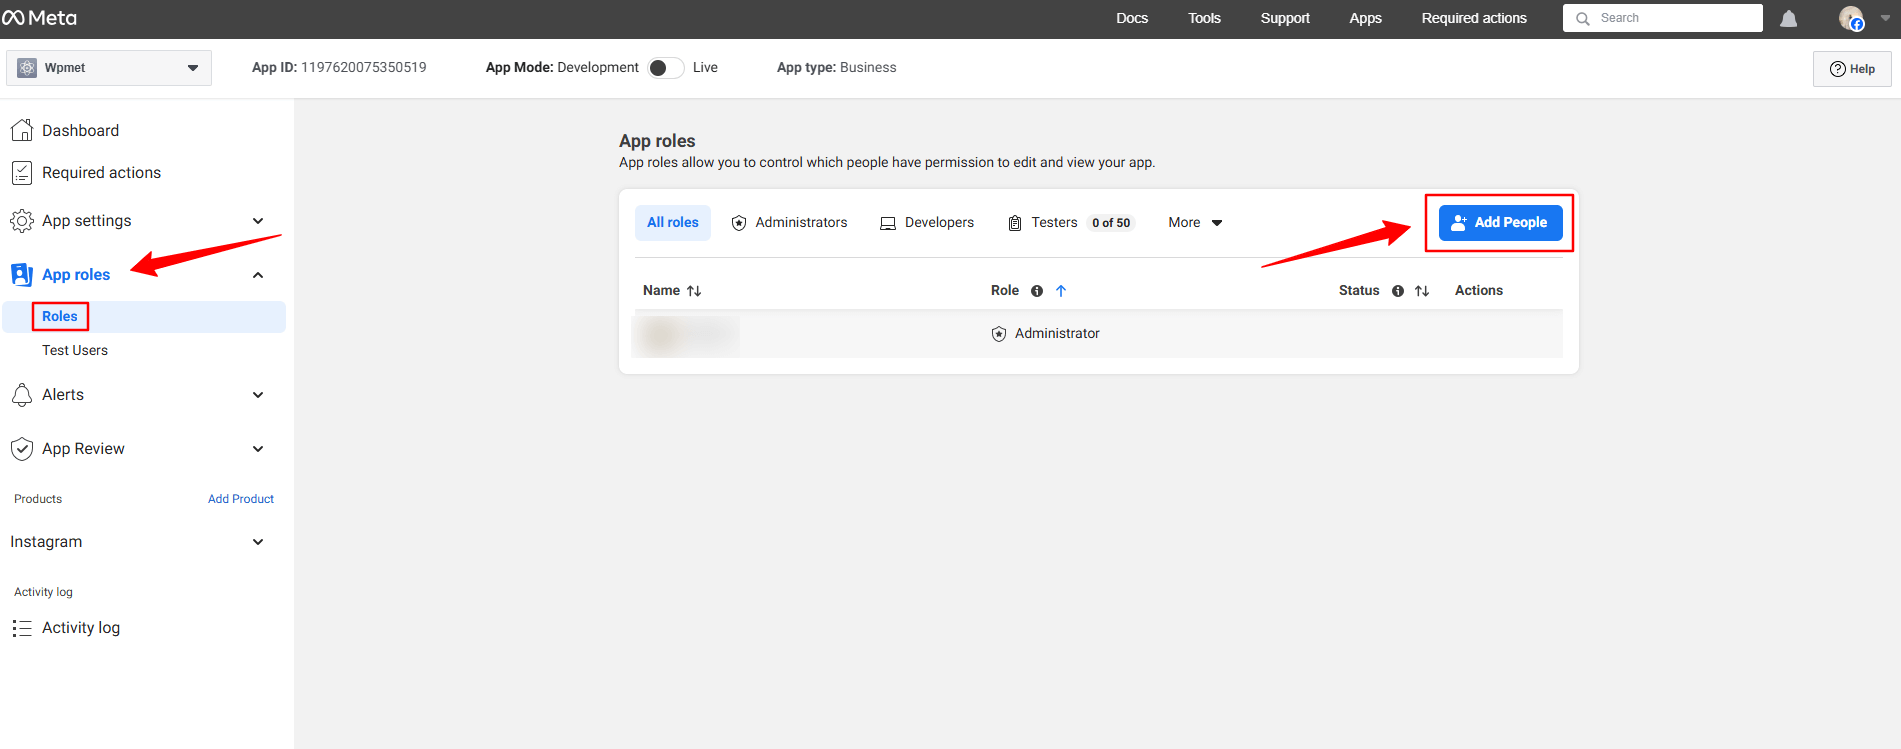
Clique le Roles option sous le App roles dropdown. In the next page, you’ll see an Add People button. Clicking here will reveal a popup like image below.
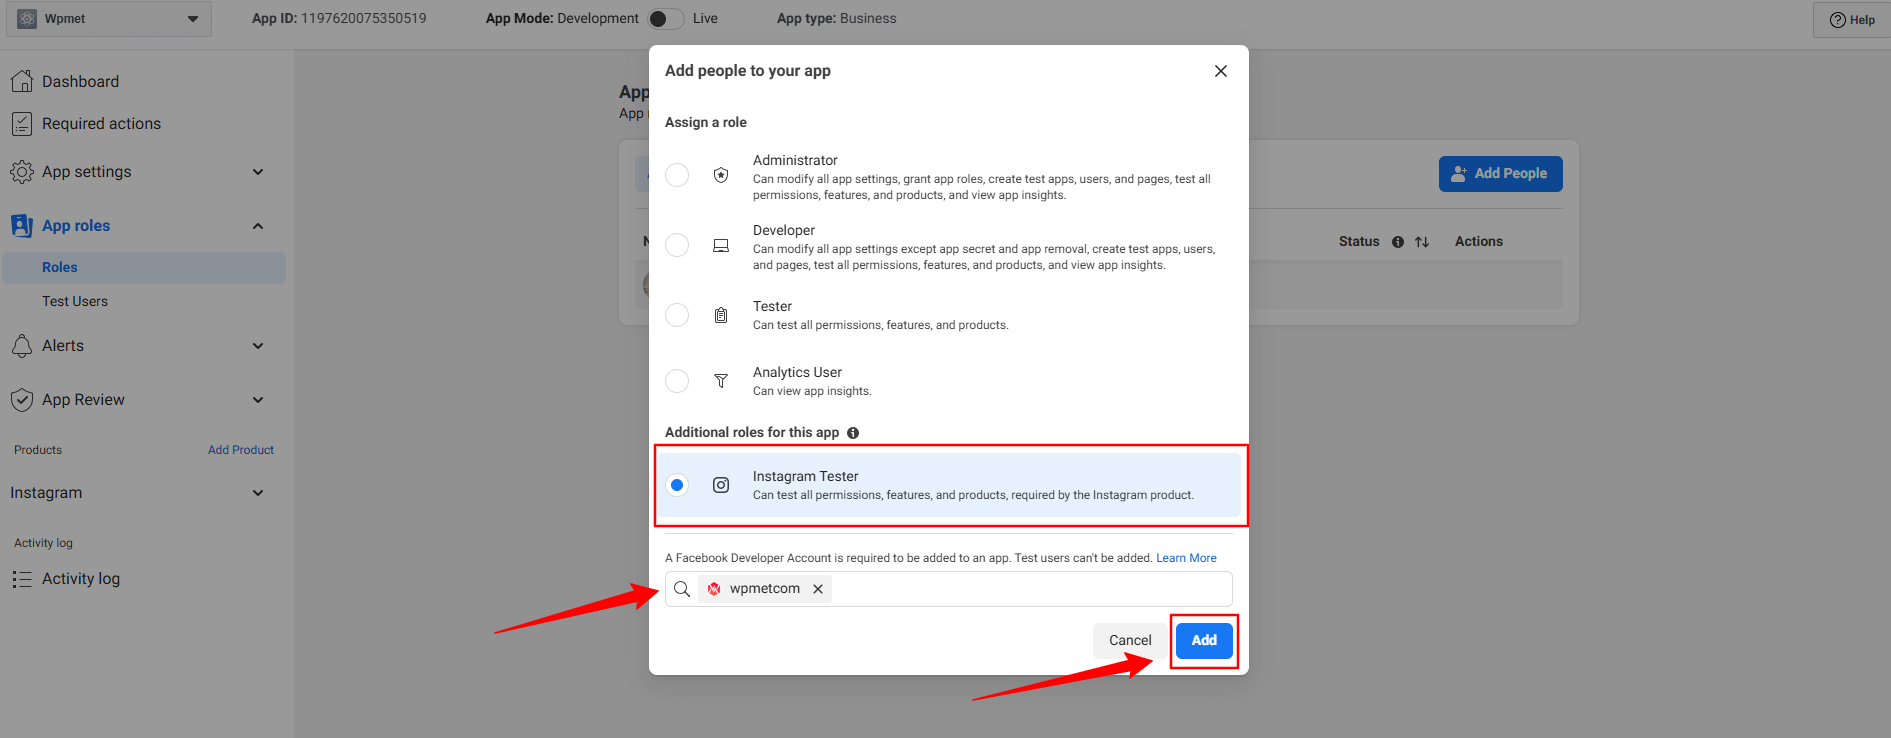
Ici, sélectionnez le Instagram Tester option. When you’ll check this option, a search box will reveal. Search for the Instagram account that you want to integrate with your Elementor website. For example, in our case, we’ve searched for the Wpmetcom Instagram profile and click it from the search result to add in the box.
Ensuite, frappez le Ajouter button. You will see the pending status with the newly added profile. To resolve that, you need to verify your Instagram account.
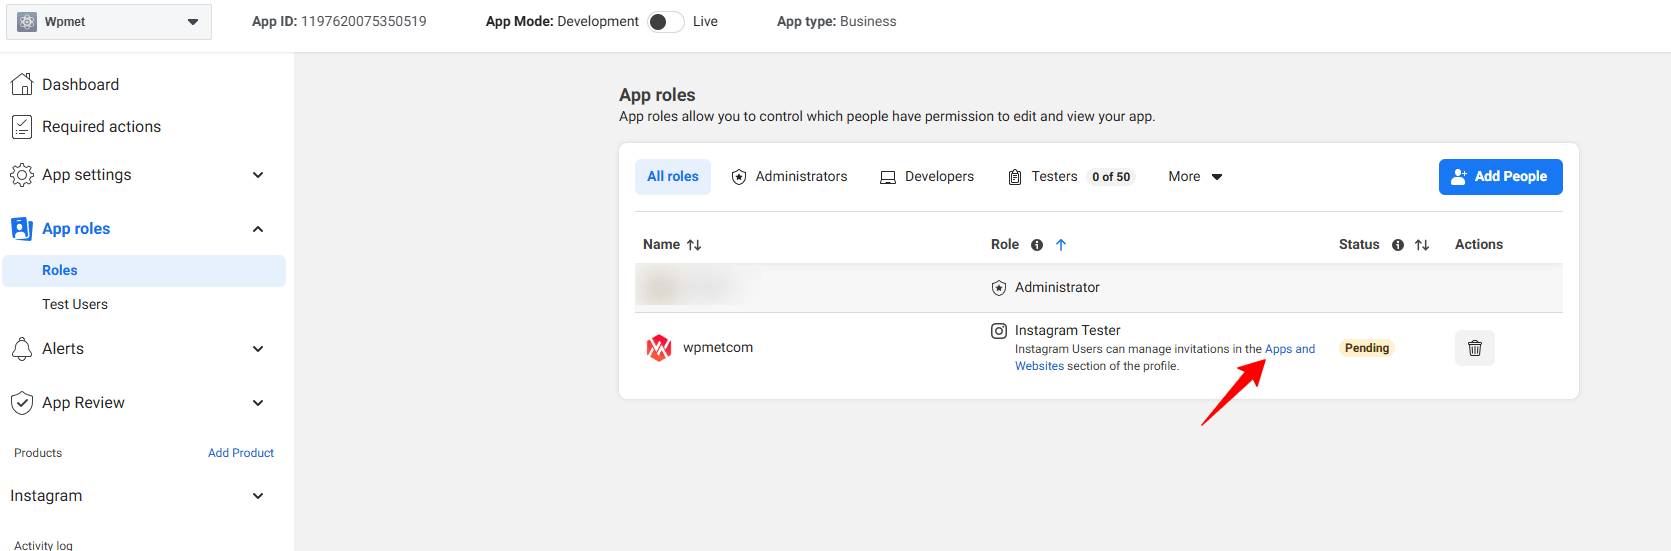
Click in the Apps and Websites, marked in the above image. Doing this will open up the Facebook profile in a new tab.
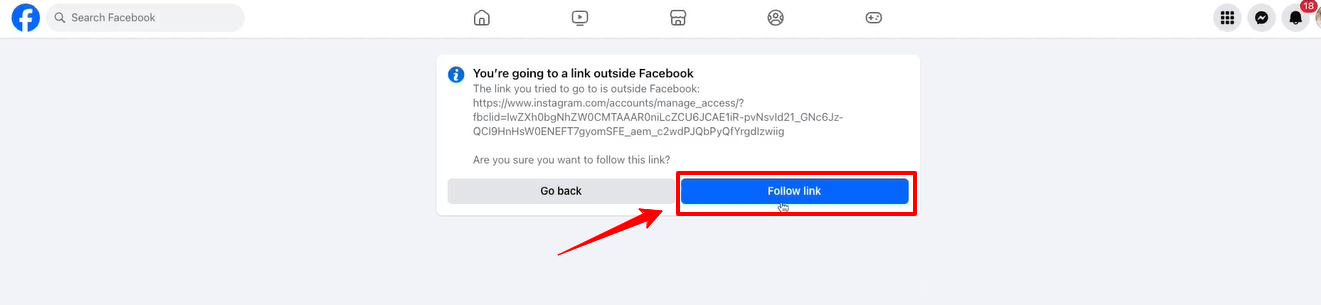
Clique le Follow link option and it will take you to your Instagram profile web page.
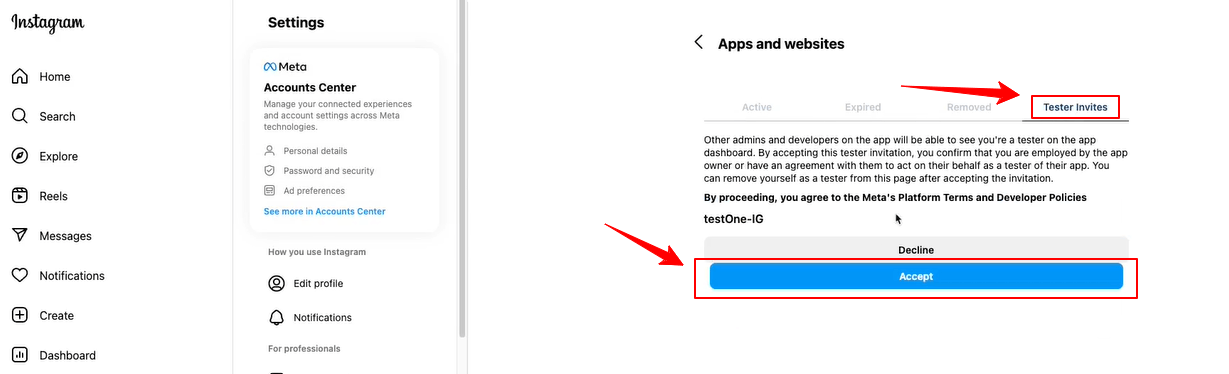
When the Instagram page will load on your screen, navigate to the Tester Invites tab and click the Accept button. Then, return to the Facebook developer dashboard and refresh the page. Now, there will be no pending status anymore with the newly added profile.

Now, you will see the green check mark with the Generate access tokens option. Click the Generate token option next to your instagram account and you’ll see a popup to re-login with your Instagram account.
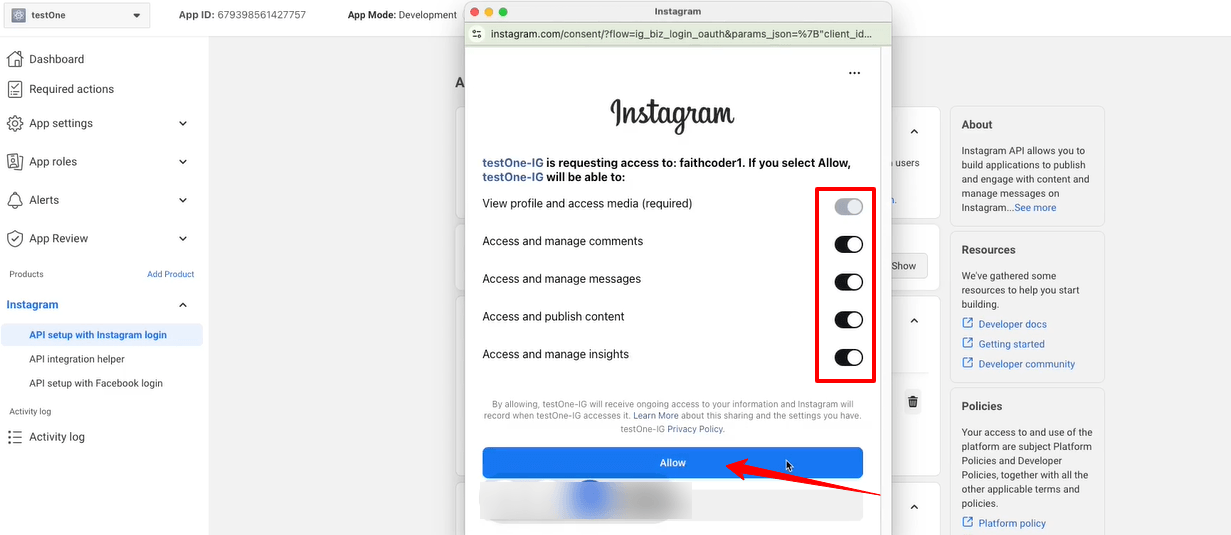
You also need to allow all the access and actions. Toggle all the options to permit like the image above and click the Permettre bouton.
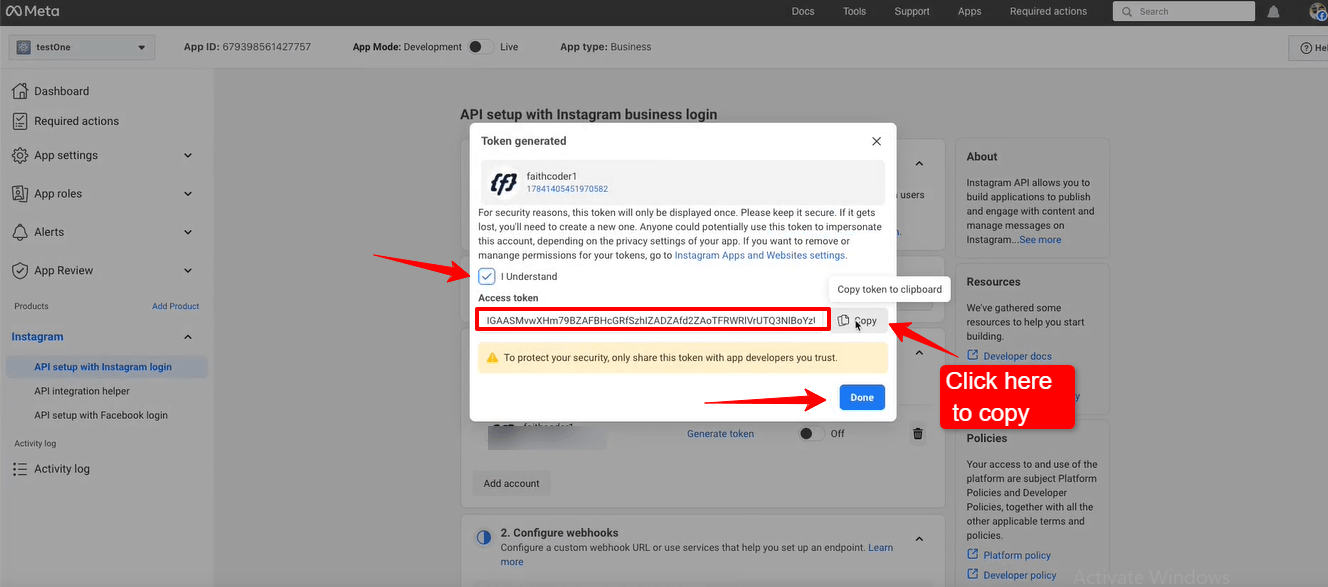
Up next, you’ll see the access token. Check the box with I Understand and select the Copie button to copy your Instagram access token. You need to paste it within the ElementsKit settings. We’re going to show the process in the next phase.
Frappez le Fait button to clear the popup.
Adding Instagram Access Tokens to ElementsKit #
Vous aurez besoin d'un ID utilisateur et Jeton d'accès pour vous connecter à votre Instagram.
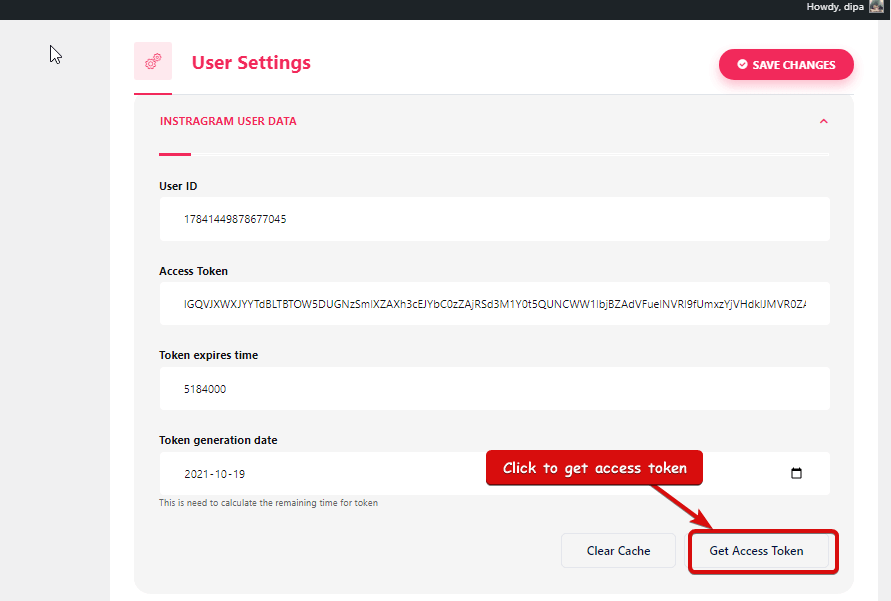
- Étape=>1 : Aller à Kit d'éléments=> Données d'utilisateur=> Cliquez sur le Données utilisateur Instagram pour développer -> Cliquez sur Obtenir un jeton d'accès.
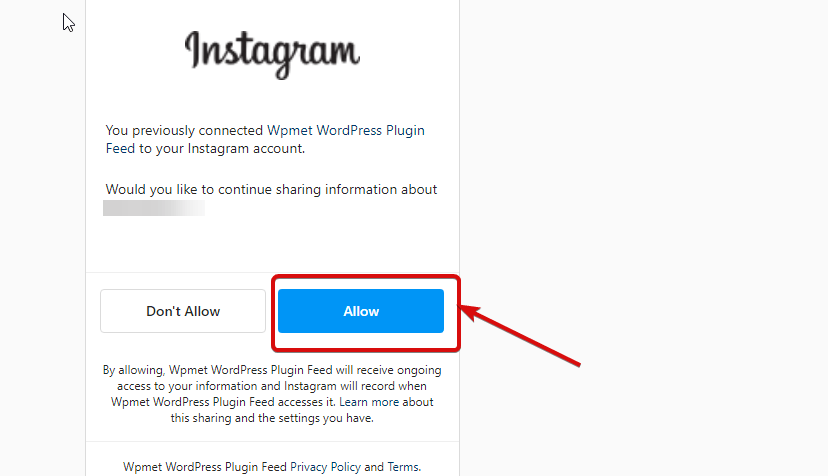
- Étape=>2 : Entrez votre compte Instagram Informations d'identification et cliquez sur Se connecter. Ou vous pouvez vous connecter avec votre Compte Facebook. Une fois la permission demandée, cliquez sur autoriser.
- Étape=>3 : Voici votre Instagram ID de l'utilisateur, Jeton de longue durée, le jeton expire et le jeton est généré. Copie eux.
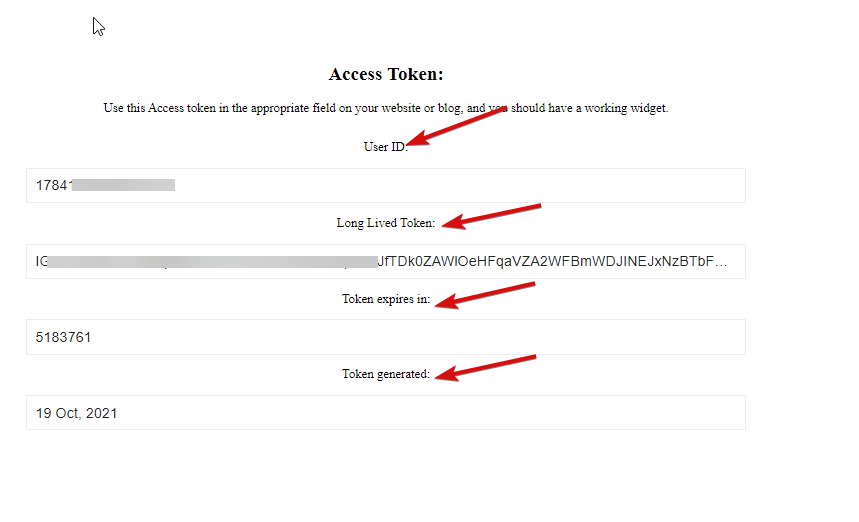
- Étape=>4 : Ensuite aller à Données utilisateur Instagram et pâte le ID utilisateur, Long Lived Token, Token expire in et Token valeurs générées.
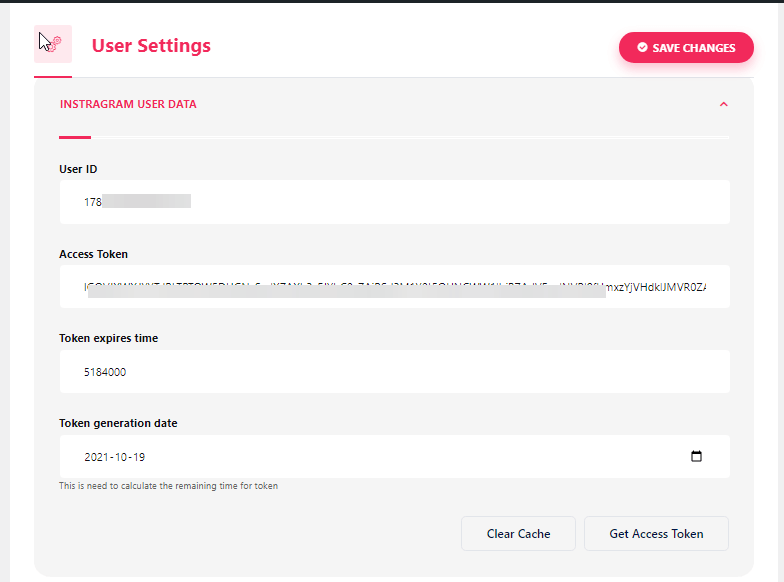
Remarque : Vous devez synchroniser les données avant l'expiration du délai d'expiration du jeton.
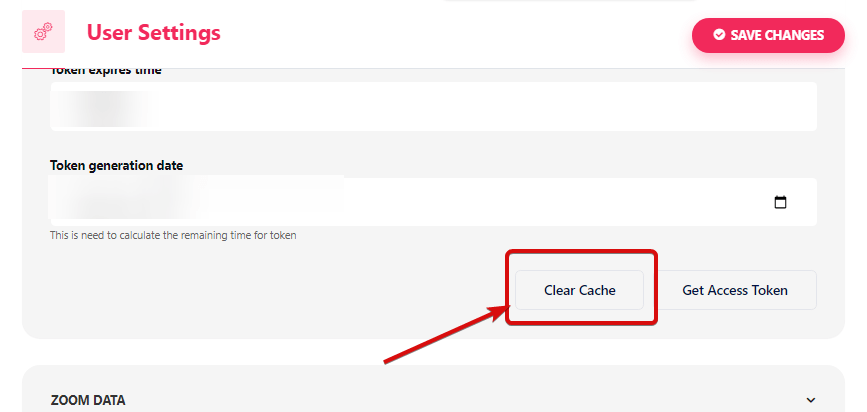
- Si vous rencontrez un problème concernant la synchronisation des données, cliquez simplement sur vider le cache.
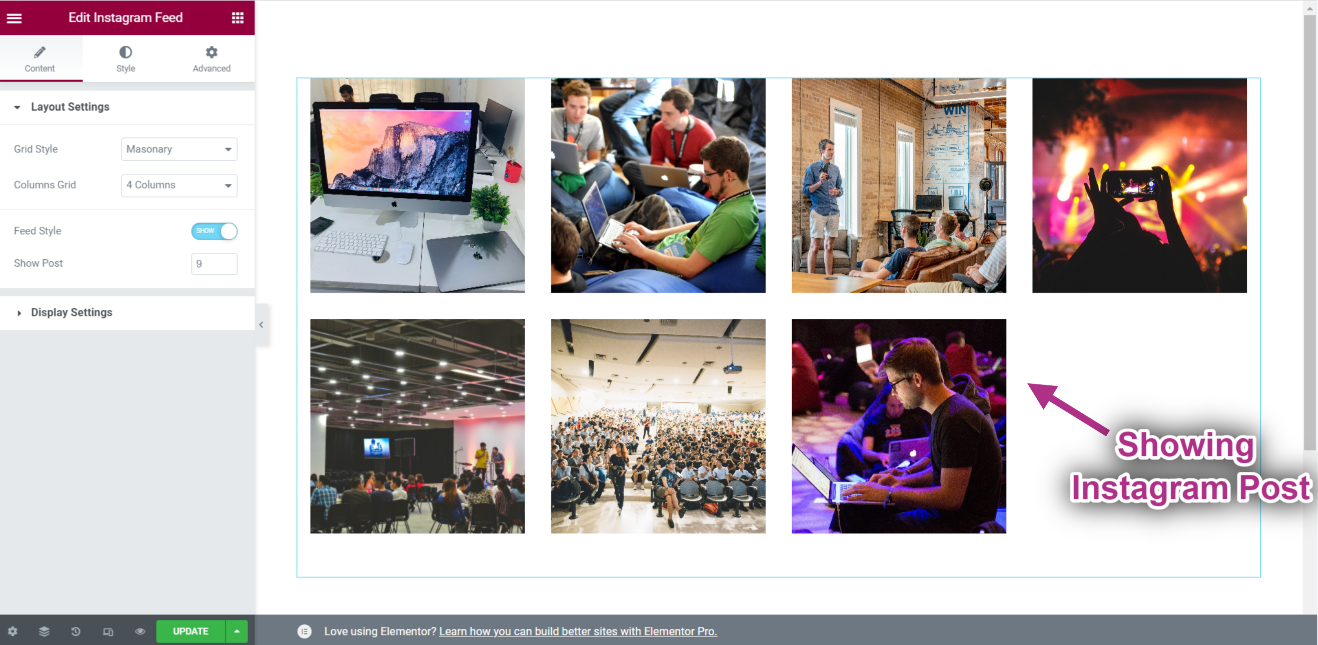
- Étape=>5 : Aller à Élémentor=> Rechercher Flux Instagram=> Juste Faites glisser et déposez le champ.
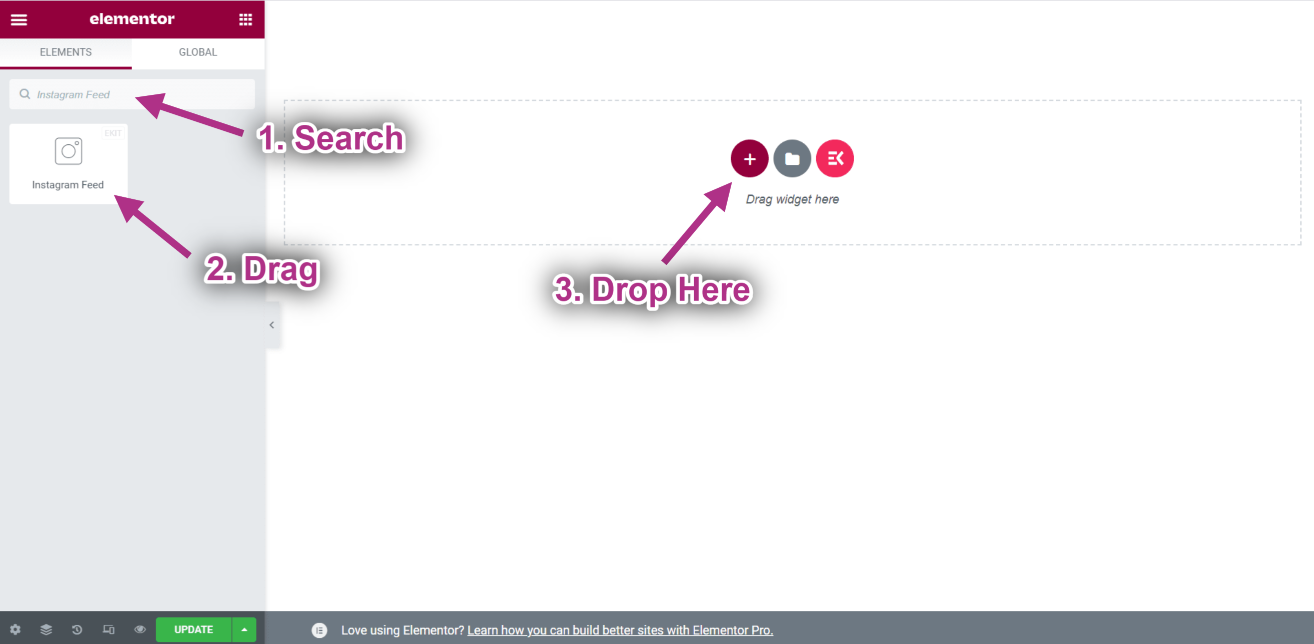
- Vous pouvez maintenant voir votre publication Instagram sur votre widget de flux Instagram.