


Form scheduling in WordPress lets you set a start and end time for your form, so it automatically goes live (at start time) and stops accepting submissions (at end time) without you having to manage it manually.
It’s perfect for limited-time campaigns, event signups, surveys, or any application window you only want open for a set period.
Quick Overview
How to schedule forms in WordPress:
✅ Step 1: Open Form settings from MetForm → Forms → Edit.
✅ Step 2: Under the General tab, enable Form Scheduling.
✅ Step 3: Set the Start Date og End Date.
✅ Step 4: Enter waiting and expired messages (optional).
⚠️ Forudsætning: #
To schedule your WordPress form, you need to install the following plugins:
- Elementor: Download plugin
- MetForm Pro: Hent plugin
How to schedule forms in WordPress? #
The form scheduling option is available in the form settings for individual forms.
If you haven’t created one yet, start by making a new form.
For help creating a form, check out this guide: How to create WordPress forms with MetForm.
Now, to schedule a form, open its settings and follow these steps:
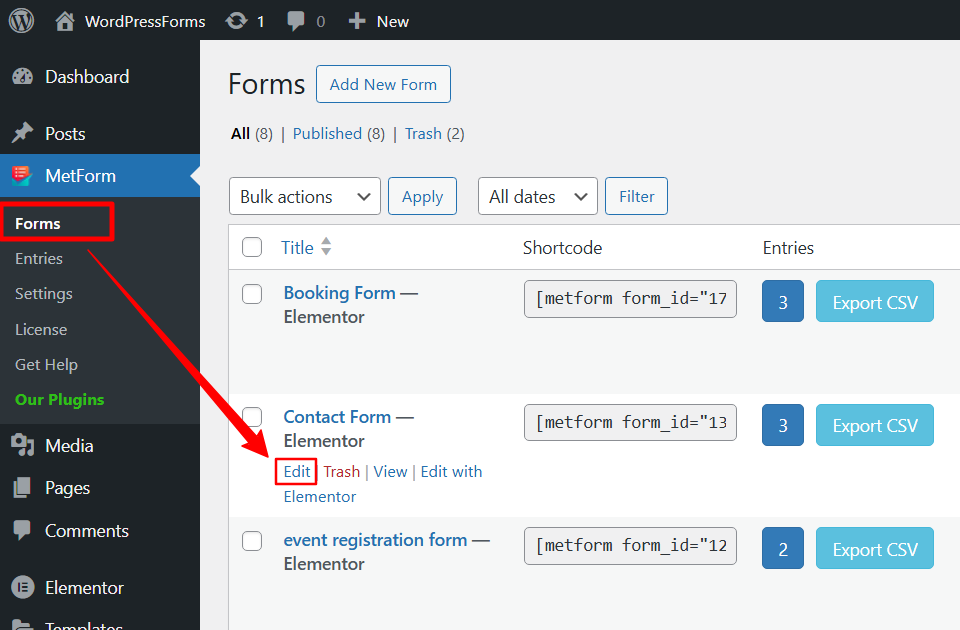
- Gå til MetForm → Forms fra dit WordPress-dashboard.
- The form you want to schedule, click on the Redigere at åbne form settings.
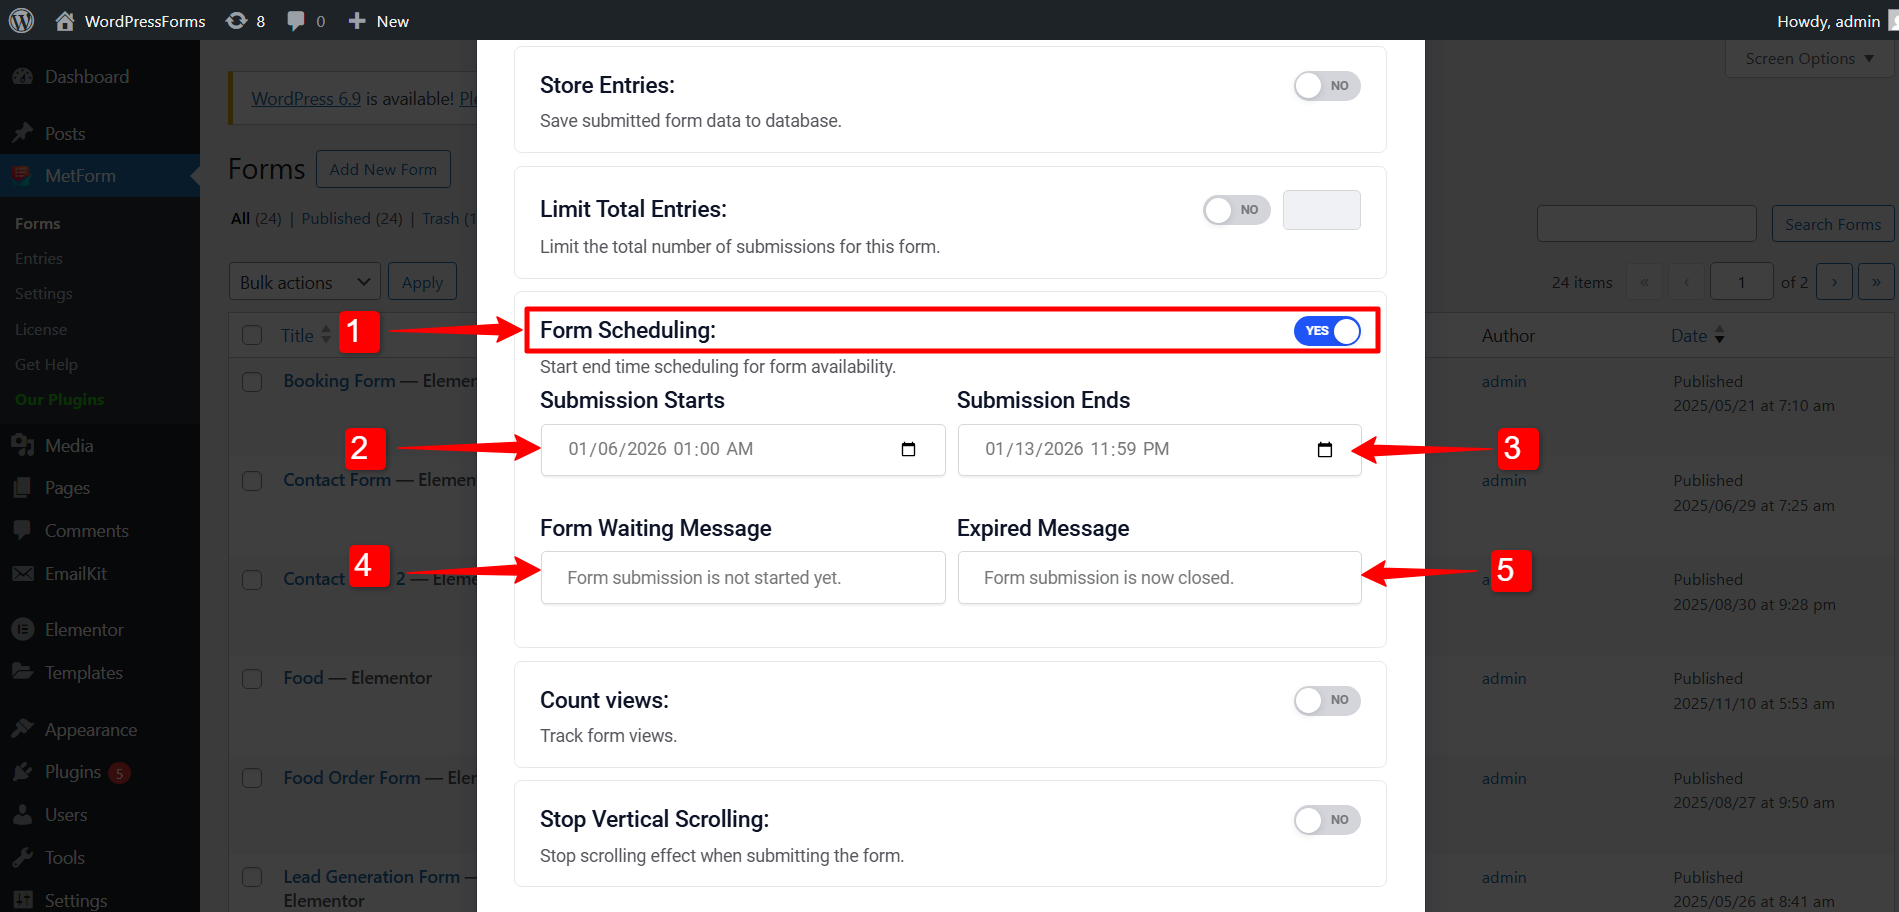
Under Generel tab, you will find the Form Scheduling muligheder.
1. Form Scheduling: Enable this option by switching the toggle button.
2. Submission Starts: Set a time and date when the form will be available for the users.
3. Submission Starts: Set a time and date when to closing the form submissions by the users.
4. Form Waiting Message: Enter a message that user will see, before the form goes live.
5. Expired Message: Enter a message that will be displayed after you stop accepting form submissions.
💡Tips: Set the timezone #
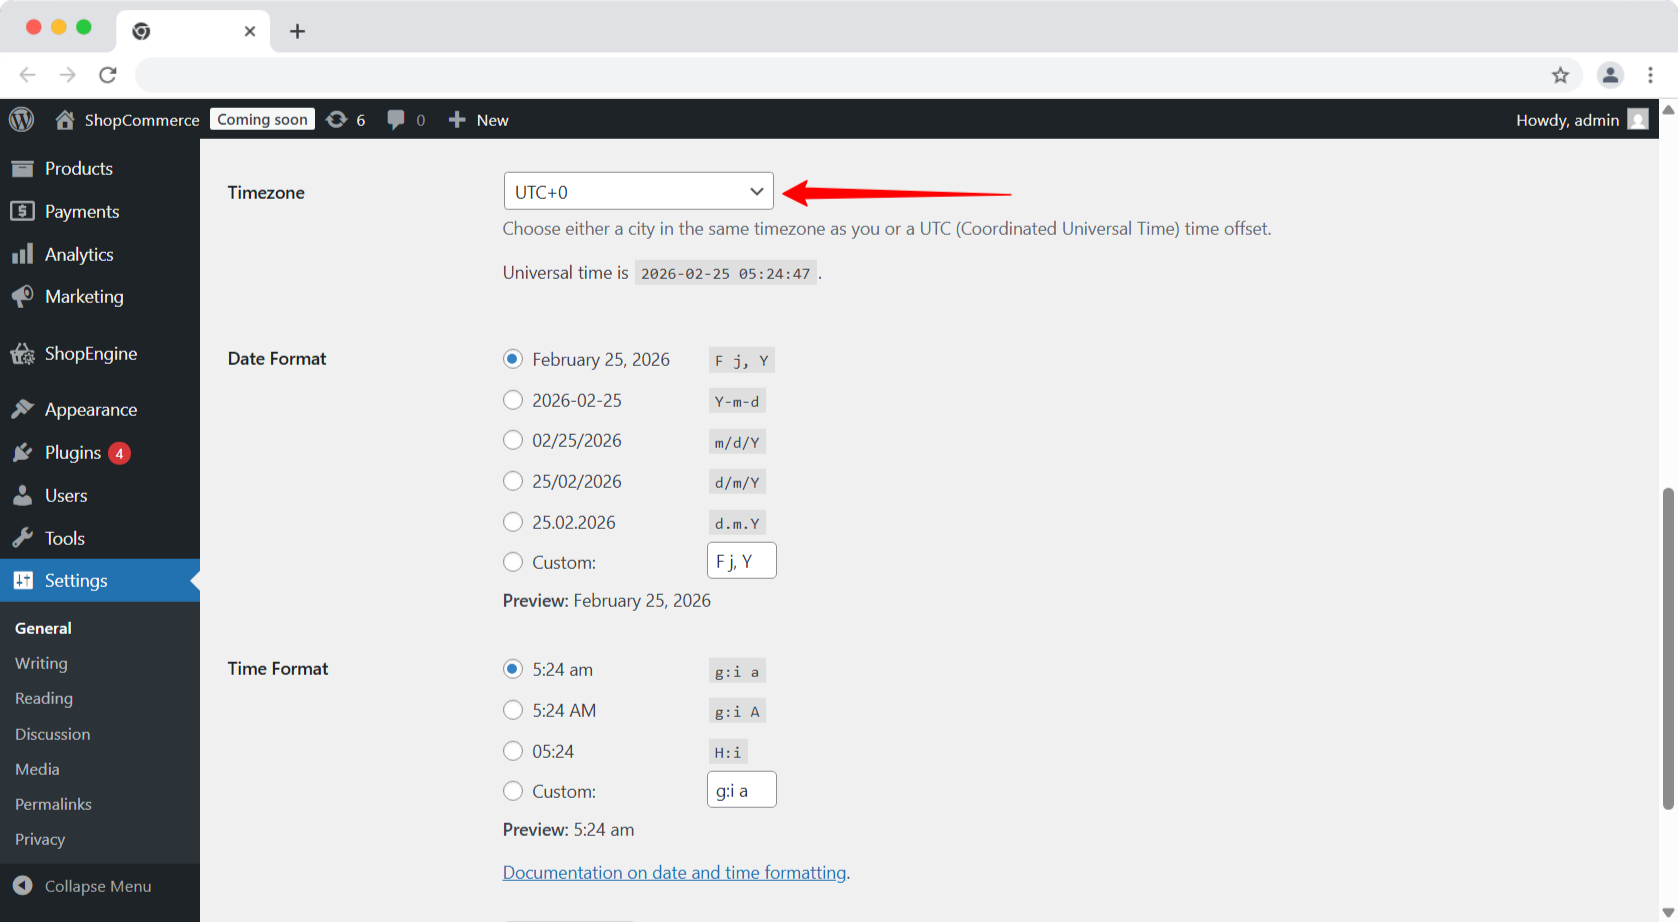
To set time and date to schedule forms, you need to set up the Timezone fra dit WordPress-dashboard.
Naviger til Settings → General, then select a Timezone, Date Format, and Time Format.

Once you’ve set the start date, end date, and custom messages, the form will automatically open and close based on your schedule. This ensures a hands-off, reliable workflow for time-sensitive forms. With everything configured, your form is now ready to go live exactly when you need it to.


