ShopEngine is an end-to-end WooCommerce shop builder for Elementor. It contains all the essential and handy widgets, modules, and templates for building a complete WooCommerce store. More importantly, it’s a simple and easy-to-use plugin and a user need not have any coding knowledge.
Quick Overview
This documentation will guide you through the process of adding product comparison feature to your shop or WooCommerce pages. For that, you will need to get ShopEngine free and pro, along with two freemium plugins such as WooCommerce and Elementor.
Needed tools: WooCommerce (free), Elementor (free), and ShopEngine (free & pro)
Now, enable ShopEngine’s Product Comparison module and set up a shop page template. After that, edit your template and add a product list widget. Thus, your product will be visible along with the comparison icon. Whenever someone clicks the comparison icon, he/ she will see a clear WooCommerce product comparison table.
Product Comparison Module: #
It’s shoppers’ tendency to always compare similar products online before making a purchase. Usually, they have to open multiple tabs to compare these products. But ShopEngine made things easy for your customers with the WooCommerce Produktsammenligning module. With this module, shoppers can click the product comparison icon placed on the bottom left side of the product.
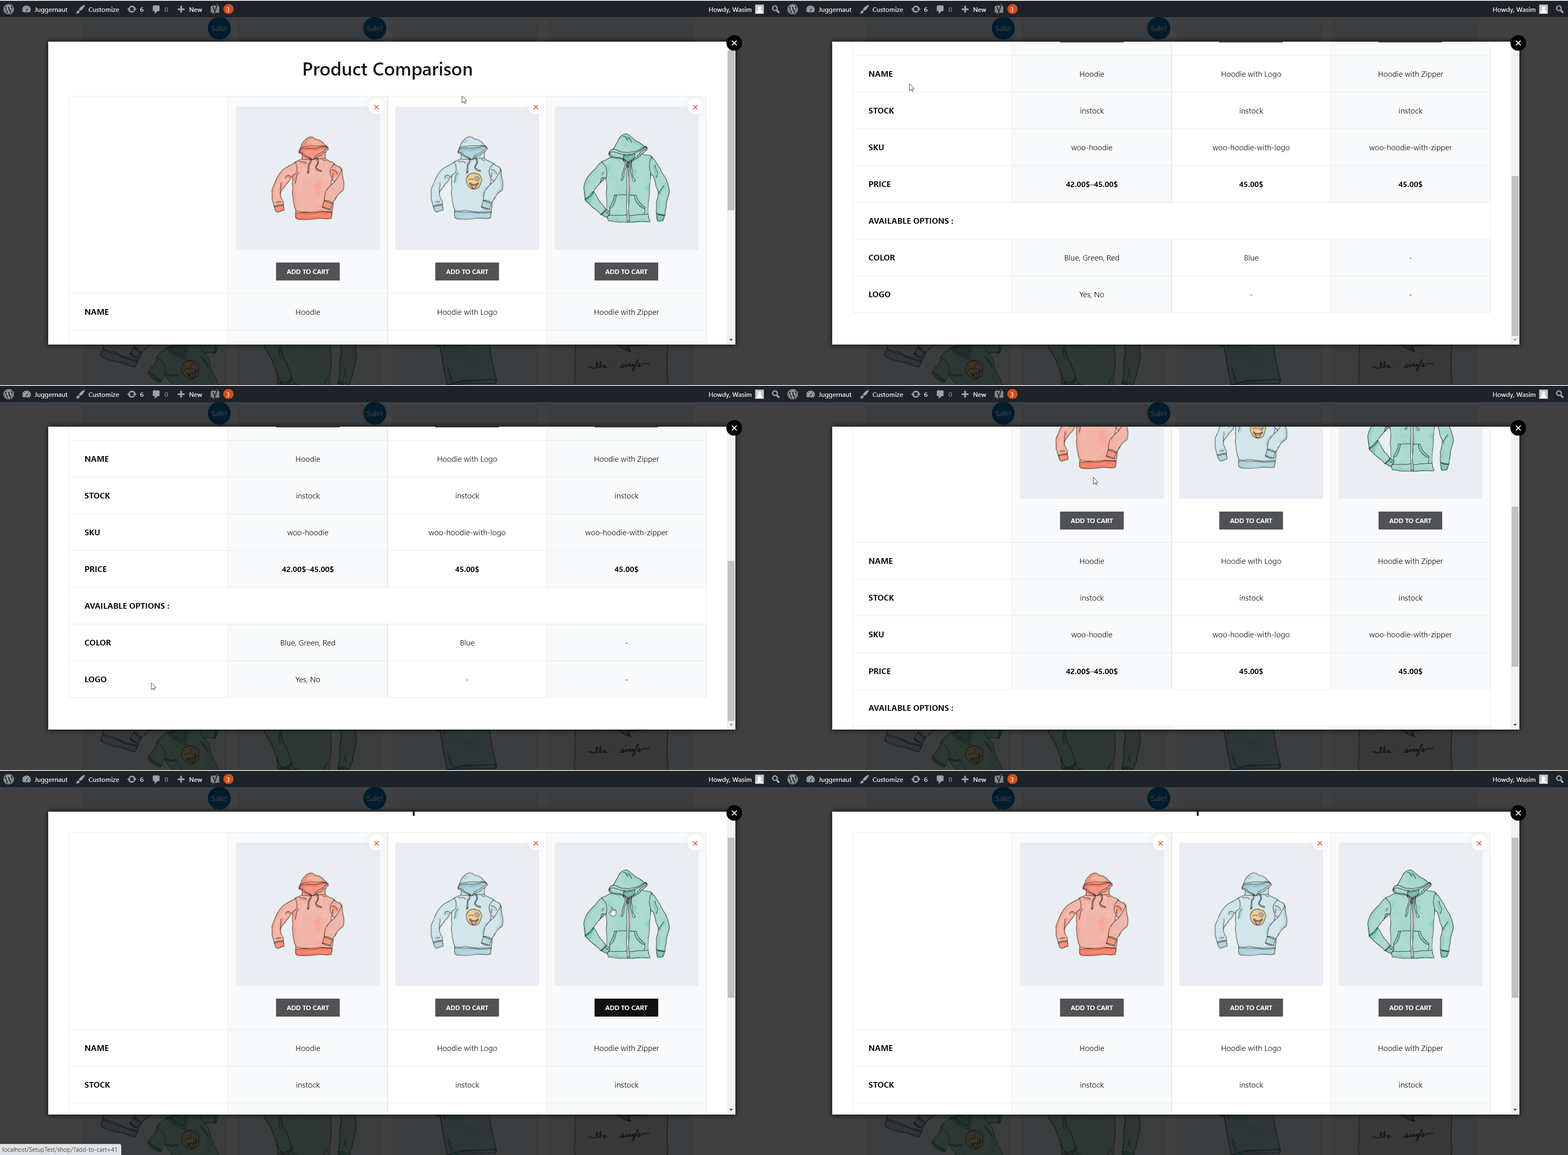
On the shop page, they can choose their desired products to compare and click the product comparison icon on each of the products. This will display all the selected products on a new window from where buyers can compare different parameters like price, stock status, color, etc.
How to Enable and Deploy the Module: #
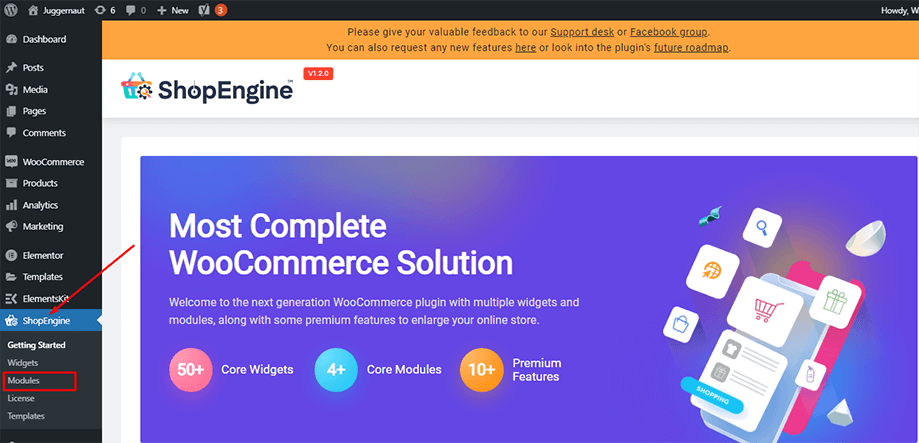
Select Modules from the Dashboard:
Firstly, go to the dashboard of your admin panel and find ShopEngine in the sidebar. Hover over ShopEngine and select Modules from the list of items.
Dashboard => ShopEngine => Modules

Select and Enable the Product Comparison Module:
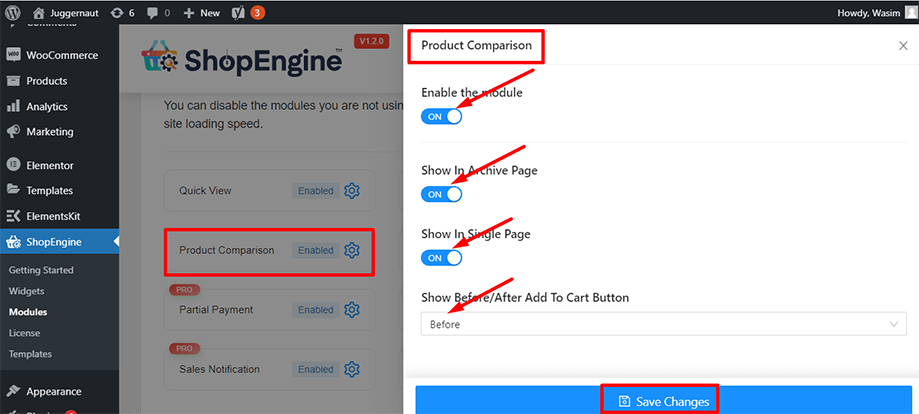
From the list of modules, find and click the WooCommerce Product Comparison module. Enable the module clicking the settings icon showing up on the module button.
Also, turn on the toggle button for both single and archive pages to display products in both archive and single pages. You can also choose to place the module icon before or after the Add to Cart button.

Add a New Template:
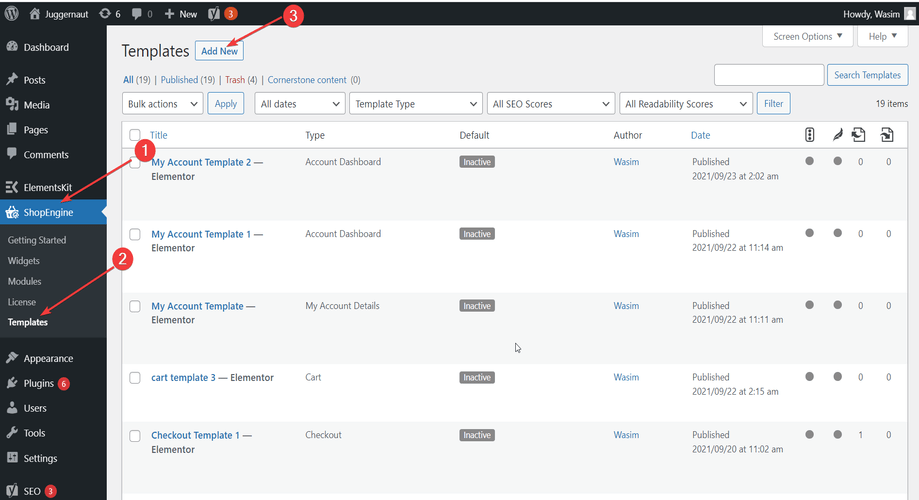
Now, go to the dashboard of your admin panel and find ShopEngine from the list of items. Click ShopEngine and then select Templates from the drop-down menu. Then, click the “Tilføj nyknappen øverst til højre ved siden af teksten "Skabeloner”.

Set a Template for Shop Page:
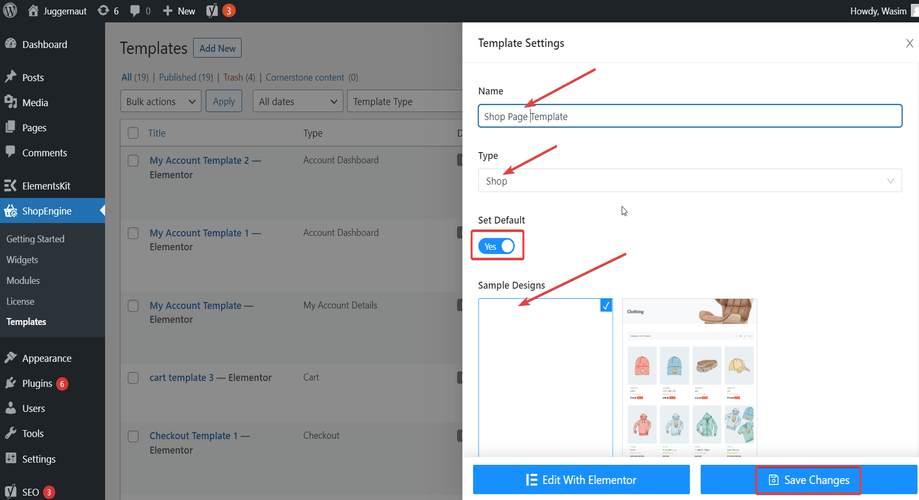
Umiddelbart derefter vises et popup-vindue med skabelonindstillinger. Indstil dit skabelonnavn i Navn field and select the type Shop as your goal is to use product comparison module.
Du kan også vælge et standardprøvedesign eller begynde at designe fra bunden. Tryk til sidst på "Gem ændringer”-knappen.

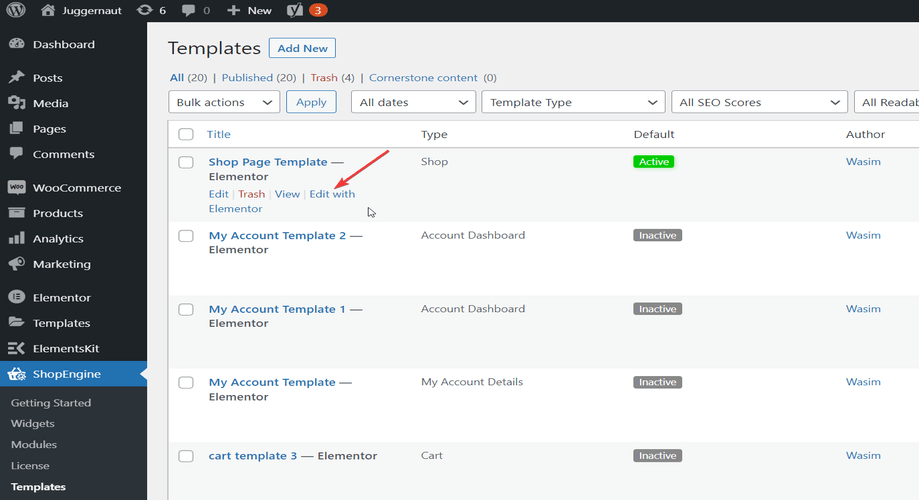
Click Edit with Elementor:
Din skabelon er oprettet, og du kan se den øverst på listen. Klik nu på "Rediger med Elementor” for at skifte til Elementor-vinduet.

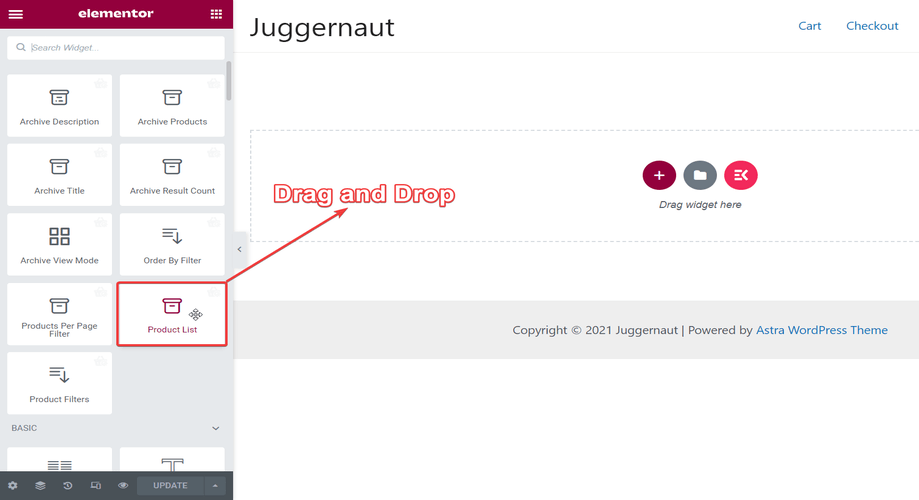
Drag and Drop Product List Widget:
In this step, you will notice a sidebar on the left with a list of ShopEngine widgets. Find Product List widget under ShopEngine Product Archive section and drag and drop it to the specified area as shown in the screenshot below.

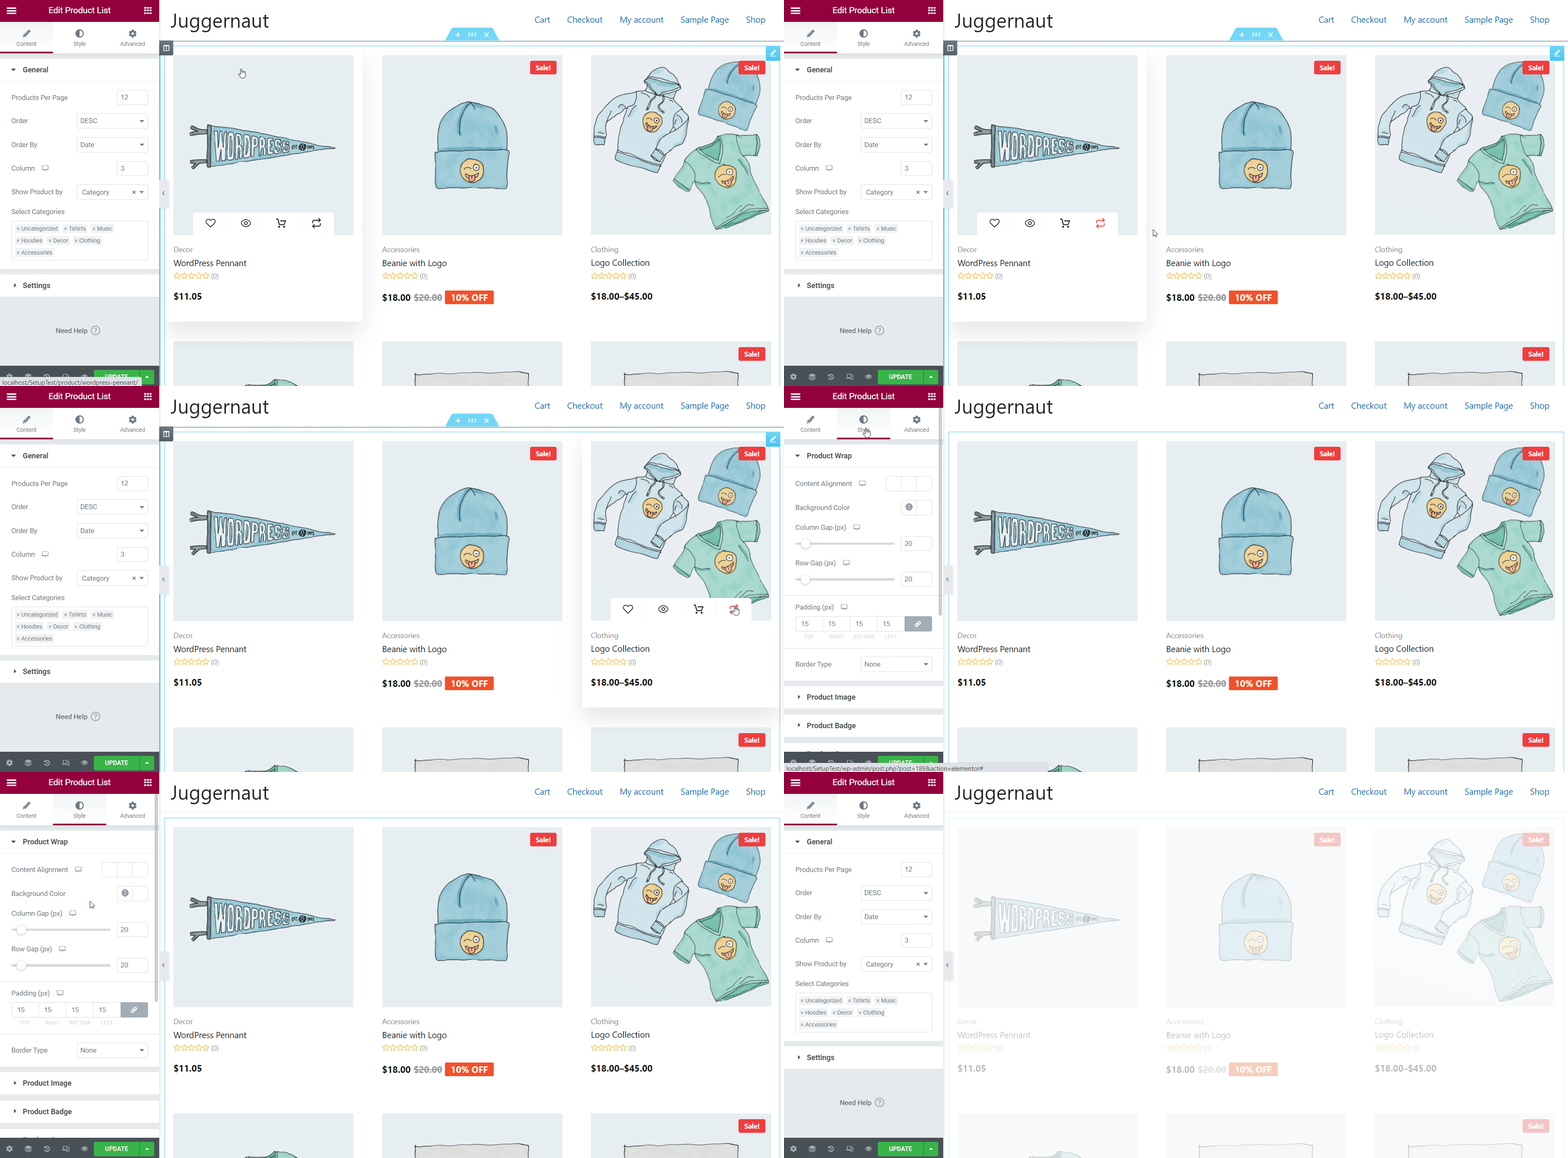
Product Comparison Icon Visible under Product Images:
Immediate after dropping the product list widget, a list of products will show up on the page with all the necessary details. You can have a look at the product comparison icon on bottom right under each product image as shown in the gif below.

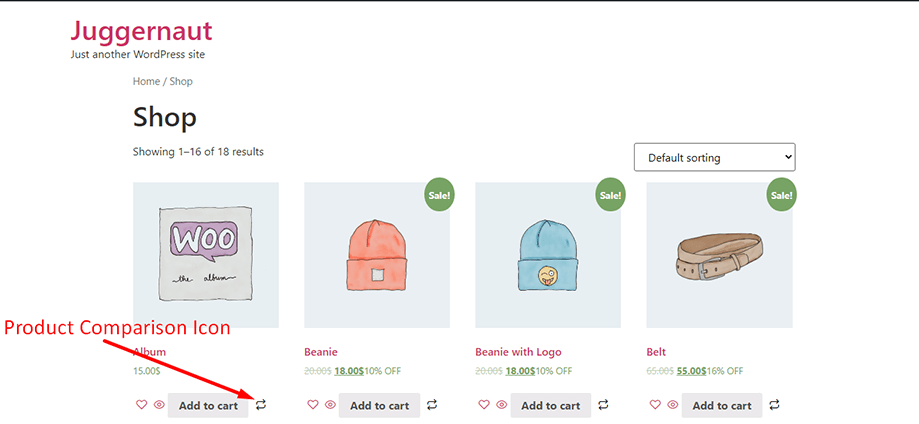
View the Product Comparison Icon on the Shop Page:
Product Comparison icon is on display on the shop page as you can see from the screenshot below. You can now choose similar products clicking the icon and compare products on a pop-up window with all the details.

Similar Products shows up on a Pop-up Window:
Now, get a glimpse of how similar products look like on the shop page after you hit the product comparison icon. You can see from the gif how products show up with items and parameters like image, name, stock, SKU, price, color, and logo in WooCommerce product comparison chart.

This is how you can compare products in the best possible way with product comparison module and take a better purchase decision.


