


You can integrate Google services like Google Sheets and Drives to your WordPress forms. For that you need to connect the MetForm with your Google Cloud Console.
Here is how to integrate Google services with MetForm:
Pre-requirements: #
- You will need a Google Cloud Console account, either you have to open a new account or log in to your exisiting account.
- Since MetForm is an Elementor form builder, you need to have Elementor plugin installed and activated on your website.
- Elementor: Download plugin
- MetForm Pro: Hent plugin
👑 Google integration in only available with MetForm Premium version.
Step 1: Set up a project in the Google Cloud Console #
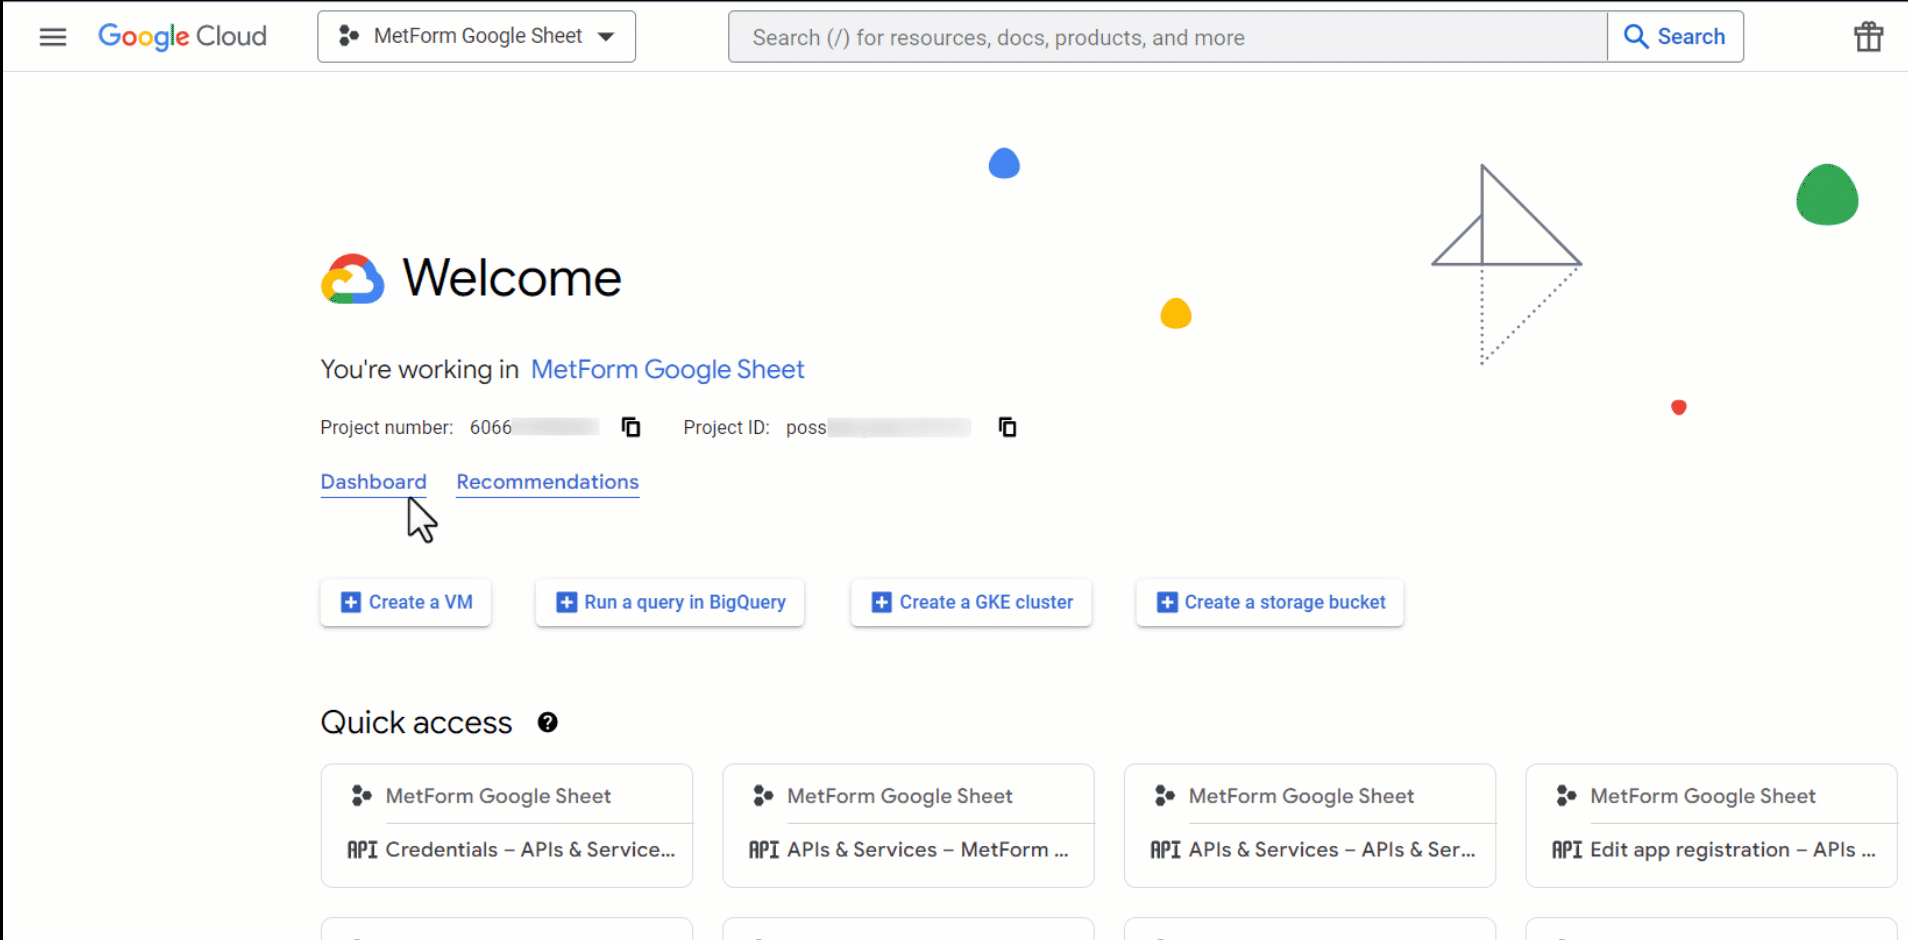
You will need APIs to connect the Google Sheet with WordPress form. For that, login to your Google Cloud console acoount. After that,
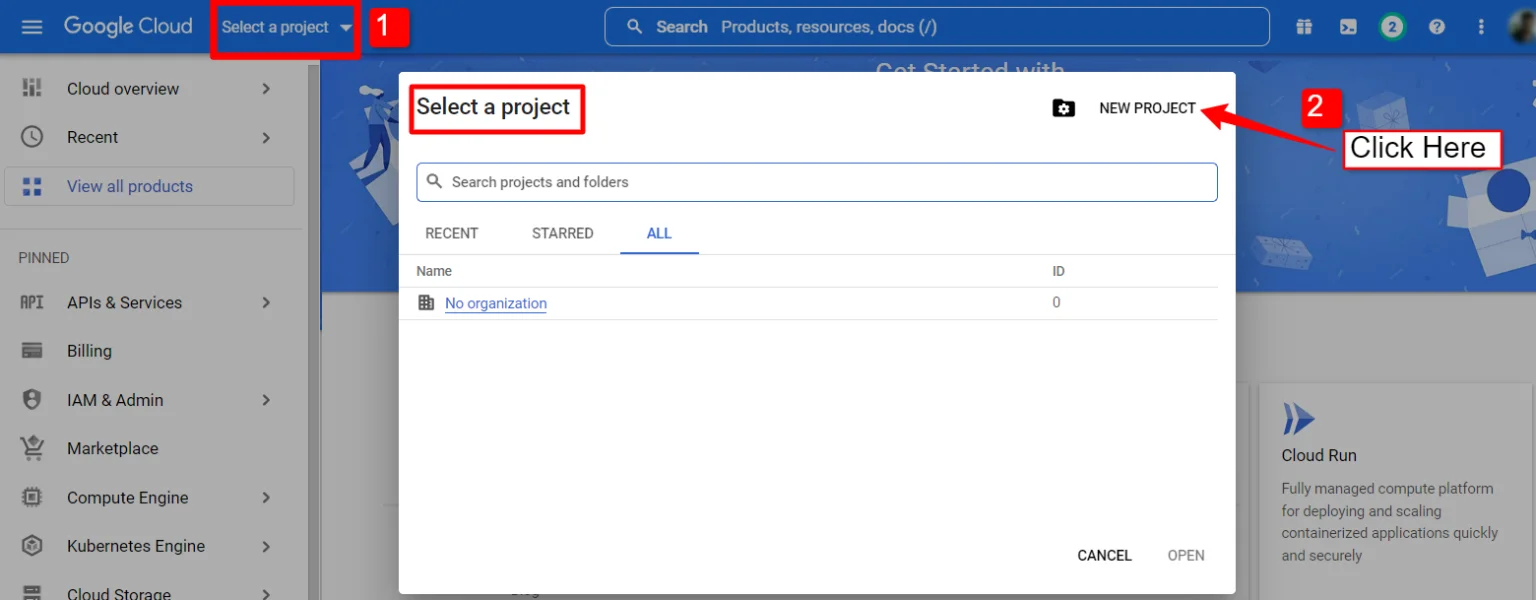
1. Click on the Select a project dropdown.
2. A popup will appear, there click on the Nyt projekt mulighed.
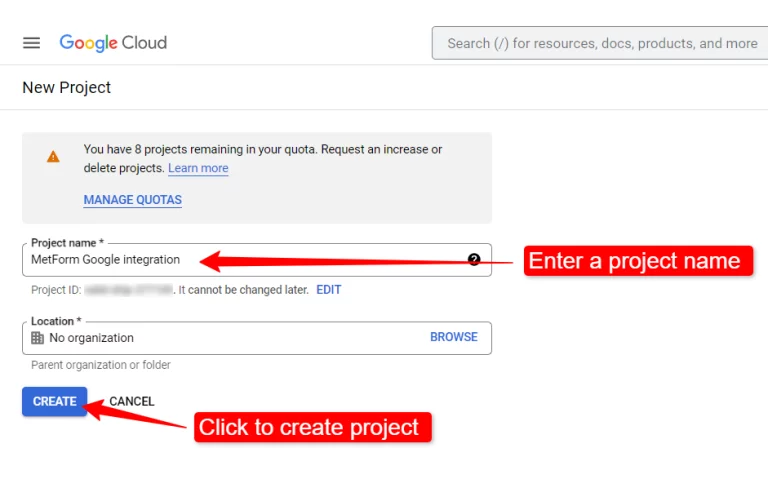
For at oprette et nyt projekt skal du indtaste et Projekt navn og Beliggenhed (hvis relevant), og klik på Opret knap.
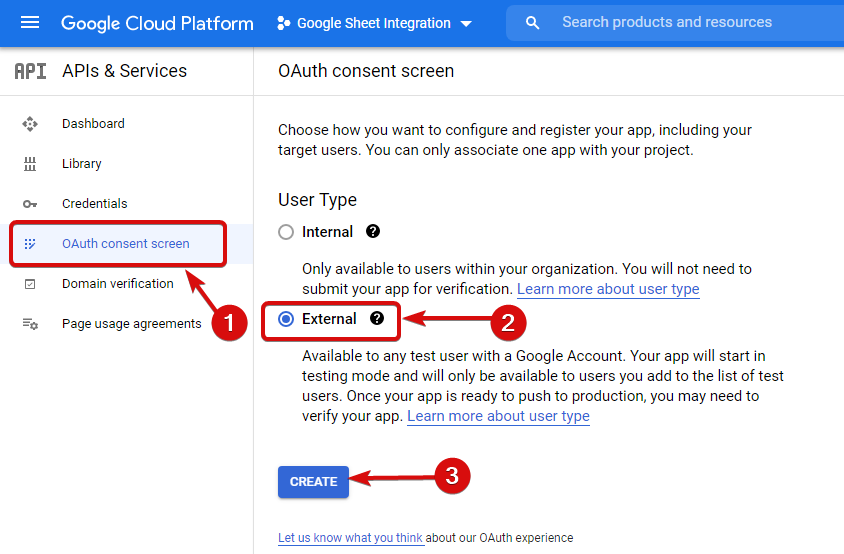
Then go to your project dashboard, and navigate to APIs overview >> OAuth consent screen.
On the OAuth consent screen select the Brugertype til ekstern og fortsæt ved at klikke på knappen "Opret".
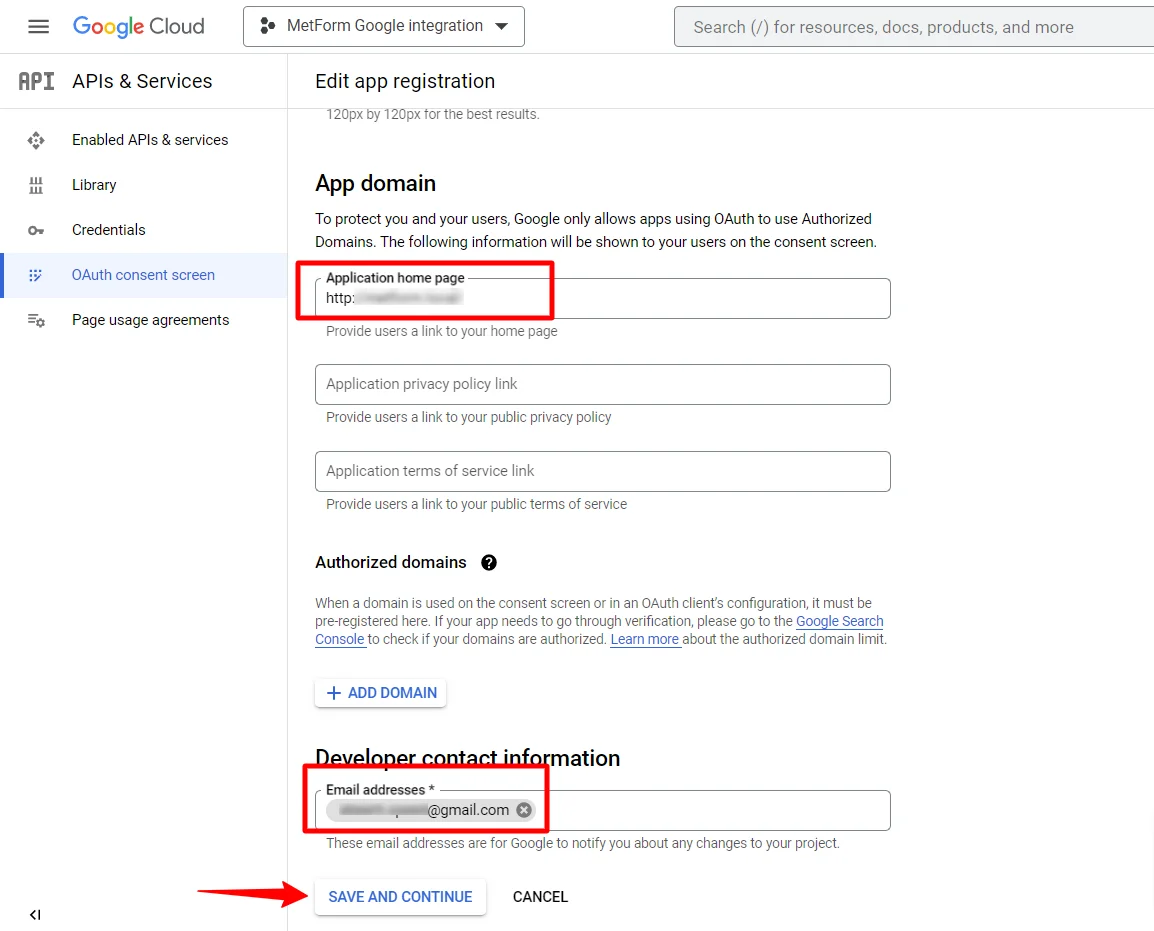
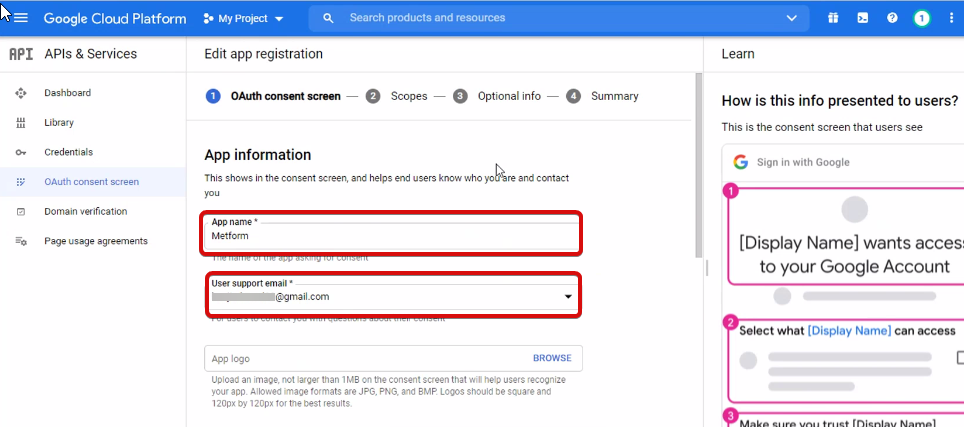
On the next screen, enter your App information including:
- App navn
- Brugersupport e-mail
- Autoriserede domæner
- Developer contact
Klik til sidst videre Gem og fortsæt
Gå til API-oversigt
- Gå til OAuth-samtykkeskærmsiden
- Vælg ekstern brugertype
- Tryk på knappen Opret
Angiv dine appoplysninger, se billedet nedenfor –
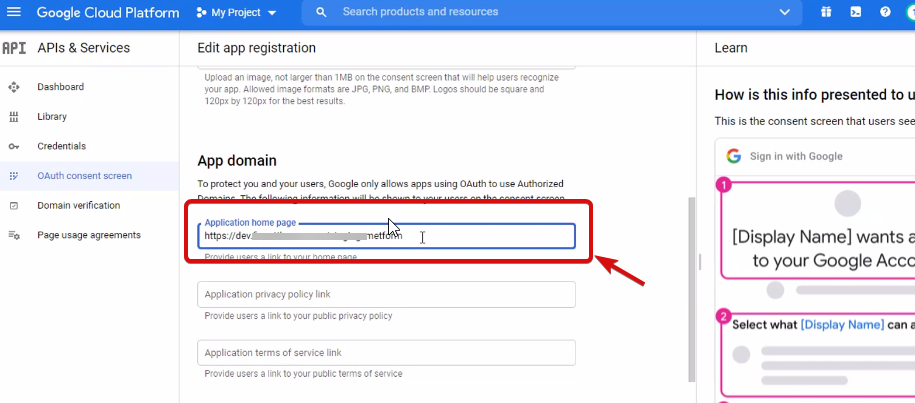
Nu skal du add App domain. If your site is on the live server then you need to authorize the domain. An authorized domain does not allow subdomain names and any protocol. However, you can use this Google project for websites created with your subdomain. For localhost, you do not need to authorize the domain.
Gem derefter og fortsæt.
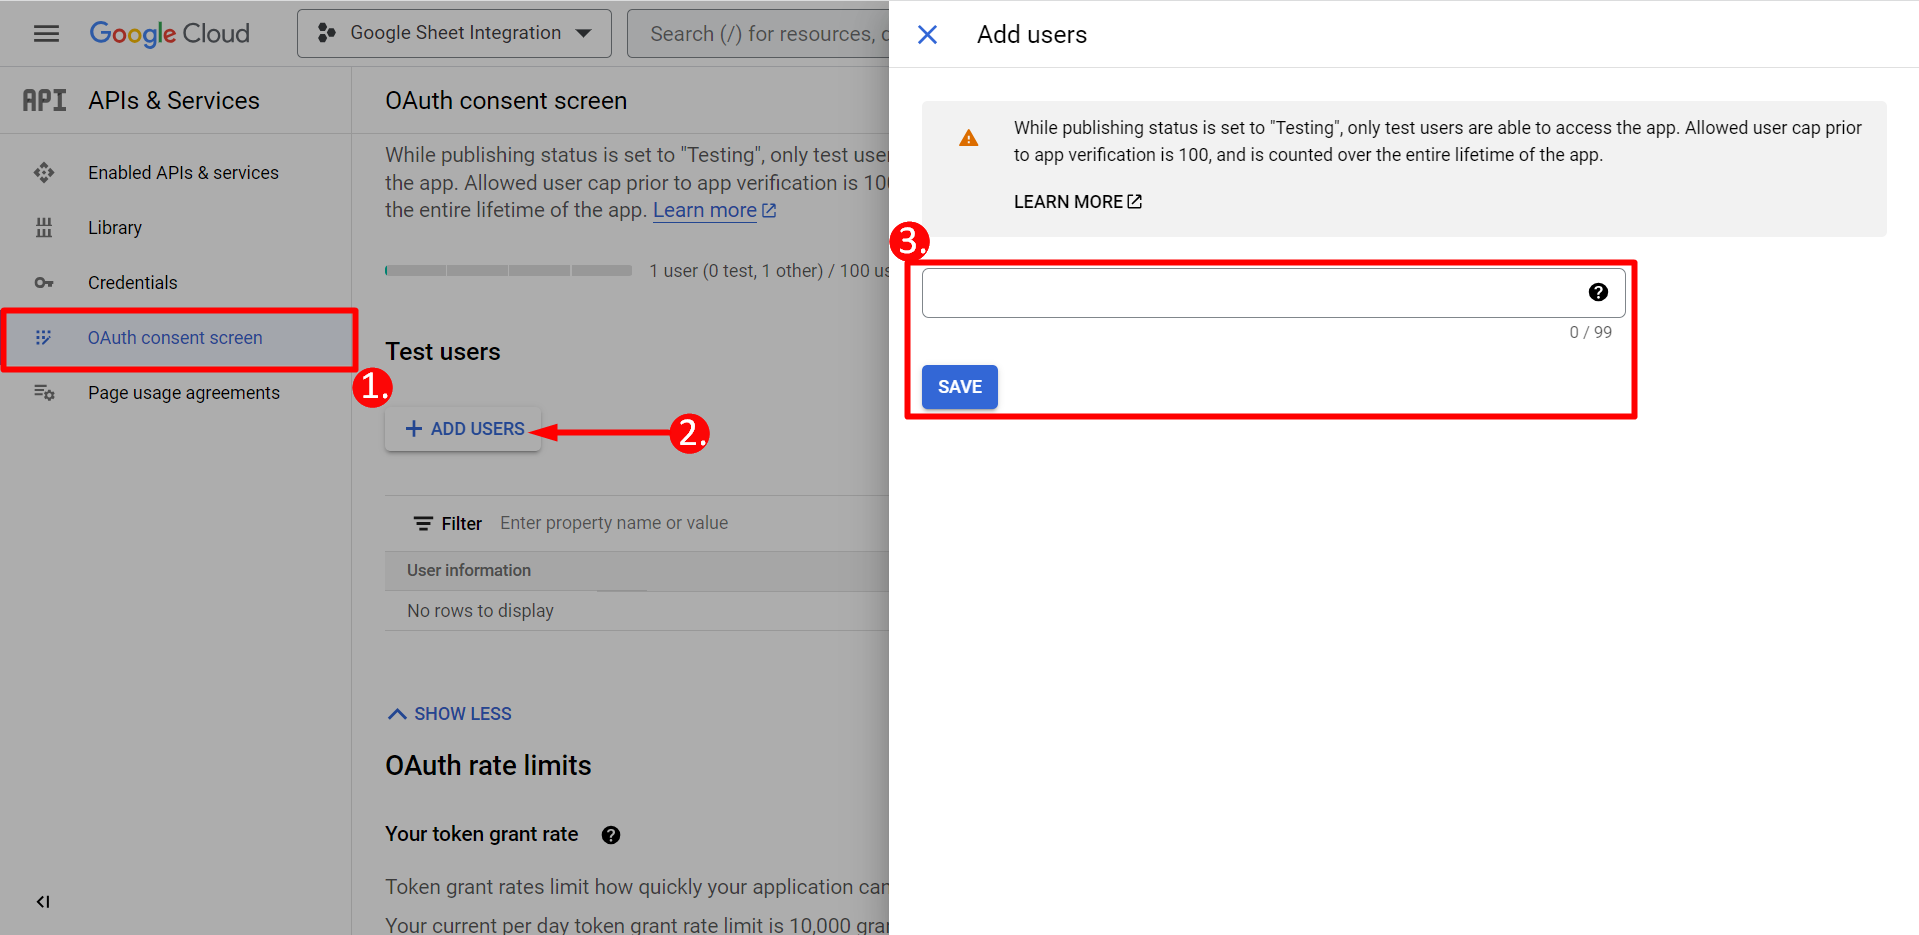
- Fra OAuth-samtykkeskærmen
- Klik på Tilføj brugere
- Add your email address and save it
Klik tilbage til dashboard-knappen
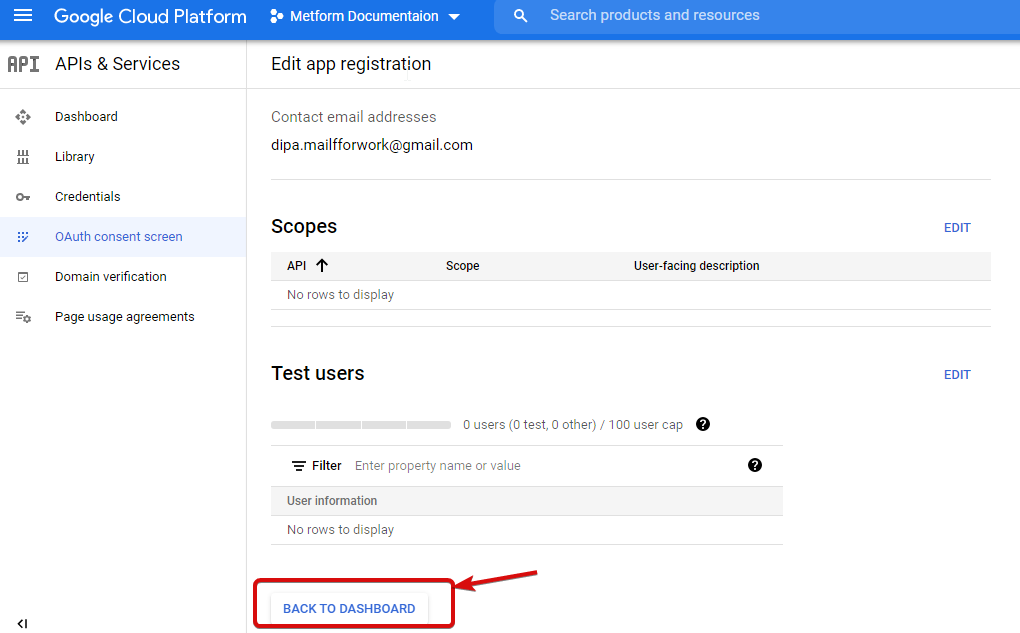
Klik på knappen Udgiv app, og gå til siden med legitimationsoplysninger. Hvis dit websted er på localhost, behøver du ikke klikke på knappen for at udgive app. Bare gå til legitimationssiden.
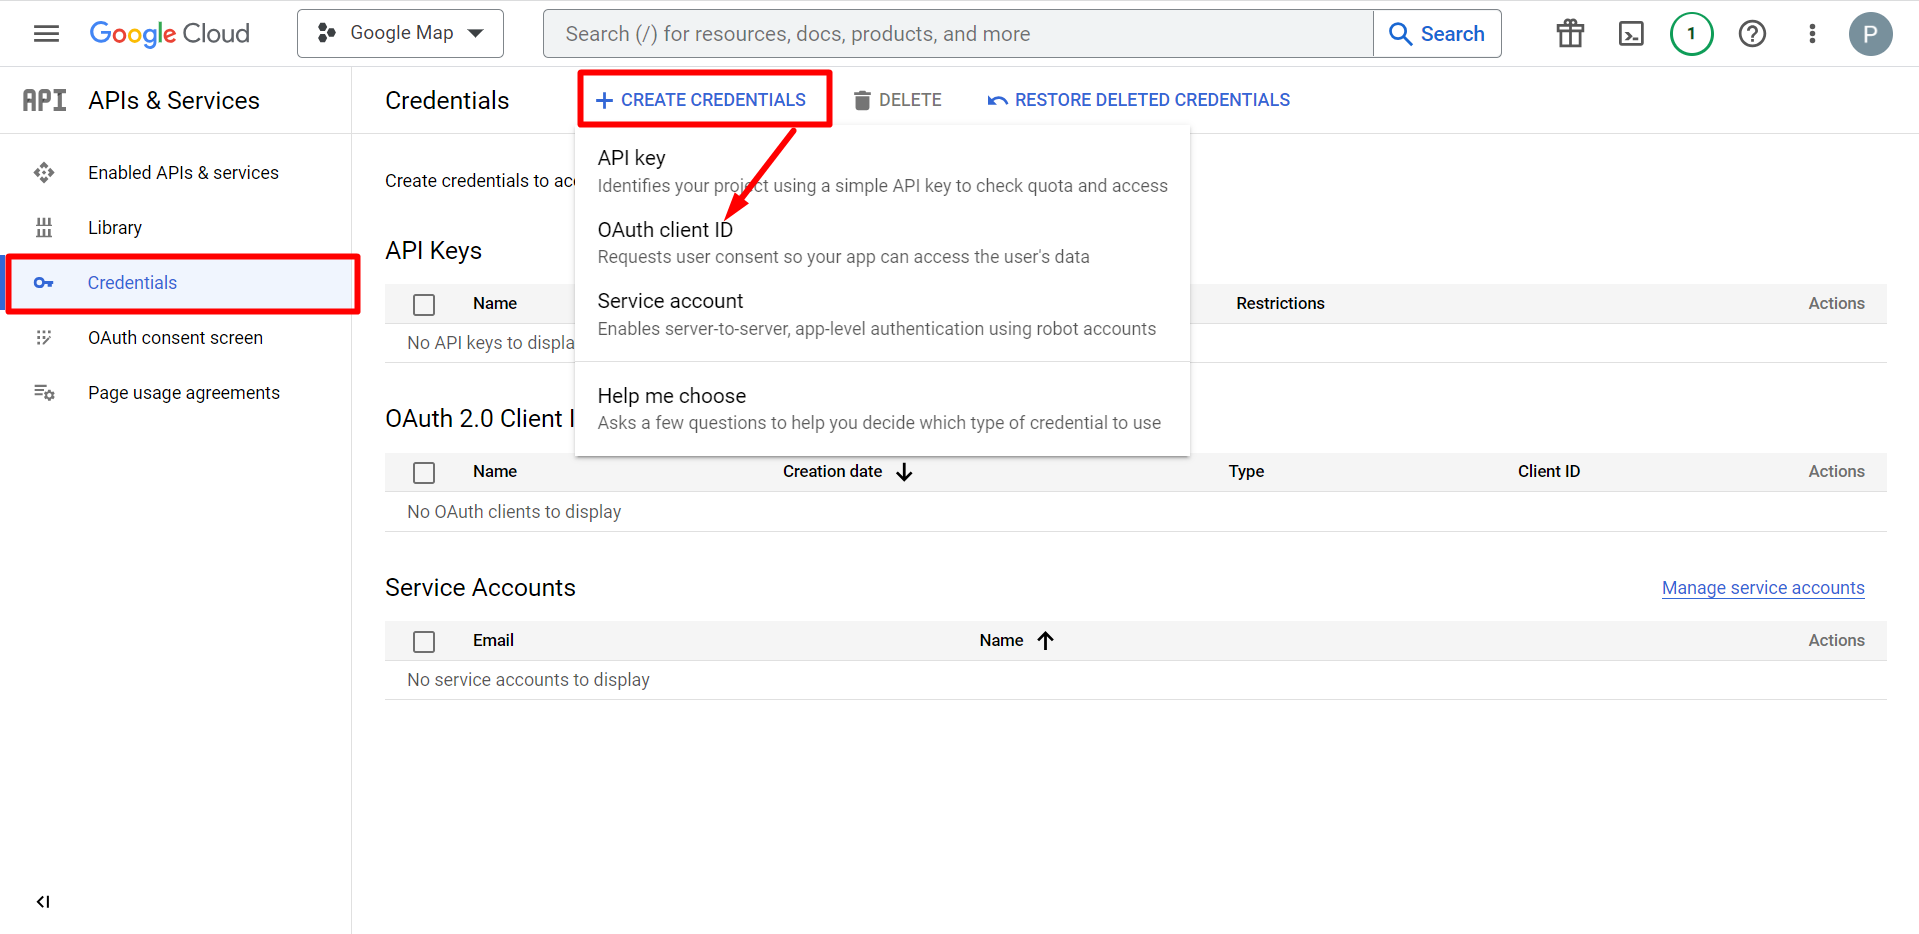
- Gå til legitimationsoplysninger
- Opret legitimationsoplysninger
- Vælg OAuth-klient-id
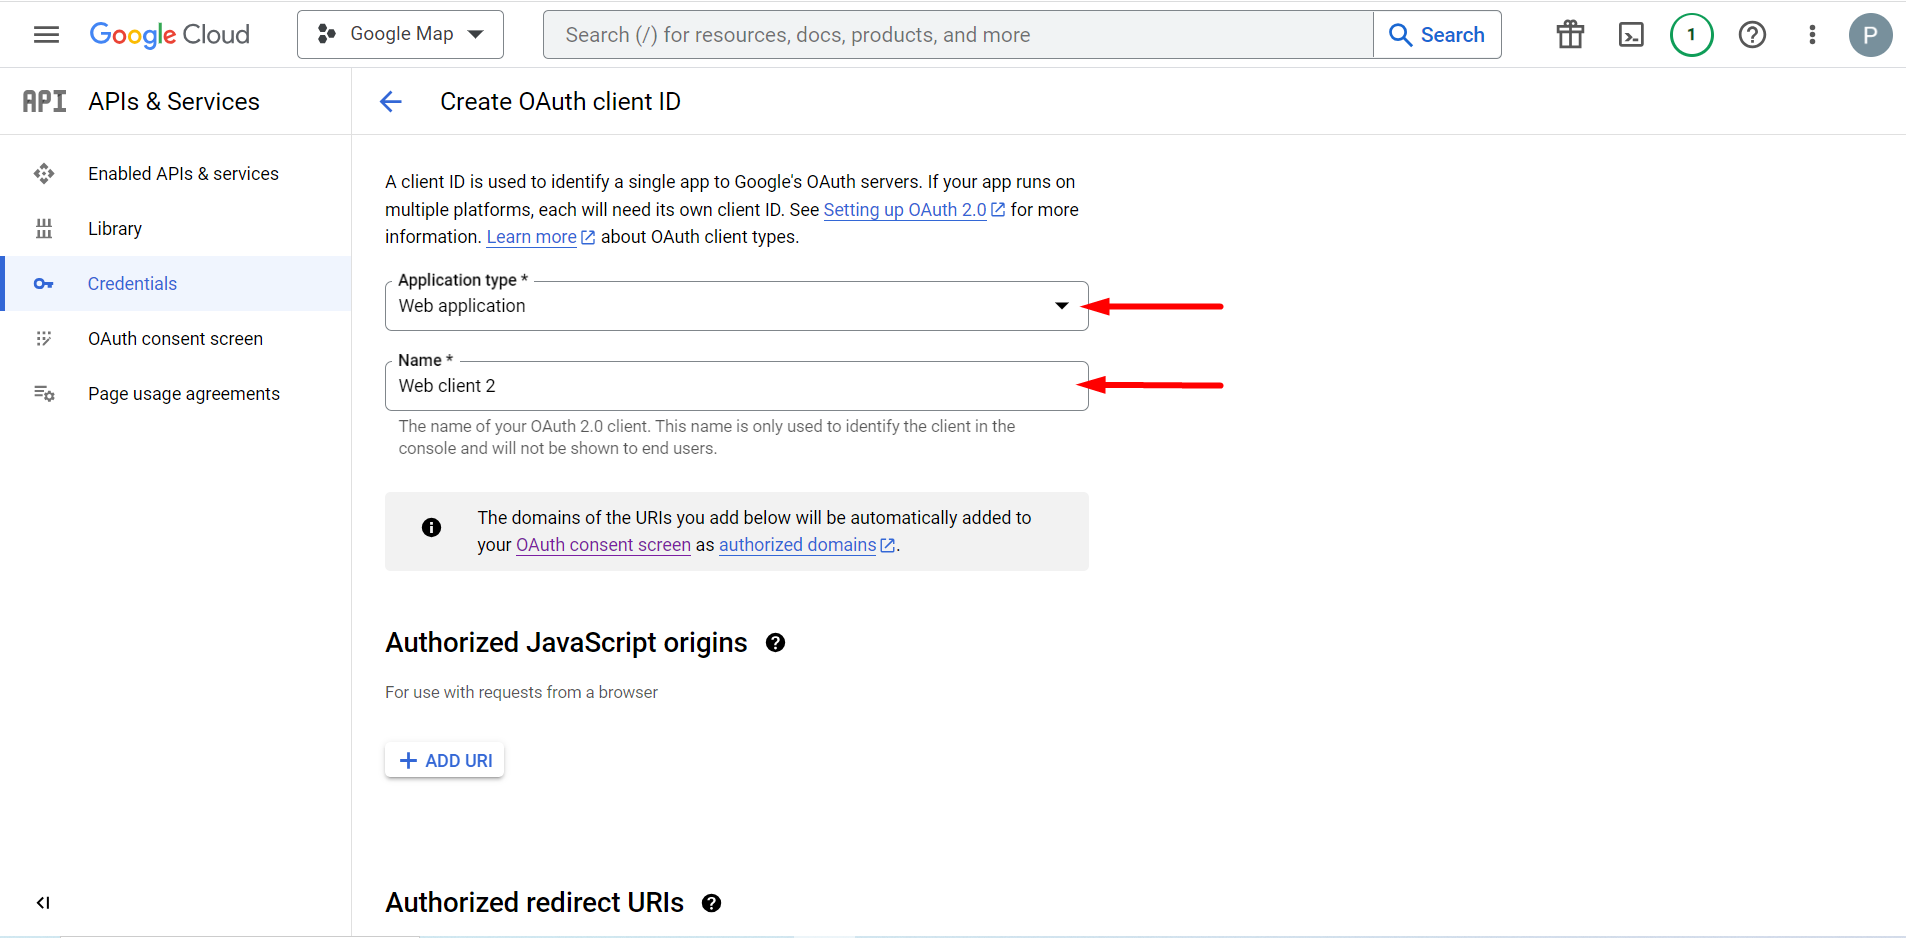
Den valgte applikationstype er en webapplikation, udfyld navneindtastningsfeltet
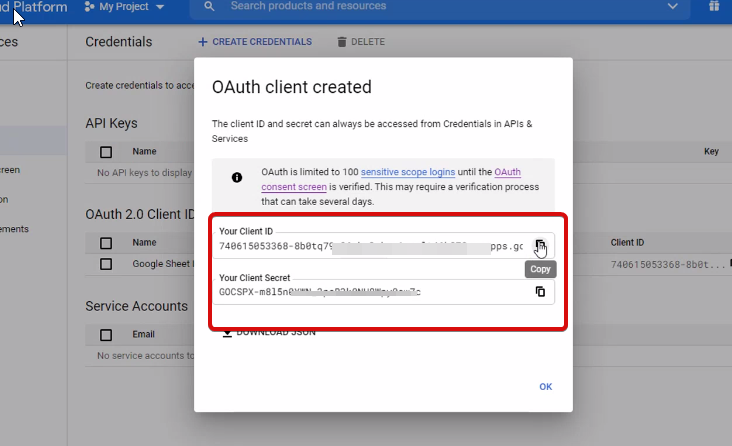
Du kan nu tjekke din klients ID, det føjes til legitimationsoplysningerne
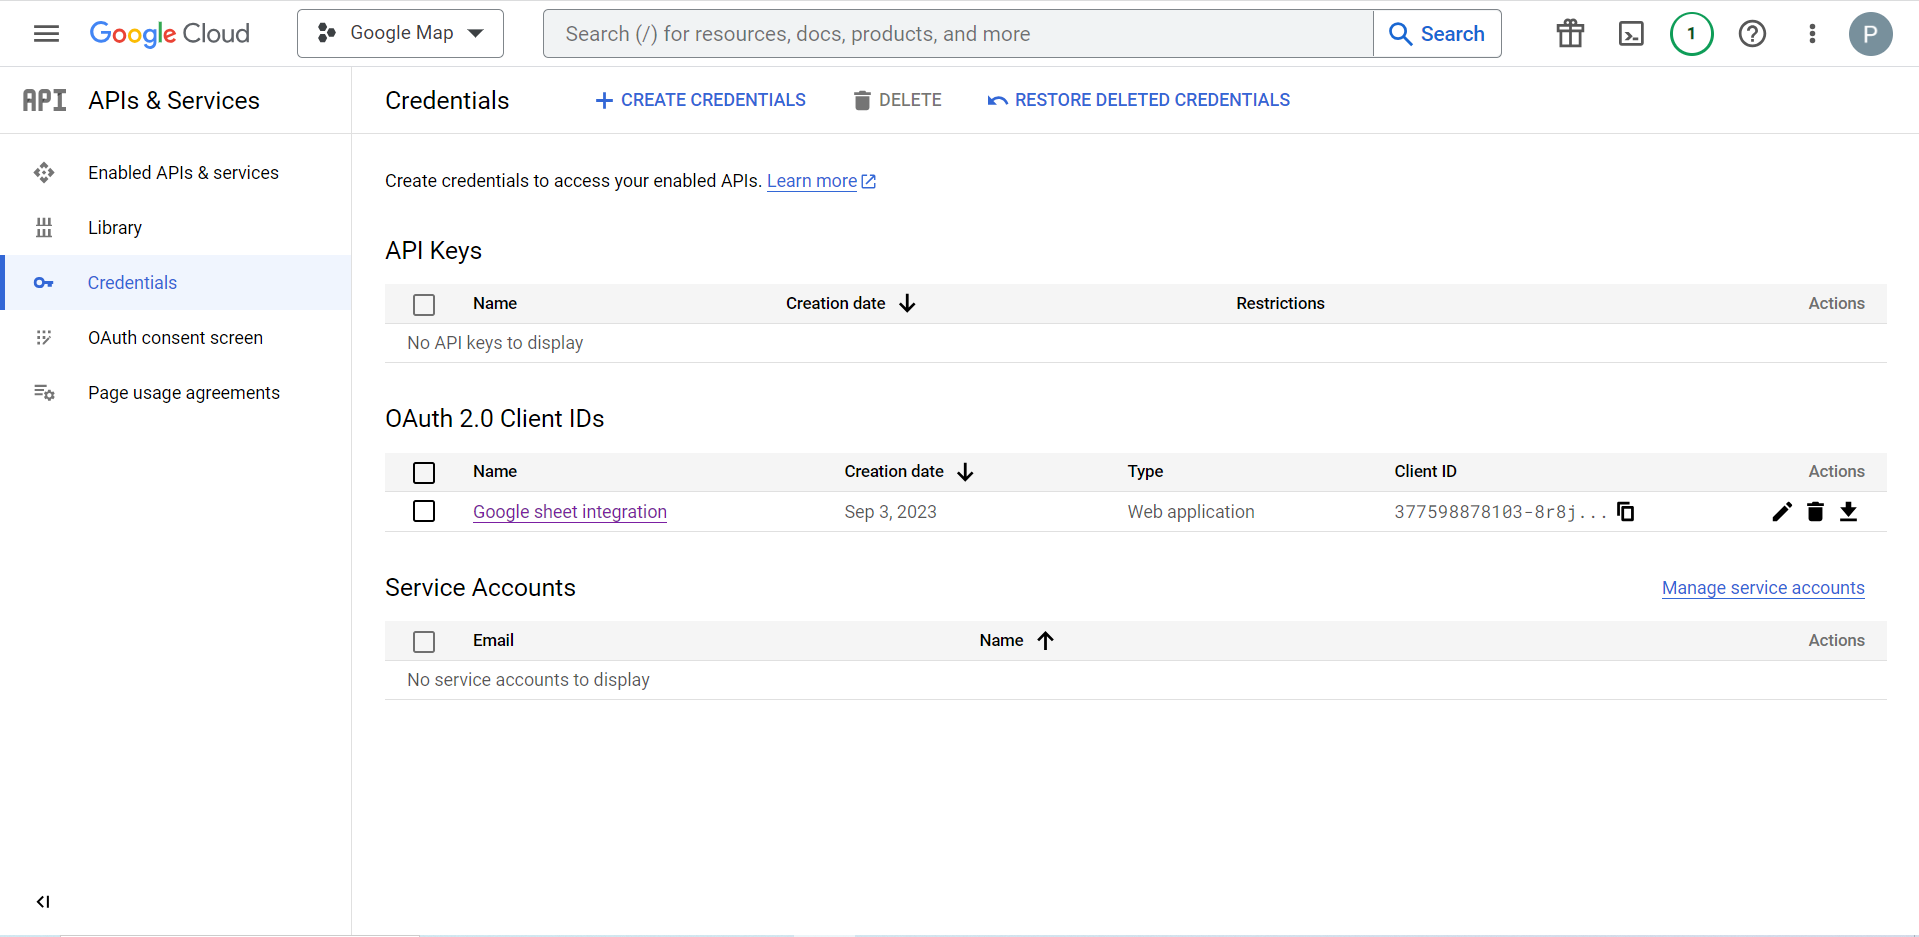
Now you will get the client ID and client secret, just copy them from here.
Step 2: Copy the URL From Metform’s Google Integration Tab #
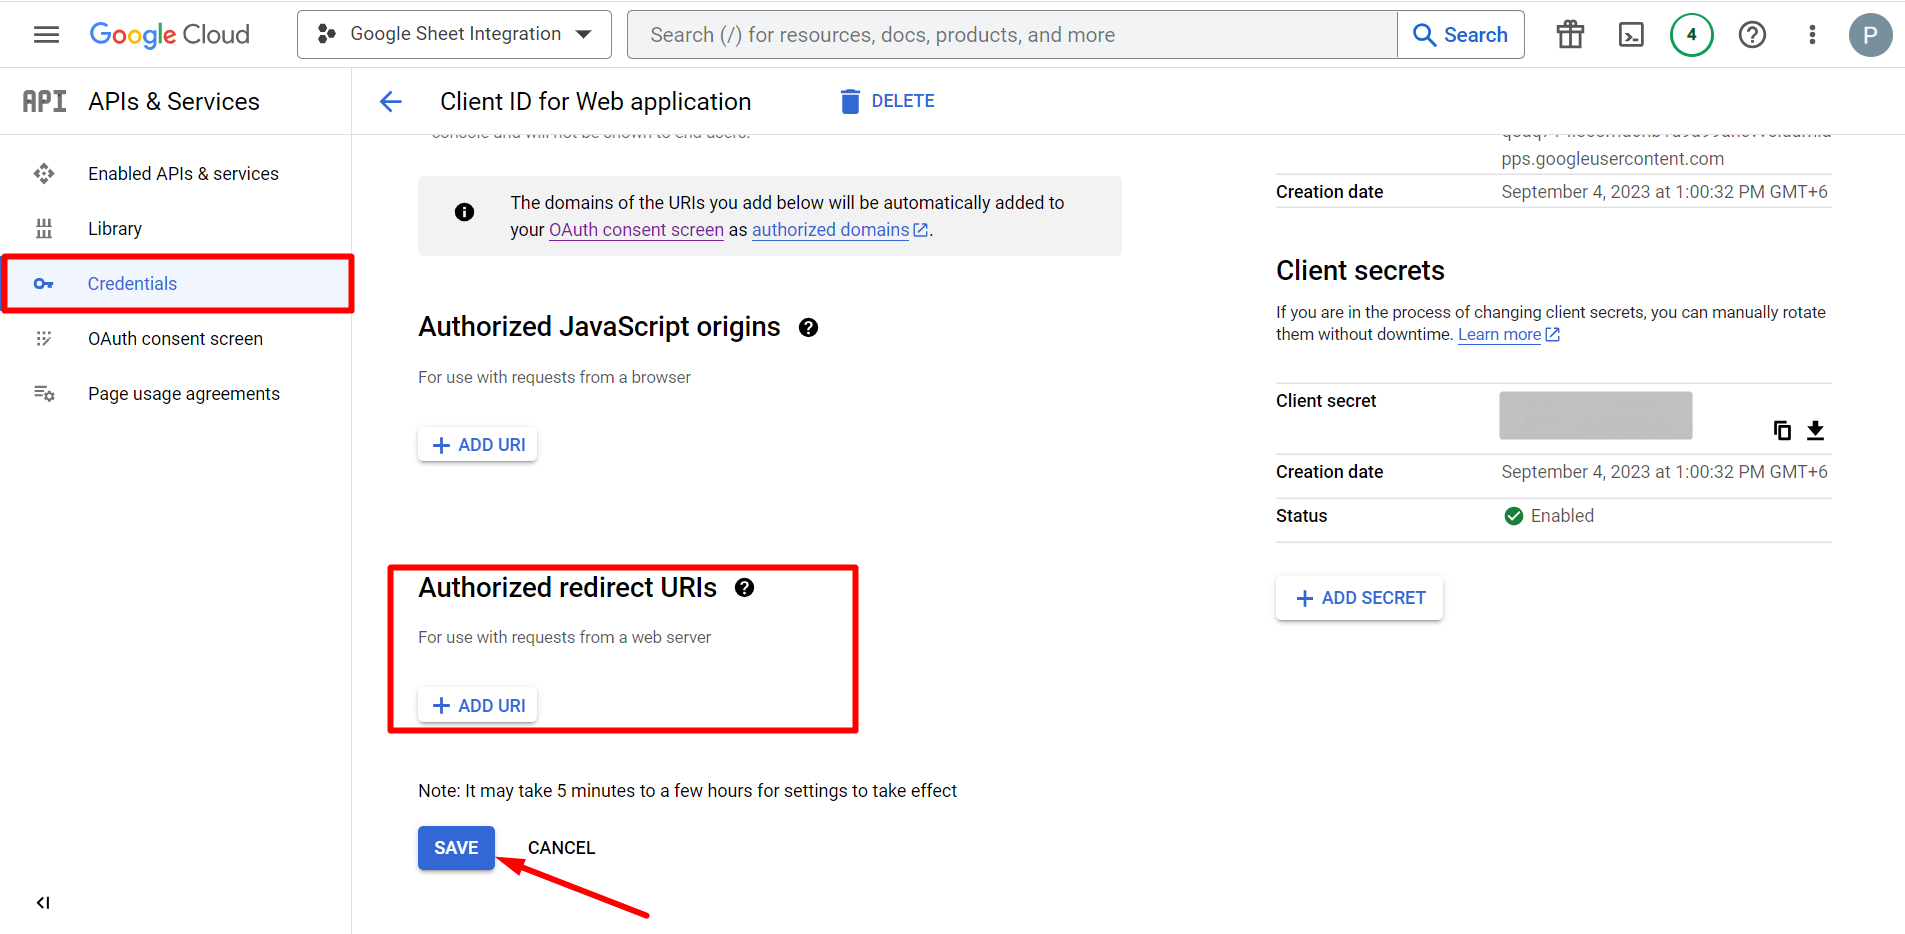
I dette trin skal du tilføje en autoriseret omdirigerings-URI. Du får omdirigerings-URI'en i din MetForms Google Sheet Integration-indstillinger.
Gå derefter til Credentials again > find Authorized redirect URIs > Add URI that you have just copied from Metform’s Google Sheet Integration settings
Step 2: Insert the Copied Ids #
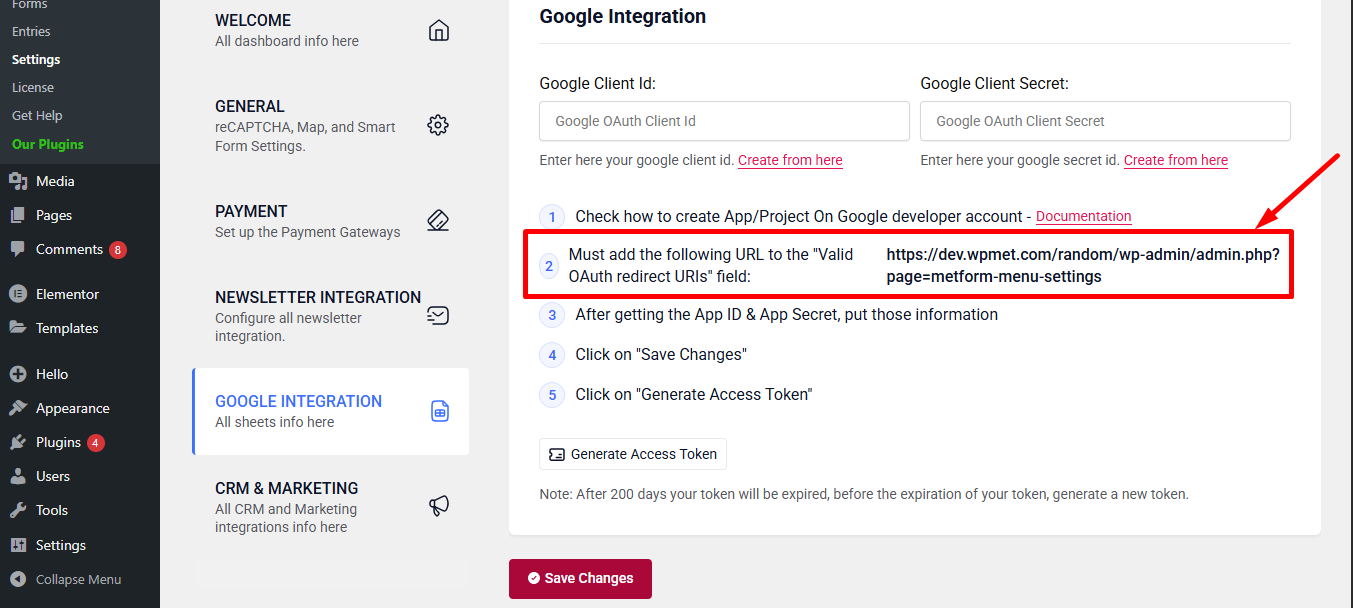
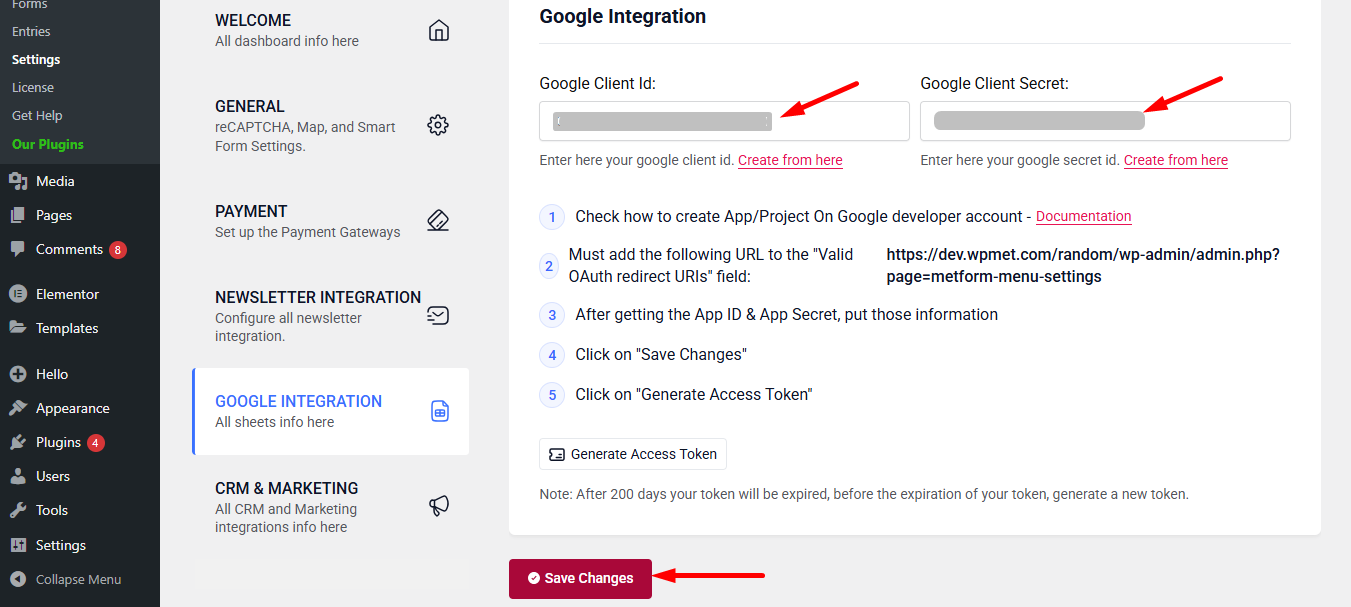
Now, return back to Metform’s Google Integration tab from your dashboard.
Here, you have to paste the copied Client ID and Client Secret in the fields and save changes.
Finally you can connet Google services with your WordPress form.
Læs også:


