Content timeline is a cracking tool to display any event’s sequential info, but creating such a timeline on your WordPress website requires using the right tool with full command.
If you pick up any random WordPress tool to build your content timeline, chances are the tool will be below-average, producing a cheesy design look.
I have done an in-depth analysis to find an optimum way to create content timeline in WordPress. Guess what? In this write-up, I have put together the easiest method to create content timeline in WordPress with Elementor.
Understanding Content Timeline
A content timeline represents info in a chronological form. It is a simple, yet effective method to share information in a visually striking way.
The primary purpose of a content timeline is to demonstrate the action of an event sequentially within a time interval. It helps the readers to get more information in the blink of an eye.
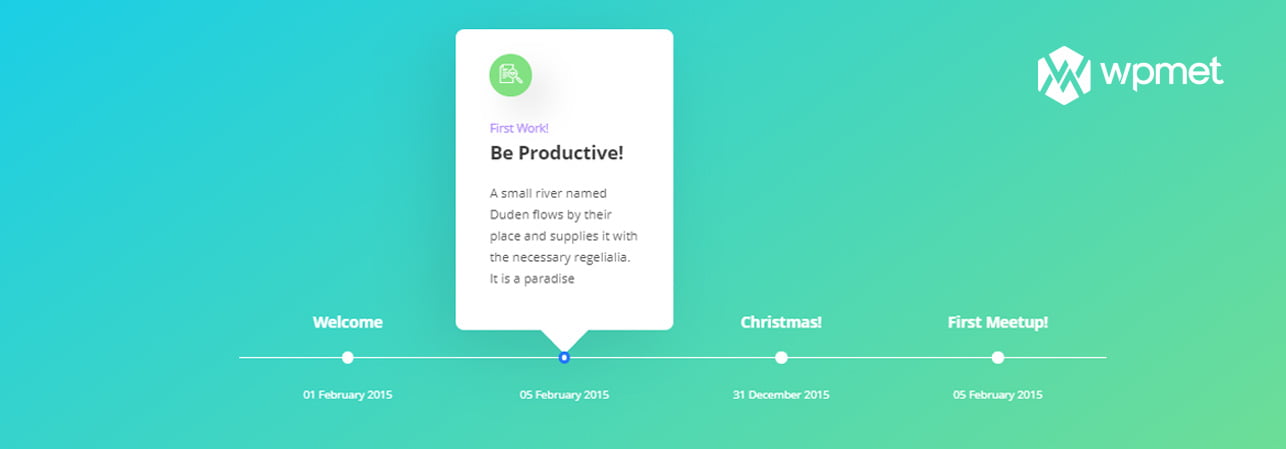
Generally, a content timeline contains a long bar with points and some information around it. This bar could be both vertical and horizontal. Whatever the direction, simply make sure that the timeline bar contains enough resources. You may improve the bar with related images, icons, numbers, clickable texts, or other interactive elements.
Where Should You Use a Content Timeline?
A content timeline is a multipurpose tool. You can use this tool almost anywhere to perform a task smoothly. Let’s have a look at the main sectors where this timeline works the best.
Education Sector
The education sector is the most important sector to implement a content timeline. It helps the students to learn the tasks efficiently. It simplifies the historical events, times, or movements. Thus, it becomes easier for students to understand new topics.
The Social Science Research Network reports that 65% of our total population is visual learners. It means they struggle to learn only by using oral lectures or textbooks. They need to see what they are learning.
Marketing Sector
The marketing sector highly depends on the timeline strategy. Just imagine, what are the challenges you have to face while conducting marketing research.
If you narrow down the challenges for your marketing team, then you might notice mainly four challenges. These are –
- Which task needs to be completed right now?
- Where should you focus mainly (based on priority)?
- Which one is coming next in your project?
- How close are you to reach the goal?
- When is the deadline (so that the members don’t miss the deadline)?
By having a clear concept about these facts, both the team member and the leader can eliminate their project panic. Thus you run a pitch-perfect marketing campaign and reach your goal.
Business Management
Nowadays, content timeline models gain immense popularity among the business owners. From a small startup to the billion-dollar business proposal presentation, the timeline model is being used everywhere.
It can represent the history of a company as well as create a visual representation of the company’s potentiality for future investors.
Project Management
A content timeline is the most appropriate way of getting an overview of a project. It helps the investors to visualize the overall project plan. It makes processes like time scheduling, task managing, or milestone creation buttery smoother.
In the long run, it helps everyone to keep themselves on the right track throughout the whole project. Even, there might be a situation where the project leader wants to introduce a new member to the project.
If you have an appropriate timeline bar, then the new recruit fits into the project quite efficiently.
Research process
Time management is one of the main things to consider while conducting research. If you are involved in archeological research, this timeline can perfectly visualize the overall researchers’ time frame.
Not only the archeological studies, a proper timeline benefits every research sector, including scientific, business, biology, astronomy, geology, etc.
How to Create a Content Timeline
Creating an appropriate timeline needs time and dedication. Here is a straightforward process of creating a timeline.
Step #1: Analyze your topic
At first, choose your topic and gather the required information about that topic. You must thoroughly choose the information that you want to display in your timeline.
Step #2: Name the timeline
Be cautious while choosing the name of your timeline. The ‘timeline name’ must represent the purpose of your timeline.
Always put the timeline on the top of the timeline so that the name remains visible to everyone.
Step #3: Draw a rough timeline
At this moment, draw a rough timeline structure on a piece of paper. Simply draw a horizontal or vertical line along with a few points. Every single point indicates a date or milestone of your project.
Now it’s time to add some texts or other related information about your project. And that’s it!
Step #4: Finalize the topic
I hope the rough timeline plan is already in your hands. Now, take a break and conduct in-depth research about your topic once again. Thus you can find out the silly problems and fix those.
Step #5: Customize the timeline
Customizing the timeline makes it easily understandable as well as visually stunning. You may add some icons or media files to do this.
How to Add the Elementor Content Timeline to Your WordPress Website?
Now that you have a clear knowledge of the content timeline and its application along with the process of creating the timeline.
Now it’s time to integrate the content timeline into your WordPress website. So, how can you do it?
Okay!
There are mainly two different methods to create a content timeline in WordPress. Scroll down to learn more about the processes.
Manual Process (The hard way)
The manual process is the traditional way of creating a content timeline on your website. You will need either an image or a GIF file to make a content timeline. So, how can you do it?
Simple! Just follow the steps.
- Firstly, draw the content digitally. You may use the photo editing software like Photoshop, Gimp, or Paint to draw the timeline. After completing the project, save the image or gif file.
- Secondly, create a page or post on your website and put the image/gif file on that page. Then add the required content and publish.
Boom! That’s it, you’re done!
Drawbacks of This Process:
The process might seem quite simple. But don’t get chill yet! You’ll face lots of issues with this process in real life. The significant drawbacks are listed below.
- You can’t update the published timeline via the website admin dashboard.
- You can’t create an interactive timeline.
- Customizing the icons and images is a bothersome process.
Automatic Process (Easiest way – ElementsKit pro)
To make the most of your content timeline, you may use ElementsKit. It is a premium Elementor addon that can be handy for building a content timeline on your WordPress website.
In this section, I’ll introduce you to the process of creating an Elementor content timeline within a few minutes. Let’s get started.
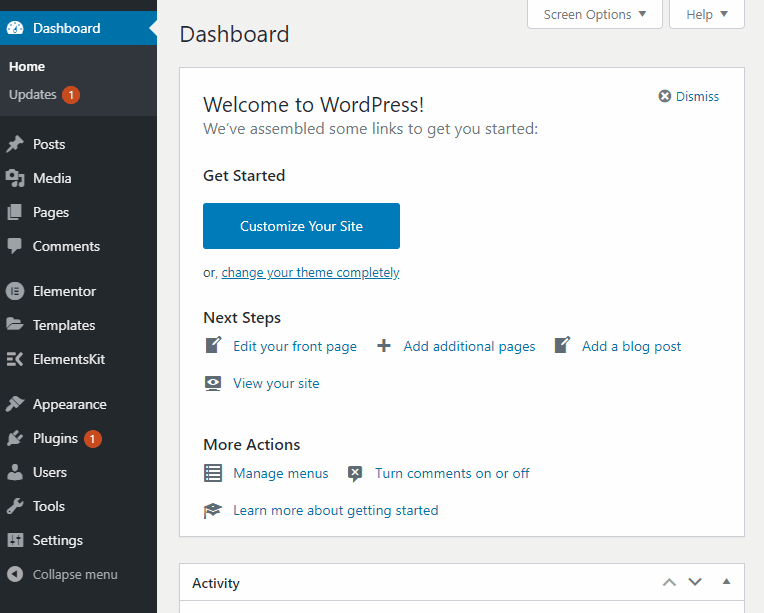
Access Website Admin Panel
Like the manual method, you don’t need to draw the timeline in photo editing software. You can do everything from your website’s admin panel dashboard.
Simply log in to the admin panel dashboard. In general, the dashboard URL looks like this Yourdomain.com/wp-admin
Install Elementor and ElementsKit
After logging in to your admin dashboard, it’s time to install Elementor and Elementor addon ElementsKit. You’ll need both of these to create the timeline automatically.
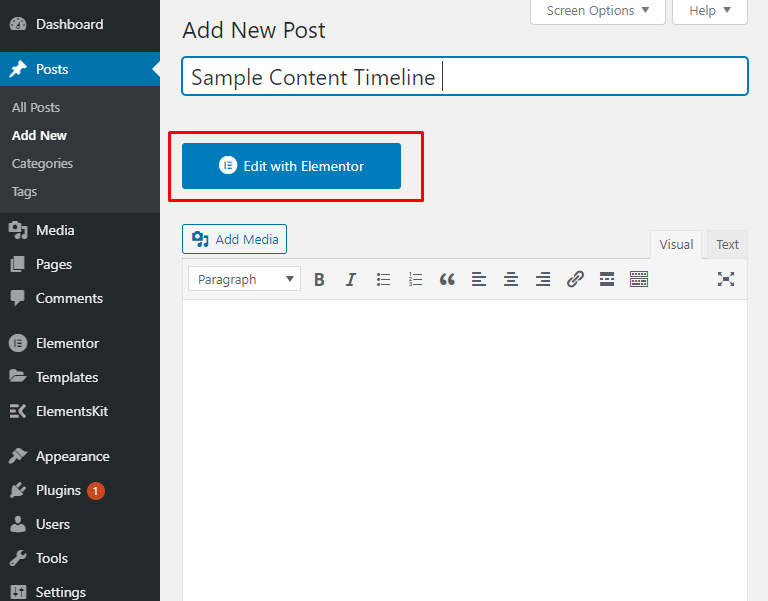
Open a New or Existing Webpage
After activating Elementor and ElementsKit, it’s time to use those in a post or page. So, create a new post by clicking Posts > Add New.
Click on the “Add title” block and add your title. You may also add the plain text and images to the post.
Launch Elementor
Now, click on “Edit with Elementor” and it will open your brand new post in the Elementor editor. The Elementor editor is used to edit the post more professionally.
Launch ElementsKit Timeline
Scroll down the “Elementor” panel and look for the “Timeline” addon in the list. Otherwise, you may simply search for “Timeline” in the Elementor panel.
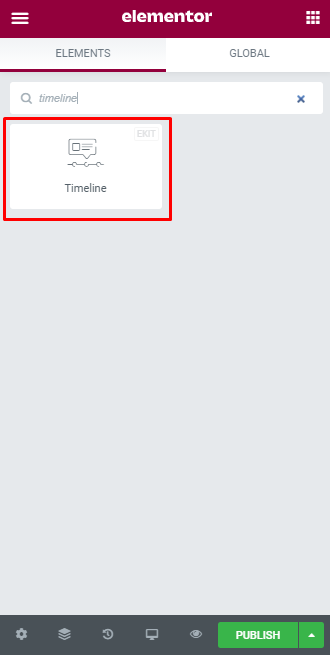
Launching ElementsKit Timeline
Now, drag and drop the Timeline widget into your post, and that’s it! You’ll notice a sample timeline in your post.
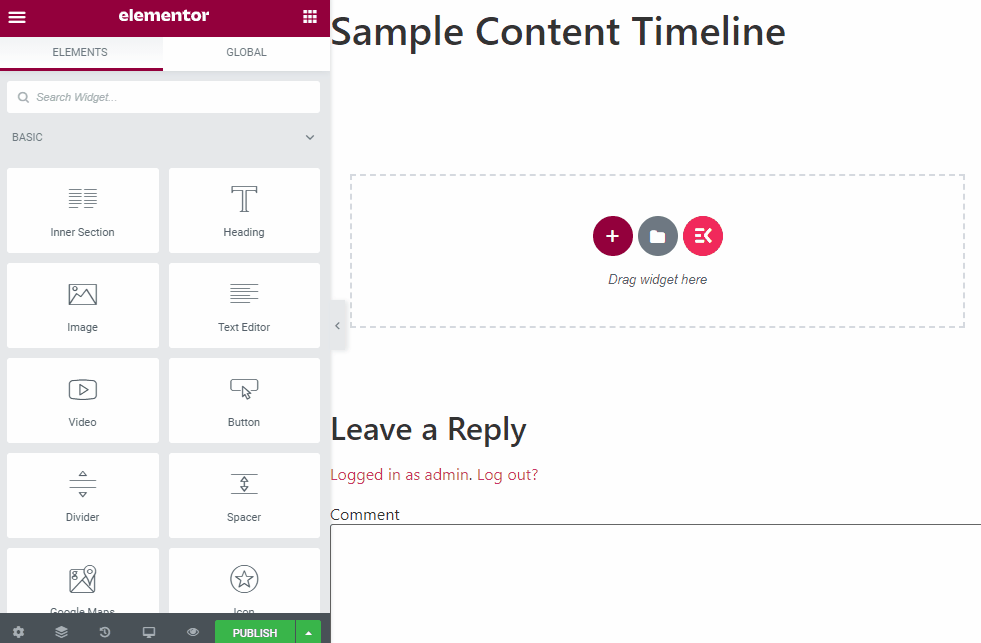
By default, there will be three timeline points. You may remove all of these and start creating your own timeline. Otherwise, you can also edit the contents of these existing points and add more points if required.
The next step is modifying the text, icon, or style of your content timeline.
Customizing Timeline Content
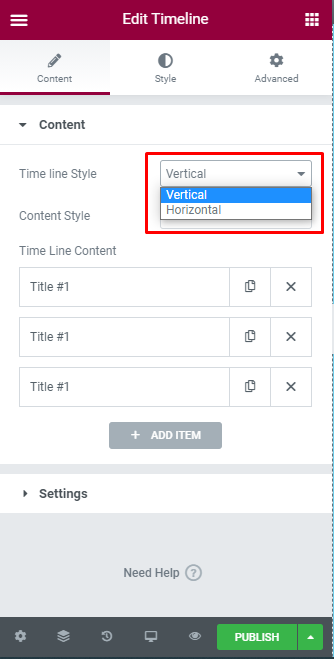
The “Content” tab allows you to customize timeline style, content style, timeline content, etc. You can modify multiple options from the content tab. Let’s have a look at those key options.
1. Timeline Style
This is the very first section of the Content tab. It allows you to choose either the vertical Elementor timeline or the horizontal Elementor timeline style. By default, the vertical style will be selected. You can change the style whenever you feel like doing it!
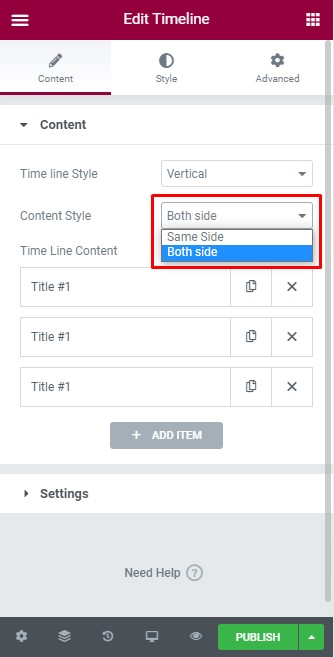
2. Content Style
The content style tab allows you to choose sides. You can display all of the content either on the same side or both.
The outlook of your content timeline is complete by now. In this section, you have to update the texts, images, or icons of the timeline.
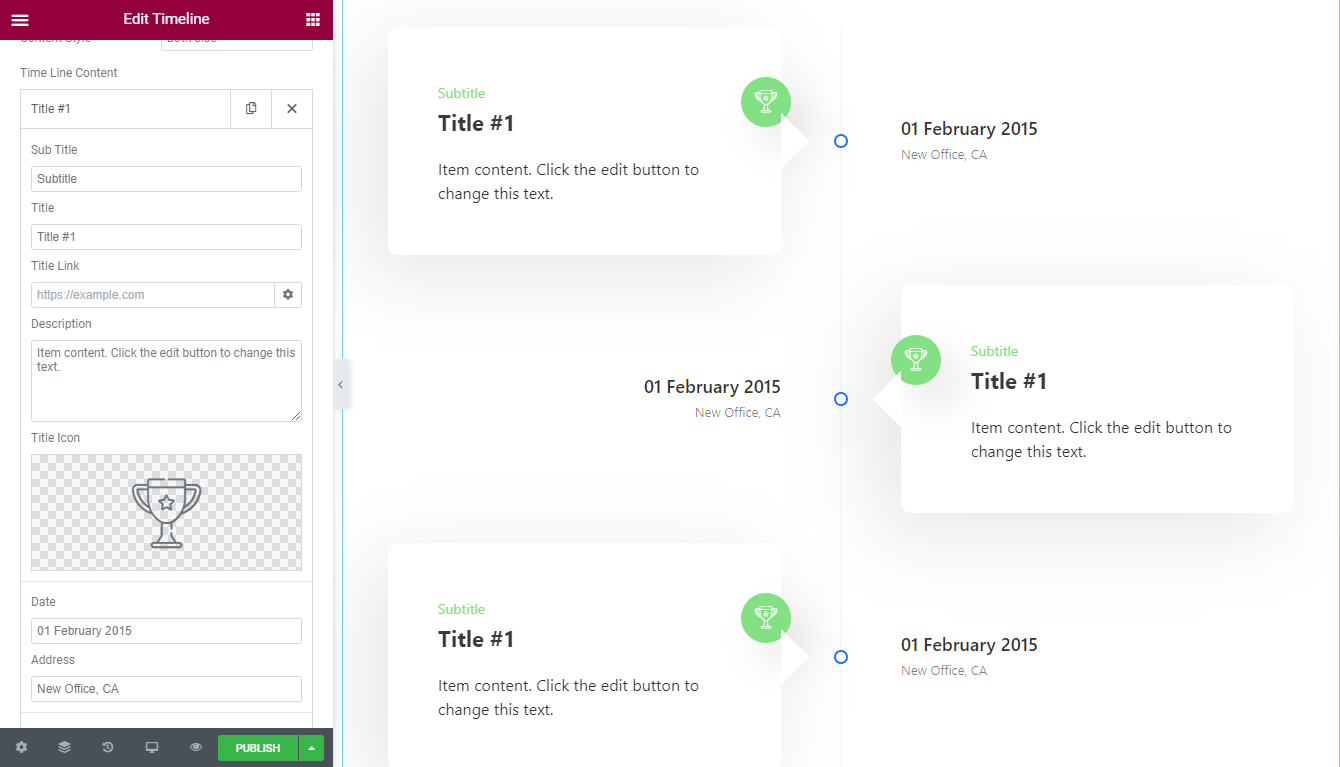
3. Timeline Content
The timeline content allows you to modify multiple options like title, description, link, date, address, icon, etc. You can enable this feature simply by clicking on the title name.
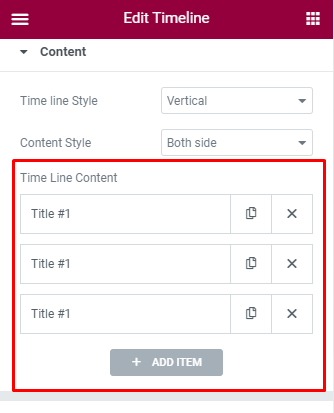
There will be three titles in default settings. You can either add or remove those titles. After clicking on the title, the content editing options will become visible to you.
In the timeline content section, you can modify the following options –
- Title
- Subtitle
- Title link
- Description
- Title icon
- Date
- Address
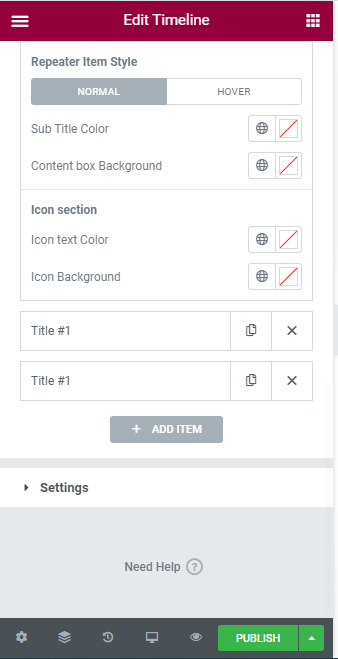
- Subtitle color
- Content box background
- Icon text color and
- Icon background
4. Repeater Item Style
In this section, you can modify your content’s color and background of the texts and icons. Most importantly, the hover style also can be changed from this section.
Kudos to the developers!
5. Animation Settings
In the settings option, you can change the icon and animation of both the date and address. This Elementor timeline widget allows you to choose multiple zooming styles, such as fading, zooming, bouncing, sliding, rotating, shaking, wobble, jello, roll-in, etc.

That’s all about customizing the content of your timeline. Now it’s time to add some styling to your content. Follow the next phase to get details about adding style.
Customize Timeline Style
In the style tab, you can customize your content style, line style, and container style. Scroll down to get a detailed overview of these features.
1. Content Tab:
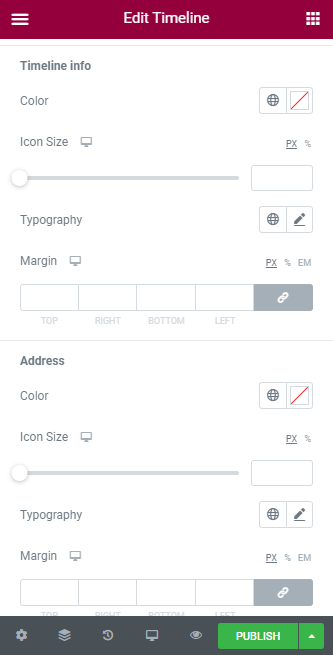
The content tab offers you numerous customization opportunities for your content. For example, you can control the alignment, padding, inner padding, border radius, text color, subtitle, timeline style, etc.
You can customize all of these settings for every platform, including desktop, tablet, and mobile versions. Check the images below to have a clear understanding of the features lying under the content tab.

Not only that! You can also modify multiple other options like text color, anchor text color, subtitle color, margin space, typography, round icon, etc. Both the icon and background color of this round icon can be modified from this section.

By now, we’ve tweaked multiple styles in your website text. However, the ElementsKit Elementor timeline widget can do even more!
You can also seamlessly modify the timeline bar color, icon size, margin, typography, addresses, etc.
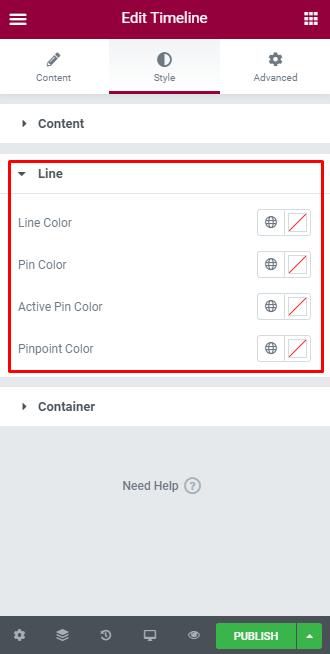
2. Line Tab
The line tab allows you to add four customization styles to your content timeline. These are –
- ● Line Color –change the horizontal or vertical Elementor timeline bar color
- ● Pin Color – change the color of your pin
- ● Active Pin Color – change the color of your activated pin color
- ● Pinpoint Color – changes the pinpoint color
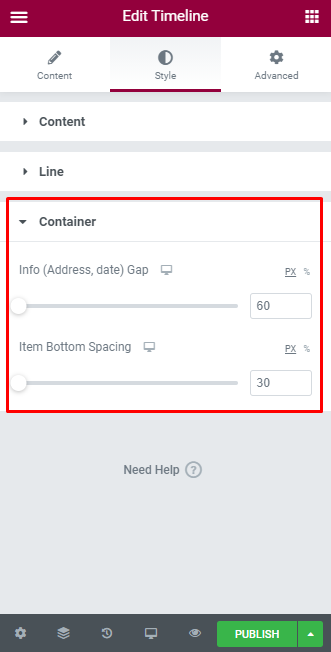
3. Container Tab
The container tab allows you to change the spacing of your content. It includes changing the address or date spacing and item bottom spacing.
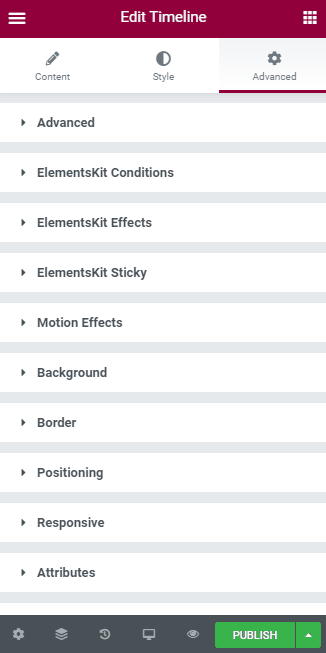
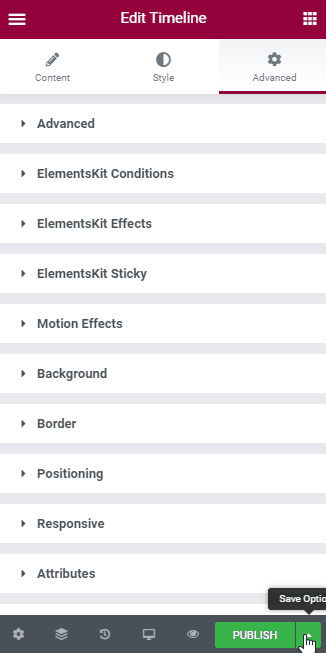
Advanced Customization
You can complete the customization of your website only by using the ‘content’ and ‘style’ tab. However, if you want to do some more advanced customization, you must use the advanced tab.
So, what will you get in our advanced tab?
On the advanced tab, you’ll get the ElementsKit condition, effects, sticky element, motion effects, responsiveness, background type, padding, and margin customization feature.
Let me introduce you to all of these features one by one.
- ElementsKit Conditions
By enabling the ElementsKit condition, you can publish conditional posts to your webpage. By the way, you can choose to display a particular part of your webpage via WordPress Elementor style tabs based on condition. You can apply different conditions based on login status, browser, day, time, etc.
- ElementsKit Effects
The ElementsKit effect feature allows you to add some interactive effects to your text. It allows you to add interactive timelines on WordPress. You can add four different effect styles, which are CSS, tilt, on-scroll, and mouse move.
● CSS Effects
The CSS feature allows you to add some CSS animation to your web texts. You can change the animation appearance style, animation speed, direction, and iteration count.
By enabling the CSS Transform feature, you can change four transformation settings like Translate, Rotate, Scale, and Skew option. In case anything goes wrong, you can click on the ‘Back to Defaults’ button, and everything will return to the previous phase.
- ● Tilt Effects
By enabling the tilt effects, you can change the MaxTilt functions, image scales, axis functions, etc.

- ● Scrolling Effects
On-scroll effects allow the webmaster to modify the Parallax style, transition, smoothness, offset settings, etc.

- ● Mouse Movement Effect
The mouse-move effects enable you to control the movement speed and on/off the animation in the editor mode.

- ● ElementsKit Sticky
Here goes the control of the sticky movement of your website element. You can choose the placement of your sticky content. You can choose from the Top, Bottom, Column, and Scroll-up options. You can tweak the sticky offset, background color, and sticky device from the layout.

- Motion Effects:
The motion effect feature enables you to select the entrance style, duration, and delay of your animation.
ElementsKit offers multiple entrance animation styles such as zooming, fading, bouncing, rotating, sliding, shaking, jello, wobbling, roll-in, etc.
- Background Effects
The advanced tab’s background option allows you to transform the background image in both normal and hover styles.
In the “Normal” background section, you can choose either to change the Classic or Gradient feature. The classic image feature enables the image and color-changing style along with the transition speeds too.
On the other hand, the gradient section offers the ability to change background type, color, location, angle, and liner or radial background type.

You can perform all of these actions on the hover options too.
- Border
We’ve already done a lot in the content section. Let’s tailor the text and box borders.
You can choose different border types such as solid, double, dotted, dashed, and groove. After selecting the border type, it’s time to select the radius. The updated ElementsKit allows for changing the radius style and box-shadow too!
You’ll also get all of these features in the Hover section too. By the way, you can also change the ‘Transition Duration’ in the hover tab.

- Positioning
Primarily, you can modify the ‘Width’ and ‘position’ of your content.
In the width section, you can keep the default width or change it to full width, inline, auto, or custom section. You can also choose the vertical alignment too.
After that, it’s time to tweak the position section. Rather than the default option, you can change either the ‘Absolute’ or ‘Fixed’ option. Whichever you choose, the subsection will be similar.
For instance, you will get horizontal and vertical orientation with offset modification in pixels.
Caution: Don’t use the custom positioning feature unless you need it badly. Because it affects the responsiveness of your site. Even if you do, try not to use it too frequently.
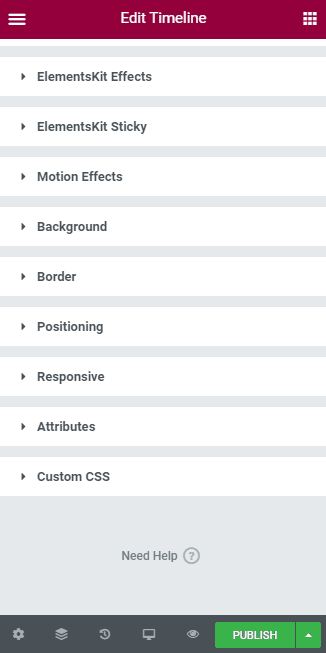
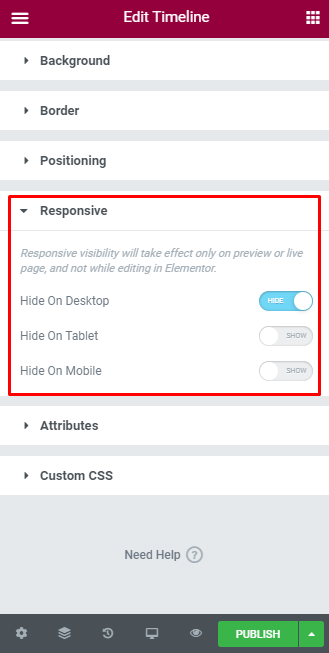
- Responsive
The responsive tab allows you to choose the appearance of your elements. You can change the settings in every platform, such as Desktop, Tablet, and mobile sections.
- Custom CSS
Just like the name indicates, you can insert custom CSS into your post via this feature. However, you’ll need the ElementsKit Pro version to insert custom CSS or Attributes in your webpage.
That’s all you’ll get in the ‘Content Timeline’ widget of ElementsKit – All in One Addon for Elementor Page Builder.
Why Should You Use the Content Timeline by ElementsKit?
Okay! I hope you’ve gone through all of our features in the previous section. So, should you use ElementsKit or stick with the pen and paper traditional method?
Well, I think you must use the Content Timeline by ElementsKit. Let’s focus on some primary reasons behind using this product.
- User-friendly
You don’t need any coding or designing skills to create a content timeline with ElementsKit. Thus, it becomes completely user-friendly.
- Time-saving
Creating a new timeline and customizing manually is a time-consuming process. Hopefully, this multi-purpose plugin allows you to create or customize a timeline within a few minutes.
- Built-in layouts
ElementsKit has multiple built-in timeline styles in it. If you are in an emergency and don’t have time to design a timeline, we’ve got you covered. Simply choose one of those built-in layouts, customize the texts, and publish!
- Advanced Tweaking
The timeline module allows you to make some advanced tweaking to create an easier and eye-catching timeline for your website. We’ve already discussed the advanced tweaking feature in the “Advanced Customization” section.
- Fast and Responsive
The Timeline module of ElementsKit is extremely lightweight and loads fast. Being a responsive product, it also fits in any device with regard to the screen size.
Things to Add in a Content Timeline
Creating a timeline isn’t a big deal. But, building a resourceful and eye-catchy timeline is quite a creative task!
Well, adding the following options will make your timeline will make your project more resourceful and satisfy all of your queries. Let’s have a quick look at those options that might be included in your timeline.
- Date
Can you imagine a timeline without any date?
Nope!
That’s why you must add appropriate dates in your content timeline. Otherwise, it will be just a waste of time. A timeline without a date holds no value to its audiences.
- Relevant Headline
Don’t ever forget to name your timeline. A proper headline allows the users to understand the purpose of your timeline quickly.
- Graphical Icon
Using some striking illustrated images, icons, or other graphical elements will make your timeline vivid and highly appealing.
- Design
Choose an eye-catching design that matches your timeline presentation. It adds clarity and simplifies the perception.
- Short description
The short descriptions allow the users to understand the milestones of your timeline project.
Final Words
The content timeline is the perfect element to represent the milestones of a project. Though it covers a long time interval, don’t clutter it with excessive description. Instead, try to keep it simple by using images, short descriptions, etc.
This Elementor timeline widget can significantly help users create and customize a timeline without any hassle.
If you still have any questions crossing your mind about the Elementor content timeline, post your query in the comment section. I will respond to your query ASAP!
It’s time to start creating your content timeline on your WordPress site!
Leave a Reply