When it comes to selling WooCommerce store products, one of the challenges you will encounter is your store’s inventory management. Messing up with WooCommerce inventory management will not only impact your store’s sales but also tarnish your brand’s reputation.
So, you can’t afford to downplay your store’s inventory management. But it’s also crucial to find fruitful tips for WooCommerce inventory management. Fret not! This write-up is all about WooCommerce inventory management.
In this post, I will share practical and proven WooCommerce inventory management tips. Hopefully, these tips will smoothen all the essential steps of your store’s inventory management, including stocking and selling.
Why WooCommerce Inventory Management is Essential?
Inventory is a vital part of any e-commerce store, including WooCommerce stores. However, the positive fruit of inventory can be experienced only if it’s managed well. With proper inventory management, your WooCommerce store will function better, generating higher profits for you.
When you have exact counts and records of your goods, not only can you sell smoothly but also plan well how to set up your store. Let’s get a glimpse at the reasons why you should emphasize your WooCommerce inventory management —
- Makes you aware of what items are available in stock, thus letting you deal with your customers better.
- Lets you display the quantity of products available to your customers or show “out-of-stock” if a particular product is unavailable.
- Helps you forecast product needs by letting you estimate the quantity of products available in stock and order accordingly.
- Enables you to minimize loss as it shows the inventory products that don’t sell well.
- Leaves a strong impact on your WooCommerce store’s overall sales, generating higher profits.
Managing WooCommerce Inventory – The Effective Way:
The best part of WooCommerce inventory management is you can do it right from the built-in inventory tool of WooCommerce.
The tool lets you handle everything related to inventory management— tracking available products, orders, shipments, hiding out-of-stock products, updating stock status, etc.
To further enhance efficiency, many store owners utilize warehouse inventory receiving software, which automates stock adjustments and minimizes manual errors when updating inventory levels after shipments arrive.
Right at the outset, let’s check out how to set up WooCommerce inventory efficaciously–
Setting up WooCommerce Inventory:
First up, make sure to enable inventory tracking options from the WordPress dashboard. Then, proceed to install WooCommerce on your WordPress website.
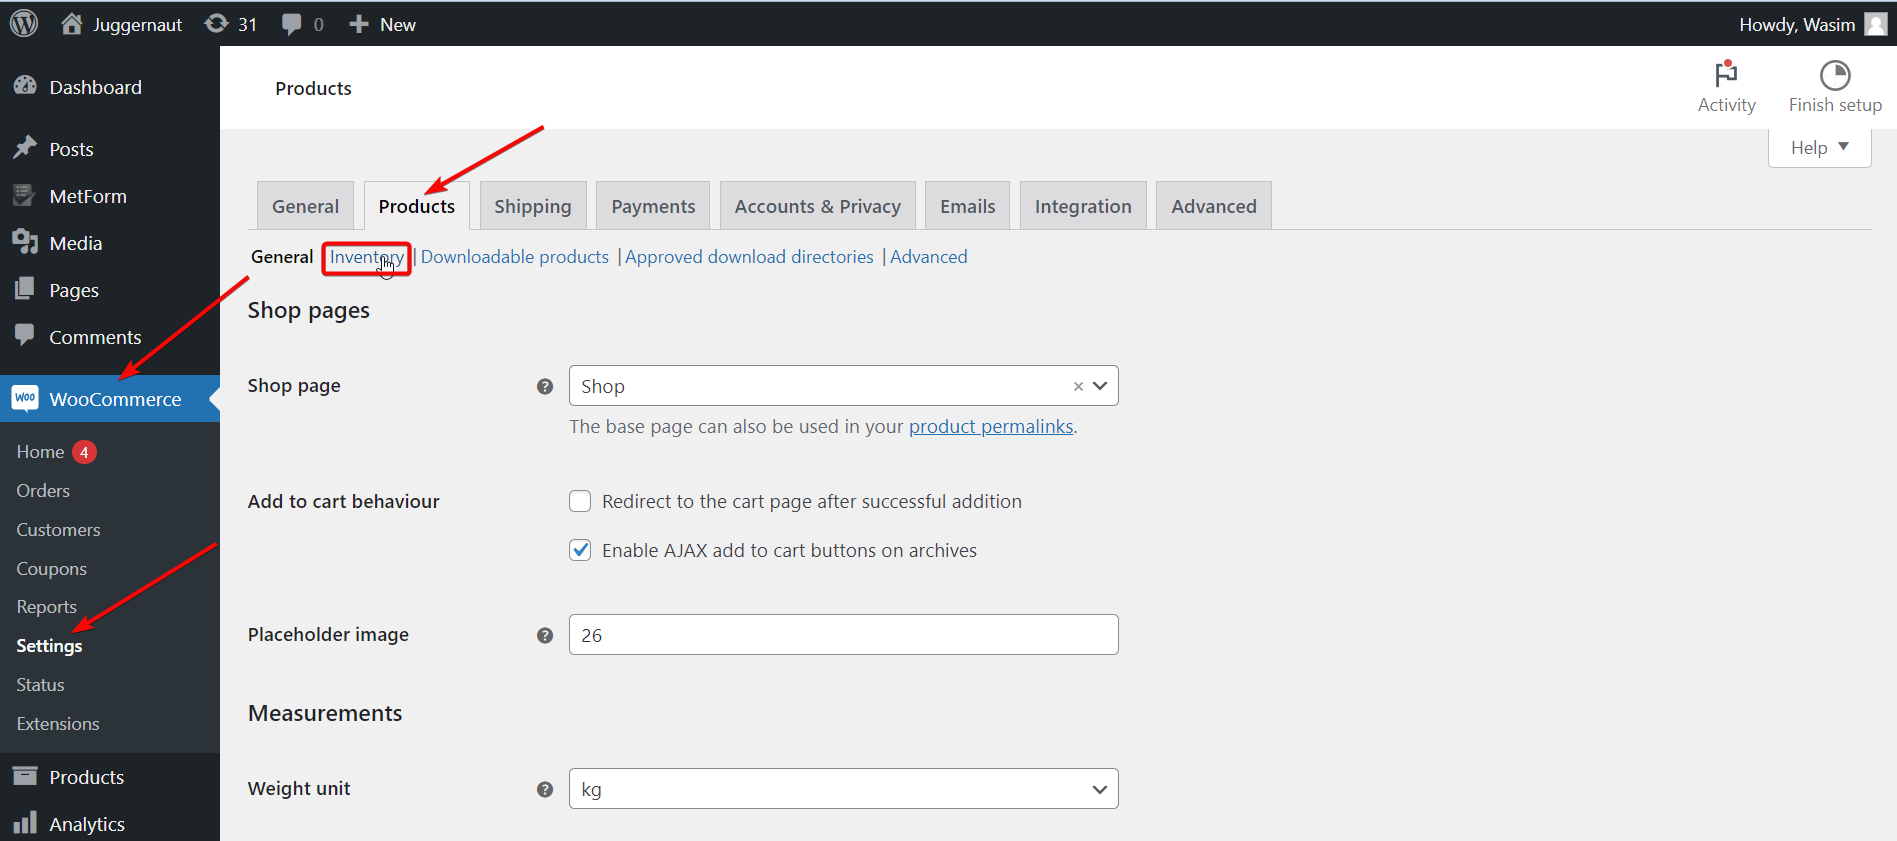
Navigate to the sidebar on the left and hover over the WooCommerce menu appearing on the bar. Click “Settings” from the menu and move to the Settings page. Click the “Products” tab from a list of tabs and then click “Inventory” showing up as a link.
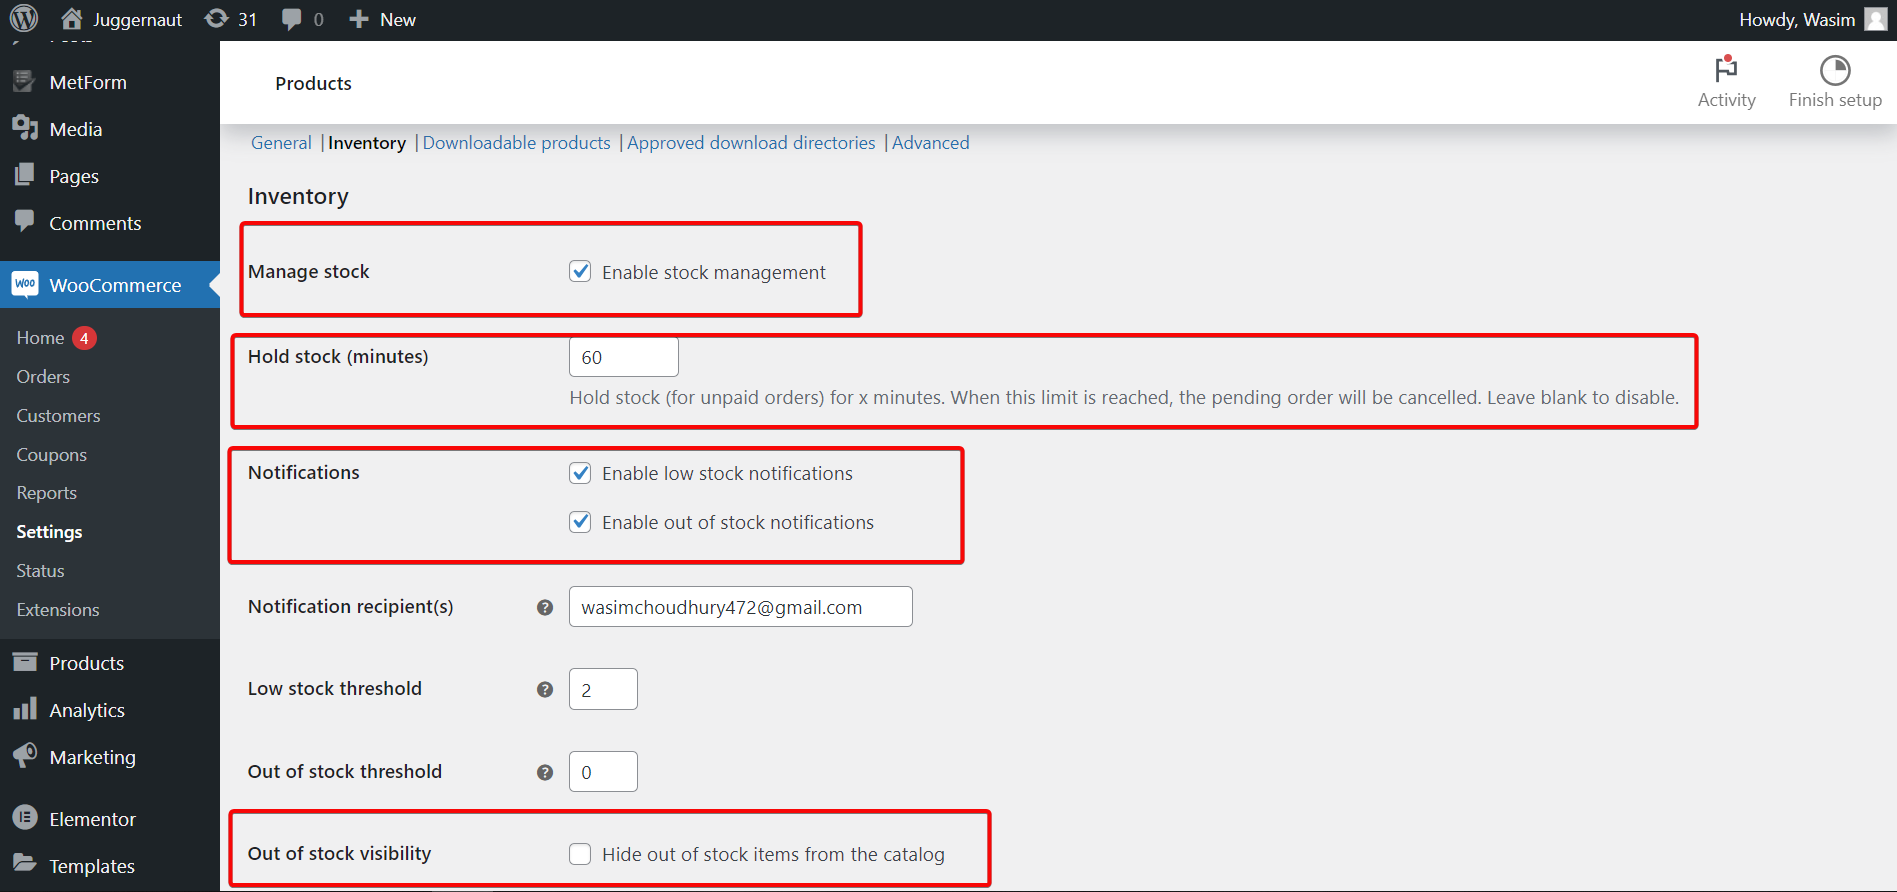
First things first, tick the item labeled “Enable stock management“. With this feature enabled, WooCommerce will automatically reduce the stock available once sales take place. If you run out of products, WooCommerce will modify the stock status.
However, if you want to modify the stock status manually, leave the feature unchecked.
Apart from that, you can also control other setting options too —
Hold Stock: This option will let you set a time for an unpaid order up to which the order is held for the buyer. Once the time runs out with payment remaining unclear, the order is automatically canceled.
Out-of-Stock Visibility: With this option, you can hide a particular product from the display if it gets exhausted or runs out of stock.
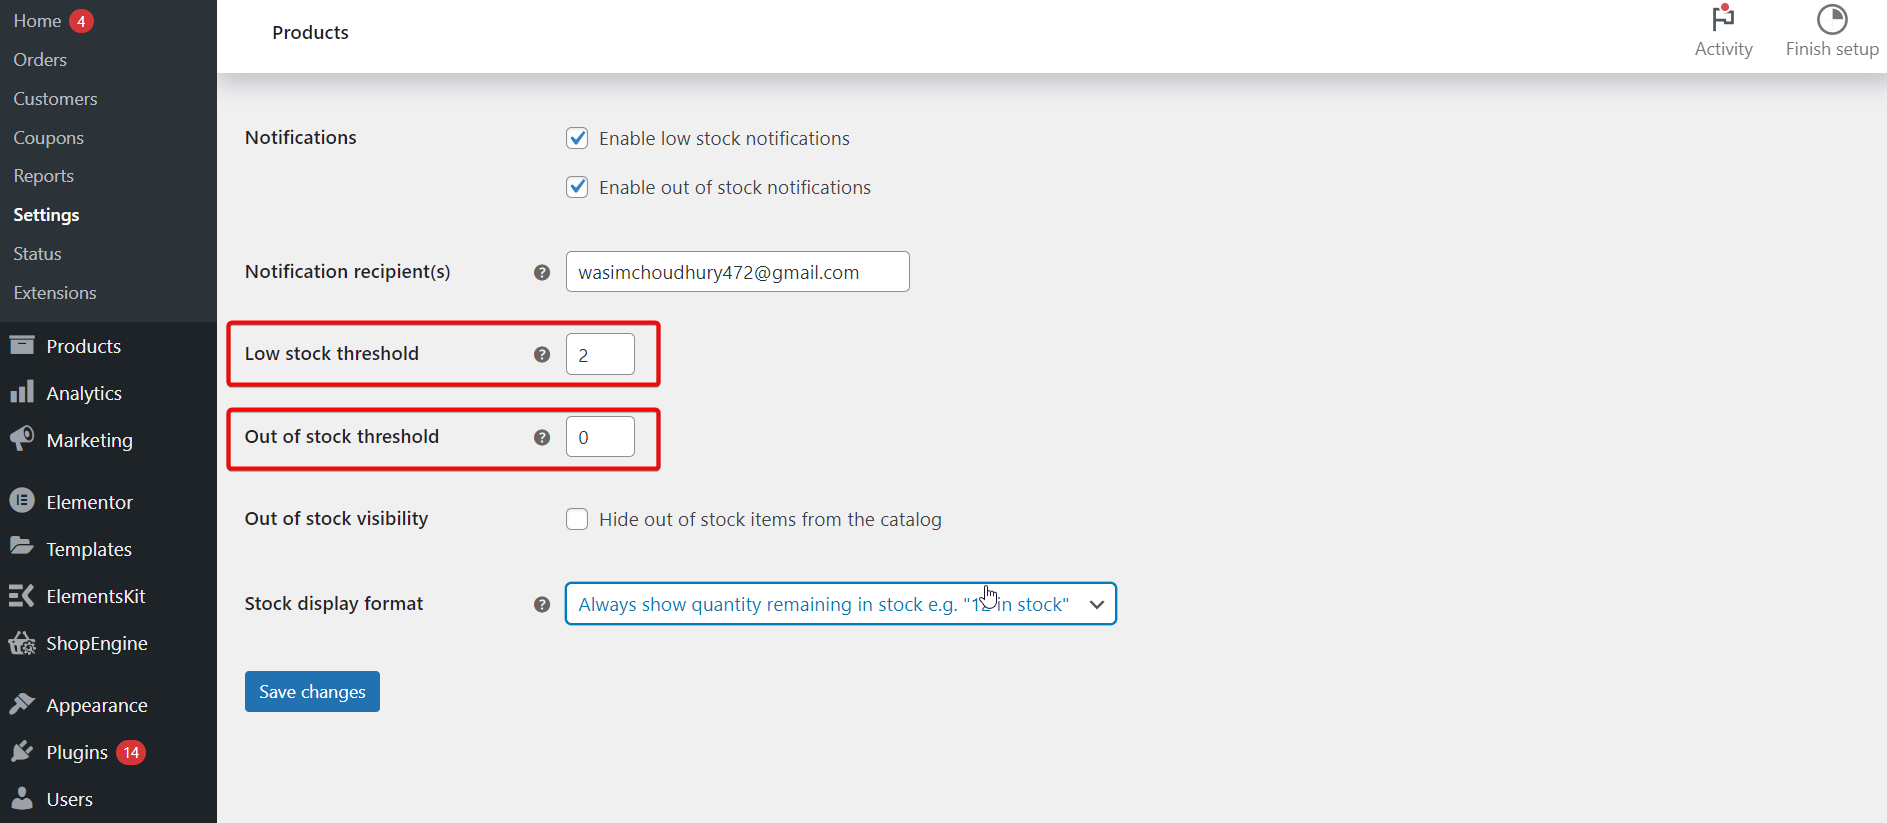
Notifications: This setting option is a cool one through which you can send an email to targeted recipients when a product’s stock is low or exhausted. You can also have the freedom to set a low and out-of-stock threshold.
Stock Display Format: With this option, you can choose to display how much stock you have available. You can also activate the display when stock is low or choose to entirely deactivate the display.
In the case of making stock-by-stock changes, you have to make use of the specific product stock settings. For that, follow the steps below —
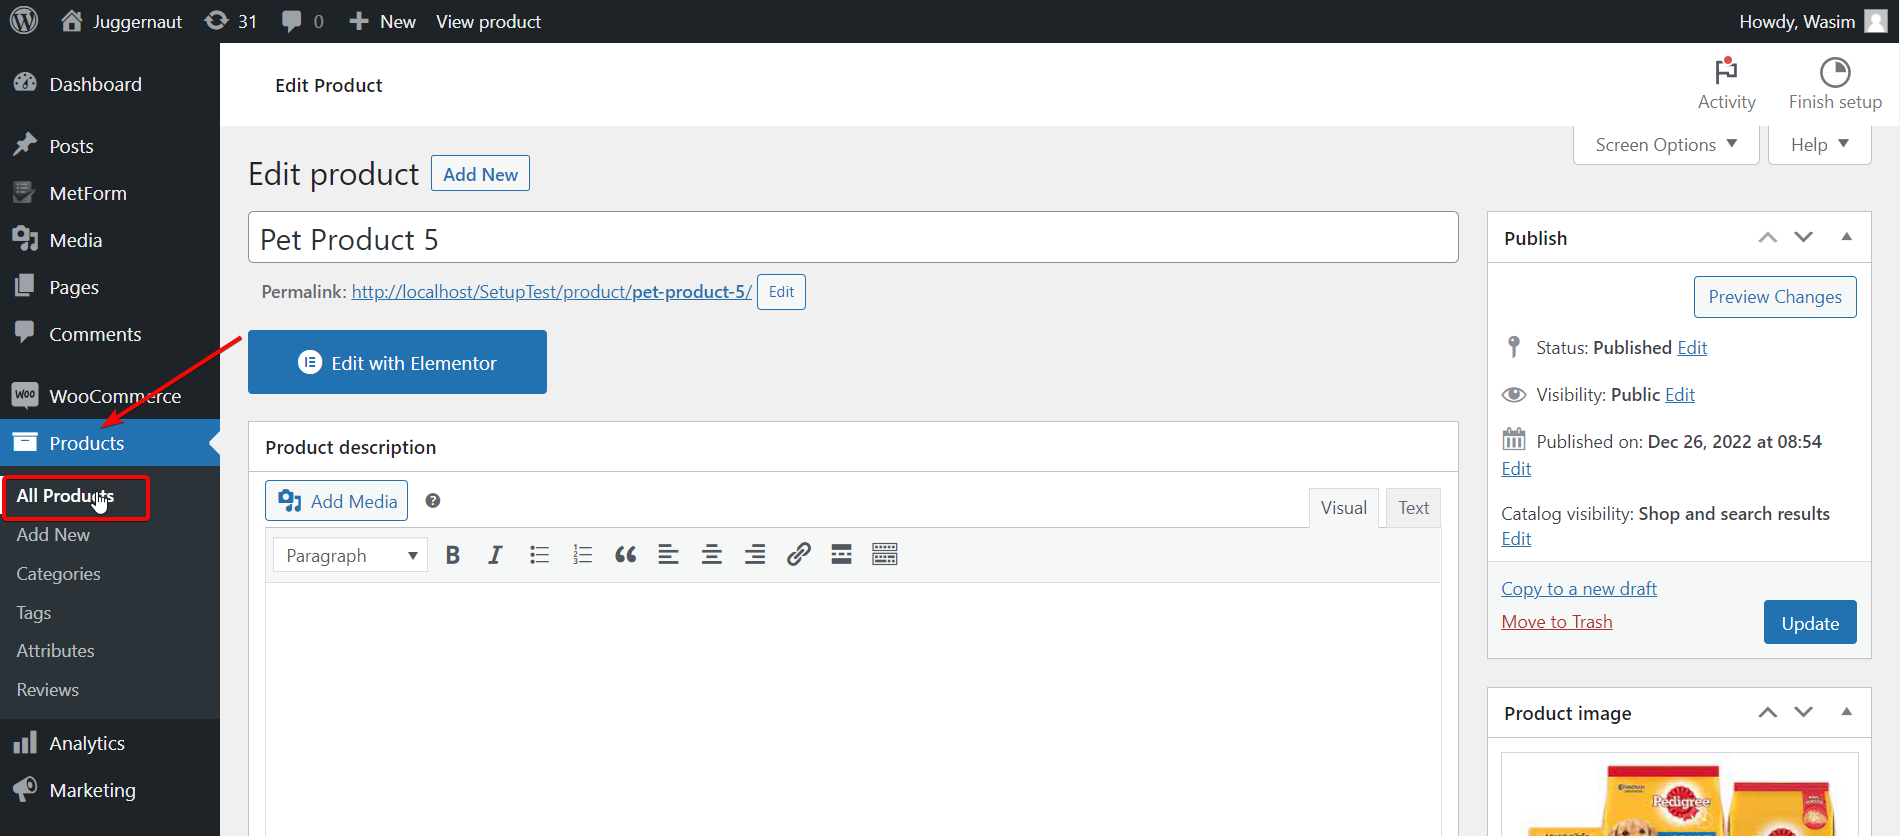
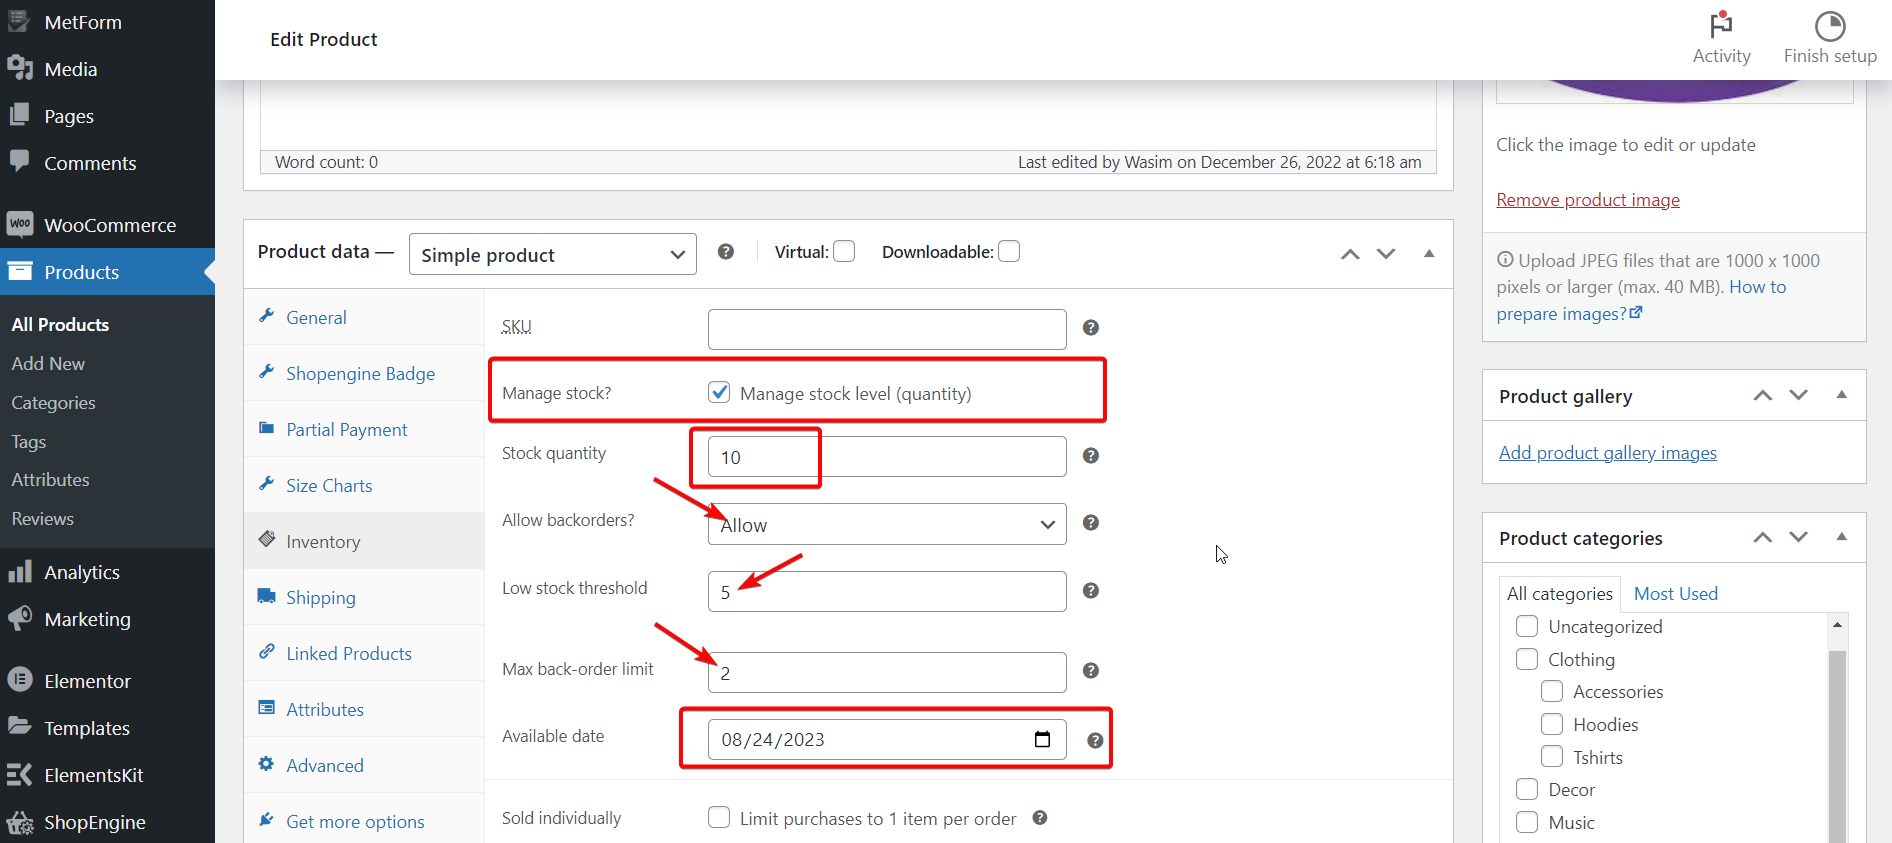
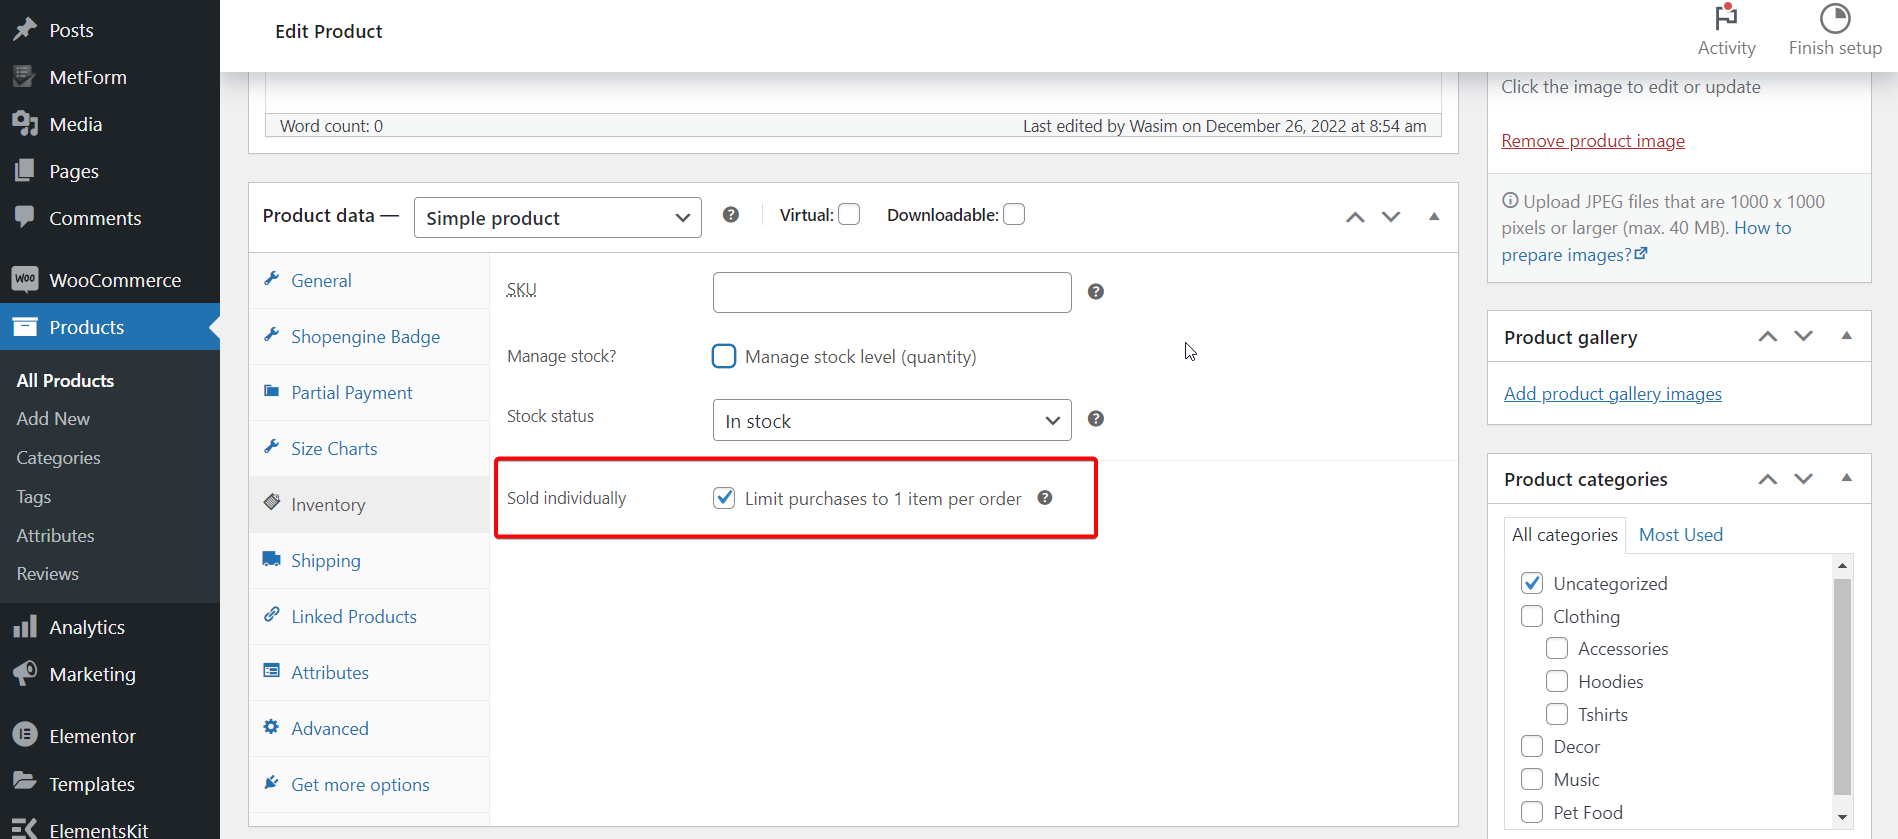
Products > All Products and click the Edit button against any product. Move to the Product data box and click Inventory.
After that, click on the “Manage stock level (quantity)” checkbox to manage individual stock settings. Let’s have a glimpse at each of the stock settings —
- SKU – Set a product SKU number first.
- Stock quantity – Manually set the amount of stock.
- Allow backorders – Let customers order products when they’re stocked out.
- Low stock threshold – Allows you to manually alter the low stock threshold set on the global settings screen for this product.
- Sold individually – Let customers only buy one product at once.

Keeping the WooCommerce Inventory Updated:
To keep the inventory updated, you must ensure the correct settings of the store’s inventory. With the right settings, WooCommerce will automatically slash products in stock once a sale takes place.
Turn on “Enable stock management” in WooCommerce > Settings > Product > Inventory to start making inventory settings. After that, you can turn on Enable “Manage stock level (quantity)” at the product level in the products’ Edit pages and set the stock level for each product.
WooCommerce has the feature to automatically slash stock once you sell a product. But if any shipment comes in, it can’t raise the stock as it doesn’t have any built-in functionality for product increment. So, you have to increase the number of products by making manual updates.
However, you do have the option to make use of any functional addon to increment stock automatically. As a matter of fact, WooCommerce can automatically set your products to low or out-of-stock status appropriately.
Managing Stock Status:
To manage your stock status, go to WooCommerce > Settings > Product > Inventory page. From there, you can set the low and out-of-stock threshold, modify whether out-of-stock items show up in the store, and how stock status appears in your store.
Additionally, on any product’s Edit screen, you can set a separate low stock threshold and update yourself on whether it’s in stock. WooCommerce will manage this provided you have the Enable stock management at product level setting ticked.
If you do not have the global Enable stock management setting on, you will only be able to update whether products are in stock or out of stock. WooCommerce won’t do it automatically.
Moreover, you can also alter the stock status of variations for variable products. Once you have set up variations, you can go to each one on the “Variations” tab to modify the stock number, status, and low stock threshold.
More WooCommerce Stock Management Tools:
Apart from the stock management tools discussed above, WooCommerce offers some more stock management tools. Let’s check out them —
Bulk Management
Updating stock status and turning on stock management manually will take an abundance of time. To save you valuable time, there are built-in bulk editing features.
To avail of this smashing feature, go to the Products > All Products page. Next up, click the checkboxes to select multiple products or click the top checkbox to like them all. Alter the Bulk actions dropdown to Edit and click Apply.
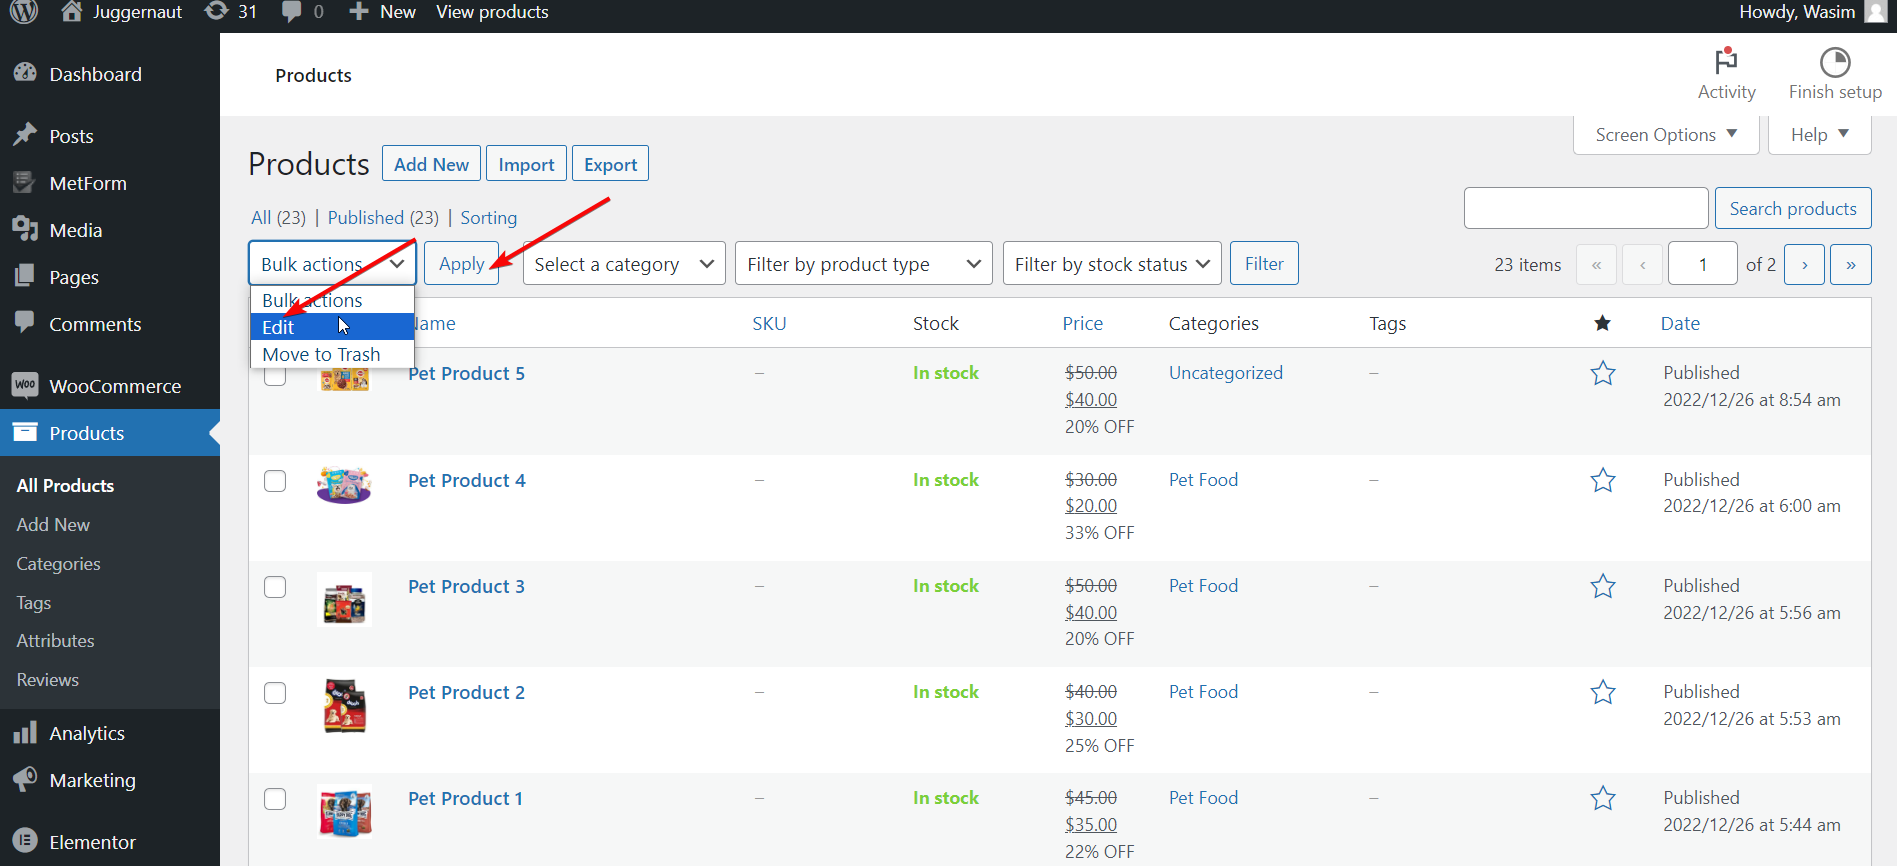
A bulk edit menu will appear, click the dropdown menu, select Manage Stock, and switch it to Yes. Now, all your selected products will have individual stock management enabled.
Once enabled, you can modify the Stock qty setting in bulk, altering it to an exact number or increasing or decreasing by a certain amount.
Low Stock Threshold
As part of WooCommerce inventory management, you can set the low stock threshold or cap in two places. From WooCommerce > Settings > Product > Inventory, you can alter it on a global scale.
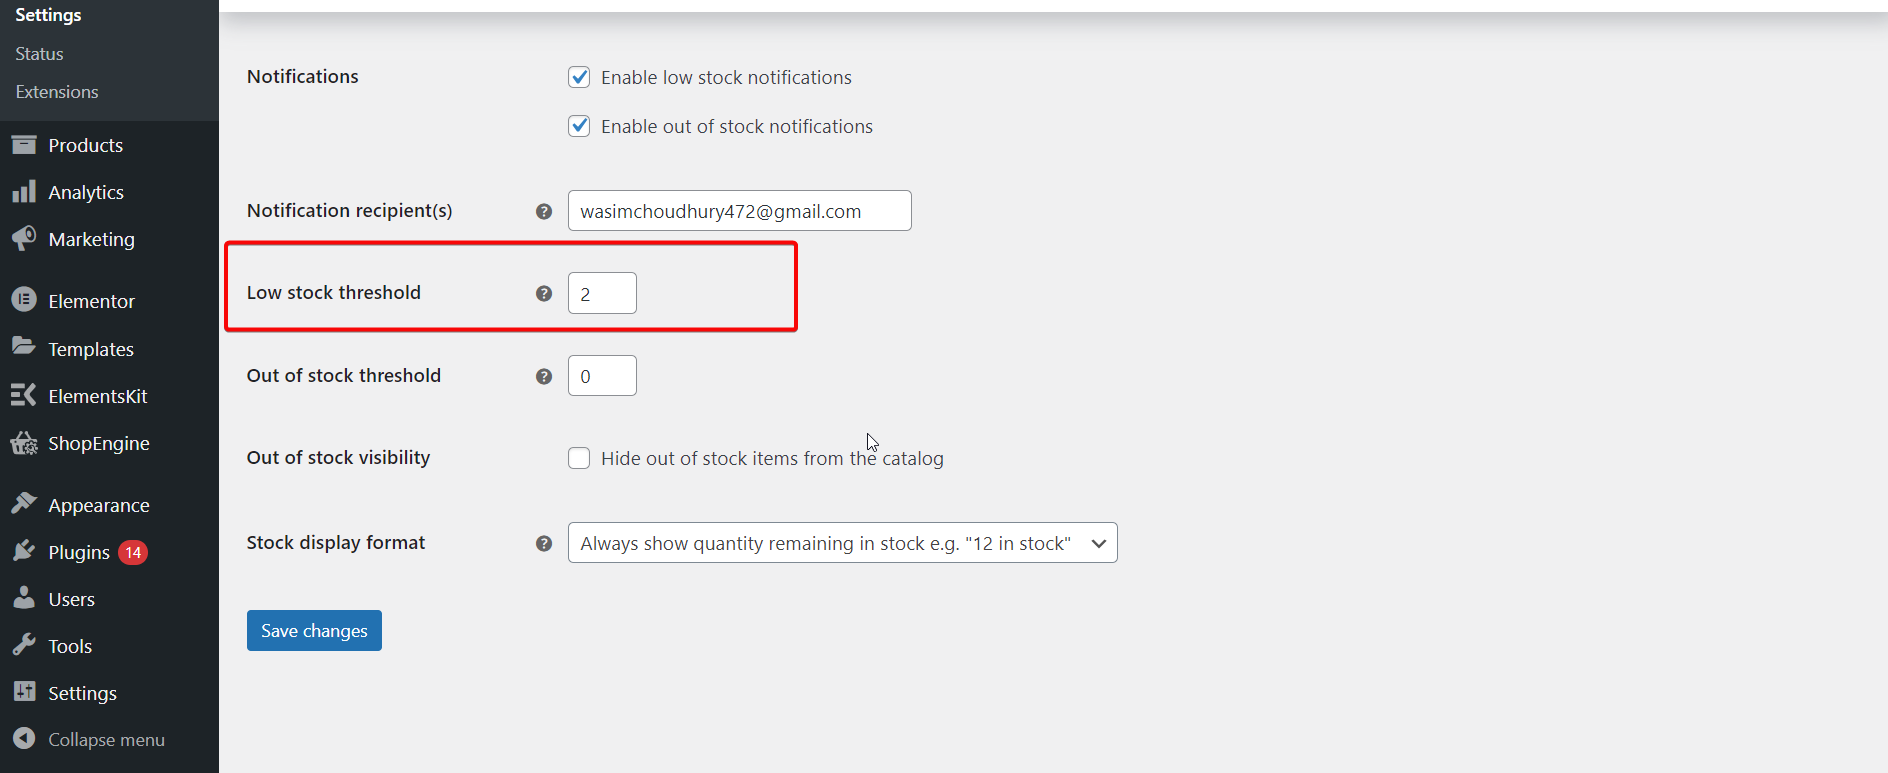
Additionally, you can also set whether stock numbers are shown to customers at low stock numbers, and who gets emailed when a product reaches this threshold.
On an individual product basis, you can head over to its Edit screen and scroll down to the Inventory tab. Make sure Manage stock is ticked, and then tune up the Low stock threshold.
Sold Individually
If your aim is to only sell one product at a time, go to the Inventory screen on a product’s Edit page. Make sure to enable the Sold individually checkbox. However, this does not require turning on stock management at the product level.
As a matter of fact, you can also turn on this setting through the bulk editor.
Choosing a Product Type
WooCommerce classifies its products into 4 types by default. Simple, Variable, Grouped, and External/Affiliate products. Let’s dive in…
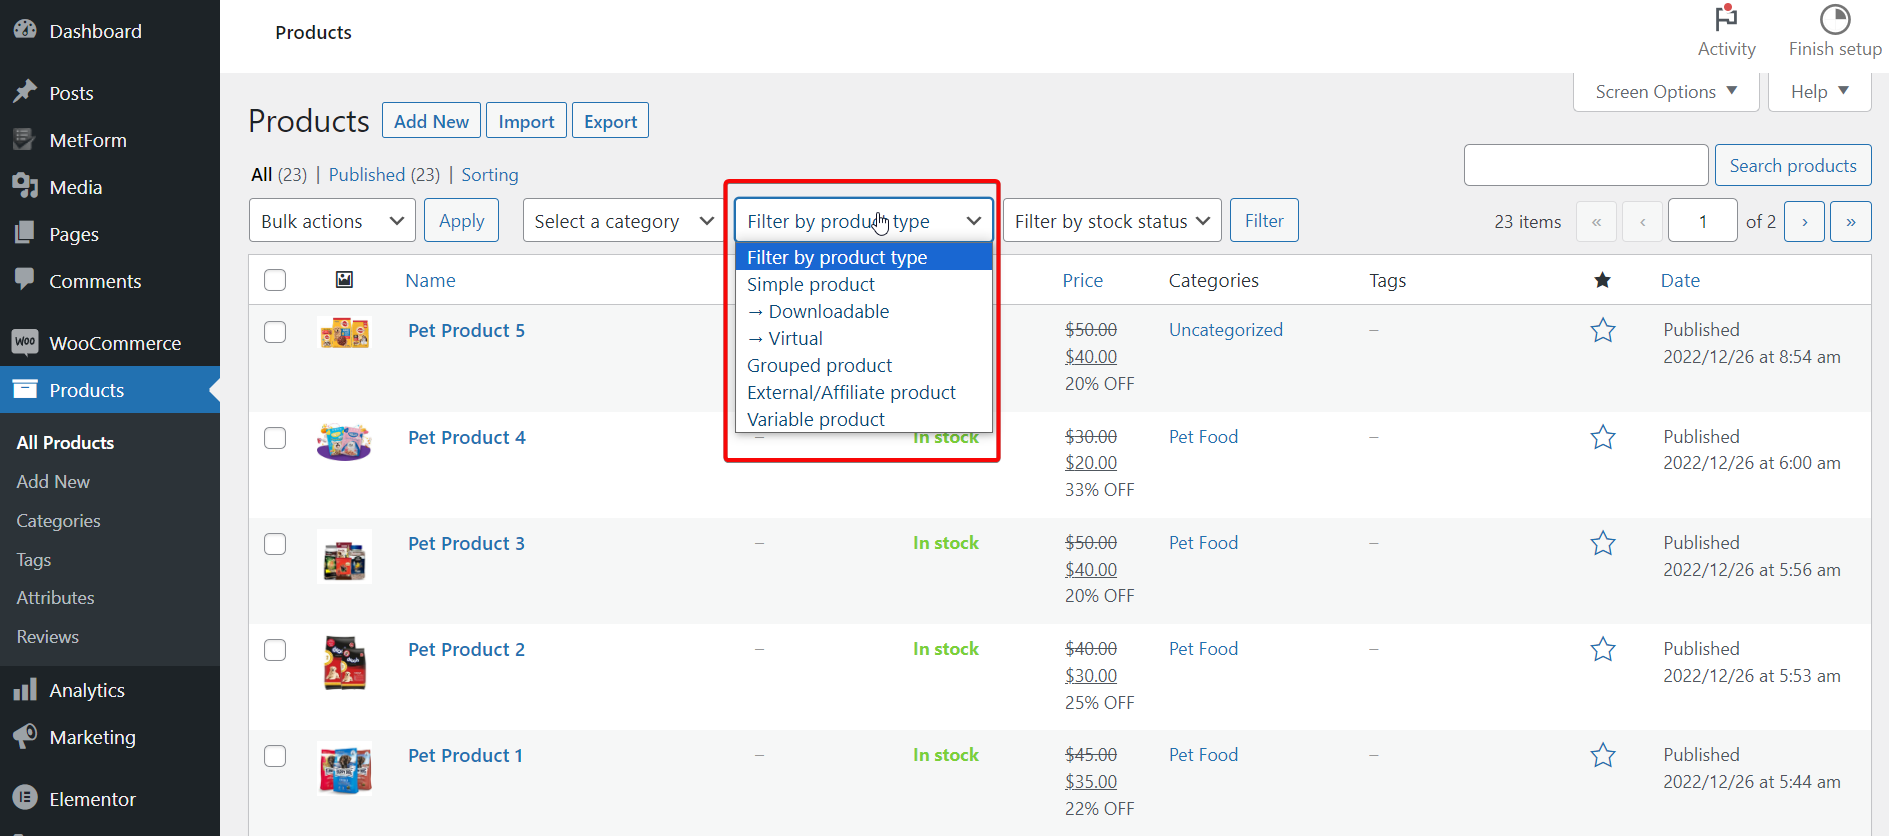
- Simple products – Simple products imply the most basic type of products available in WooCommerce. These are individual and shippable products with no unique variations or groupings.
- Variable products – Identical in function to simple products, but variable products contain different variations in color and size. All these variations are mainly of one parent product with its stock number and SKU.
- Grouped products– Grouped products are product types that are sold in a bundle or collection. This bundle consists of products that can be picked up individually. So, if you run out of stock, the bundle is no longer available. Hence, it’s vital to keep track of such things with the tools WooCommerce offers. This is also separate from upsells and cross-sells.
- External/affiliate products – These are entirely not your own products. Instead, you take a commission off them, and part of the share goes to someone else. They are usually sold on a particular website.
Aside from that, there are also downloadable products that eliminate the shipping aspect and sell virtual items in your store. The upside of this type of product is that you don’t have to worry about stock tracking.
How to View and Analyze Stock Status Report?
WooCommerce displays stacks of analytics and reports, and these can be leveraged to keep a better eye on your stocks.
Visit your WooCommerce Dashboard > Analytics > Stock page. The page will display an overview of the number of units and in-stock status. From there, click Product/Variation, SKU, Status, or Stock to sort the status report by these values. You can click again to undo or reverse the order.
Use the Show menu to narrow it down to only products of certain stock status. For example, you can find instantly which products are out of stock or on backorder.
It’s Your Turn:
I have walked you through the ins and outs of WooCommerce inventory management. By following the guidelines shown above, you can set up your WooCommerce inventory, manage your stock status, and update inventory too.
The ball is in your court now, so decide for yourself if you would like to manage and organize your WooCommerce store inventory optimally. After all, that would definitely give a boost to the overall sales of your products!
Additionally, if you want to extend your WooCommerce store’s functionalities holistically and improve its customer retention, avail of ShopEngine, the ultimate WooCommerce solution for Elementor.

Leave a Reply