

 Korean
  English
  German
  Spanish
  Italian
  French
  Danish
  Portuguese
  Swedish
  Polish
  Japanese
 ShopEngine으로 WooCommerce 보관 페이지를 만드는 방법 #
WooCommerce 아카이브 페이지 특정 가격, 카테고리 색상, 태그 등으로 제품 목록을 구성하게 됩니다. 여기에서 지정된 일부 항목을 얻을 수 있습니다. ShopEngine 아카이브 카테고리를 포함한 위젯, 아카이브 제목, 아카이브 수, 아카이브 제품., 제품 필터 등. 이러한 위젯을 사용하면 원하는 방식으로 아카이브 페이지를 쉽게 정렬할 수 있습니다.
Just follow the step-by-step process to create & beautify your Archive page with ShopEngine, WooCommerce archive page builder:
Quick Overview
This guide will present creating a WooCommerce product archive page using ShopEngine’s provided archive widgets. This plugin supports Elementor’s drag-and-drop interface that facilitates beginners who have zero to minor technical expertise.
Plugins needed: ShopEngine, WooCommerce, and Elementor.
After installing these plugins, you need to enable the archive widgets. Then you need to create and customize an archive page template with ShopEngine’s archive widgets.
Step 1: Create an WooCommerce Product Archive Page Template #
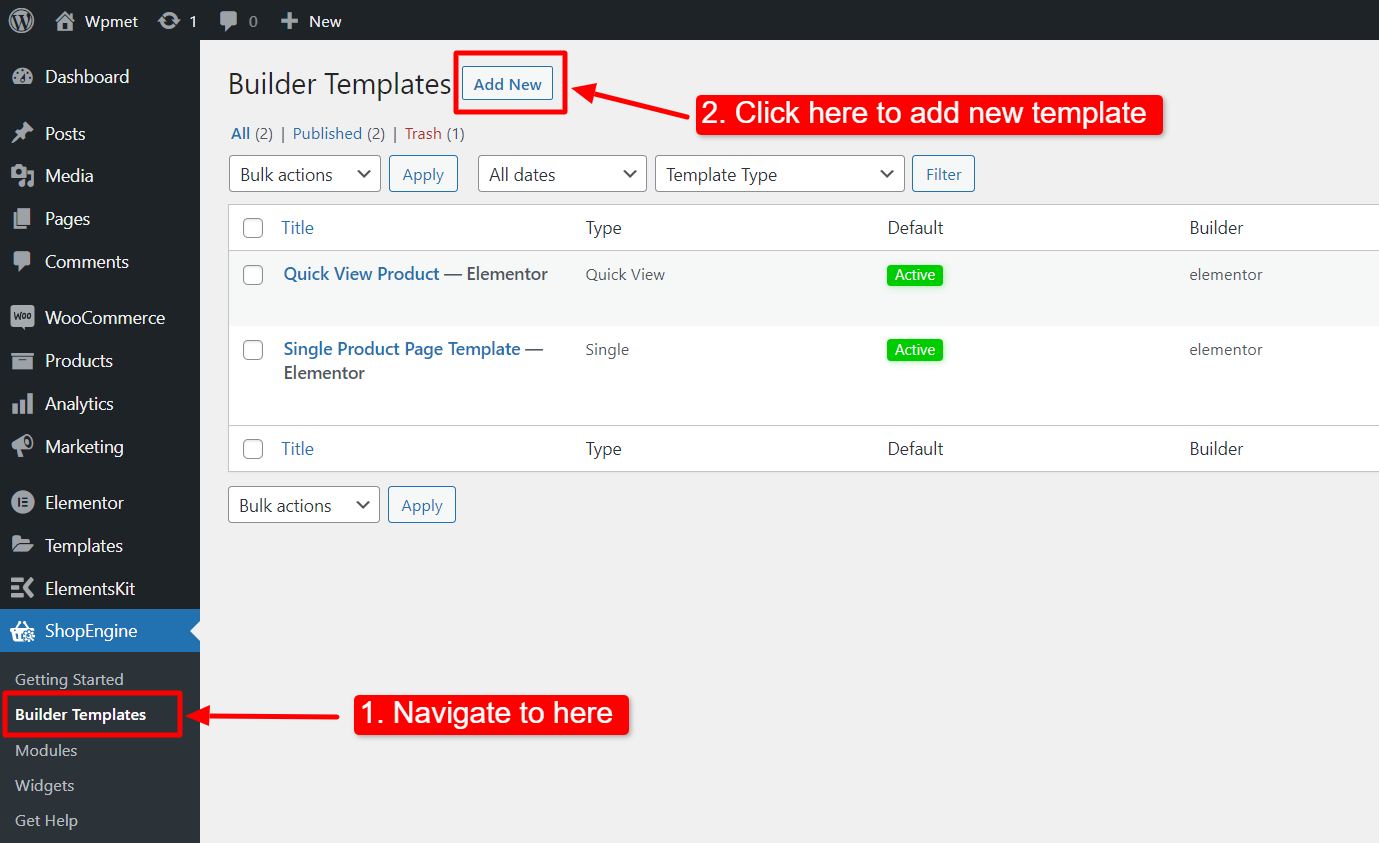
- 로 이동 ShopEngine-> 템플릿 WordPress 대시보드에서.
- 다음을 클릭하세요. 새로운 걸 더하다 버튼을 눌러 새 템플릿을 만듭니다.
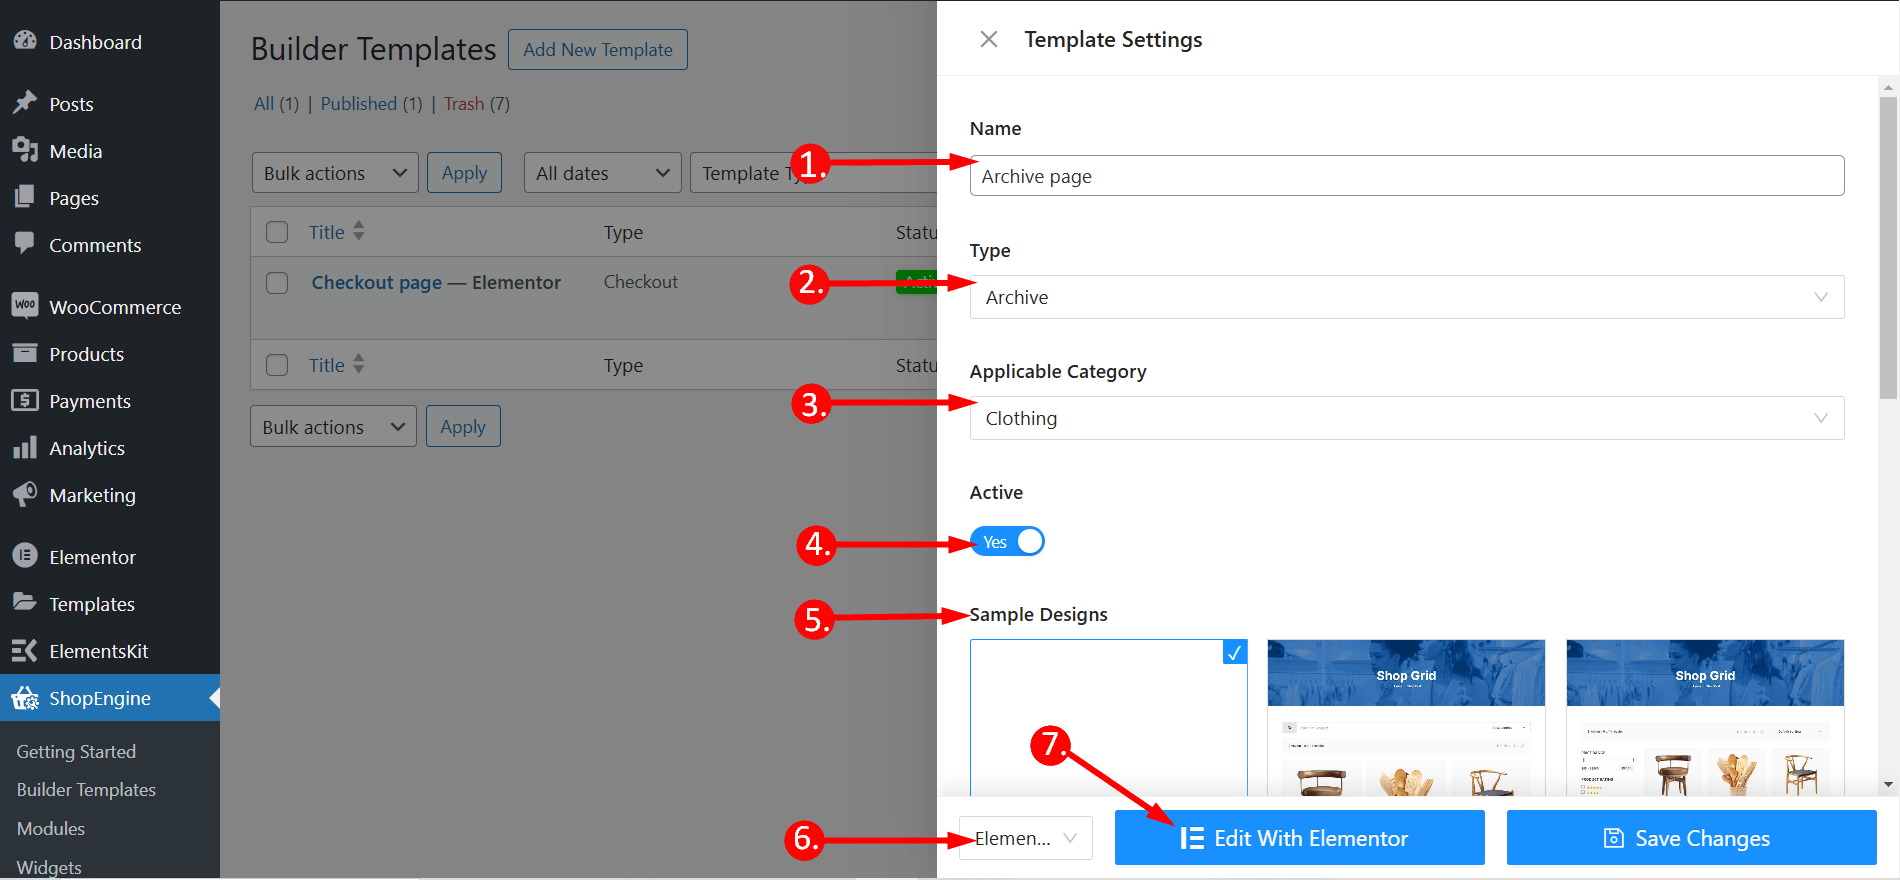
그 후 템플릿 설정을 위해 캔버스 외부 창이 표시됩니다. 템플릿 설정에서,
- 다음을 입력하세요. 템플릿 이름.
- 템플릿 유형을 설정합니다. 보관소.
- 선택 해당 카테고리 제품용. (선택사항. 단, 카테고리를 선택하실 경우 일반상품은 물론 다른 카테고리의 상품에 대해서도 별도의 템플릿을 생성하셔야 합니다.)
- 할 수 있게 하다 기본값으로 설정 템플릿을 다음과 같이 설정하려면 기본.
- 에서 디자인을 선택하세요. 사용 가능한 템플릿 또는 디자인을 창조하다 단일 제품 페이지 위젯을 사용하여 직접 처음부터 생성된 템플릿을 보여드리겠습니다.
- 주어진 옵션에서 템플릿 편집에 사용할 편집기를 선택하십시오: 엘레멘터 그리고 구텐베르크.
- 이제 클릭하세요 Edit with Elementor/Gutenberg or Save changes.
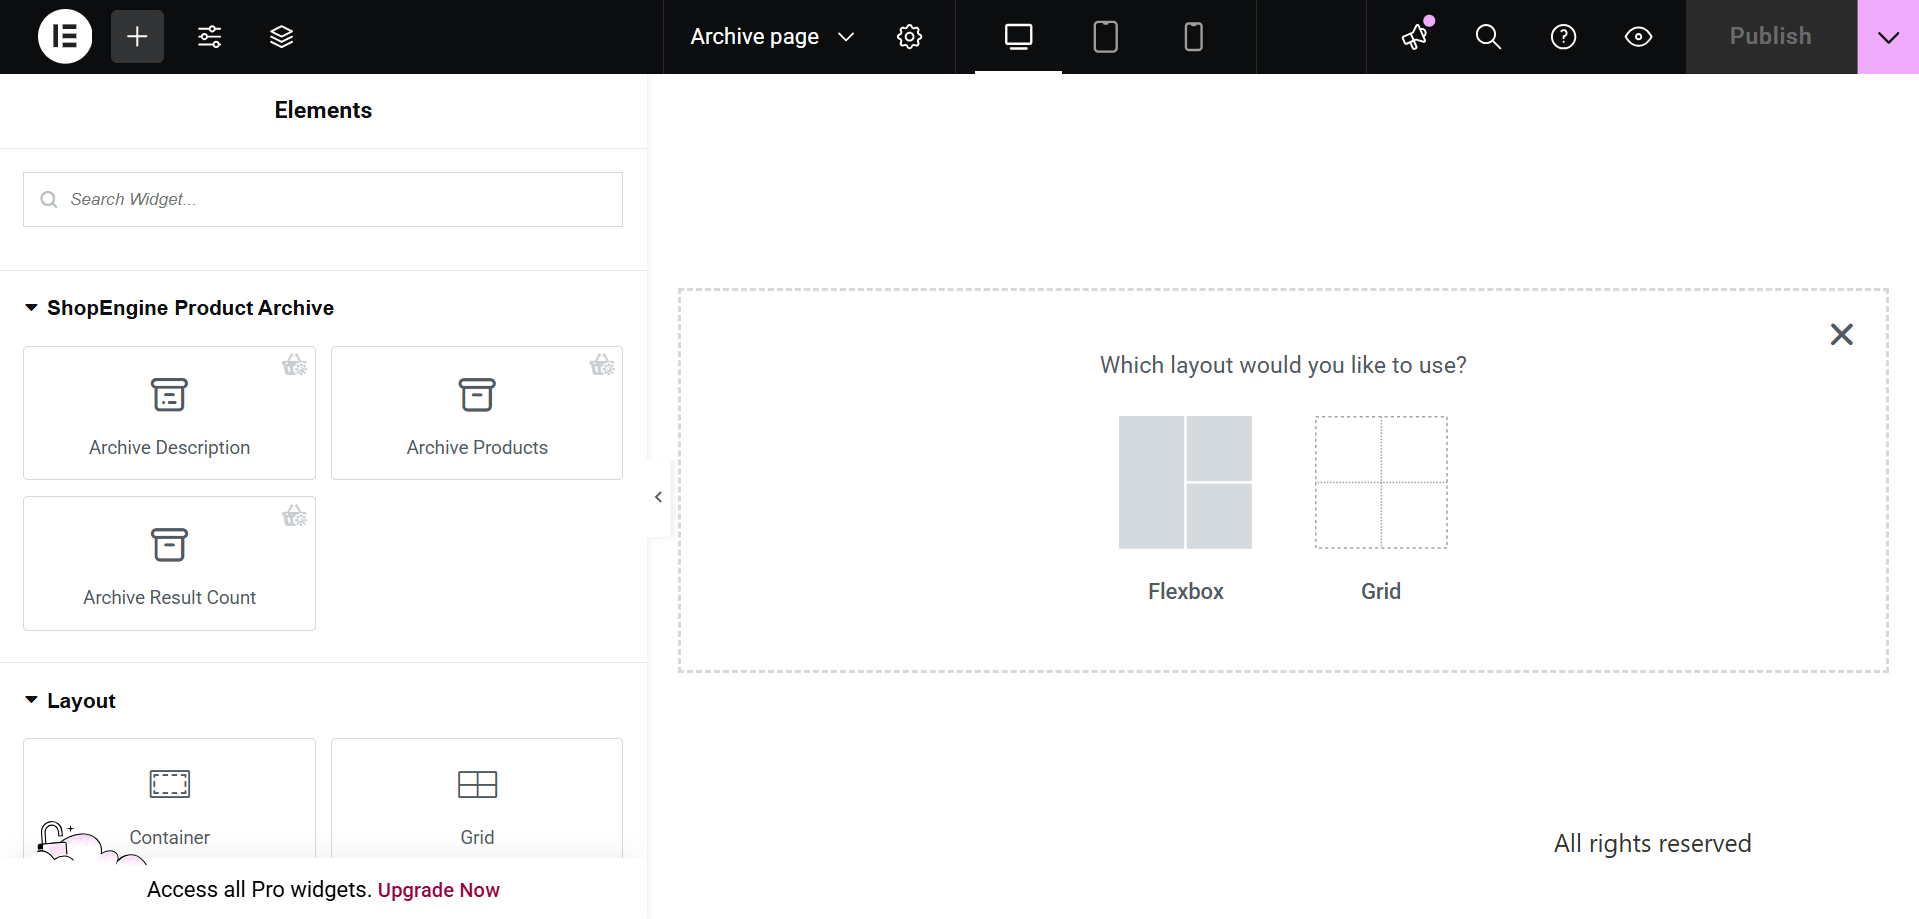
2단계: 구조 선택 #
- 선택한 영역에서 구조를 선택하세요.
3단계: ShopEngine 아카이브 위젯을 사용하여 WooCommerce 아카이브 페이지 디자인 #
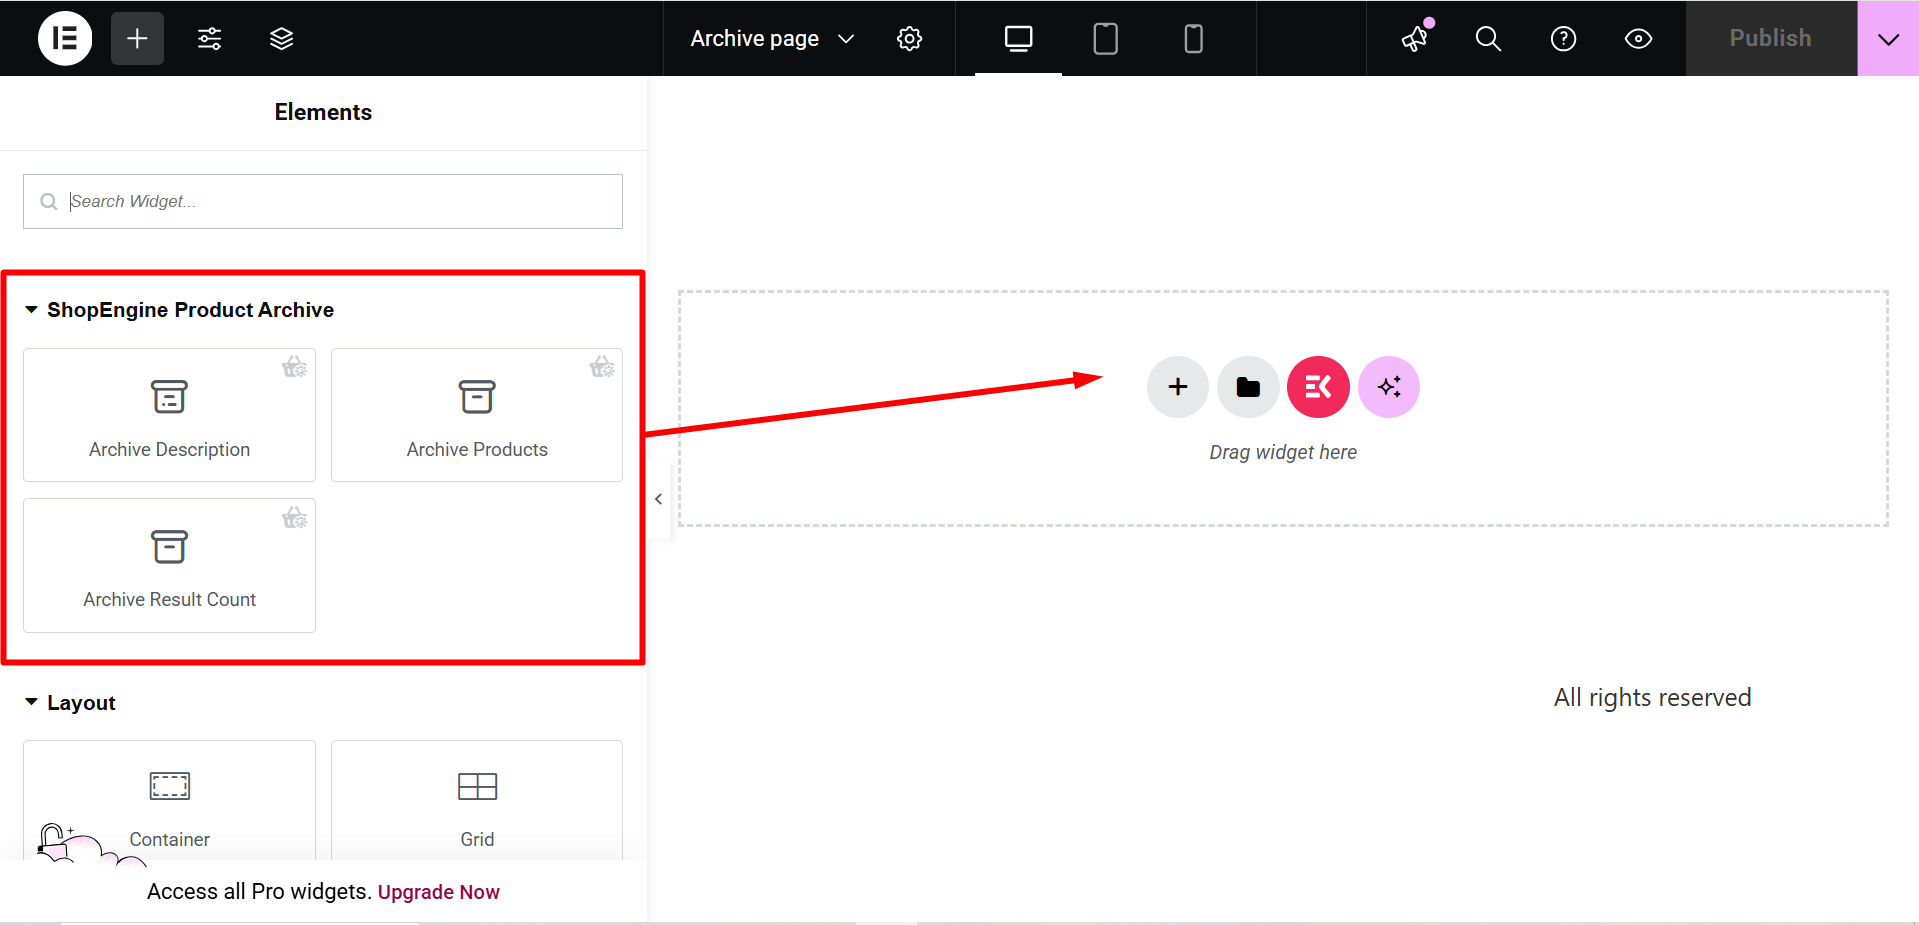
ShopEngine Block으로 이동하여 직접 디자인할 수 있습니다. 여기서 당신은 지정된 몇 가지를 얻을 것입니다 ShopEngine 아카이브 카테고리를 포함한 위젯, 아카이브 제목, 아카이브 수, 아카이브 제품 등. 이를 사용자 정의하는 방법을 살펴보겠습니다.
이제 다음 위젯을 드래그하여 선택한 영역에 놓으십시오..
- 범주.
- 아카이브 제목.
- 아카이브 수.
- 아카이브 제품.
4단계: 아카이브 페이지 게시 #
- 디자인을 마친 후 다음을 클릭하세요. 업데이트.
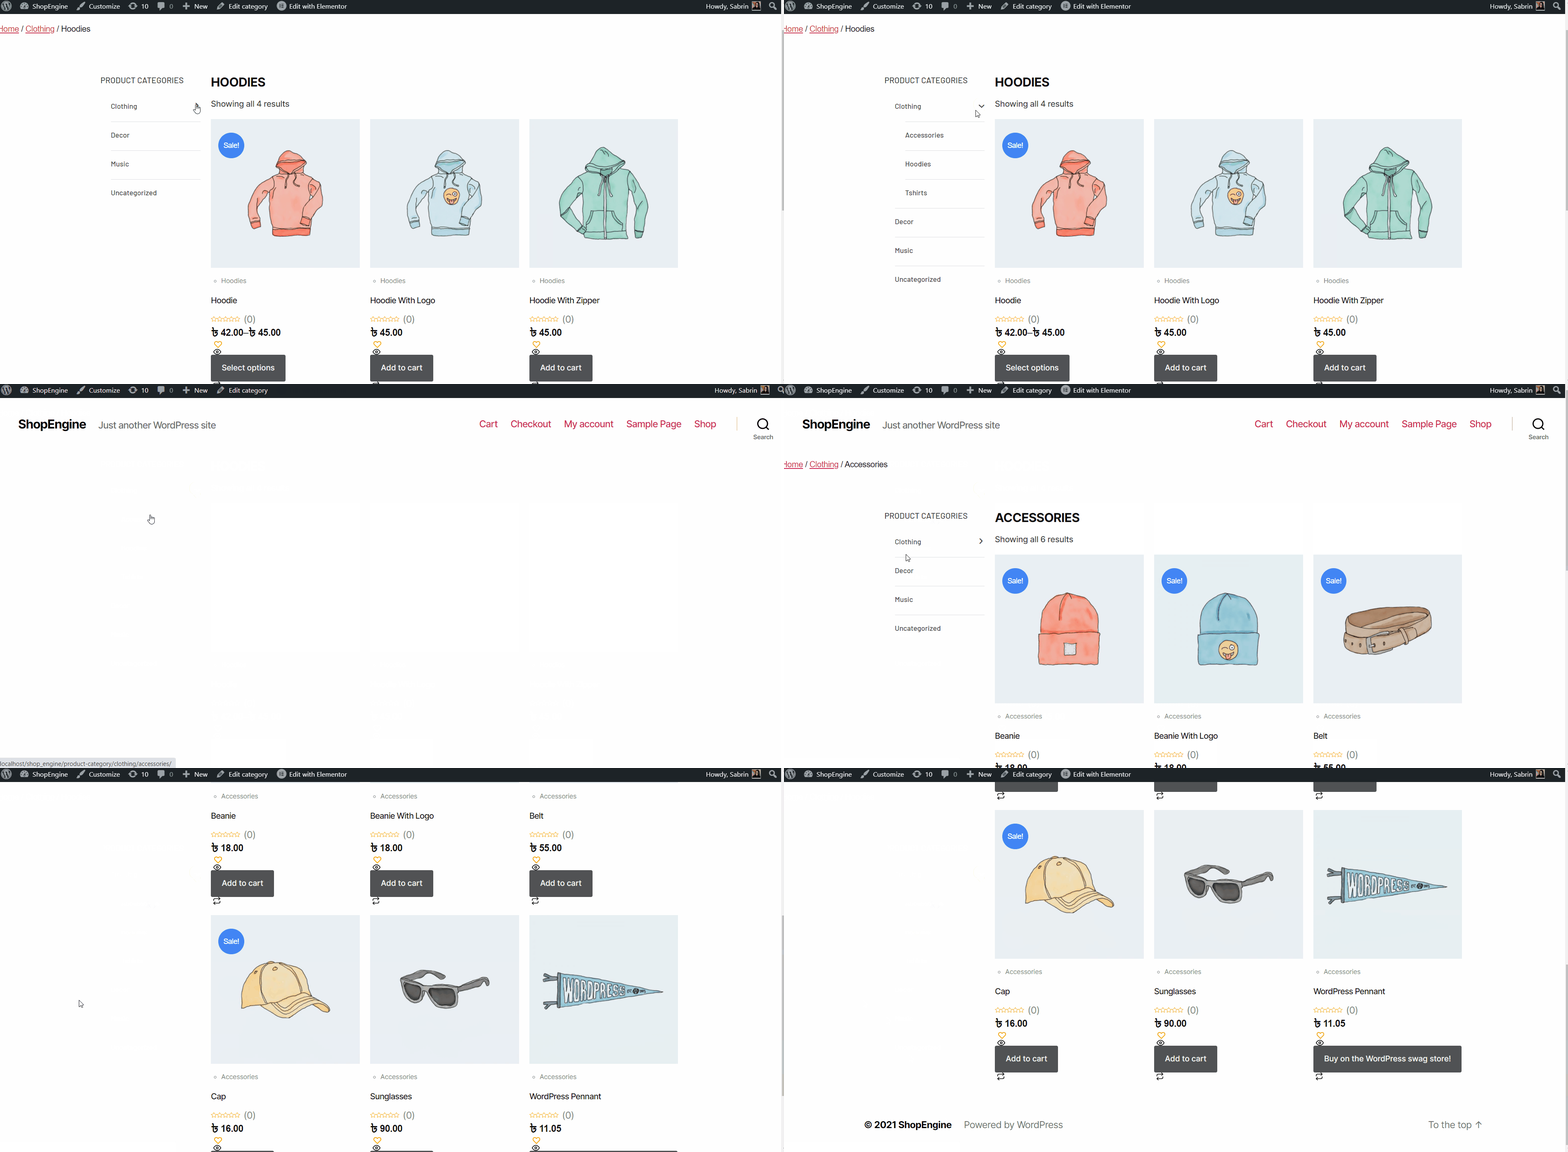
이제 아카이브 페이지 프런트 엔드에서. 여기에서 귀하가 디자인한 아카이브 페이지를 볼 수 있으며 페이지의 모든 기능이 완벽하게 작동하는지 확인할 수 있습니다.