ShopEngine Pro viene con el módulo Avatar de WooCommerce donde puede configurar cómo aparecerá el avatar del usuario en el panel de la cuenta.
Quick Overview
This documentation will guide you to the process of adding Avatar with ShopEngine. This WooCommerce Avatar plugin includes a dedicated module to set up avatar to your WP site.
For this Documentation, you will need the following tools to add Avatar:
Tools Used: Elementor (free), WooCommerce (free), TiendaMotor (free & pro)
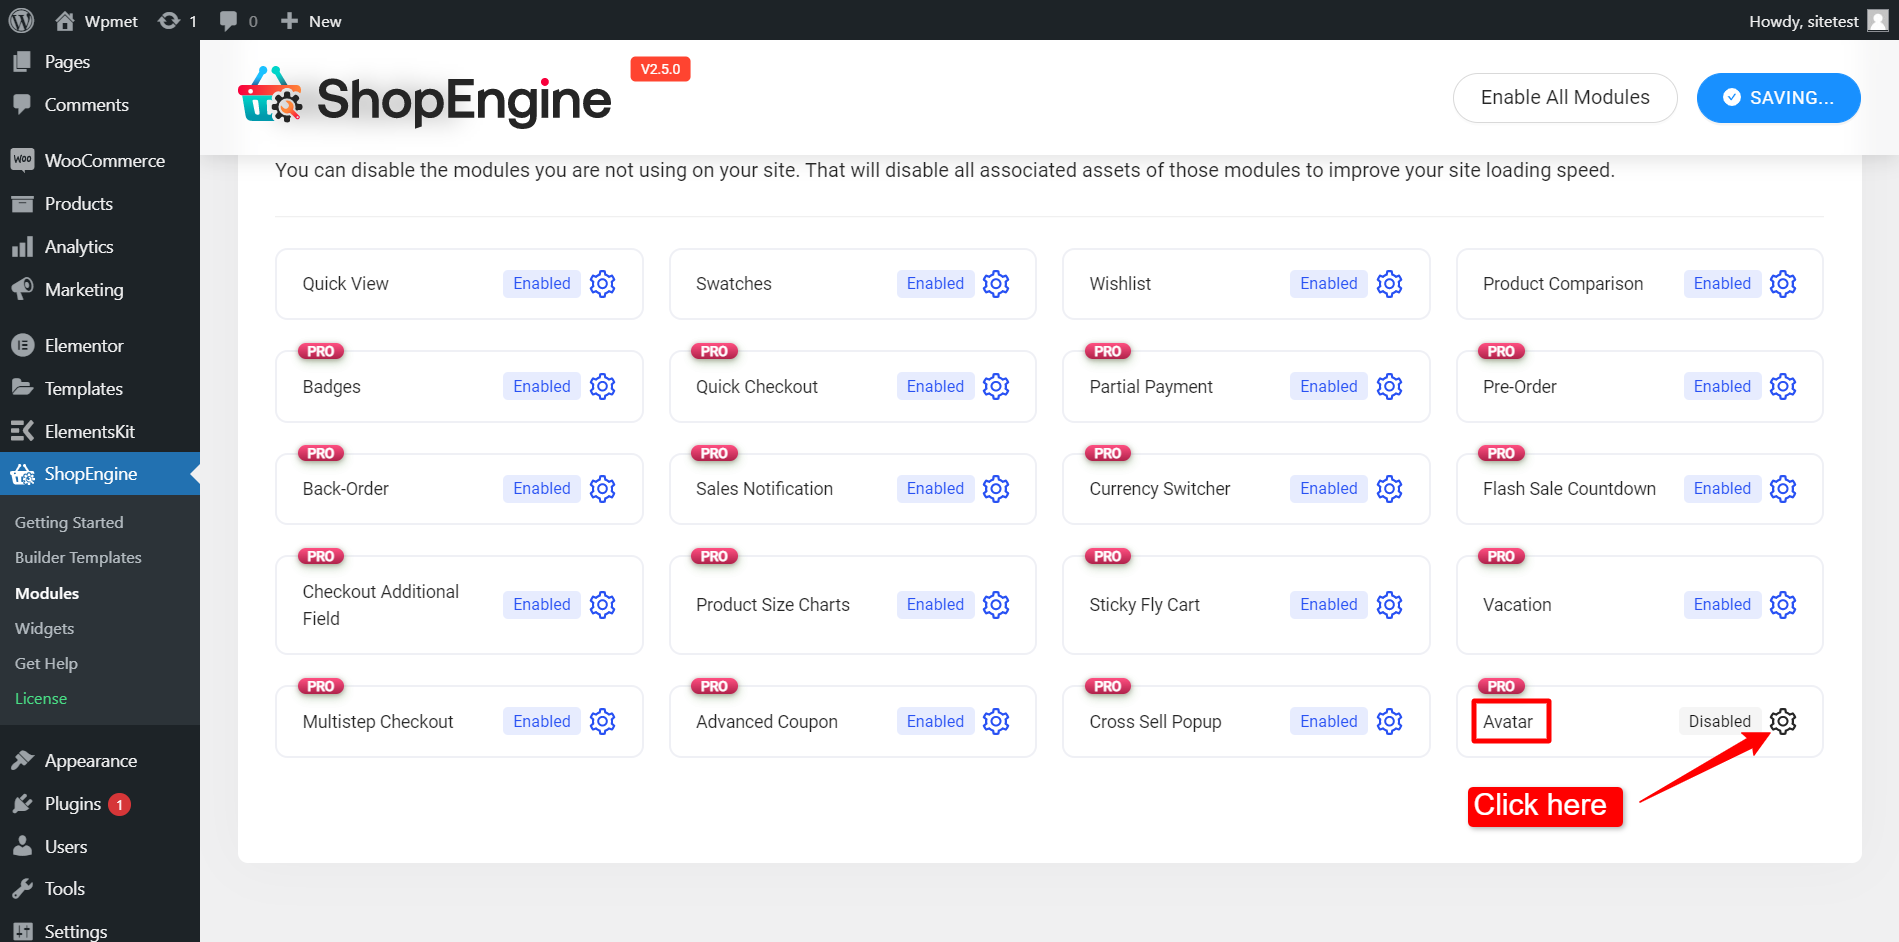
After download and activation of the above plugins, navigate Modules under ShopEngine and:
✅ Activate Avatar module
✅ Configure Avatar module
Habilitar el módulo de avatar de WooCommerce #
To enable the ShopEngine WooCommerce Avatar module,
- Inicie sesión en su sitio de WordPress.
- Navegar a ShopEngine > Módulos desde el panel de WordPress.
- Encuentra el Avatar módulo de la lista.
- Haga clic en ⚙️ (icono de configuración).


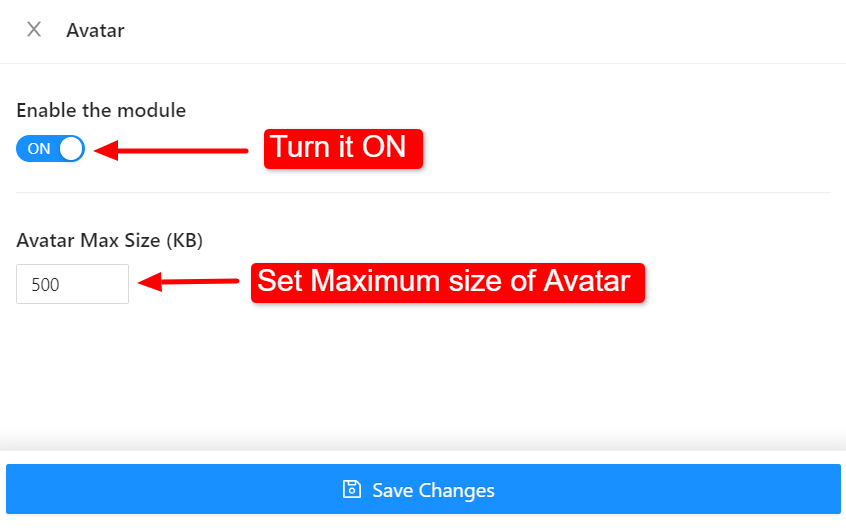
After that, an off-canvas window will show up for WooCommerce Avatar template settings. In the Template Settings,
- Primero, Habilitar el módulo.
- Selecciona el Tamaño máximo de avatar (KB).
- Clickea en el Guardar cambios botón en la parte inferior de la pantalla.


Ahora podrá agregar un avatar de usuario en la página del panel de cuenta de su sitio web. Lea la documentación para widget de avatar para aprender a usar el widget y agregar un avatar de usuario en páginas web.


