


Let’s be real. Just like shifting your house, moving your website to a new hosting is a lot of hassle. You are probably picturing broken code, lost media files, and weeks of downtime.
But guess what? It doesn’t have to be that way. Whether you’re upgrading for speed or running away from bad support, learning how to transfer your WordPress site to a new host is totally doable. You just need a solid roadmap.
I’m going to walk you through the entire process, step-by-step. I will cover the two best ways to get your site safely across the finish line. Let’s learn how to move a WordPress site to a new host the smart way!
Preparation stage: Checklist before migrating a WordPress site to a new host
Think of this as packing. You don’t start hauling boxes until you’ve bought tape and cleaned out the fridge, right? A little preparation here saves major headaches later.
✔️ Set up the new host
Before you move WordPress to another host, you need to make sure your new hosting account is ready to go. To set up your new hosting platform:
- Choose your hosting service wisely: Pick a WordPress hosting provider that is known for being fast and reliable. Don’t just go for the cheapest option! Check the uptime, support, security, and backup services, as well as site migration features.
- Get a fresh install ready: Once signed up, log into your new host’s dashboard (cPanel, etc.). You don’t need to build the site yet, but make sure you have a clean slate: either a fresh, empty WordPress installation or just an empty directory and a new database.
- Save the credentials: You’ll need the new database name, username, and password. Keep this info handy.
✔️ Back up your WordPress site as an essential safety net
You surely don’t want to skip this part. A full backup is your emergency parachute. If everything explodes (it won’t, but just in case), you can always hit the reset button with your backup files.
To back up your WordPress site, you can either use a backup plugin or do it manually from the cPanel or FTP server.
Here is a short overview to back up your WordPress site manually:
- Step 1: Log in to cPanel and locate the “File Manager”.
- Step 2: Compress the public_html file.
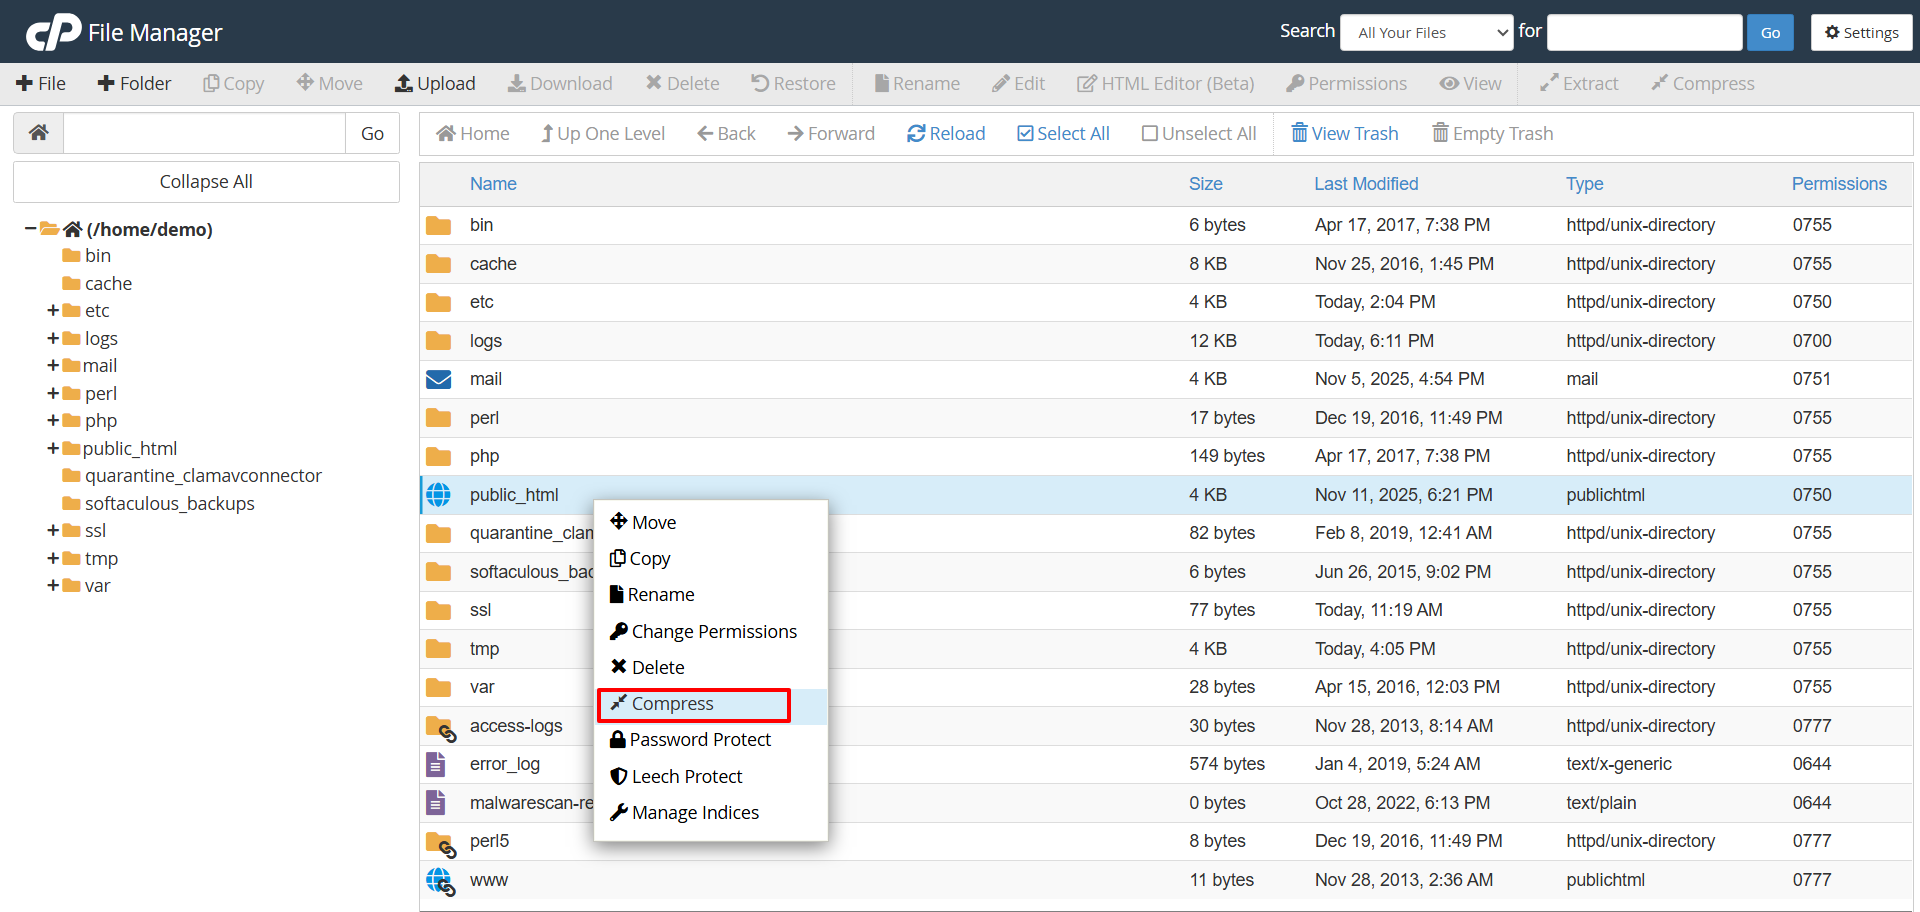
- Step 2: Navigate to your WordPress installation folder.
- Step 3: Select all WordPress files and folders.
- Step 4: Create a backup folder and move the selected files.
- Step 5: Compress the files and download the backup.
- Step 6: Export the WordPress database.
Always keep regular backups of your WordPress site so you have a fresh copy of your data and files if things go south.
How to migrate a WordPress site to a new host
To move your WordPress site to another host, you vividly have two options. You can either transfer it manually or use a WordPress plugin.
Method 1: How to transfer the WordPress site to a new host manually
If you’re a DIY enthusiast or have a gigantic site that might choke a plugin, the manual route gives you full control.
Step 1: Export your WordPress database
Your database is like the brain of your WordPress site. It holds all your posts, comments, and settings. Without it, your site is just a collection of inert files.
To export the WordPress database of your website:
- Log In to phpMyAdmin: Access your previous host server’s control panel (cPanel, Plesk, etc.), and find the phpMyAdmin tool. This is the interface for managing your MySQL databases.
- Select and Export: To export your WordPress database:
- and choose the Custom method. This gives you more control.
- Select your site’s database from the left sidebar.
- Go to the Export tab.
- Choose the Custom method. This gives you more control.
- Set Format to SQL.
- Select all in the tables.
- Click to export button and save the file in your local storage.
Step 2: Download your WordPress files
The files are the body of your site. It has the themes, plugins, images, media uploads, and core WordPress files of your website.
- Connect via FTP/SFTP: Use an FTP client to connect to your old host. You’ll need the hostname, your username, and password.
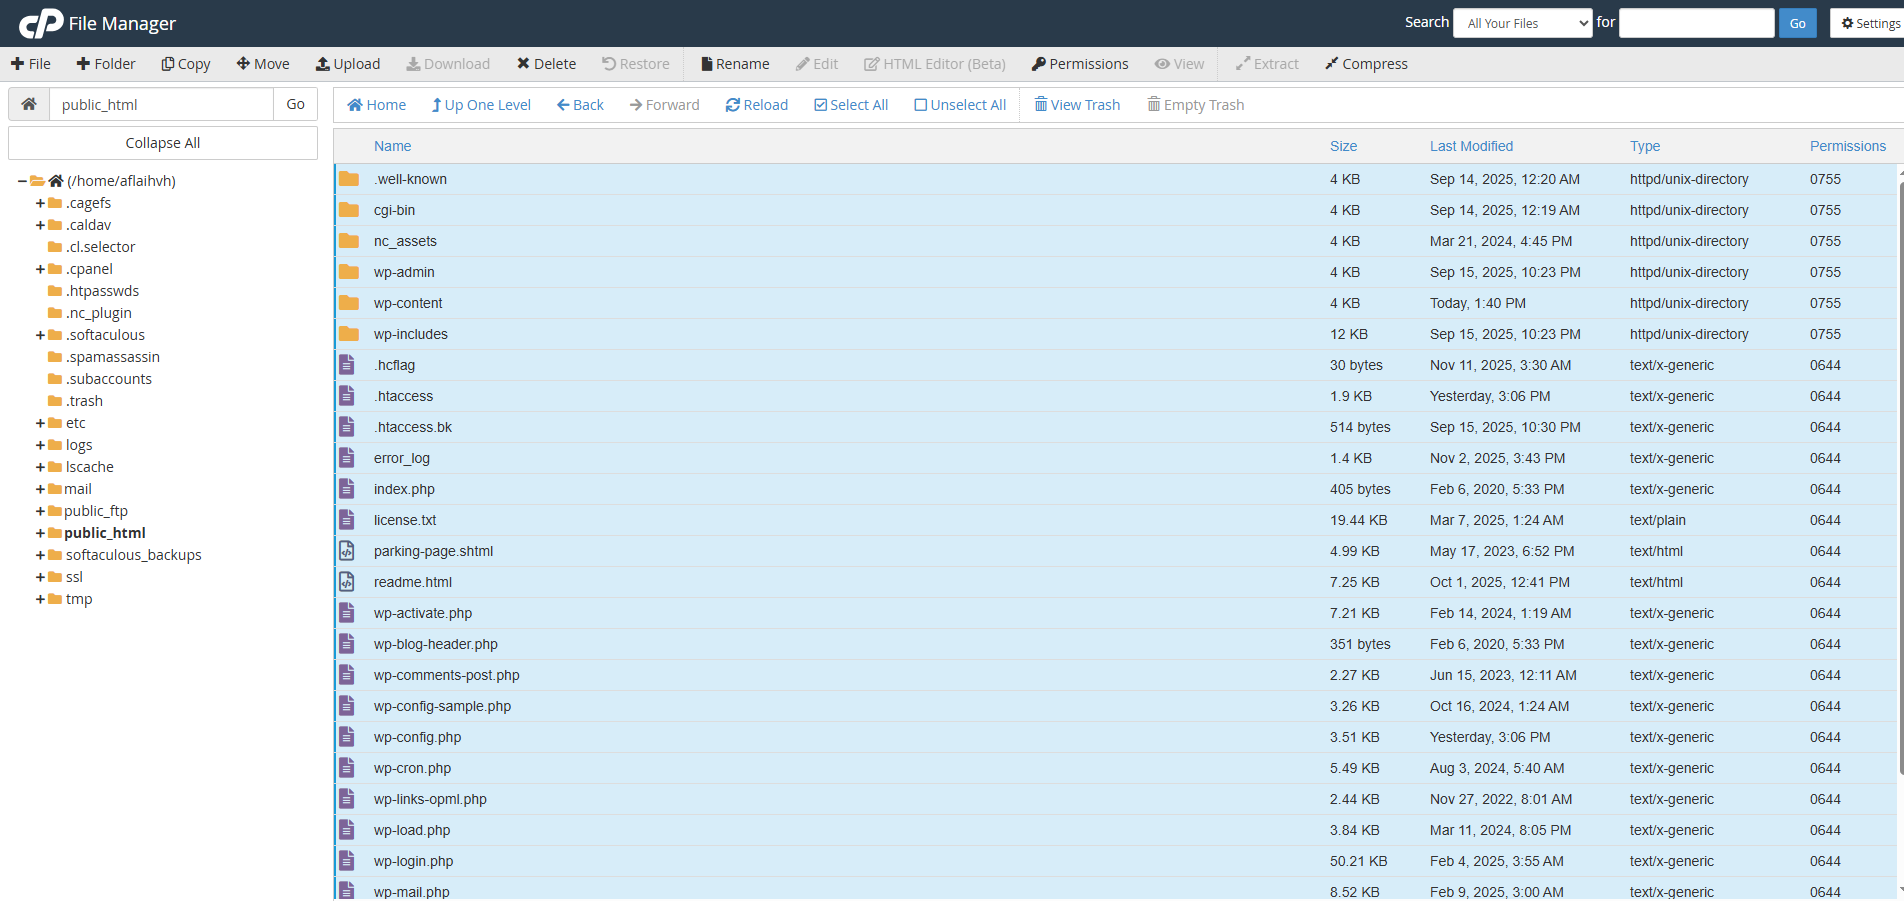
- Locate the Root Folder: Navigate to your main WordPress installation folder, which is typically named public_html, www, or the name of your specific domain folder.
- Download Everything: Select everything inside that folder (including hidden files like .htaccess) and download it to a single, dedicated folder on your computer.
Pro Tip: Zip First! It’s significantly faster to zip (compress) all the files directly on the old server first, then download one large .zip file. This reduces the number of connections and saves time. You’ll then unzip it on the new server later.
Step 3: Create a new database on the new host
On your new host, you need a fresh, empty home for your data. You’ll create three essential components: a database, a user, and a link between them.
- Locate MySQL Databases: Find the MySQL Databases or a similar section in your new host’s control panel (usually located in cPanel).
- Create the Database: Create the new, empty database.
- Create the User: Create a new database user and assign a strong password.
- Assign Privileges: This is crucial! You must assign the new user to the new database and give them ALL PRIVILEGES (or at least all the necessary SELECT, INSERT, UPDATE, and DELETE privileges).
- Crucial Info: Remember (or write down!) those three pieces of information: the Database Name, the Database User, and the Database Password.
Step 4: Import WordPress database from your previous host
Now let’s put the brain and body into the new house.
- Upload Files: Connect to your new host via FTP/SFTP. Navigate to the new public directory (e.g., public_html). Upload all your downloaded/zipped files into this directory. If you uploaded a zip, use your host’s File Manager tool to unzip the files on the server.
- Import Database: Go back to your new host’s phpMyAdmin. Select the empty database you created in Step 3. Hit the Import tab. Choose the .sql file you saved in Step 1 and click Go to upload and import the data.
Step 5: Update the wp-config.php file
This is the most critical link in the chain! You must tell your old site files (now on the new host) the new credentials for the database they are supposed to connect to.
- Locate the File: Find the wp-config.php file. It’s usually in the root folder of your uploaded files.
- Edit Credentials: Open it with a text editor or use your host’s File Manager editor. Replace the old database connection info with the new name, user, and password you created in Step 3.
Find the following lines in the wp-config.php code to update the credentials.
| PHPdefine( ‘DB_NAME’, ‘new_database_name_from_step_3’ ); //The database name define( ‘DB_USER’, ‘new_user_from_step_3’ ); //The database usernamedefine( ‘DB_PASSWORD’, ‘new_password_from_step_3’ ); //The database password |
Step 6: Update DNS settings
You’ve moved everything, but the entire internet still directs visitors to your old host’s address. It’s time to change the domain’s address book entry.
- Log in to Your Registrar: Log in to your domain registrar. This is where your domain name is registered.
- Find DNS Settings: Look for the DNS or Nameserver settings.
- Replace Nameservers: Replace the old host’s nameservers (e.g., ns1.oldhost.com) with the new nameservers provided by your new host (e.g., ns1.newhost.com).
- Wait for Propagation: This change is not instantaneous. It takes time (often 4 to 24 hours, sometimes up to 48 hours) for internet service providers (ISPs) globally to update their records. This waiting period is why people often talk about downtime when migrating a WordPress site.
Step 7: Conduct a test run after migrating the WordPress site to the new host
Want to see your site on the new server immediately without waiting for the DNS to propagate? You can use the hosts file trick on your local computer.
- The Goal: The hosts file overrides the global DNS lookup only for your computer.
- How: You edit this file (its location varies by OS) to map your domain name (e.g., www.yoursite.com) directly to your new host’s IP address.
- Test: Save the hosts file, clear your browser cache, and visit your site. Your browser will bypass the internet’s waiting period and look directly at the new server’s files, letting you test everything—links, images, logins—before the public sees the switch!
Also, remember to remove the entry from your hosts file once the DNS propagation is complete.

Method 2: Use a migration plugin to transfer WordPress site to a new host
If the manual steps seem complicated to you, try a plugin to simplify migrating a WordPress site to a new host.
This method is recommended for beginners, small-to-medium-sized sites, and anyone prioritizing speed and simplicity. For this tutorial, let’s try the Updraft plugin to transfer the WordPress site to a new host.
Step 1: Install and activate the migration plugin
Log in to your old site’s WordPress dashboard and install your chosen migration plugin.
- Click into the ‘Plugins’ menu in WordPress to install.
- Select ‘Add New’ and search for UpdraftPlus.
- After installing, click ‘Activate’ to complete the process.
- UpdraftPlus is located under ‘Settings’ on the left-hand side of the WordPress menu.
Step 2: Export your entire site from the source
Navigate to the plugin’s dashboard and select the Export or Backup option.
- Generate a single File: The plugin processes all your components, including the database, themes, plugins, and media files, and packages them into a single, compressed file.
- Download: Download this large file to your local computer. This file is your entire website.
Step 3: Set up the destination and import
- New host setup: On your new host, ensure you have a clean, fresh installation of WordPress ready to go.
- Install the Same Plugin: Log into the brand-new WordPress dashboard and install the exact same migration plugin you used in the first step.
Import the File: Go to the plugin’s interface and click the Import or Restore option. Upload the single compressed file you downloaded from your old site.
Final Check-up: Did It Work? (Troubleshooting)
Once your DNS updates, visit your site and check these common post-migration issues:
| What Happened? | Why It Happened & What to Do |
| I see a 404 Error (Page Not Found) | Your permalink structure got confused. Go to the new WordPress dashboard: Settings > Permalinks. Just click Save Changes twice. That regenerates the file needed to find your pages! |
| Layout looks weird (no styling) | This is often an SSL problem. Make sure you have an SSL certificate installed on your new host. Also, go to Settings > General and ensure your WordPress Address and Site Address start with https://. |
| “Error Establishing a Database Connection” | You made a typo in the wp-config.php file. Go back and triple-check the database name, user, and password you entered in Step 5. |
Wrapping up
Moving a WordPress site to a new host may seem like a high-stakes task. But as you have seen, it’s a systematic process with clear steps and safety nets. Whether you choose the hands-on control of the manual migration or use a migration plugin, if you follow the process accurately, you will be able to transfer your WordPress site to a new host smoothly and successfully.

Leave a Reply