


A Utcheckningssida låter din besökare ange betalningsinformation och slutföra sin beställning. Den här sidan innehåller betalnings- och frakt-/faktureringsinformation på din Woocommerce-butik. Här får du några specificerade ShopEngine Checkout Widgets inklusive fakturering för kassaformulär, kupongformulär, beställning för granskning av kassan, betalning i kassan, etc. Med hjälp av dessa widgets kan du enkelt ordna din WooCommerce kassasidamall på önskat sätt. Och din skapade mall kommer att vara mer unik än Shopify kassan eller någon annan mall.
Quick Overview
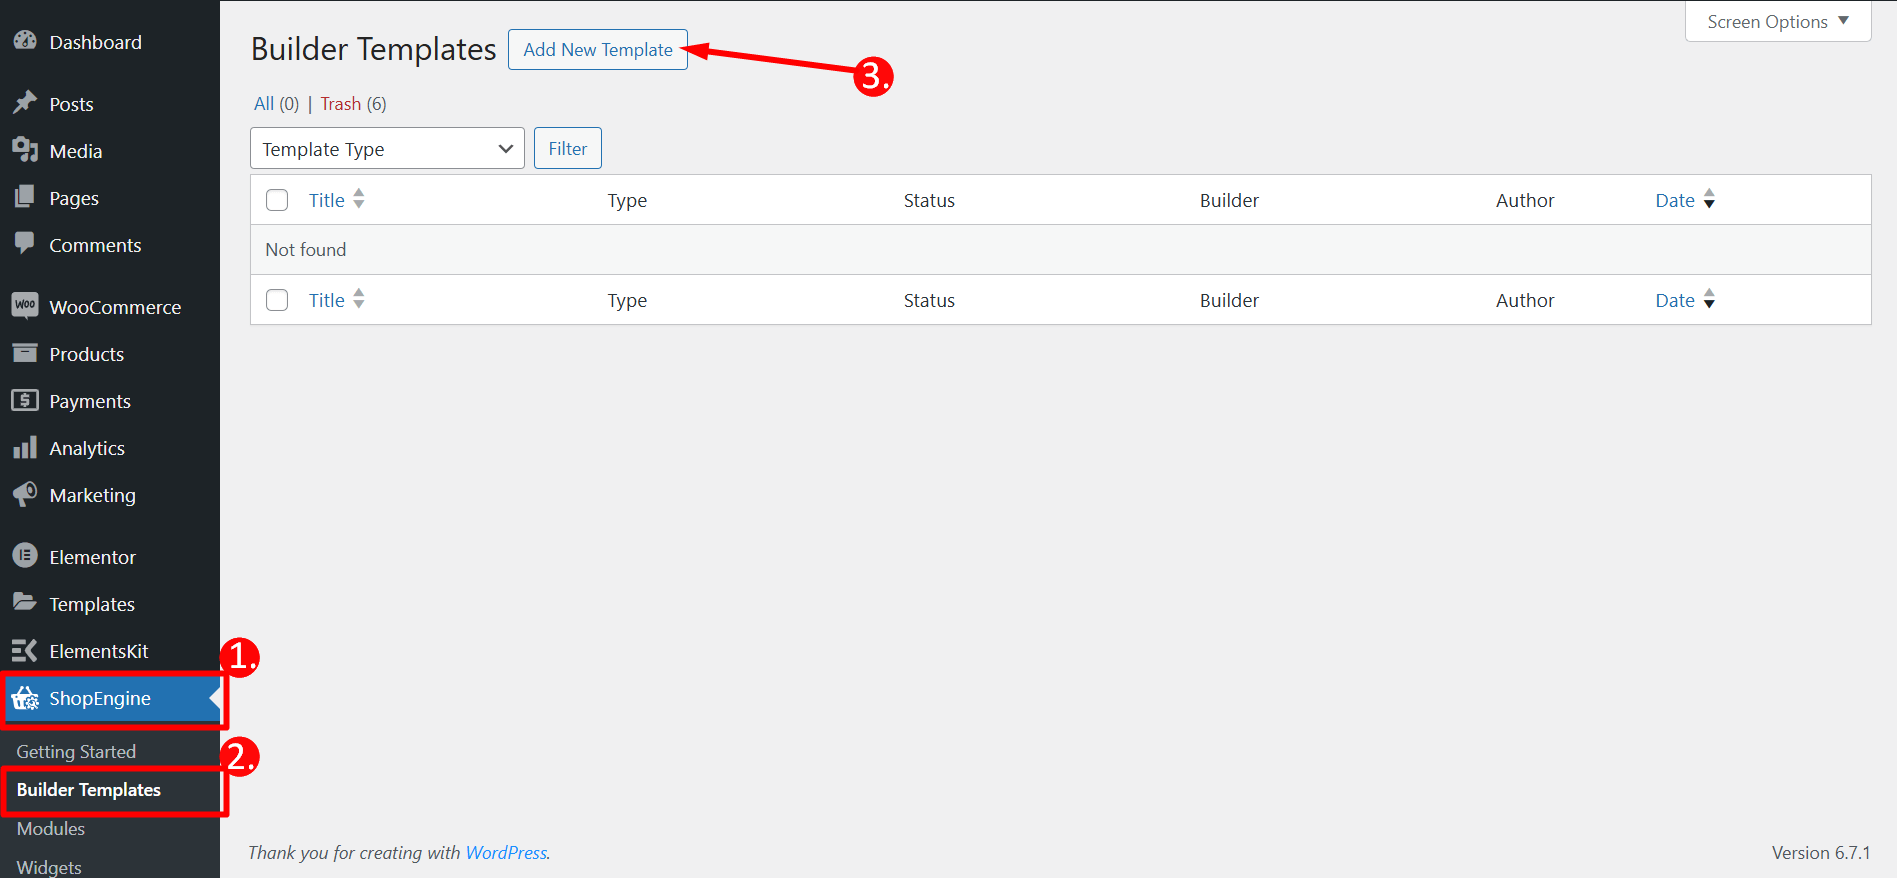
To create a checkout page with ShopEngine, WooCommerce page builder, log in to your WordPress dashbaord, go to ShopEngine > Builder template > Add New Template.
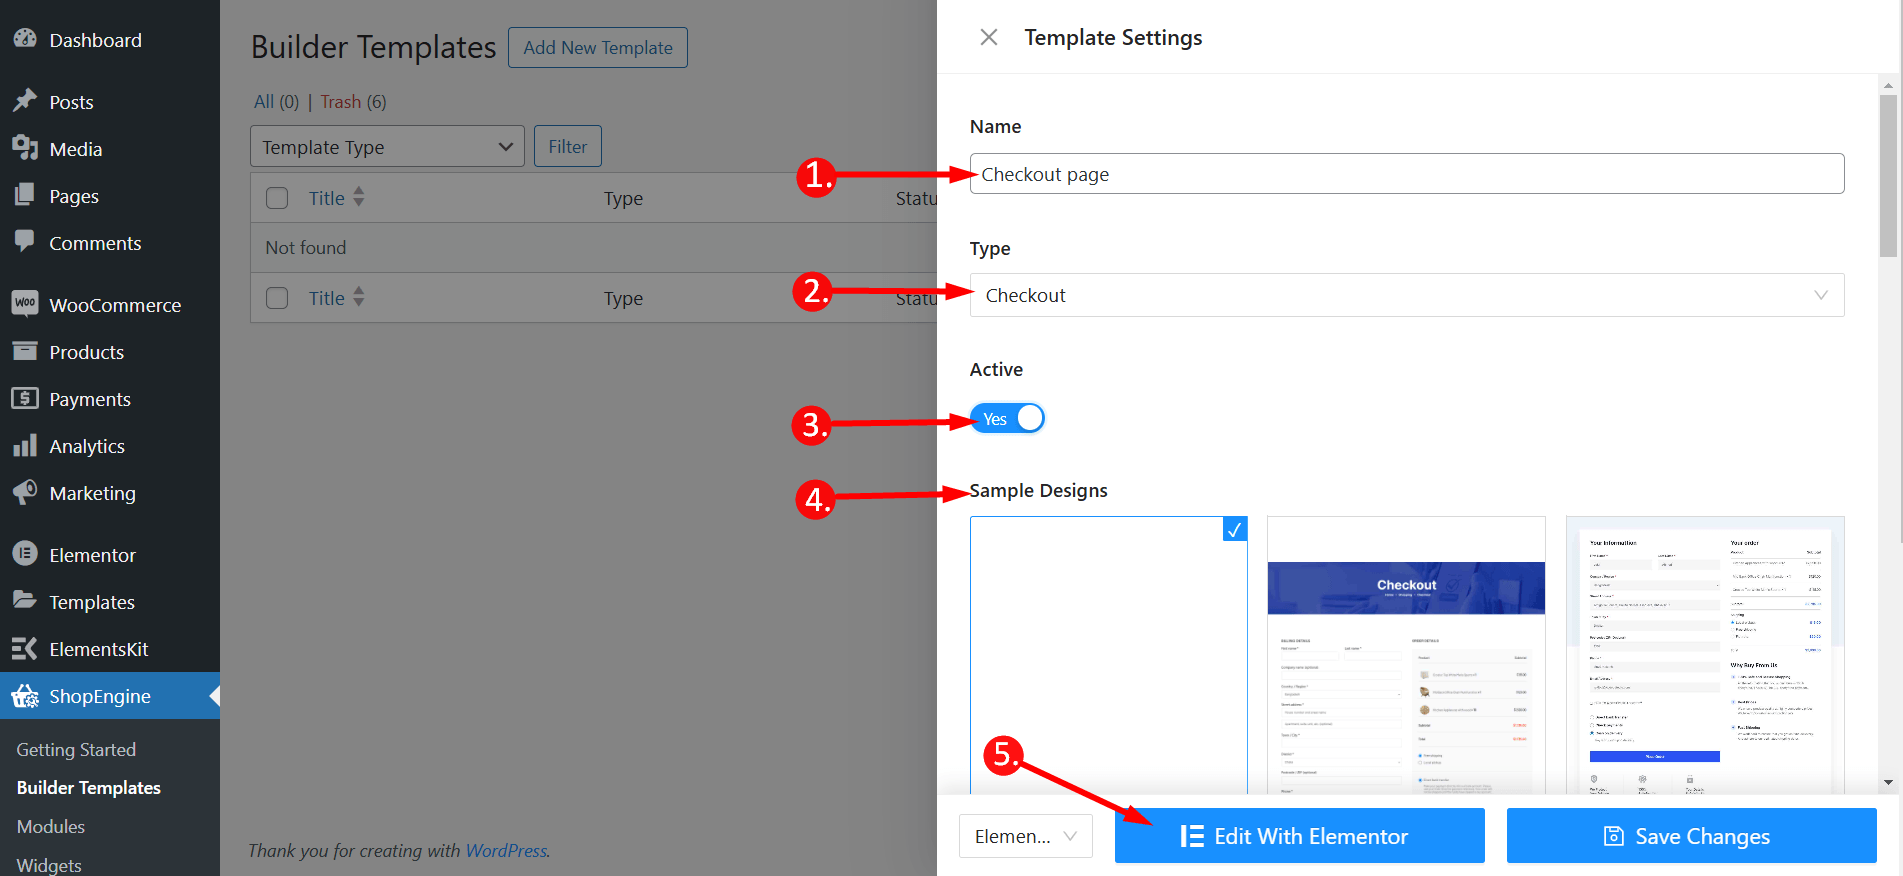
Then set the following: 1. Mallnamn, 2. Template type: Checkout, 3. Aktivera mallen, 4. Choose a template (blank or pre-designed), and 5. Click Edit with Elementor to start customizing the template.
Tools Used: WooCommerce, Elementor, and ShopEngine.
Hur man skapar en WooCommerce Checkout-sidamall med ShopEngine #
Just follow the step-by-step process to create & beautify your WordPress Checkout page template:
Steg 1: Skapa en mall för kassasidan #
- Go to ShopEngine > 2. Builder Templates > 3. Add New Template
Mallinställningar
- Name – Type a name of the template
- Type – Välj ‘Checkout’ as template type
- Active – Toggle the button to active the template
- Template – Choose any checkout page template or take a blank template
- Edit with Elementor – Click on the button to edit
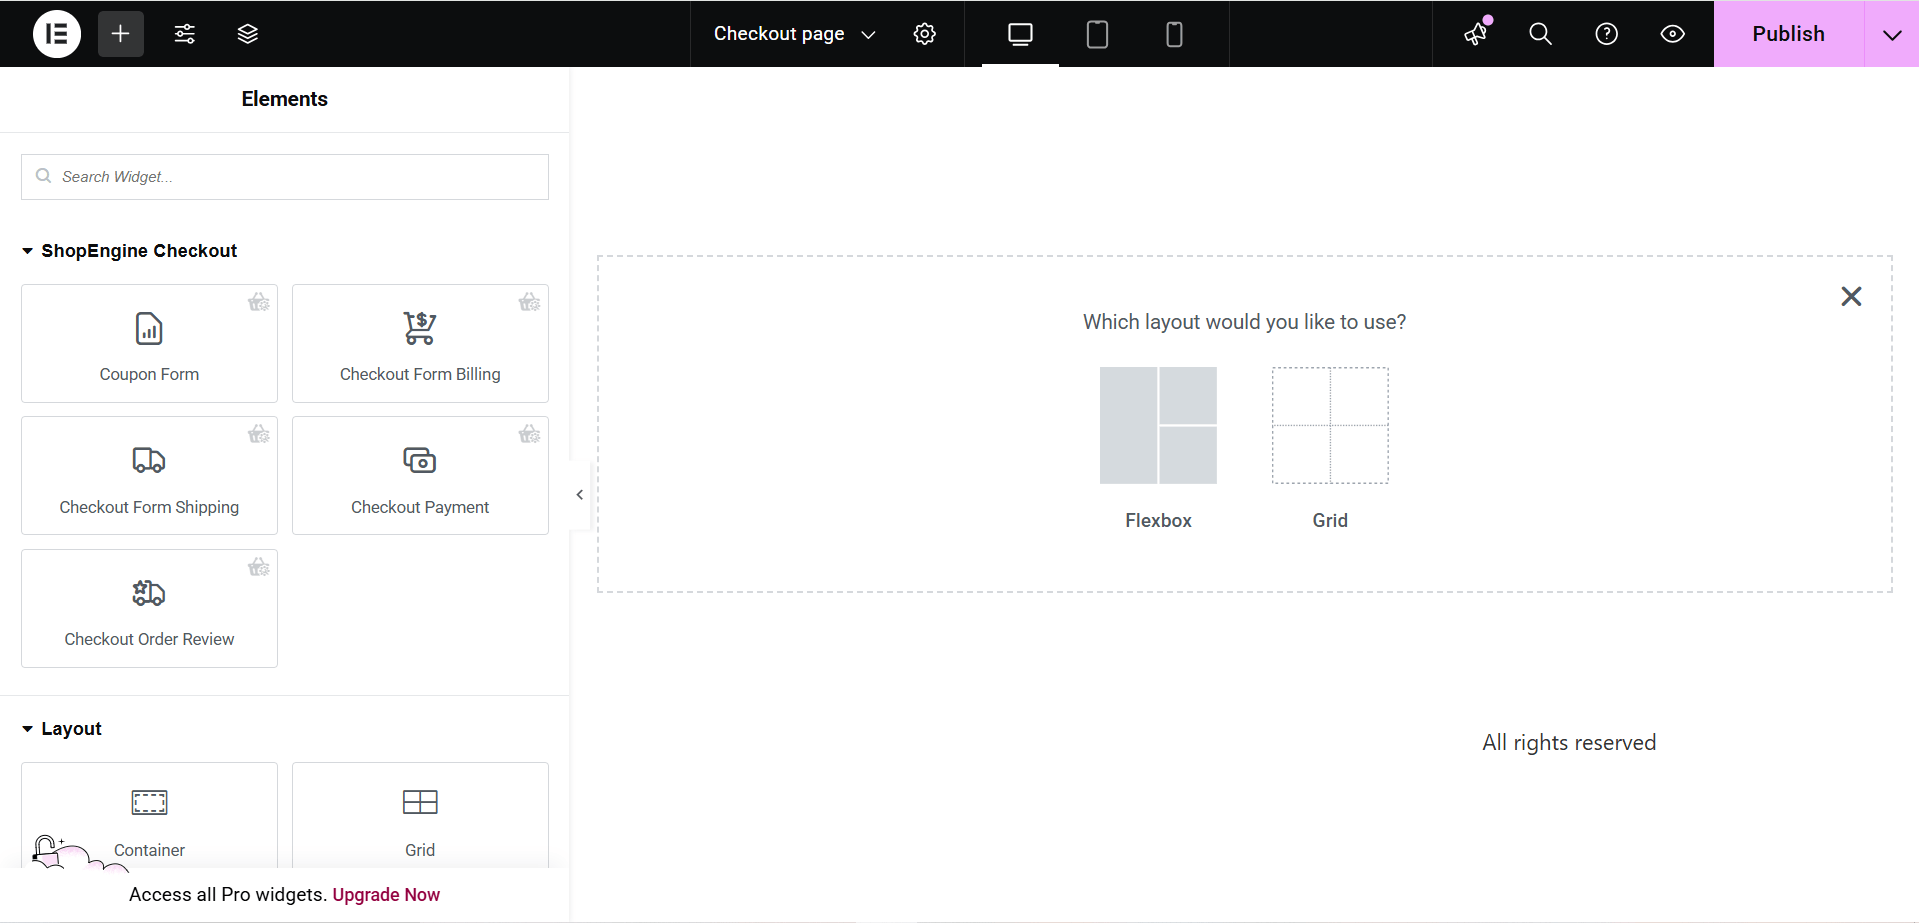
Step 2: Choose a layout for checkout page template #
Choose your layout style from Flexbox or Grid styles.
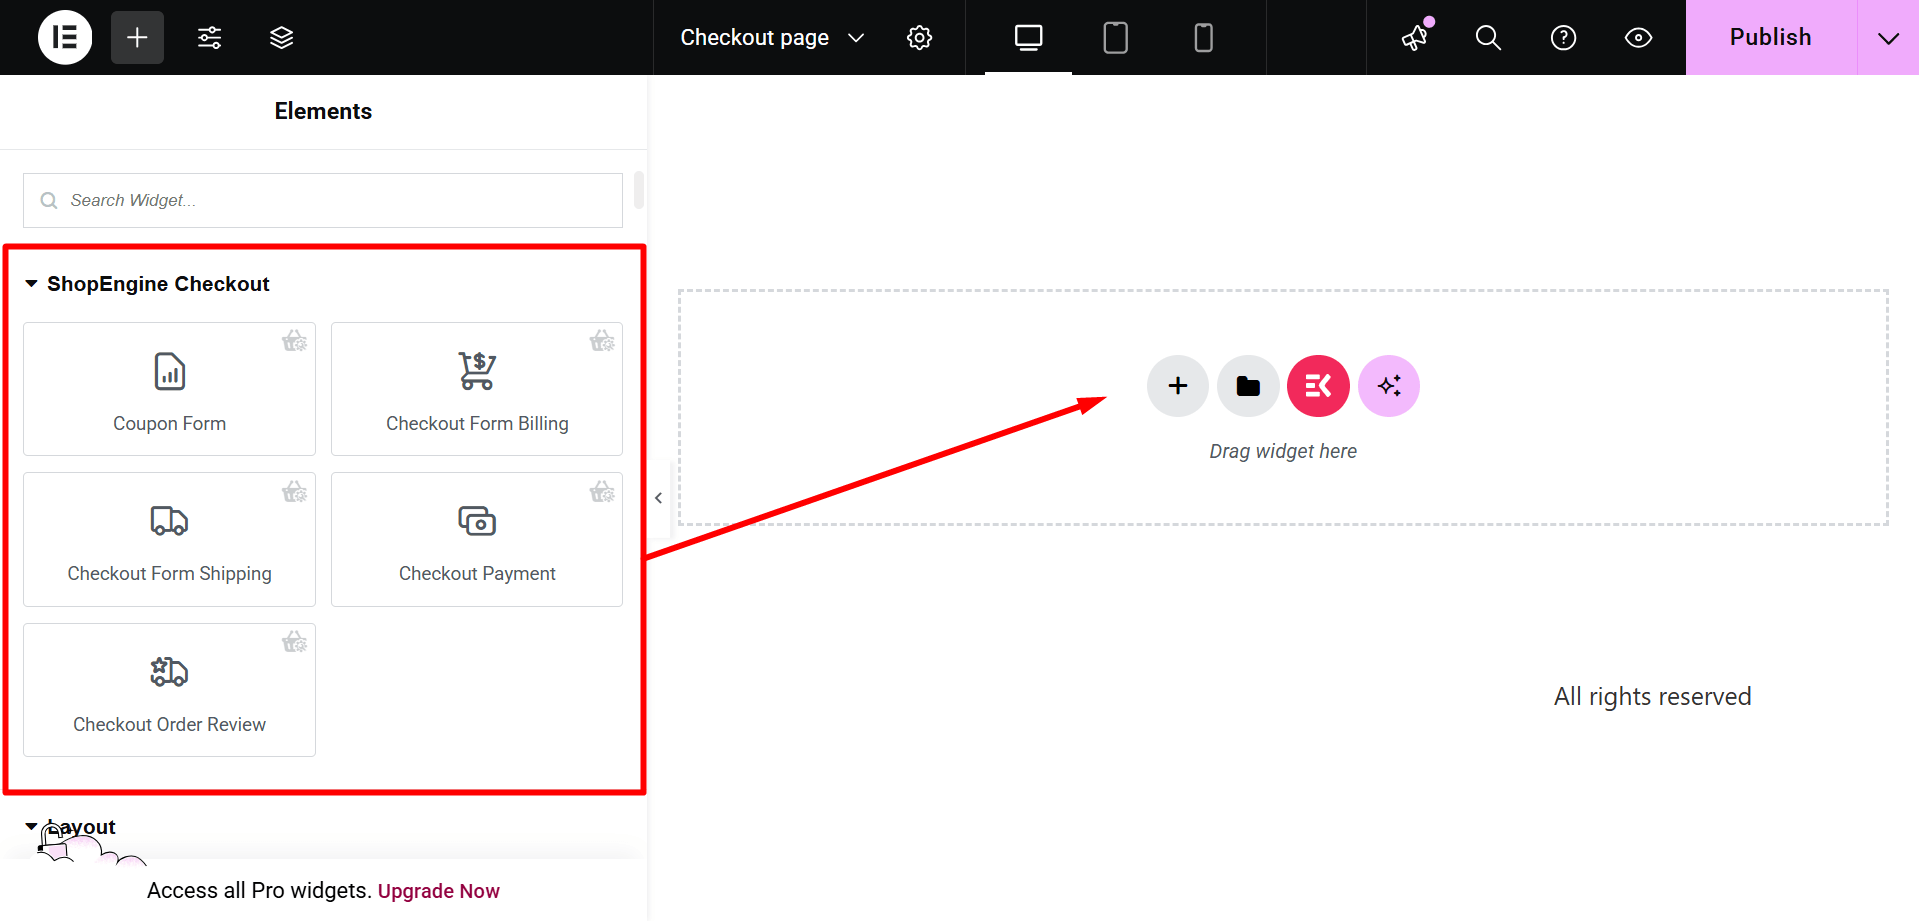
Step 3: Customize your WordPress checkout page template with Checkout widgets #
Gå till ett ShopEngine kassablock så kan du designa ditt eget. Här får du några specificerade ShopEngine Kolla upp Widgets inklusive Fakturering för kassaformulär, kupongformulär, beställning för granskning av kassan, betalning i kassan, etc. These widgets also provide the advanced customization options than the Shopify or any other checkout page template. Let’s see how to customize them with ShopEngine, a WooCommerce checkout page builder:
Now just drag the following widgets and drop them on the selected area or just click on them, and they will be added to the editor.
- Kupongformulär
- Debitering för kassaformulär
- Kassaformulär Frakt
- Kassa Betalning
- Checkout Order Review
Step 4: Publish your checkout page template #
- Efter design, klicka Publicera/Uppdatera för att göra din Elementor kassasidamall live.
- Gå nu till din Kolla upp Sida-> Du kan se att din önskade kassasida visas i enlighet med detta.
Som mallen för kassasidan kan du också skapa en WooCommerce kundvagn sidmall, mall för butikssida, tack sidmall, produktsida mall, och så vidare.


