


Creating a mega menu in Elementor is easy with ElementsKit, and it doesn’t require Elementor Pro. ElementsKit offers a dedicated Mega Menu module that lets you design rich, multi-column menus using Elementor’s visual editor.
Steps to Create a Mega Menu Using ElementsKit:
- Save the menu and assign it to your site location.
- Installera och aktivera ElementsKit plugin.
- Gå till ElementsKit > Modules and enable Mega meny.
- Navigera till Utseende > Menyer and create or edit a menu.
- Gör det möjligt Mega meny for a menu item and choose the layout.
- Klick Redigera med Elementor to design the menu content.
De Mega Menu-modul från ElementsKit plugin is a powerful feature in WordPress that allows you to create a category-based expandable WordPress dropdown menu with flexible layouts. Elementor Mega menus are easy to use and can be a great way to show the multi-level website menu in an organized way.
Watch our video guide on Elementor Mega Menu Building:
Eller följ steg-för-steg-instruktionerna om hur du skapar megameny i Elementor:
Nödvändig förutsättning: #
- Elementor, a page builder plugin (Free version is enough)
- ElementsKit Pro, a WordPress mega menu plugin for Elementor
Hur man skapar WordPress Mega Menu i Elementor #
Först och främst innan skapa en Elementor Mega Menu i WordPress se till att aktivera ElementsKit Mega meny modul.
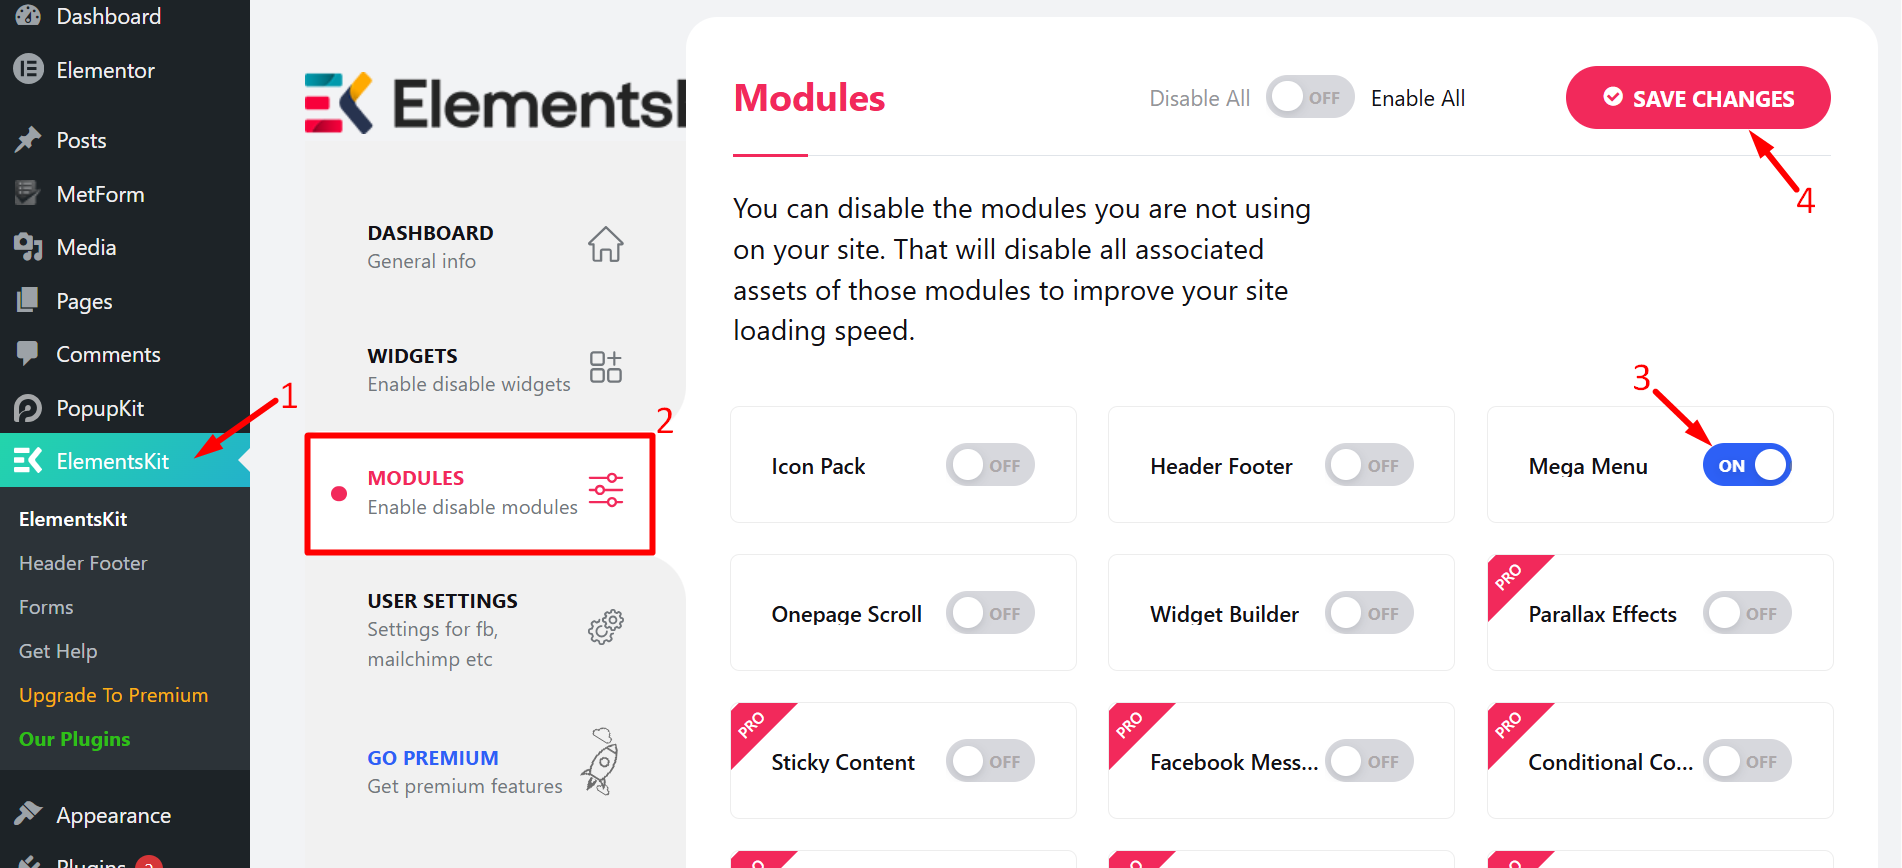
- Navigera till ElementsKit on your WordPress dashboard
- Gå till Moduler
- Find and turn ON Mega Menu
- Spara förändringarna
Step #1: Configure WordPress Menu #
Till skapa en megameny för WordPress on your website –
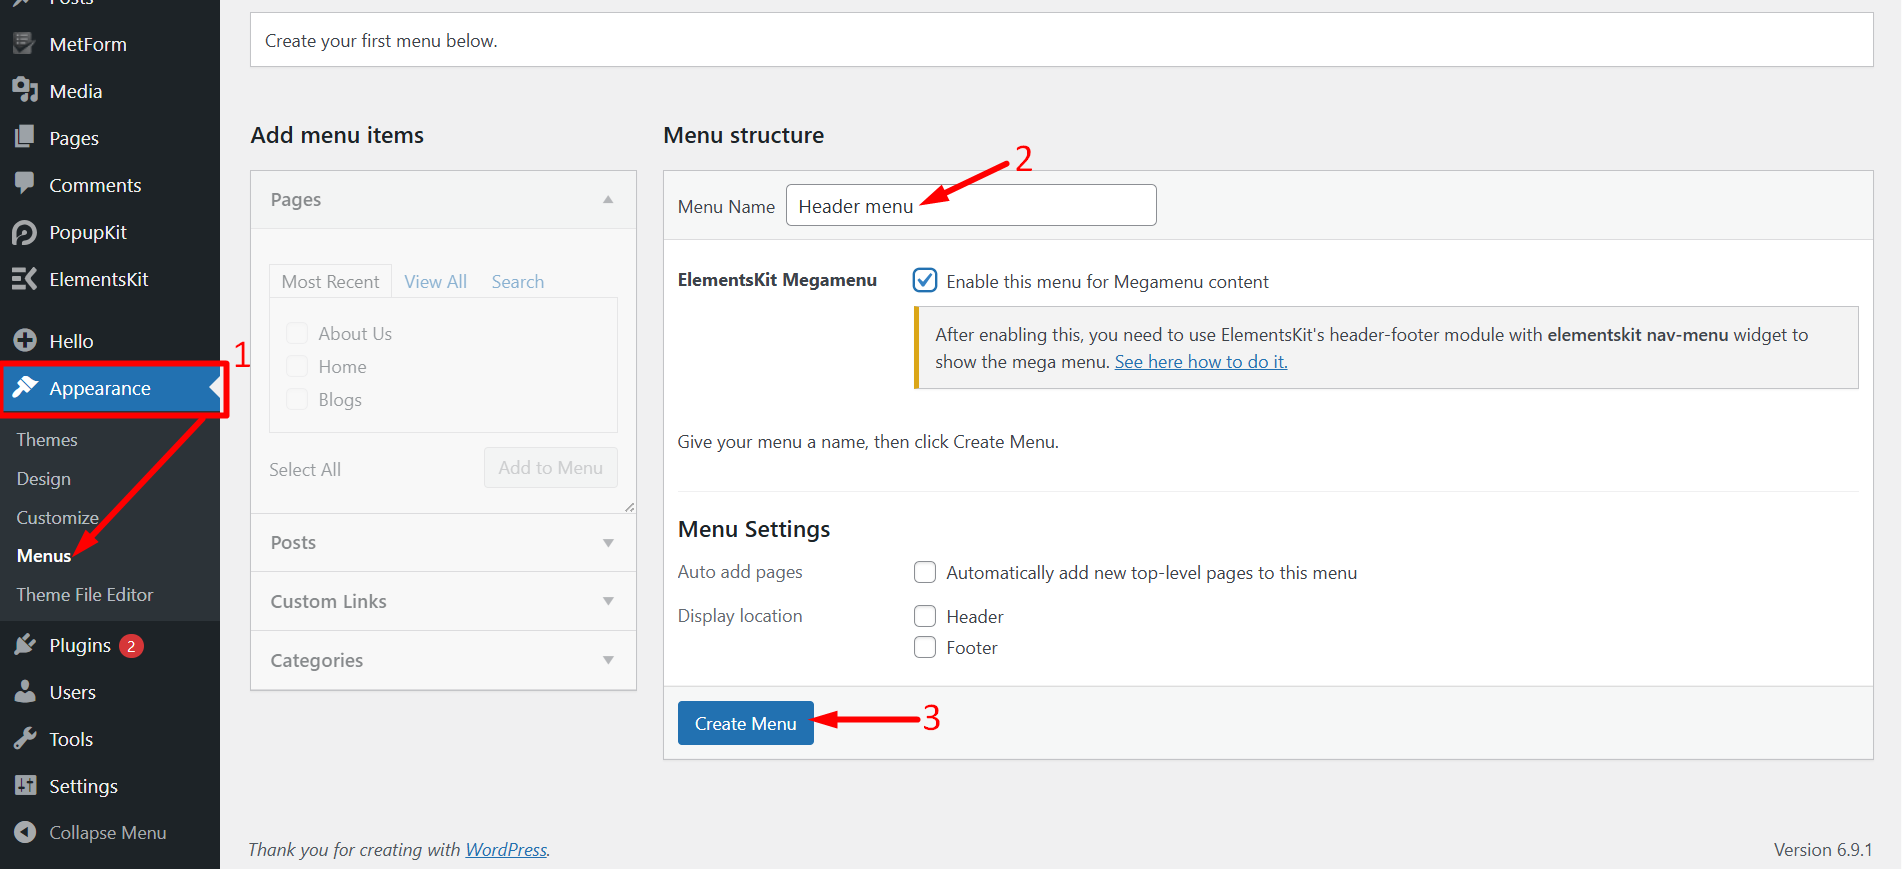
- Navigera till Appearance > Menus från WordPress-instrumentpanelen.
- Ange a Menynamn.
- Klicka på Skapa meny knapp.
Add pages to the mega menu och spara ändringarna.
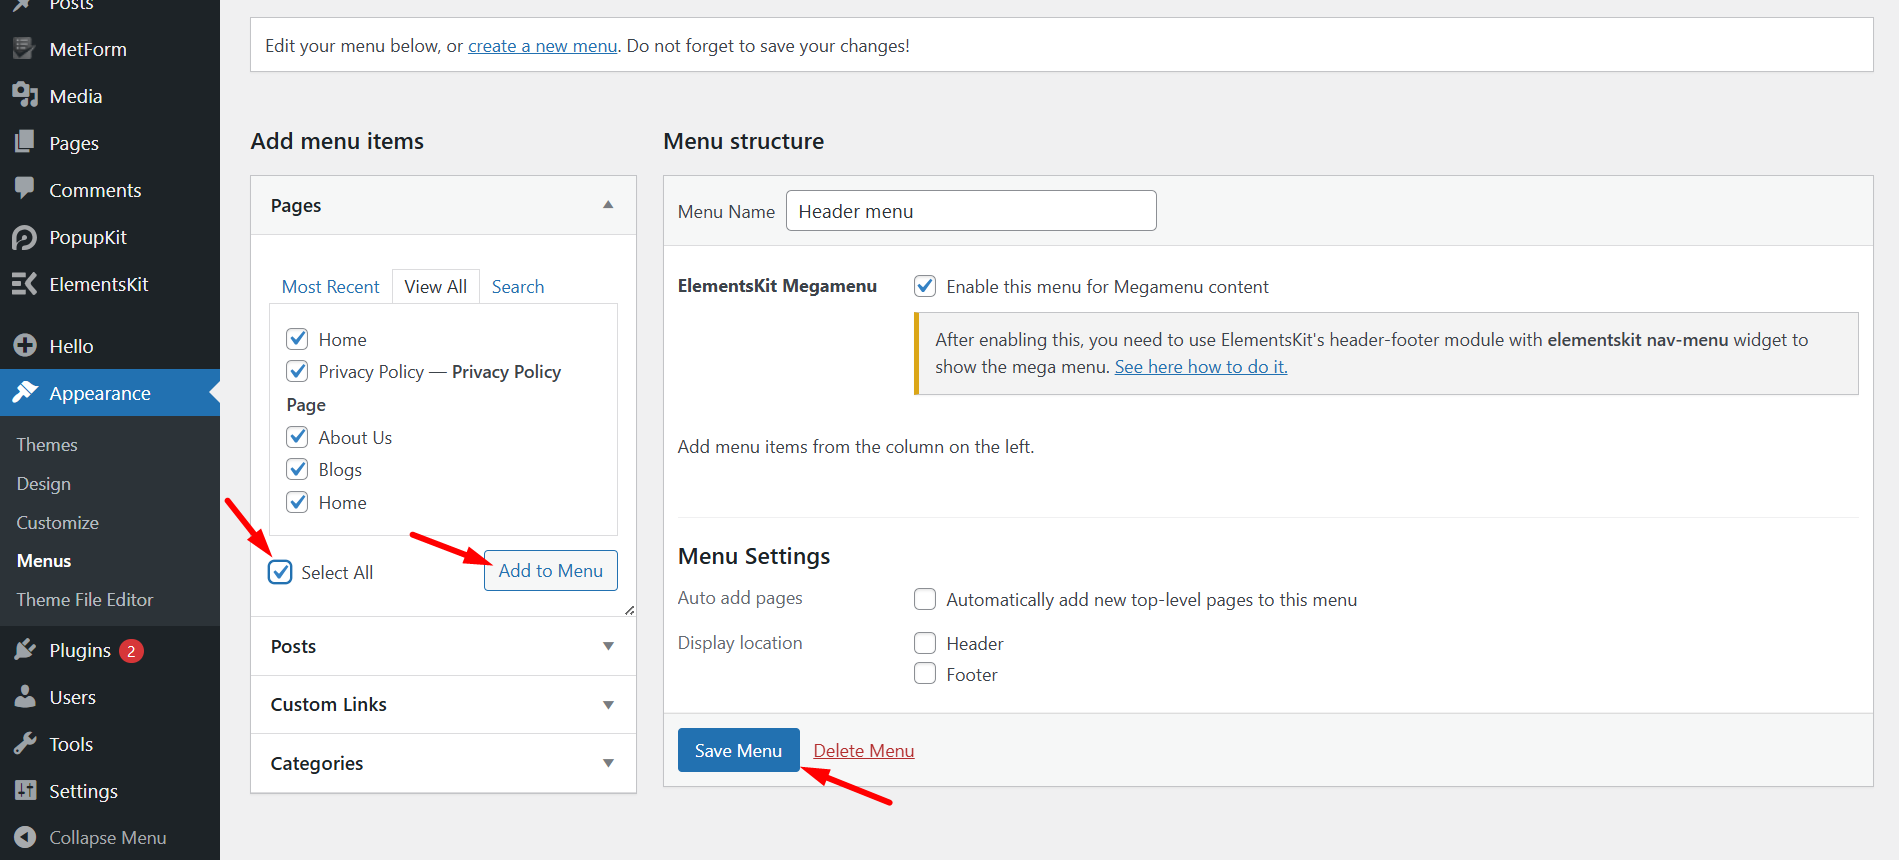
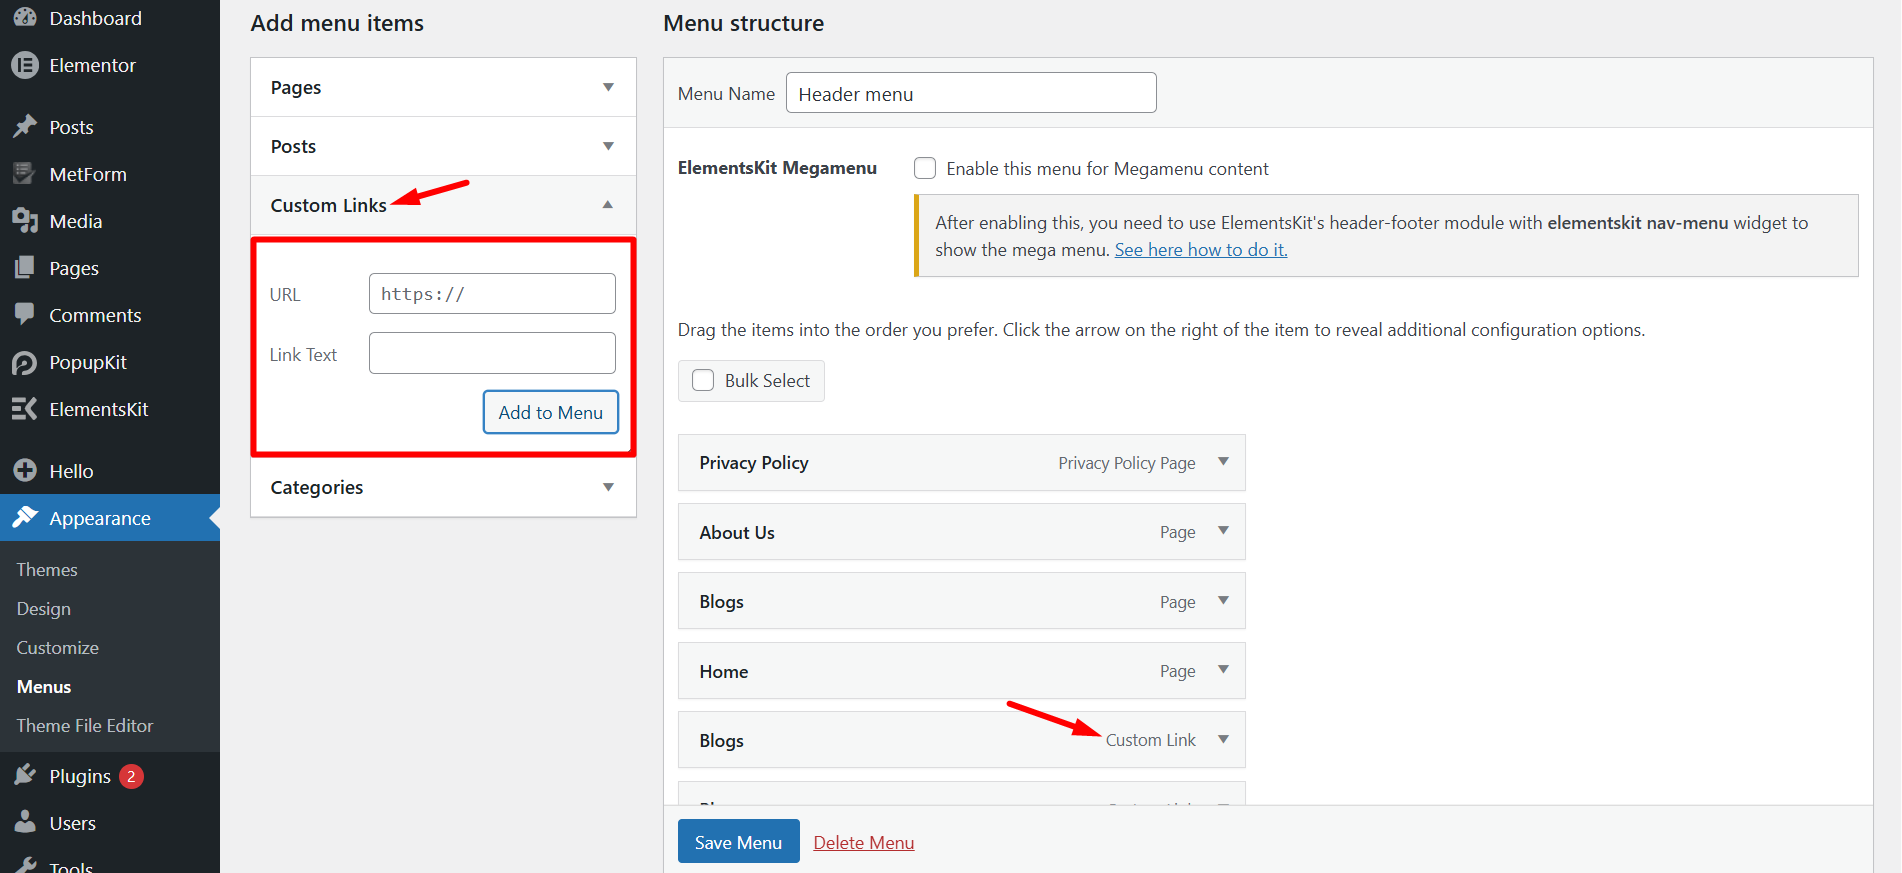
Now, you can lägg till objekt till megamenyn. För det,
- Bygga ut Anpassade länkar on the “Add menu item” on the right column.
- Ange a URL och Länktext.
- Klicka på Lägg till i menyn.
Then add other menu items in the same way with this WordPress menu customizer, ElementsKit.
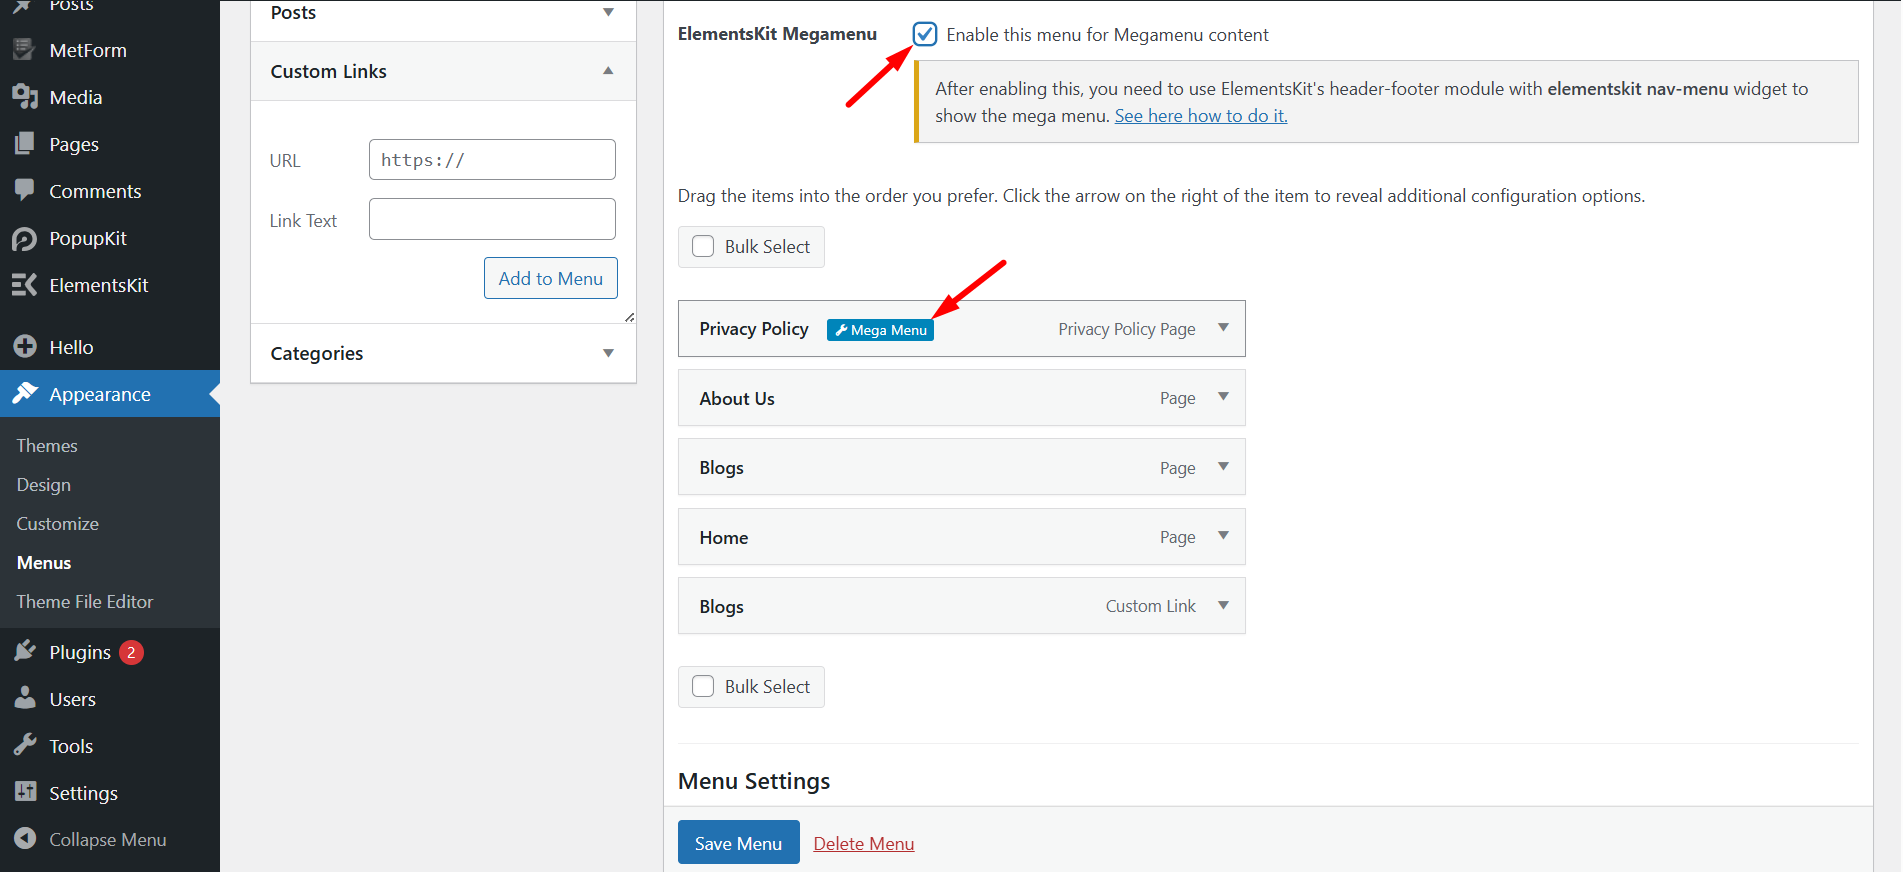
Efter det, make sure you’ve checked the checkbox for “Aktivera denna meny för Megameny-innehåll”. When the mega menu is enabled, you will click the mega menyinställningar ikon när du håller muspekaren över menyalternativen.
Steg #2: Anpassa Elementor Megameny-innehåll With ElementsKit #
När du klickar på ikonen för megamenyinställningar öppnas en popup. På popupen,
- Växlingsknapp för att aktivera Mega Menu.
- Klicka på Spara knapp.
- Efter det klickar du på REDIGERA MEGAMENU-INNEHÅLL knapp. Den tar dig till Elementor-redigeringsknappen.

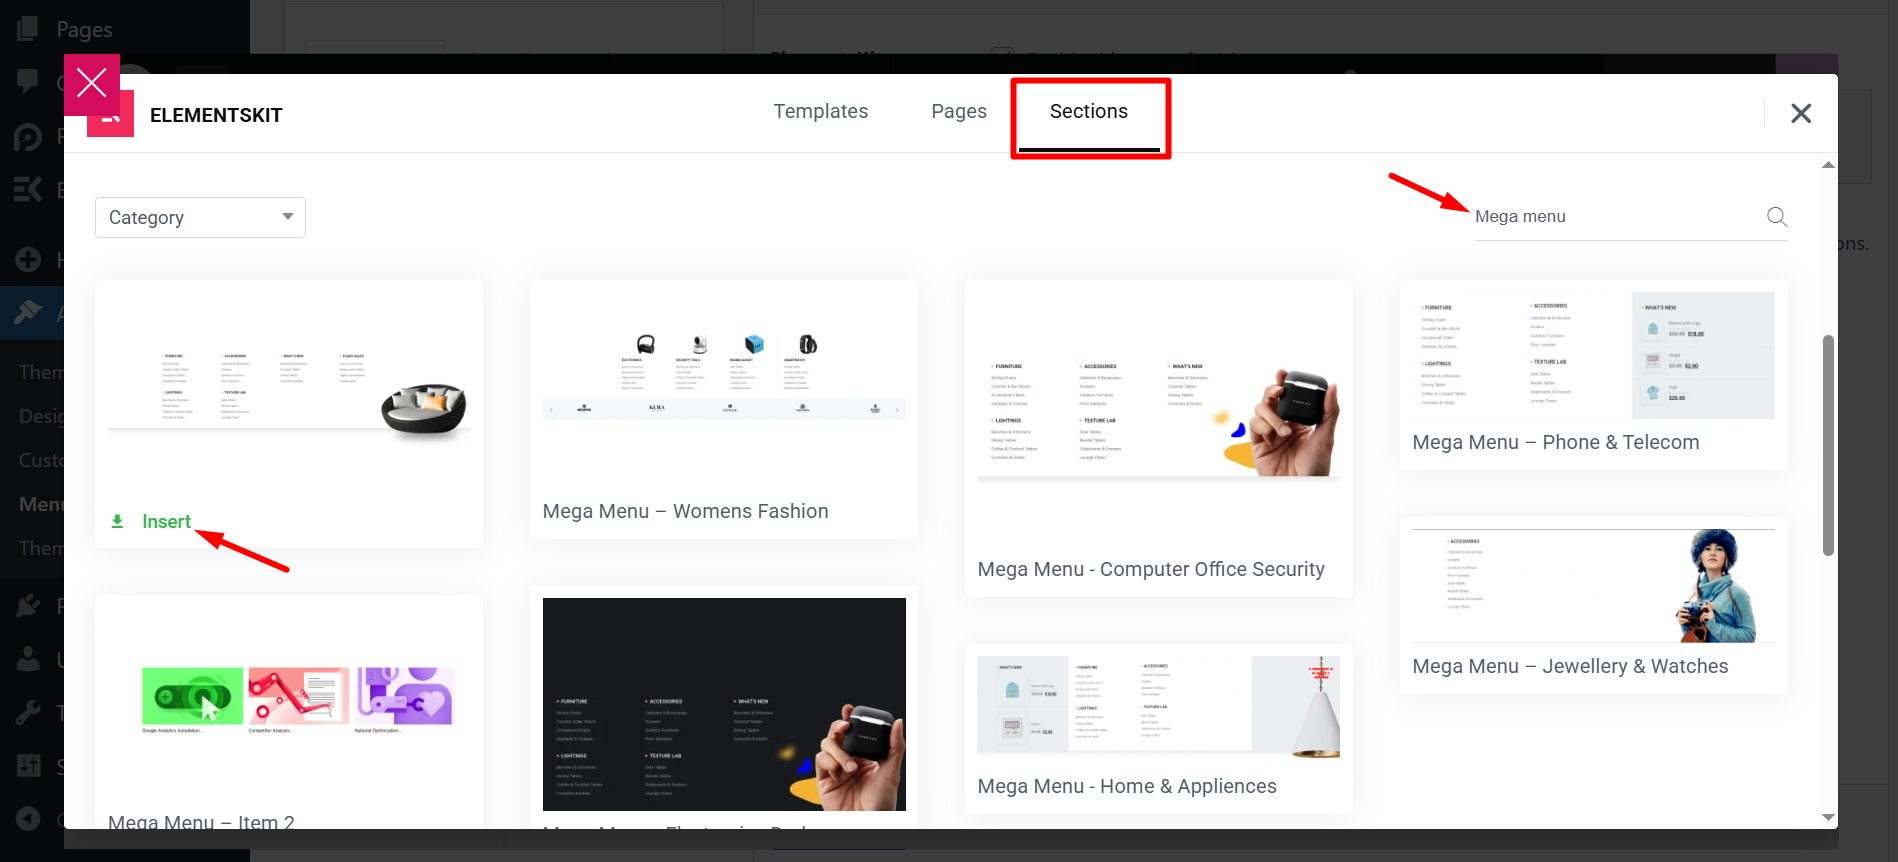
In the next step, a window will appear where you need to click on the ElementsKit mallbiblioteksikon.
- Gå till sektioner
- Search mega menu
- Välj en Megameny template from the list and insert
You’ll see that your inserted pre-designed mega menu template item will display. Redigera den inre delen genom att klicka på det prickade avsnittet.
Behållare
Container Layout: Select the structural system, like Flexbox, to organize your elements.
Content Width: Choose between Full bredd eller Boxad for your horizontal boundaries.
Bredd: Set the specific horizontal percentage or pixel size.
Min Height: Set the minimum vertical space the container must fill.
Items Management
Wrap: Allow items to move to a new line when they run out of space.
Riktning: Stack items vertically in a column or horizontally in a row.
Motivera innehåll: Distribute items along the main axis, such as center or spaced out.
Justera objekt: Position items along the cross axis for consistent vertical or horizontal alignment.
Gaps: Define the exact pixel spacing between individual items.

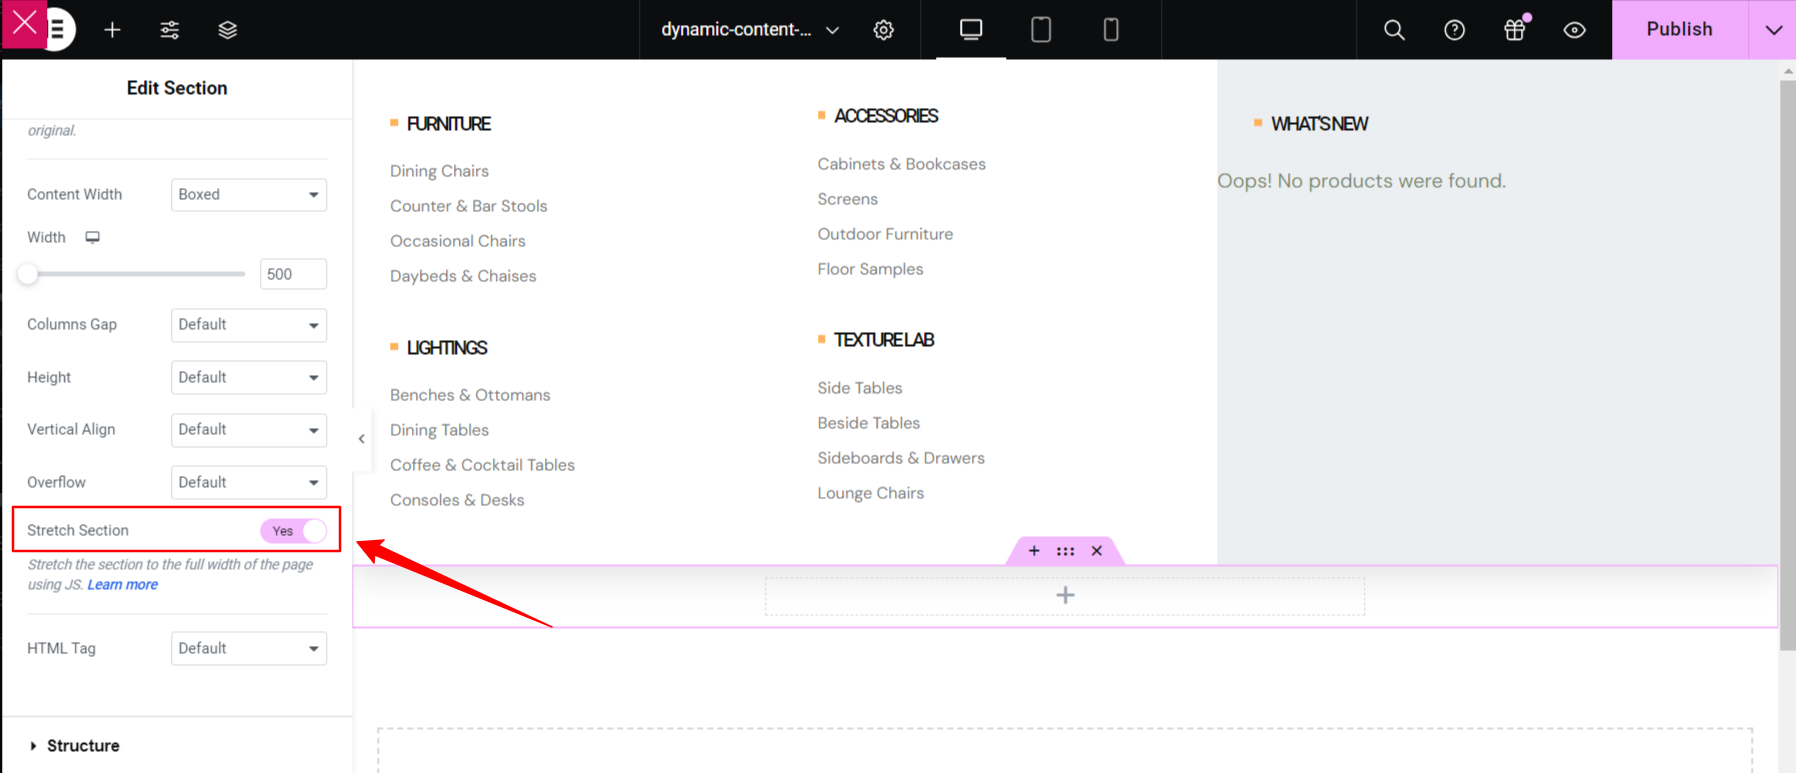
Stretch avsnitt #
Toggle this button to turn the Elementor mega menu to full-width, which spans from right to left of the screen’s width.
Välj HTML-tagg #
- Välj din HTML-tagg från Falla ner to create custom WP menu.
Om du vill se det i aktion, titta på den här videon och gör det själv inom några minuter.
Anpassa Mega Menu Rubrik Text #
- Välj ikontyp.
- Aktivera för att lägga till ikon.
- Ladda upp rubrikikon.
- Lägg till eller redigera titel.
- Lägg till Redigera beskrivning.
Anpassa text #
- Lägg till eller redigera Text.
- Lägg till eller redigera Texta.
- Göra det möjligt att Visa etikett.
- Lägg till eller redigera Märka.
- Anpassa Bakgrundsfärg, typografi, stoppning, justering, radie.
- När du är klar klickar du på uppdatera och stäng fönstret.
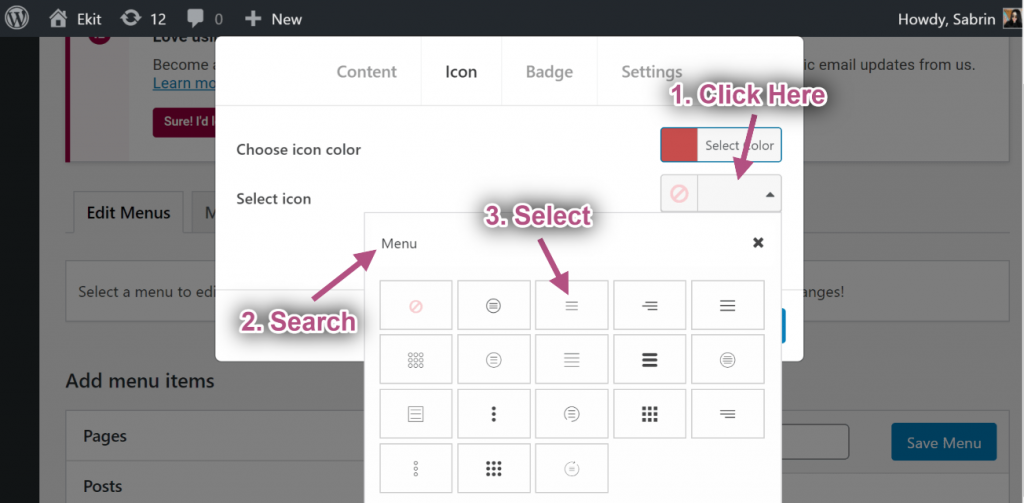
Steg #3: Anpassa ikon #
- Gå nu till Ikon Tab=> Välj valfri färg från Färgpalett.
- Välj Ikon från Ikon bibliotek.
Steg #4: Anpassa märket #
- Lägg till eller redigera text.
- Välja Badge färg.
- välja Badge bakgrundsfärg.
- Klick Spara.
Steg #5: Inställningar #
Standardbredd #
- Välj Mega Menu Width: Standard.
- Välj Mega Menu Position: Standard.
- Spara fönstret.
- Webbplatsvy: Visar standardbredd med standardposition.
Standardrelativ #
- Välj Mega Menu Width: Standard.
- Välj Mega Menu Position: Relativ.
- Klick Spara.
- Webbplatsvy: Visar standardbredd med relativ position.
Standard full bredd #
- Välj Mega Menu Width: Full bredd.
- Välj Mega Menu Position: Standard.
- Klick Spara.
- Webbplatsvy: Visar full bredd med standardposition.
Full bredd relativ position #
- Välj Mega Menu Width: Full bredd.
- Välj Mega Menu Position: Relativ.
- Klick Spara.
- Webbplatsvy: Som visar Full bredd med relativ position.
Anpassad standardbredd #
- Välj Mega Menu Width: Anpassad bredd.
- Ange vilken anpassad bredd som helst, men det är det som standard 750 pixlar.
- Välj Mega Menu Position: Standard.
- Klick Spara.
- Webbplatsvy: Som visar Anpassad bredd med standardposition.
Anpassad standardbredd Relativ #
- Välj Mega Menu Width: Anpassad bredd.
- Ange vilken anpassad bredd som helst, men det är det som standard 750 pixlar.
- Välj Mega Menu Position: Relativ.
- Klick Spara.
- Webbplatsvy: Som visar Anpassad bredd med relativ position.
Steg #6: Skapa en huvudmall #
Här kan du använda Elementor Header Mall eller så kan du använda ElementsKit Header Mall. Låt oss se till att lägga till det.
- Navigera till ElementsKit→ Sidhuvud Sidfot→ och klicka Lägg till ny.
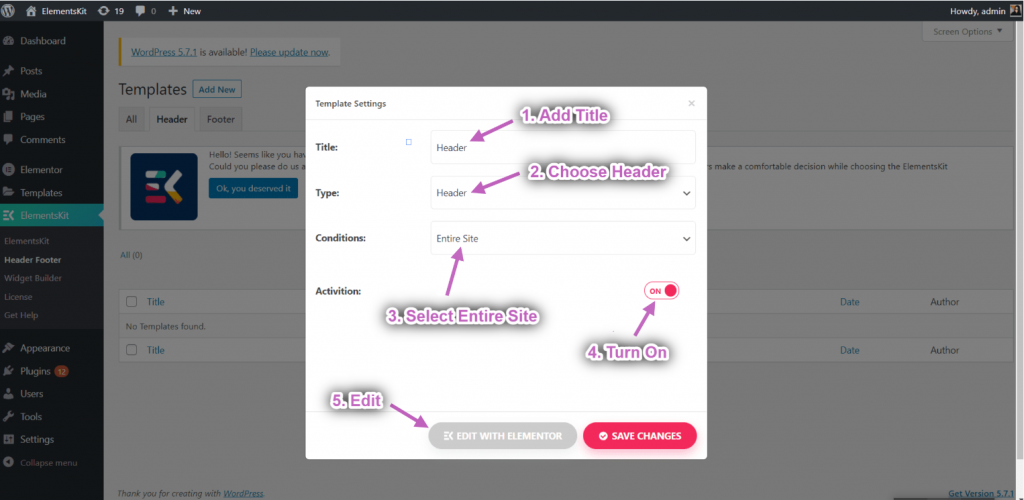
- En popup-ruta öppnas med alternativ.
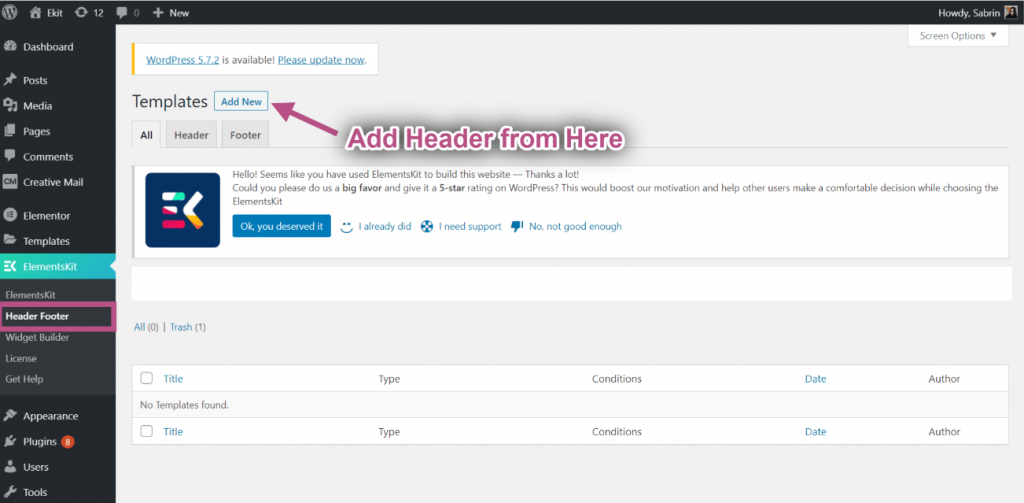
- Skriv a i popup-rutan Titel, Välj Skriv→ Rubrik.
- Välj Villkor→ Hela webbplatsen.
- Växla på Aktivering alternativet och klicka på Redigera med Elementor.
- Välj din Strukturera från det valda området.
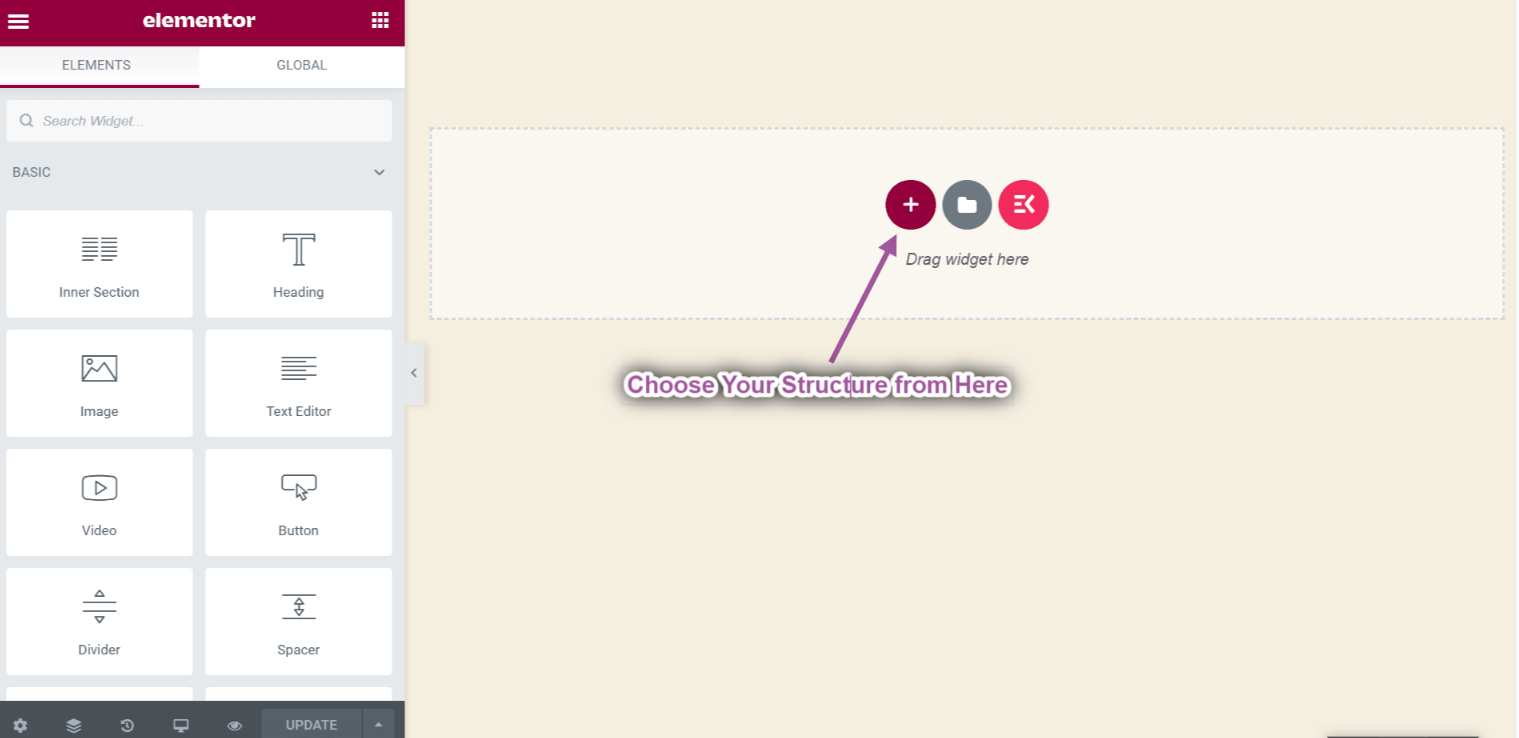
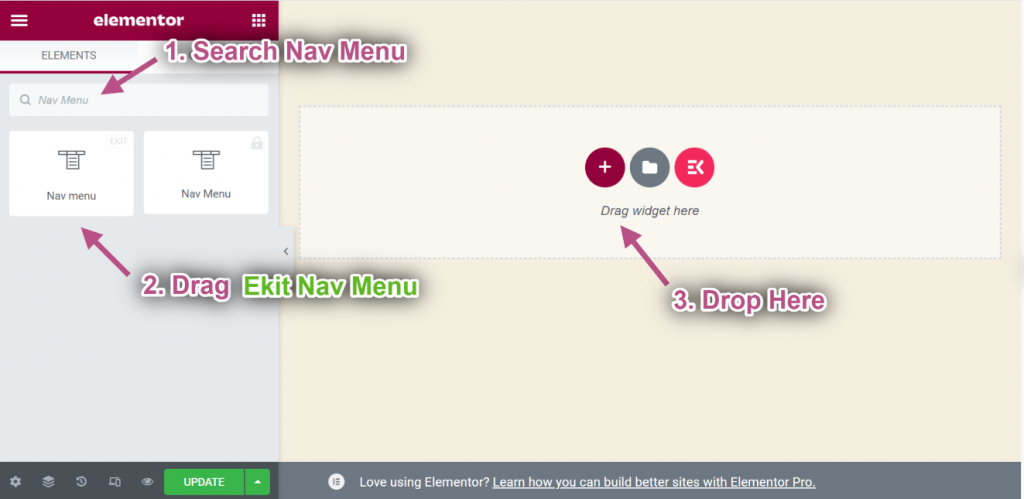
- Sök nu Nav-meny=> Dra Ekit Nav-meny och Släppa på det valda området.
** Notera: Se till att dra i ElementsKit Nav-menyn annars kommer din skapade Meg-meny inte att visas.
- Gå nu till Menyinställningar=> välj din skapade Huvudmeny från rullgardinsmenyn.
- Du kan lägga till vilken typ av widget som helst härifrån för att anpassa din rubrikmall.
Slutlig utgång #
När du är klar klickar du på Uppdatering button to save the menu created with the best mega menu plugin for Elementor.
Gå nu till din webbplats och du kan se att din valda Elementor Mega-meny visas i enlighet med detta.
Quick Recap
So overall, what we’ve done throughout this WordPress mega menu tutorial is:
Tools Used: Elementor & ElementsKit Elementor Addon
✅ Install and activate a mega menu plugin, in our case, it’s the ElementsKit Mega Menu plugin for WordPress.
✅ Then, navigate to Appearance> Menu and configure our site’s menu.
✅ After setting all dropdown menu items, click the Mega meny button to start creating an Elementor mega menu with ElementsKit.
✅ Aktivera Mega meny toggle button and hit the REDIGERA MEGAMENU-INNEHÅLL alternativ.
✅ You’ll get the Elementor visual interface as your mega menu builder, with drag-and-drop controls to design it effortlessly.
✅ Insert a mega menu template or use Elementor widgets to build from scratch.
✅ In the ElementsKit mega menu editor, you can add rows, columns, and content to your submenus.
✅ Customize background, heading, layout, icon, badge, and other content elements without writing any code.
✅ Lastly, see the preview and make it live. And, with ElementsKit, you can apply conditions for header navigation.
So, this was the easiest way to build Elementor mega menu in your WordPress website.


