


ShopEngine’s WooCommerce multistep checkout module makes it easy to split the checkout steps. As a result, your customers will find it convenient to complete the checkout process. It is highly modifiable that you can give the very best experience to your customers.
Quick Overview
This documentation will guide you to add WooCommerce multistep checkout with a template. ShopEngine allows you to create multi-step checkout with its dedicated module and templates. It’s a premium feature so you will need both ShopEngine free and pro plans.
Needed solutions: Elementor (free), WooCommerce (free), & ShopEngine (free & pro)
Besides, you will need two more free solutions mentioned above. After setting up those plugins on your WordPress dashboard, take the following attempts:
✅ Enable multi-step checkout module.
✅ Select multi-step checkout template.
✅ Customize the template
Also, you can create multi-step checkout page from scratch by selecting the blank template.
How to Integrate WooCommerce Multistep Checkout with ShopEngine? #
Följ följande steg för att integrera flerstegsutcheckningen för WooCommerce.
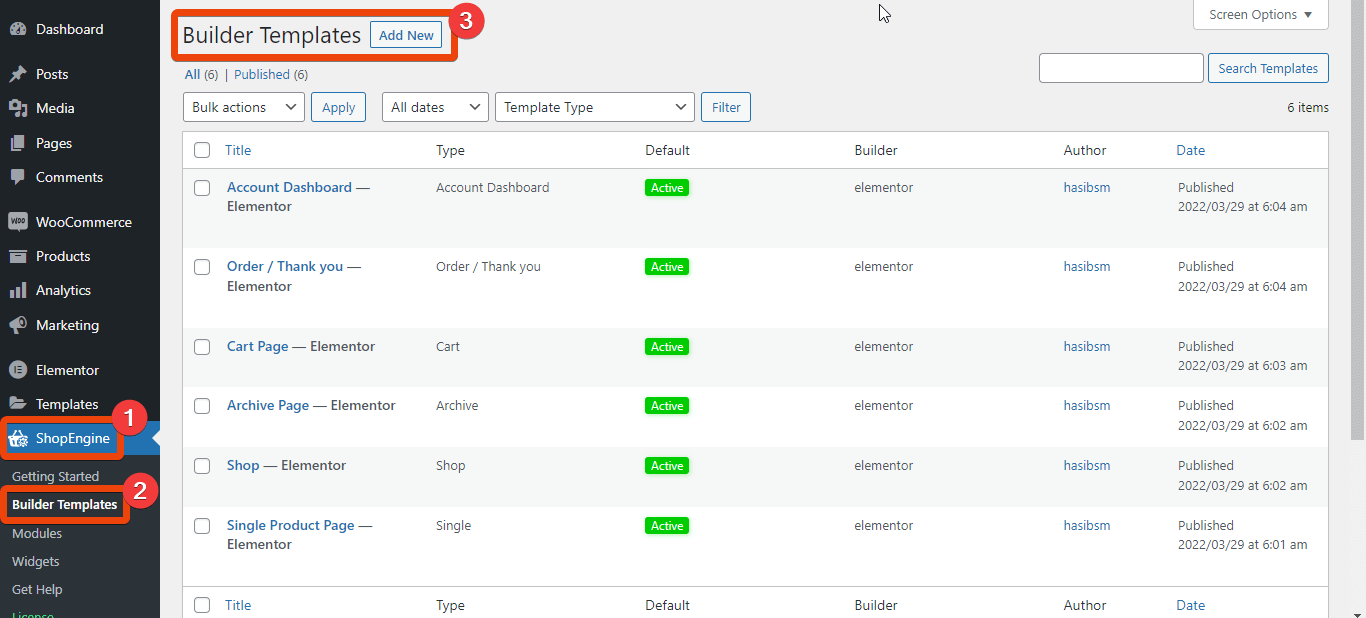
Steg 1: Gå till WordPress Dashboard > ShopEngine > Moduler
Från modullistan, turn on the ‘Flerstegsutcheckning’ module.
Gå nu till ShopEngine > Builder-mallar. Nu välj 'Lägg till ny'.
Du kommer att se alla färdiga mallar från ShopEngine. Nu välj "Kassa" från listan och ge mallsidan ett namn.
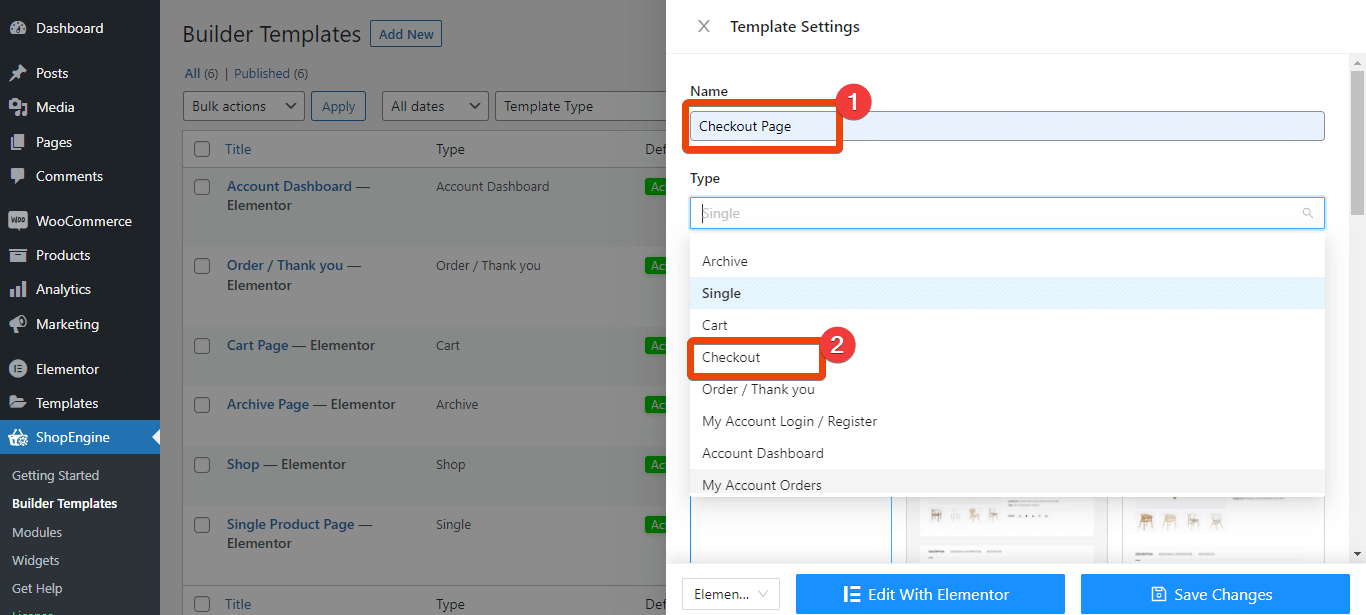
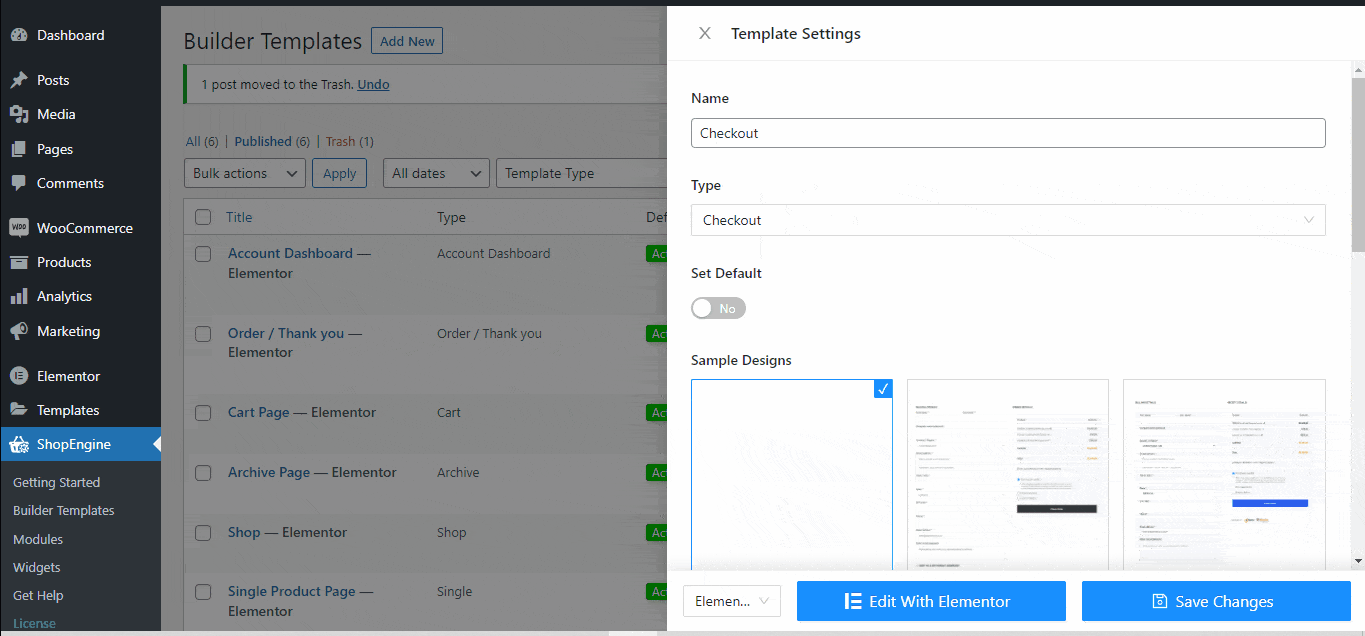
Du kommer att se flera layouter för kassan. Som ditt mål är att sätta flerstegs utcheckning så välj malllayouten med flera steg från listan. Välj mallen som standard för att aktivera den.
Nu, om din kund lägger till produkter i varukorgen och går till kassan, kommer han att se flera steg för att slutföra kassan.
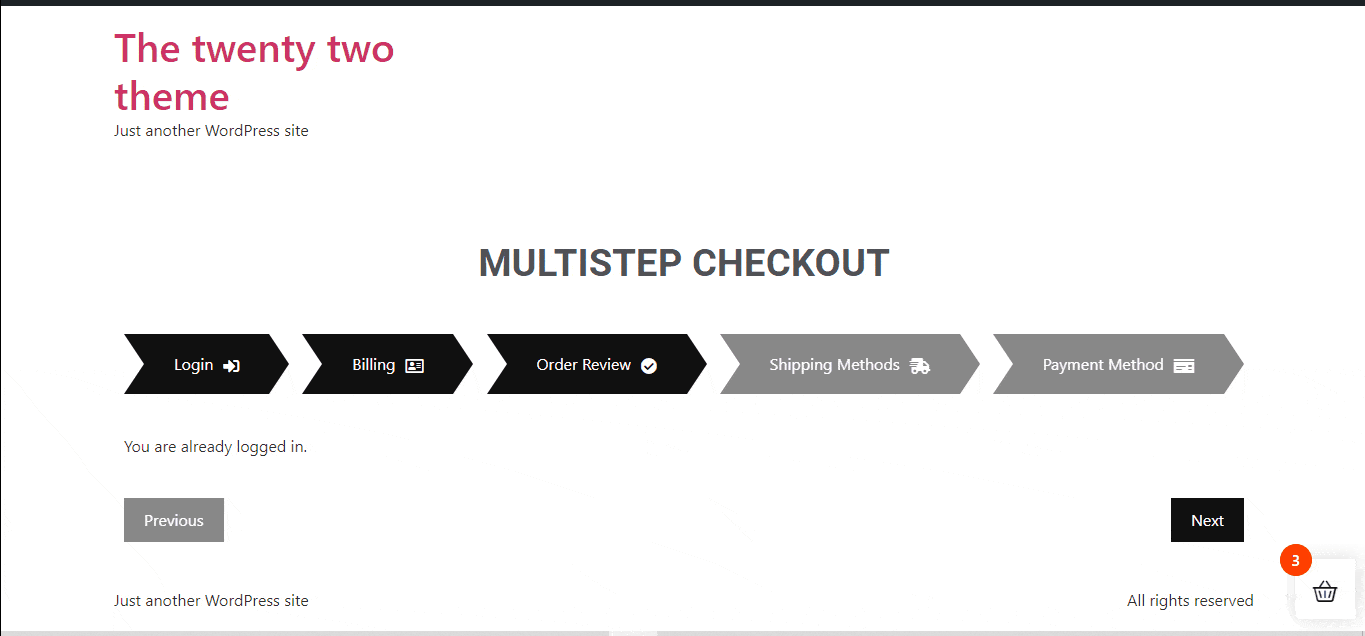
Du kan anpassa var och en av avsnitten i denna färdiga mall.
Dock, du kan skapa flerstegsutcheckningen från grunden också.
För anpassad flerstegsutcheckning, välj en tom mall istället för den färdiga från malllistan för kassan. Spara ändringarna.

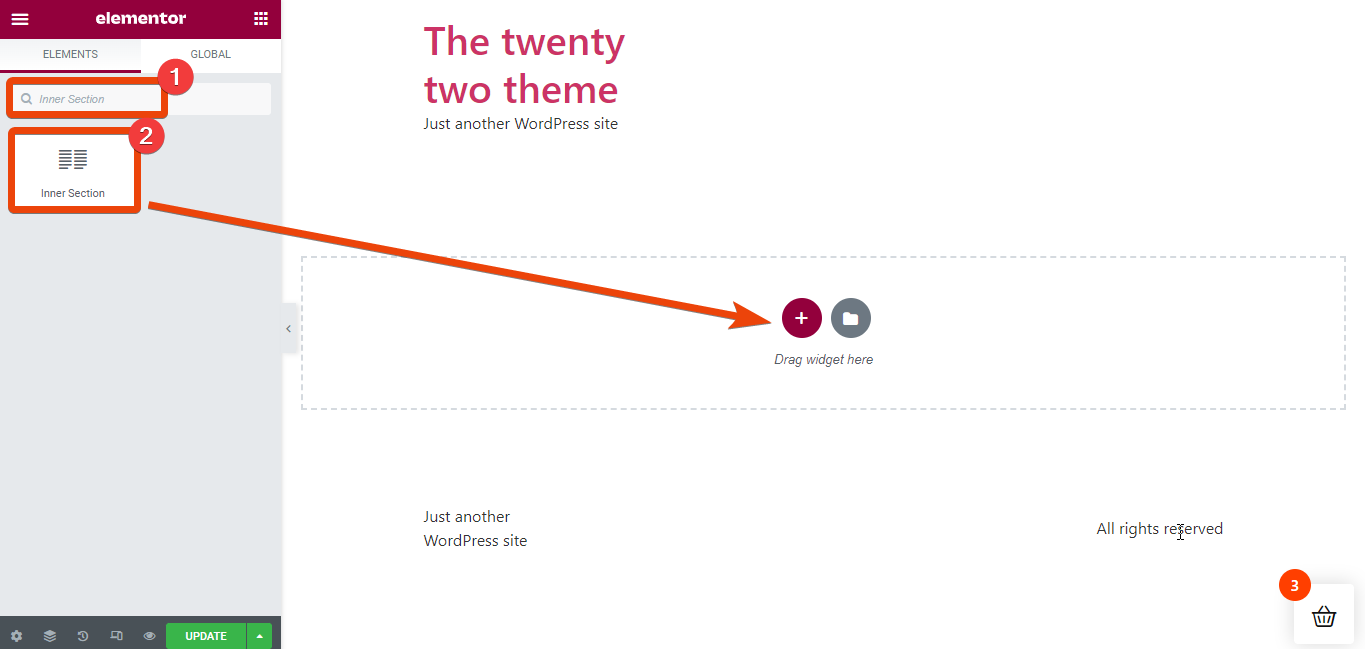
Välj nu "Redigera med Elementor". Skapa ett nytt avsnitt på sidan.
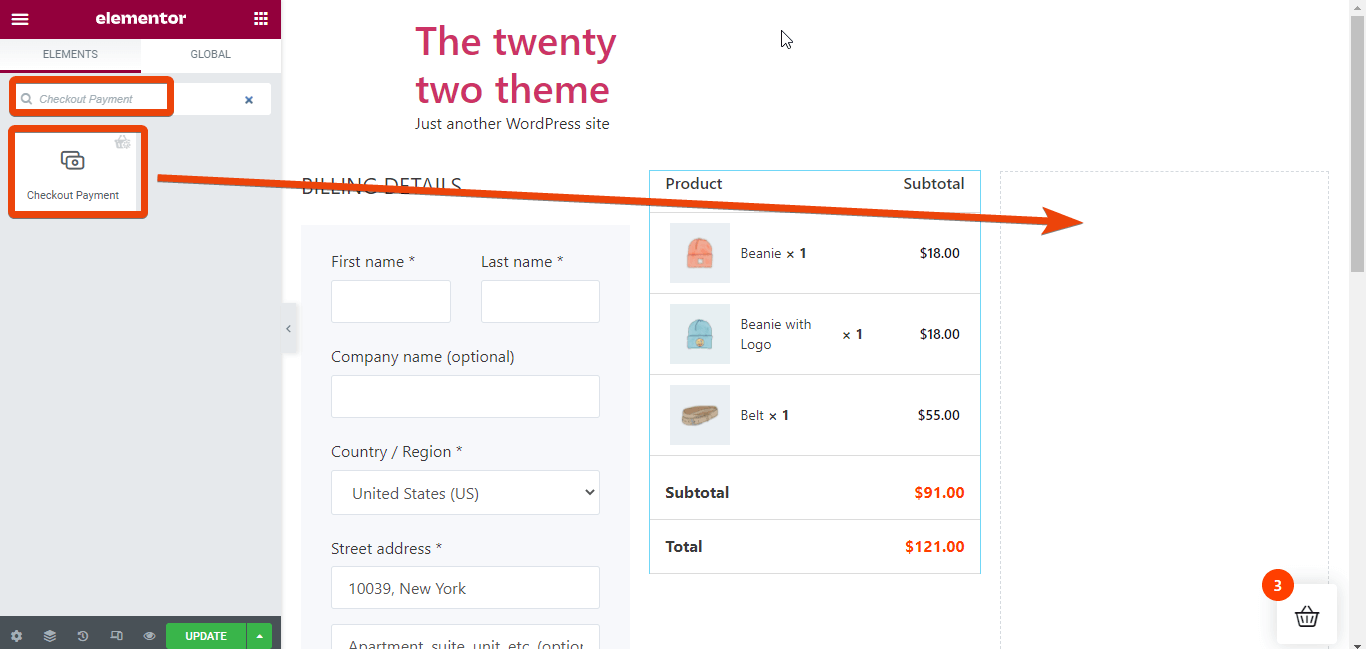
Gå till widgetbiblioteket och sök efter 'Inner sektion'. Dra och släpp den inre delen på sidan. Du kan sedan lägga till vilket steg som helst i det inre sektionsområdet.
Anta att du vill lägga till fakturering, ordergranskning och betalningsalternativ steps for the WooCommerce multistep checkout page. In the widget library, search for ‘Checkout Form Billing’ widget and it will appear.
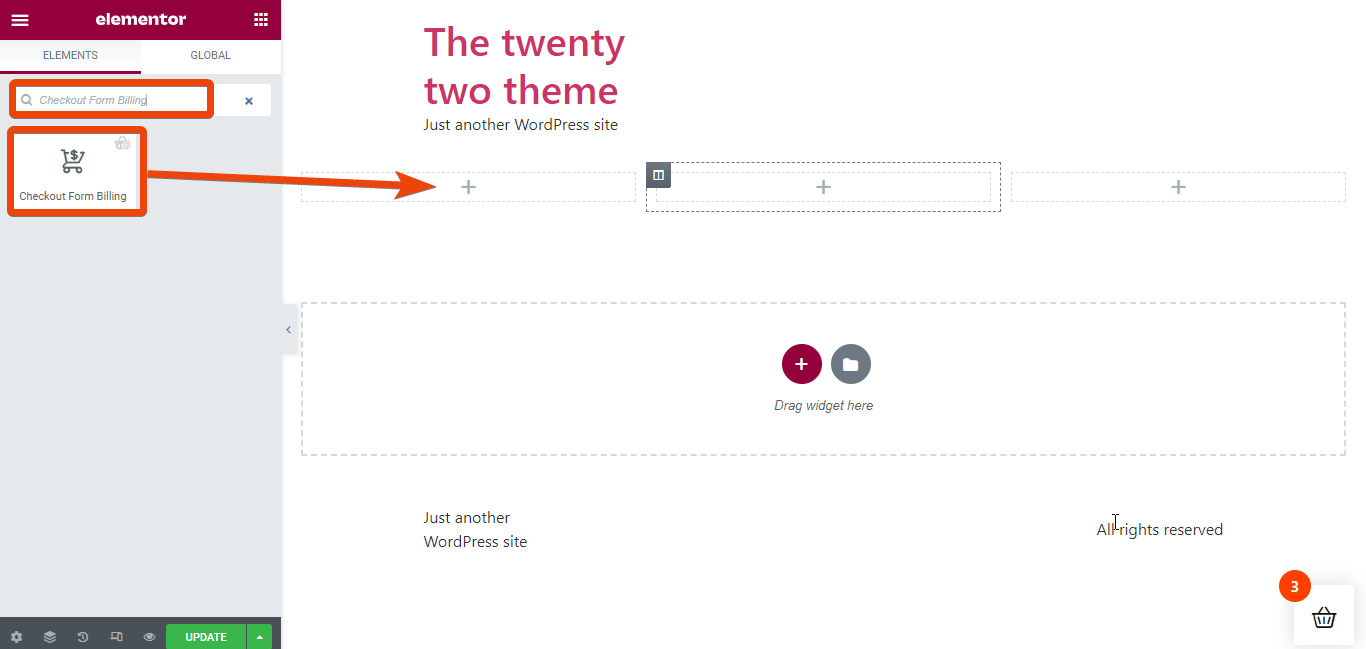
Dra och släpp widgeten i den inre delen.
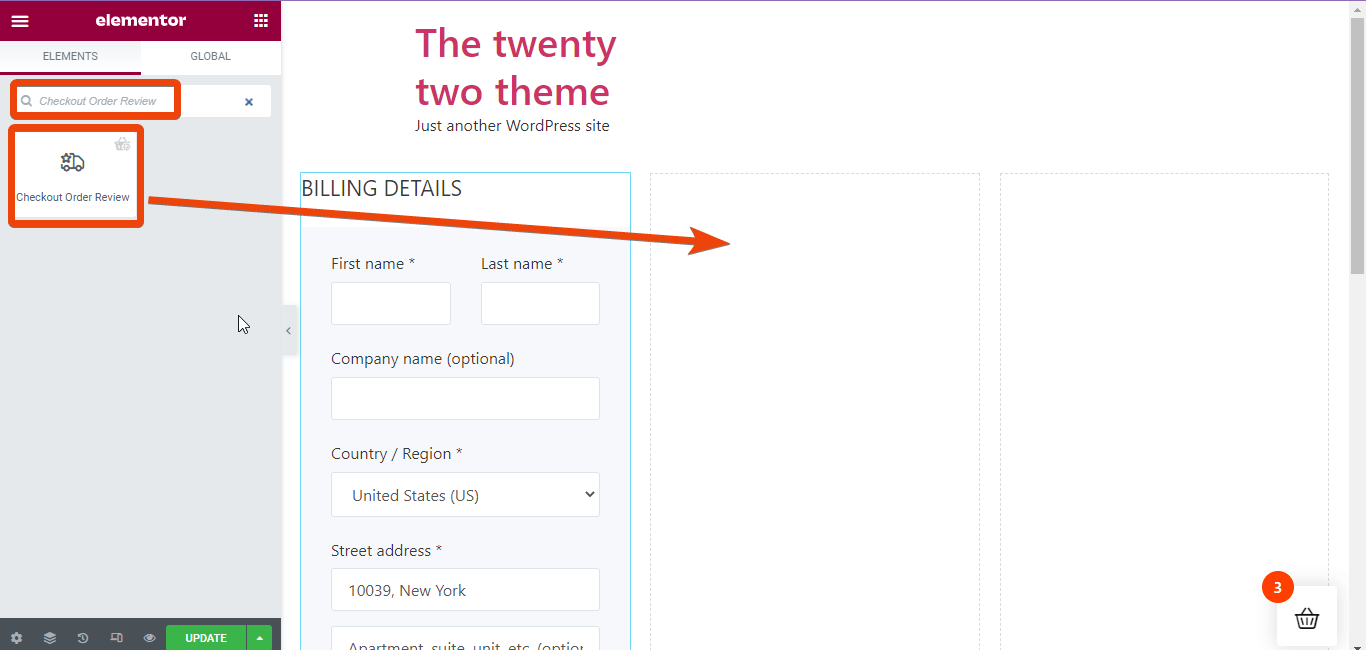
Lägg på samma sätt till 'Recension av beställning till kassan'. Sök efter widgeten och dra och släpp widgeten.
Återigen, sök efter "Kassabetalning" widgets på sidan.
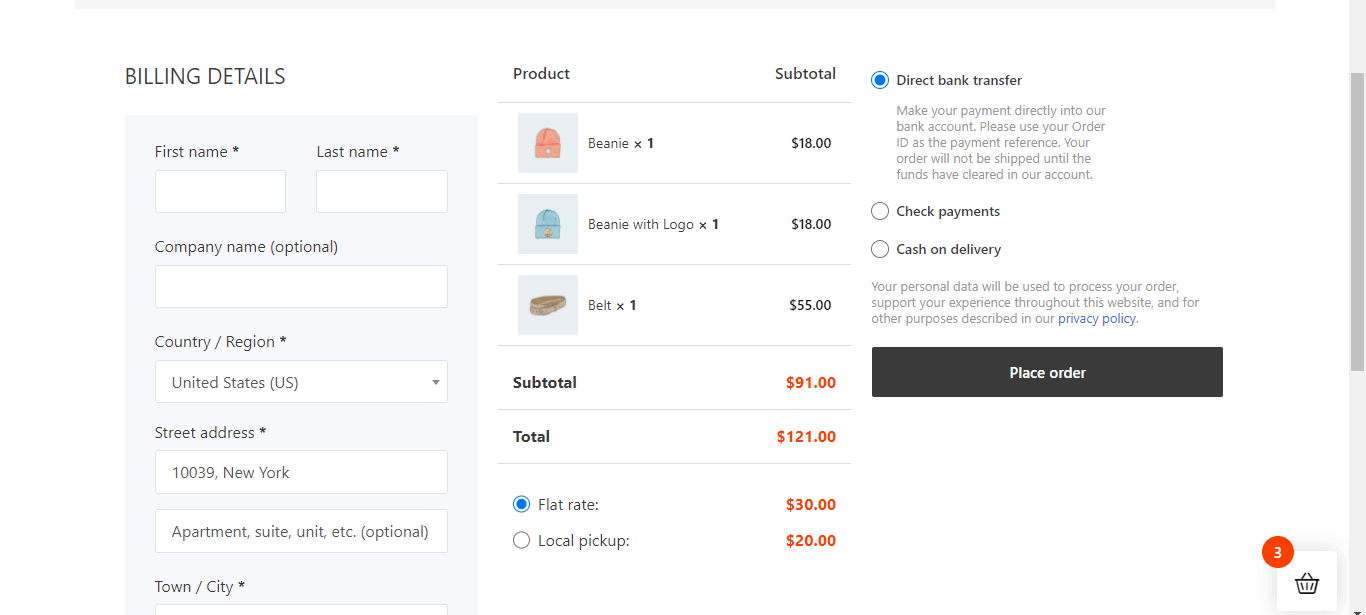
Kontrollera förhandsgranskningen av sidan för att se hur den kommer att se ut för kunderna.
Till sist, update the WooCommerce multi-step checkout page. Du kan också lägga till andra alternativ.


