What to update your WordPress site, plugins, or themes? But couldn’t, since new updates can break down your site? If yes, then you shouldn’t be afraid anymore. Because now you can resolve this problem by setting up a WordPress staging site.
A WordPress staging website will create a private environment where you can make any changes without pushing them to the live site. As a result, your live site remains the same as before no matter how many wrong update attempts you have done on your staging site.
Now the most concerning part is how to set up a staging site in WordPress. No worries, we will cover this up on this blog. In this blog, you will know everything regarding a staging website, its importance, and how you can create it.
What is a WordPress staging site?
A WordPress staging site is a copy of your live site where you can try out all the major updates of plugins and themes without harming your live site. This staging site won’t be available to the public. Only you can view this site and use it for testing purposes.
Now, are you thinking, what are the uses of staging sites in WordPress? There are many advantages. Without a staging website, your live site will be at risk. Wondering how? Have a look at the next section where you will get to know what are the benefits of using the WordPress staging environment.

Why do you need to create a WordPress staging environment?
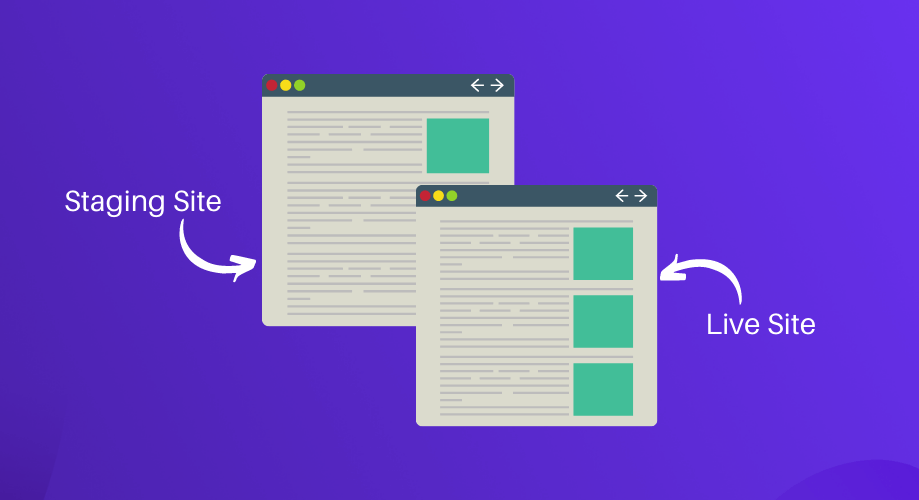
Creating a WordPress staging website is the first precaution that you can take to keep your site safe before making any wrong updates. As it is not connected to the live site that means any changes on your staging site won’t affect your live site. As a result, you can test out all the recent updates of plugins and themes on your testing site and after checking, you can migrate them to the live site.
But, why do you need to do that?
Sometimes, new updates of plugins and themes can have bugs. Now, updating the buggy version can break down the live site that you had built with lots of effort and time. So, it is ideal to check the new updates on the testing site, then bring that to the live site.
Let me give a real-life example. WordPress 6.0 was released on May 24, 2022. If you go to your admin dashboard, you will see WordPress is suggesting you install its latest version. In this case, updating your WordPress version without checking on the staging website might cause you some issues. Let’s have a look at those:
- Plugins on your site might have compatibility issues with the new WordPress version.
- The New WordPress release might have some bugs.
- The latest update might bring some changes to your WordPress site.
There is a higher possibility that your site might break down for all the above issues. So, you need to check new updates on your WordPress staging website first. After that, do it on your live site. Likewise, the scenario is the same for plugin or theme updates.
It is highly recommended to check every small or big update on the staging site. That’s why it is important to create a WordPress staging environment that helps you to keep your site safe and secure from buggy updates.
Want to know more about recent updates of WordPress such as its new release, full site editing, and Twenty Twenty-Two theme? If yes, then don’t forget to check out the following blogs:
1. The ultimate guide of WordPress full site editing.
2. A Quick look at the new features and improvements of WordPress 6.0.
3. Things you need to know about Twenty Twenty-Two block theme.
How to set up WordPress staging site in two simple ways
You can create a staging site either with your hosting provider’s built-in staging site feature or you can create it manually using cPanel or a plugin. Here we are skipping creating a testing site with hosting providers. Because only popular hosting providers have a one-click staging site creation option. Other non-popular ones don’t have that.
So, showing WordPress staging site creation using the cPanel or WordPress staging plugin is more appropriate. Hence, here you will get to know how to set up WordPress staging website using cPanel and plugin.
Set up staging environment using cPanel
Follow the following steps to set up a WordPress testing site manually using cPanel:
Step 1: Create a subdomain.
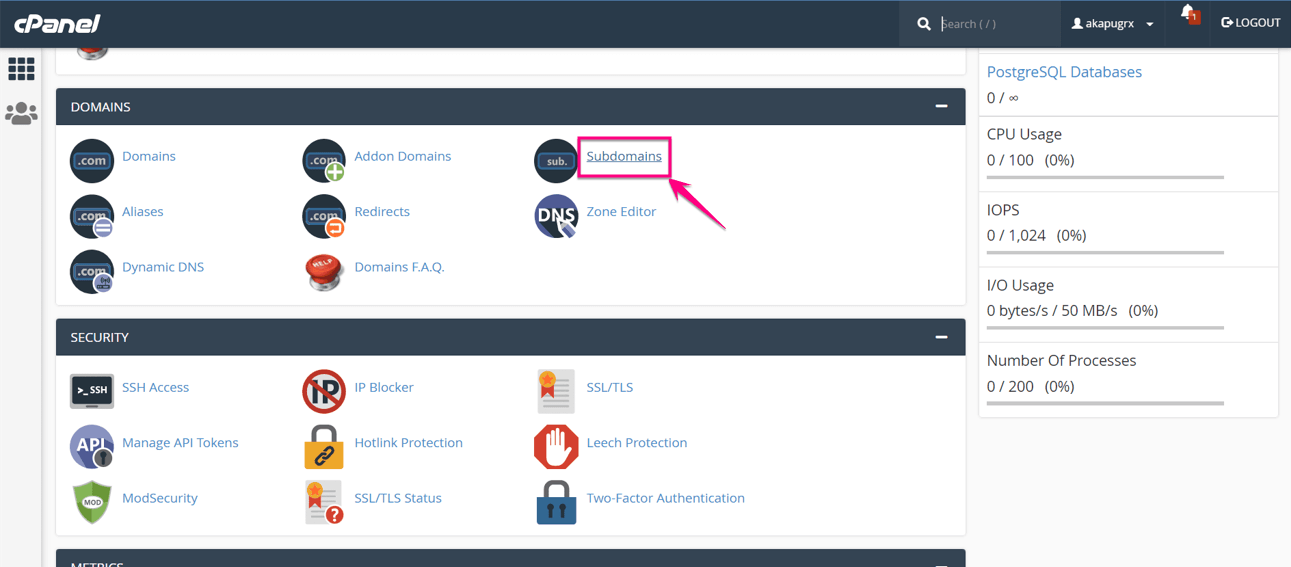
To create a staging site, you need to create a subdomain first. Go to your cPanel and click the subdomain option like the following image.
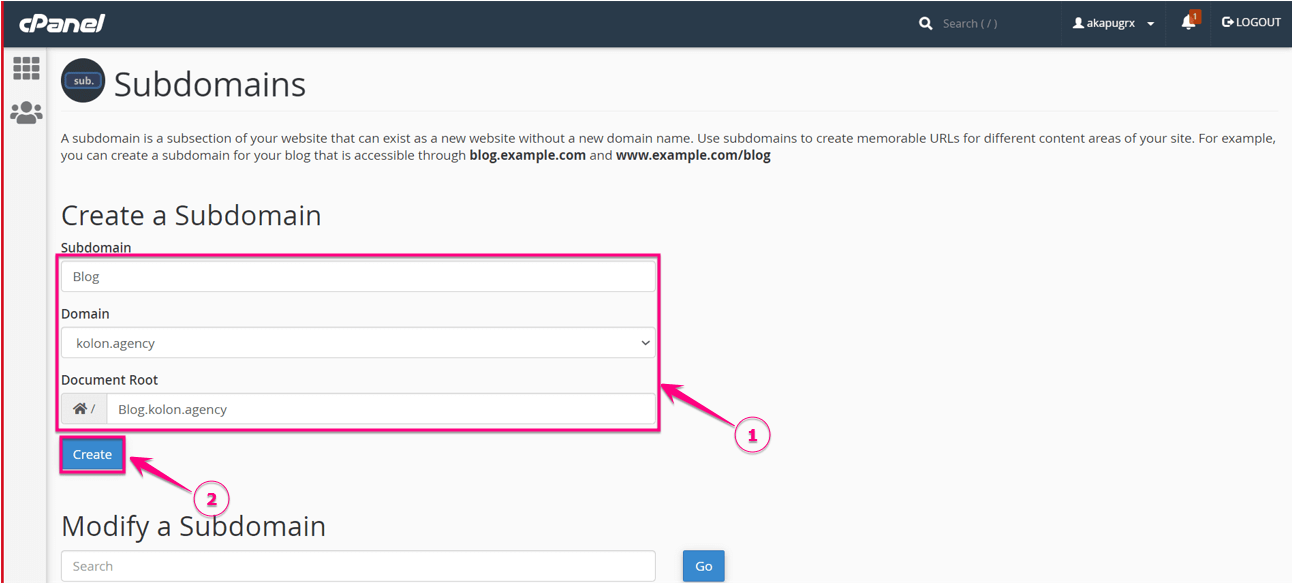
After that, provide some information like Subdomain, Domain, and Document Root for subdomain creation. Then click the “Create” button.
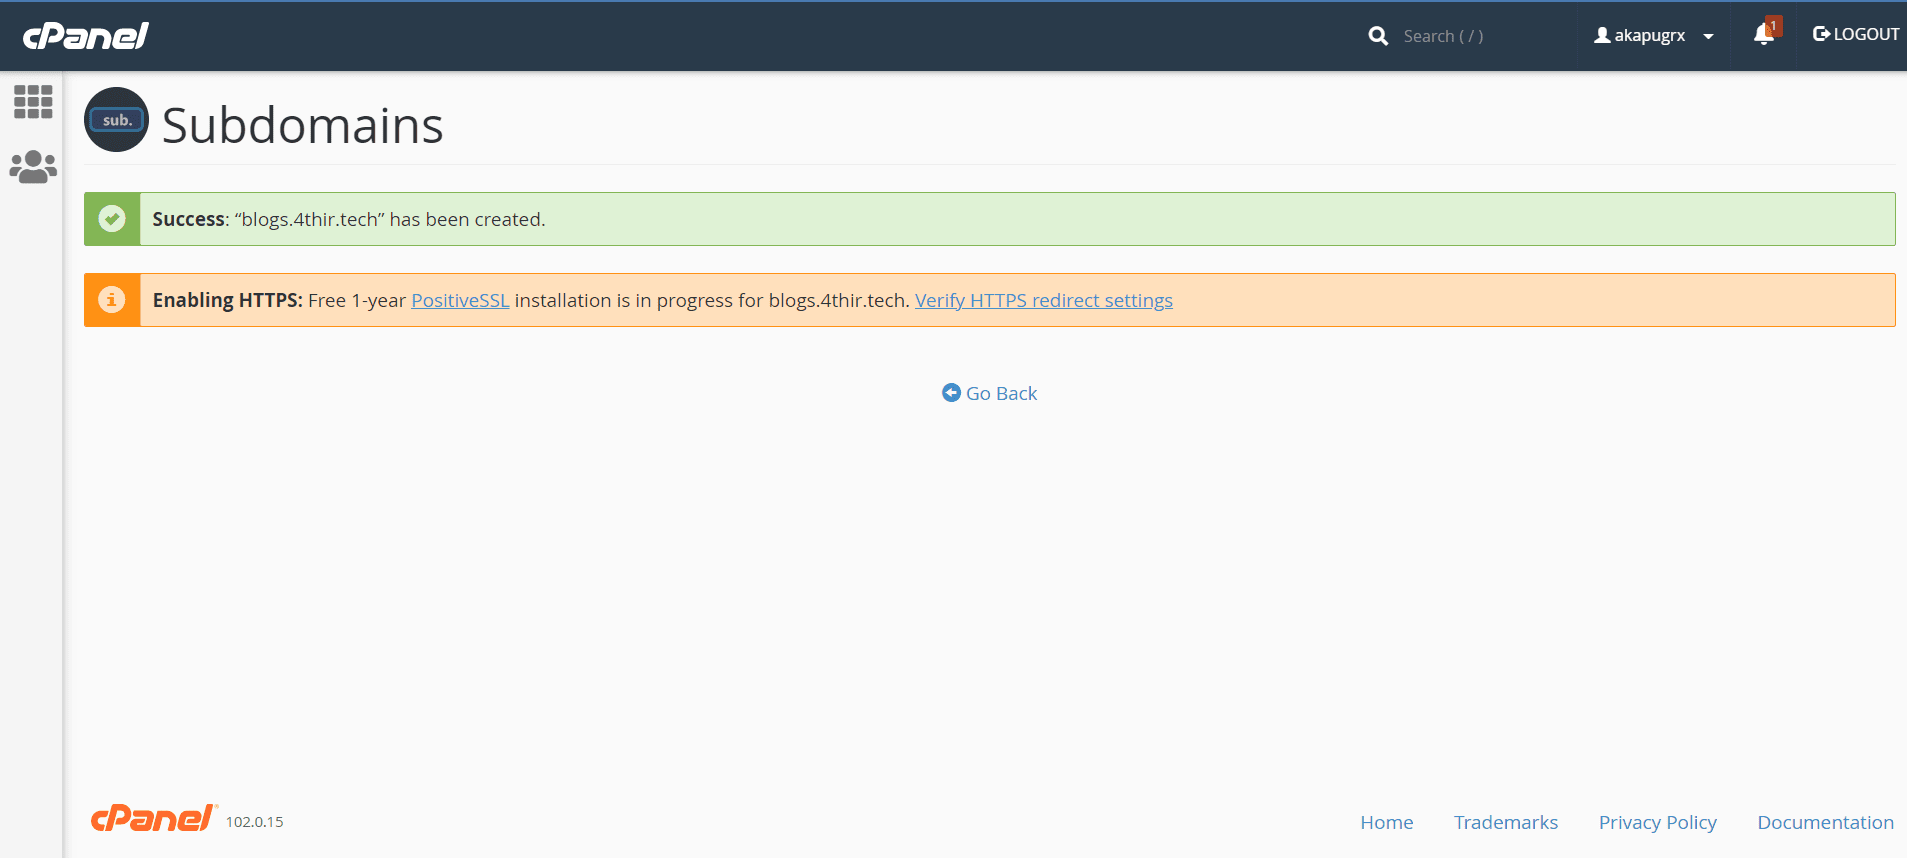
Here is your created Subdomain:
Step 2: Install your WordPress staging site.
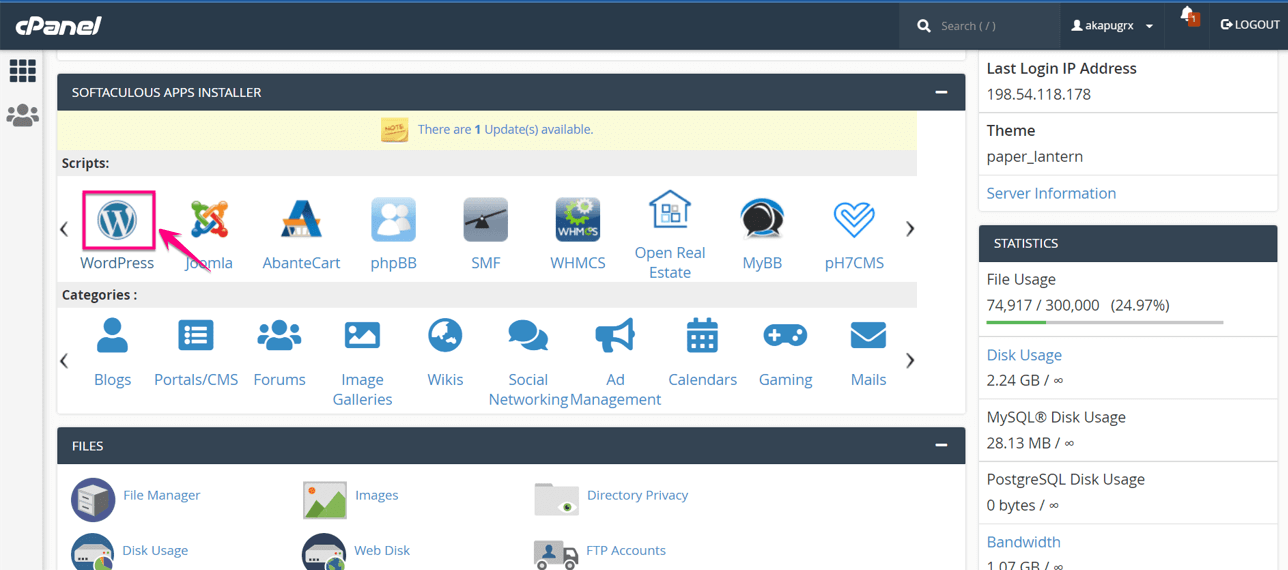
In the second step, you need to install a WordPress staging website. To do that, click on the WordPress icon from the WordPress manager.
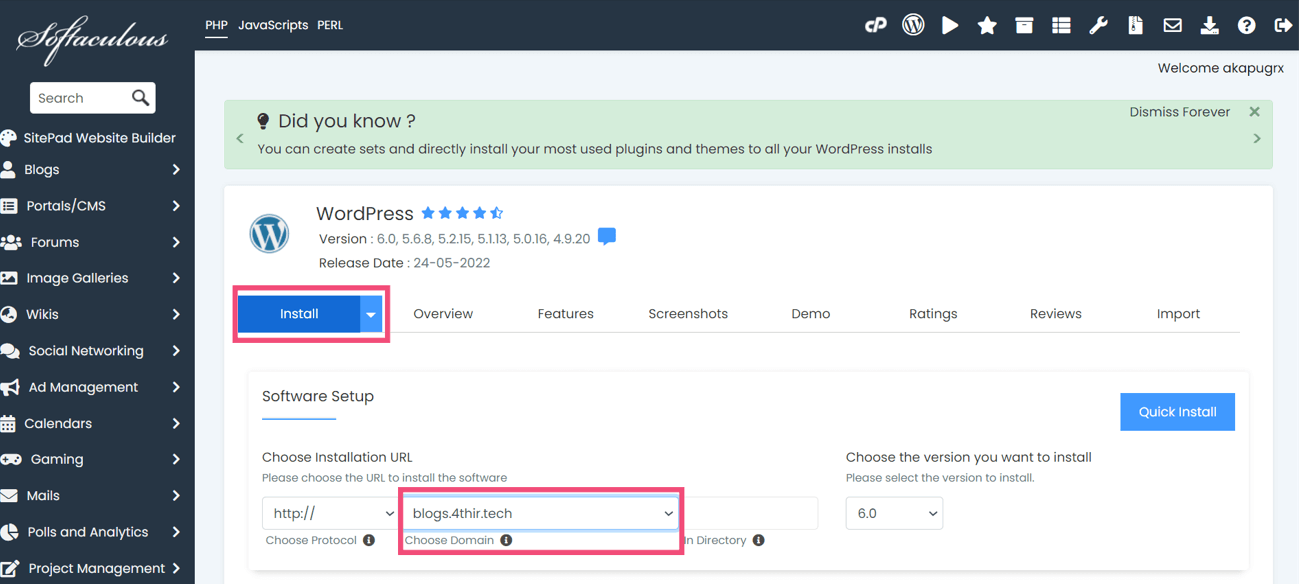
Now, go to the install tab and choose the subdomain that you just created.
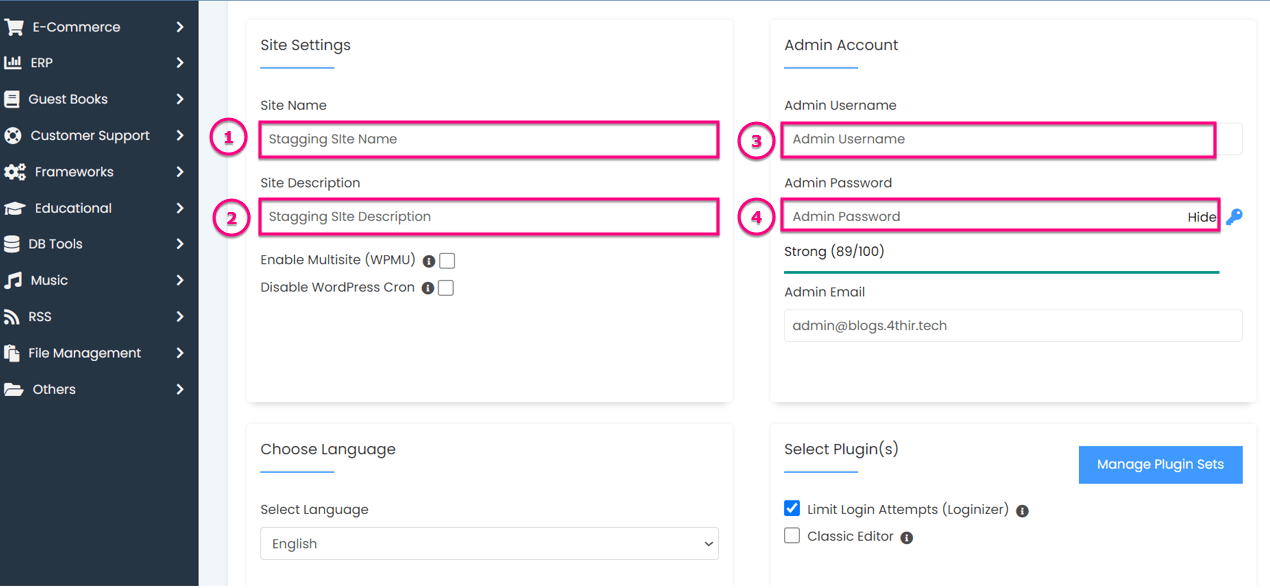
After that, provide the following information to install a staging site in WordPress:
- Site Name: Enter the site name of your staging website.
- Site Description: Here you need to provide the description for your site.
- Admin Username: Put the username of the site’s admin.
- Admin password: Provide the password for the admin login.
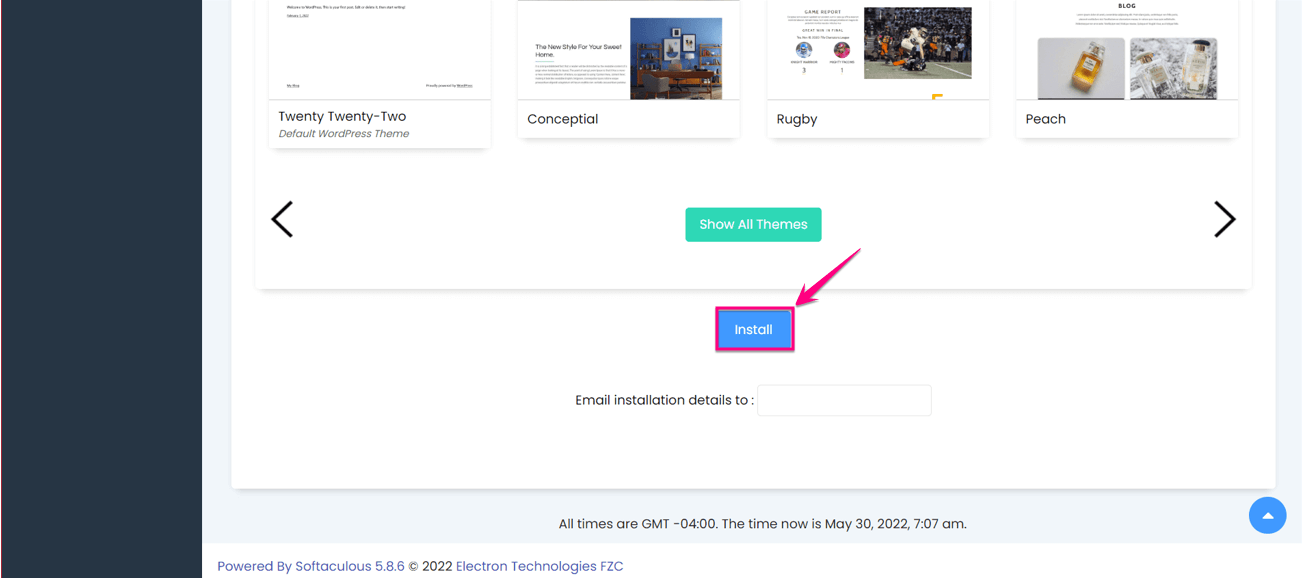
Finally, doing all the settings, you need to press the “install” button to build a staging site for WordPress.
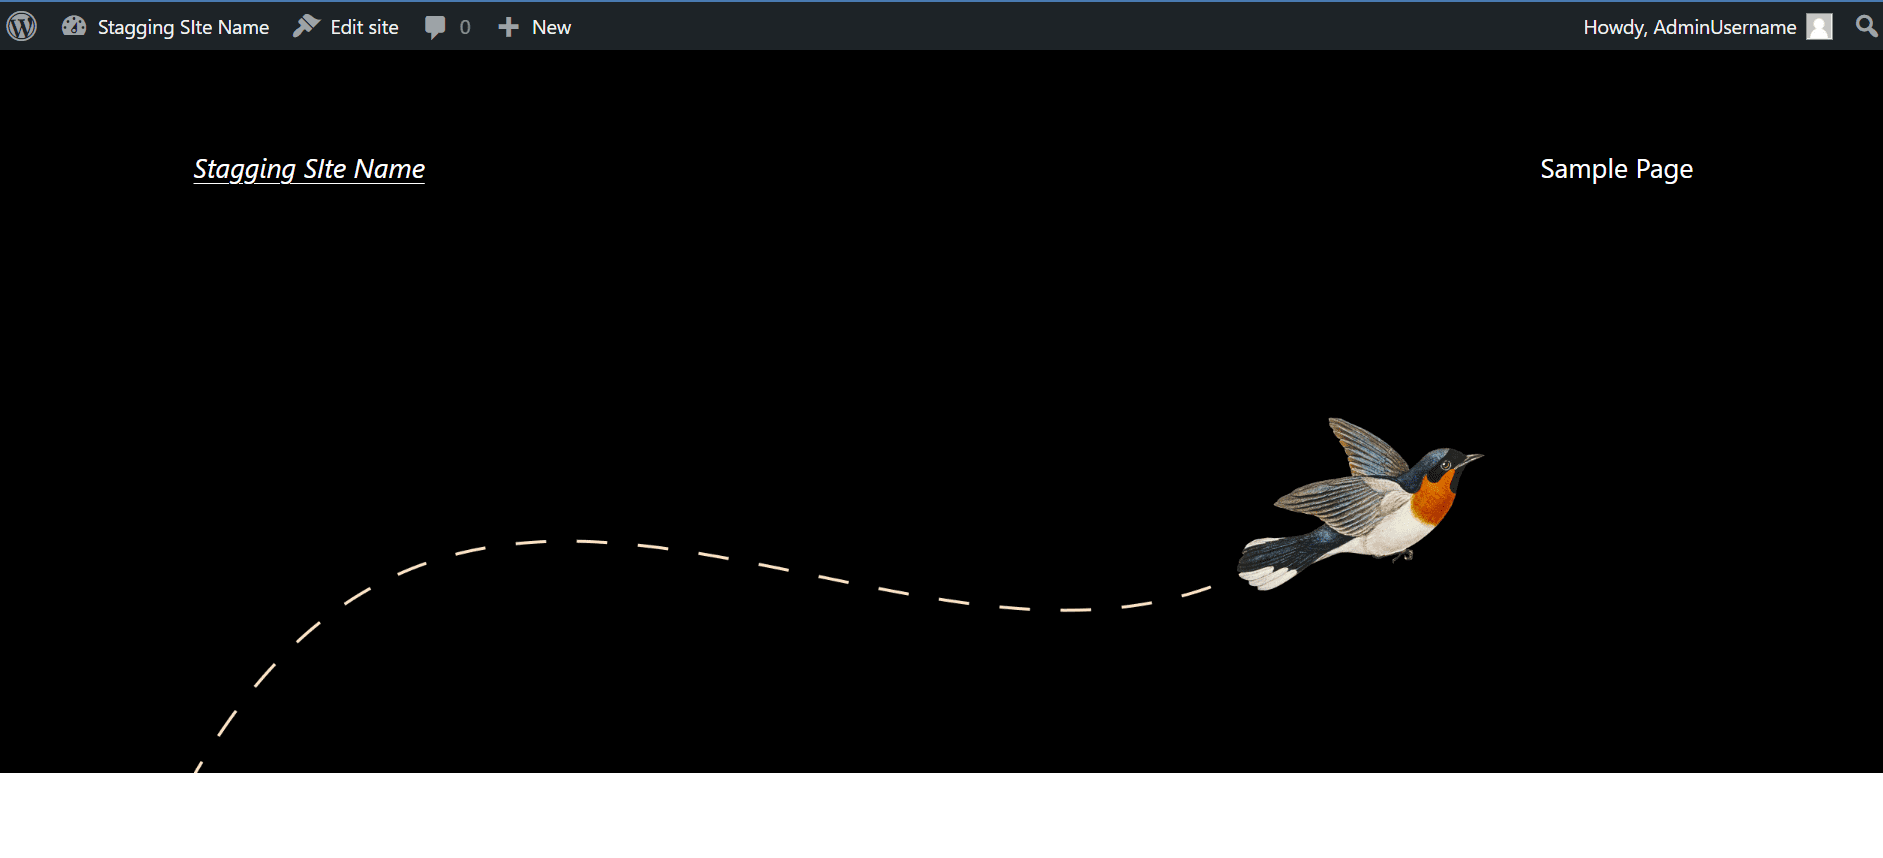
Here is the final look of your created WordPress dev site:
Create a staging site using a plugin
As we promised at the starting of this blog, we will include both staging site creation using the cPanel and a plugin. Now it is time to provide the steps of plugin one. So, let’s get started with how to set up WordPress staging site using a WordPress staging plugin:
Step 1: Install and activate the WordPress staging plugin.
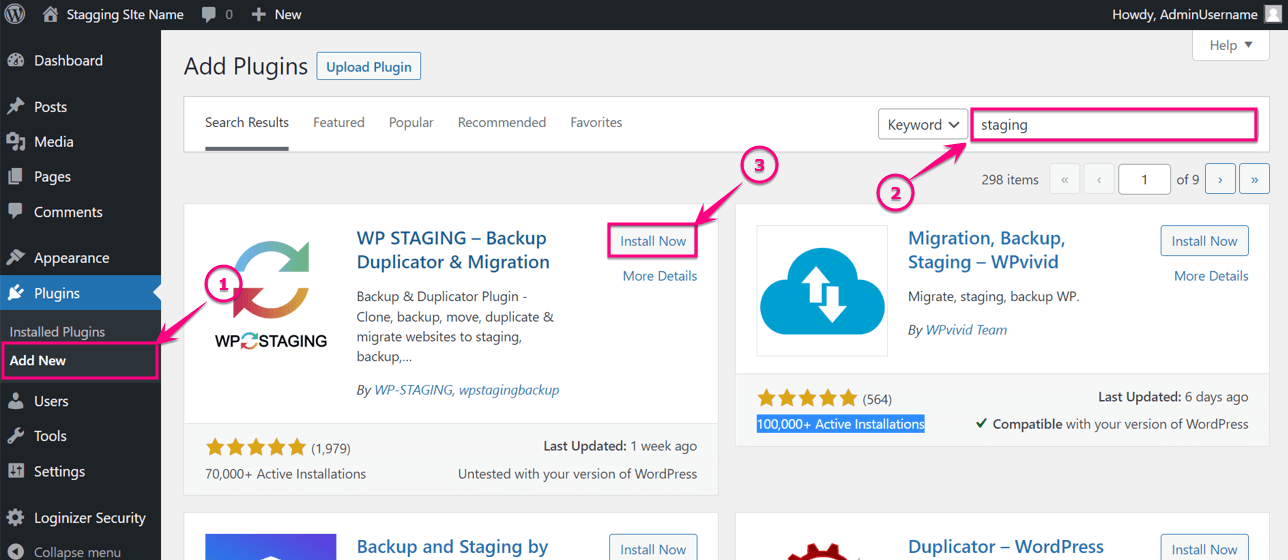
In the first step, you need to install a WordPress staging plugin. To do that, visit your admin panel and go to Plugins>> Add New. Now search for the WP Staging plugin in the search box and press the “install” button like the added image. After installing activate the plugin to create a staging site for WordPress.
Step 2: Cloning WP staging plugin.
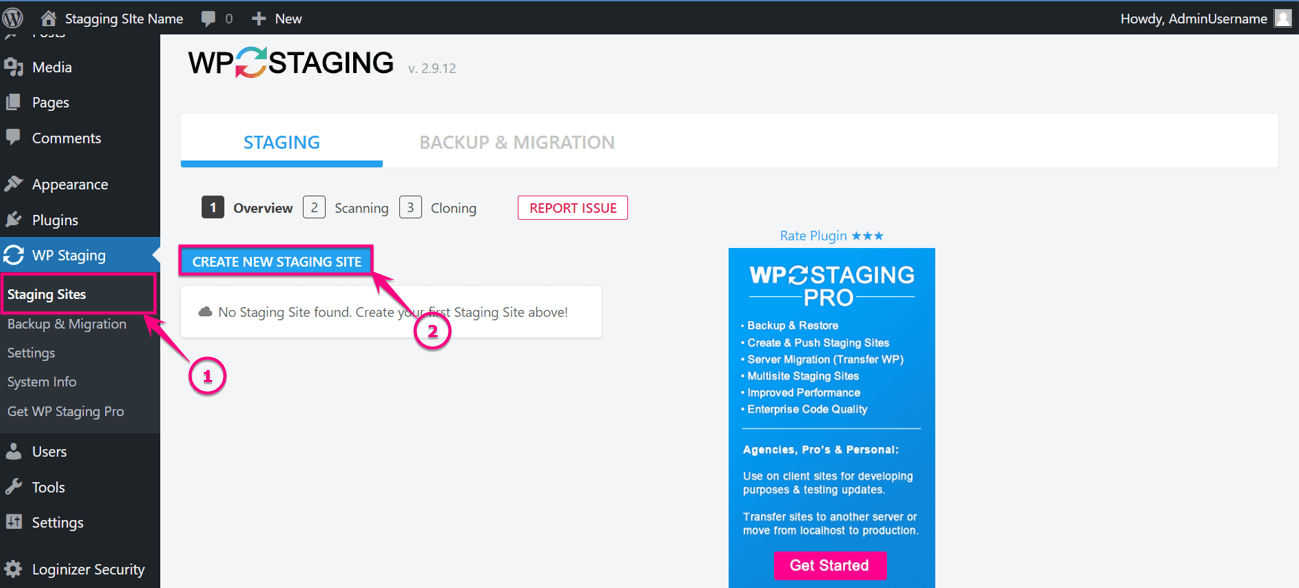
Now from the WordPress dashboard, go to WP Staging>> Staging Sites and press the “Create New Staging Site” button.
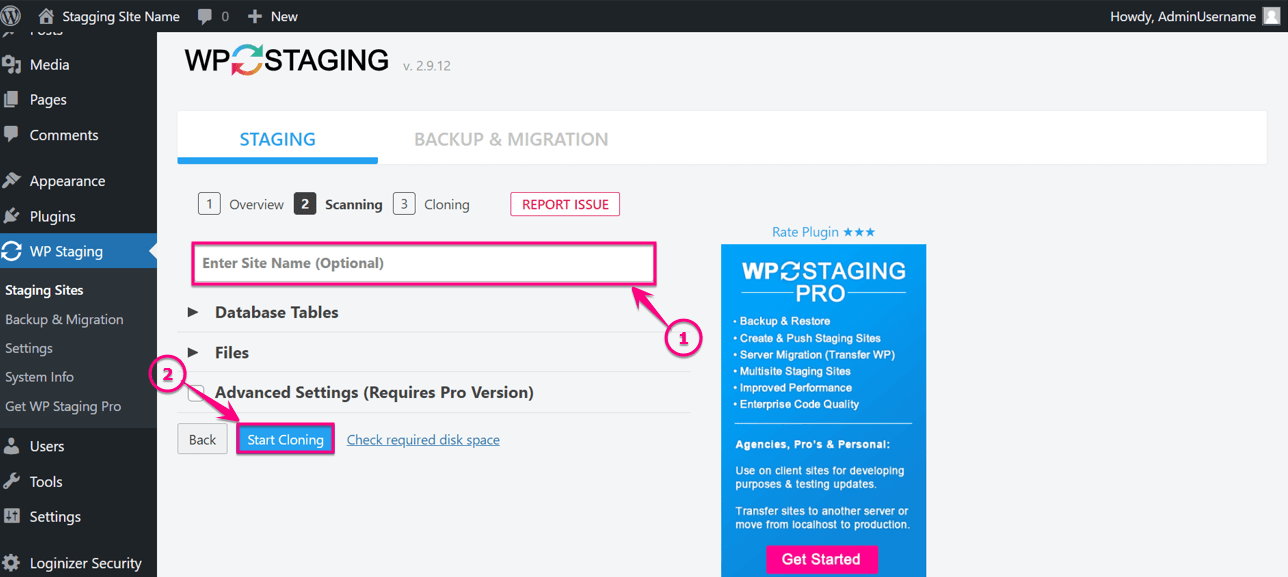
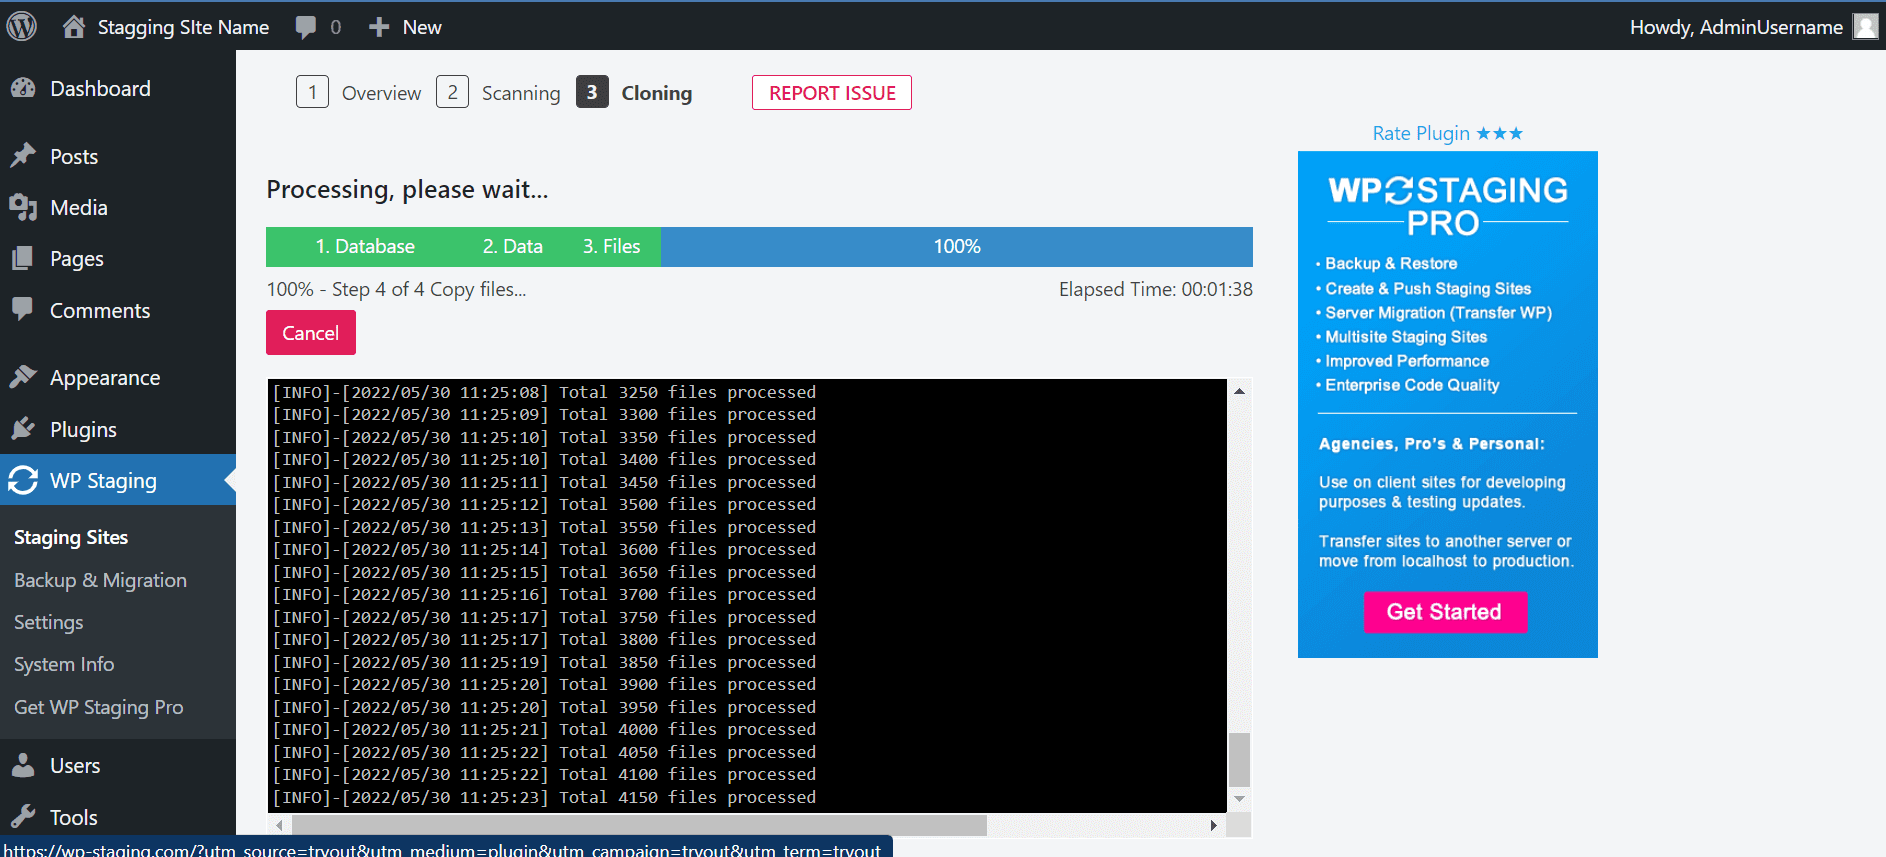
After that, you need to enter the staging site name (It is optional) and start cloning the site by clicking the “Start Cloning” button.
Here is your site, 100% cloned after clicking the cloning button:
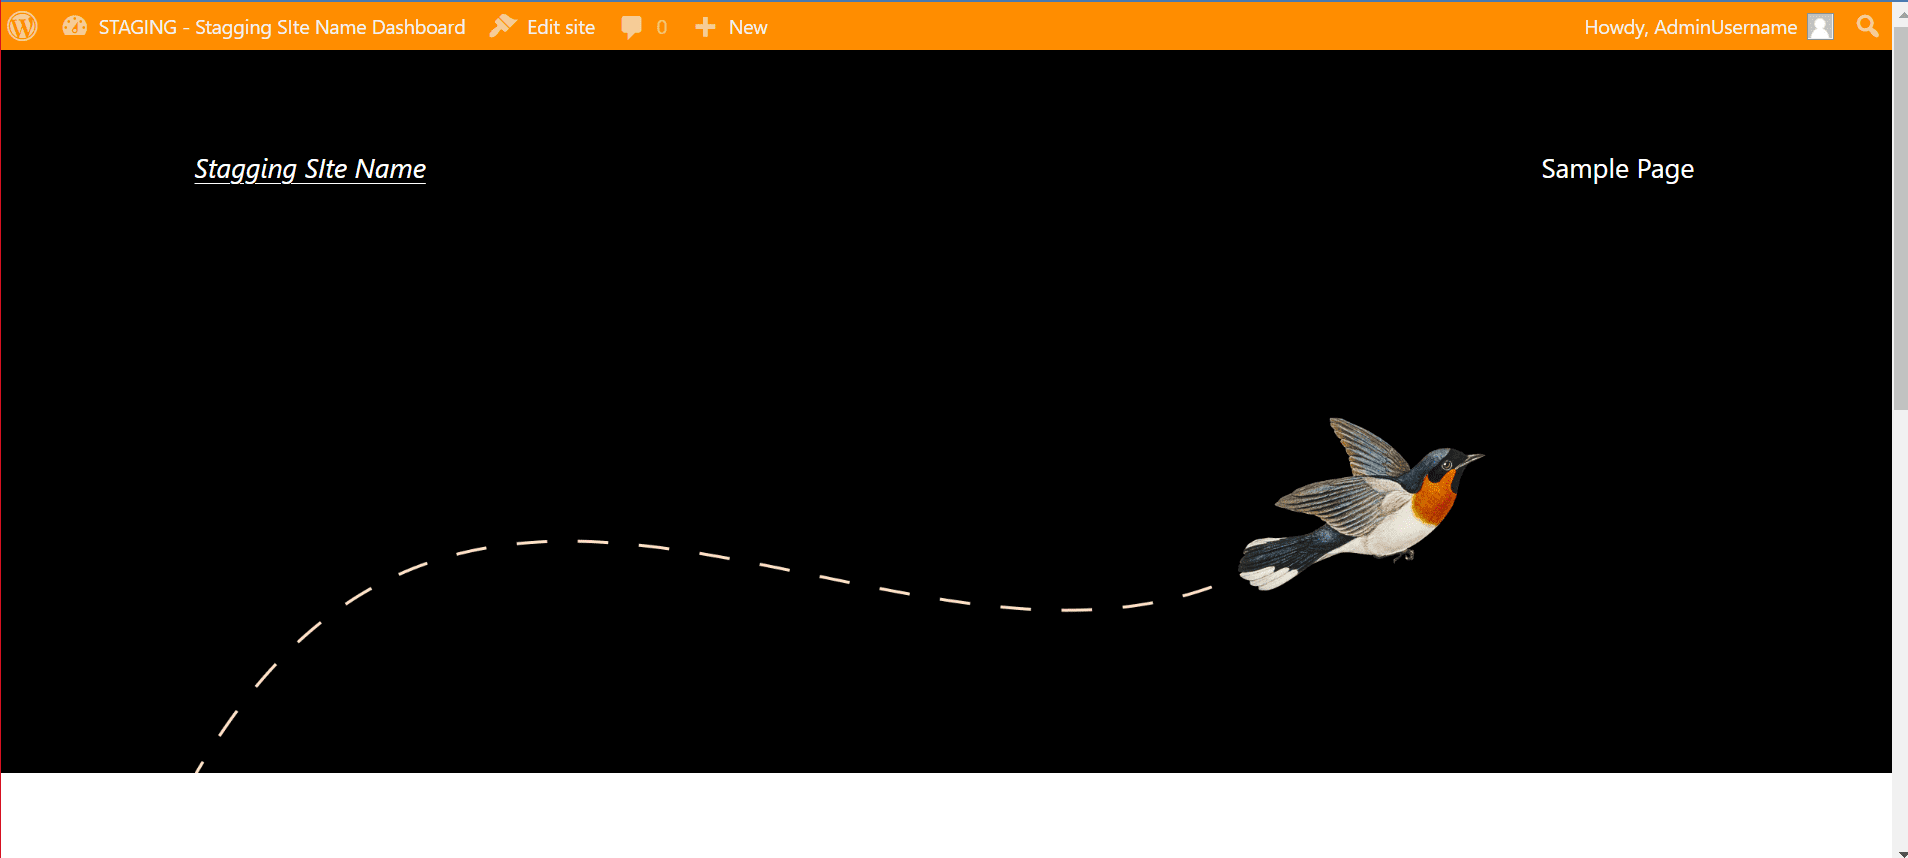
Now, here is the final look at your cloned WordPress staging website:
Can you set up a staging site for free?
Yes, you can build a staging site for free. There are lots of free staging plugins available in WordPress that will let you create your testing site. But, free stuff always comes with limitations. For example, some plugins won’t let you push changes from staging to the live site. That’s why if you want other facilities apart from just creating a staging environment, then you should buy the premium version.
Also, you will get a one-click staging site creation facility from the popular hosting servers. In that case, you need to pay an average of $100 for getting this feature. So, decide how much you want to spend on your staging site first and then get the service according to that.
Get Started with a WordPress staging site
Done with exploring all the ways of creating a testing site? Now create one for yourself by following any of the processes that are mentioned above. A testing site or WordPress dev site will work as a protective shield against all the wrong updates. This will always help you to try all updates on the testing site before pushing those to live. So, ensure the safety of your site now by creating a staging environment for your site.


Leave a Reply