Partial Payment モジュールを使用すると、WooCommerce ストアの分割払いを受け取ることができます。製品の一部を支払い、別の方法を選択して残りの金額を受け取ることができます。
You can also receive money for hotel booking, restaurant booking, etc. with ShopEngine’s built-in WooCommerce Partial Payment module.
Quick Overview
This documentation will guide you through the process of integrating partial payment to your WooCommerce product. The prerequisite for adding partial payment is installing a partial payment plugin along with Elementor and WooCommerce.
必要なプラグイン: WooCommerce (free), Elementor (free), ShopEngine (free & pro)
Now, you have to navigate to your WordPress dashboard and take the following attempts:
- Activate the partial payment.
- Edit product page to add partial payment.
- Create a partial payment template.
Thus, your partial payment option will be integrated into your products.
WooCommerce に部分支払いを統合する方法 #
ステップ 1: 部分支払いを有効にする #
- WordPress ダッシュボード => ShopEngine => モジュールに移動します.
有効にする 一部支払い 必要に応じてモジュールを作成し、変更を加えます。
- 金額タイプ: 部分支払いの種類(パーセンテージまたは固定金額)を選択できます。
- 額: 部分支払いの金額または割合を入力します。
- 支払い方法/チェックアウト時にSを非表示: このオプションを使用すると、チェックアウト時に支払い方法の選択を非表示にできます。
- 注文日後にメールを送信する日数/秒: 購入後、顧客に支払いリマインダーメールを送信する日数を設定します。
次に、次の 5 つの機能にカスタマイズされたラベルを入力できます。
- Partial Payment Loop Product Label: Display a custom label on product listings showing partial payment availability.
- Partial Payment Single Product Label: Show partial payment info directly on the individual product page.
- 完全な支払いラベル: Clearly indicate the option for paying the full amount upfront.
- 最初の分割払いラベル: Label the first payment amount in an installment plan.
- Other Installment Label: Define the text for upcoming or recurring installment payments.
- チェックアウトページの支払いラベル: Highlight the amount due now at checkout for partial payments.
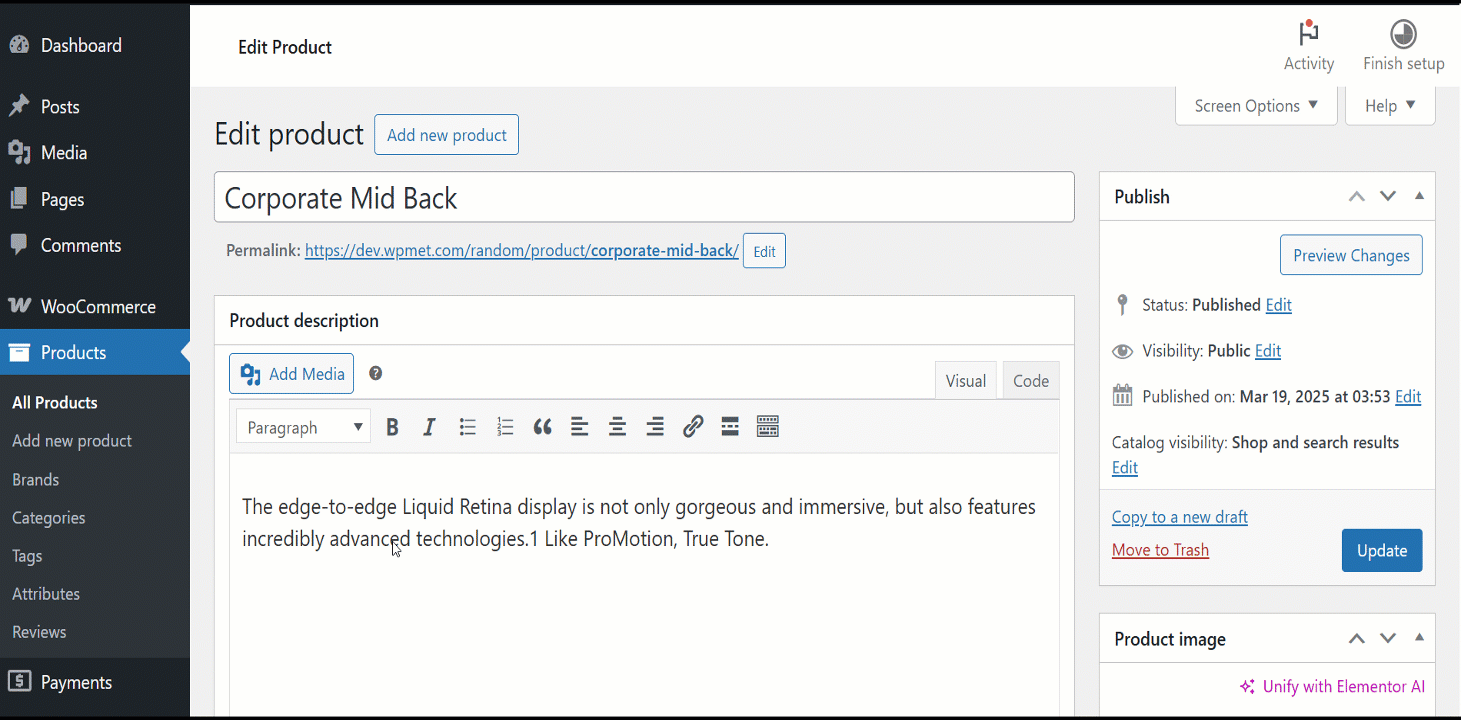
ステップ 2: 製品ページを編集して製品の一部支払いを有効にします #
次に、部分支払いを有効にする製品に移動します。
WooCommerce >> Products >> All Products >> Select the Product >> Edit
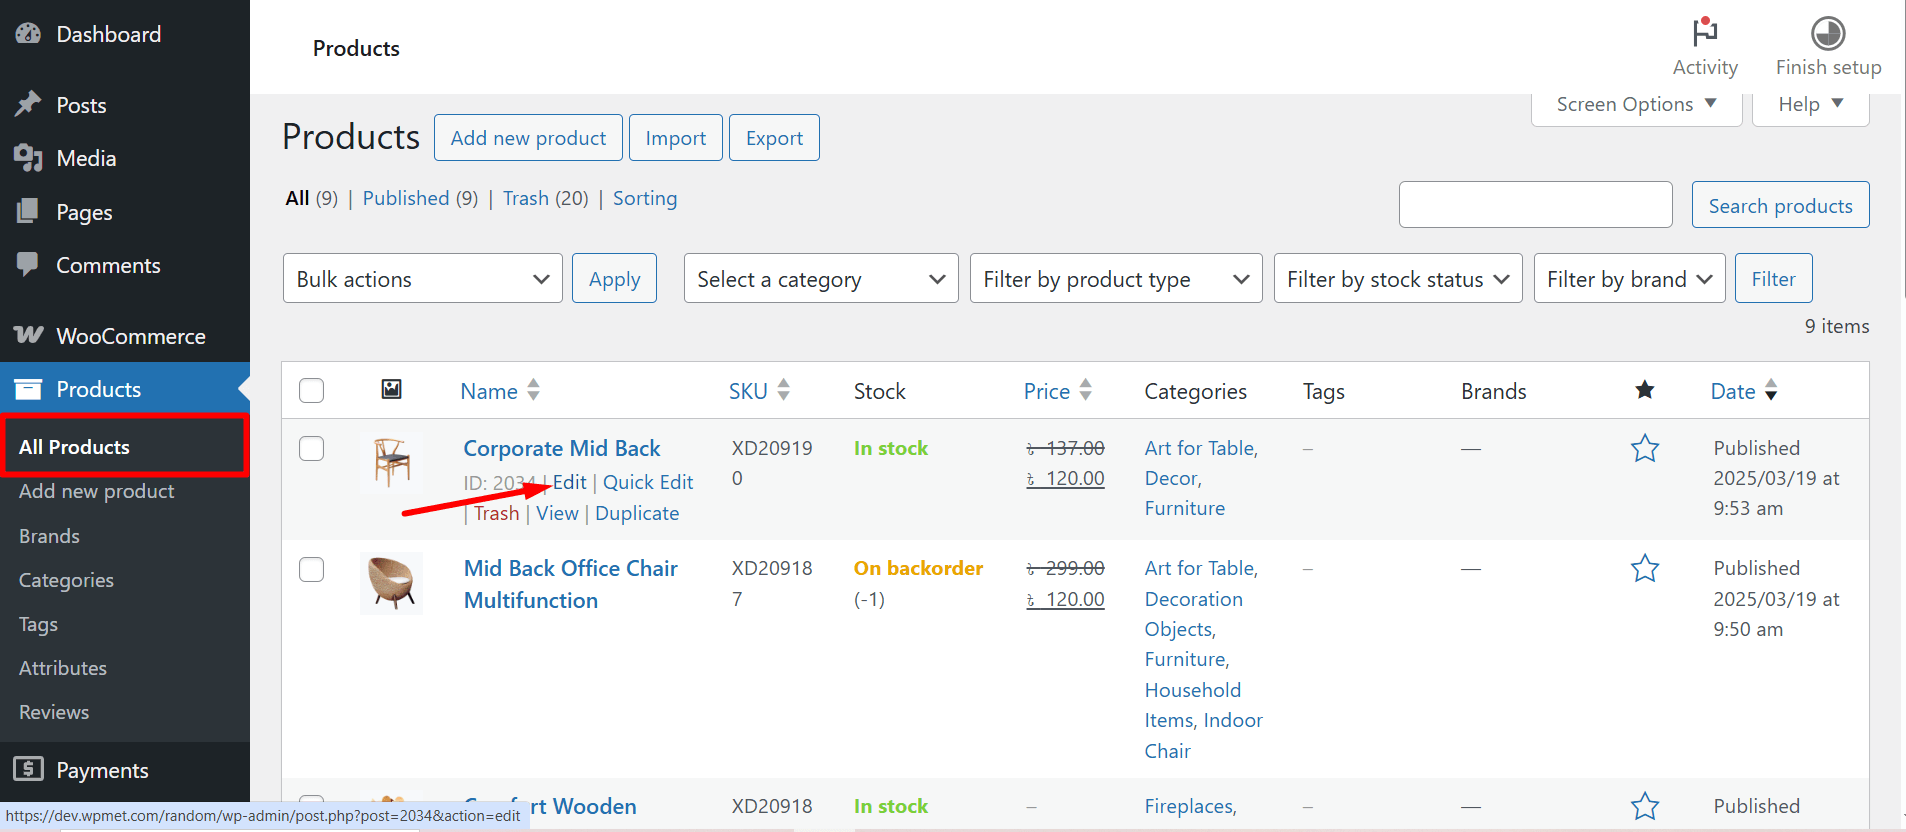
その後、商品ページより、 部分支払いを有効にする この特定の製品の場合。部分支払いの種類を選択します。
パーセントを使用している場合は、パーセントを選択します。製品をアップデートします。または、定額を選択することもできます。
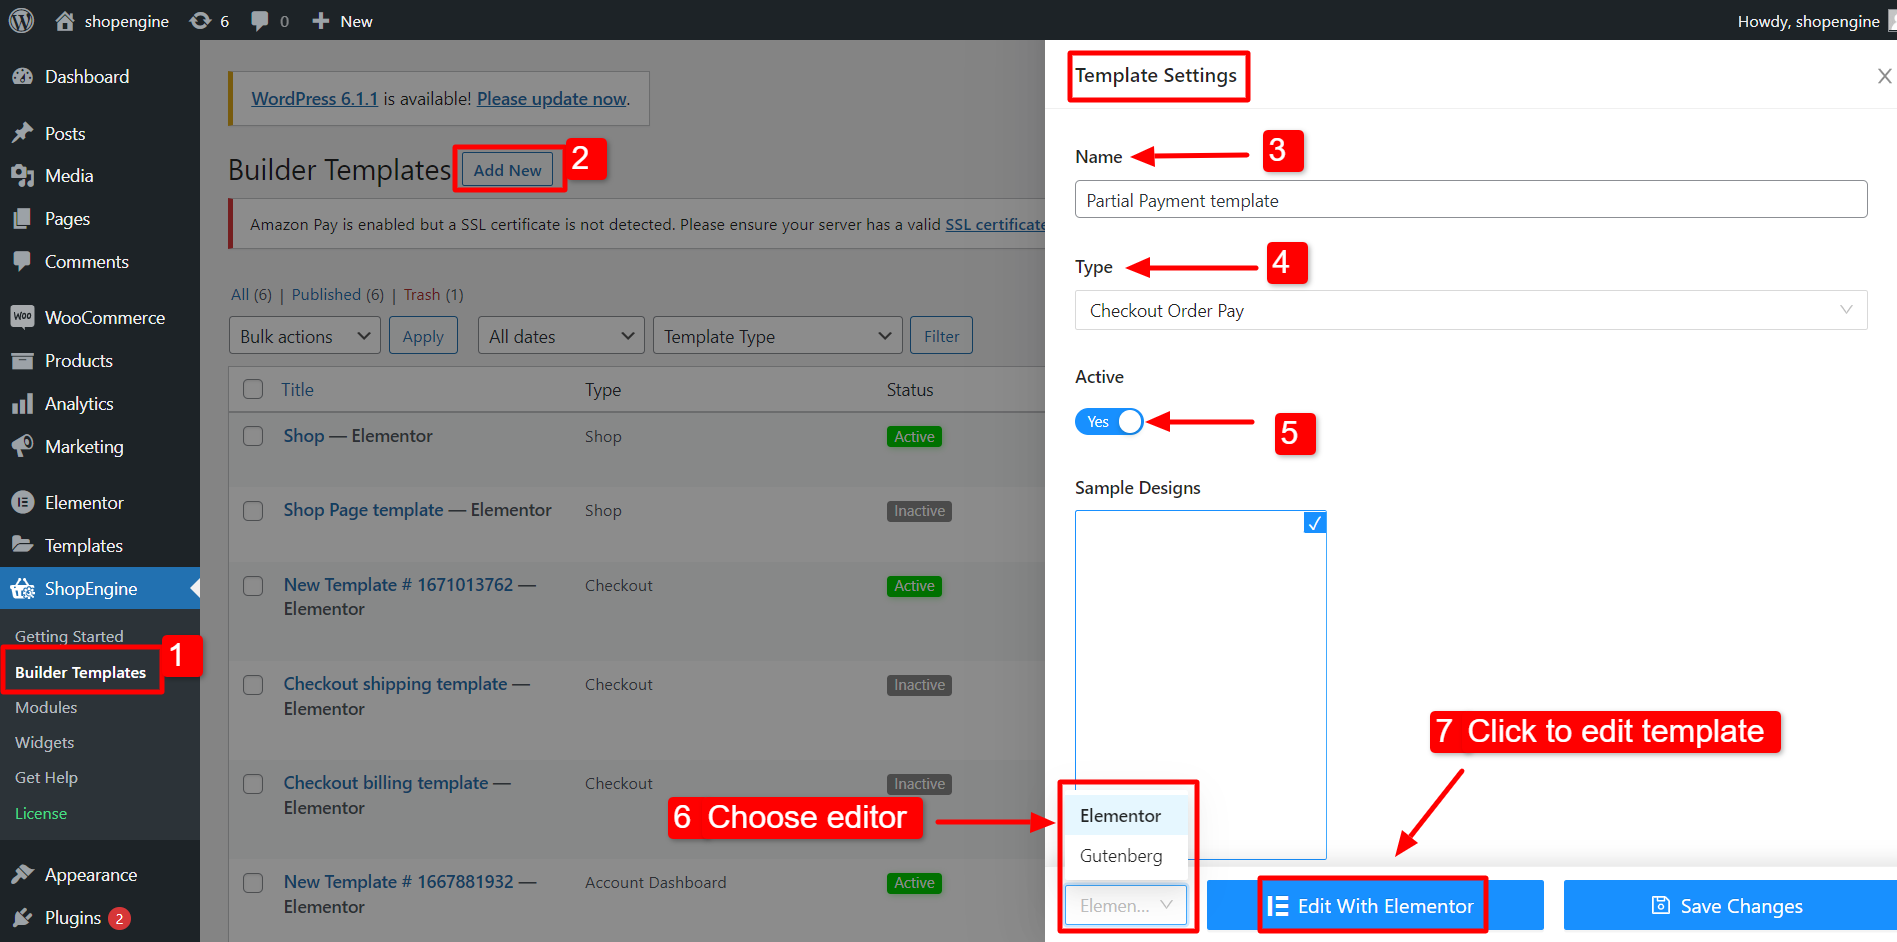
ステップ 3: 支払い期限のテンプレートを作成する #
支払期日のテンプレートを作成するには、
- 案内する ShopEngine >> ビルダー テンプレート WordPress ダッシュボードから。
- クリックしてください "新しく追加する左上隅にある「」ボタンをクリックします。
- [テンプレート設定] ウィンドウで、テンプレートを入力します 名前.
- テンプレートを設定する タイプ to: チェックアウト注文支払い。
- 活性化 テンプレート。
- エディター (この場合は Elementor) を選択します。
- クリックしてください Elementorで編集する.
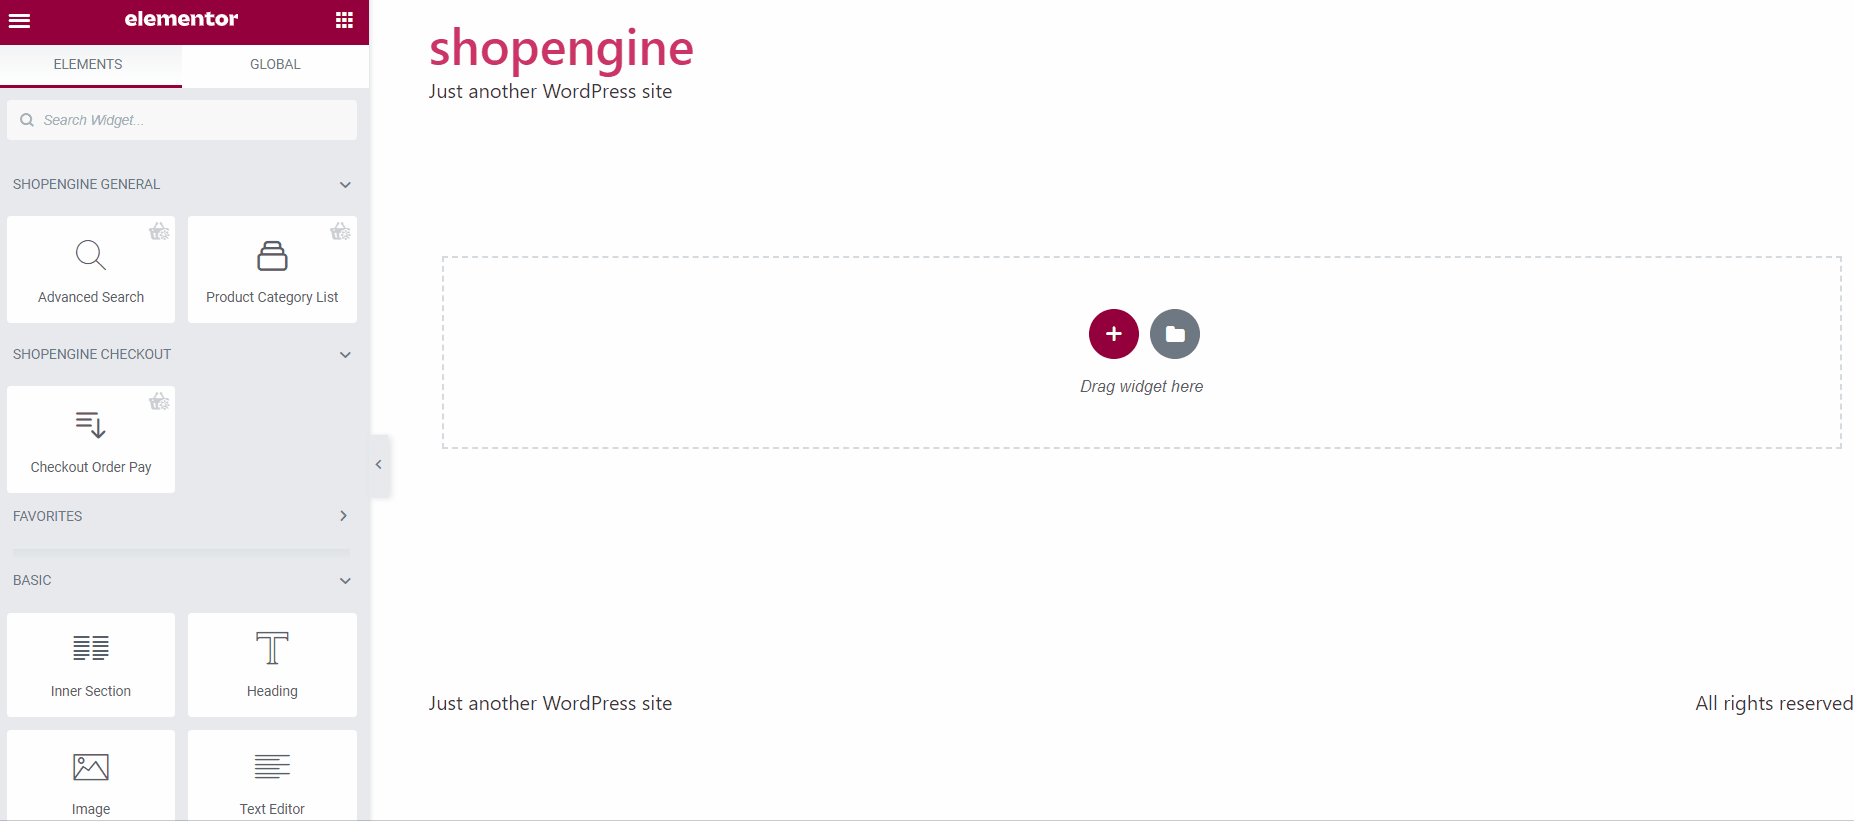
Elementorエディターで、 Checkout Order Pay ウィジェットをドラッグ アンド ドロップします。 デザインエリアに移動すると、注文の支払い期日の詳細が表示されます。
Step 4: Check how it work #
- 次に、製品ページに移動します。部分支払いと全額支払いの両方のオプションが表示されます。
- 選択する 一部支払い をクリックして、 カートに追加 ボタン。
- 次に、上部の「カートを見る」をクリックして、部分支払いが機能しているかどうかを確認します。
- 詳細は購入手続きページでもご確認いただけます。
Once the user completes the first payment, he will see the due amount on the my account order details page.
ユーザーが次の場所に移動するとき 私のアカウント > 注文 > ビュー 注文の詳細を確認すると、次のオプションが表示されます。 期限の支払い。期限内に支払うことを選択した場合、次のような 2 回目の分割払いオプションが表示されます。
ユーザーはこのページから未払い金額を支払うことができます。