

 Japanese
  English
  German
  Spanish
  Italian
  French
  Danish
  Portuguese
  Swedish
  Polish
  Korean
 Partial Payment モジュールを使用すると、WooCommerce ストアの分割払いを受け取ることができます。製品の一部を支払い、別の方法を選択して残りの金額を受け取ることができます。
ShopEngine に組み込まれた Partial Payment モジュールを使用して、ホテルの予約やレストランの予約などの代金を受け取ることもできます。
WooCommerce に部分支払いを統合する方法 #
ステップ 1: 部分支払いを有効にする #
- WordPress ダッシュボード => ShopEngine => モジュールに移動します.
部分支払いを有効にする 必要に応じてモジュールを作成し、変更を加えます。
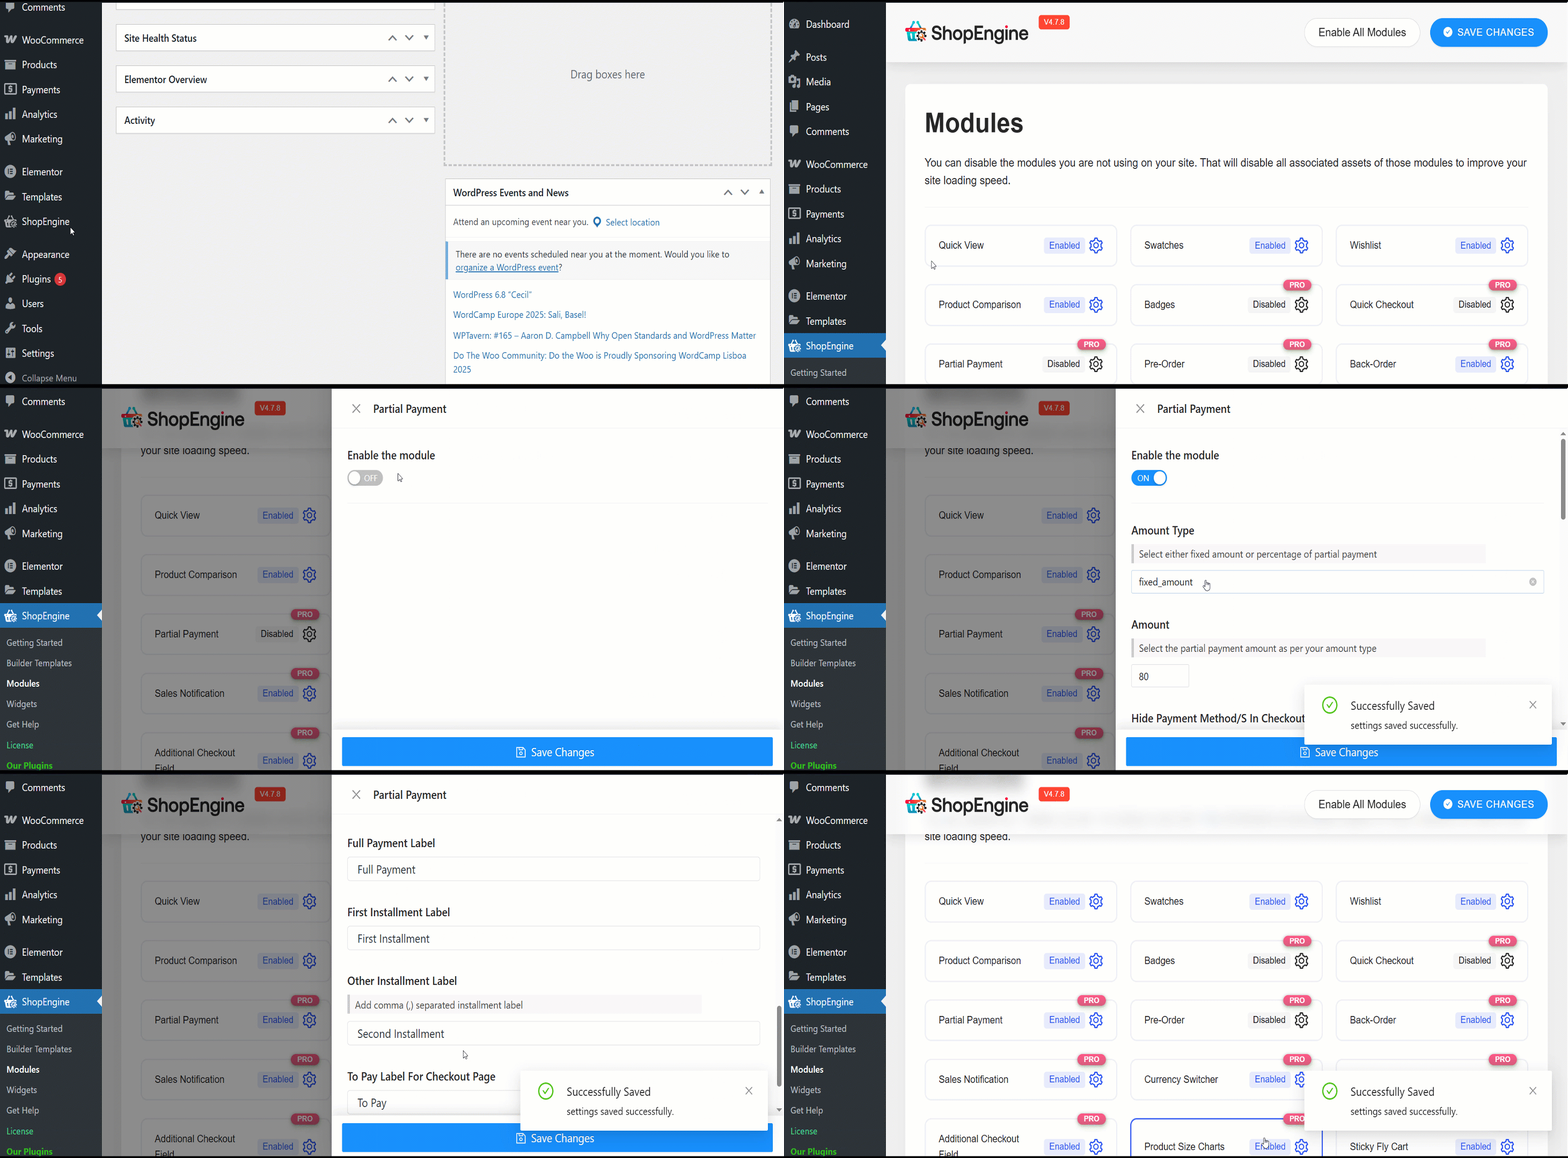
- 金額タイプ: 部分支払いの種類(パーセンテージまたは固定金額)を選択できます。
- 額: 部分支払いの金額または割合を入力します。
- 支払い方法/チェックアウト時にSを非表示: このオプションを使用すると、チェックアウト時に支払い方法の選択を非表示にできます。
- 注文日後にメールを送信する日数/秒: 購入後、顧客に支払いリマインダーメールを送信する日数を設定します。
次に、次の 5 つの機能にカスタマイズされたラベルを入力できます。
- Partial Payment Loop Product Label: Display a custom label on product listings showing partial payment availability.
- Partial Payment Single Product Label: Show partial payment info directly on the individual product page.
- 完全な支払いラベル: Clearly indicate the option for paying the full amount upfront.
- 最初の分割払いラベル: Label the first payment amount in an installment plan.
- Other Installment Label: Define the text for upcoming or recurring installment payments.
- チェックアウトページの支払いラベル: Highlight the amount due now at checkout for partial payments.
ステップ 2: 製品ページを編集して製品の一部支払いを有効にします #
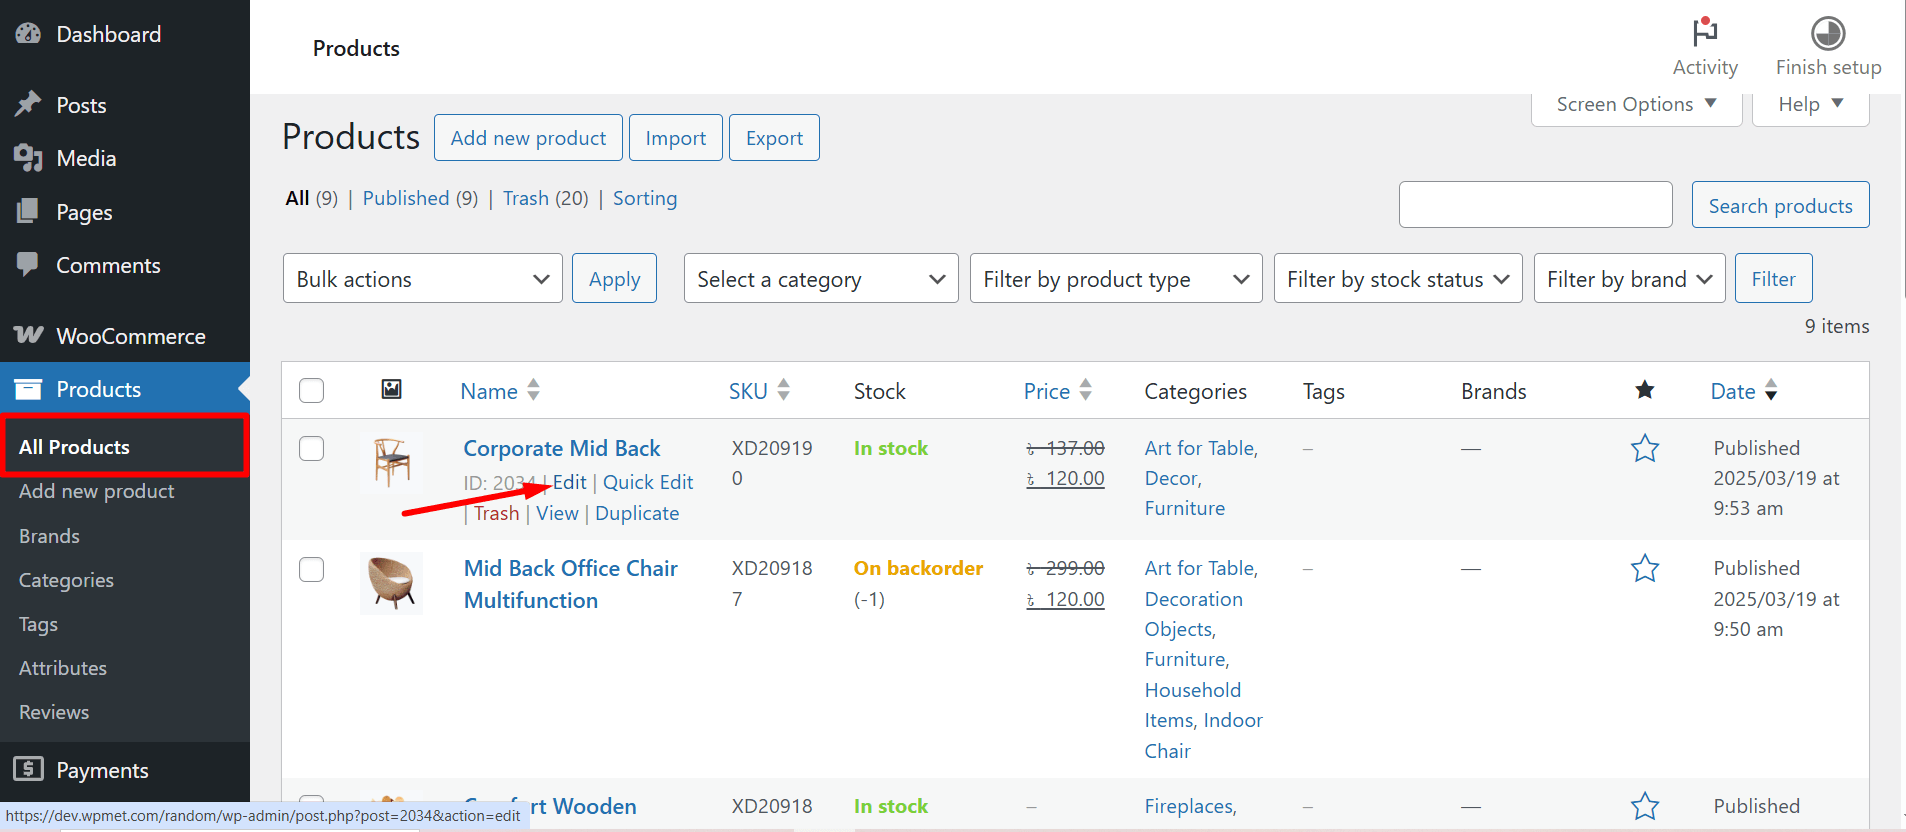
次に、部分支払いを有効にする製品に移動します。
WooCommerce >> Products >> All Products >> Select the Product >> Edit
その後、商品ページより、 部分支払いを有効にする この特定の製品の場合。部分支払いの種類を選択します。
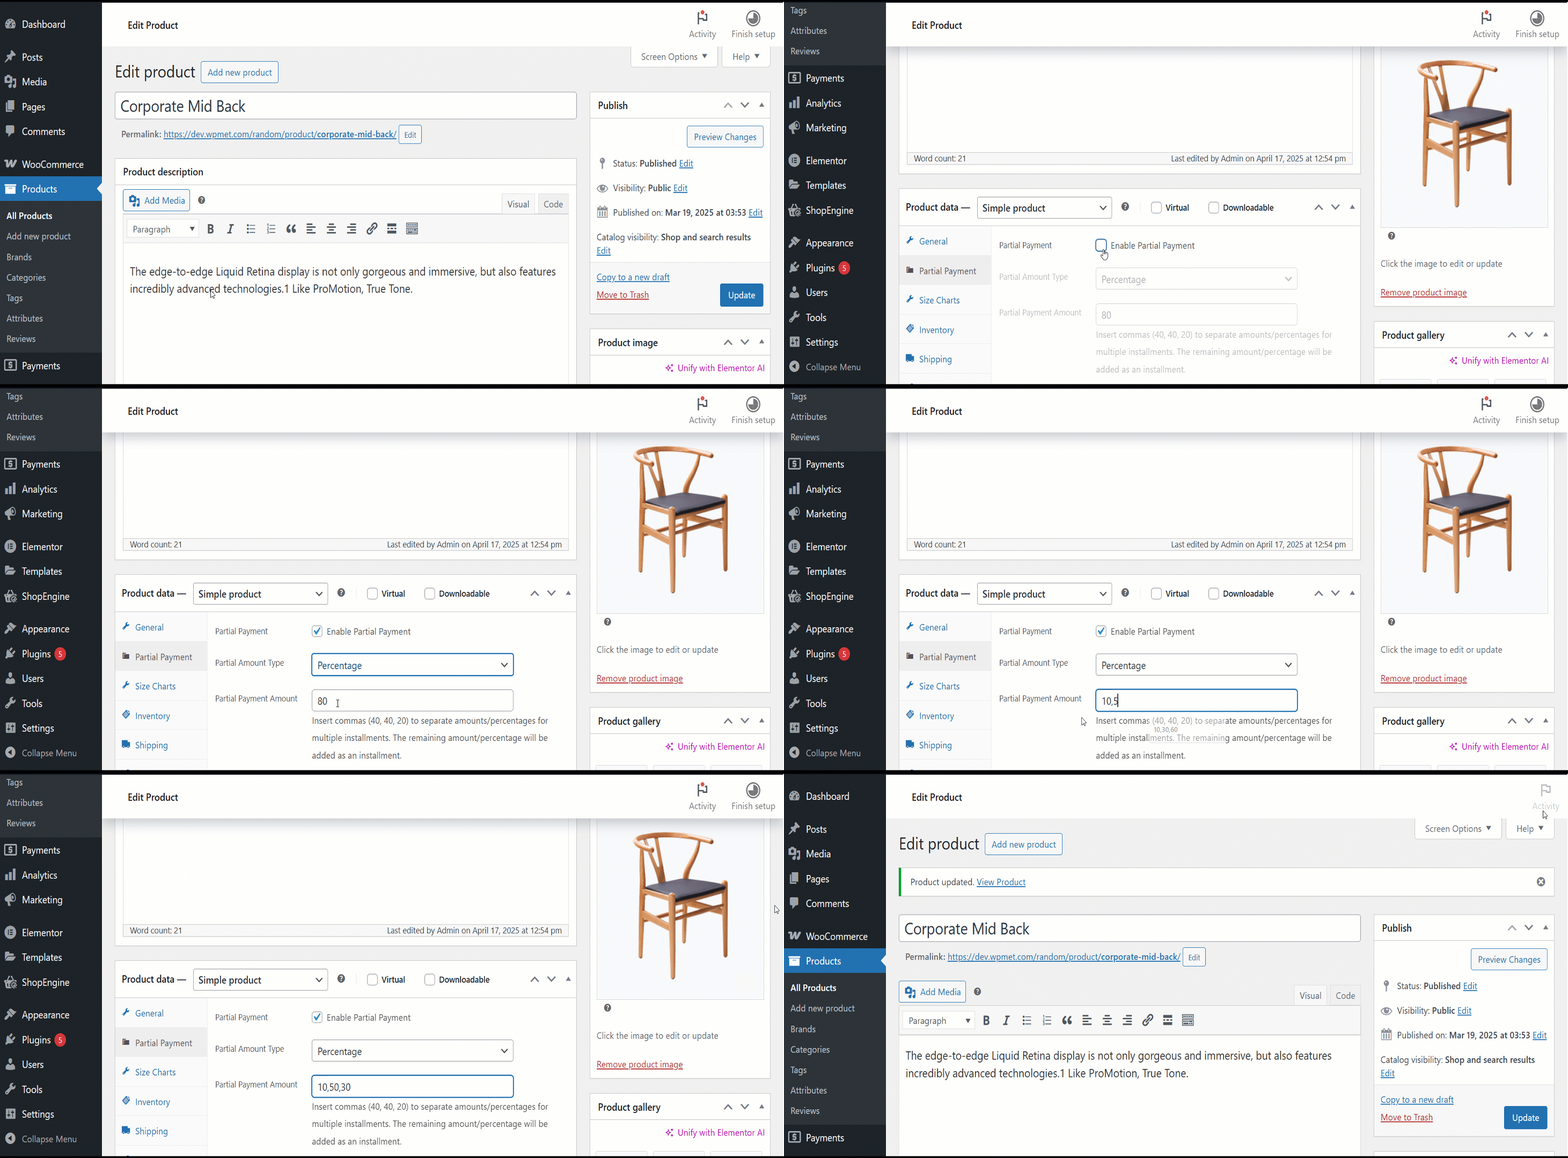
パーセントを使用している場合は、パーセントを選択します。製品をアップデートします。または、定額を選択することもできます。
ステップ 3: 支払い期限のテンプレートを作成する #
支払期日のテンプレートを作成するには、
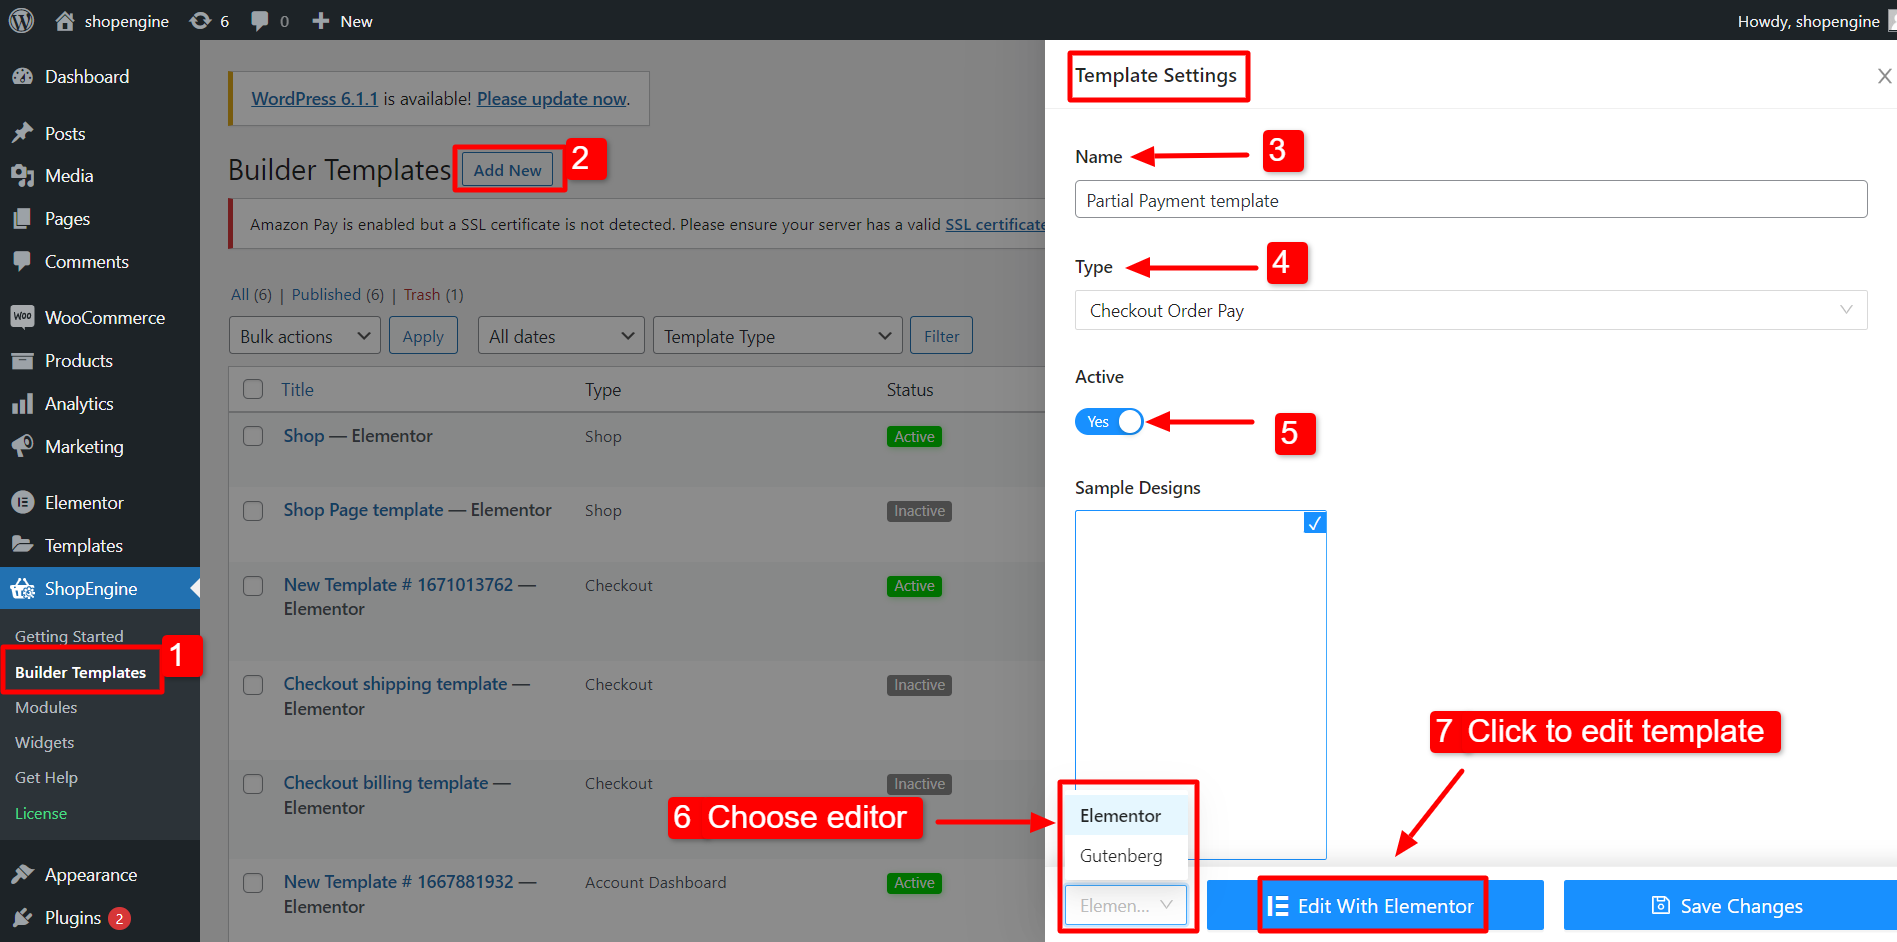
- 案内する ShopEngine >> ビルダー テンプレート WordPress ダッシュボードから。
- クリックしてください "新しく追加する左上隅にある「」ボタンをクリックします。
- [テンプレート設定] ウィンドウで、テンプレートを入力します 名前.
- テンプレートを設定する タイプ to: チェックアウト注文支払い。
- 活性化 テンプレート。
- エディター (この場合は Elementor) を選択します。
- クリックしてください Elementorで編集する.
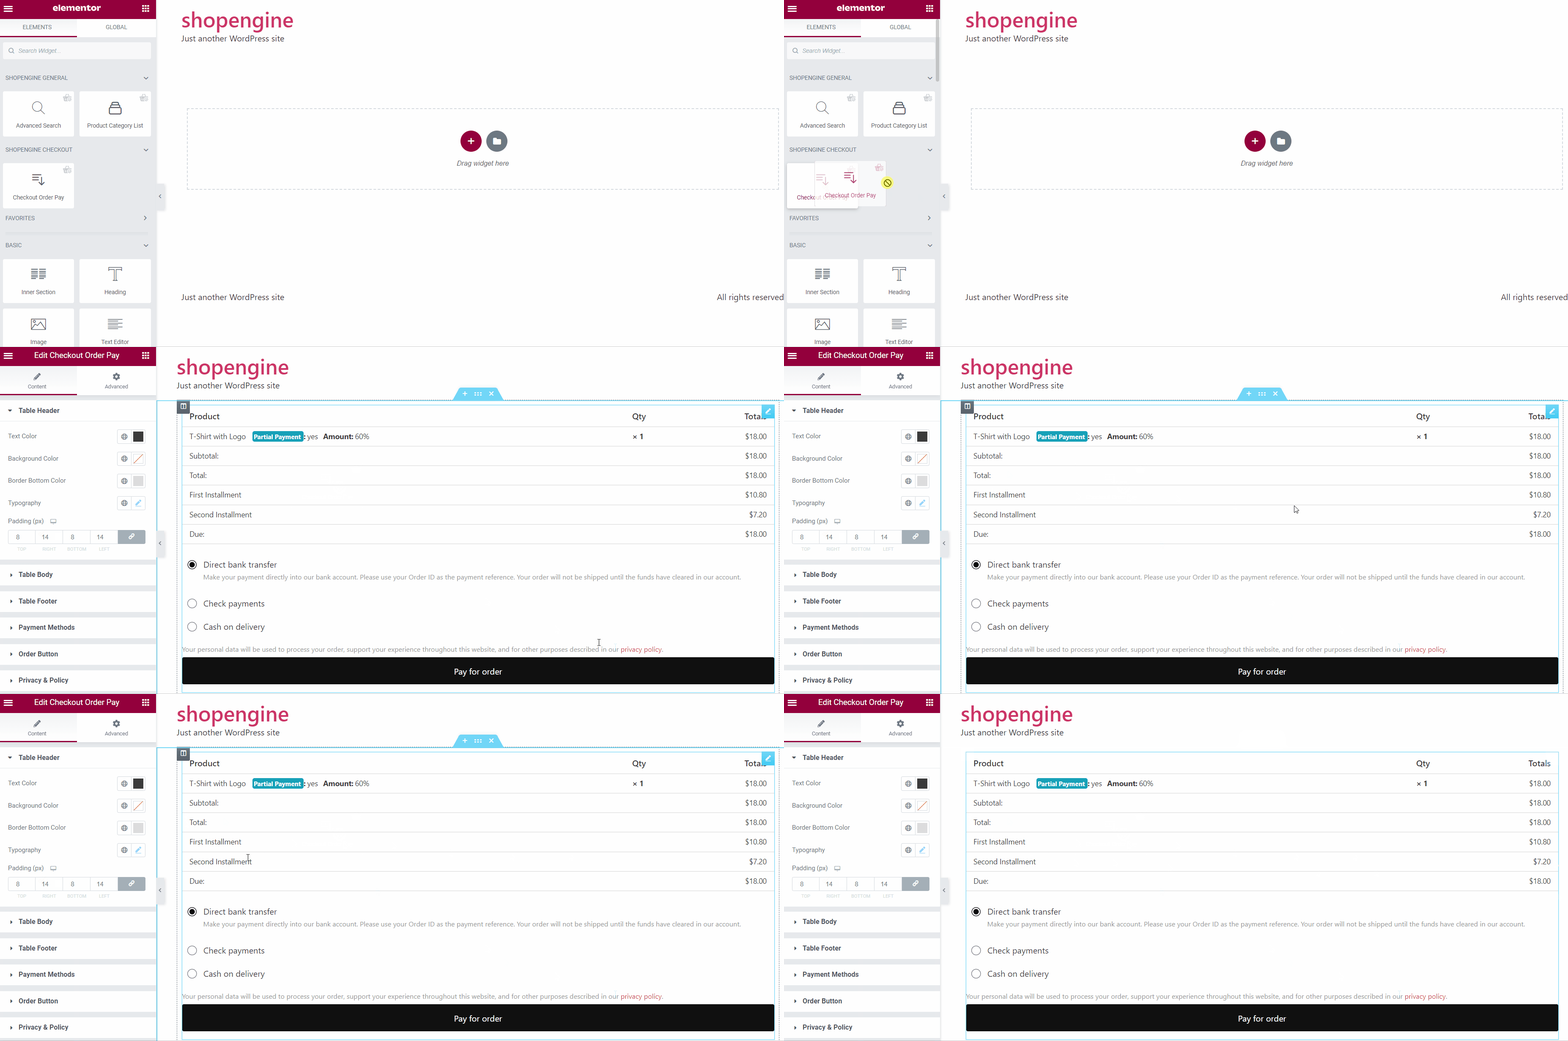
Elementorエディターで、 Checkout Order Pay ウィジェットをドラッグ アンド ドロップします。 デザインエリアに移動すると、注文の支払い期日の詳細が表示されます。
Step 4: Check how it work #
- 次に、製品ページに移動します。部分支払いと全額支払いの両方のオプションが表示されます。
- 選択する 一部支払い をクリックして、 カートに追加 ボタン。
- 次に、上部の「カートを見る」をクリックして、部分支払いが機能しているかどうかを確認します。
- 詳細は購入手続きページでもご確認いただけます。
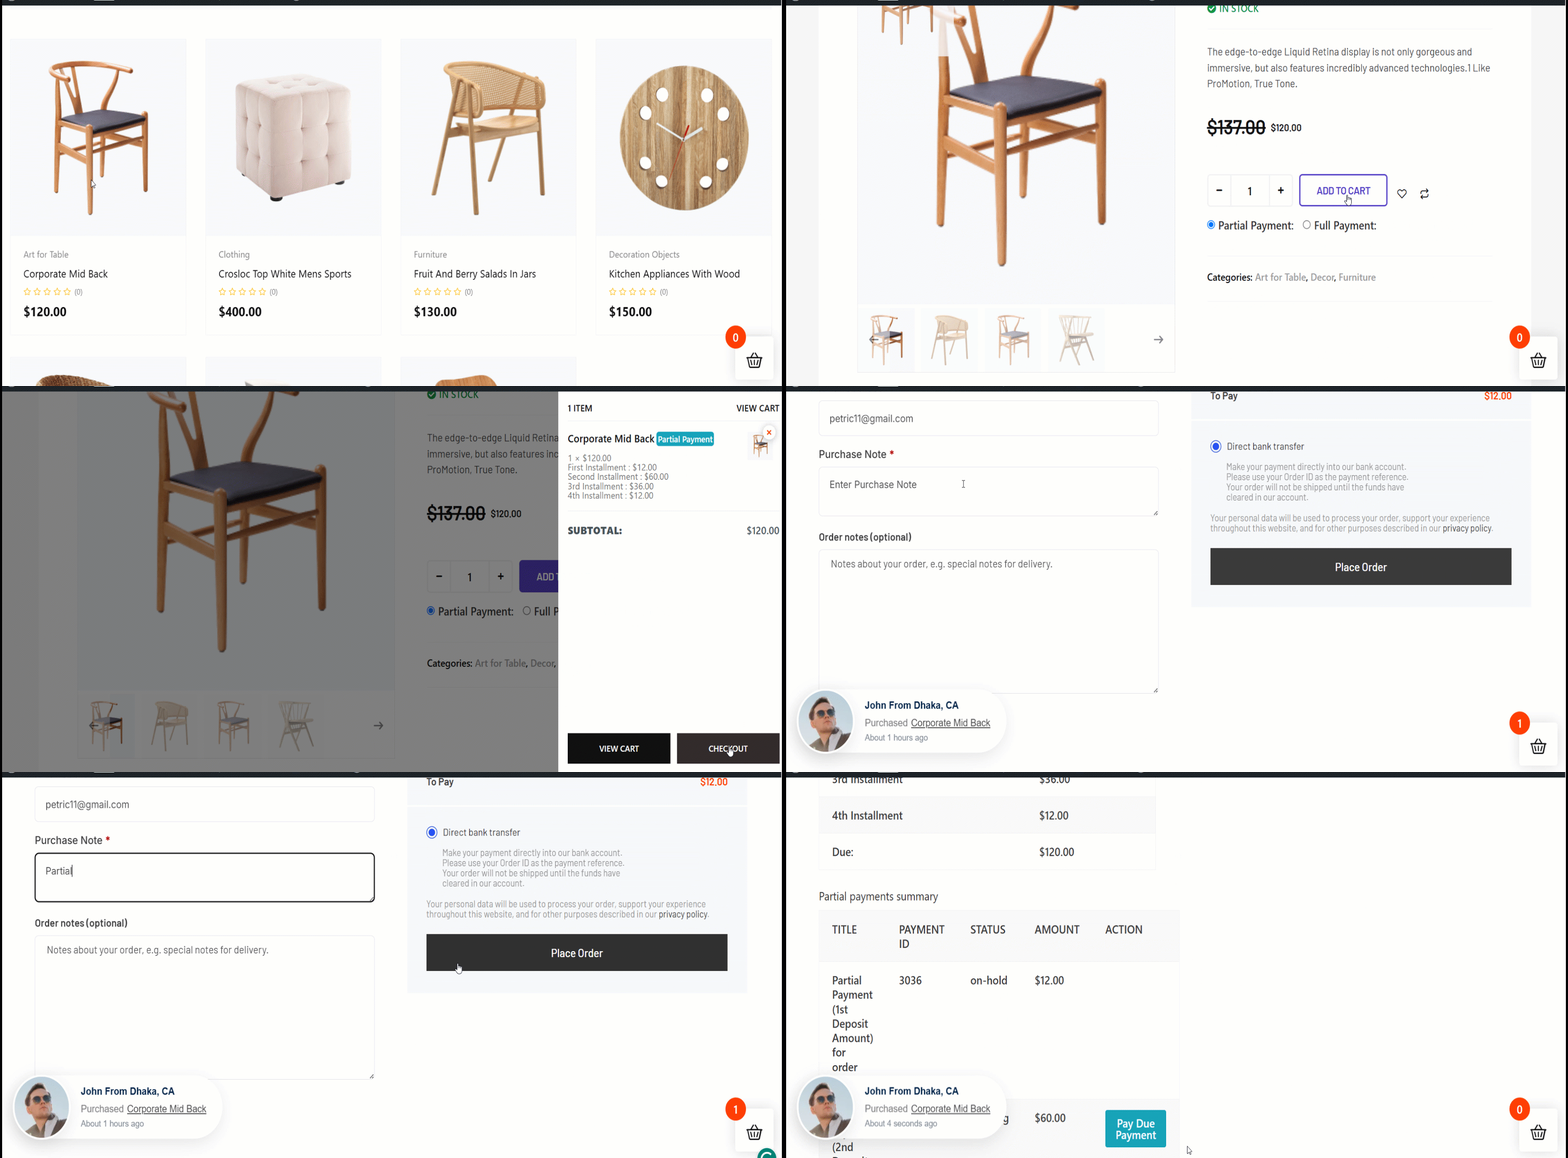
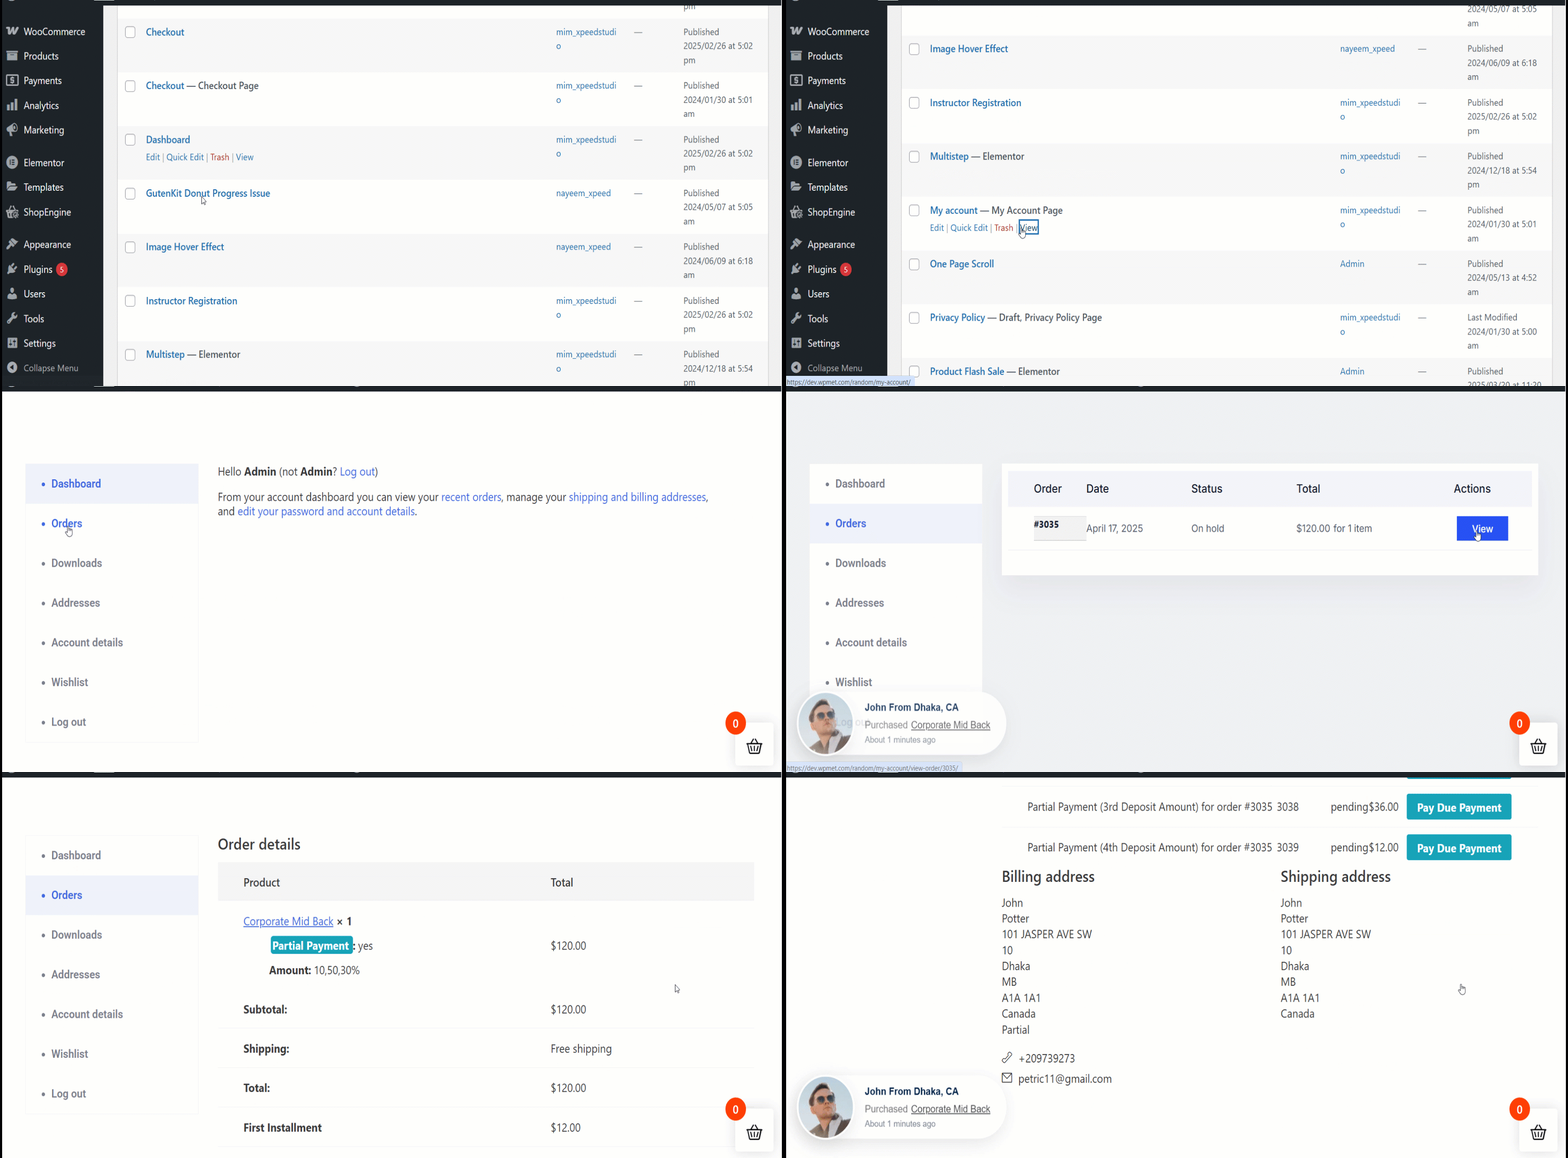
Once the user completes the first payment, he will see the due amount on the my account order details page.
ユーザーが次の場所に移動するとき 私のアカウント > 注文 > ビュー 注文の詳細を確認すると、次のオプションが表示されます。 期限の支払い。期限内に支払うことを選択した場合、次のような 2 回目の分割払いオプションが表示されます。
ユーザーはこのページから未払い金額を支払うことができます。