


Out of the thousands of emails in your inbox, which ones catch your eye?
Obviously, an email that includes a good copy, header, subheader, attractive design, and clear branding. Sadly, the templates of the default WordPress emails have still remained unchanged. No changes or customizations can be made without using WordPress email customizer or coding.
So, in the case of adding personalization to WordPress emails, you need to adopt one of these methods. Since we’ve already promised to provide a codeless solution in the title, here we’ll demonstrate how to customize WordPress emails utilizing the best WordPress email editor plugin. Along with it, we’ll also learn the significance of delivering custom WordPress emails…
Why Customize WordPress Default Emails?
WordPress default emails such as account reset and new register are generated with templates. Therefore, every WordPress user receives similar emails that are definitely not suitable for representing a brand. Besides, it fails to create tailored or personalized branding opportunities such as including brand logo, name, message, etc.
Additionally, these default emails can’t convey the necessary information needed for clear and concise communication. Also, default email deteriorates customers’ interaction with a brand by reducing email open rate, click rate, etc. Again, custom WordPress emails are optimized for better email deliverability. Thus, emails land right in the inbox without being detected as spam emails.
WordPress custom emails also effectively foster customer loyalty and business credibility which default ones can’t. Overall, custom WordPress emails reinforce branding by establishing effective email communication with your audience.
How to Customize WordPress Emails
Since WordPress doesn’t allow you to add a personalized touch to its default emails, you need to think about alternative solutions. And, these substitute solutions can be through coding or using WordPress plugins. Considering user-friendliness, UX, and flexibility for customization, using WordPress plugins is the best approach for beginners or non-coders.
However, there are still lots of plugin options to choose from that put you in a dilemma. So, without creating any confusion, we’ll reveal the WordPress default email customization process using the best solution:
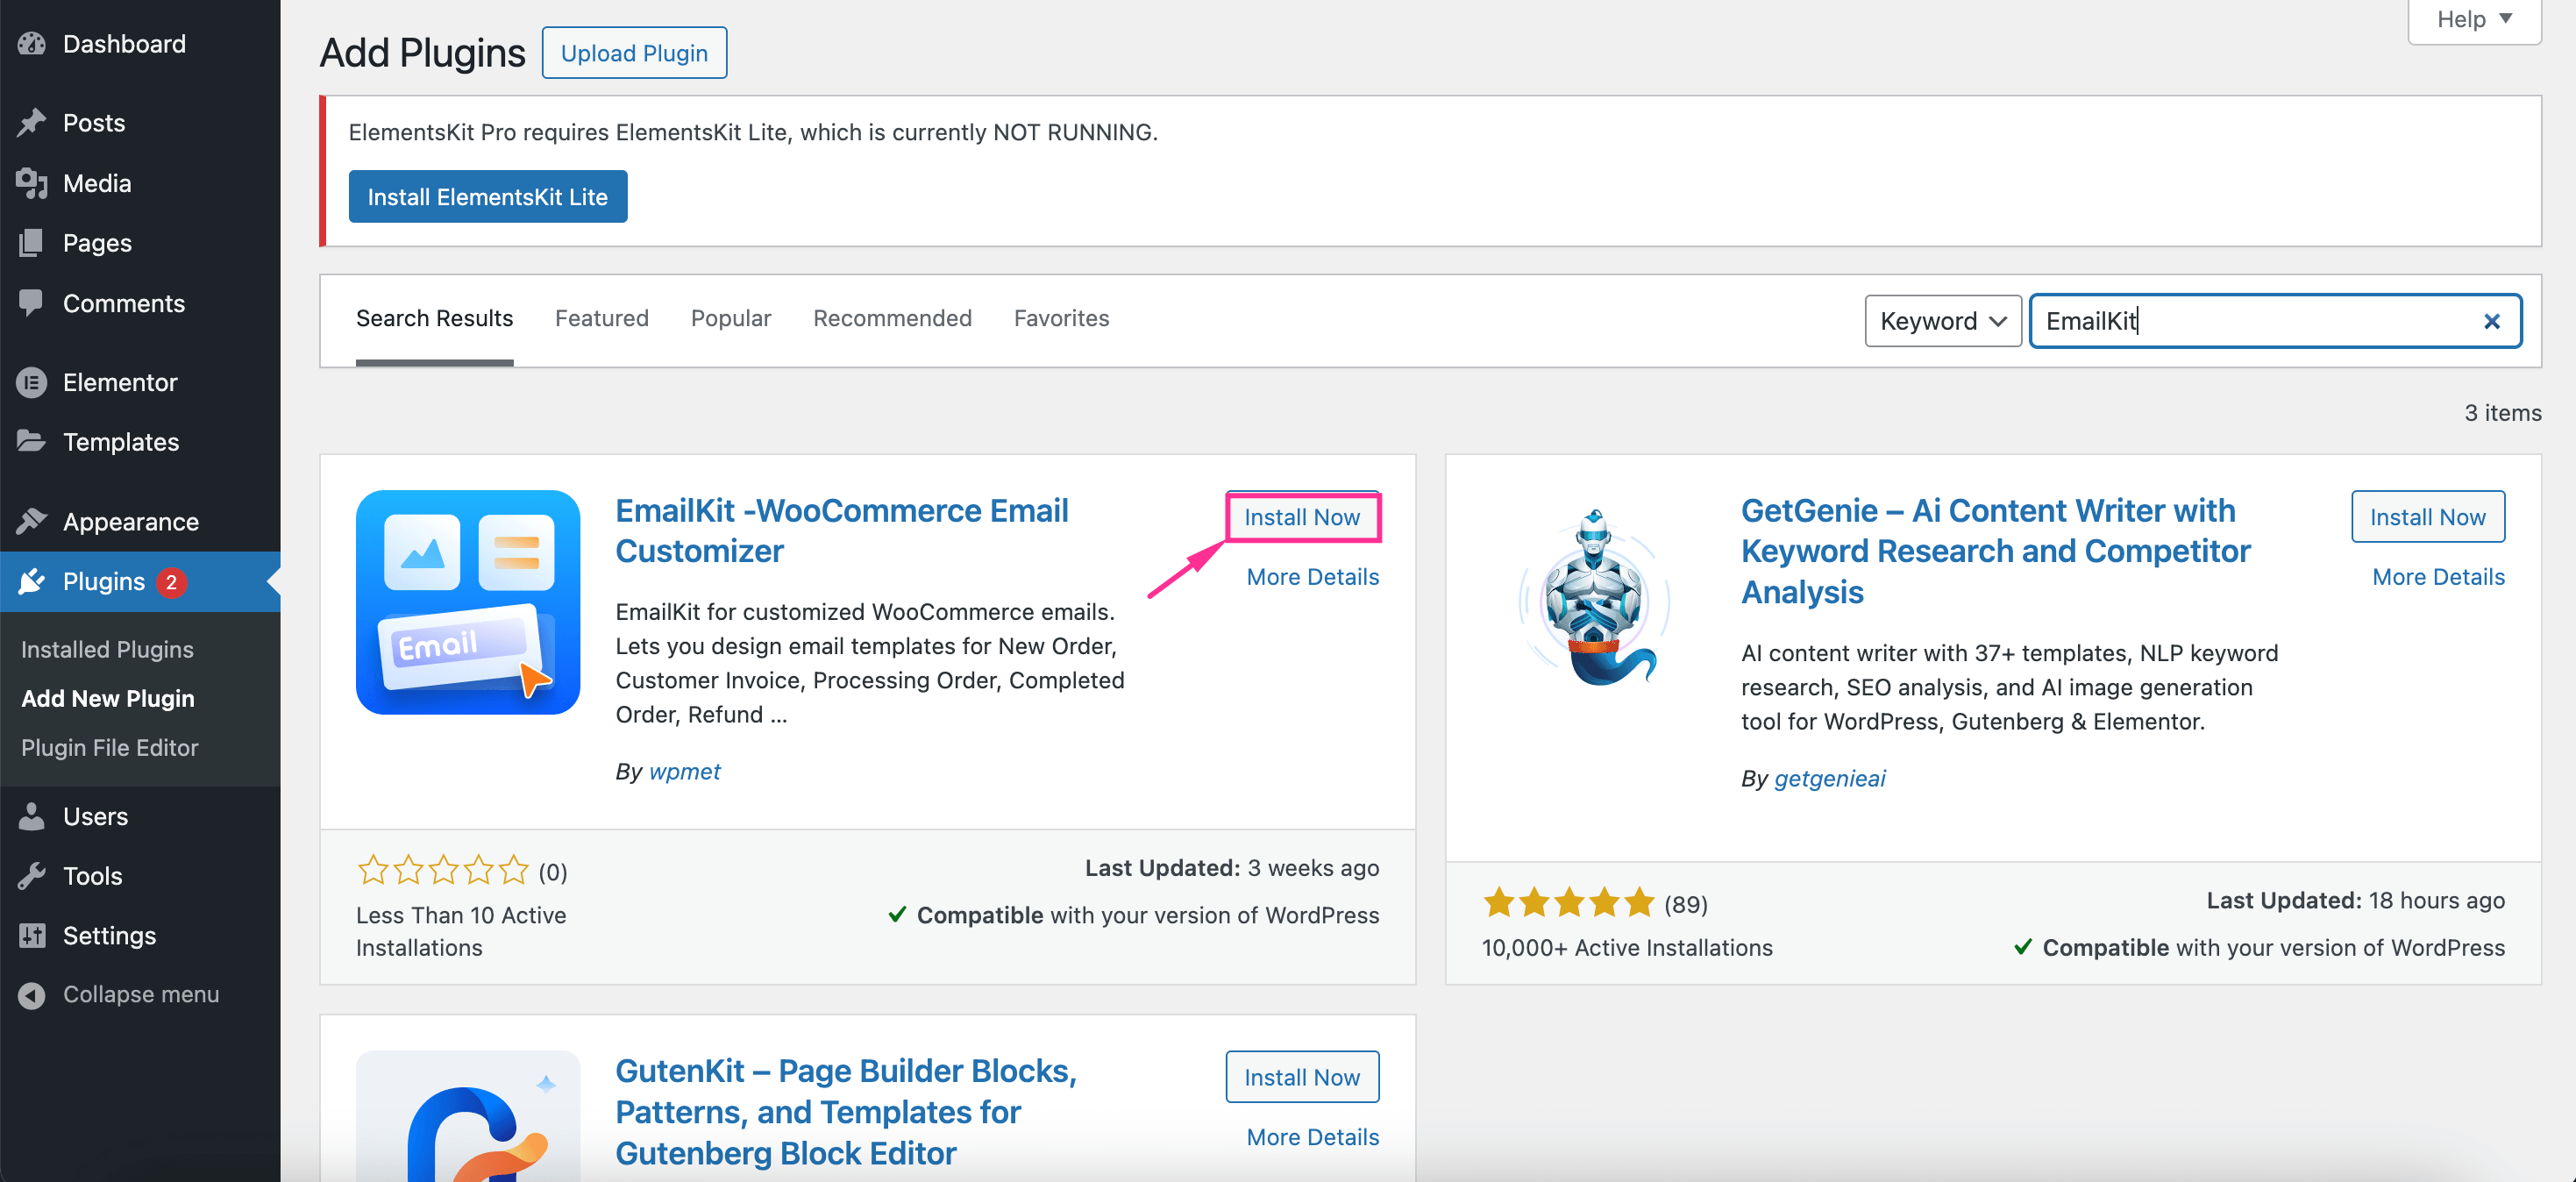
Step 1: Install the WordPress Email Customizer Plugin.
First, you need to select and install a WordPress email editor plugin to create custom WP emails. Out of all the email customizers available, EmailKit offers robust features to customize default WordPress and WooCommerce emails using its pre-built templates. Additionally, its 23+ elements reinforce email customization by promoting a drag-and-drop editing interface. Previewing and sending unlimited test email features are also available in EmailKit.
Hence, here we’ll illustrate the process of WordPress email customization using EmailKit. First, you need to install and activate EmailKit by navigating to Plugins >> Add New Plugin. After completing the activation, get into the next step.
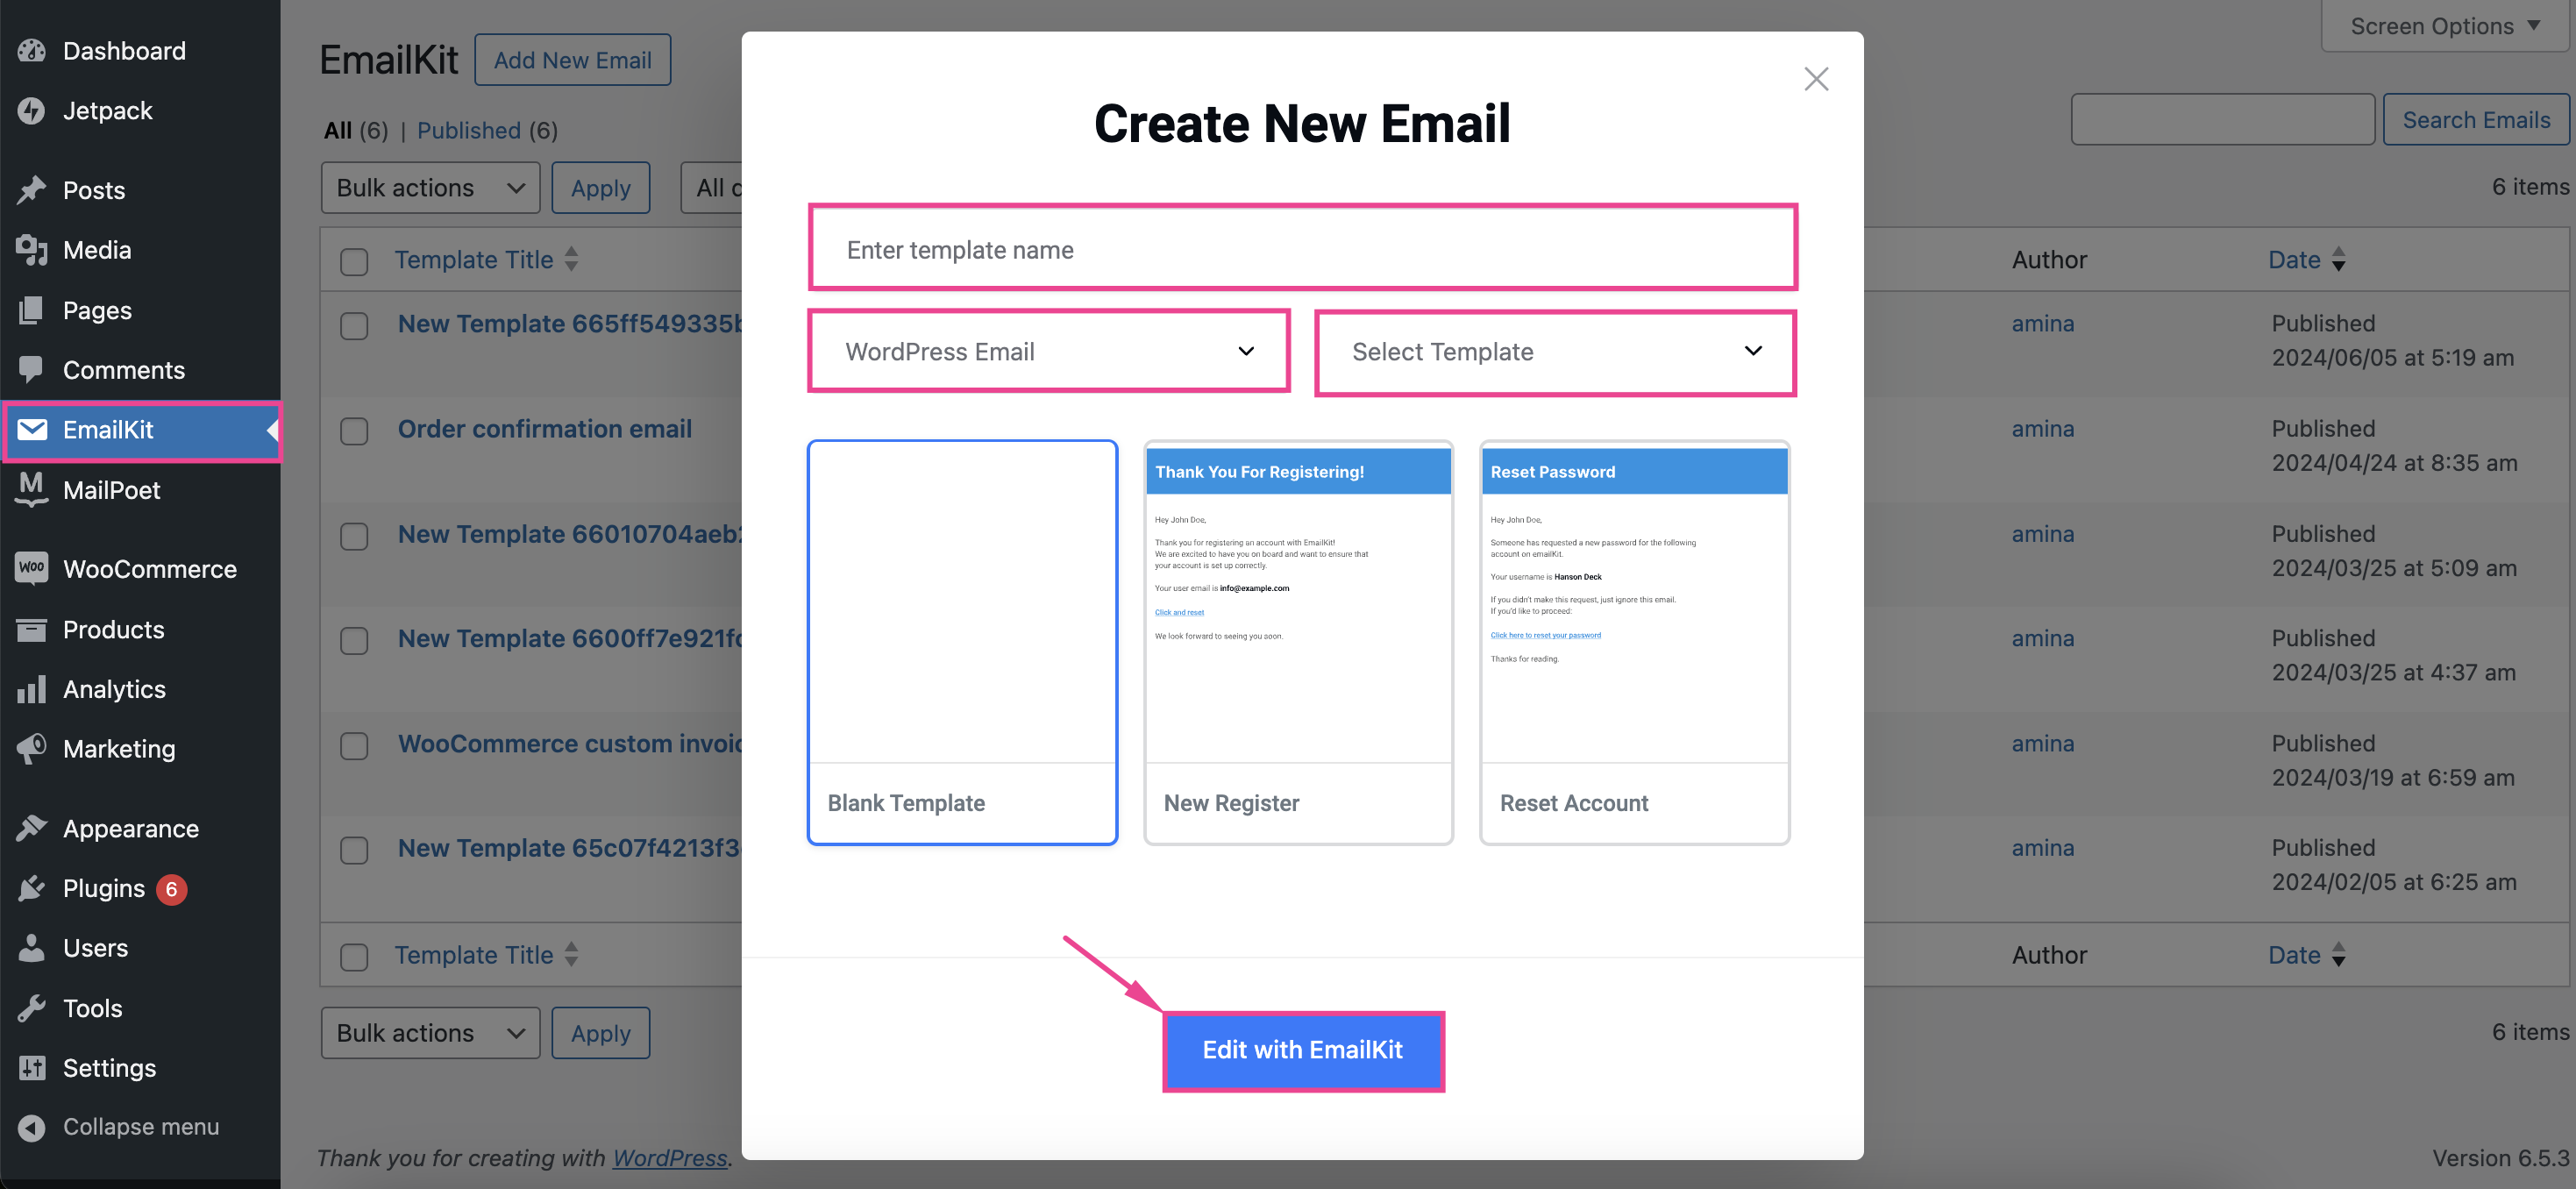
Step 2: Create Custom WordPress Emails with Built-in Templates.
Now, click on EmailKit and press the “Add New Email” button. This will open up a tab where you need to enter a name for your email template. Then, select the email type as “WordPress Email” and choose a WP template from the drop-down menu. After that, select a template and hit the “Edit with EmailKit” button.
This will take you to the email customization dashboard. Here you can search for any General, WooCommerce, and WordPress elements by dragging and dropping on your email template to give extra tweaks to your default emails.
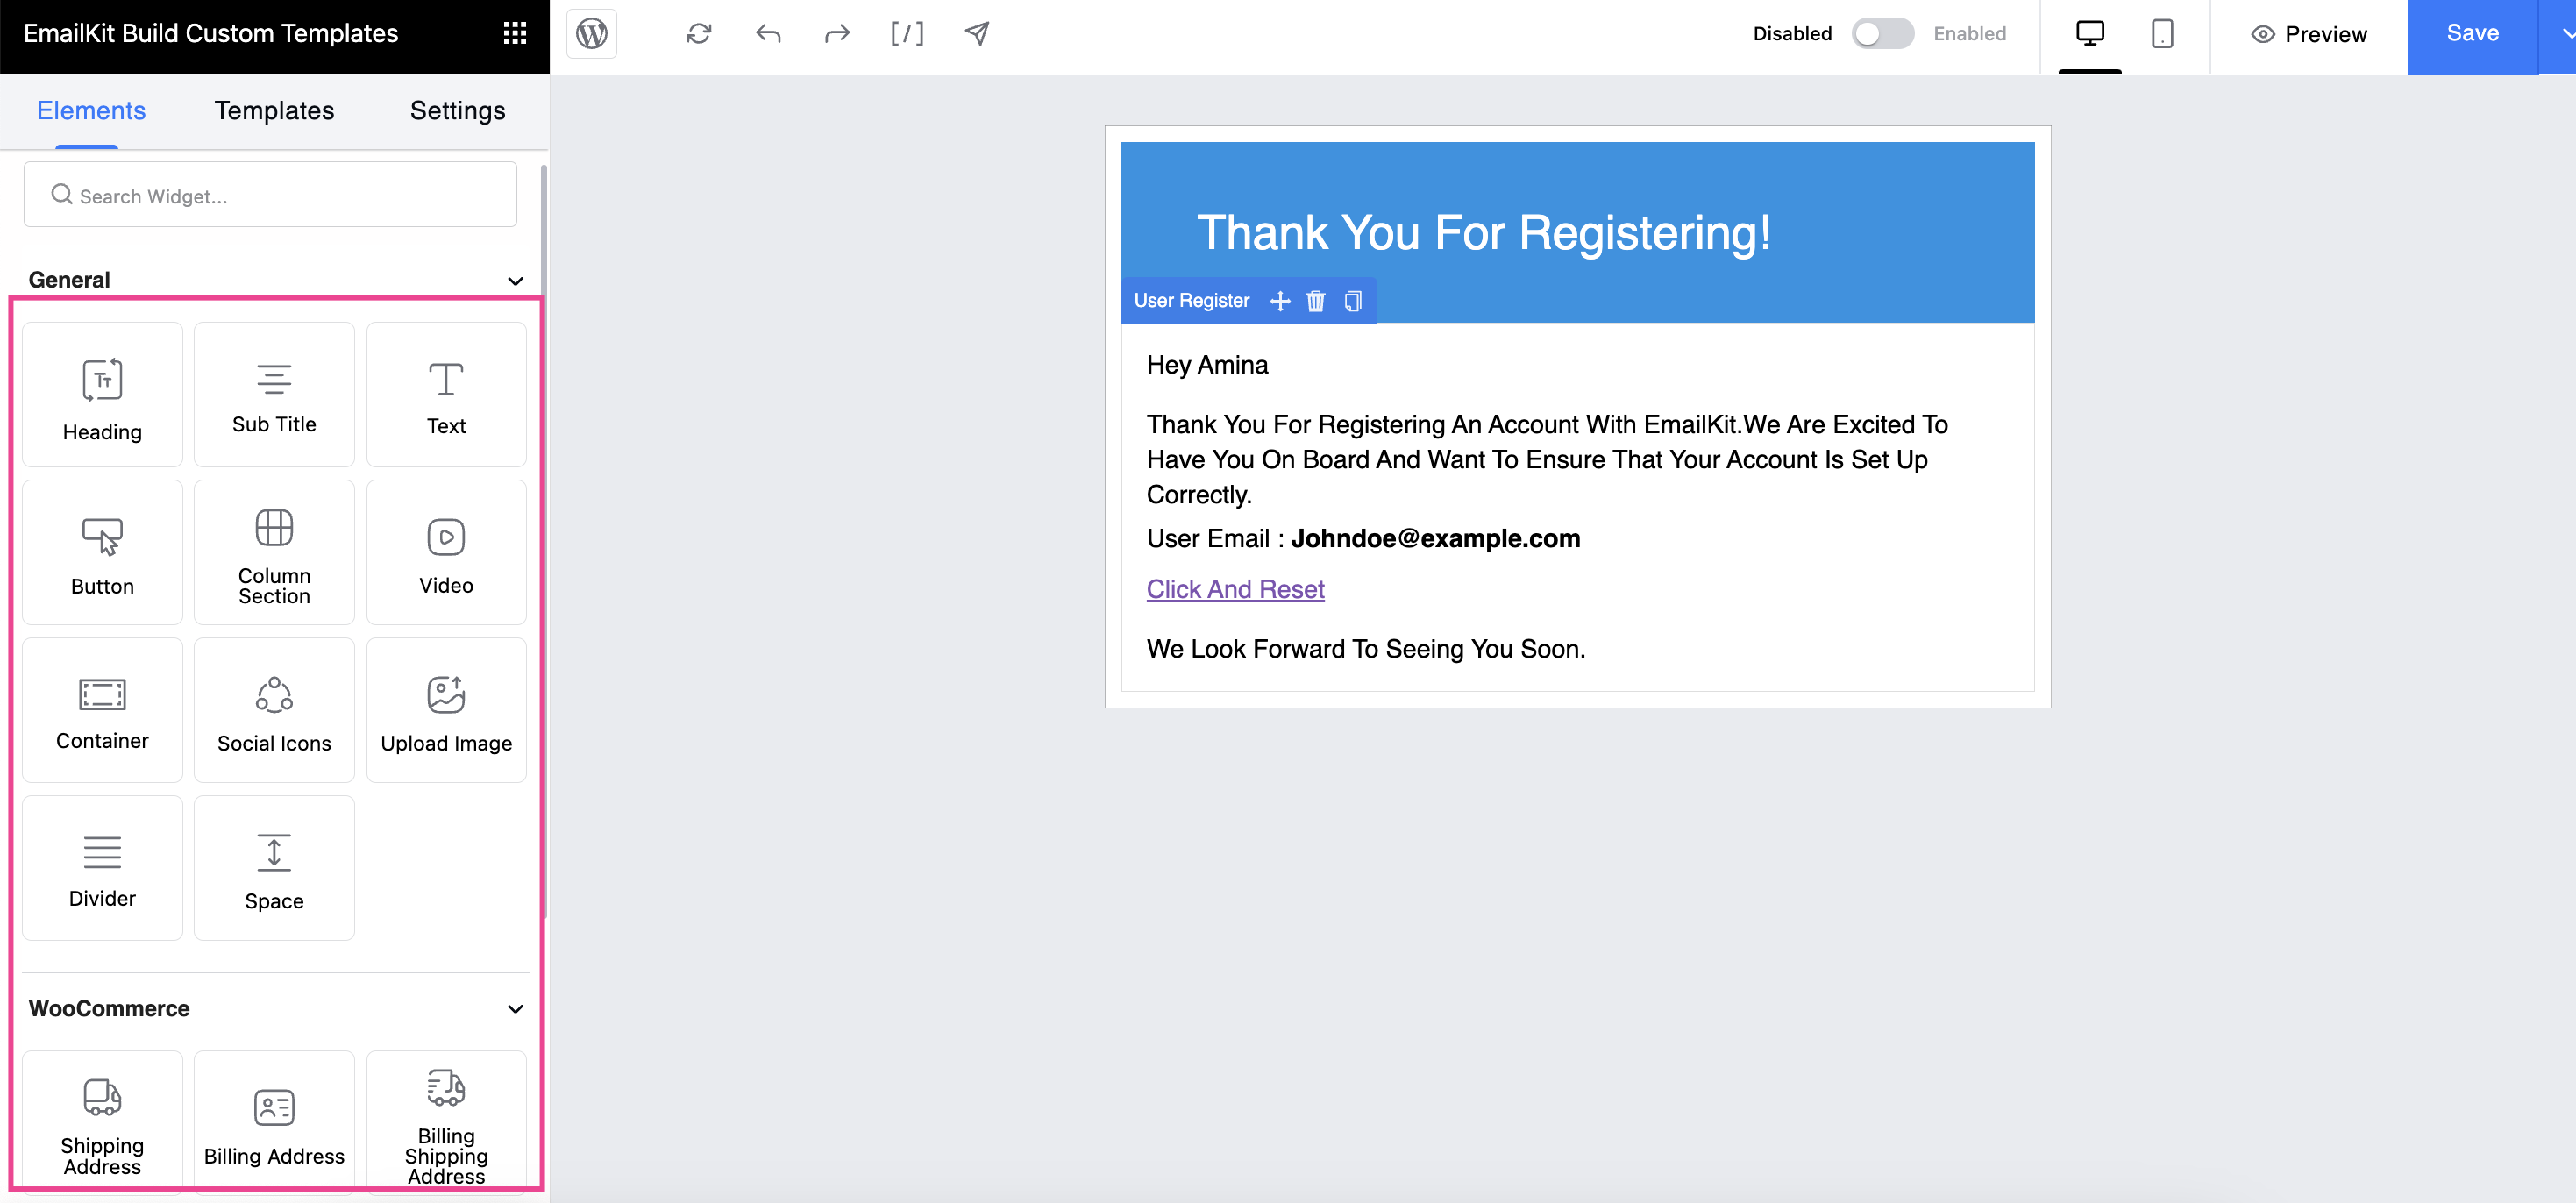
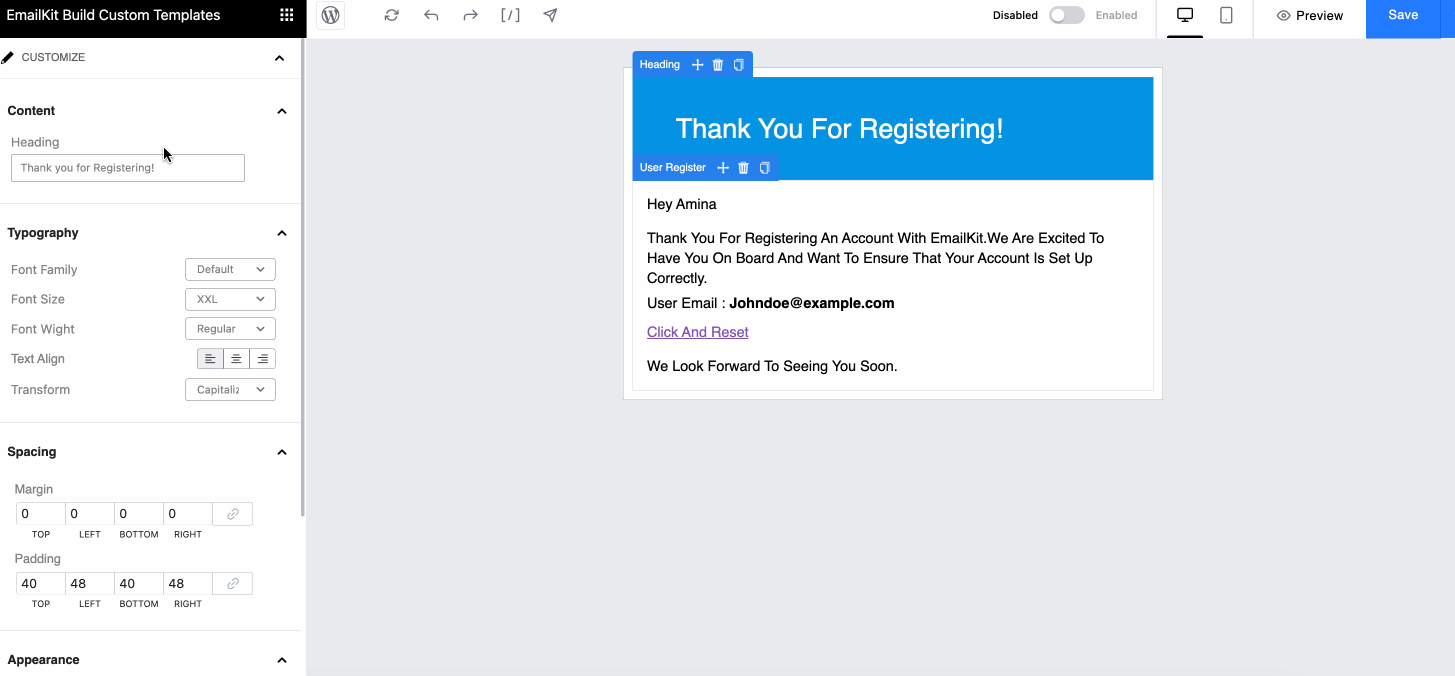
After adding all the necessary elements, click each element and customize the Content, Typography, Spacing, Appearance, Border Style, etc. of your email template.
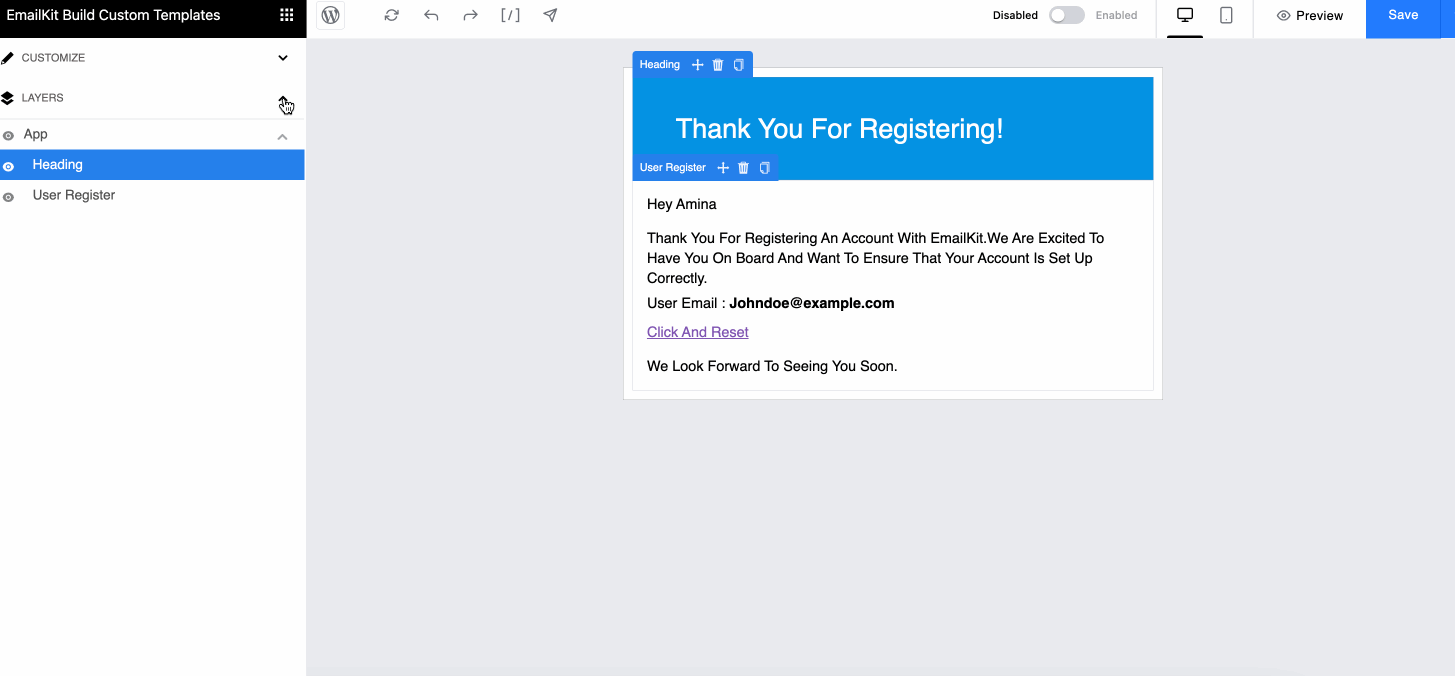
Then, expand the Layers tab and adjust the order of your elements by dragging them up and down. Also, you can hide any element by clicking the eye icon using this WordPress email template plugin.
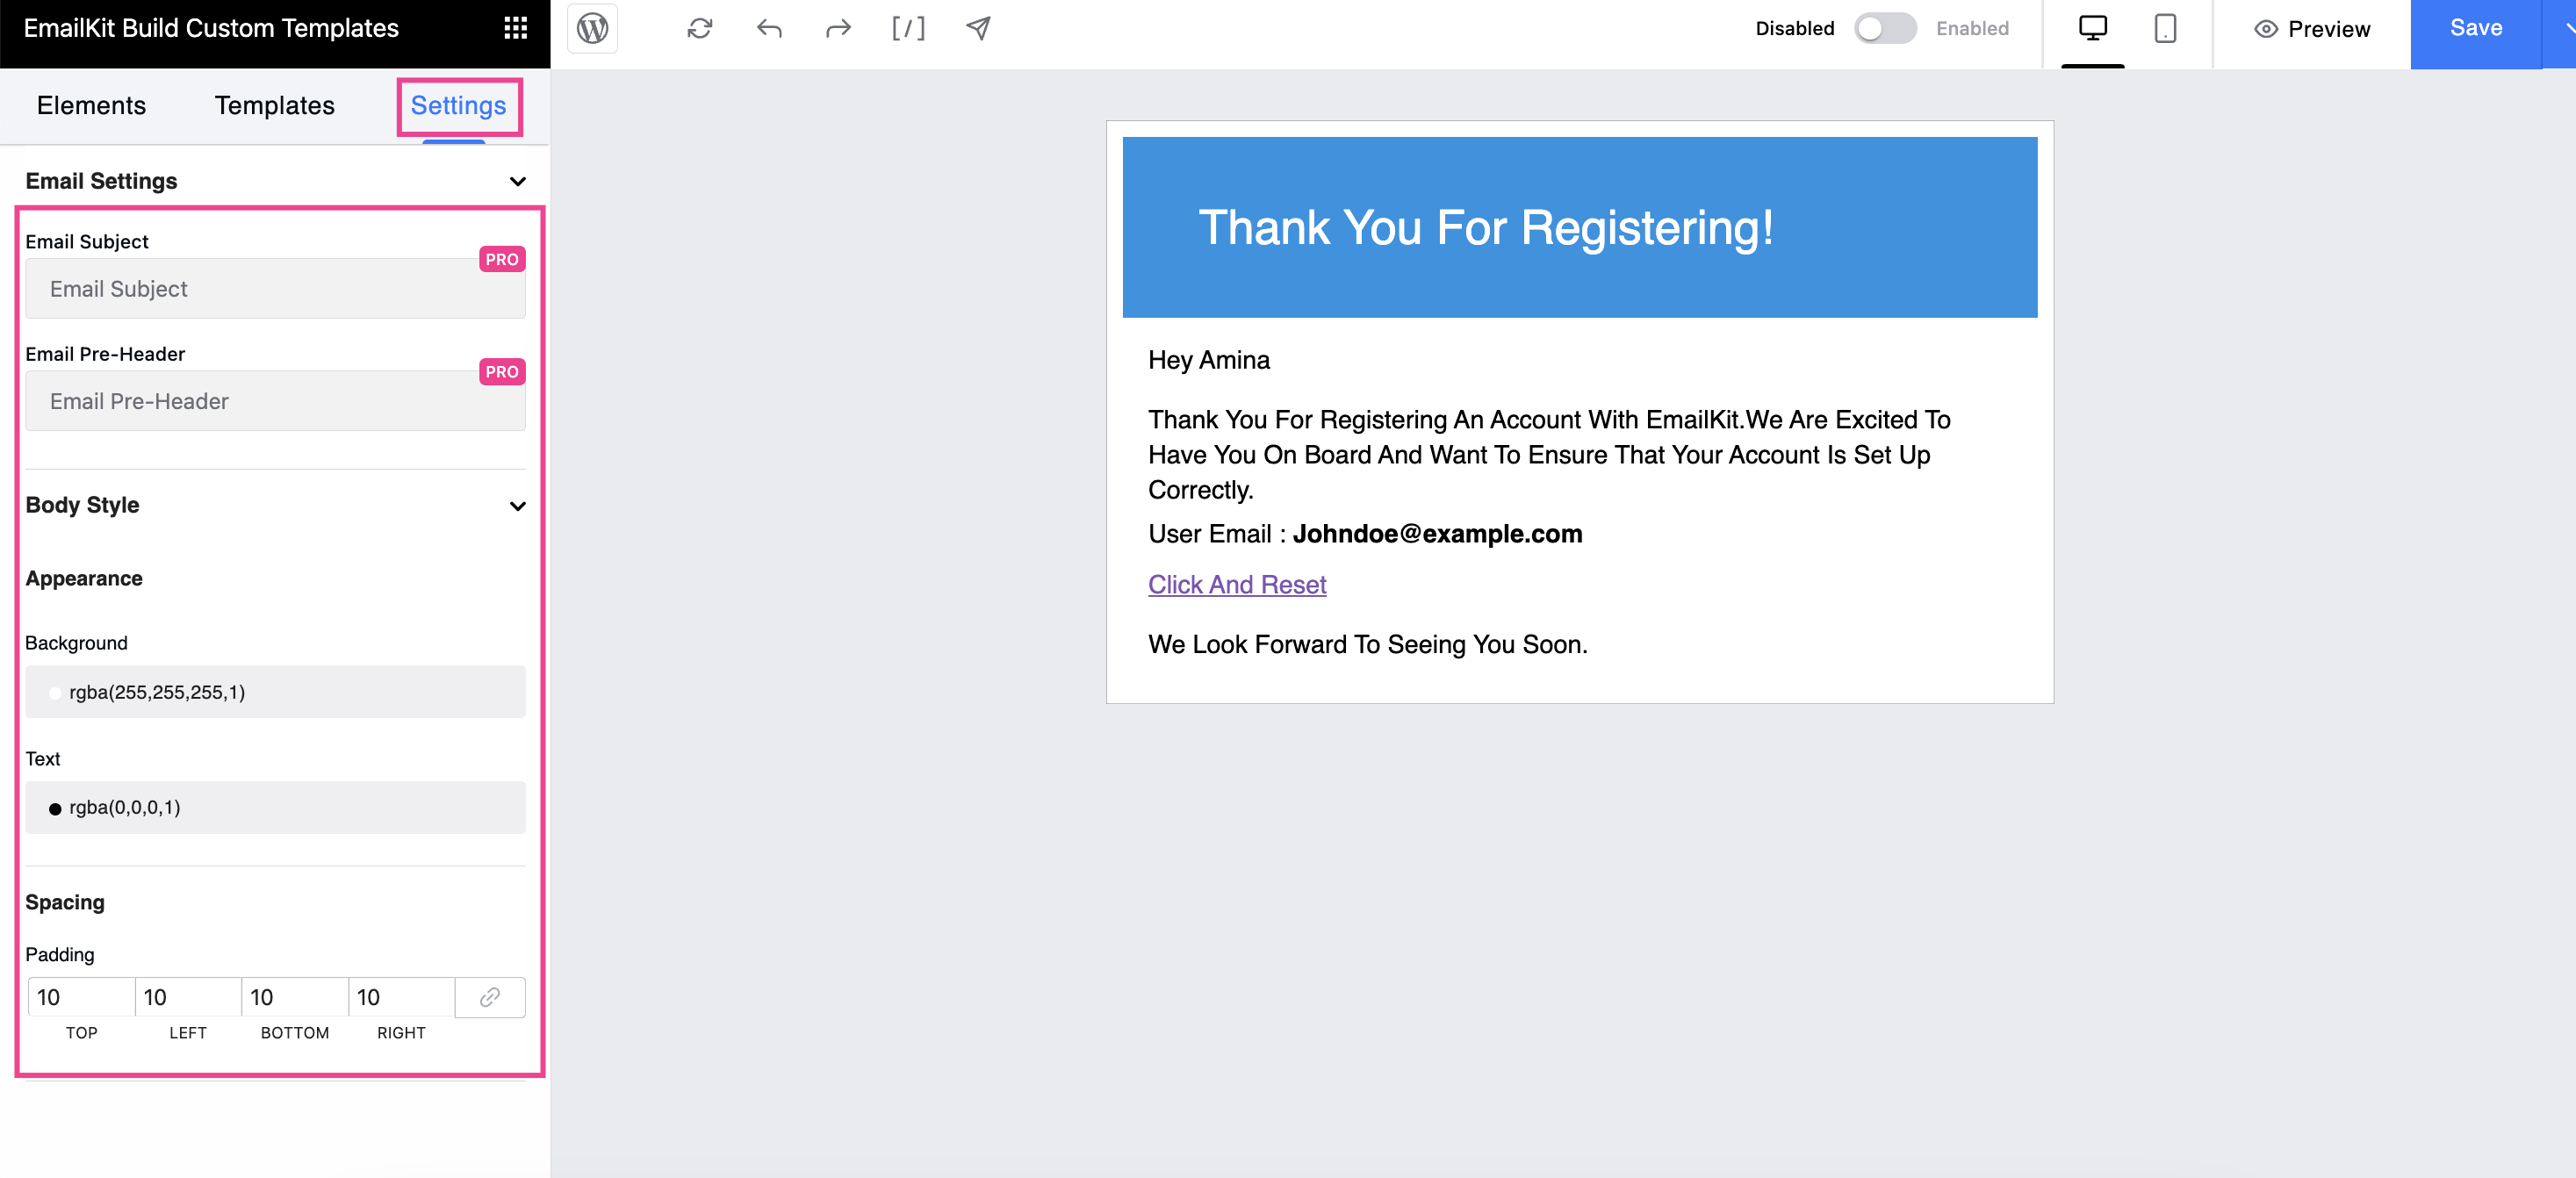
Now, navigate to the “Settings” tab and customize Email Settings such as Email Subject and Pre-header along with the Body Style.
Step 3: Preview and Send Test WordPress Emails.
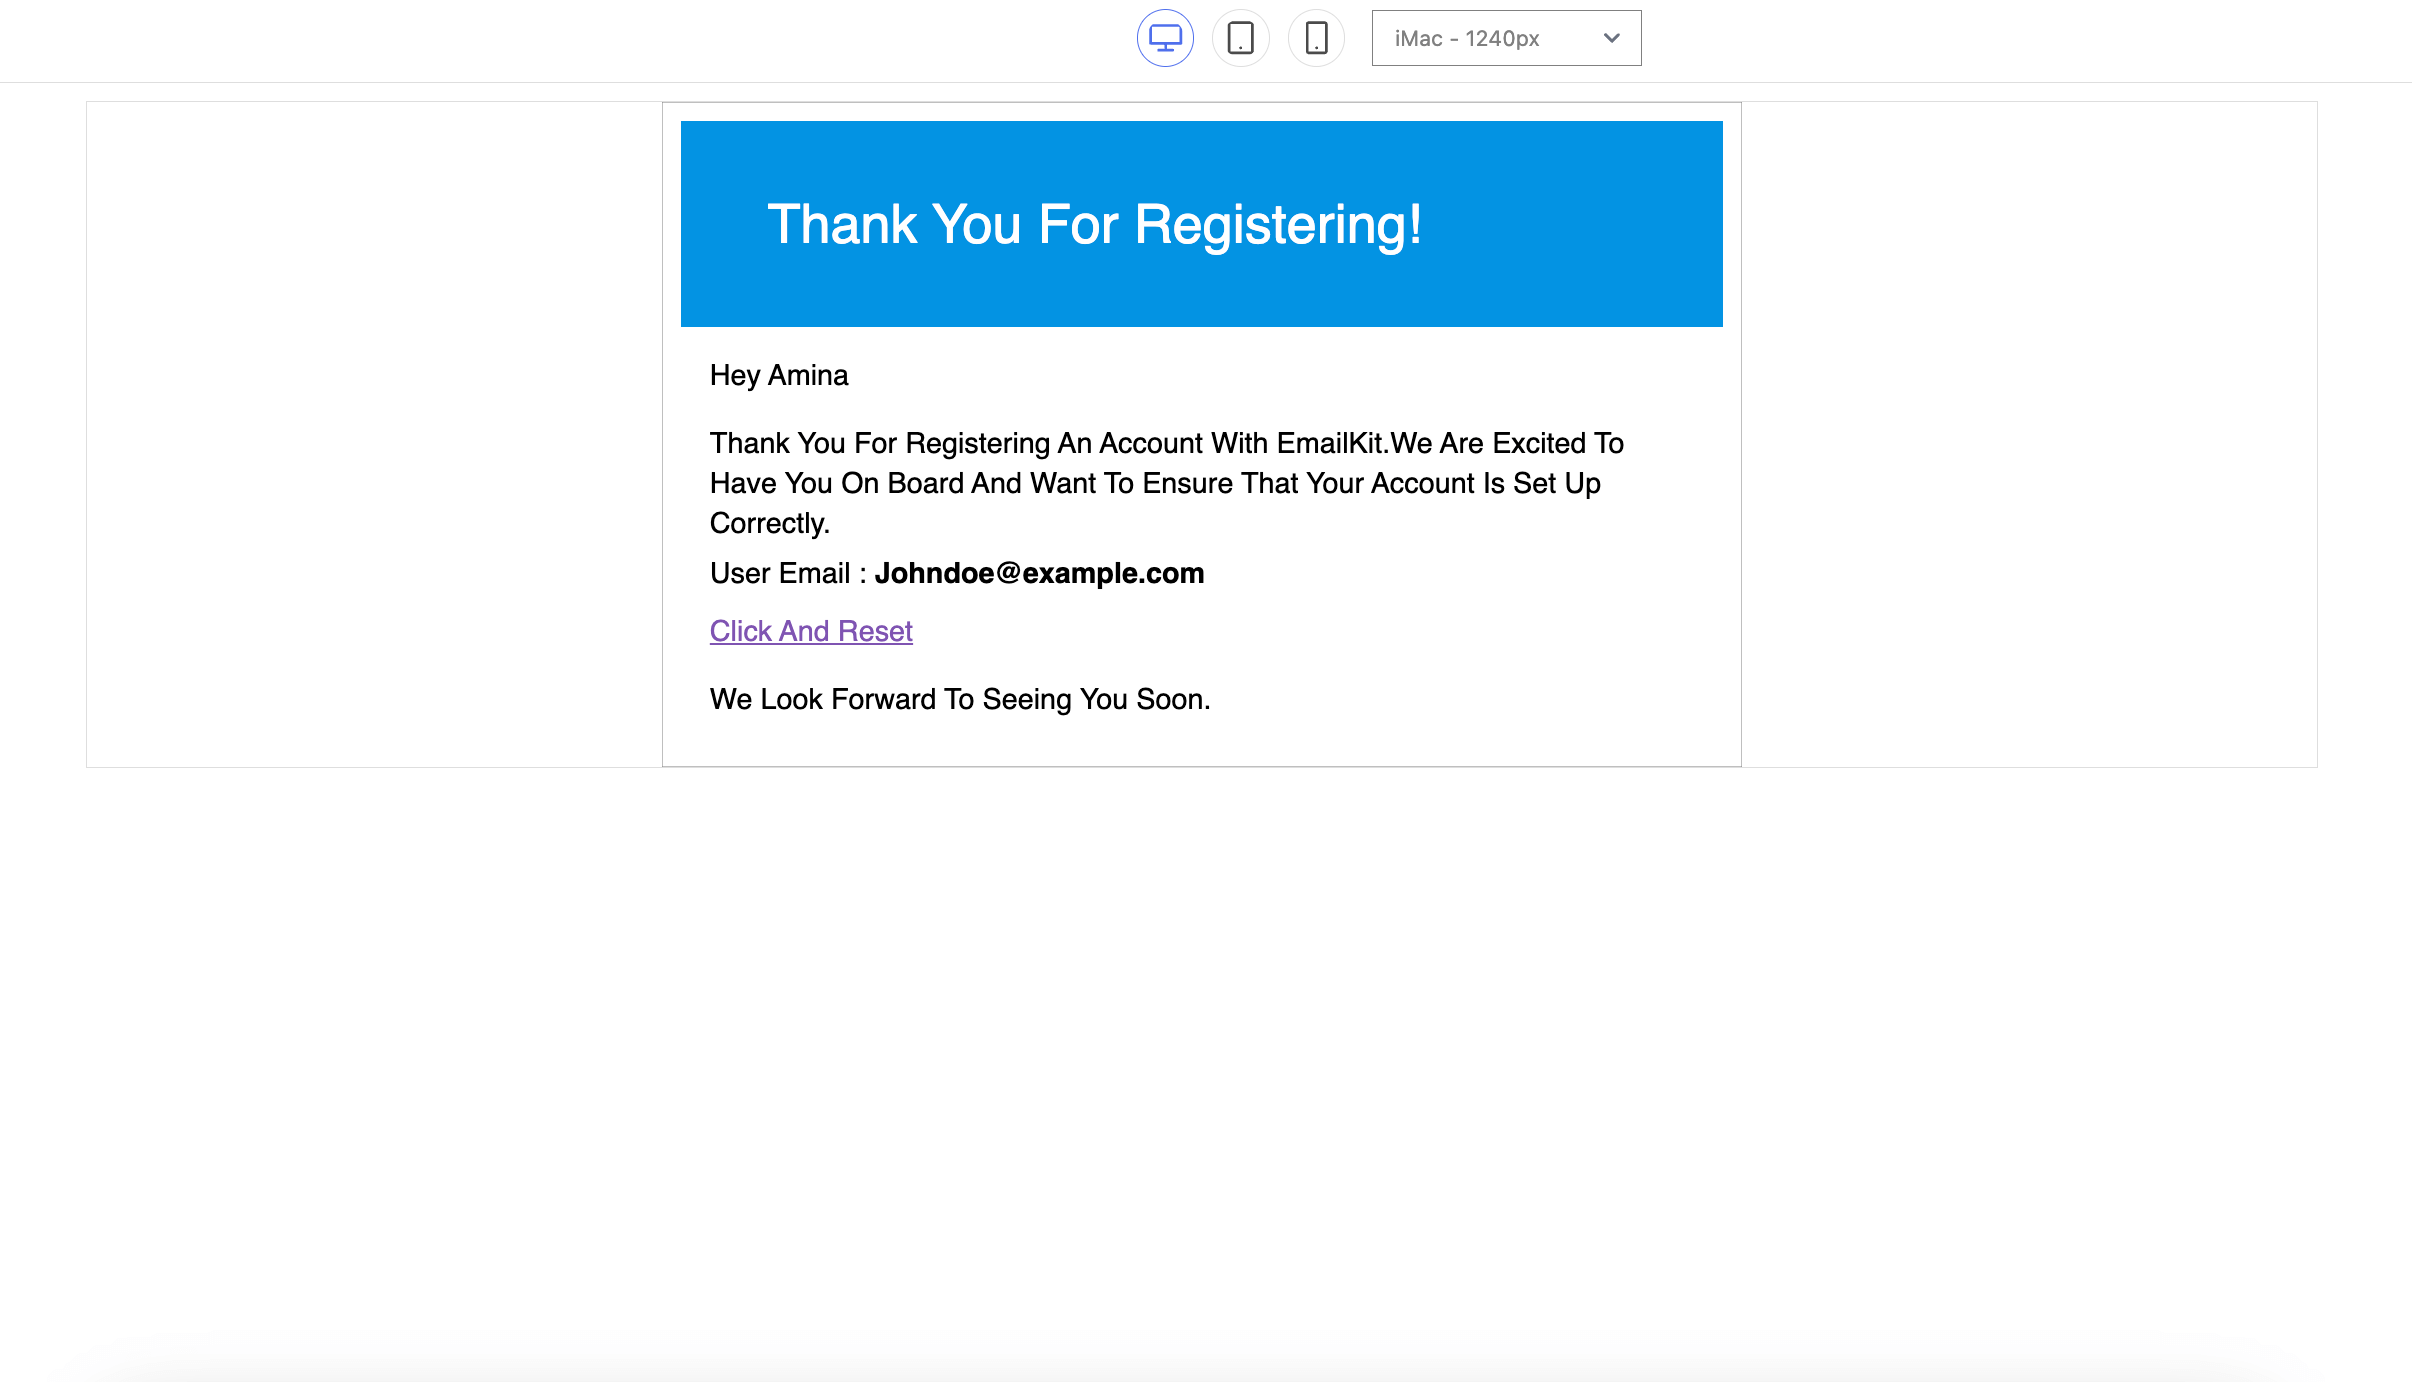
In this step, you need to preview and test WP emails to identify how they appear in your inbox. Now hit the “Preview” button to check the final appearance of your WordPress emails on different devices.
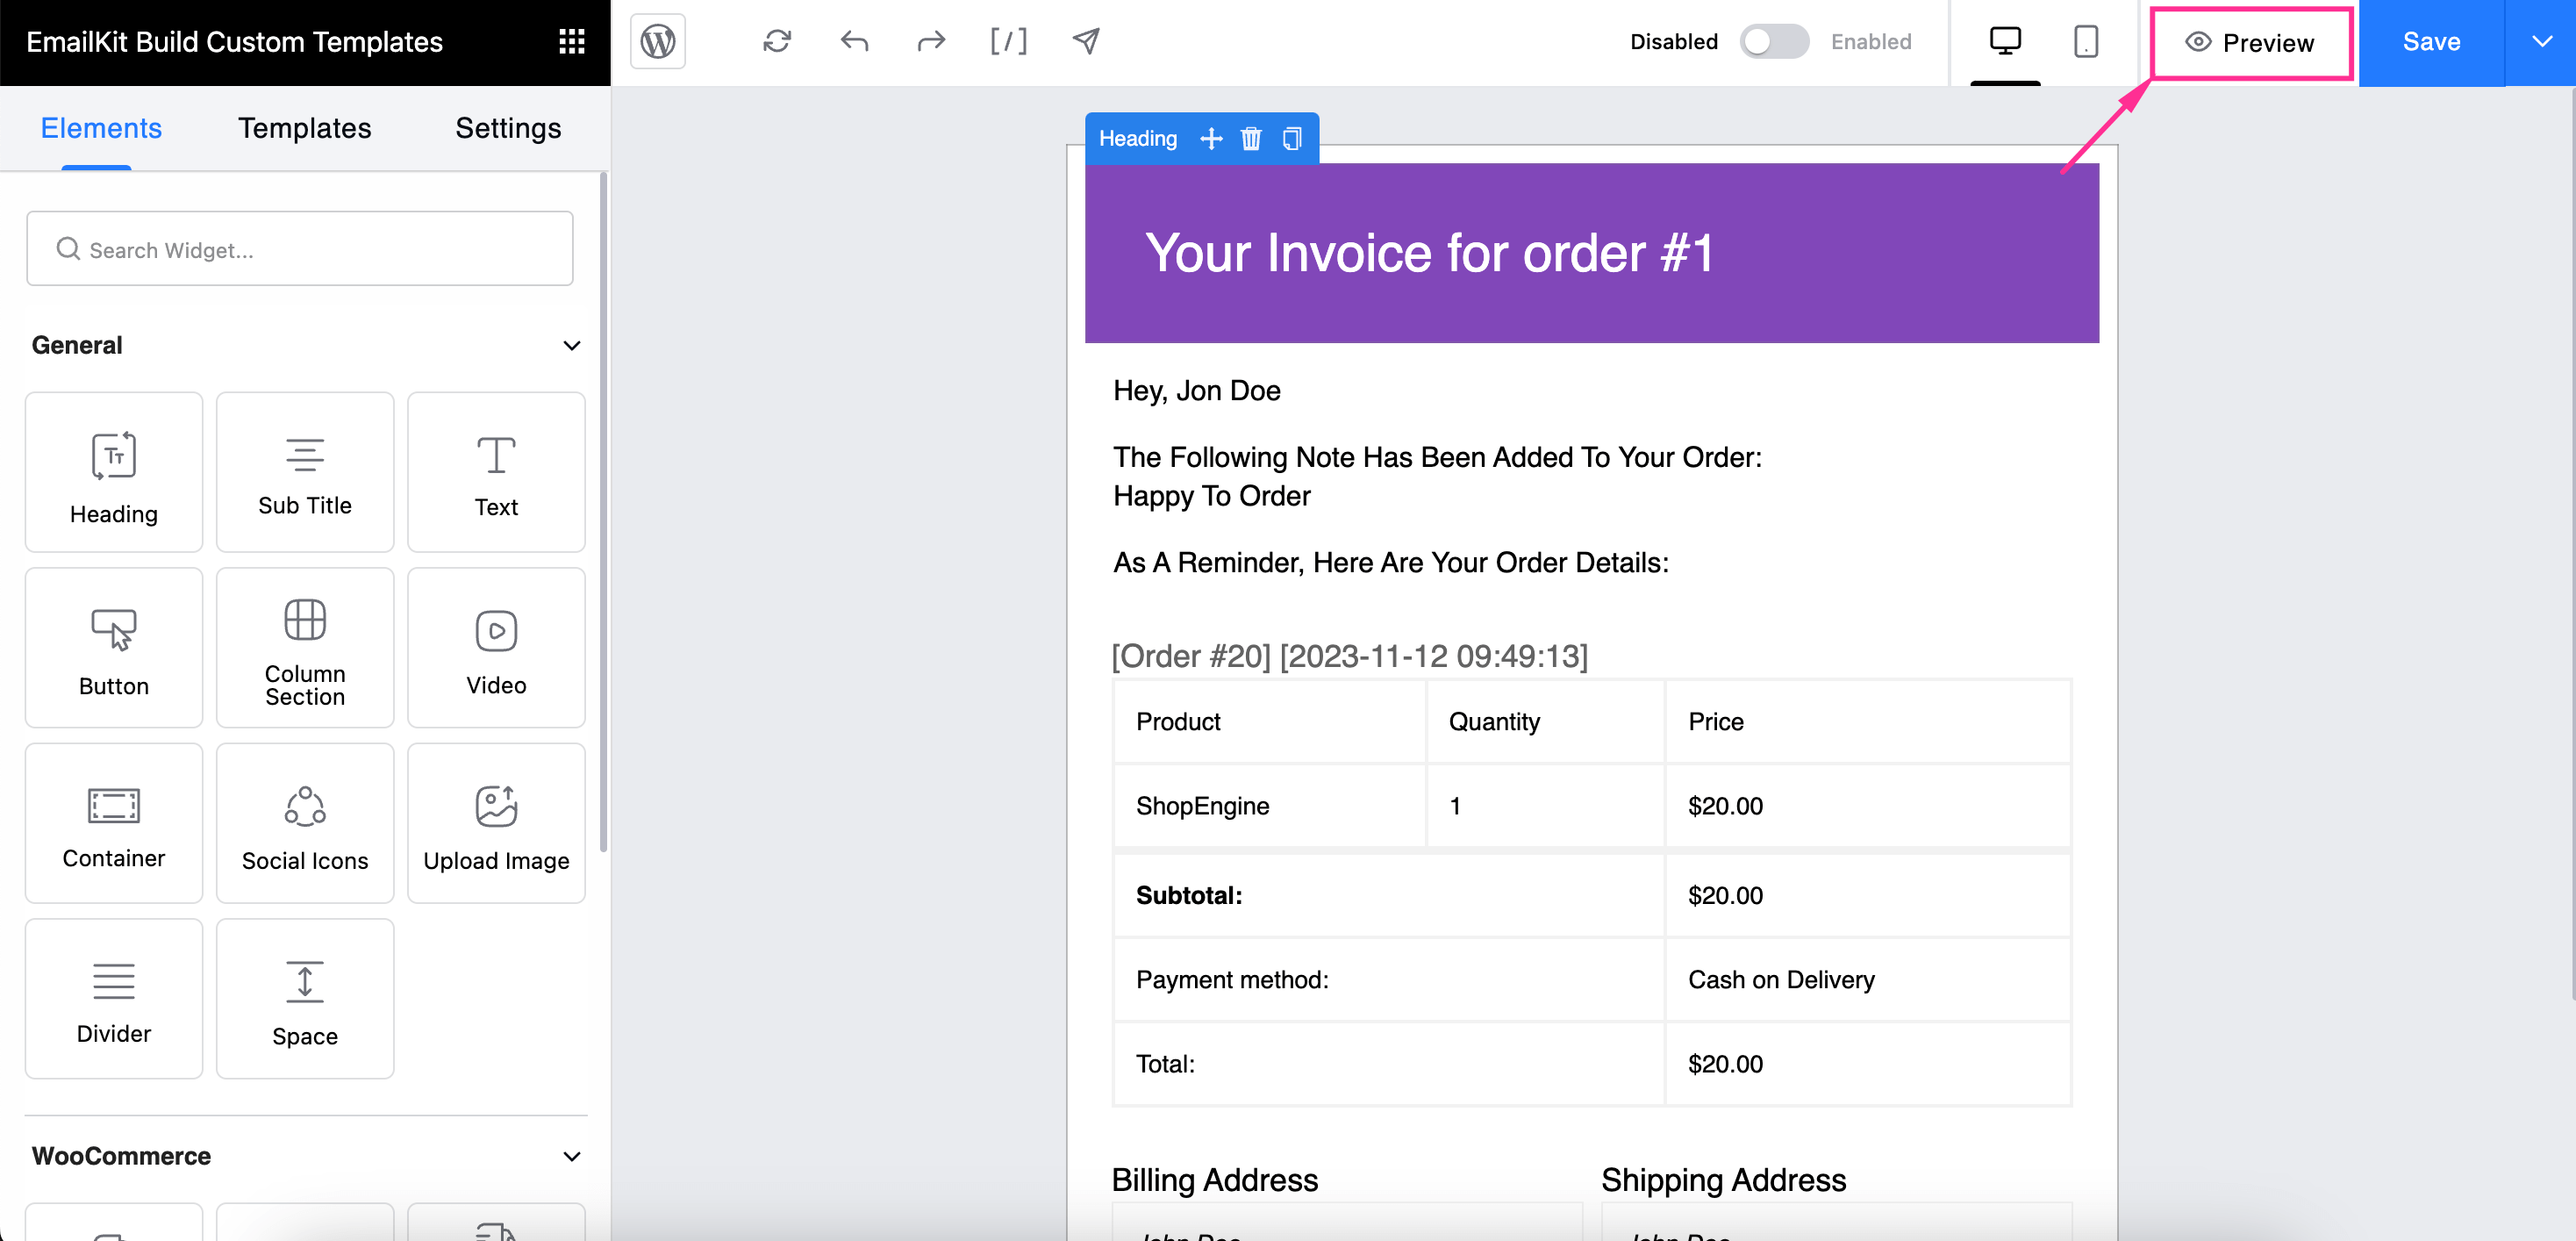
On the preview tab, select each device and see how the custom email looks on those screen sizes.
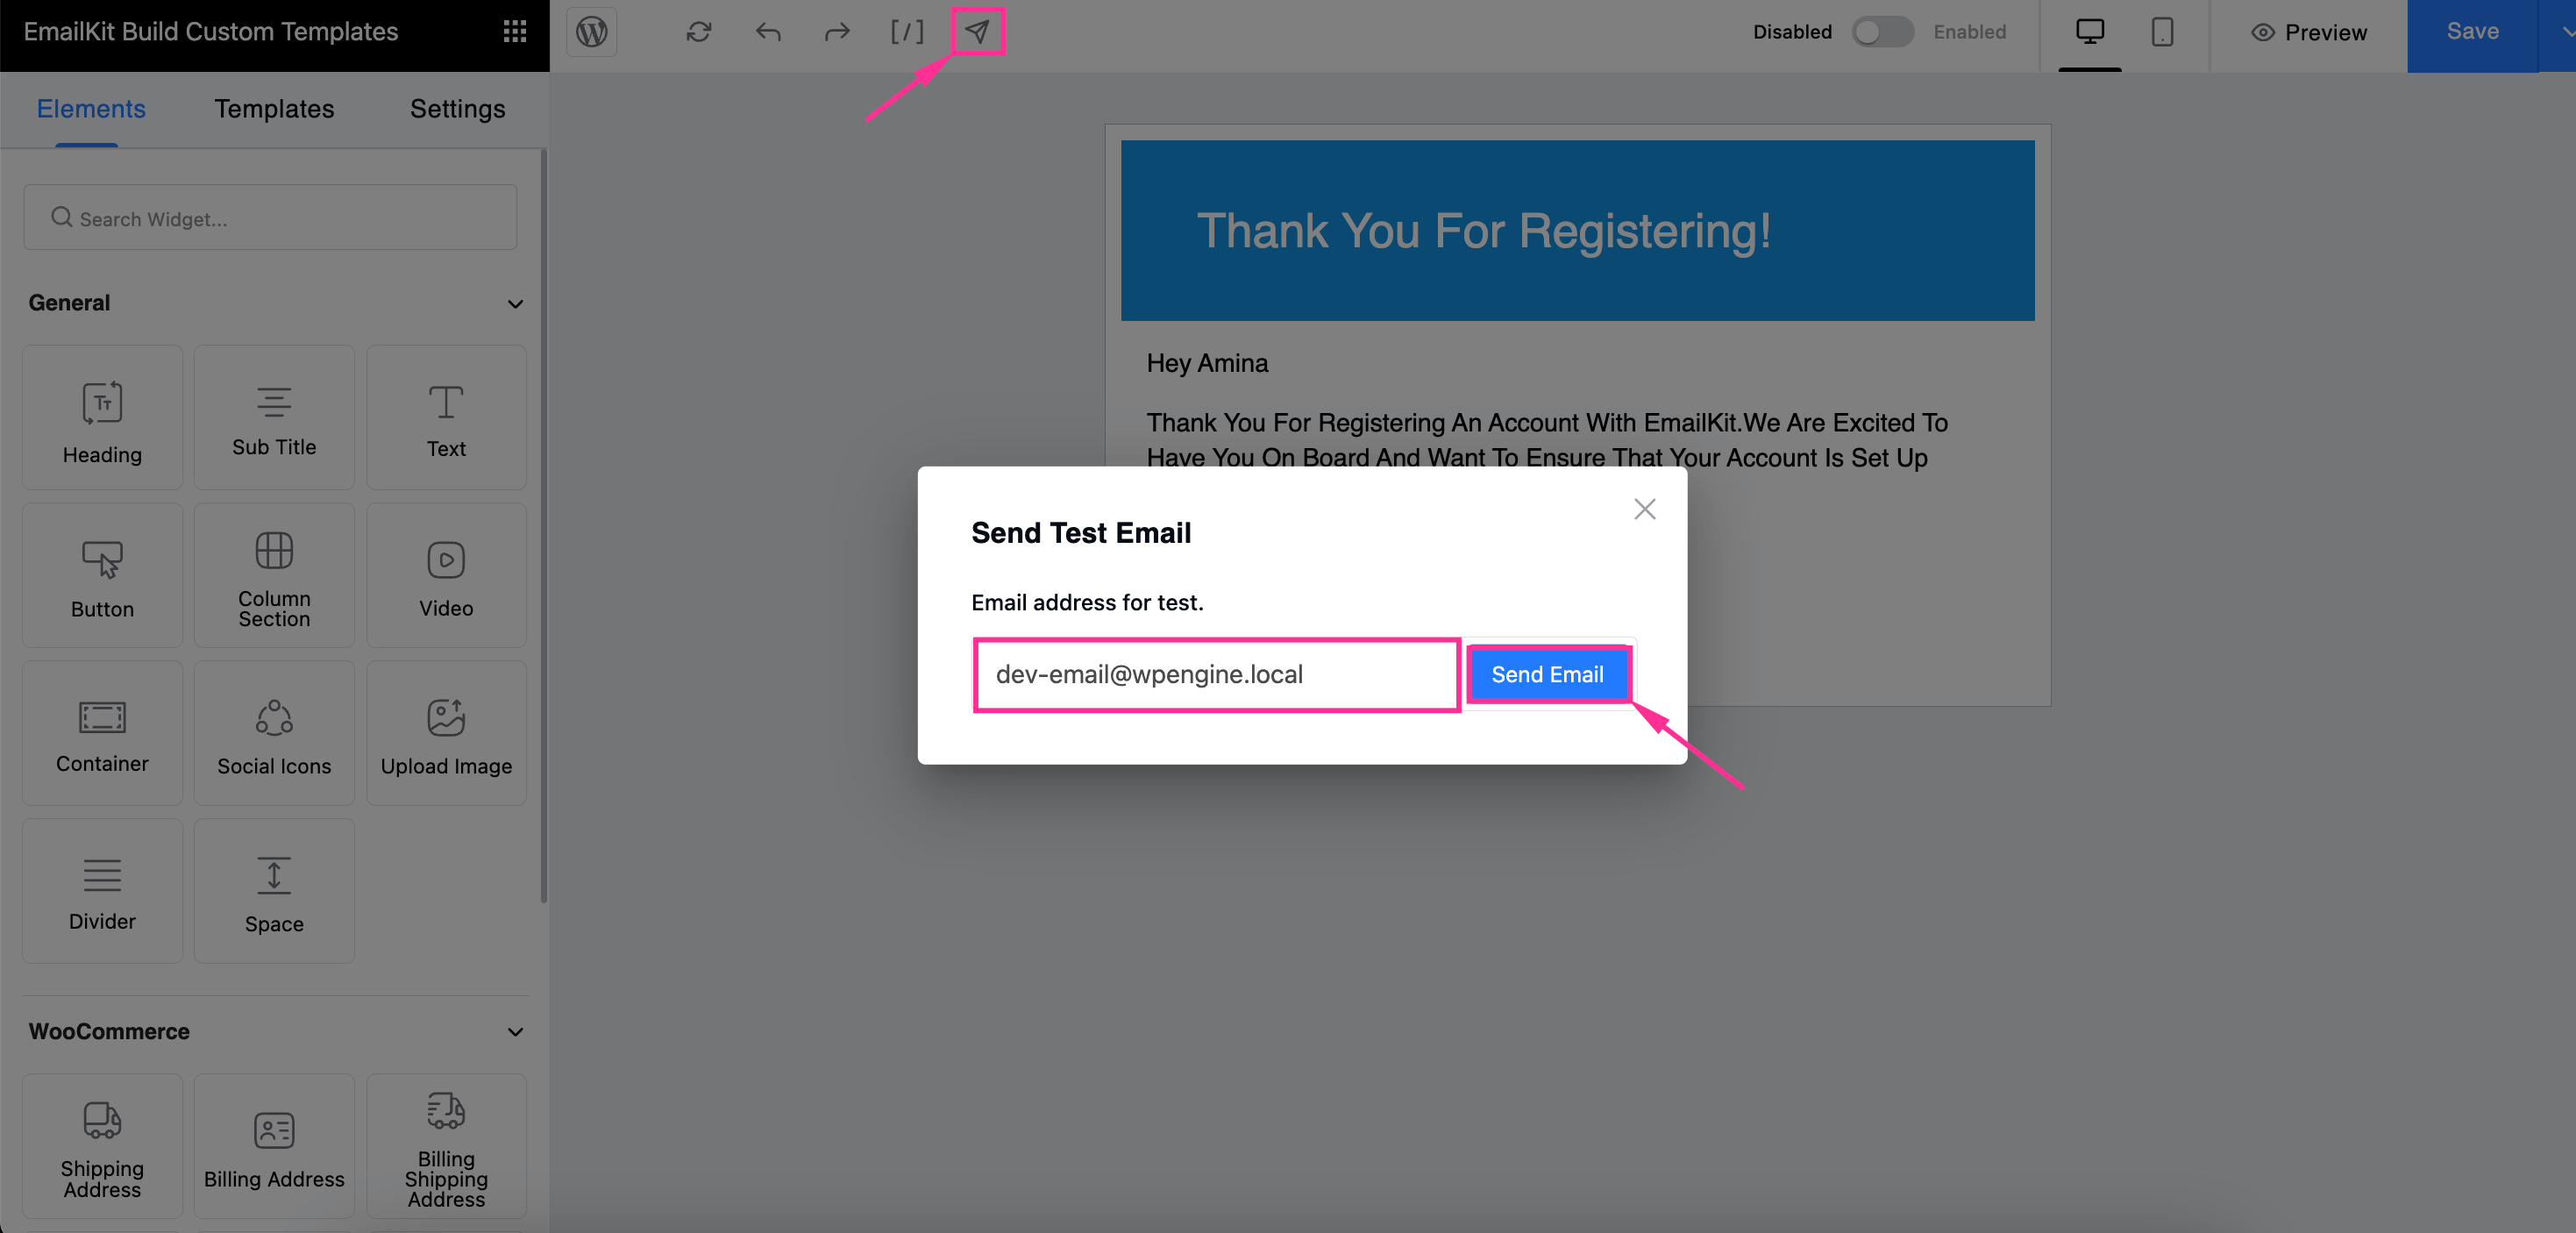
Then you can also try sending a test email by hitting the arrow marked in the following image. Now, enter the email in which you want to receive the test email and press the “Send Email” button. There you will receive a test email to that address.
Step 4: Save the Custom Default WordPress Emails.
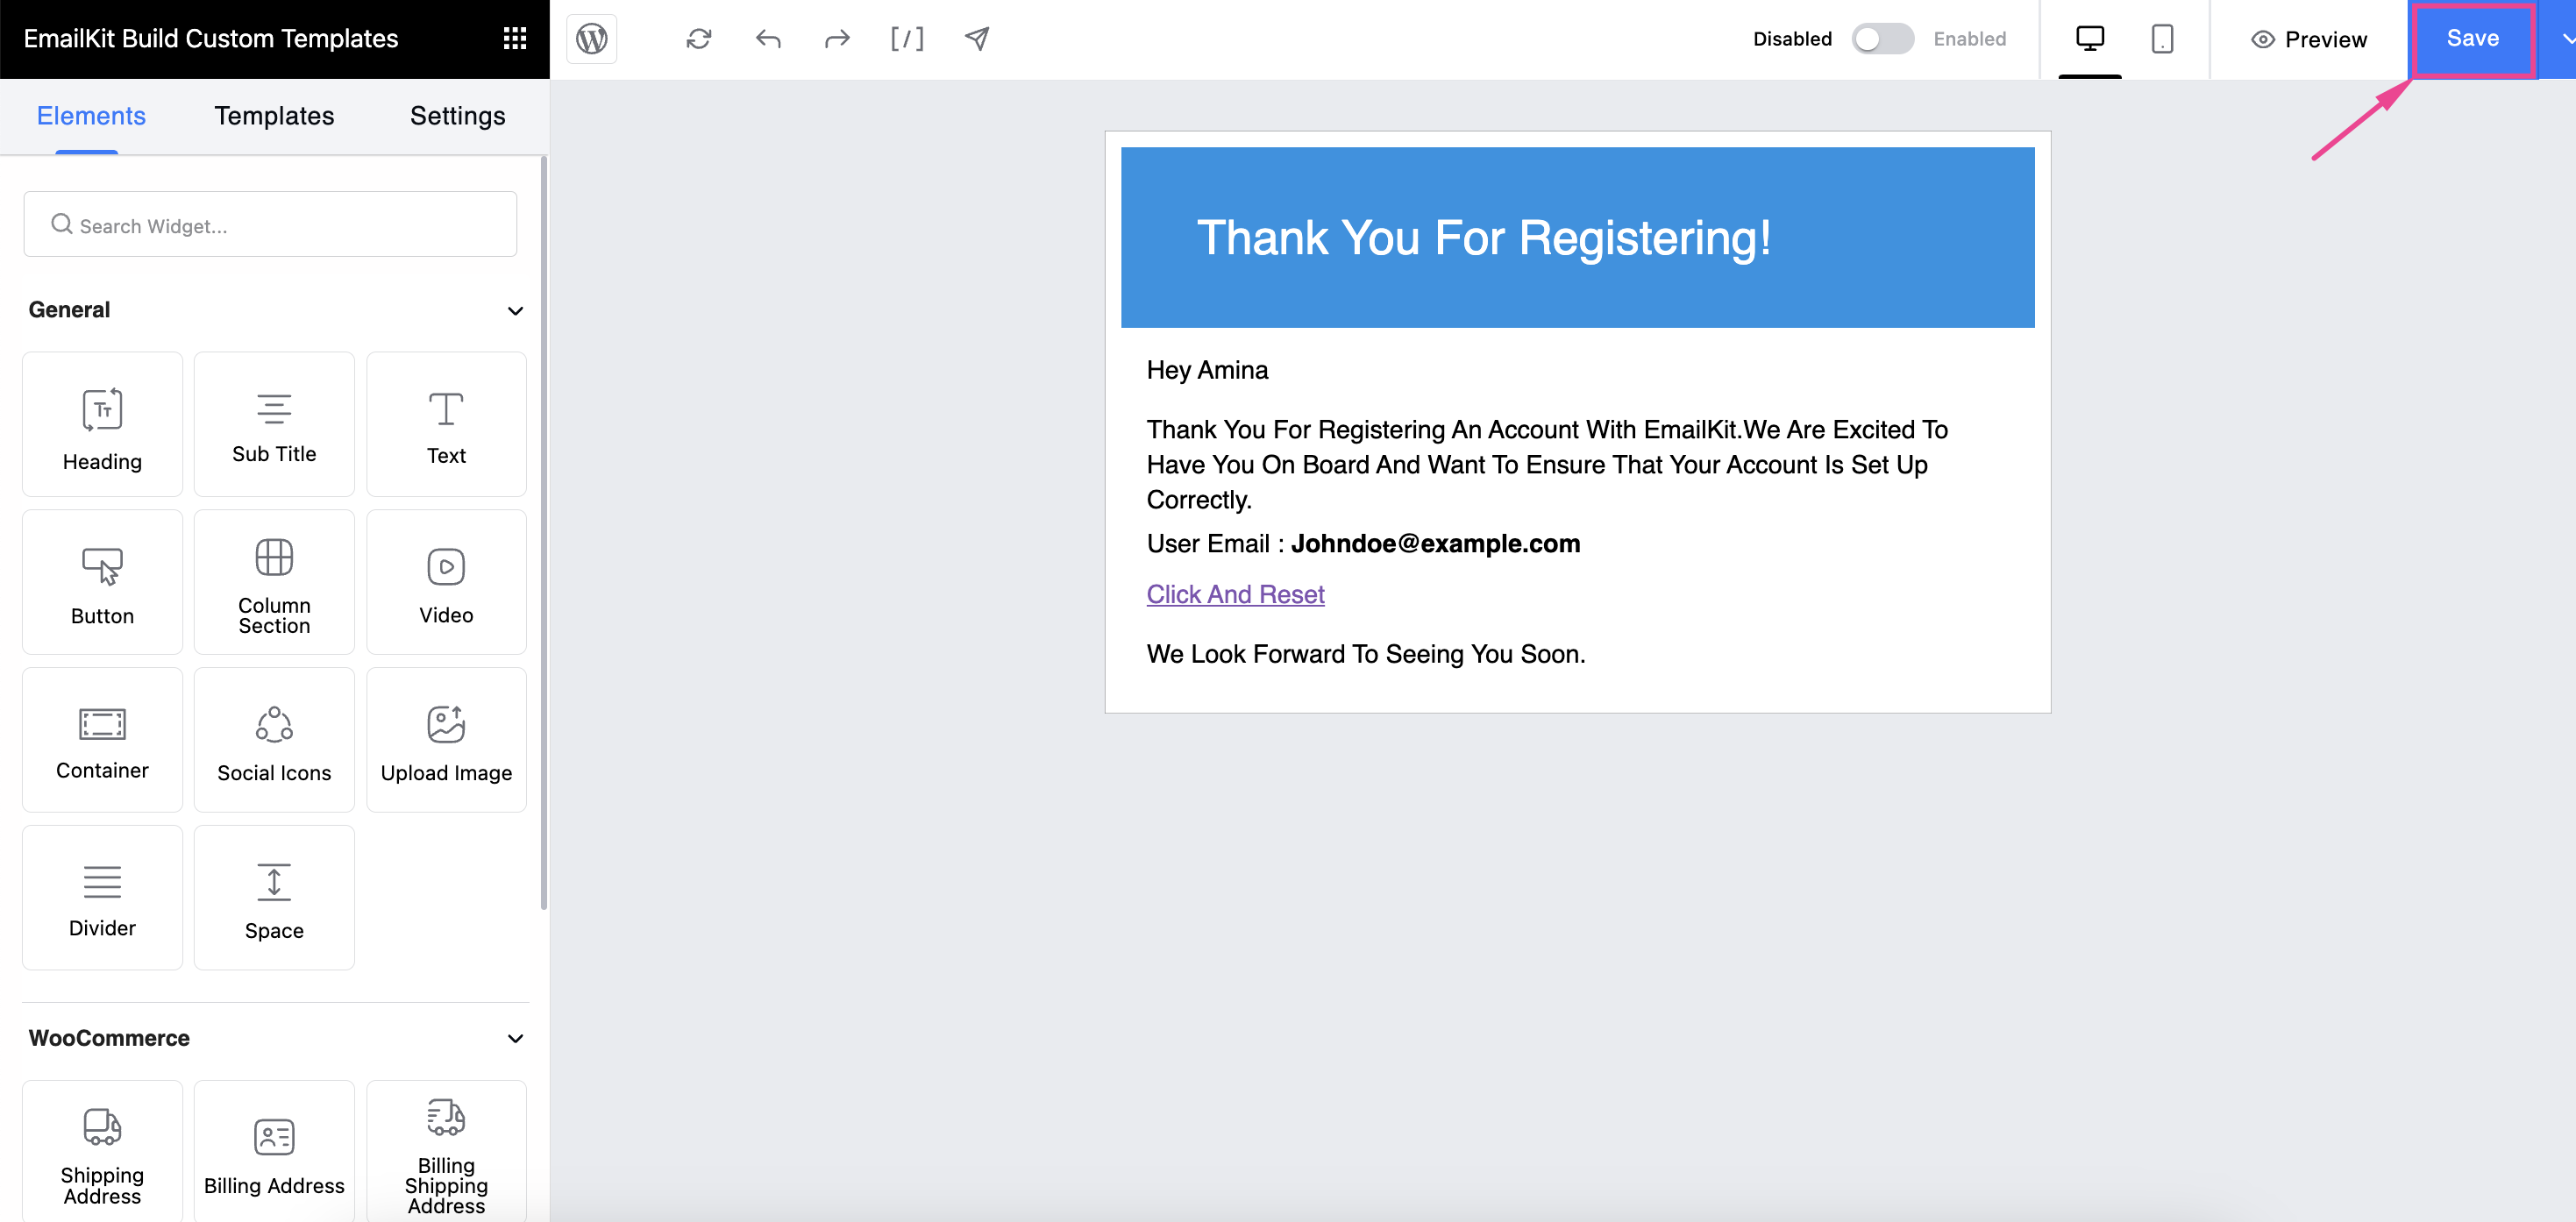
After previewing and testing emails, EmailKit allows you to save your customized WordPress emails by hitting the “Save” button.
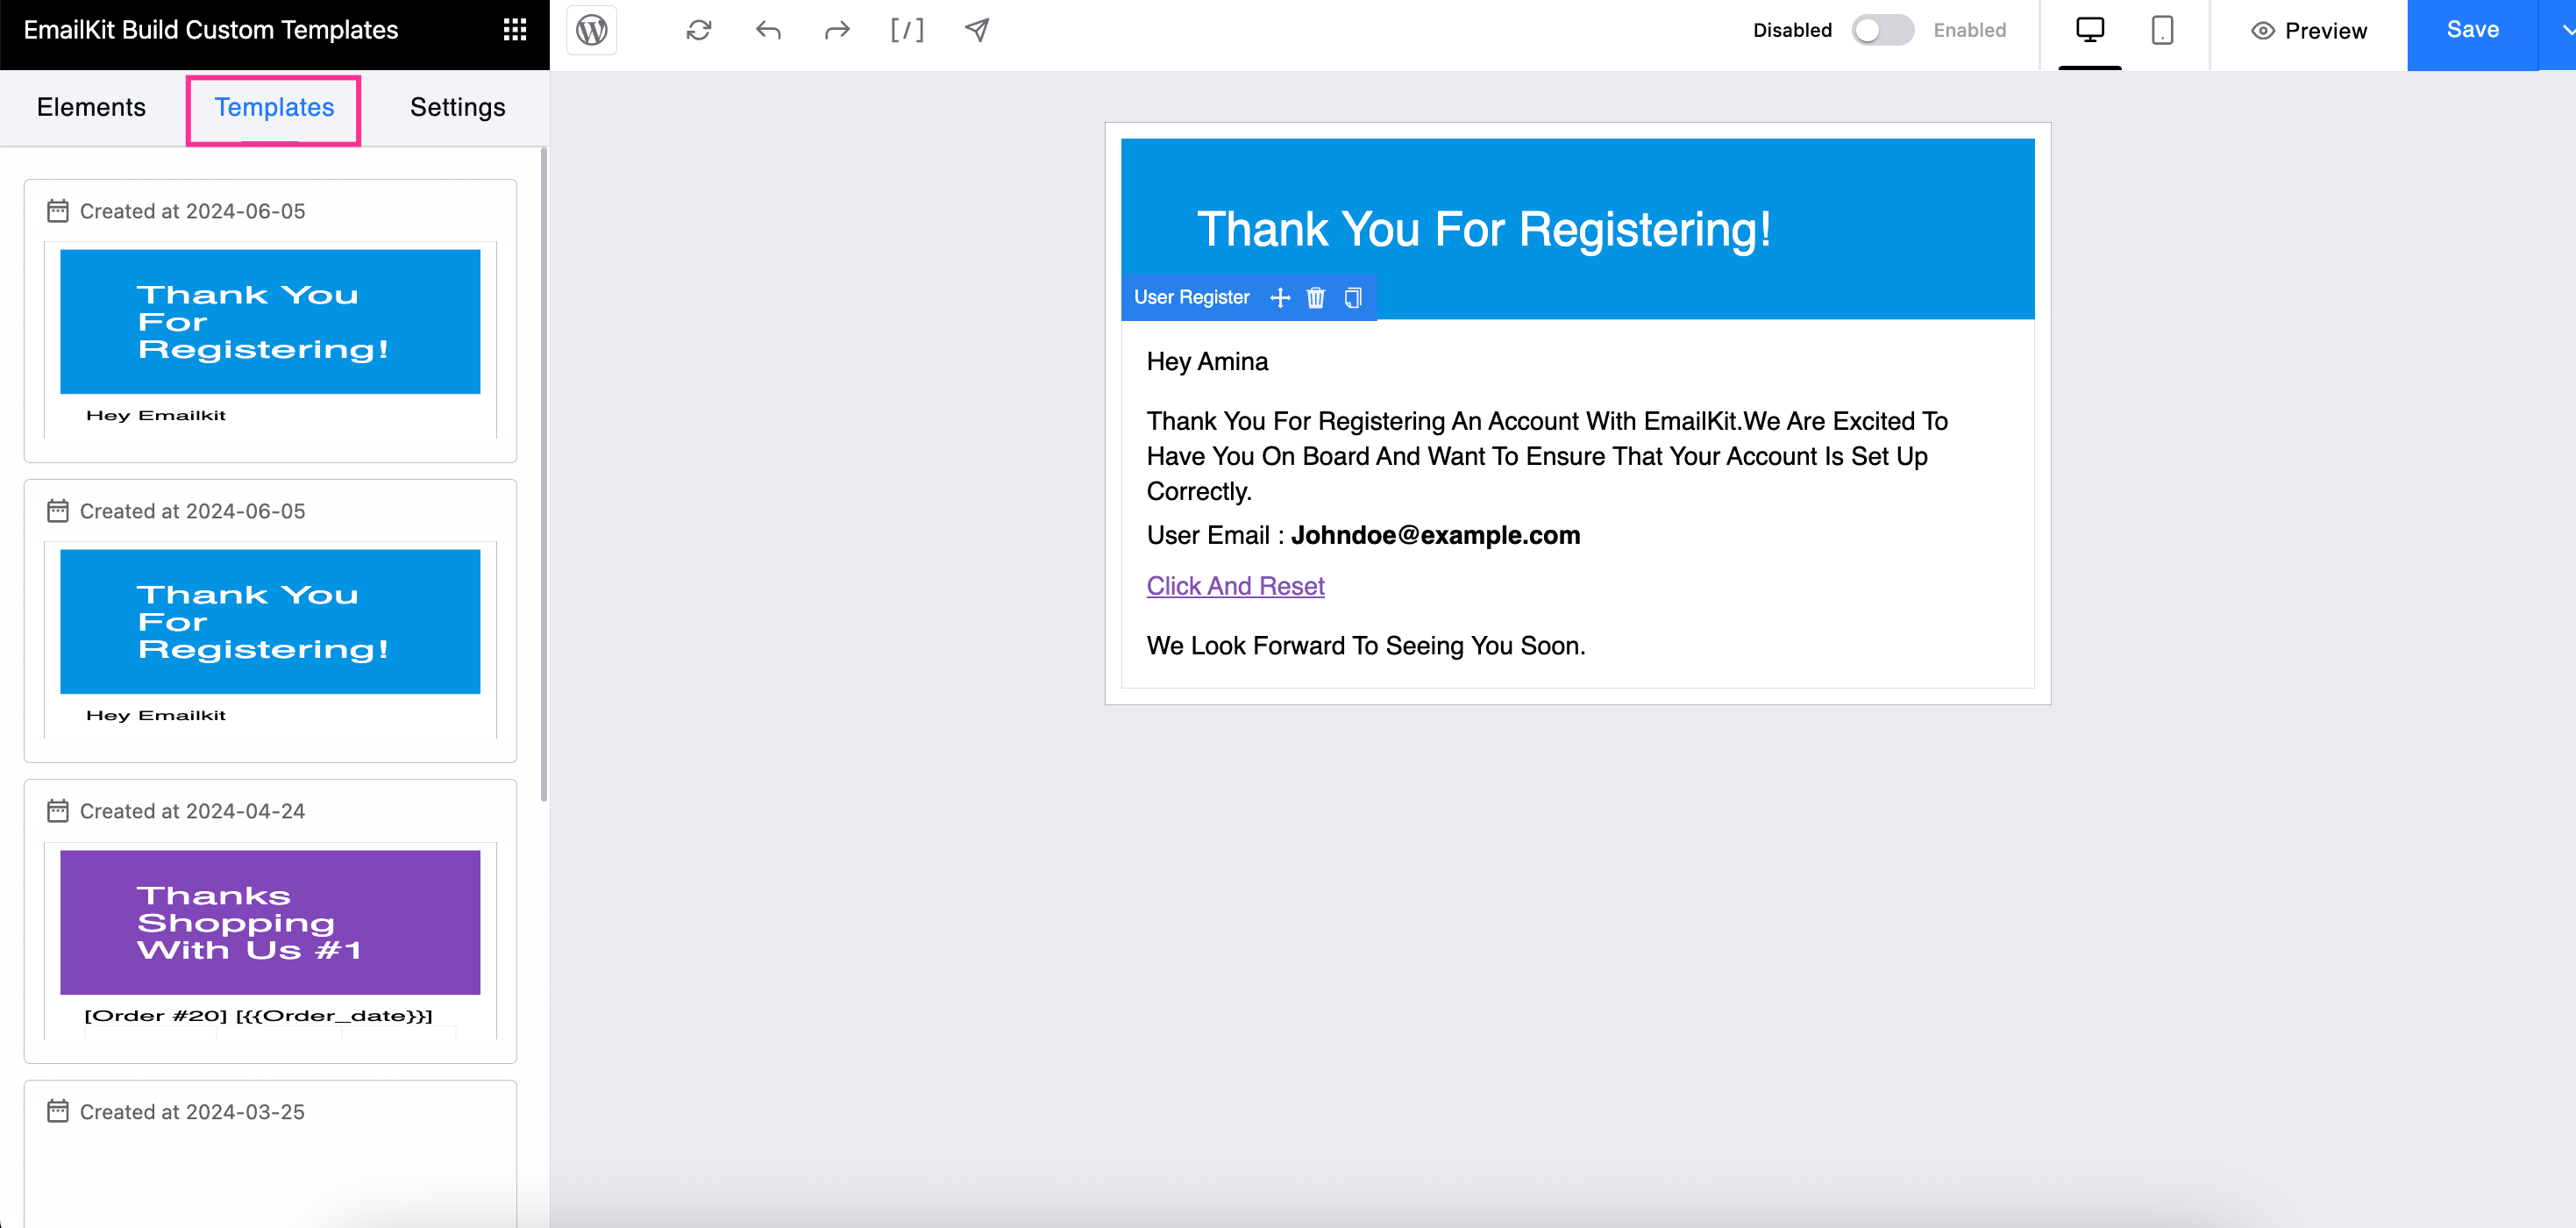
Thus, your custom WordPress emails built with an email template will be saved in the “Templates” section.
Start Customizing WordPress Emails!
Emails play a crucial role in nurturing customer relationships by providing on-time updates and fostering long-term loyalty. However, you can never accomplish these goals through default emails since personalization and brand identity are missing. Additionally, these emails can lower engagement and interaction rates.
Thankfully, by utilizing EmailKit, you can customize your WordPress default emails however you want. Zero coding expertise will be required to customize these emails. Moreover, all customization options are available in a drag-and-drop interface that further simplifies email editing for beginners. So, follow the above tutorial and boost customer interaction through personalized email communication.

Leave a Reply