


Creating a mega menu in Elementor is easy with ElementsKit, and it doesn’t require Elementor Pro. ElementsKit offers a dedicated Mega Menu module that lets you design rich, multi-column menus using Elementor’s visual editor.
Steps to Create a Mega Menu Using ElementsKit:
- Save the menu and assign it to your site location.
- Installer og aktiver ElementsKit plugin.
- Gå til ElementsKit > Modules and enable Mega menu.
- Naviger til Udseende > Menuer and create or edit a menu.
- Aktiver Mega menu for a menu item and choose the layout.
- Klik Rediger med Elementor to design the menu content.
Det Mega Menu module from the ElementsKit plugin is a powerful feature in WordPress that allows you to create a category-based expandable WordPress dropdown menu with flexible layouts. Elementor Mega menus are easy to use and can be a great way to show the multi-level website menu in an organized way.
Watch our video guide on Elementor Mega Menu Building:
Or, follow the step-by-step instructions on how to create mega menu in Elementor:
Forudsætning: #
- Elementor, a page builder plugin (Free version is enough)
- ElementsKit Pro, a WordPress mega menu plugin for Elementor
How to Create WordPress Mega Menu in Elementor #
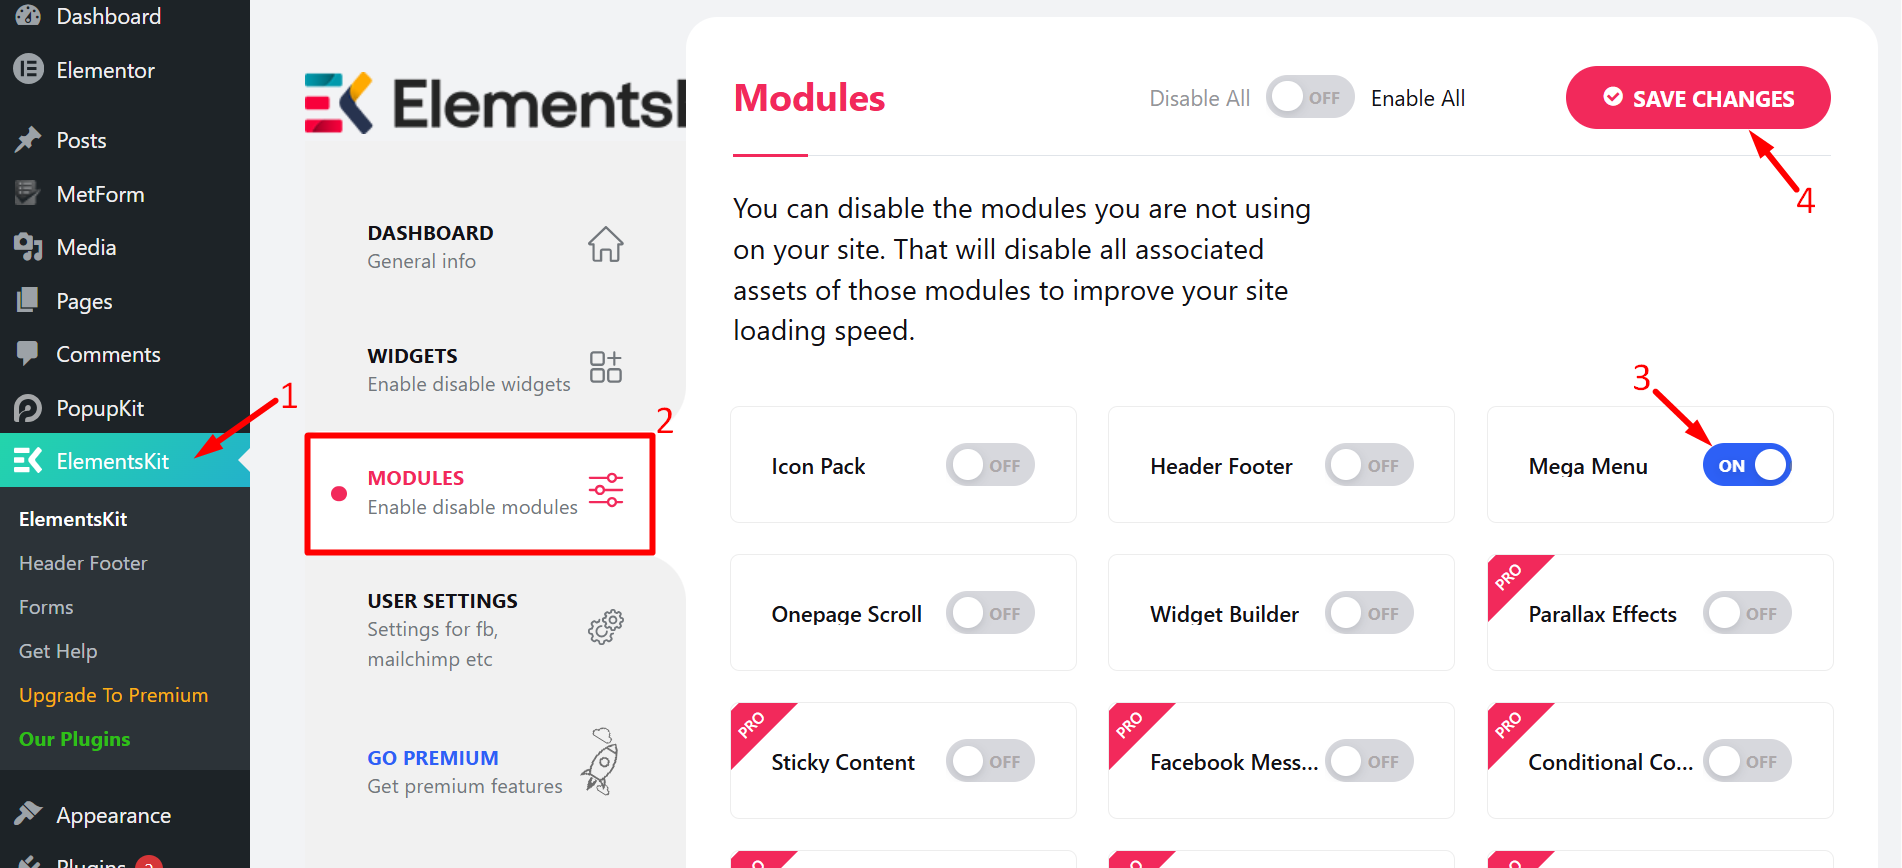
First of all, before creating an Elementor Mega Menu in WordPress make sure to enable the ElementsKit Mega menu modul.
- Naviger til ElementsKit on your WordPress dashboard
- Gå til Moduler
- Find and turn ON Mega Menu
- Gemme ændringerne
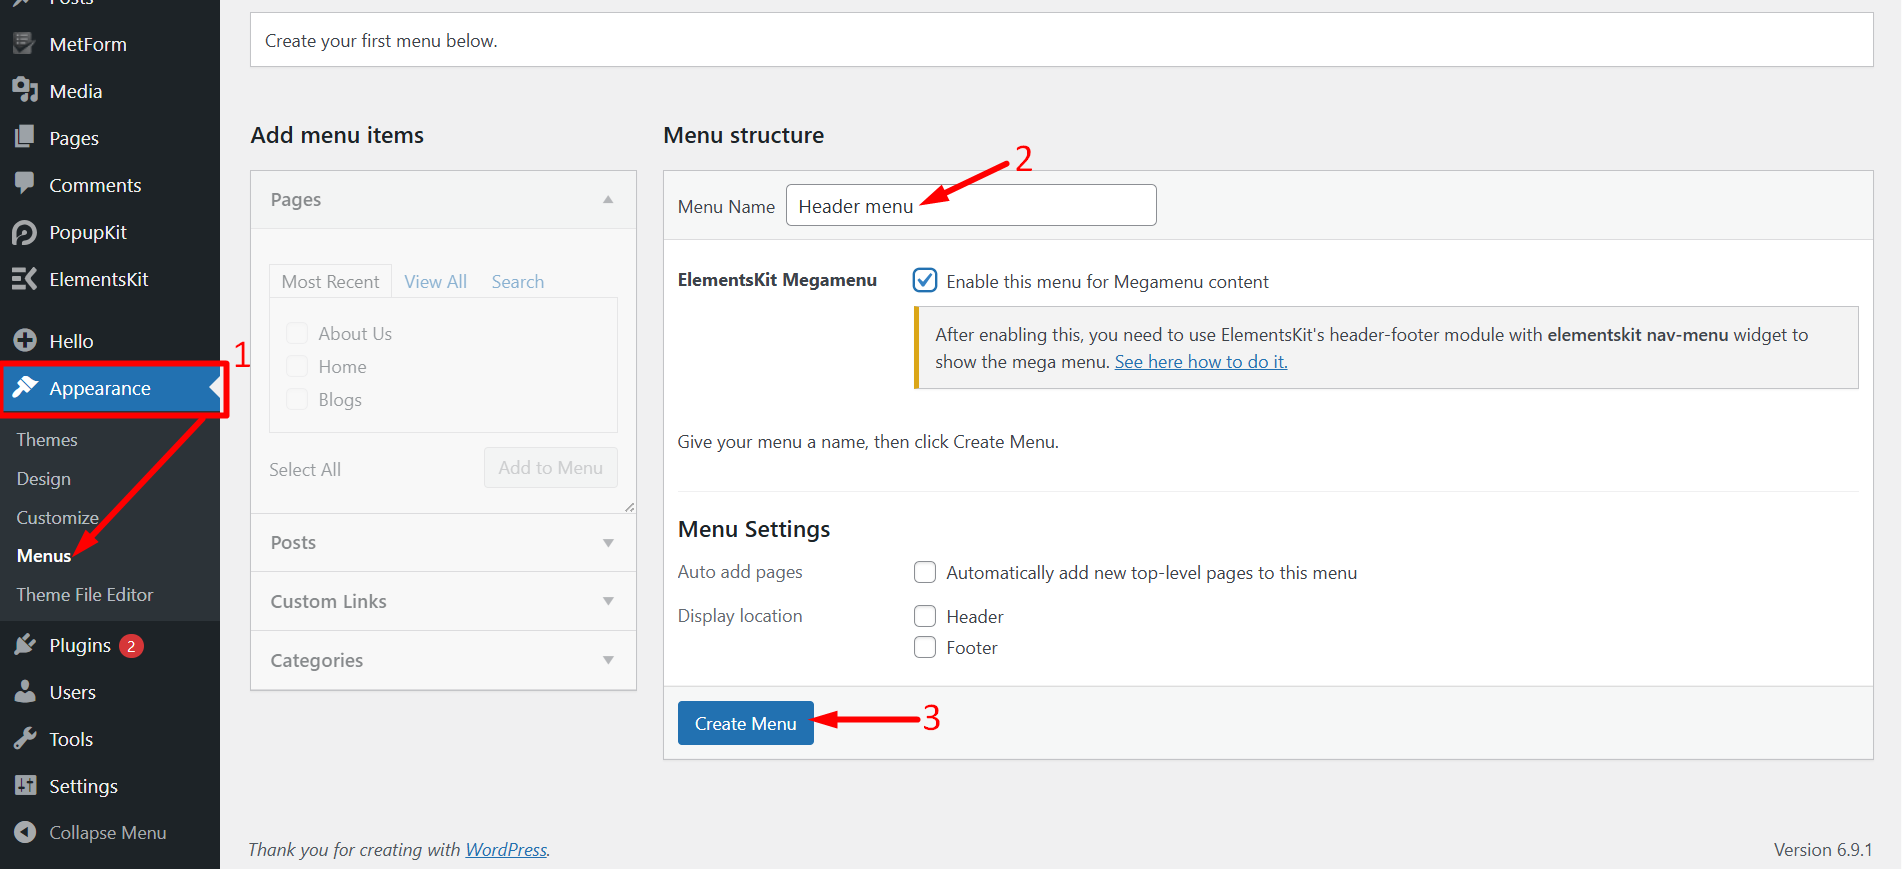
Step #1: Configure WordPress Menu #
Til create a WordPress mega menu on your website –
- Naviger til Appearance > Menus fra WordPress-dashboardet.
- Indtast en Menunavn.
- Klik på Opret menu knap.
Add pages to the mega menu og gem ændringerne.
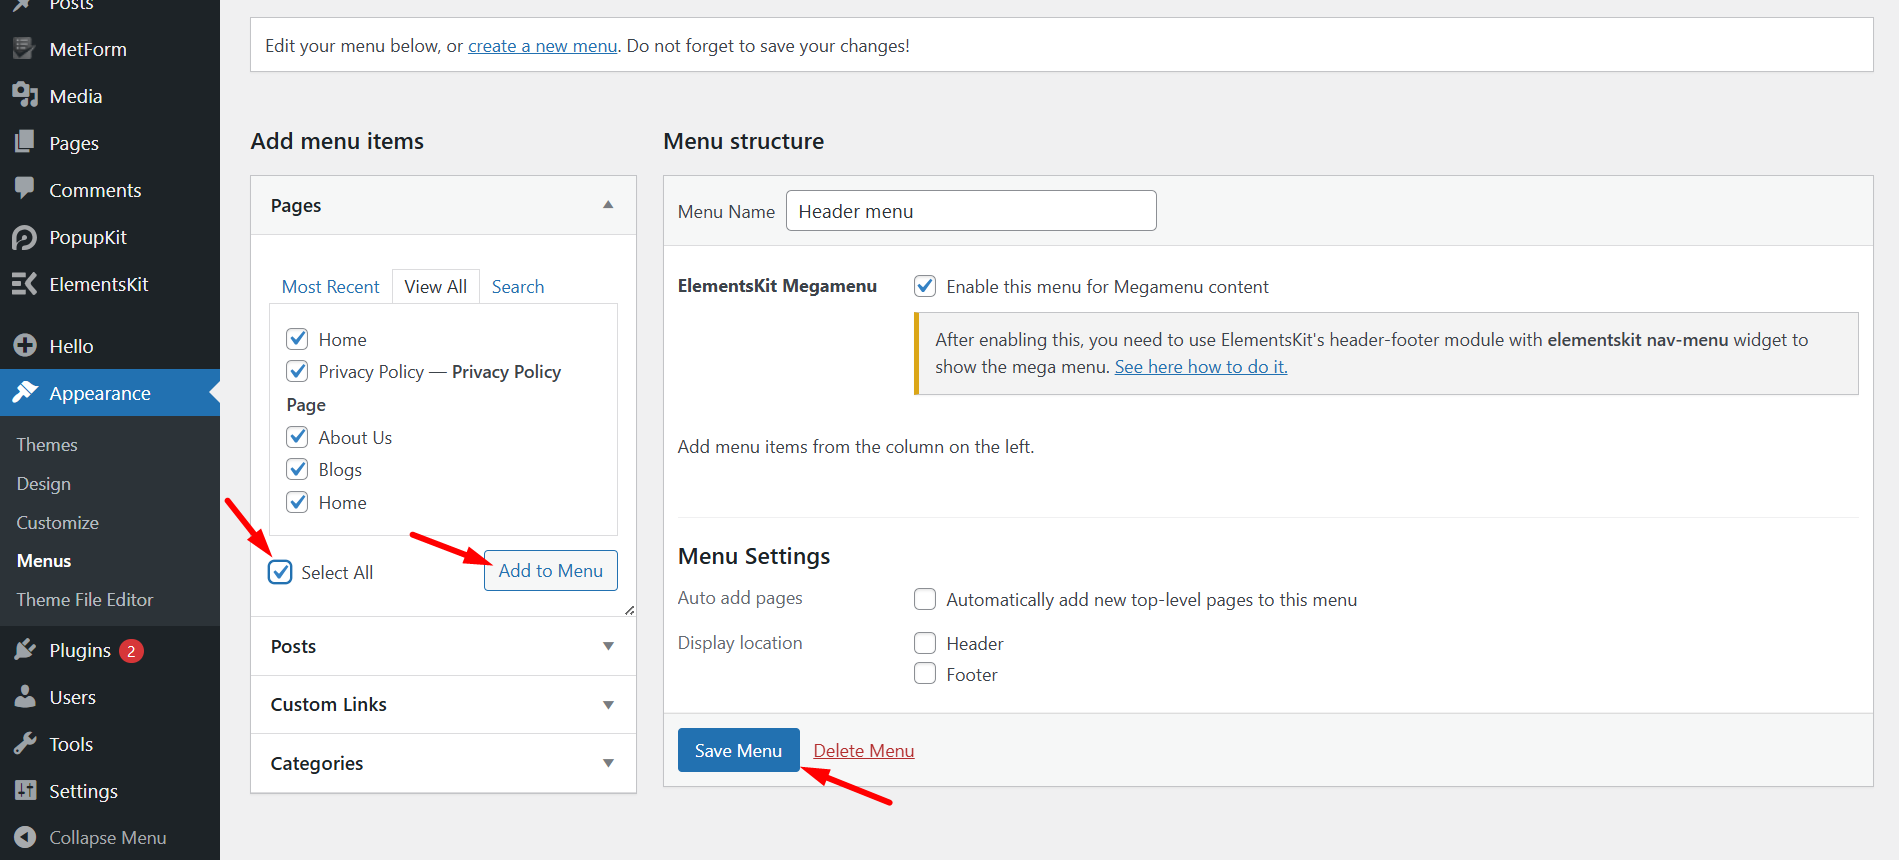
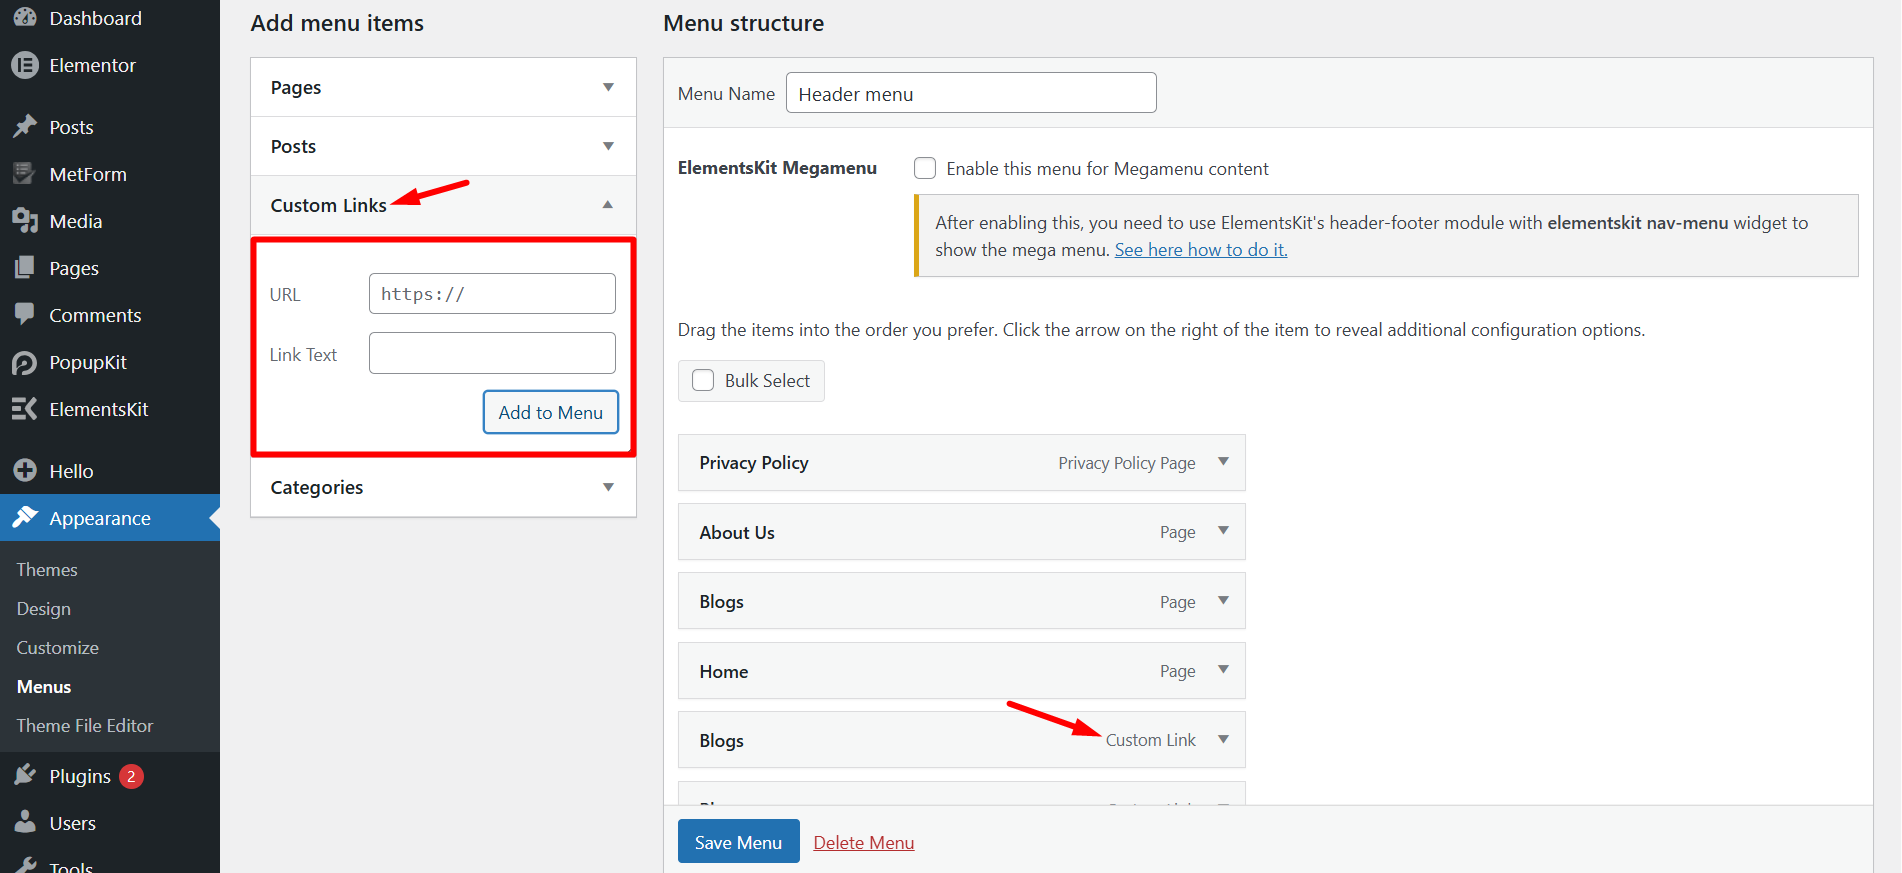
Now, you can add items to the mega menu. For det,
- Udvide Brugerdefinerede links on the “Add menu item” on the right column.
- Indtast en URL og Link Text.
- Klik på Føj til menu.
Then add other menu items in the same way with this WordPress menu customizer, ElementsKit.
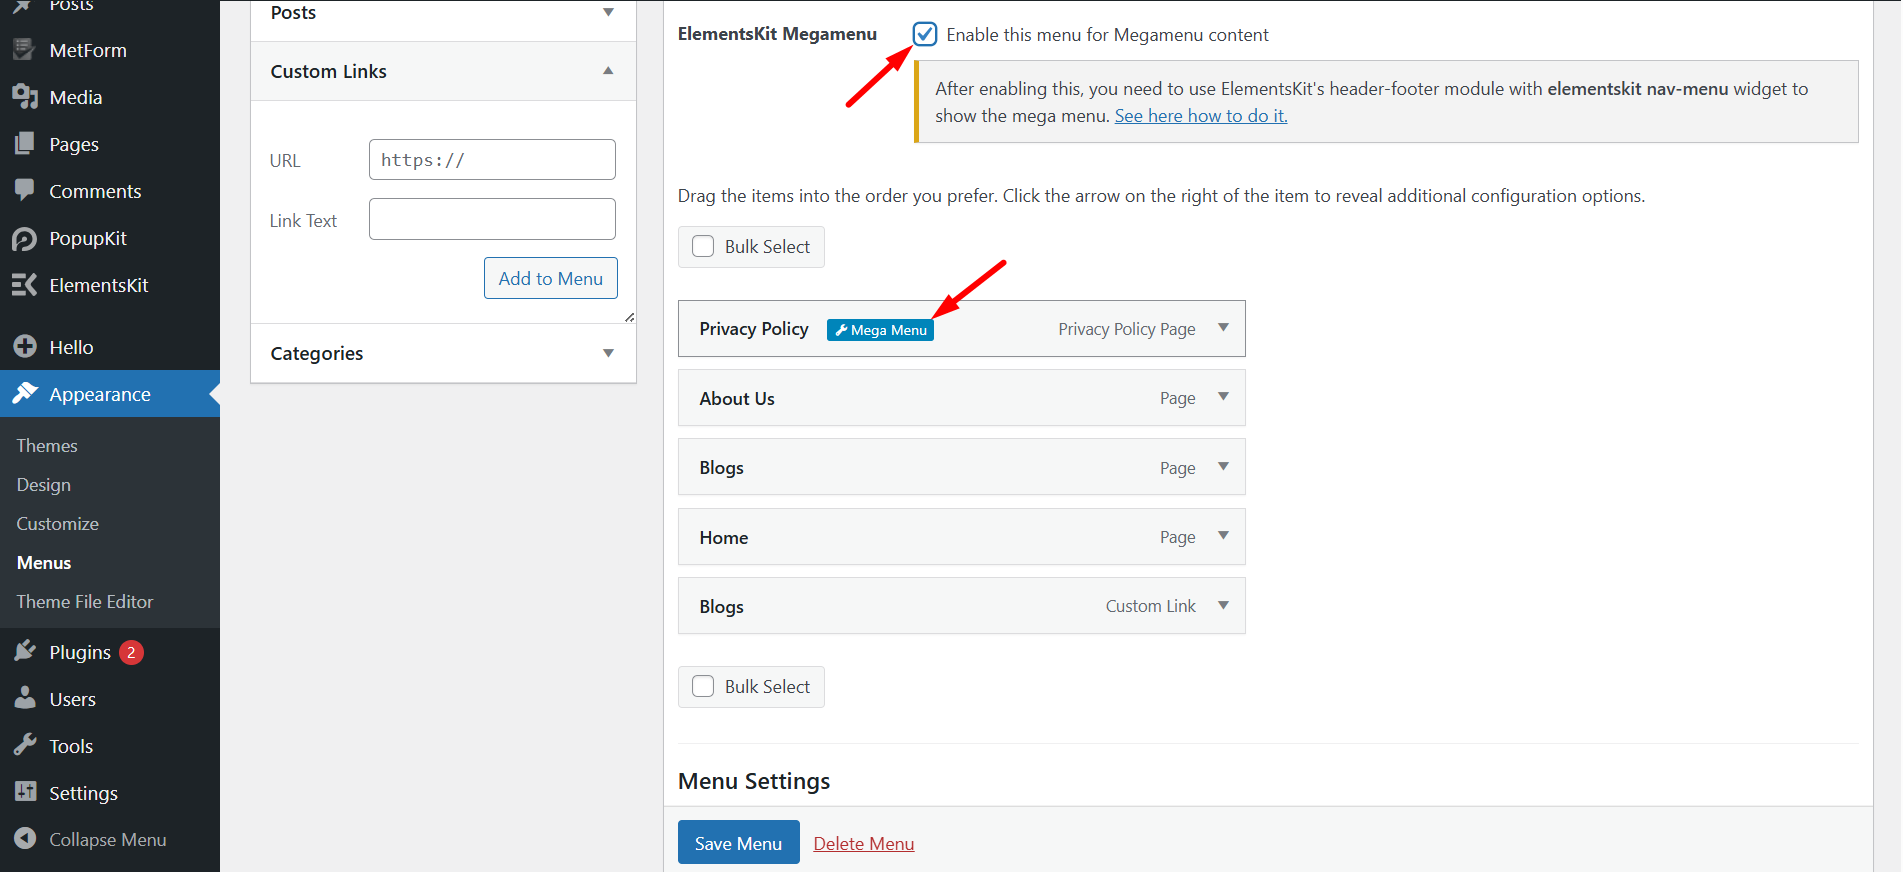
Efter det, make sure you’ve checked the checkbox for “Enable this menu for Megamenu content”. When the mega menu is enabled, you will click the mega menu settings icon when you hover on the menu items.
Step #2: Customize Elementor Megamenu Content With ElementsKit #
When you click on the mega menu settings icon, a popup will open. On the popup,
- Toggle button to enable Mega Menu.
- Klik på Gemme knap.
- After that click the REDIGER MEGAMENU INDHOLD button. It’ll take you to the Elementor editor button.

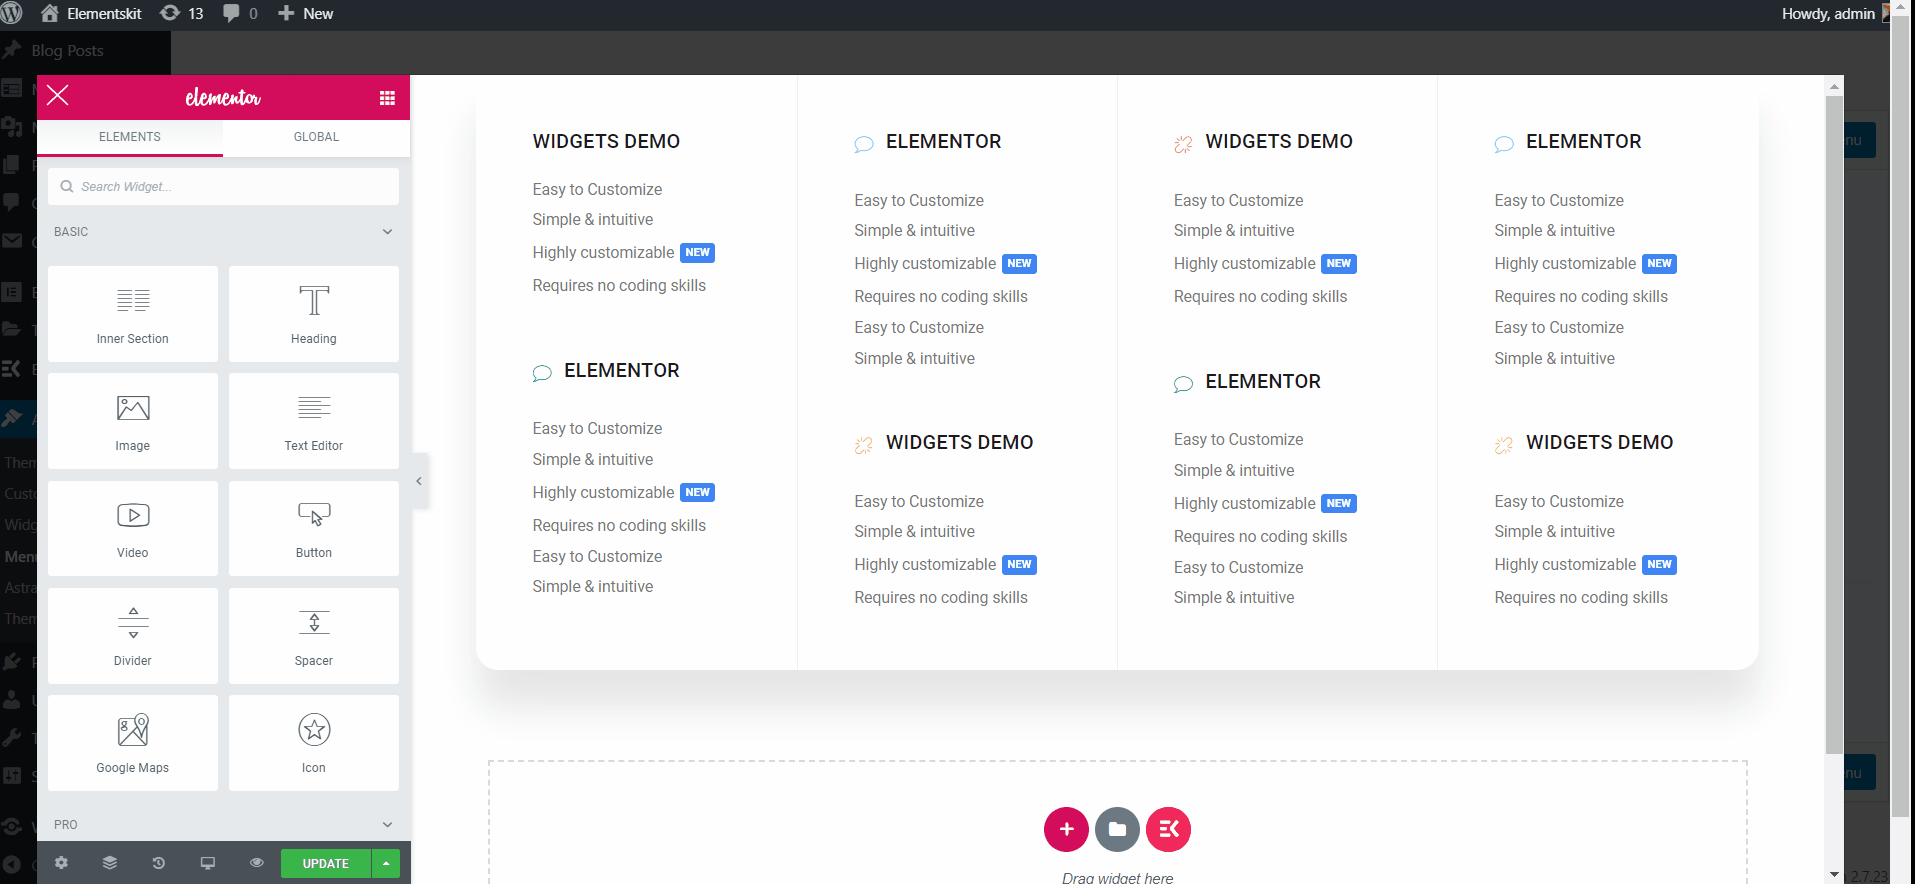
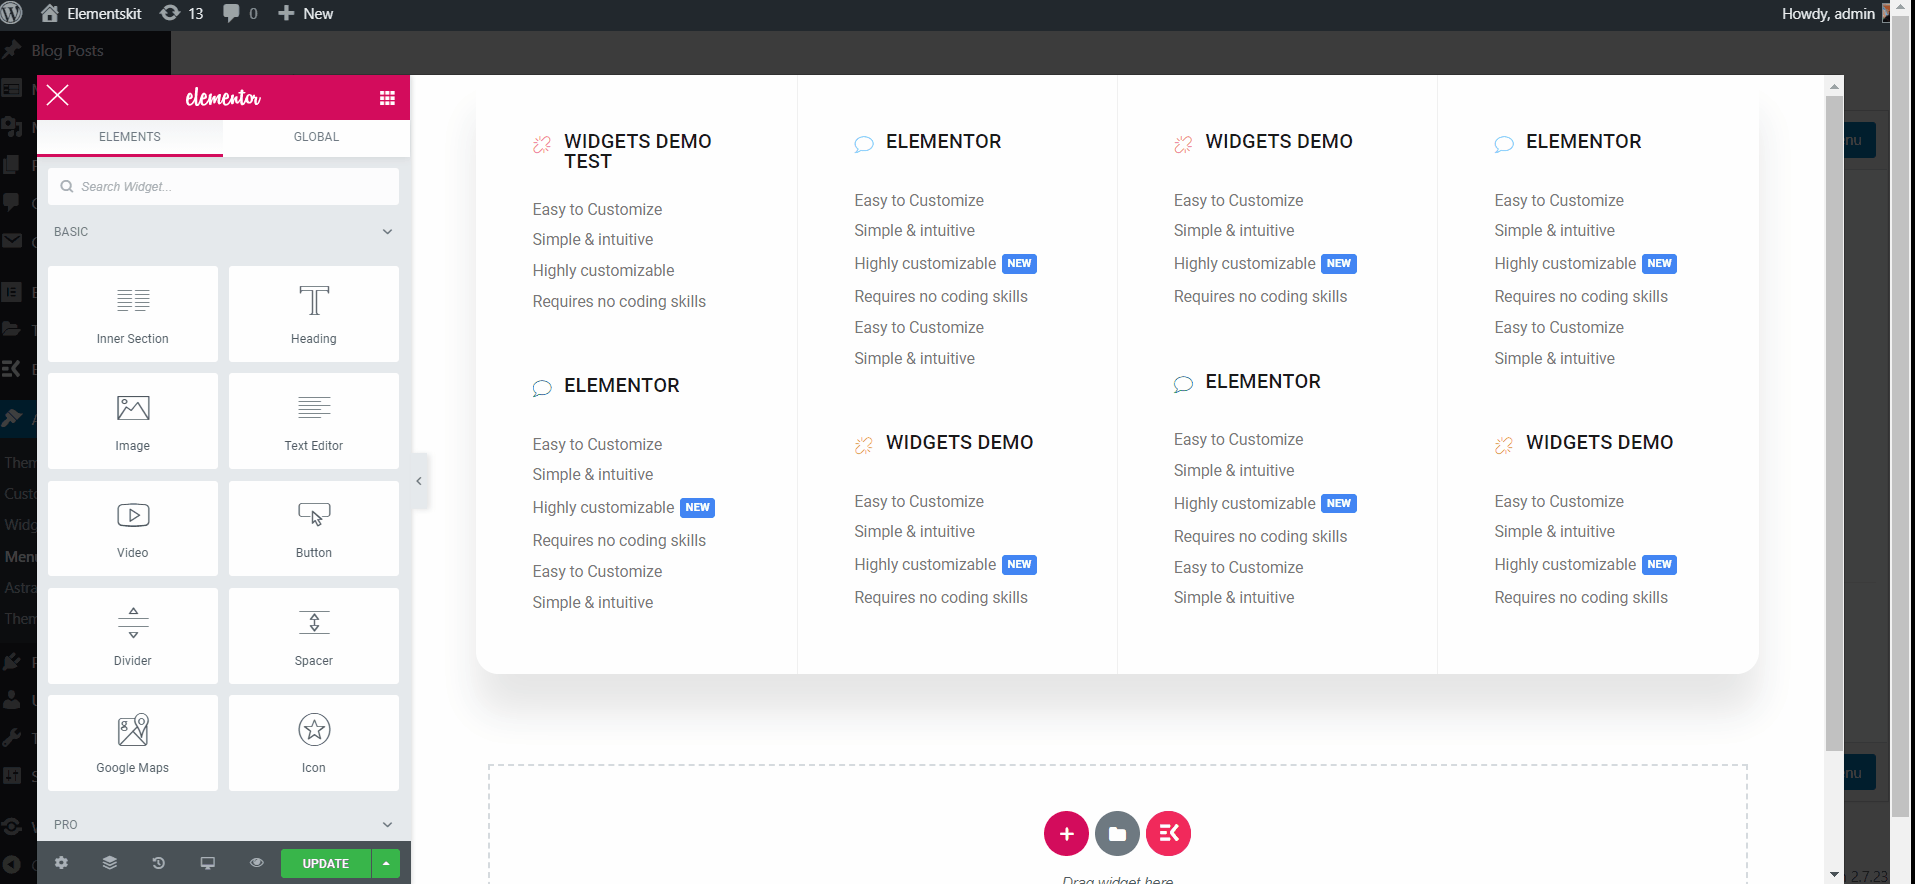
In the next step, a window will appear where you need to click on the ElementsKit Template Library Icon.
- Go to Sections
- Search mega menu
- Vælg en Megamenu template from the list and insert
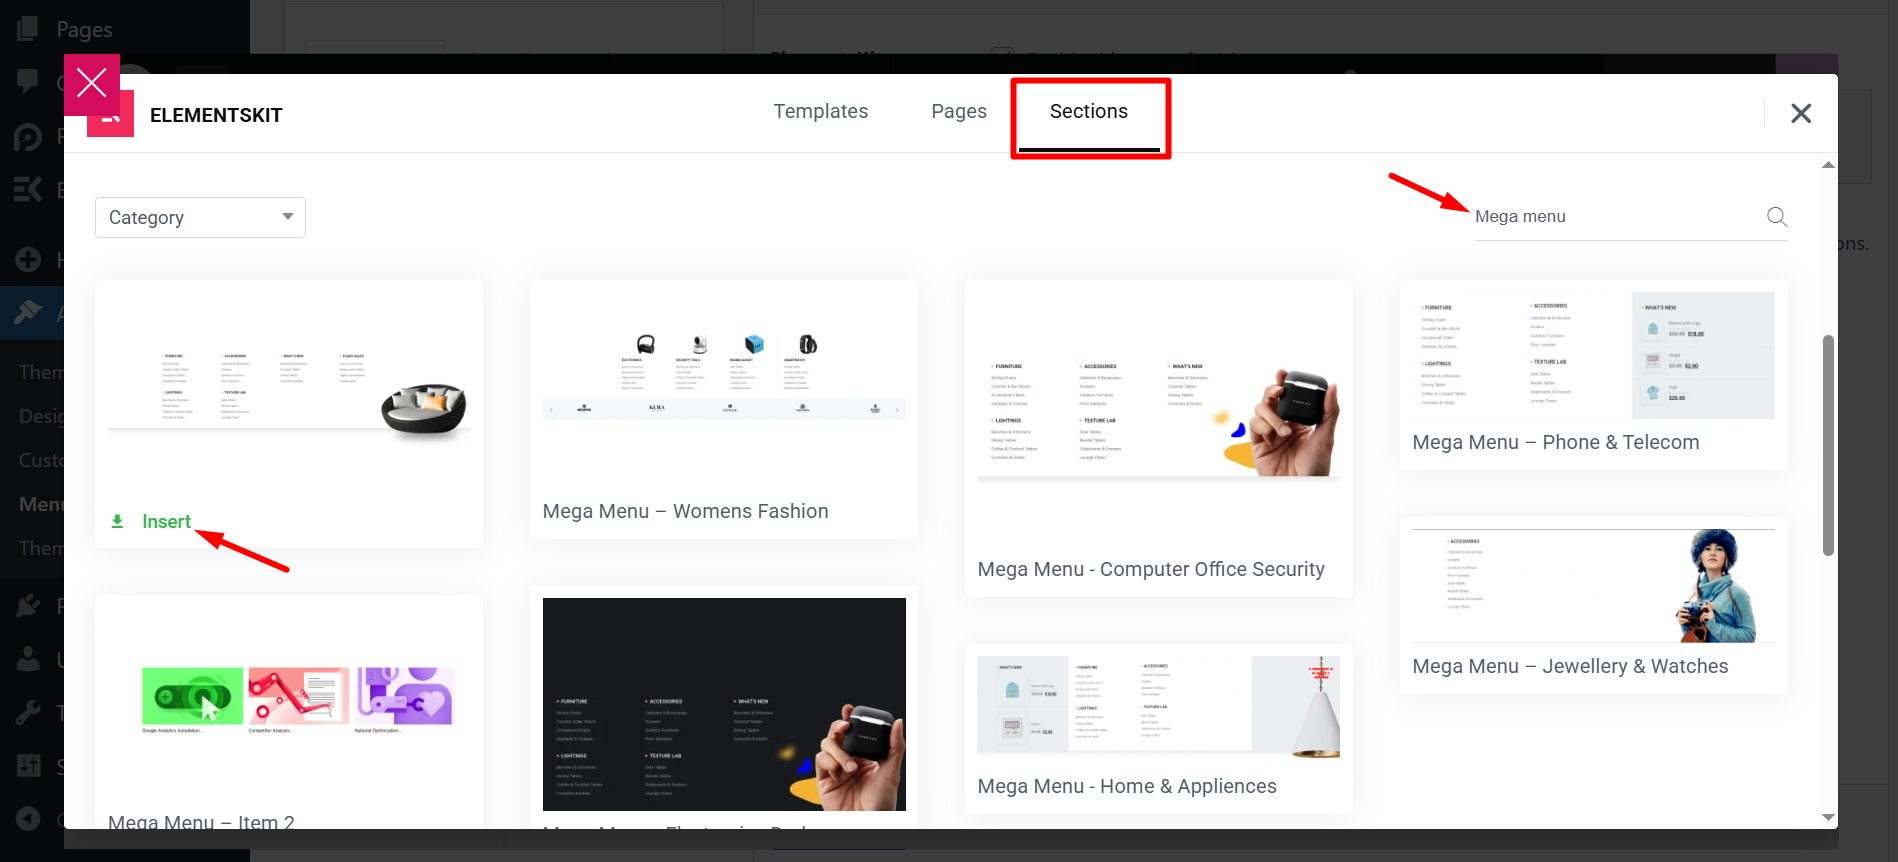
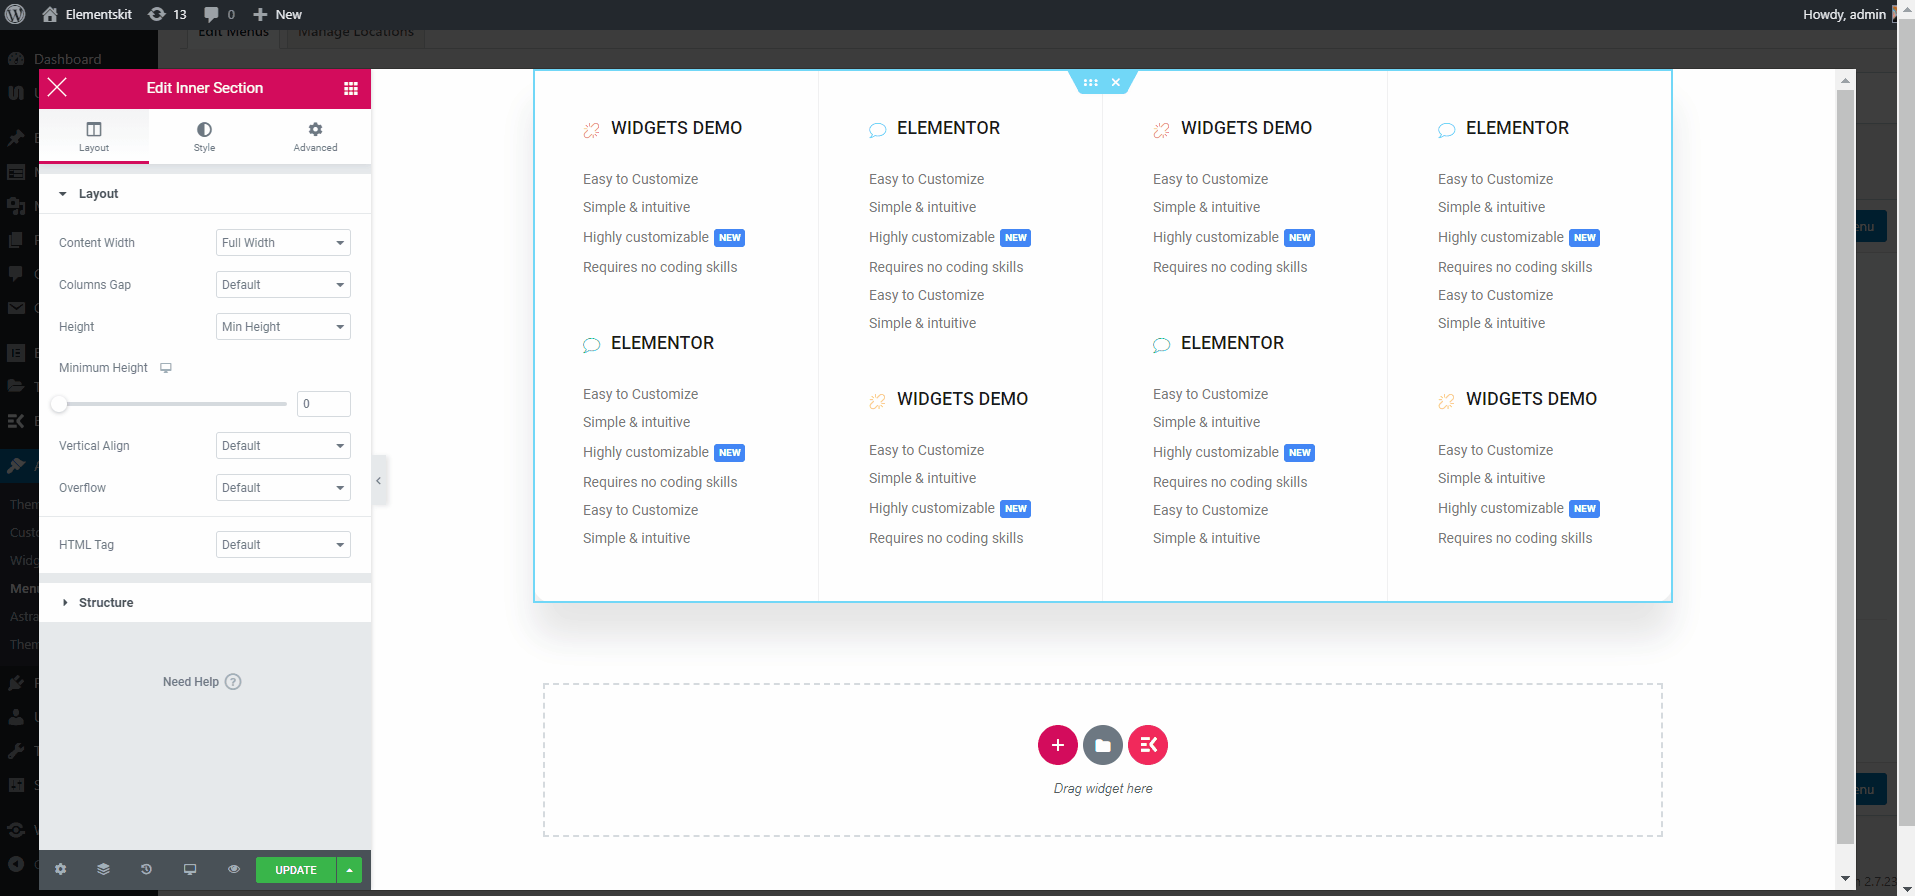
You’ll see that your inserted pre-designed mega menu template item will display. Rediger den indre sektion ved at klikke på det stiplede afsnit.
Beholder
Container Layout: Select the structural system, like Flexbox, to organize your elements.
Content Width: Choose between Fuld bredde eller Æske for your horizontal boundaries.
Bredde: Set the specific horizontal percentage or pixel size.
Min Height: Set the minimum vertical space the container must fill.
Items Management
Wrap: Allow items to move to a new line when they run out of space.
Retning: Stack items vertically in a column or horizontally in a row.
Begrund indhold: Distribute items along the main axis, such as center or spaced out.
Juster elementer: Position items along the cross axis for consistent vertical or horizontal alignment.
Gaps: Define the exact pixel spacing between individual items.

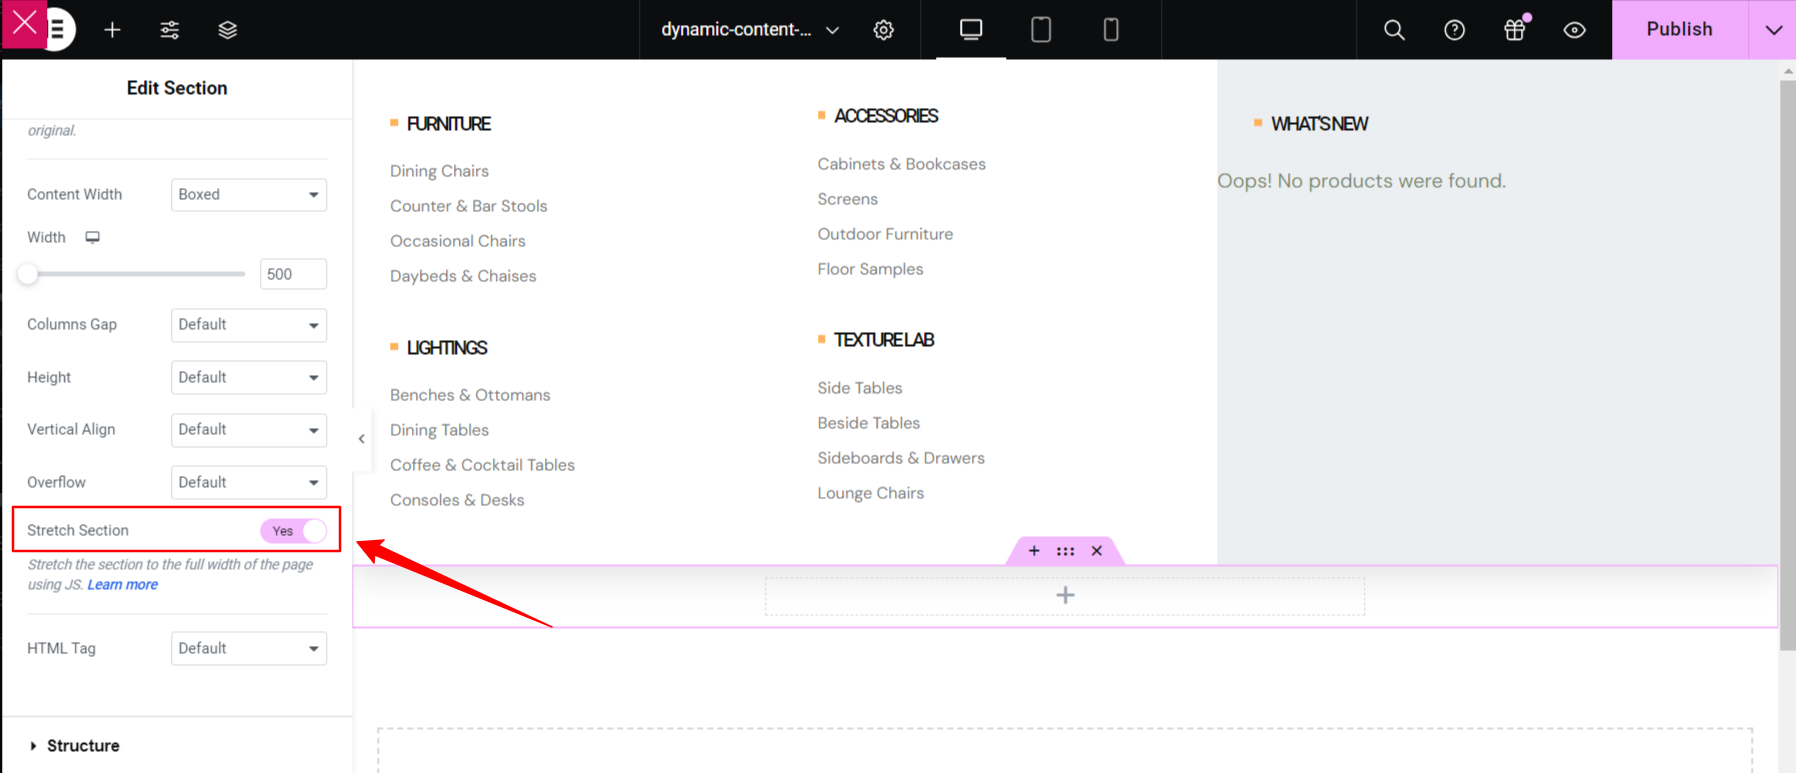
Stretch Section #
Toggle this button to turn the Elementor mega menu to full-width, which spans from right to left of the screen’s width.
Vælg HTML-tag #
- Vælg din HTML-tag fra Drop Down to create custom WP menu.
If you want to see it in action, watch this video and do it yourself within a few minutes.
Tilpas Mega Menu Overskriftstekst #
- Vælg ikontype.
- Aktiver for at tilføje ikon.
- Upload header-ikon.
- Tilføj eller rediger titel.
- Tilføj Rediger beskrivelse.
Tilpas tekst #
- Tilføj eller rediger Tekst.
- Tilføj eller rediger Sub-Title.
- Aktiver til Vis etiket.
- Tilføj eller rediger Etiket.
- Tilpas Baggrundsfarve, typografi, polstring, justering, radius.
- Once done click update and close the window.
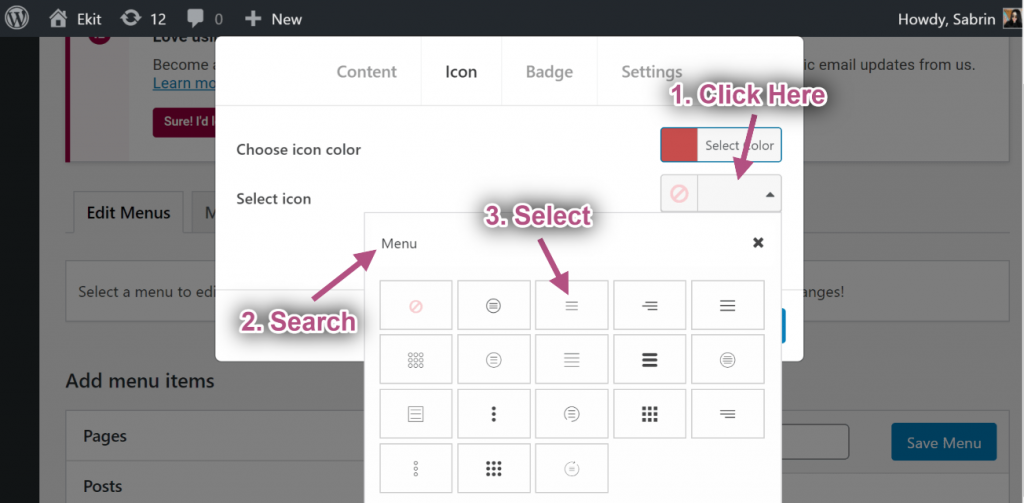
Step #3: Customize Icon #
- Gå nu til Ikon Faneblad=> Vælg en hvilken som helst farve fra Farvepalet.
- Vælg Ikon fra Ikon bibliotek.
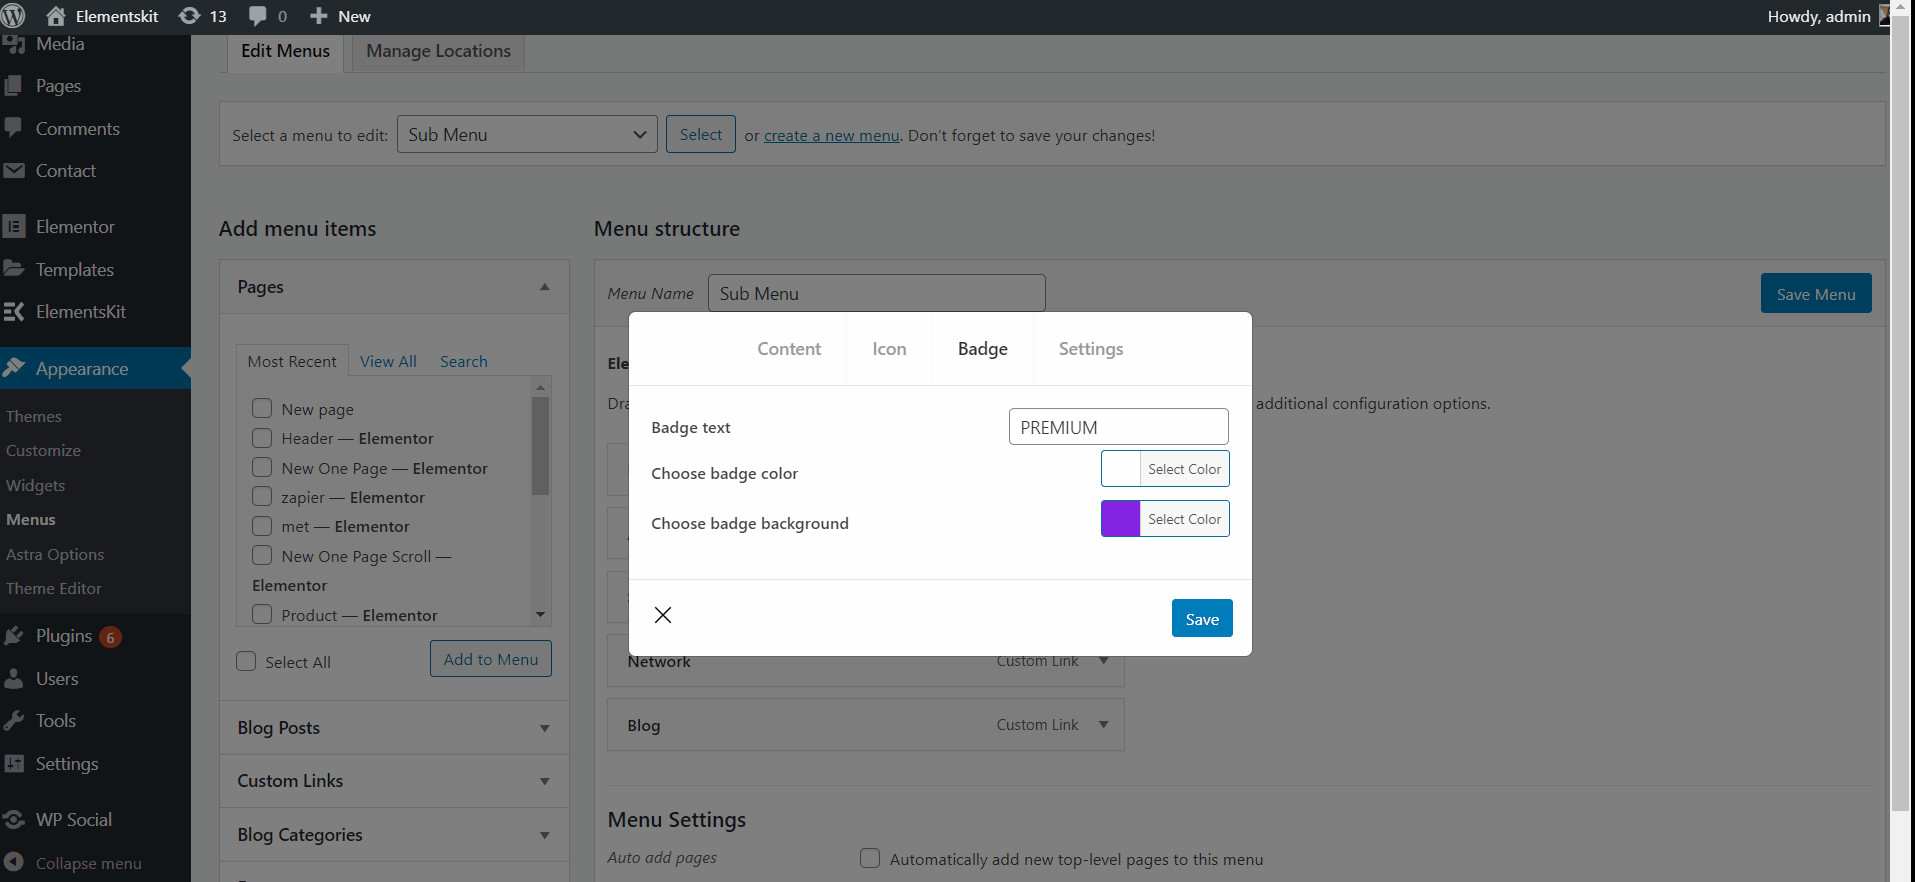
Step #4: Customize Badge #
- Tilføj eller rediger tekst.
- Vælge Badge farve.
- vælge Badge baggrundsfarve.
- Klik Gemme.
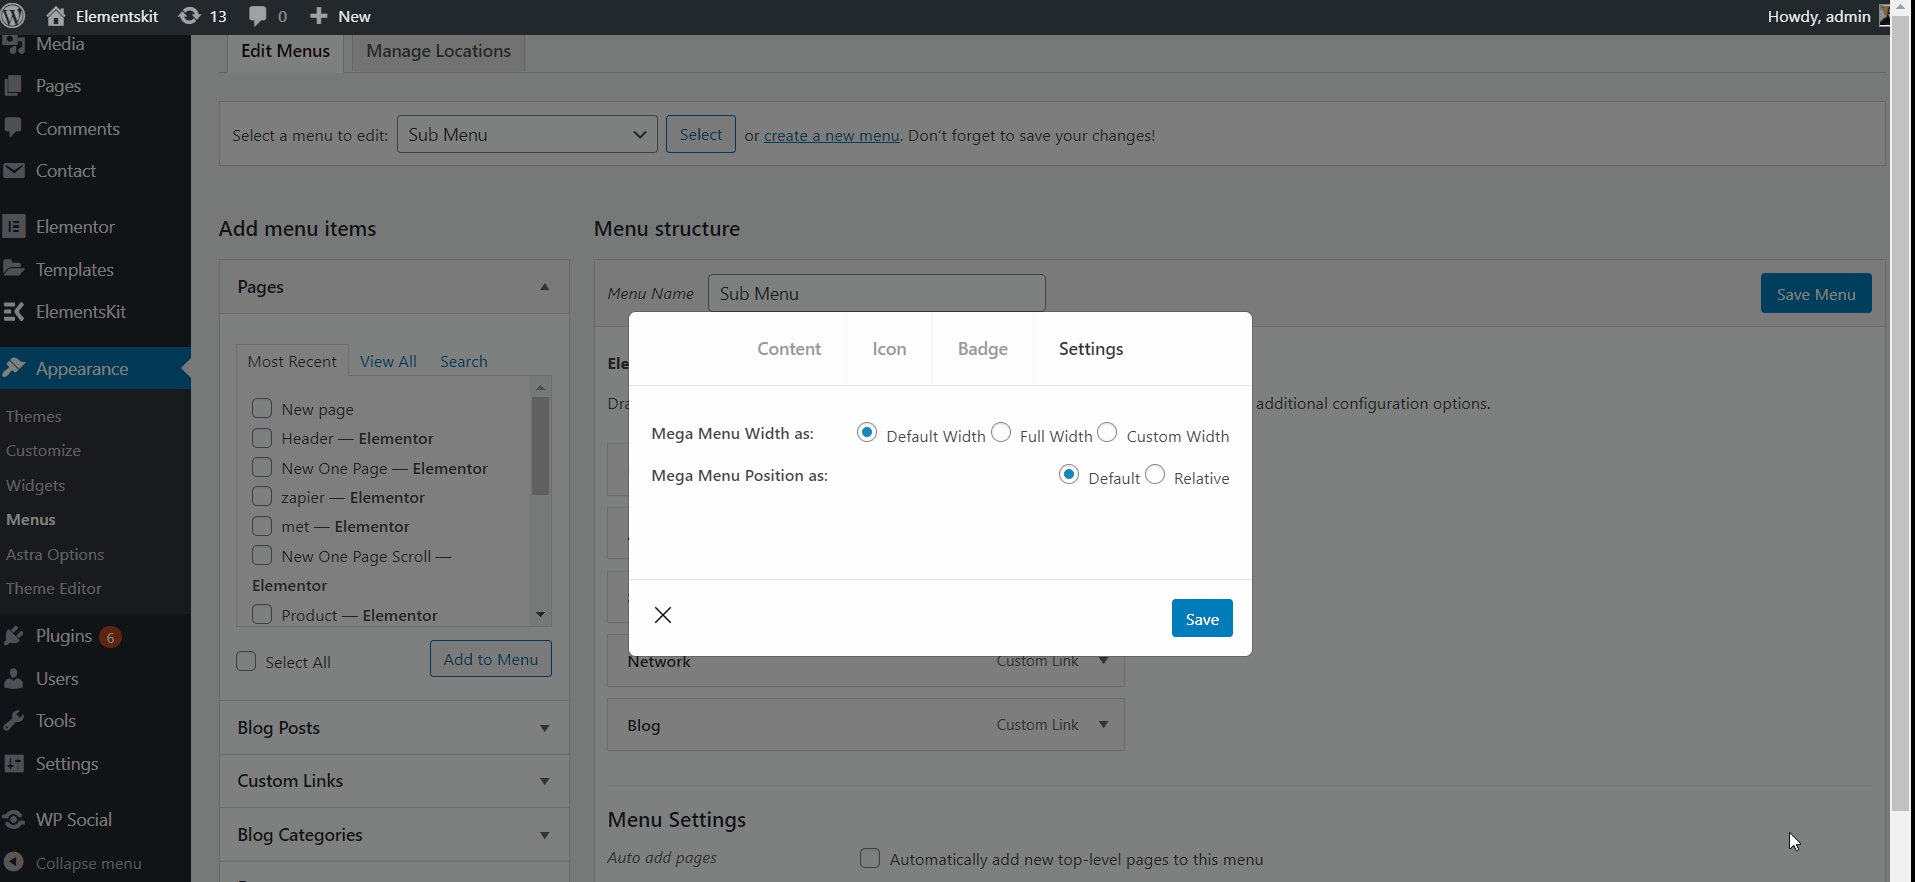
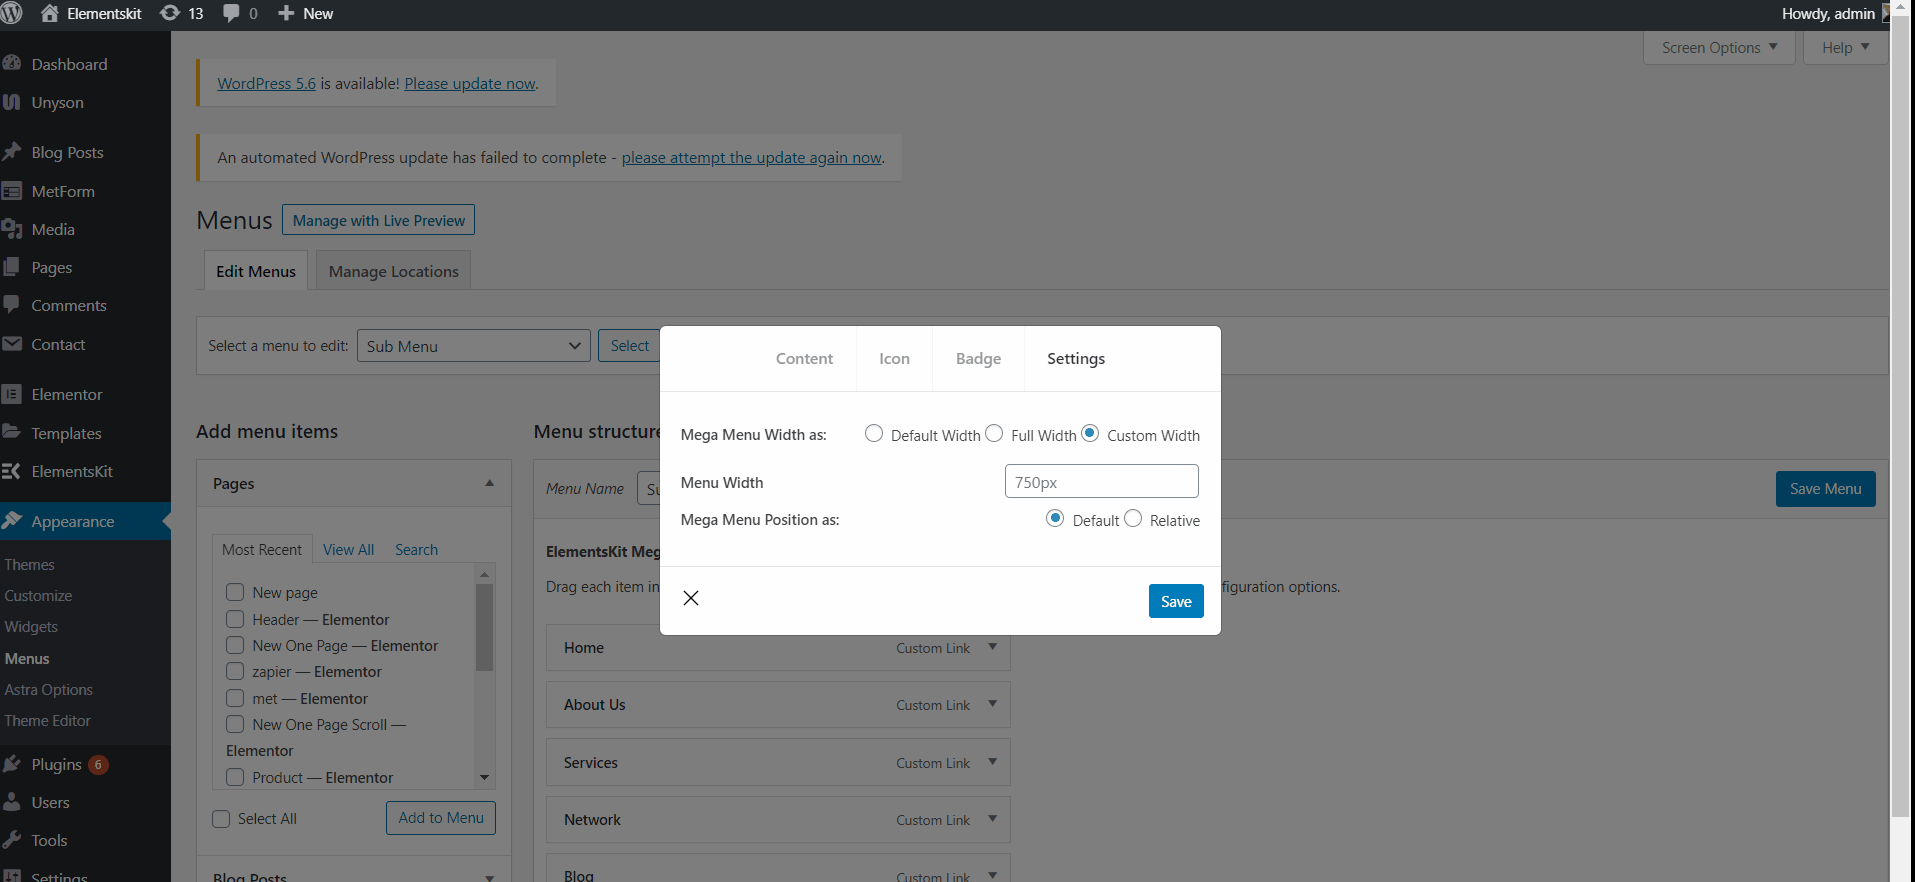
Trin #5: Indstillinger #
Standardbredde #
- Vælg Mega Menu Bredde: Standard.
- Vælg Mega Menu Position: Standard.
- Gemme the window.
- Site View: Viser standardbredde med standardposition.
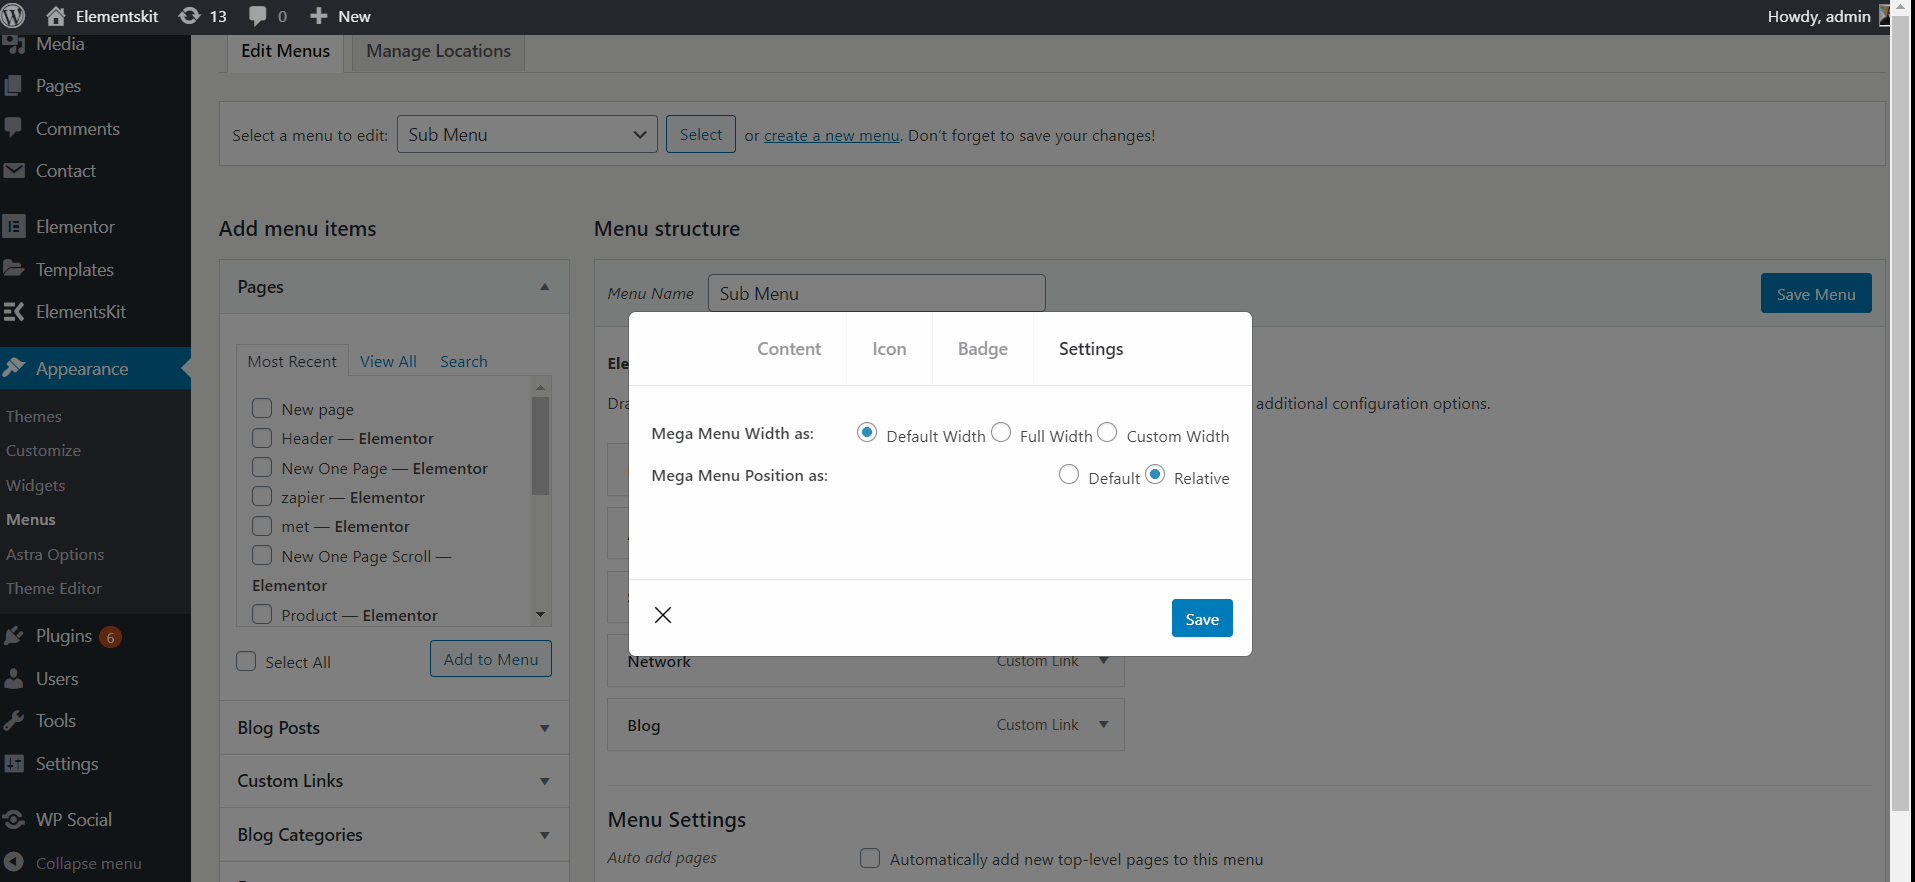
Standard relativ #
- Vælg Mega Menu Bredde: Standard.
- Vælg Mega Menu Position: I forhold.
- Klik Gemme.
- Site View: Viser standardbredde med relativ position.
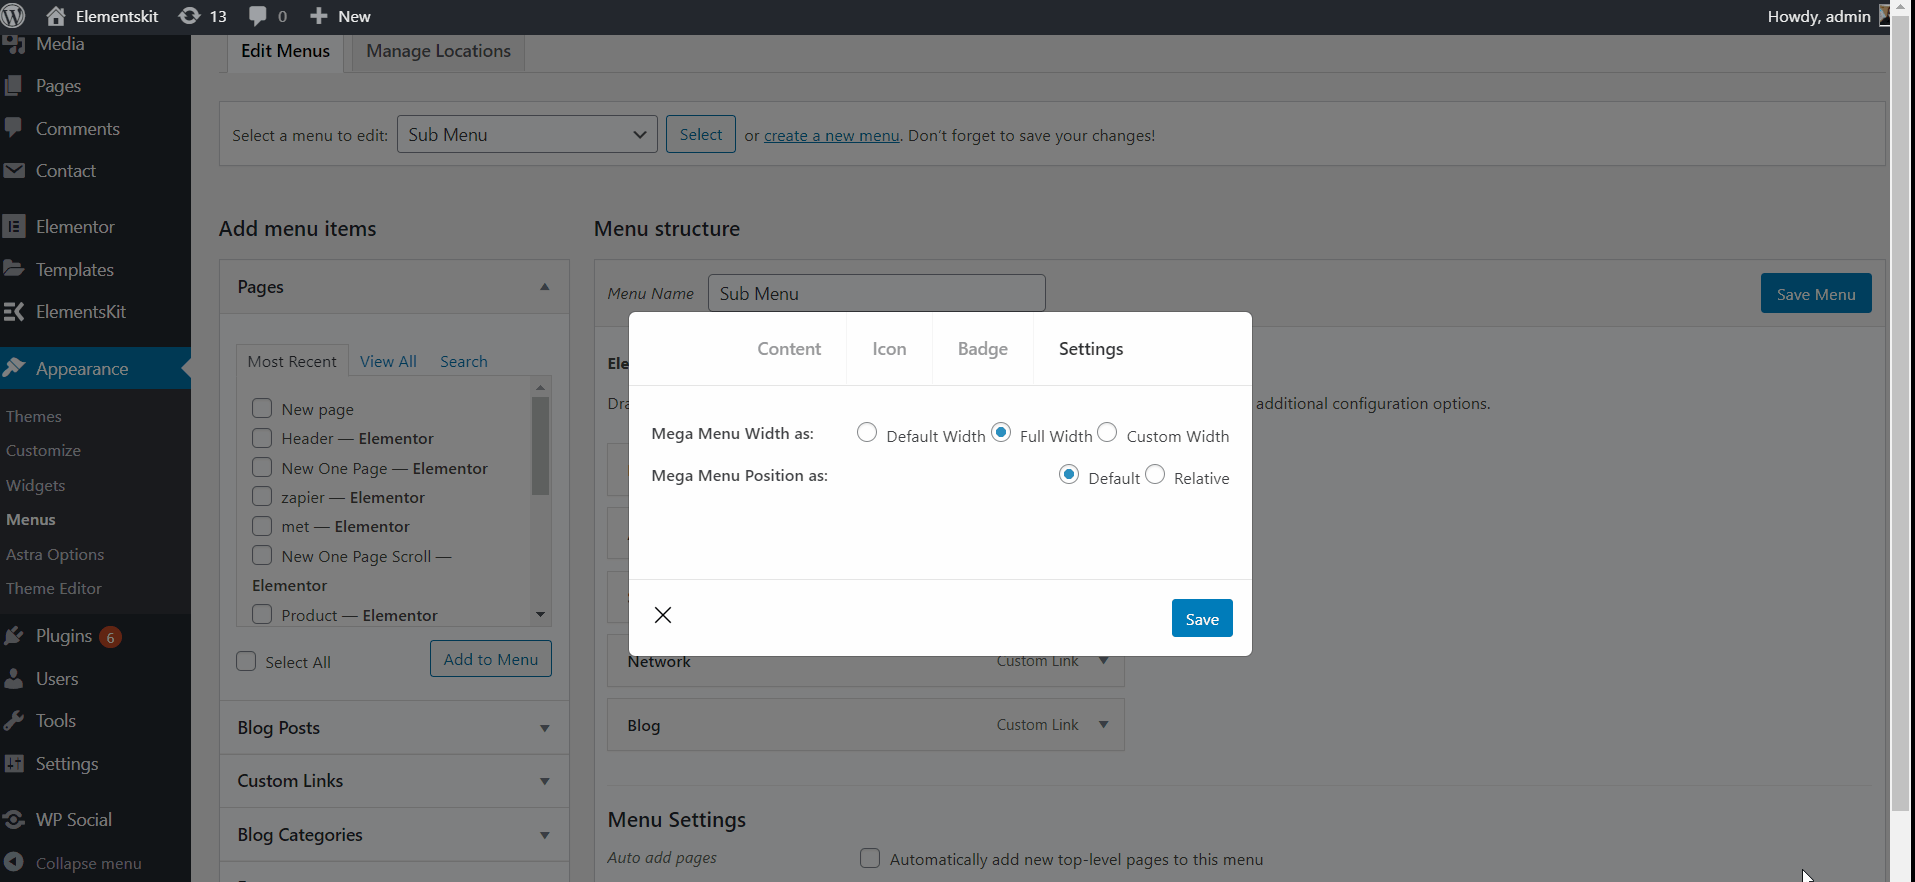
Standard fuld bredde #
- Vælg Mega Menu Bredde: Fuld bredde.
- Vælg Mega Menu Position: Standard.
- Klik Gemme.
- Site View: Viser fuld bredde med standardposition.
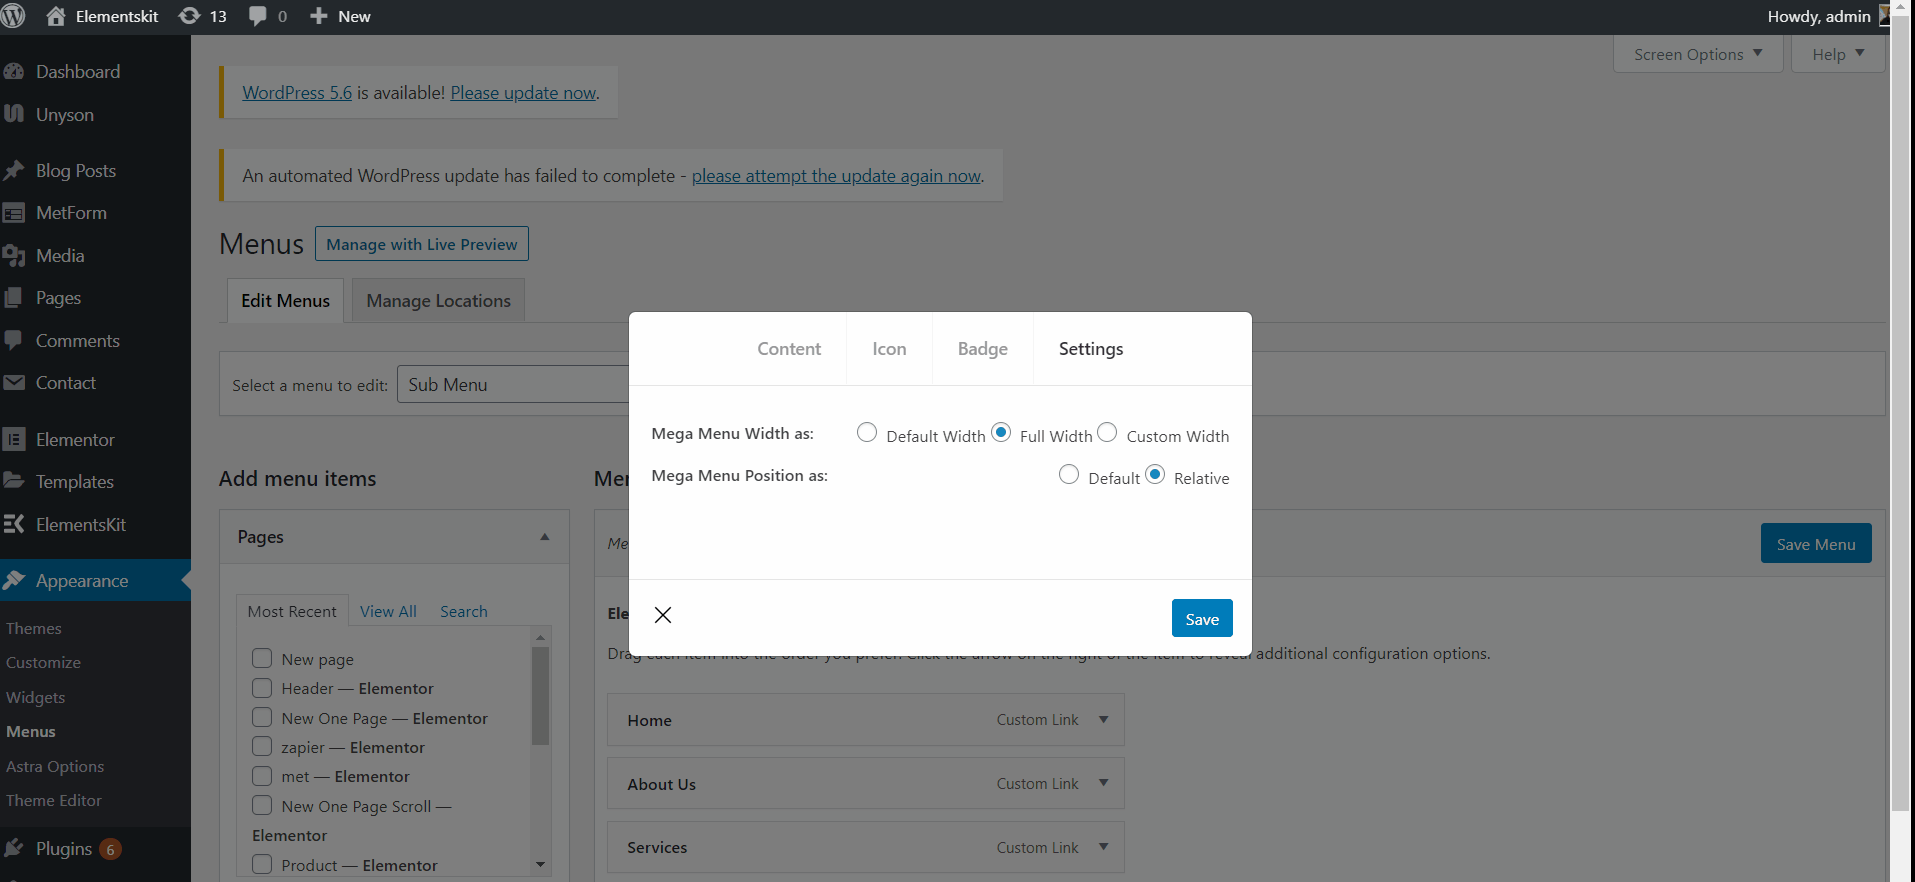
Fuld bredde relativ position #
- Vælg Mega Menu Bredde: Fuld bredde.
- Vælg Mega Menu Position: I forhold.
- Klik Gemme.
- Site View: Viser Fuld bredde med relativ position.
Brugerdefineret standardbredde #
- Vælg Mega Menu Bredde: Brugerdefineret bredde.
- Angiv enhver tilpasset bredde, men som standard er den det 750 pixels.
- Vælg Mega Menu Position: Standard.
- Klik Gemme.
- Site View: Viser Brugerdefineret bredde med standardposition.
Brugerdefineret standardbredde I forhold #
- Vælg Mega Menu Bredde: Brugerdefineret bredde.
- Angiv enhver tilpasset bredde, men som standard er den det 750 pixels.
- Vælg Mega Menu Position: I forhold.
- Klik Gemme.
- Site View: Viser Brugerdefineret bredde med relativ position.
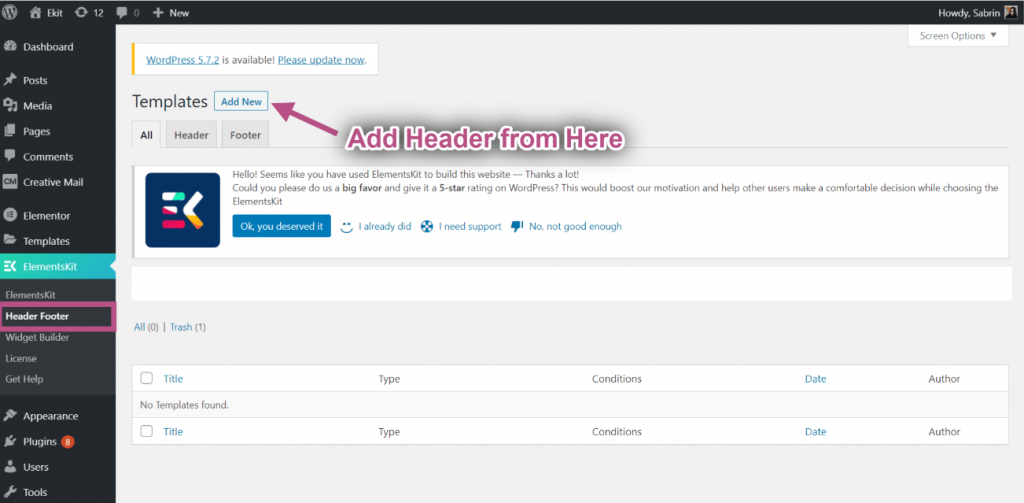
Trin #6: Opret en header-skabelon #
Her kan du bruge Elementor Header skabelon eller du kan bruge ElementsKit Header skabelon. Let’s see to to add it.
- Naviger til ElementsKit→ Sidehoved Footer→ og klik Tilføj ny.
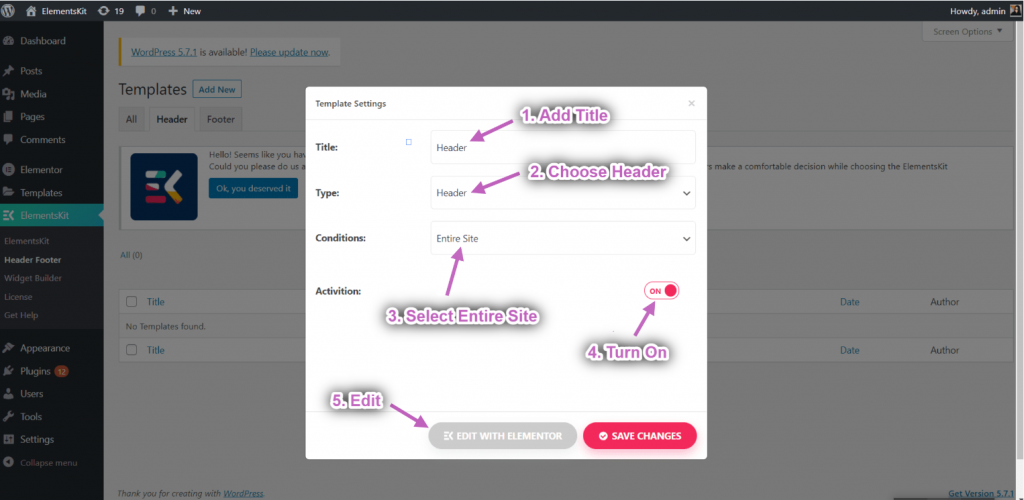
- En pop op-boks åbnes med muligheder.
- Skriv a i pop op-boksen Titel, vælg Skriv→ Header.
- Vælg Betingelser→ Hele webstedet.
- Skift til Aktivering mulighed og klik på Rediger med Elementor.
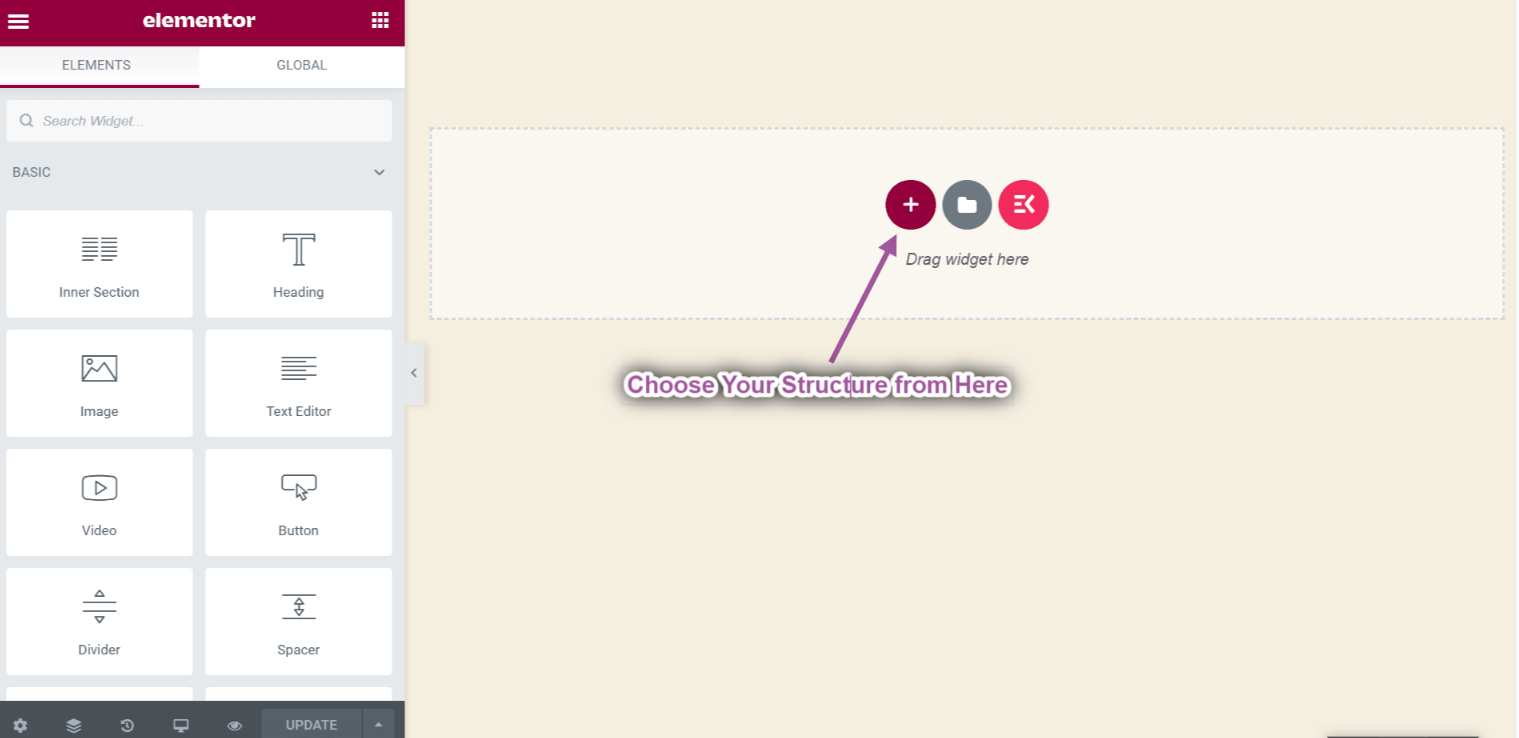
- Vælg din Struktur from the selected area.
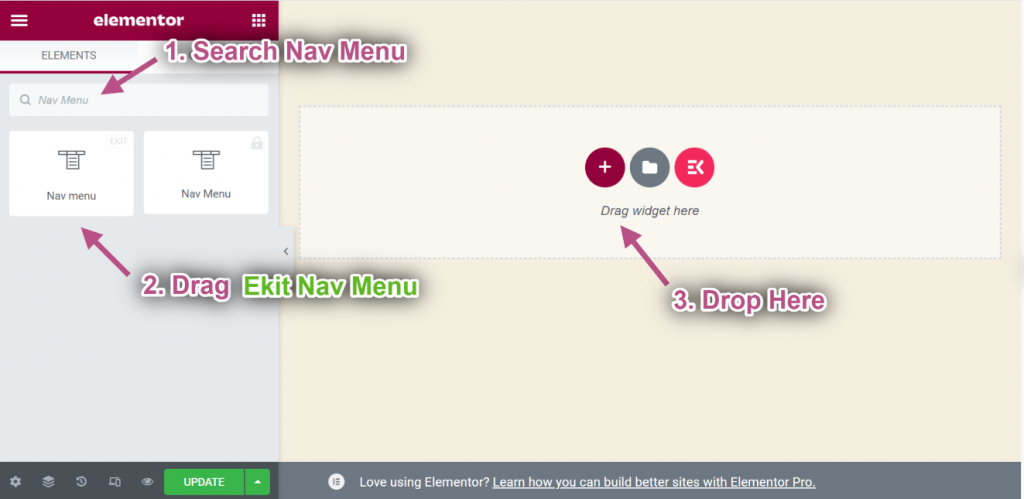
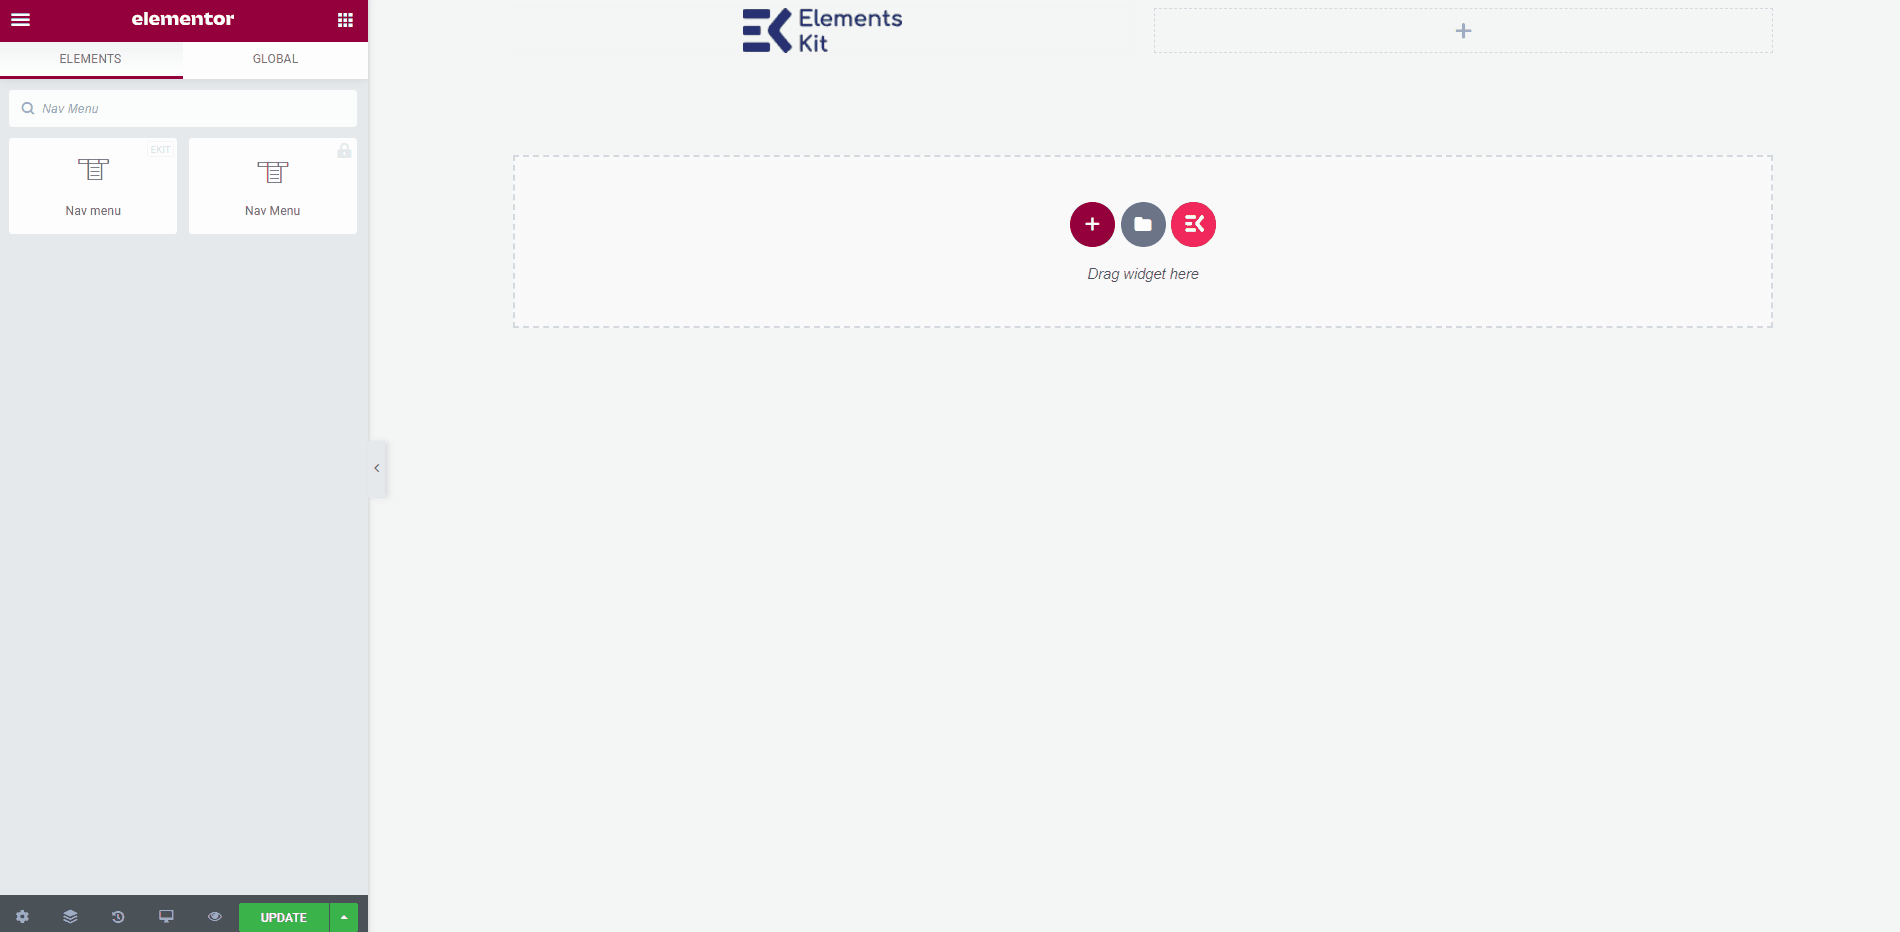
- Søg nu Nav menu=> Træk Ekit Nav Menu og Dråbe på det valgte område.
** Note: Make sure to drag the ElementsKit Nav menu otherwise your created Megmenu will not appear.
- Gå nu til Menuindstillinger=> vælg din oprettede Overskriftsmenu fra rullemenuen.
- Du kan tilføje enhver type widget herfra for at tilpasse din header-skabelon.
Endeligt output #
Når du er færdig, skal du klikke på Opdatering button to save the menu created with the best mega menu plugin for Elementor.
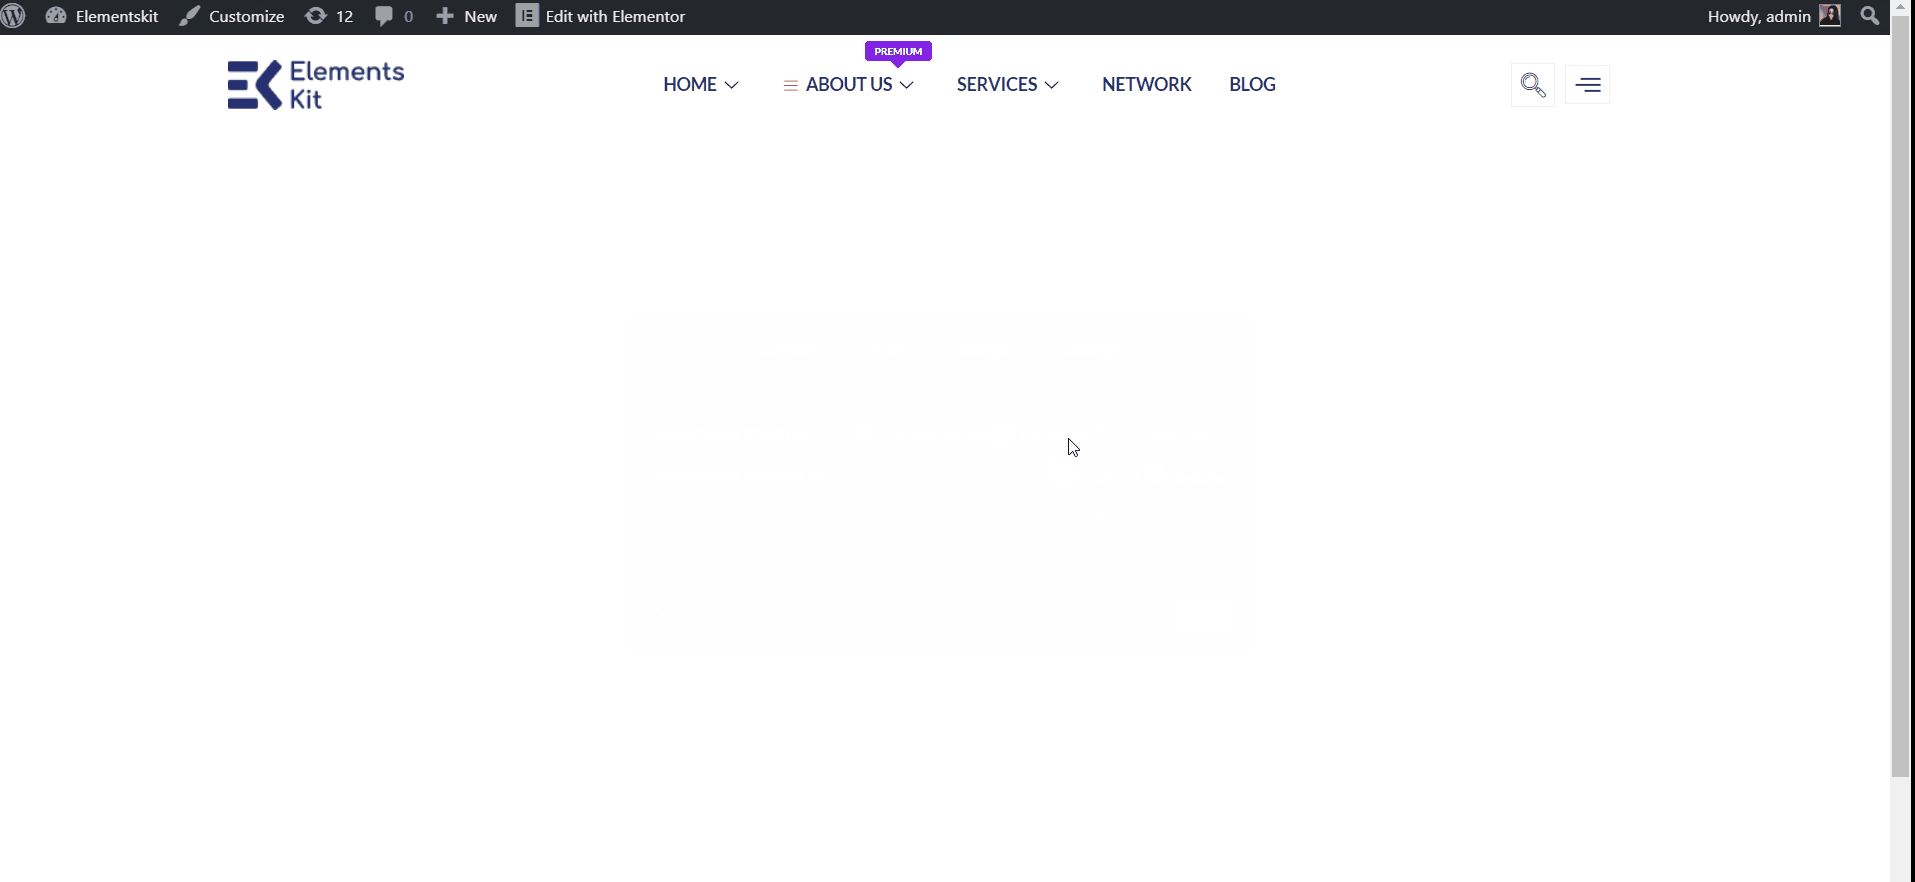
Now go to your site and you can see your selected Elementor Mega menu is showing accordingly.
Quick Recap
So overall, what we’ve done throughout this WordPress mega menu tutorial is:
Tools Used: Elementor & ElementsKit Elementor Addon
✅ Install and activate a mega menu plugin, in our case, it’s the ElementsKit Mega Menu plugin for WordPress.
✅ Then, navigate to Appearance> Menu and configure our site’s menu.
✅ After setting all dropdown menu items, click the Mega menu button to start creating an Elementor mega menu with ElementsKit.
✅ Aktiver Mega menu toggle button and hit the REDIGER MEGAMENU INDHOLD mulighed.
✅ You’ll get the Elementor visual interface as your mega menu builder, with drag-and-drop controls to design it effortlessly.
✅ Insert a mega menu template or use Elementor widgets to build from scratch.
✅ In the ElementsKit mega menu editor, you can add rows, columns, and content to your submenus.
✅ Customize background, heading, layout, icon, badge, and other content elements without writing any code.
✅ Lastly, see the preview and make it live. And, with ElementsKit, you can apply conditions for header navigation.
So, this was the easiest way to build Elementor mega menu in your WordPress website.


