ShopEngine Pro kommer med WooCommerce Avatar-modulen där du kan konfigurera hur användaravataren kommer att visas på kontots instrumentpanel.
Quick Overview
This documentation will guide you to the process of adding Avatar with ShopEngine. This WooCommerce Avatar plugin includes a dedicated module to set up avatar to your WP site.
For this Documentation, you will need the following tools to add Avatar:
Tools Used: Elementor (free), WooCommerce (free), ShopEngine (free & pro)
After download and activation of the above plugins, navigate Modules under ShopEngine and:
✅ Activate Avatar module
✅ Configure Avatar module
Aktivera WooCommerce Avatar Module #
To enable the ShopEngine WooCommerce Avatar module,
- Logga in på din WordPress-webbplats.
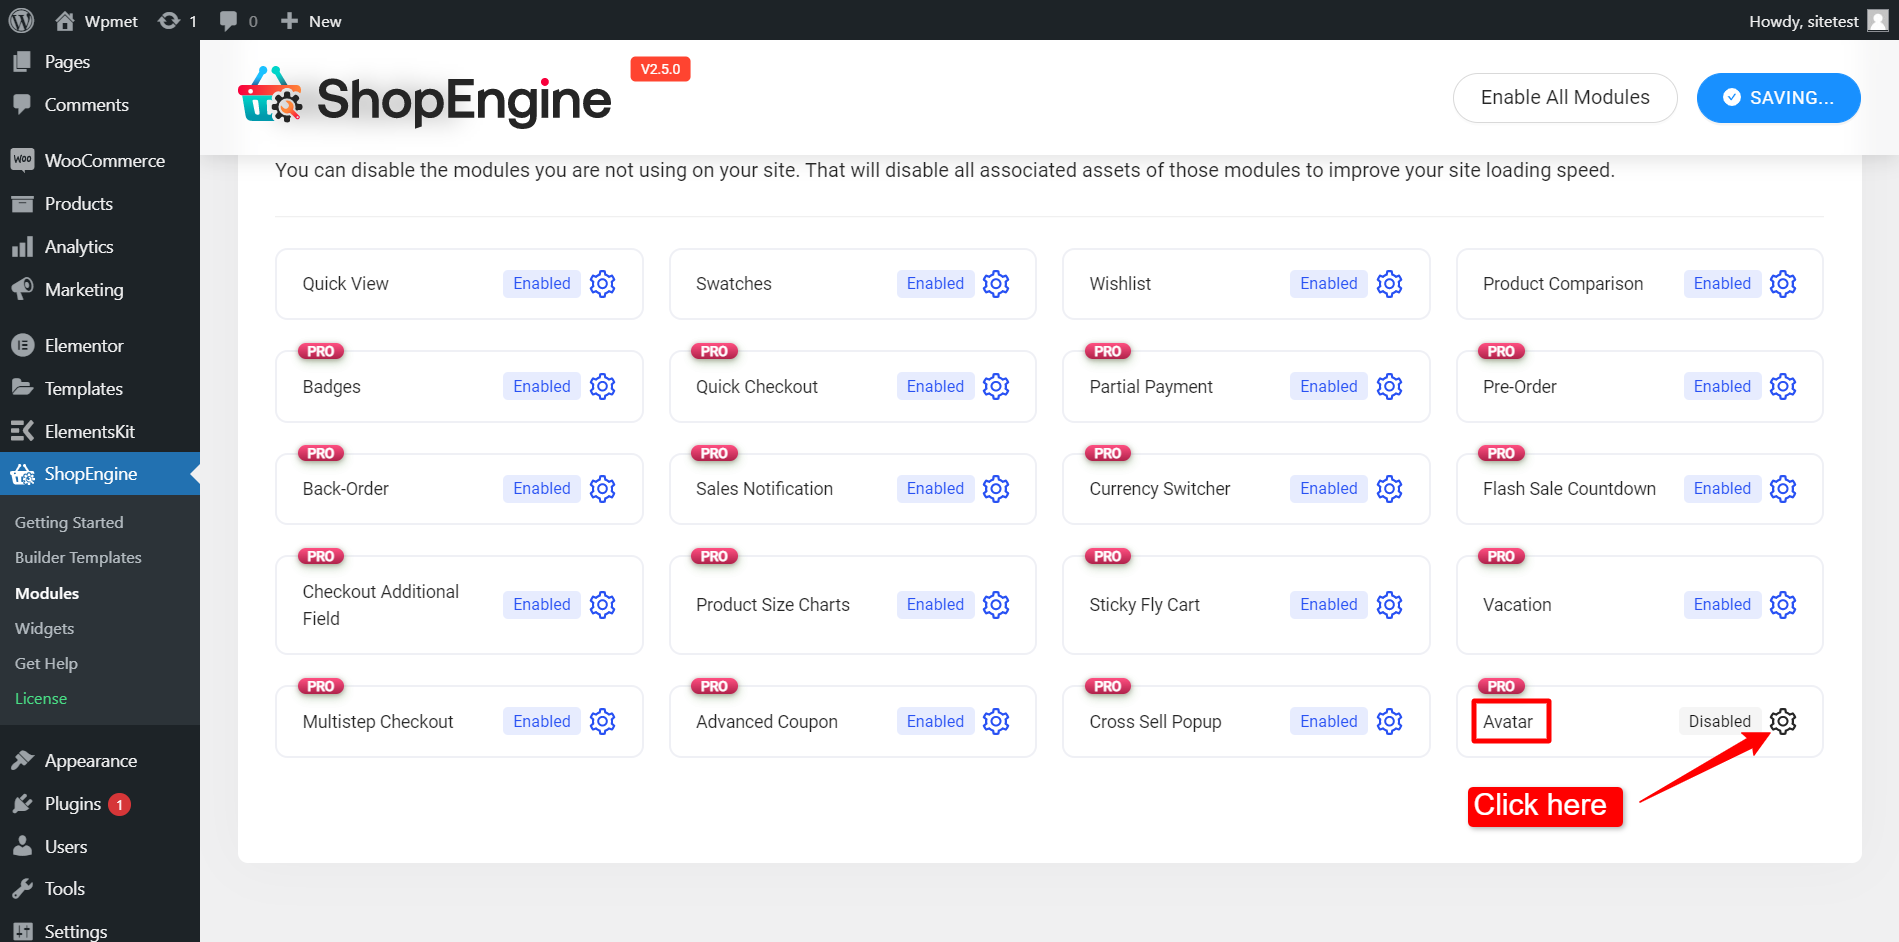
- Navigera till ShopEngine > Moduler från WordPress instrumentpanel.
- Hitta Avatar modul från listan.
- Klicka på ⚙️ (inställningsikonen).


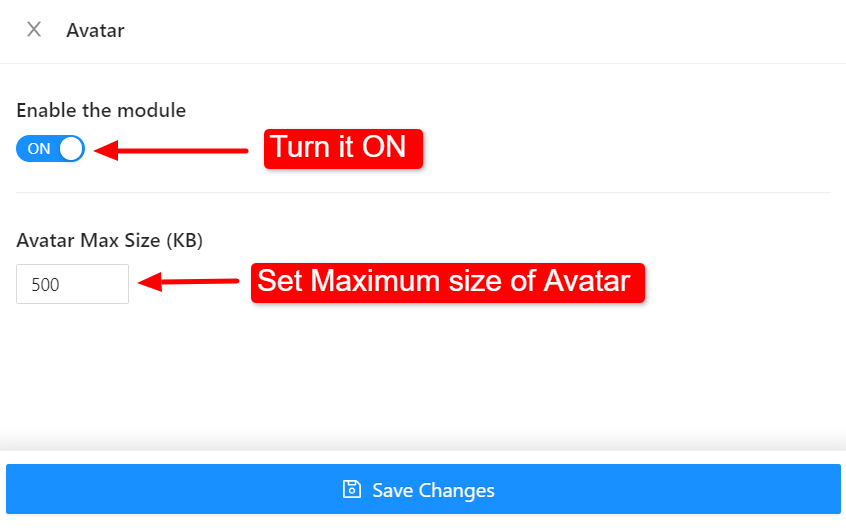
After that, an off-canvas window will show up for WooCommerce Avatar template settings. In the Template Settings,
- Först, Aktivera modulen.
- Ställ in Avatar Max storlek (KB).
- Klicka på Spara ändringar knappen längst ned på skärmen.


Nu kommer du att kunna lägga till en användaravatar på sidan Kontoinstrumentpanel på din webbplats. Läs dokumentationen för Avatar-widget för att lära dig hur du använder widgeten och lägger till en användaravatar på webbsidor.


