시작하기 #
그만큼 인스타그램 위젯 최신 정보를 표시할 수 있습니다. 인스 타 그램 WordPress 사이트의 게시물. 다음은 모든 방법을 자세히 설명하는 포괄적인 기사입니다. Instagram 피드에 연결하려면 단계별 프로세스를 따르세요.
인스타그램 생성 사용자 ID 및 액세스 토큰 #
Instagram 사용자 ID와 액세스 토큰을 생성하는 방법은 다음과 같습니다.
First browse to this link: developers.facebook.com/apps. Note that you need to be logged in here with your Facebook credential. Or, it will automatically synch with your Facebook account, if you stay logged in.
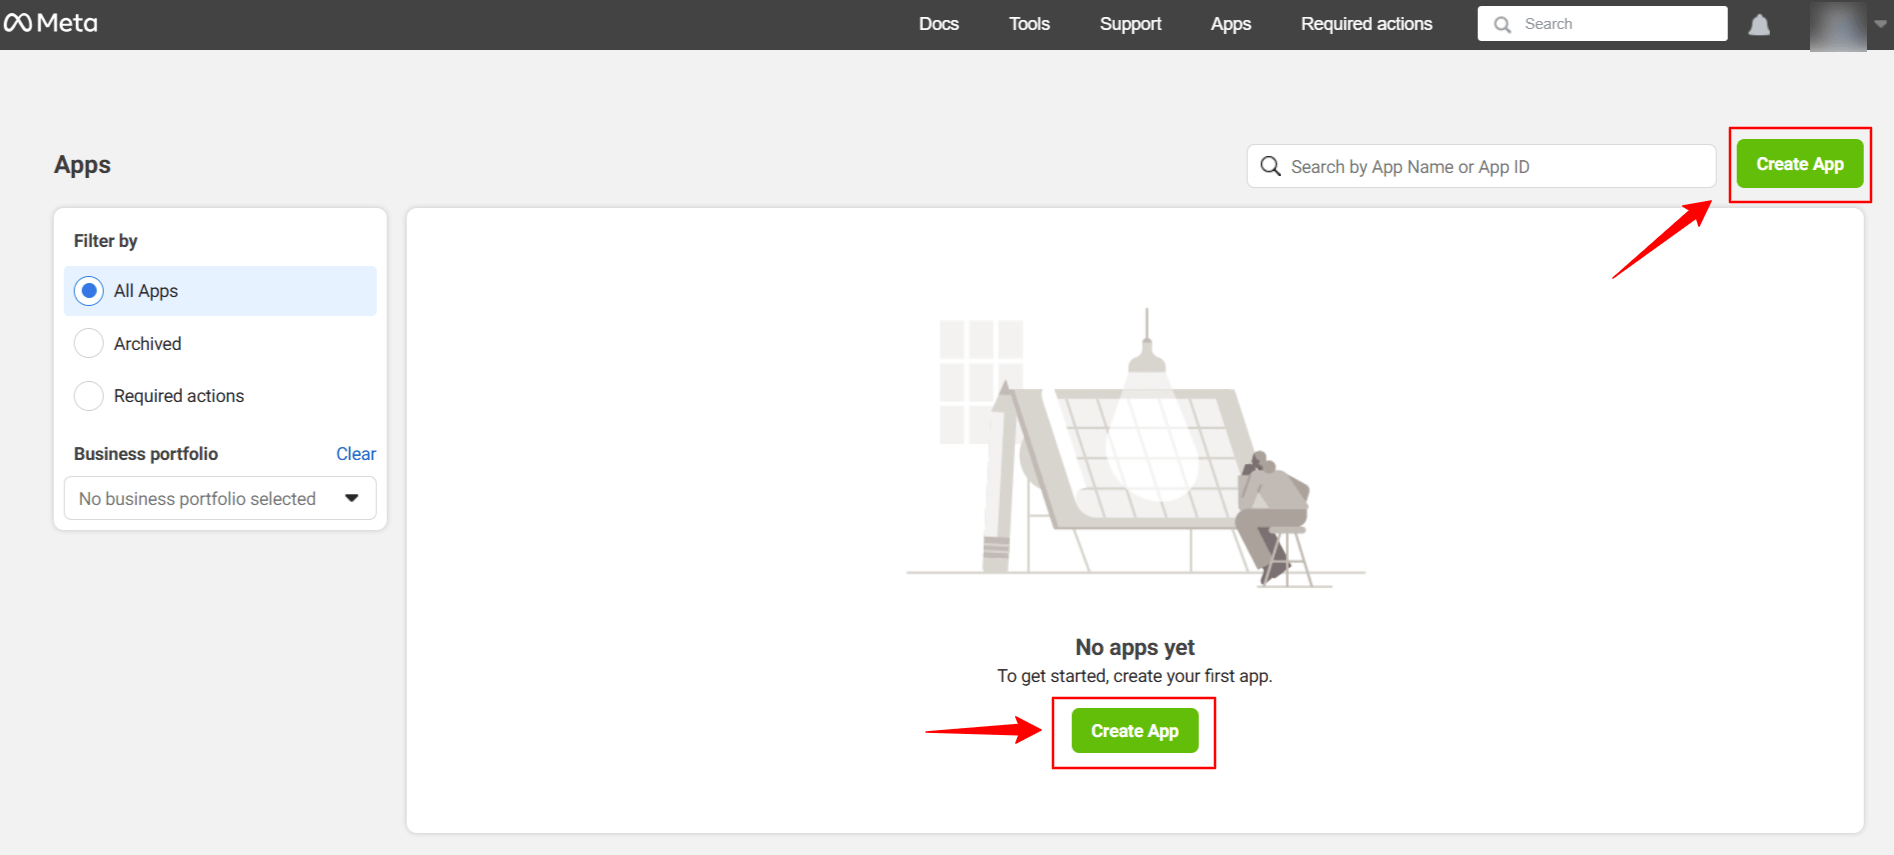
클릭 Create App. Doing this, a page will load an interface with different tabs.
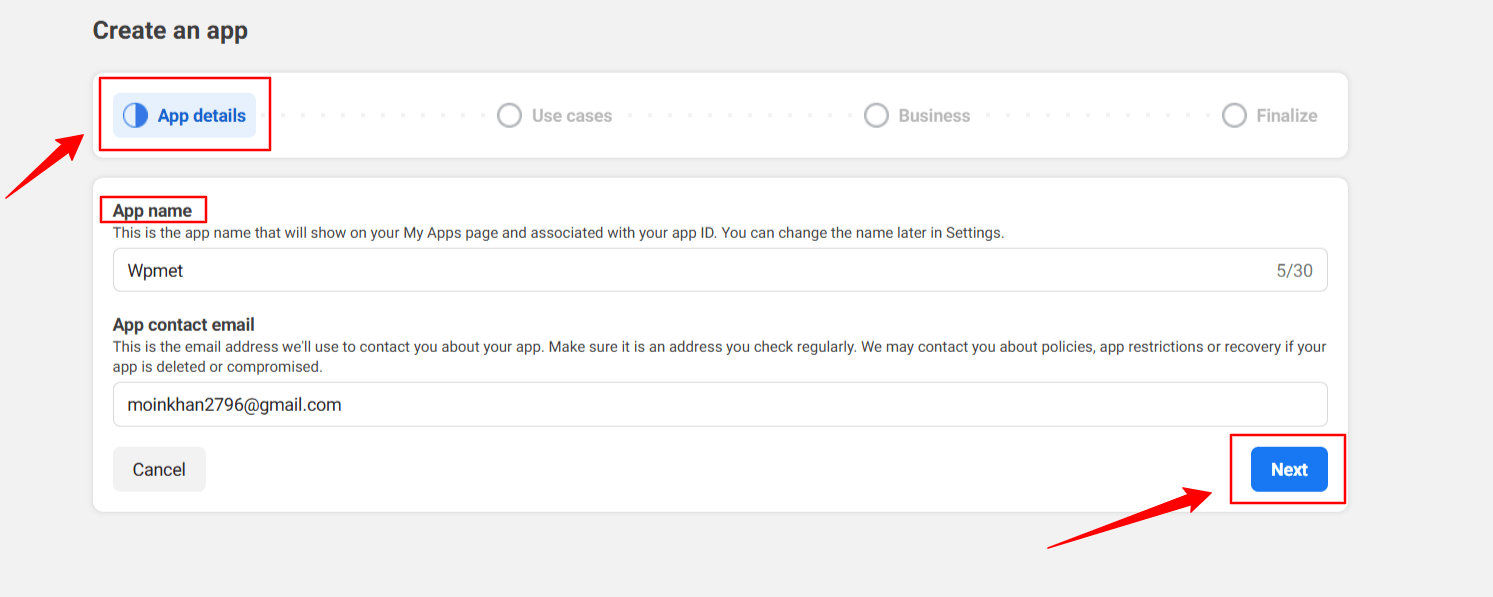
Give a name to the app, for this demo tutorial, I enter the app name as Wpmet. 그런 다음 다음 탭.
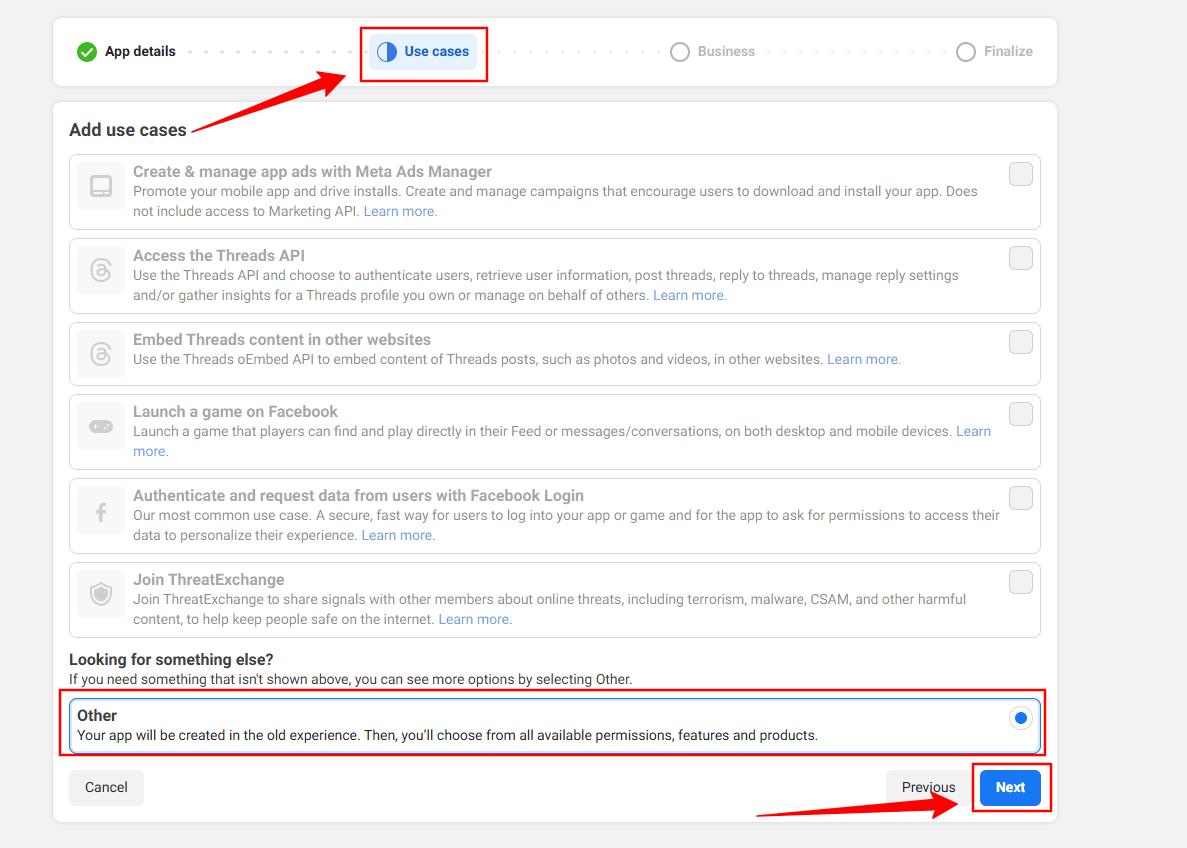
Then, select the “Other” option from the Use Cases tab. And, hit the 다음 단추.
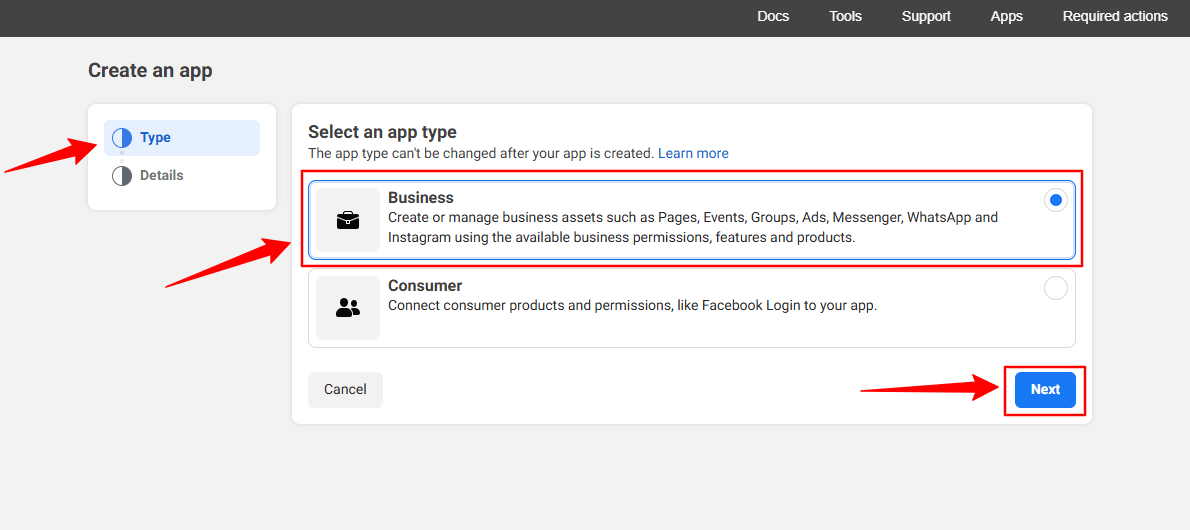
In the next screen, you’ll see two options. First, select 사업 ~로부터 유형 탭.
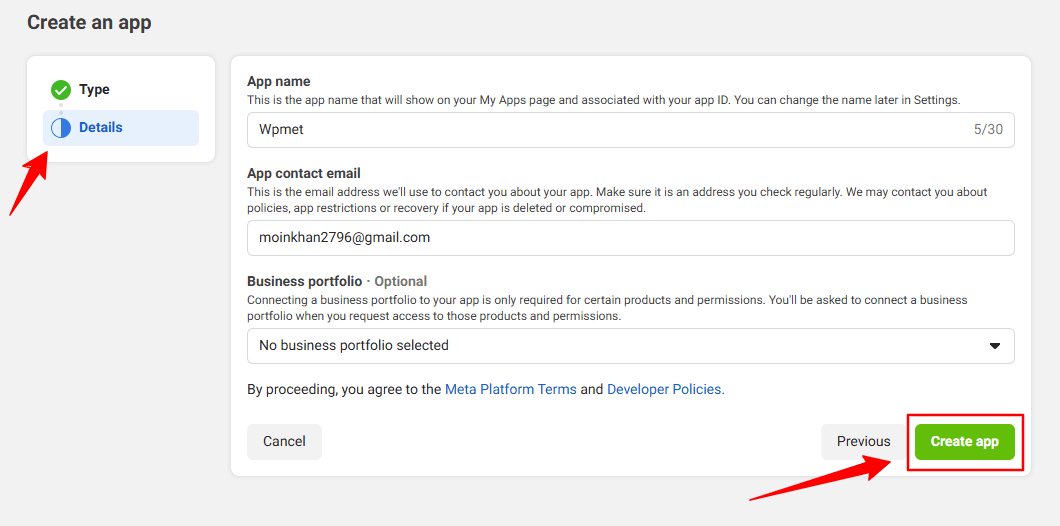
However, you don’t have to put any information in the 세부 option, just click the 앱 만들기 단추.
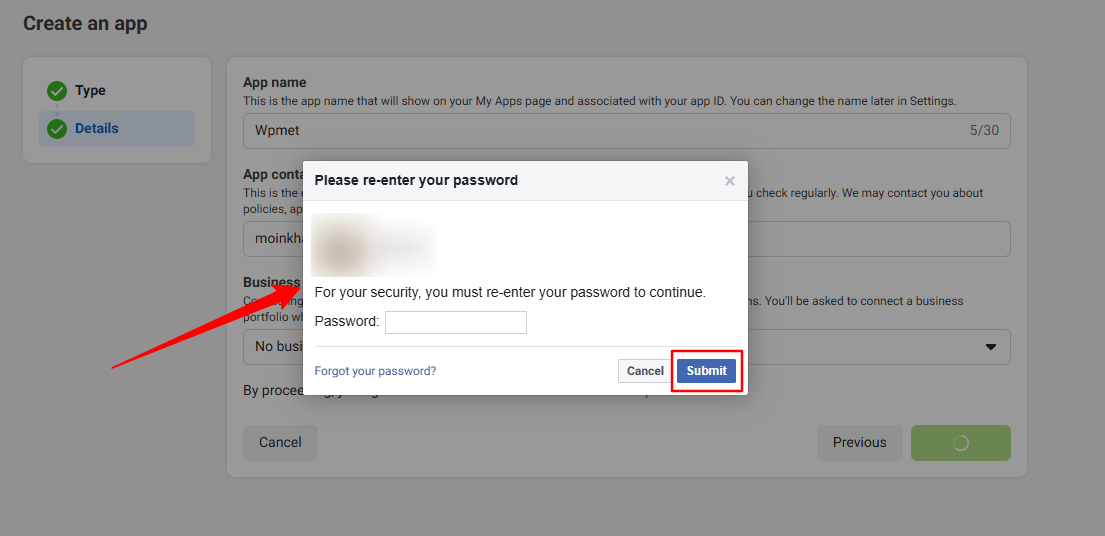
You may need to re-login with your Facebook credentials. Once, you’ve successfully login with your Facebook details, you’ll see all the apps.
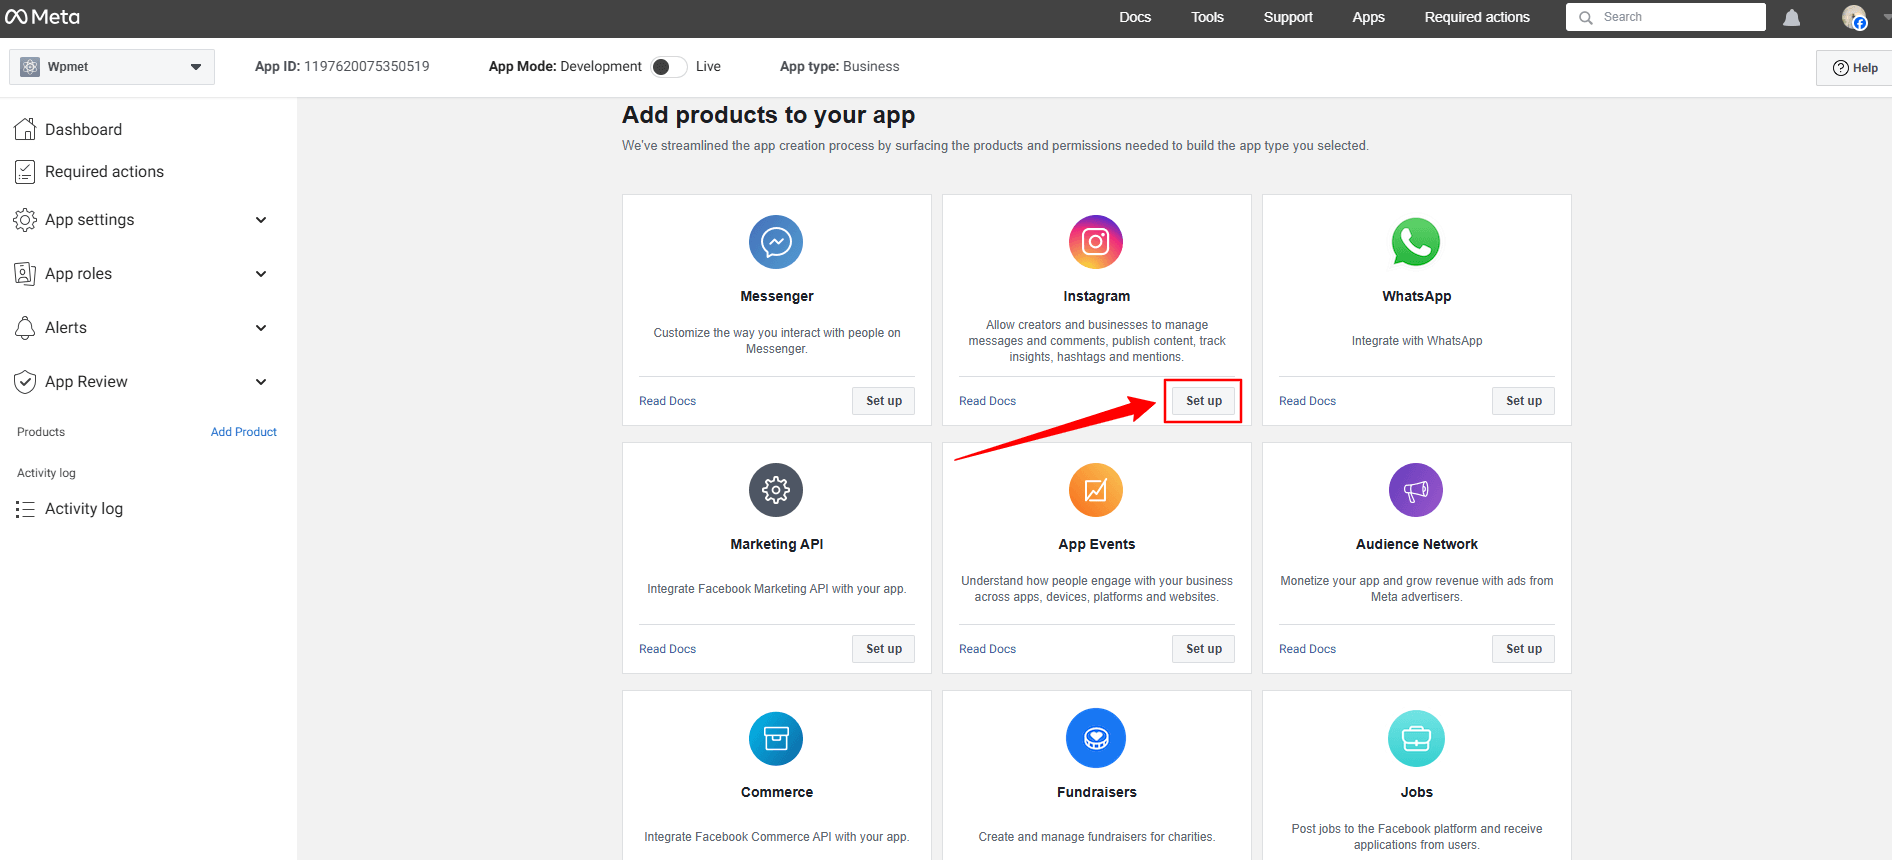
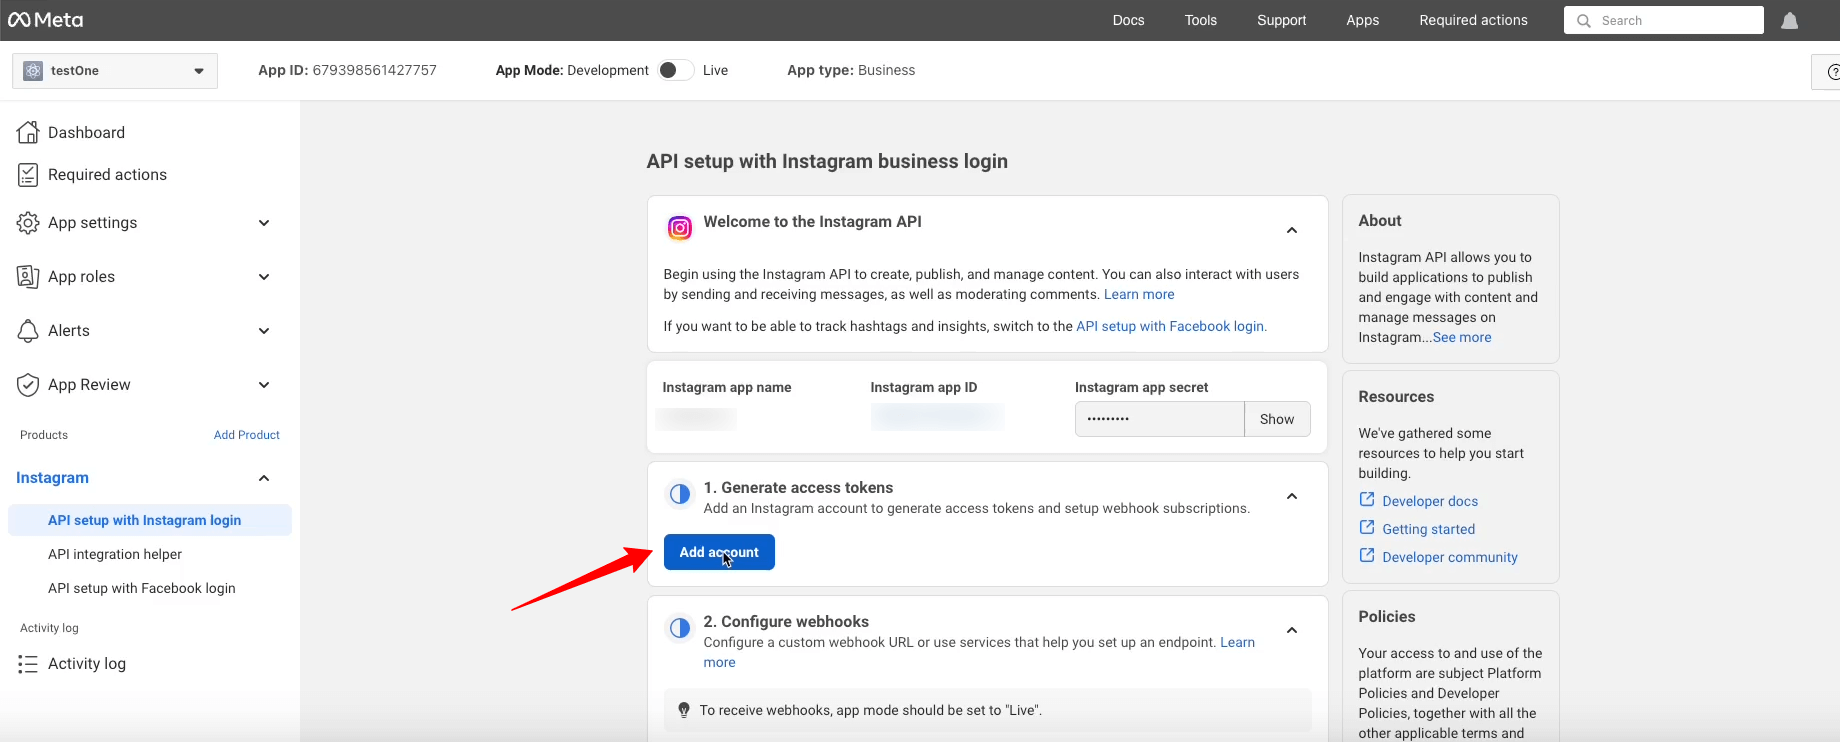
Look for the 인스 타 그램 app, click the Set up option. Now, a page will load before you, where you can add Instagram account from the Generate Access Token option by clicking the Add account button. However, when you’ll click this button a popup will appear saying only a professional account can be used.
Here’s the professional account requirement popup.
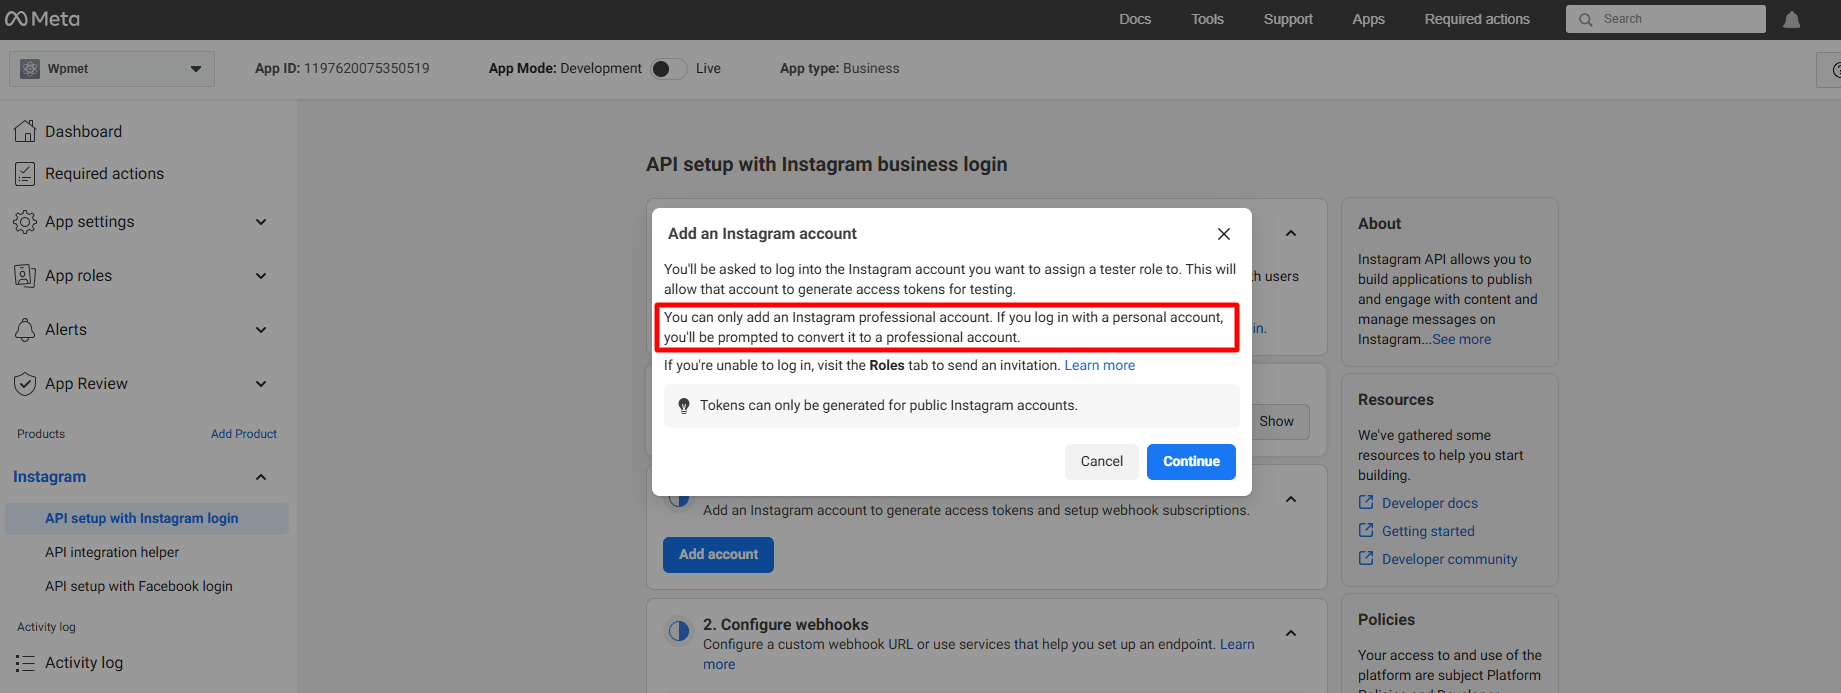
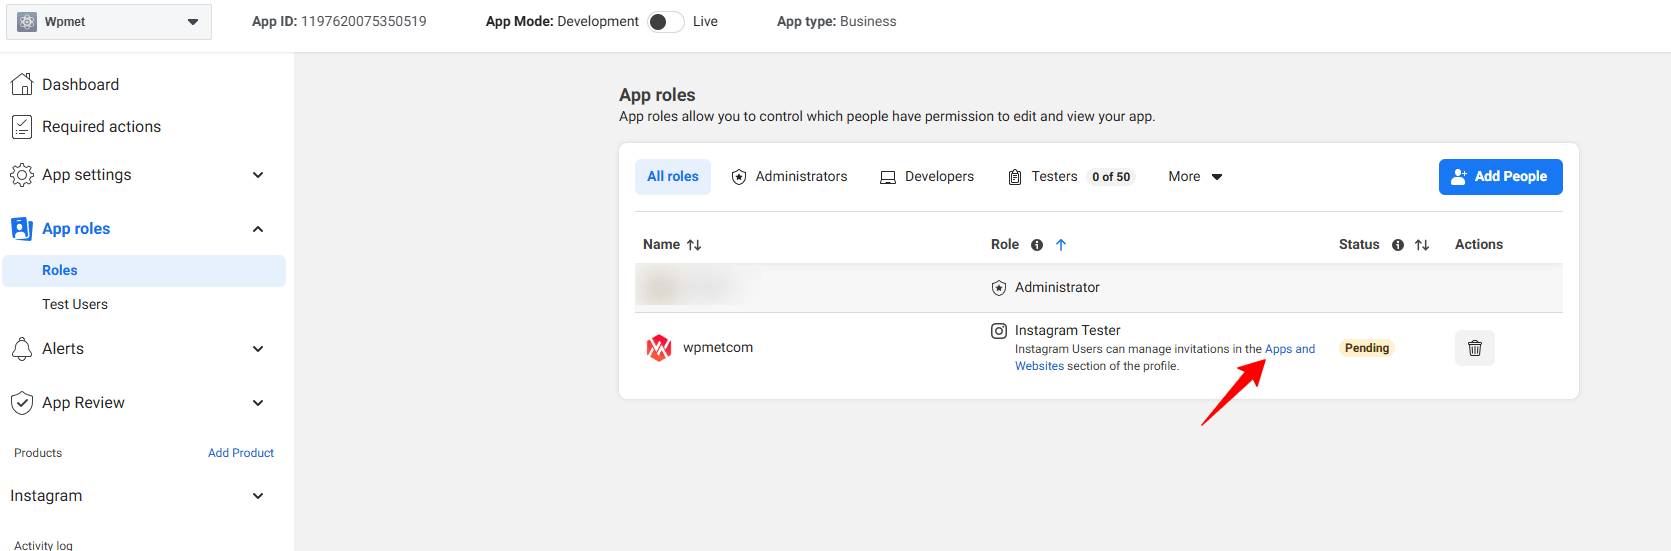
But, here we won’t proceed with this. Rather, we’ll add a regular account. To do this, go under the App Roles 드롭다운.
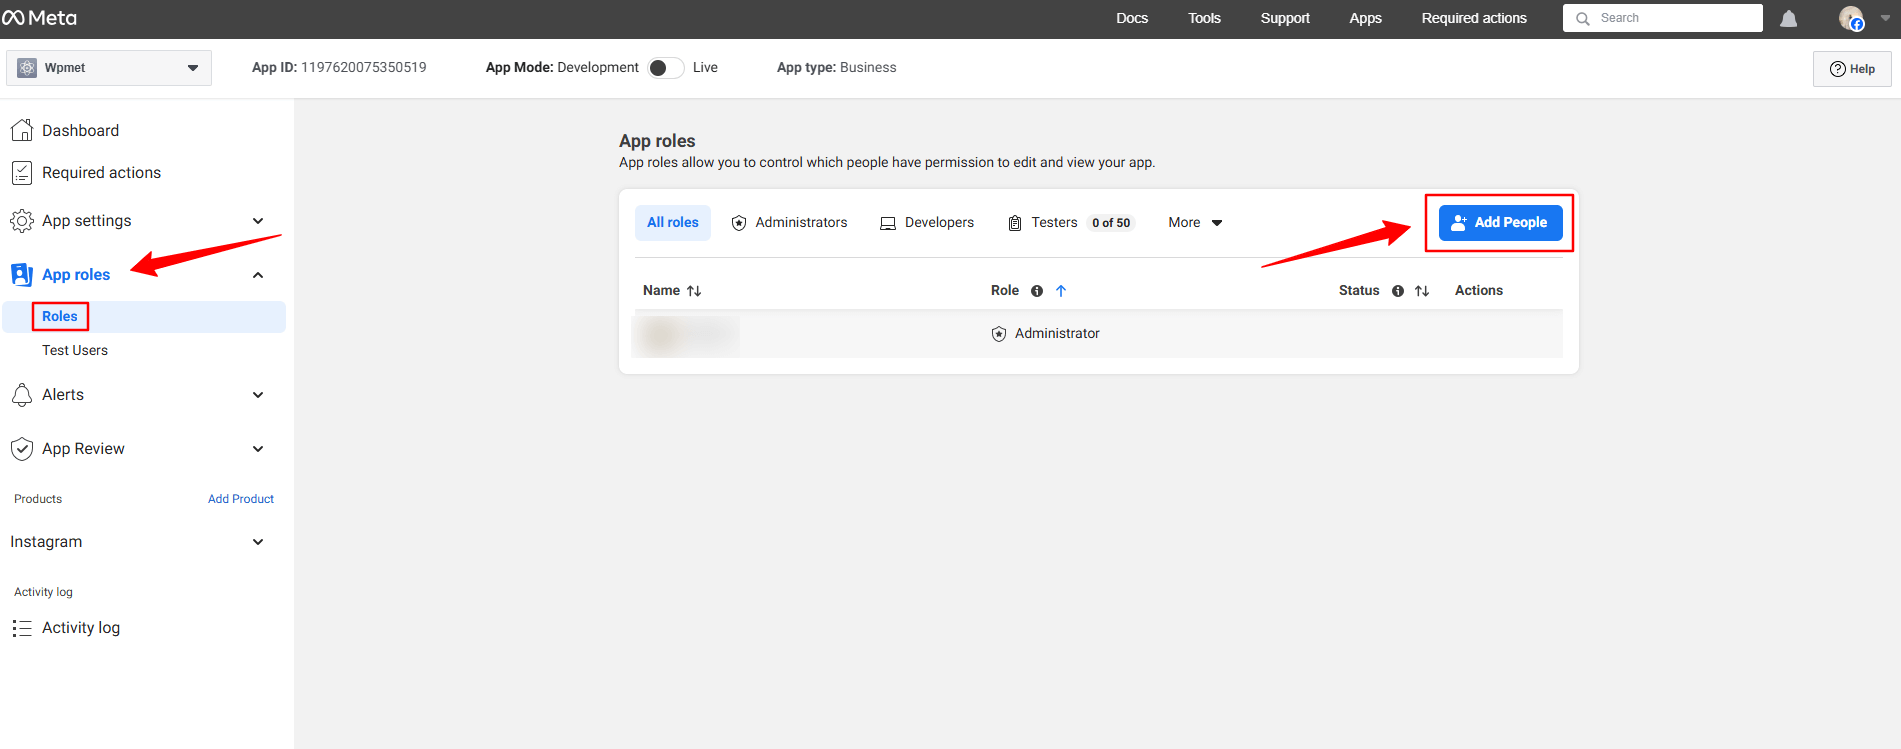
다음을 클릭하세요. Roles 옵션 아래에 App roles dropdown. In the next page, you’ll see an Add People button. Clicking here will reveal a popup like image below.
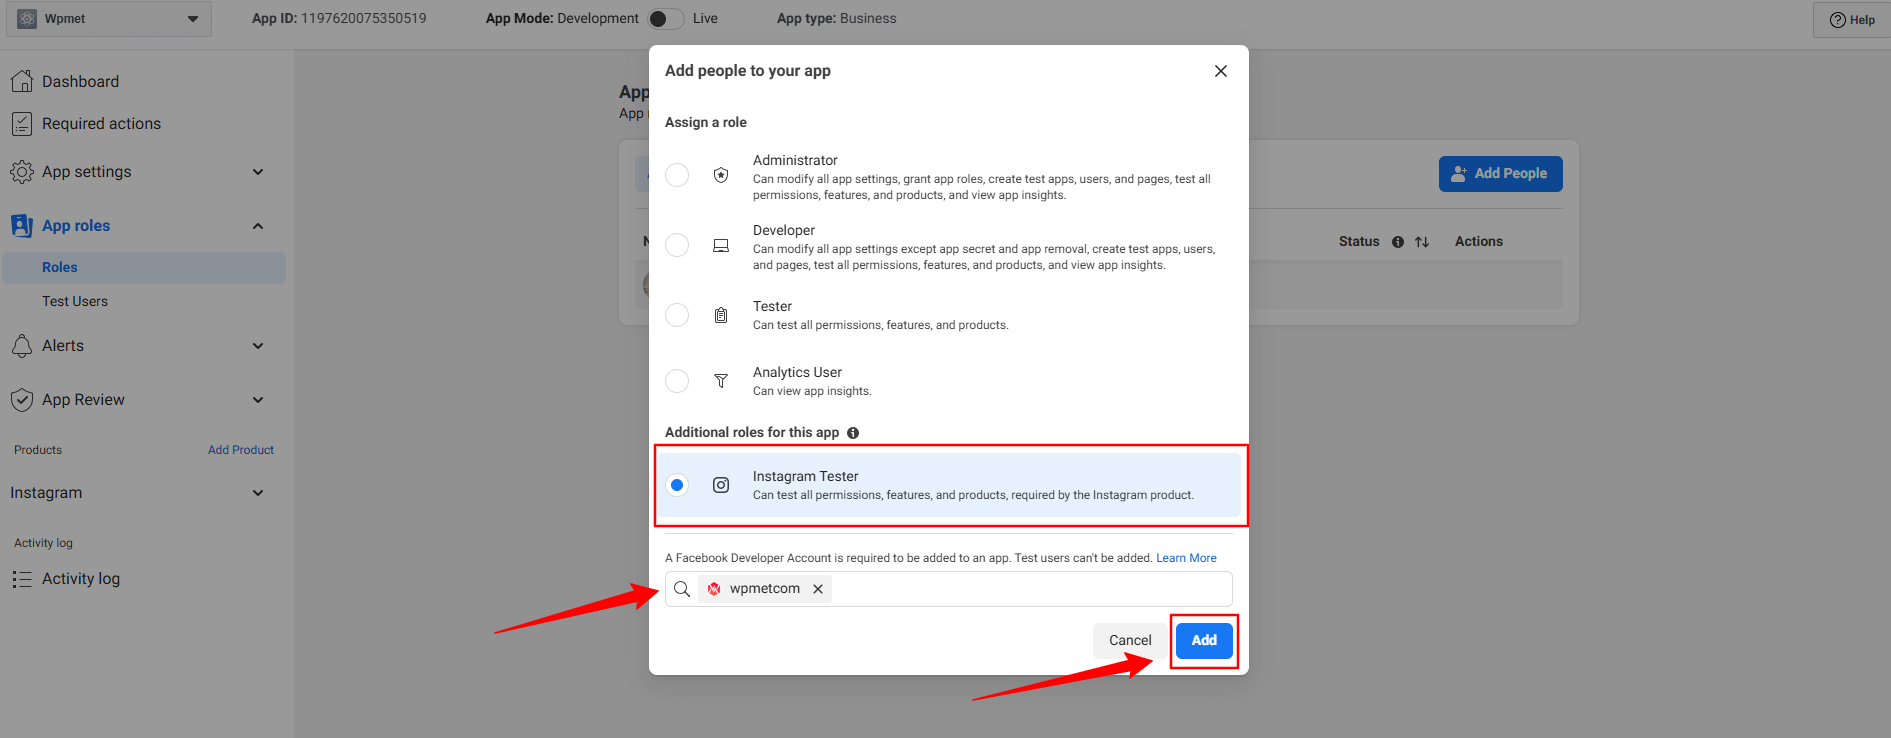
여기에서 Instagram Tester option. When you’ll check this option, a search box will reveal. Search for the Instagram account that you want to integrate with your Elementor website. For example, in our case, we’ve searched for the Wpmetcom Instagram profile and click it from the search result to add in the box.
그런 다음 추가하다 button. You will see the pending status with the newly added profile. To resolve that, you need to verify your Instagram account.
Click in the Apps and Websites, marked in the above image. Doing this will open up the Facebook profile in a new tab.
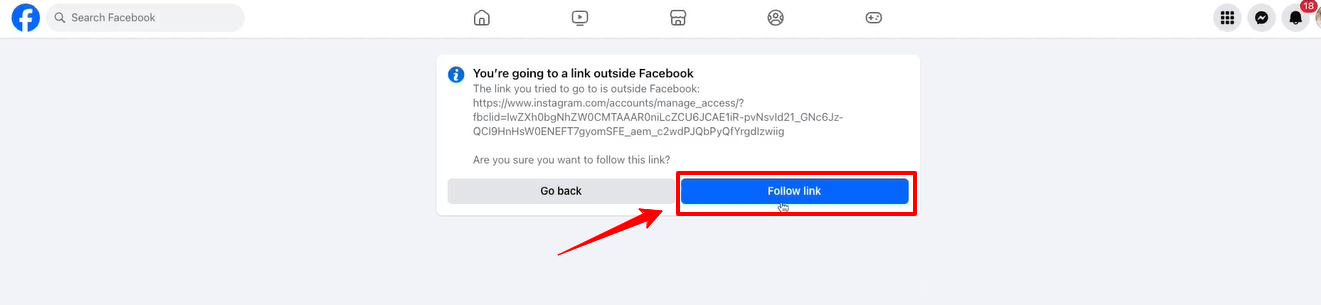
다음을 클릭하세요. Follow link option and it will take you to your Instagram profile web page.
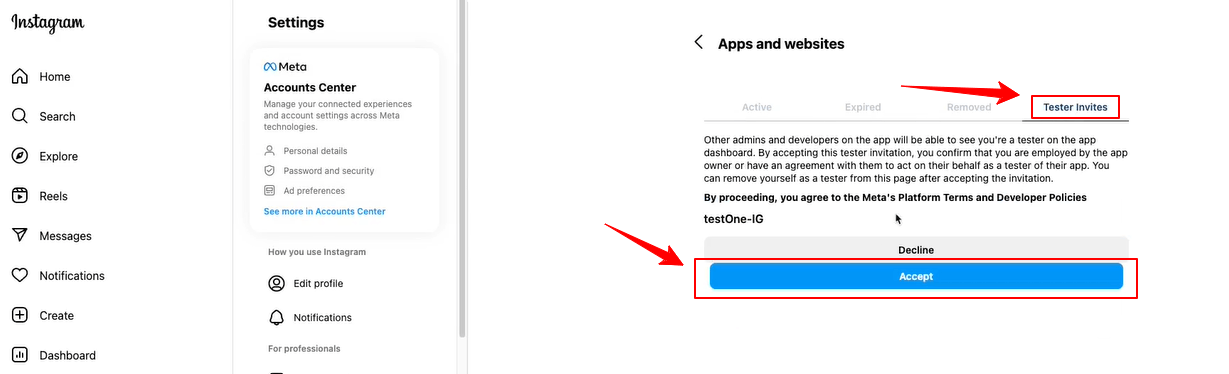
When the Instagram page will load on your screen, navigate to the Tester Invites tab and click the Accept button. Then, return to the Facebook developer dashboard and refresh the page. Now, there will be no pending status anymore with the newly added profile.

Now, you will see the green check mark with the Generate access tokens option. Click the Generate token option next to your instagram account and you’ll see a popup to re-login with your Instagram account.
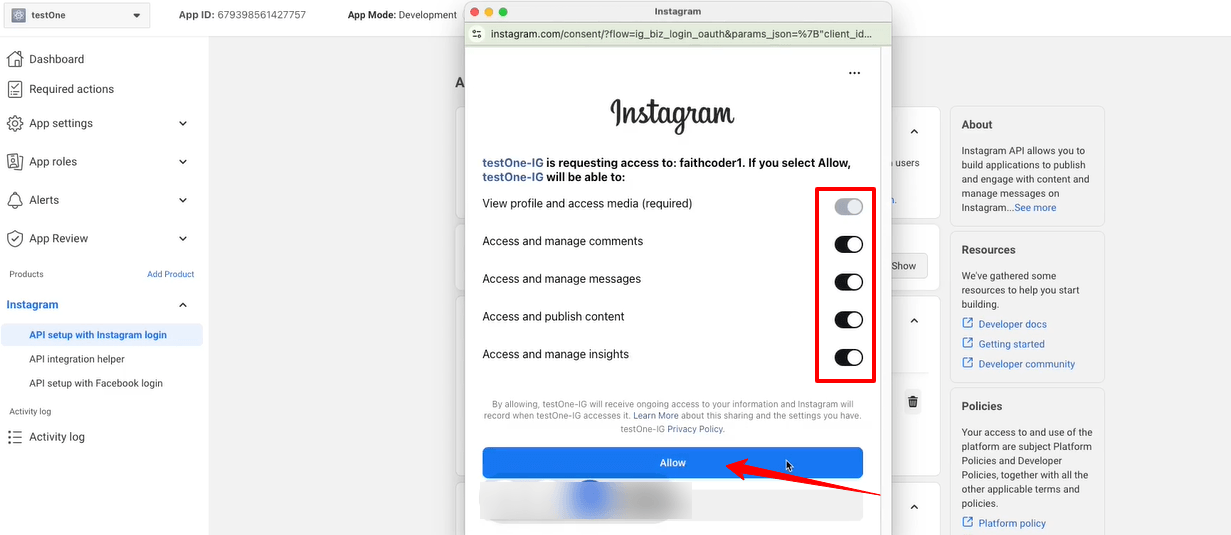
You also need to allow all the access and actions. Toggle all the options to permit like the image above and click the 허용하다 단추.
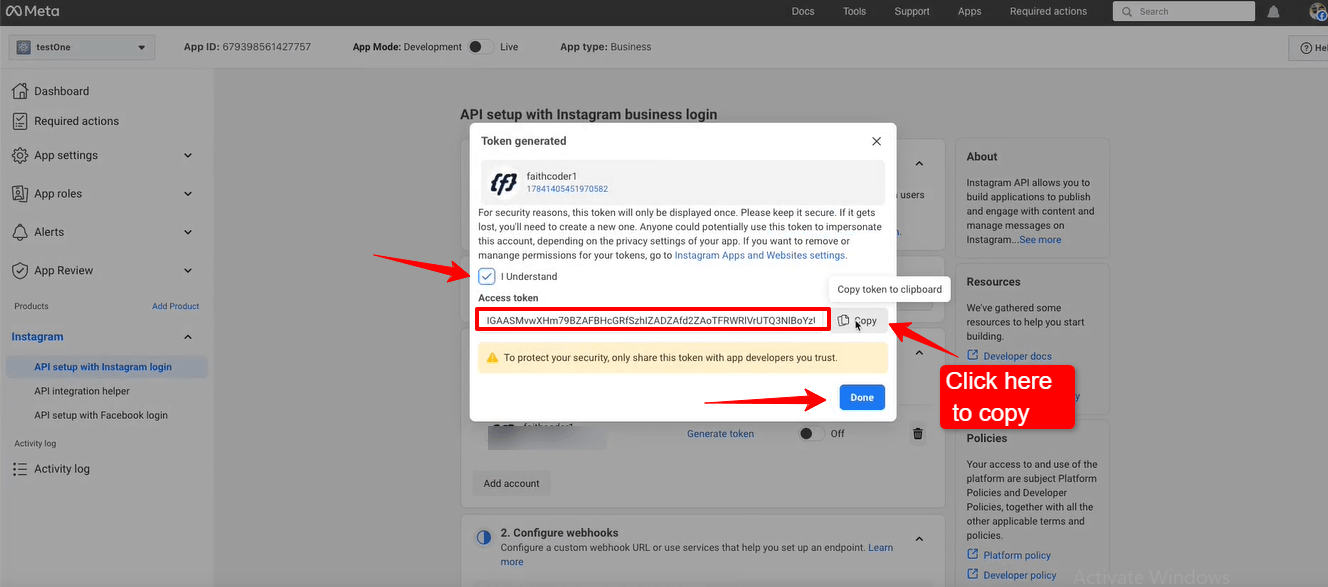
Up next, you’ll see the access token. Check the box with I Understand and select the 복사 button to copy your Instagram access token. You need to paste it within the ElementsKit settings. We’re going to show the process in the next phase.
을 치다 완료 button to clear the popup.
Adding Instagram Access Tokens to ElementsKit #
당신은 사용자 ID 및 액세스 토큰 Instagram에 연결하세요.
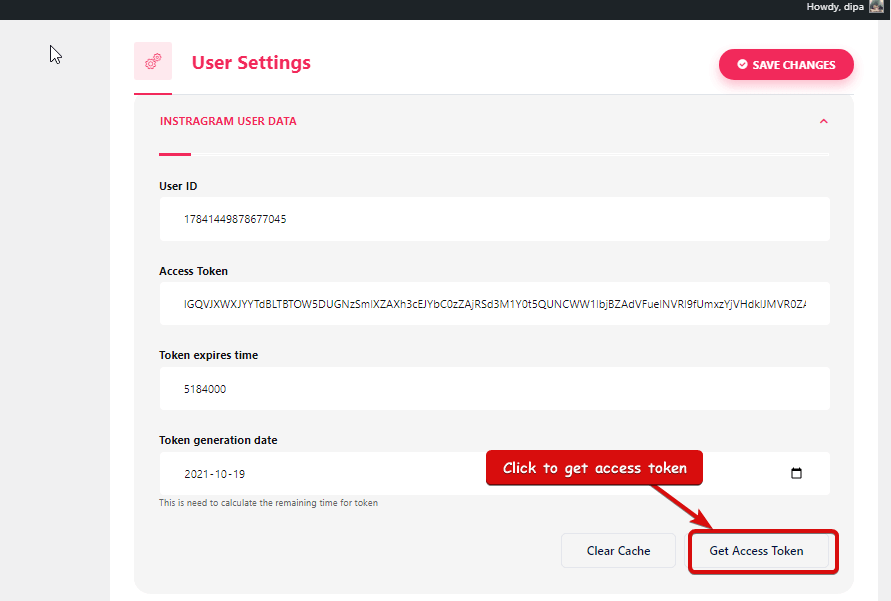
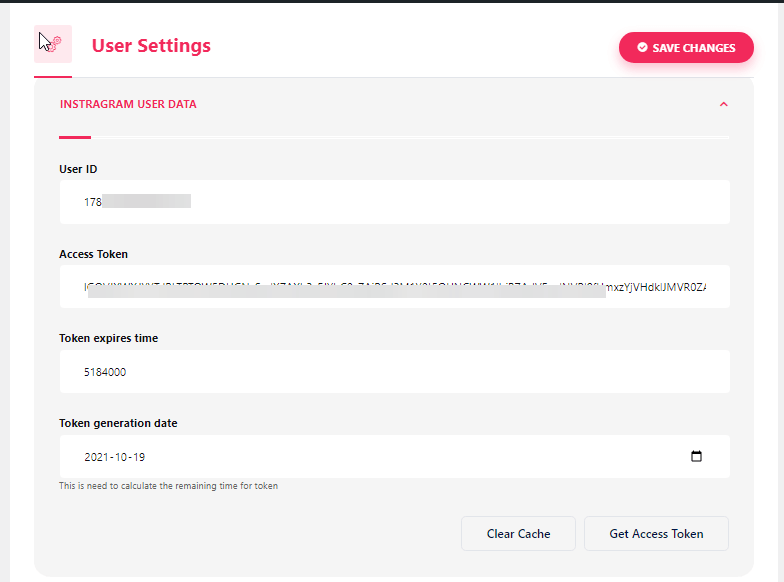
- 단계=>1: 이동 Elementskit=> 사용자 데이터=> 다음을 클릭하세요. 인스타그램 사용자 데이터 확장하려면 -> 클릭하세요. 액세스 토큰 받기.
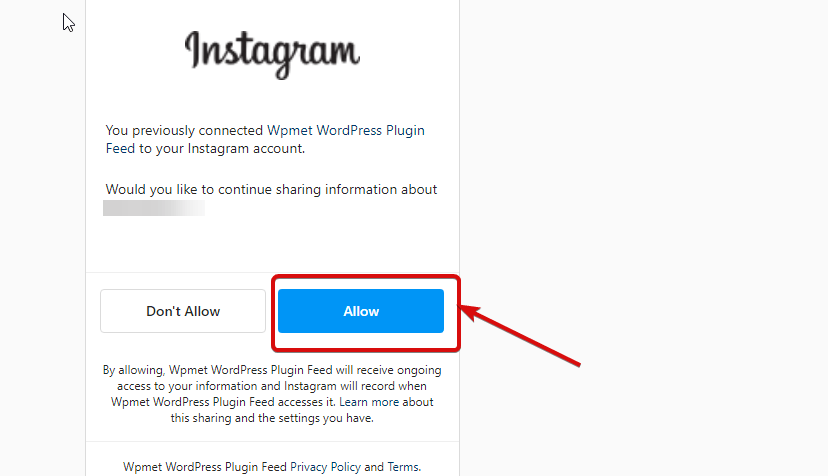
- 단계=>2: 인스타그램 계정을 입력하세요 신임장 그리고를 클릭하세요 로그인. 또는 귀하의 계정으로 로그인할 수 있습니다. 페이스 북 계정. 권한을 요청하면 허용을 클릭하세요.
- 단계=>3: 여기 당신의 인스타그램이 있습니다 사용자 ID, 수명이 긴 토큰, 토큰 만료 및 토큰 생성. 복사 그들을.
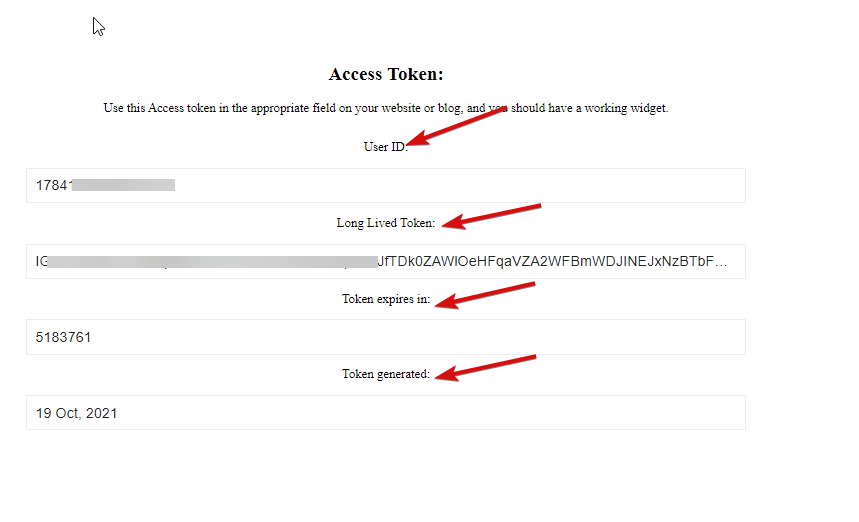
- 단계=>4: 그런 다음 인스타그램 사용자 데이터 그리고 반죽 그만큼 사용자 ID, Lo살아있는 토큰, 토큰 만료 및 토큰 생성 값.
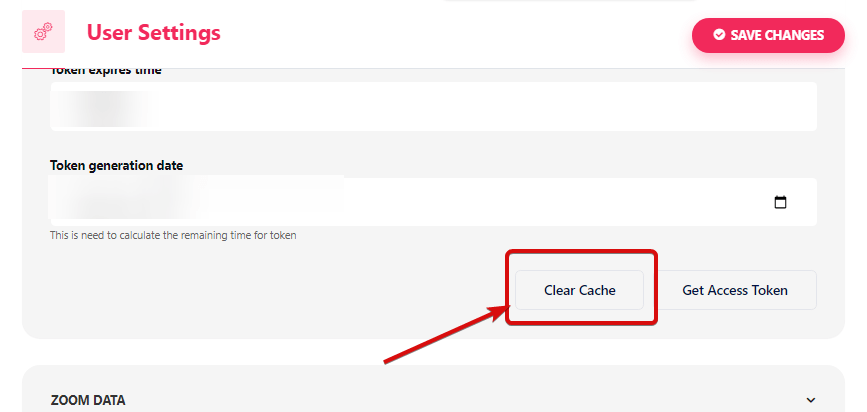
참고: 토큰 만료 시간이 초과되기 전에 데이터를 동기화해야 합니다.
- 데이터 동기화와 관련하여 문제가 발생하면 캐시 지우기를 클릭하세요.
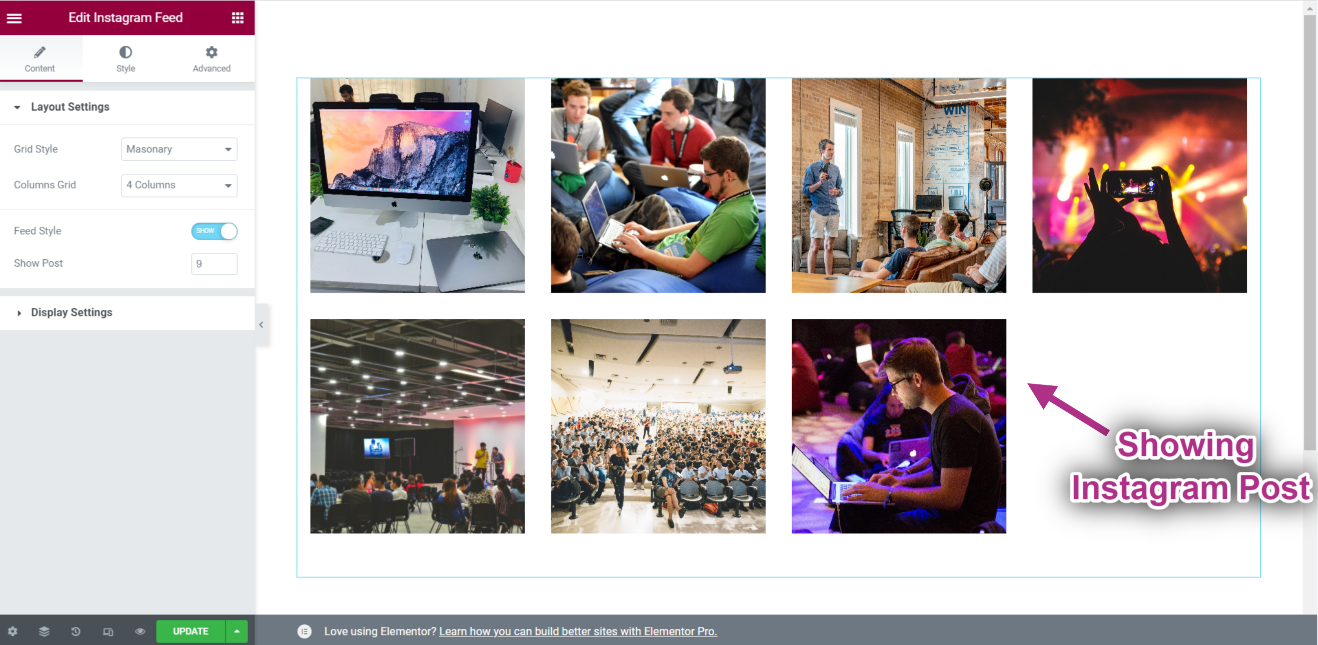
- 단계=>5: 이동 엘레멘터=> 검색 인스타그램 피드=> 그냥 필드를 드래그 앤 드롭하세요..
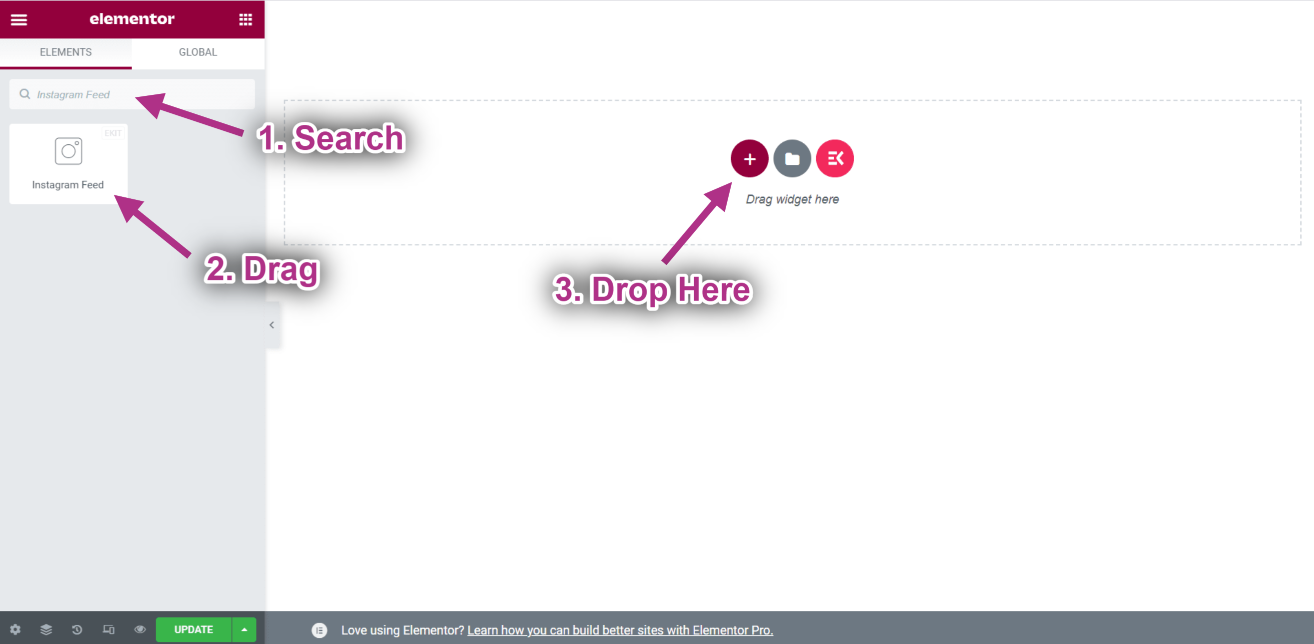
- 이제 Instagram 피드 위젯에서 Instagram 게시물을 볼 수 있습니다..