To set up email notifications, open your email app or access your inbox from a desktop browser and go to 設定. Select your email account and enable alerts for new messages. On mobile, manage sound or vibration options from 通知設定, and on desktop, make sure browser notifications are allowed.
Enable Gmail Notifications (Mobile & Desktop)
- Android: Open Gmail → Menu > Settings > Account > Notifications → Select 全て または High-priority emails.
- iPhone/iPad: Open Gmail → Menu > Settings > Email notifications → Choose your preferred notification level.
- Desktop:Open Gmail → Click Settings (gear icon) > See all settings → Scroll to Desktop notifications → Enable New mail または Important mail alerts.
Troubleshooting Notification Issues
If notifications aren’t working properly, a few basic settings usually fix the problem. Check Gmail sync, battery optimization, and system-level notification permissions.
- 確認する Sync Gmail is enabled
- Turn off Battery Saver / Power Saving mode
- Allow Gmail notifications in your device’s system settings
Set Up Automated Email Notifications (Forms & Services)
Automated notifications notify you instantly when someone submits a form. Most form builders support this through built-in email settings or add-ons.
- Google Forms: インストール Email Notifications for Forms from the Marketplace to receive submission alerts
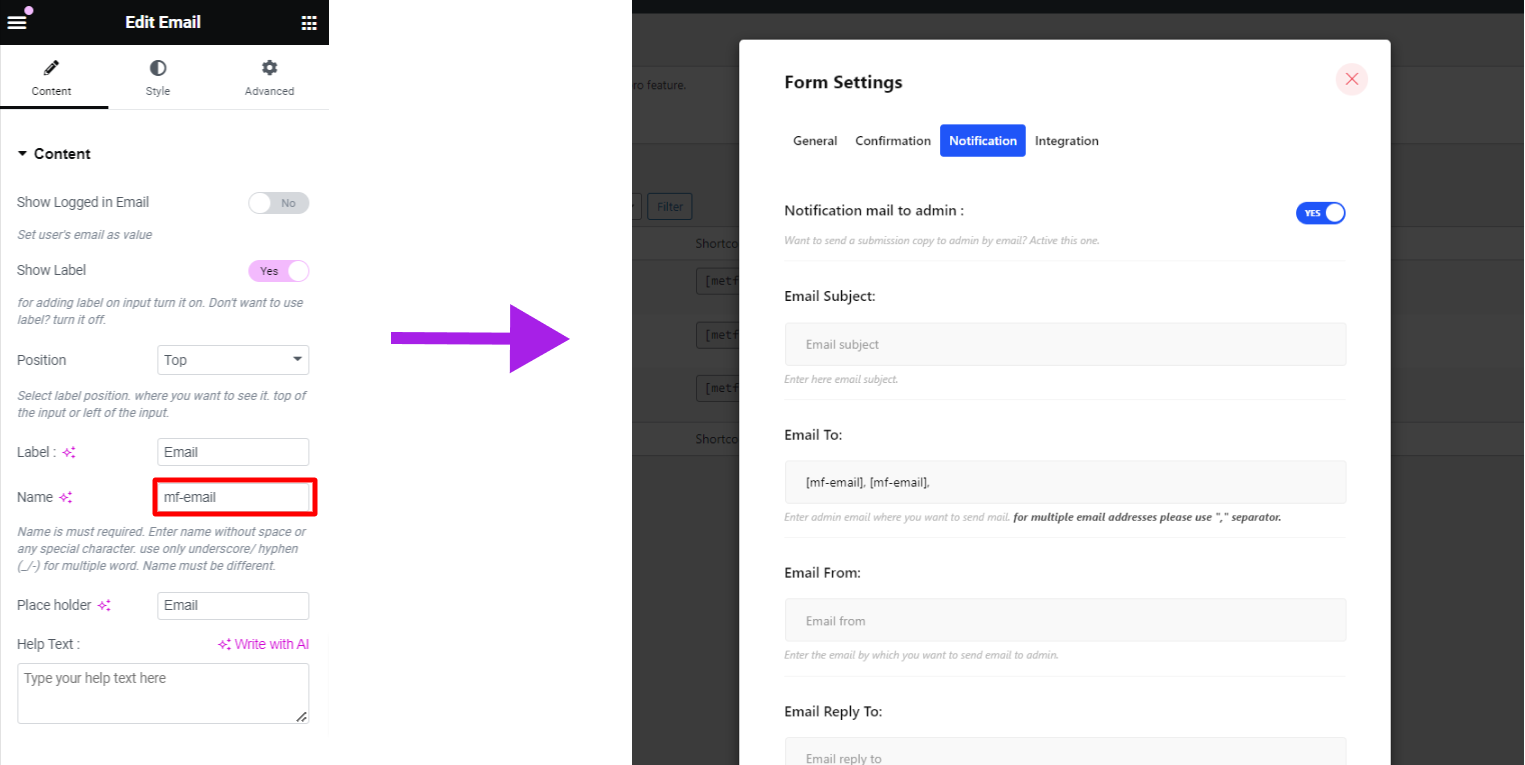
- メットフォーム: に行く Form Settings > Notifications, provide the details, customize the notification content and save the changes.
最高のフォームビルダー MetForm を使用すると、WordPress フォームの電子メール通知を簡単に設定できます。ここで共有した手順に従ってください。
Set up Notification Email with Metform #
Click the Edit option of the form where you want to set up notification email.
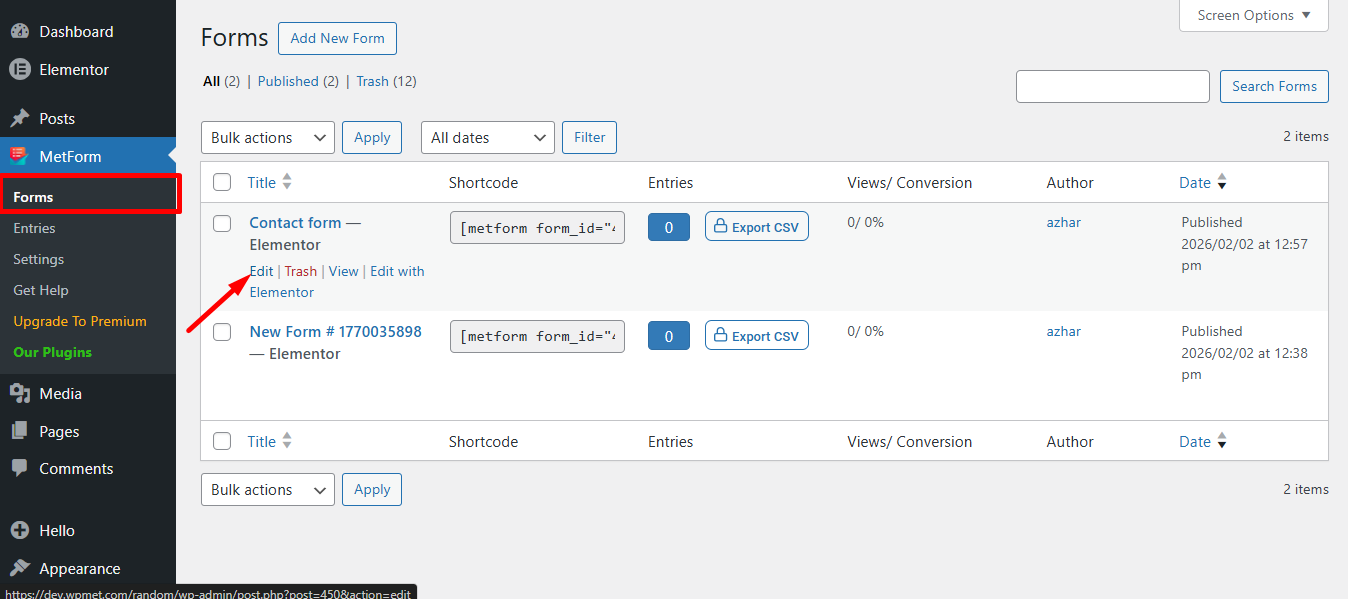
Also, you can open a new form if you need. follow the ビデオスクリーンキャスト:
Setting Notification Email #
You can send a submission copy to the admin by email. You can also set different WordPress forms email notifications for separate Forms. ビデオをフォローする スクリーンキャスト
Or follow the step-by-step process
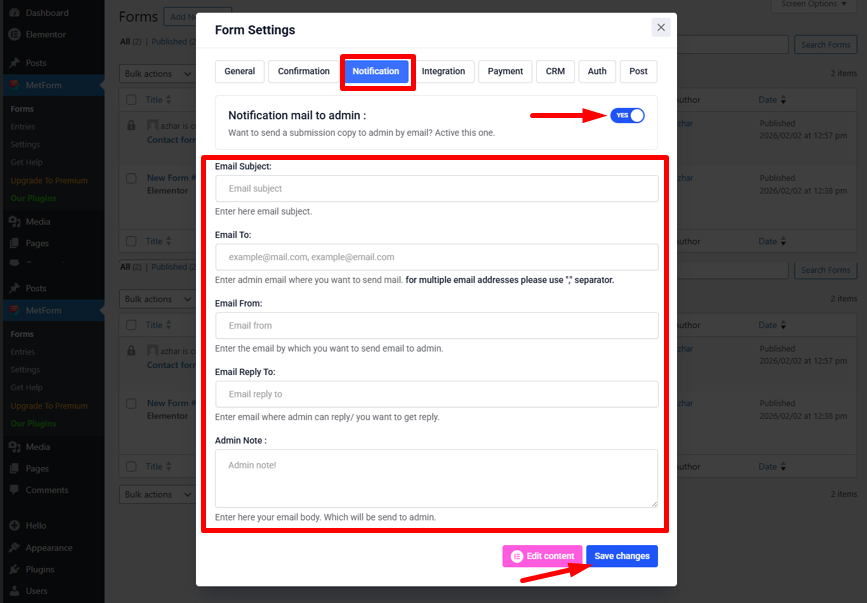
案内する フォーム設定→通知 タブ
- 通知メールを管理者に切り替えます オプション: ユーザーの送信が完了した後、またはあらゆる種類の顧客データが処理された後、管理者に通知します。
- メールの件名: 電子メールの件名を入力します。
- メールアドレス: メールの送信先となる管理者の電子メールを入力します。 複数のメールアドレスを使用する場合は、「,」区切り文字を使用してください。
- メール送信元: 管理者にメールを送信する際に使用するメールアドレスを入力します。
- メールの返信先: 管理者が返信できる電子メール、または返信を受け取りたい電子メールを入力します。
- 管理者メモ: 管理者に送信されるメール本文をここに入力します。
- 変更を保存します.
条件付き管理者メールルーティング #
This MetForm feature is dynamic and conditional admin settings for your email form. You can set conditional admin email routing that allows you to send the form to a different email address based on the selections made on the form.
Get tags from different widgets like dropdowns, checkboxes, buttons, text widgets, etc. and assign these tags to “メールアドレス” フィールドを使用して、フォームを適切なチームに自動的に送信します。
たとえば、購入関連のフォームはすべて営業チームに送信し、技術的な問題に関連するフォームはサポート チームに送信する必要があります。