Japanese
  English
  German
  Spanish
  Italian
  French
  Danish
  Portuguese
  Swedish
  Polish
  Korean
 HubSpotとの統合によりシームレスな 顧客関係管理 顧客の連絡先を効率的に管理します。MetForm の HubSpot 統合により、クライアントや訪問者が送信したフォームが失われる心配はありません。顧客のすべての連絡先情報は、将来使用できるように HubSpot アカウントに保存されます。
注意:
以前は API ベースの接続がありました。HubSpot との API ベースの接続がある場合は、OAuth 2.0 を使用して以下のプロセスに従い、HubSpot アカウントをサイトに再接続してください。
始めましょう #
Hubspotのような人気のCRMサービスに接続してユーザーデータを送信します。ここでは、HubspotをMetformに接続する方法を段階的に説明します。.
簡単に見つけることができます HubSpot MetForm アプリがマーケットプレイスに登場 そこから「アプリのインストール」をクリックするか、以下のプロセスに従ってください。
HubSpotとMetFormを接続する #
MetForm HubSpot 統合は、OAuth 2.0 を使用して有効になります。MetForm ダッシュボードから HubSpot にサインアップまたはサインインするだけです。これにより、HubSpot アカウントが MetForm と自動的に統合されます。このプロセスは安全であり、HubSpot マーケットプレイスの公式 MetForm アプリは統合に OAuth 2.0 を使用します。
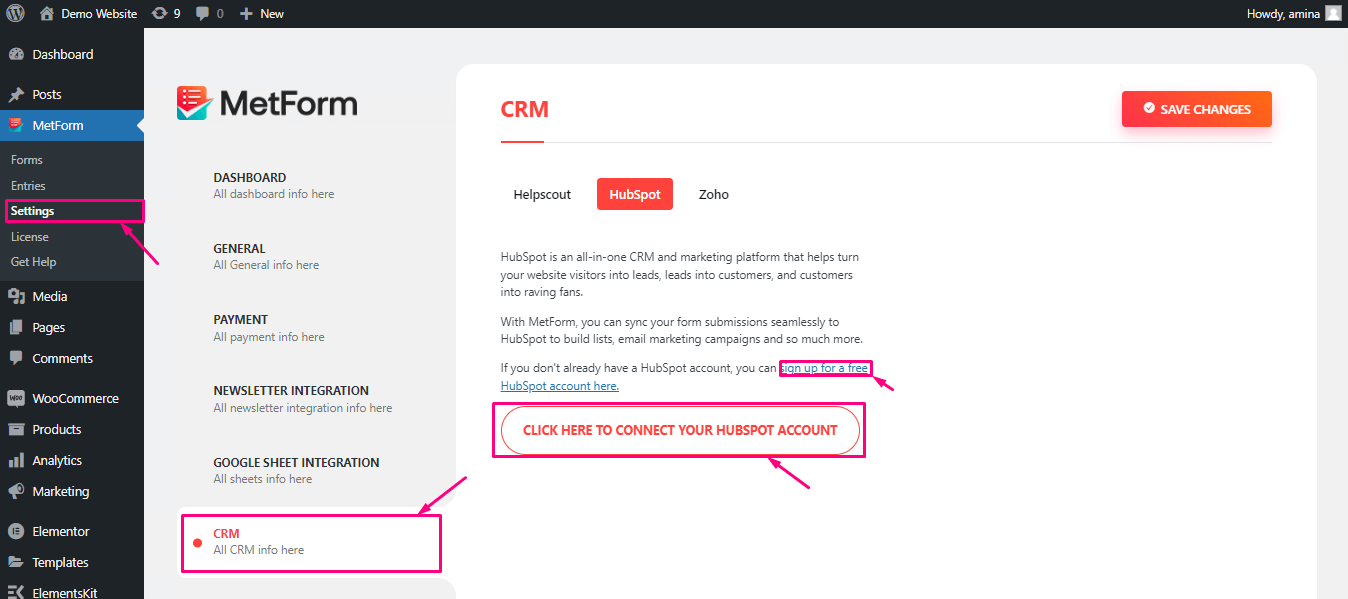
HubSpotに接続するには、 「設定」を押します MetFormの下にあります。その後、 CRM>> ハブスポットを押して、 「HubSpotアカウントを接続するにはここをクリック」ボタン.
HubSpotアカウントをお持ちでない場合は、 こちらから無料の HubSpot アカウントにサインアップしてください。
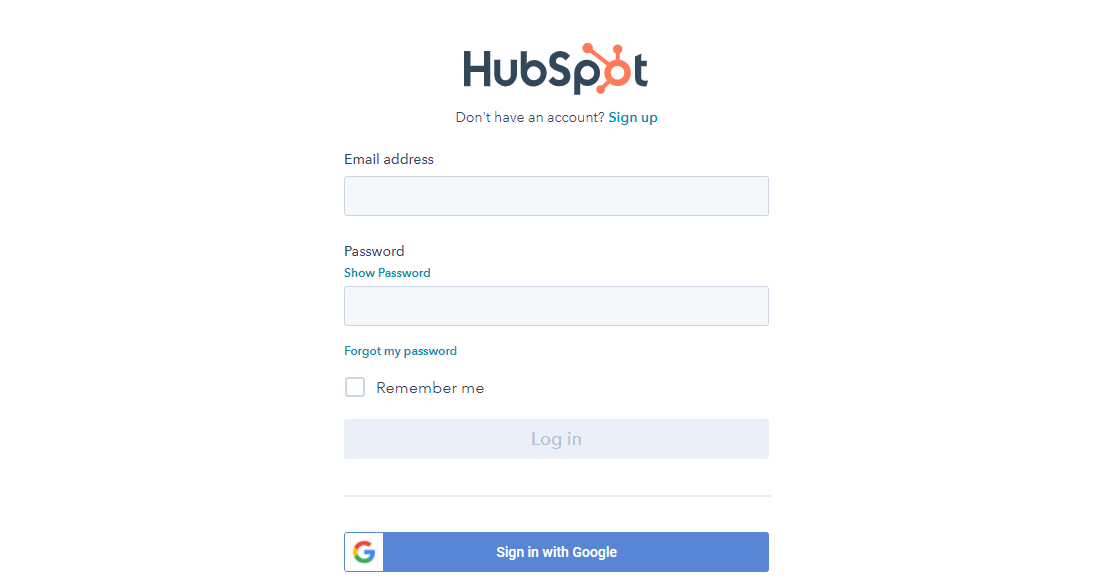
HubSpot のサインイン ページにリダイレクトされ、そこからサインインまたはサインアップすることができます。
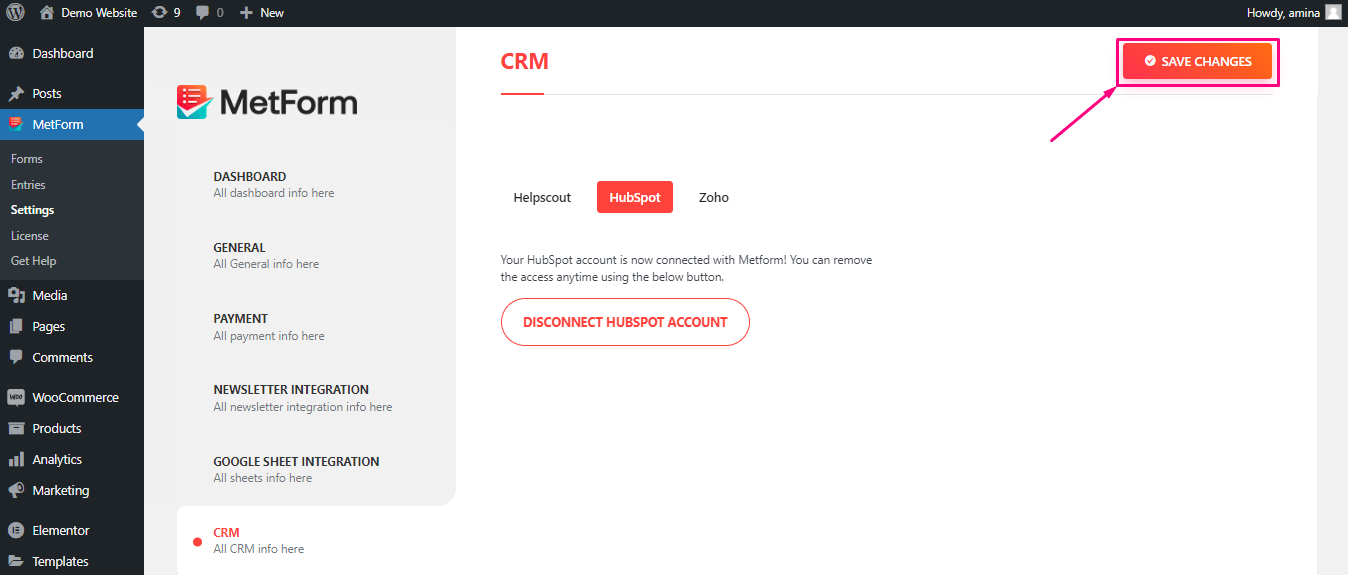
サインアップまたはサインイン後、HubSpotアカウントは 自動的に接続する OAuth 2.0を使用してMetFormに接続します。最後に、 "変更内容を保存" ボタン。
注意:
以前は API ベースの接続がありました。HubSpot との API ベースの接続がある場合は、OAuth 2.0 を使用して上記のプロセスに従い、HubSpot アカウントをサイトに再接続してください。
HubSpotフォームを作成する #
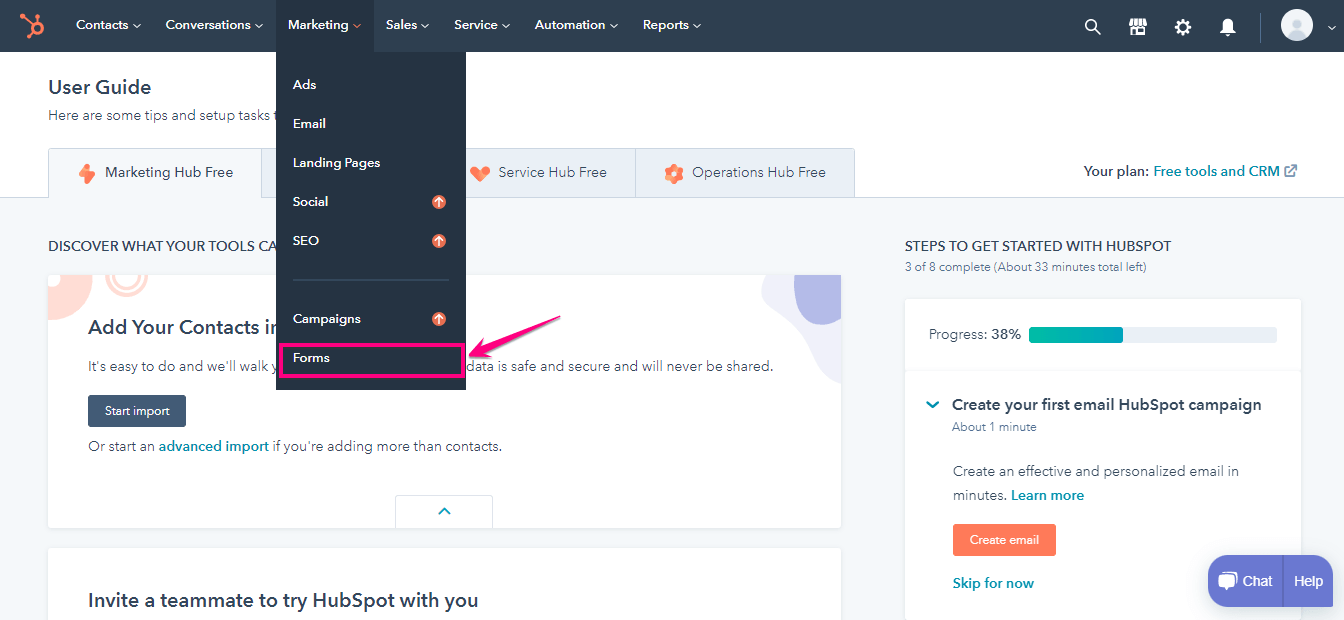
- に行く ハブスポット=> マーケティング=> をクリック フォーム
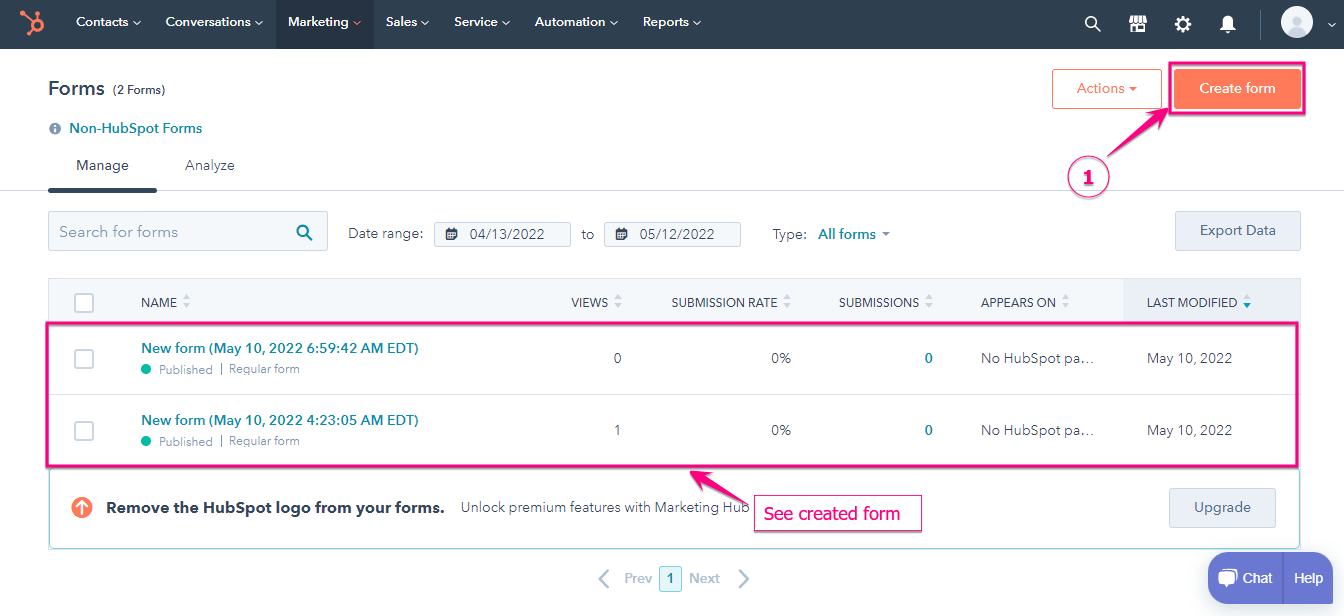
2. クリック フォームを作成=> 作成されたフォームが登場
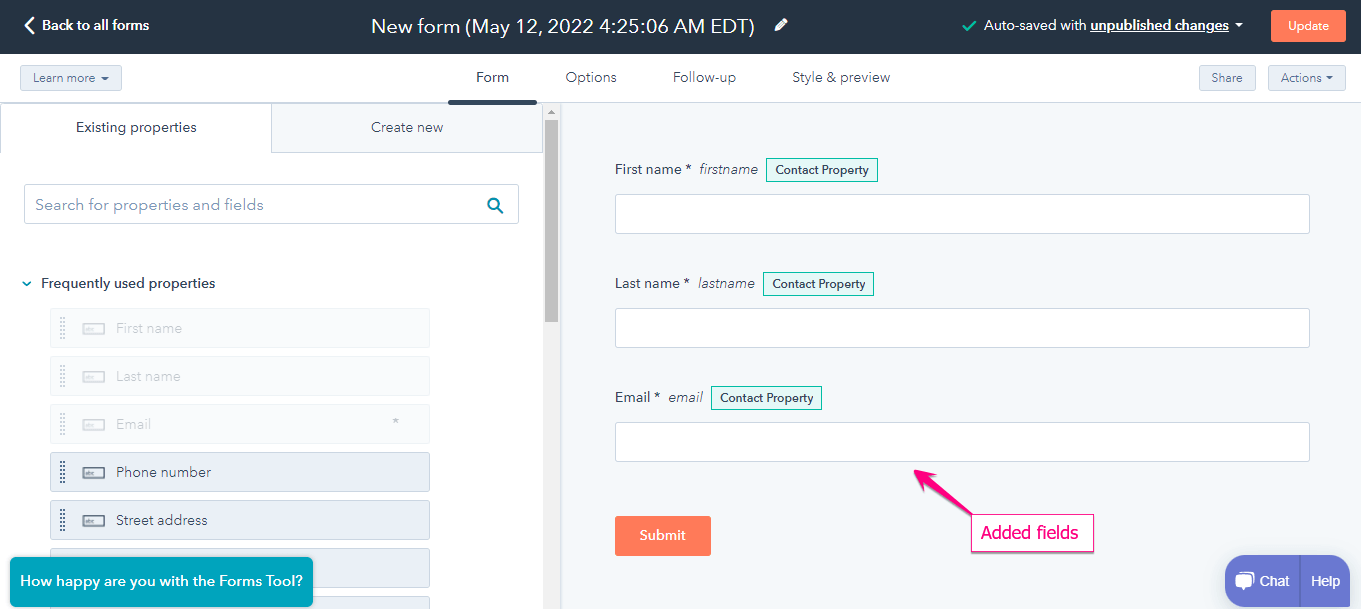
- Hubspotで作成されたフォームフィールドを表示する: メールアドレス、名、姓
新しいフォームを作成する #
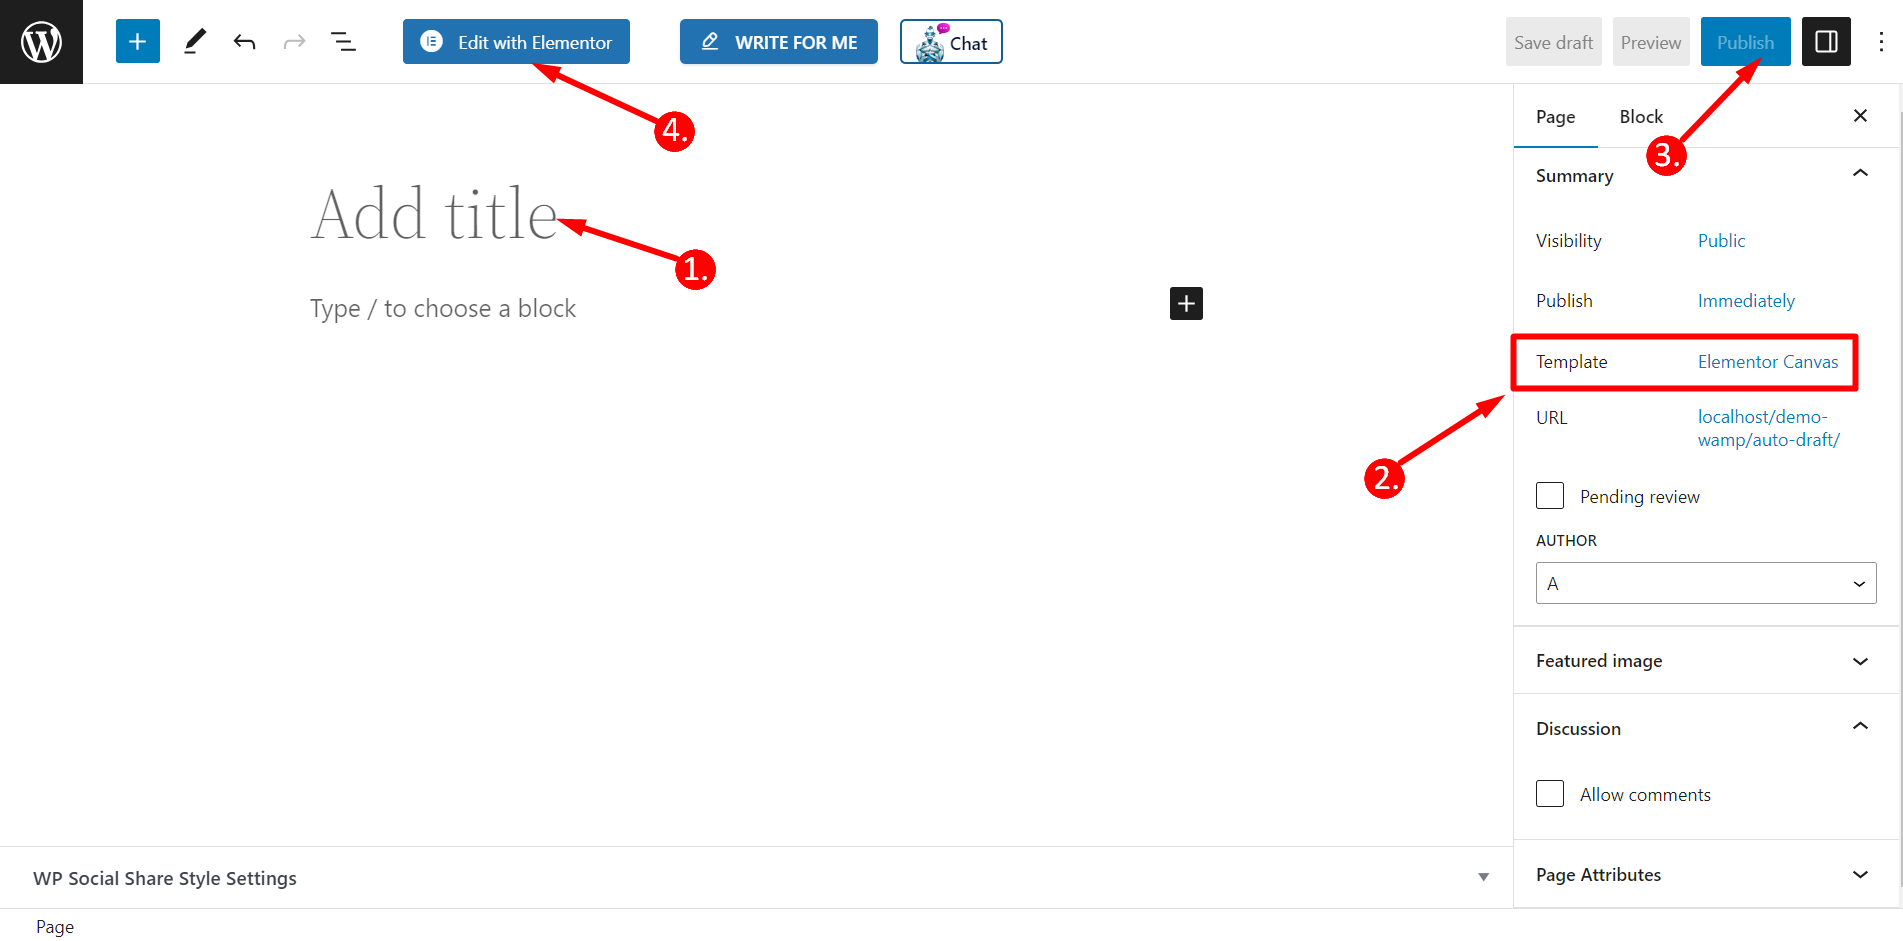
ステップ=>1: に行く ダッシュボード=> ページ=> 新しく追加する=>
- 追加 ページタイトル
- テンプレートの選択 エレメンターキャンバス
- クリック 公開
- Elementorで編集する
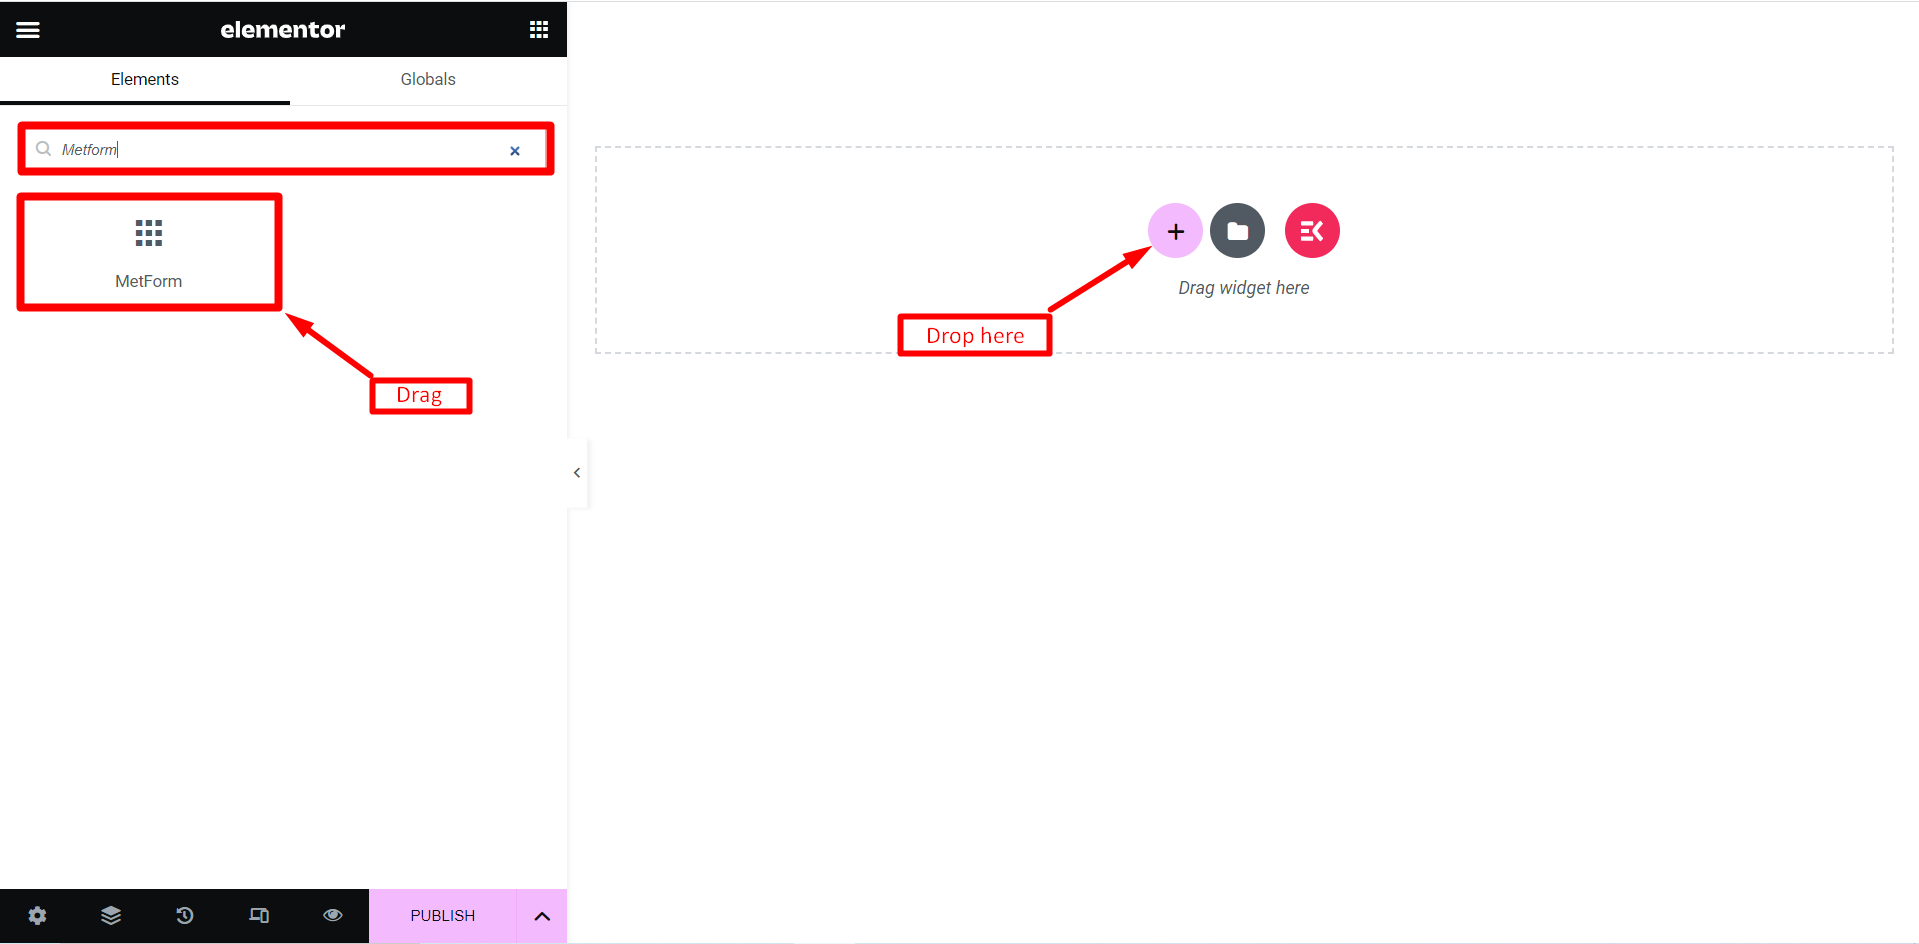
- ステップ=>2: Metform を検索し、MetForm をプラス アイコンにドラッグ アンド ドロップします。
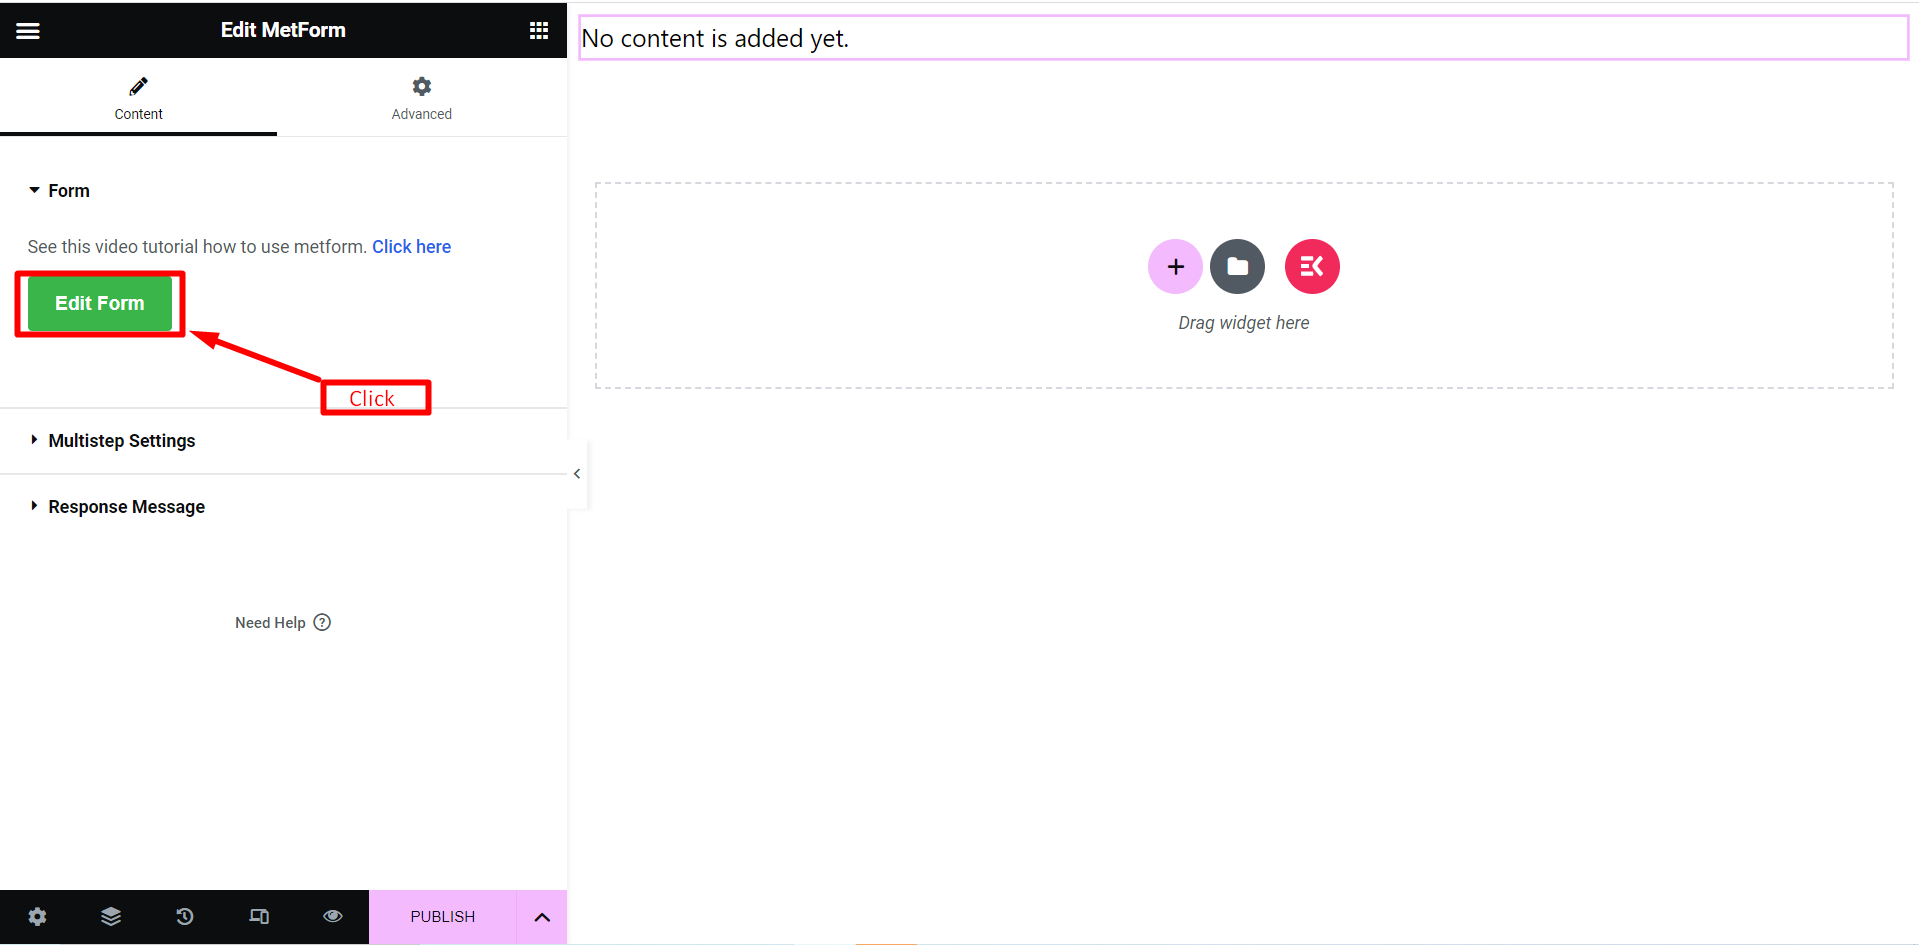
- ステップ=>3: クリック 「フォームの編集」 ボタン。
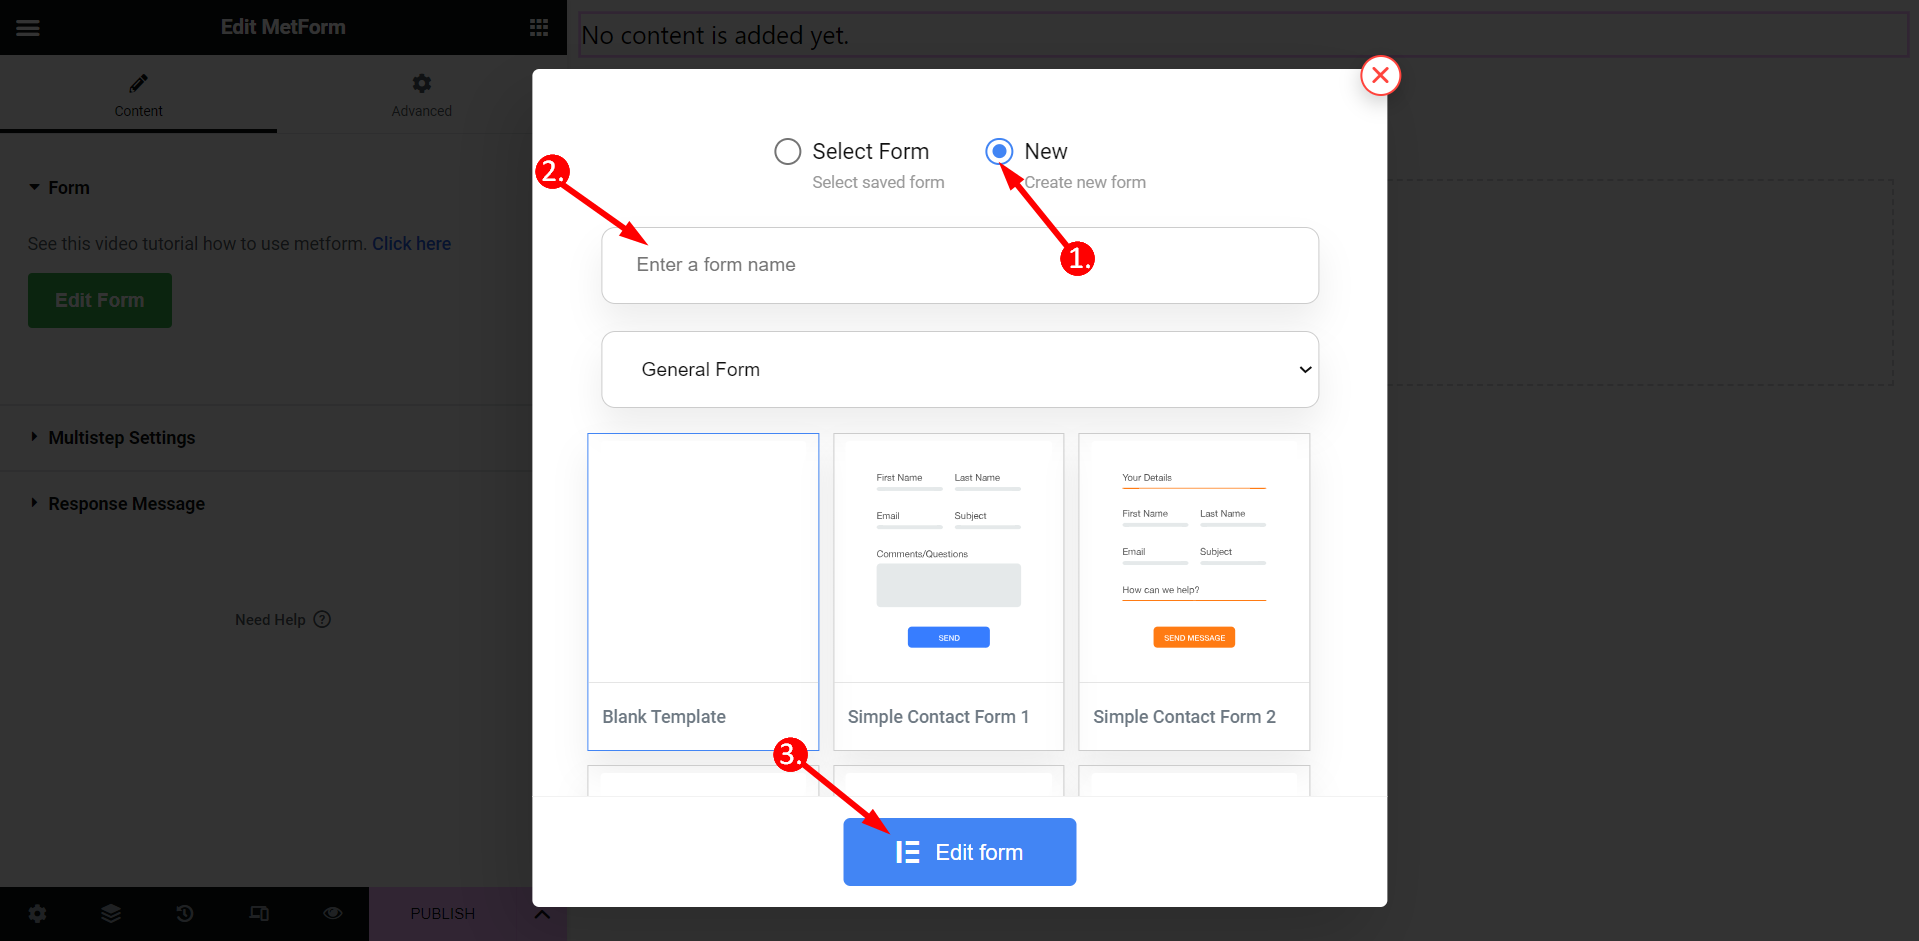
- ステップ=>4: 選択する 新しい=> を入力してください フォーム名=> をクリック フォームの編集
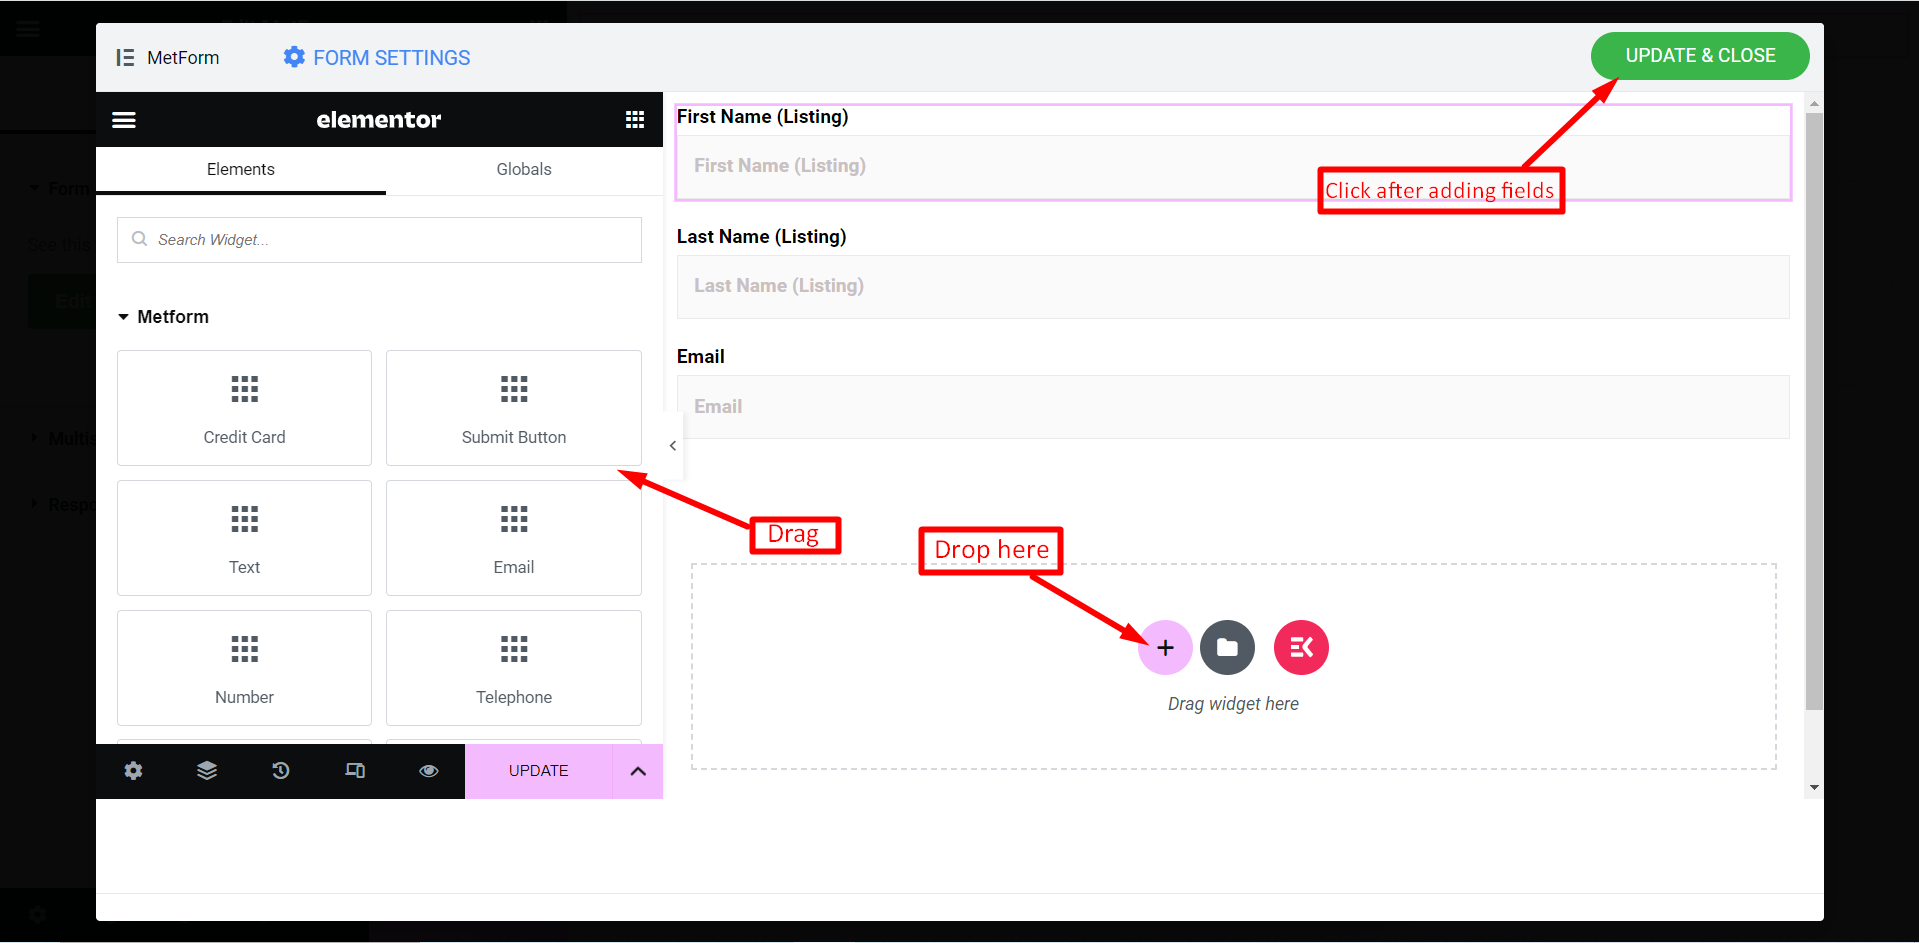
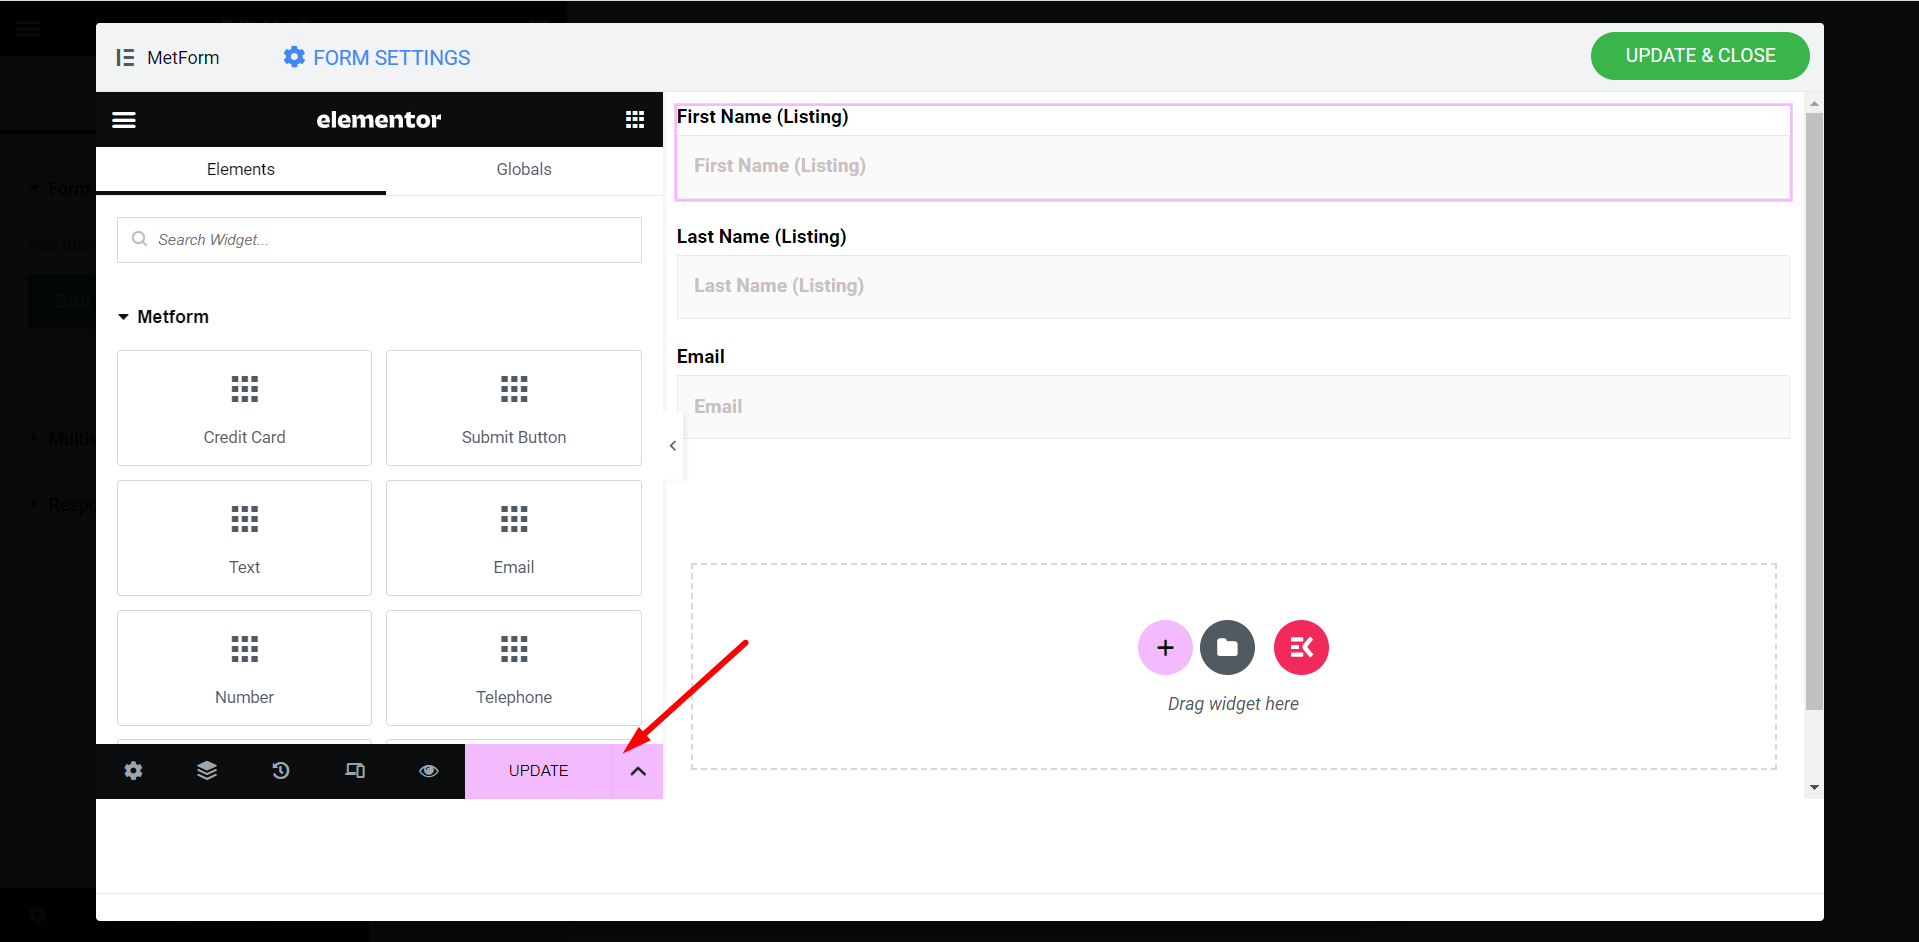
- 次の名前の 3 つのフィールドをドラッグ アンド ドロップするだけです。 Eメール , 名前苗字 同じ Hubspot で作成されたフォームフィールド
- クリックしてください 更新して閉じるボタン。
ついに、 「公開」を押します ボタン。
HubSpotの連絡先 #
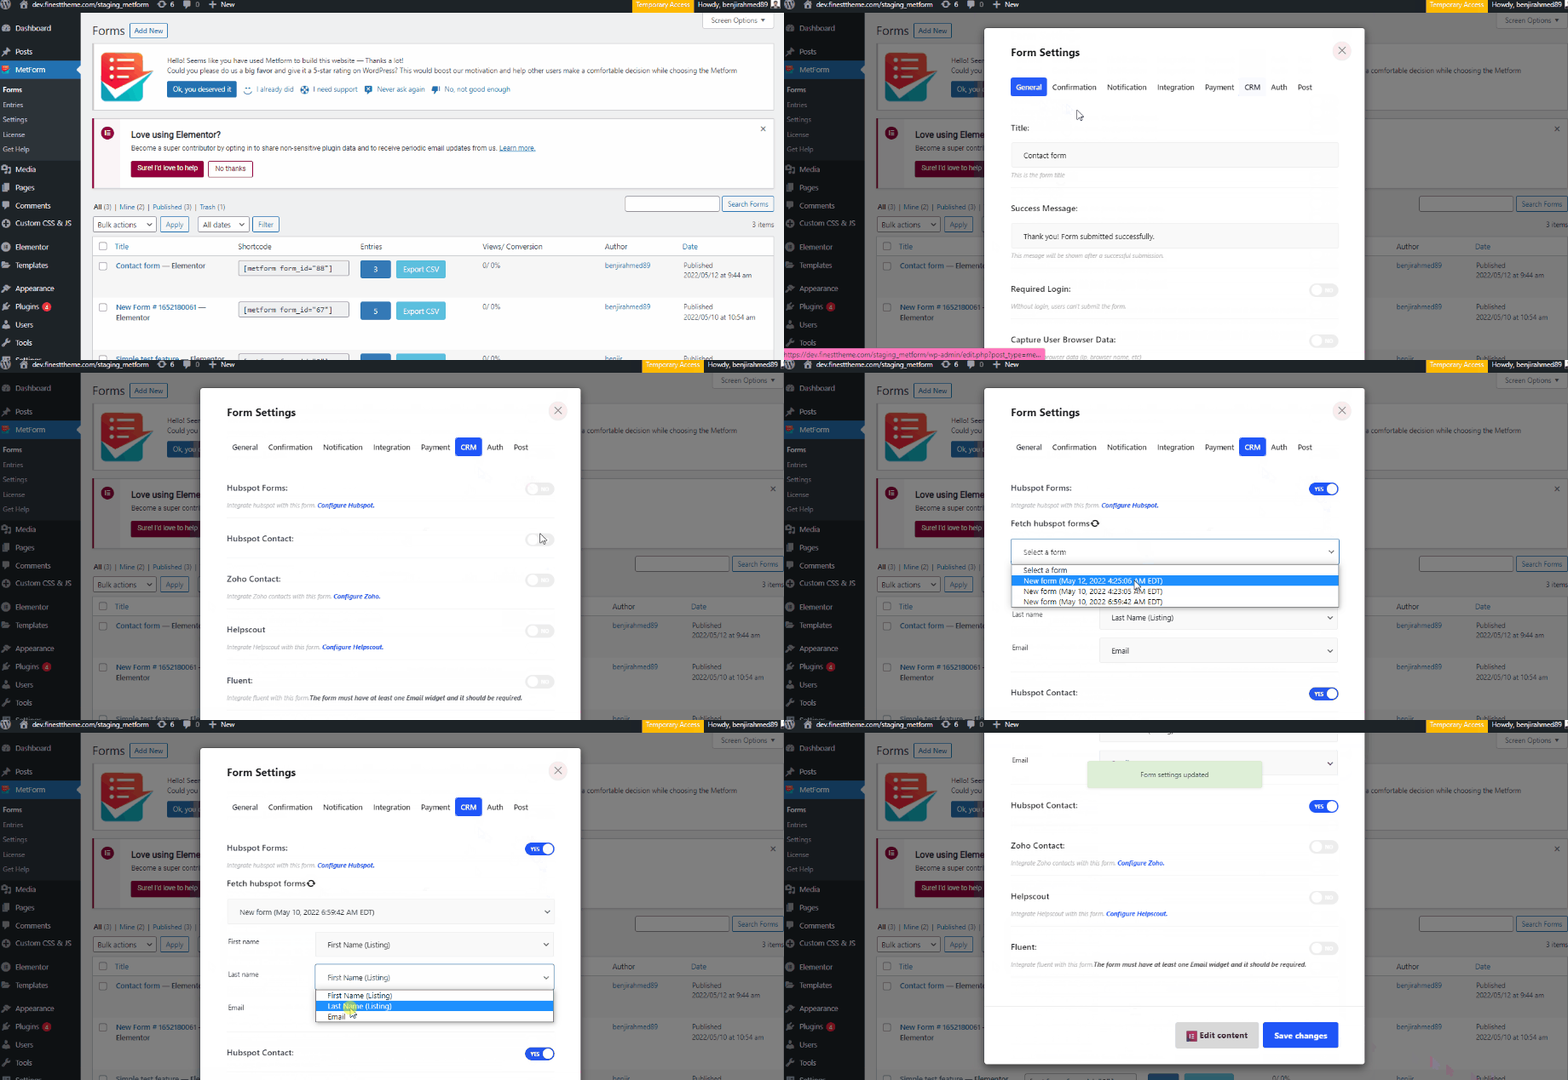
- 次にフォームの設定をいくつか行う必要があります。これを行うには、 管理パネル 訪問する MetForm>> フォーム。 それから フォームを編集する HubSpotを追加したいサーバーを選択します。その後、 一般タブ そして ストアエントリを有効にします。
今 HubSpot フォームとコンタクトを有効にする CRMタブの下にあります。 HubSpot Formsの取得をクリック そして 類似のフォームを選択 HubSpot で作成したものです。ここからが本題です。
左側のフィールドは、サイトの問い合わせフォームに追加したフォームのフィールドで、右側のフィールドはHubSpotの問い合わせフォームのフィールドです。 右側で正確な HubSpot フィールド名を選択します。 たとえば、HubSpot フォームの名のフィールド名が「名 (リスト)」である場合は、gif のようにそれを選択する必要があります。このように、HubSpot フォームのすべてのフィールド名を選択します。
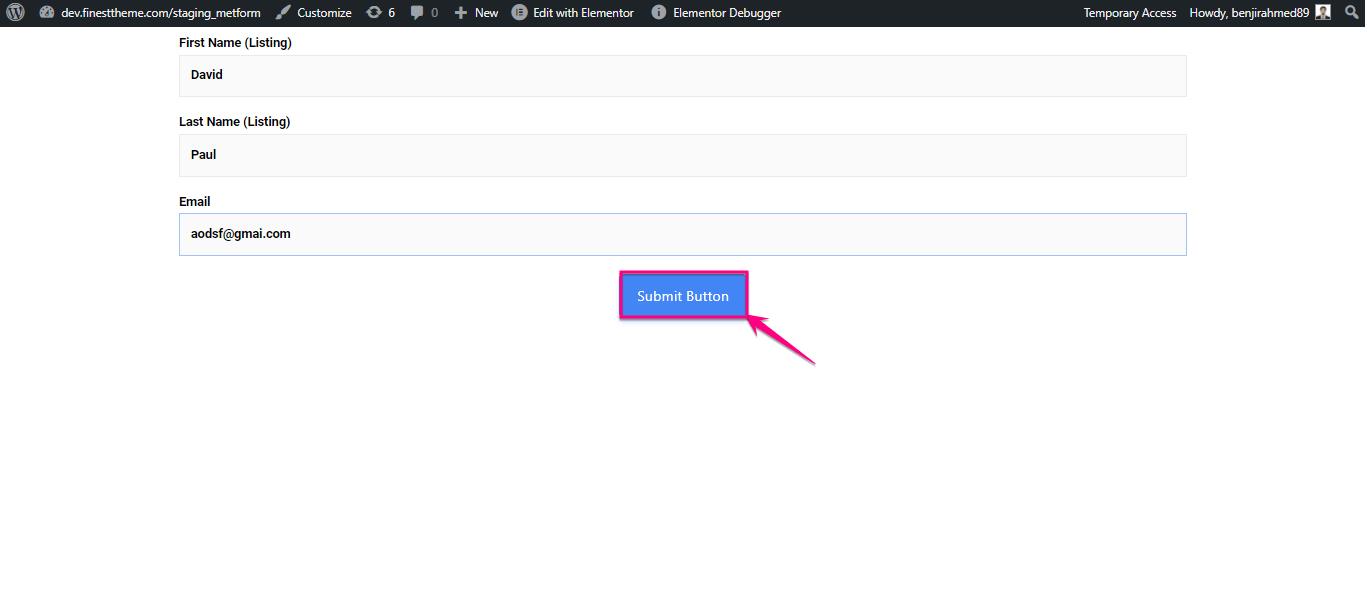
2. に行く サイト=> フォームに記入してください をクリックして、 送信ボタン
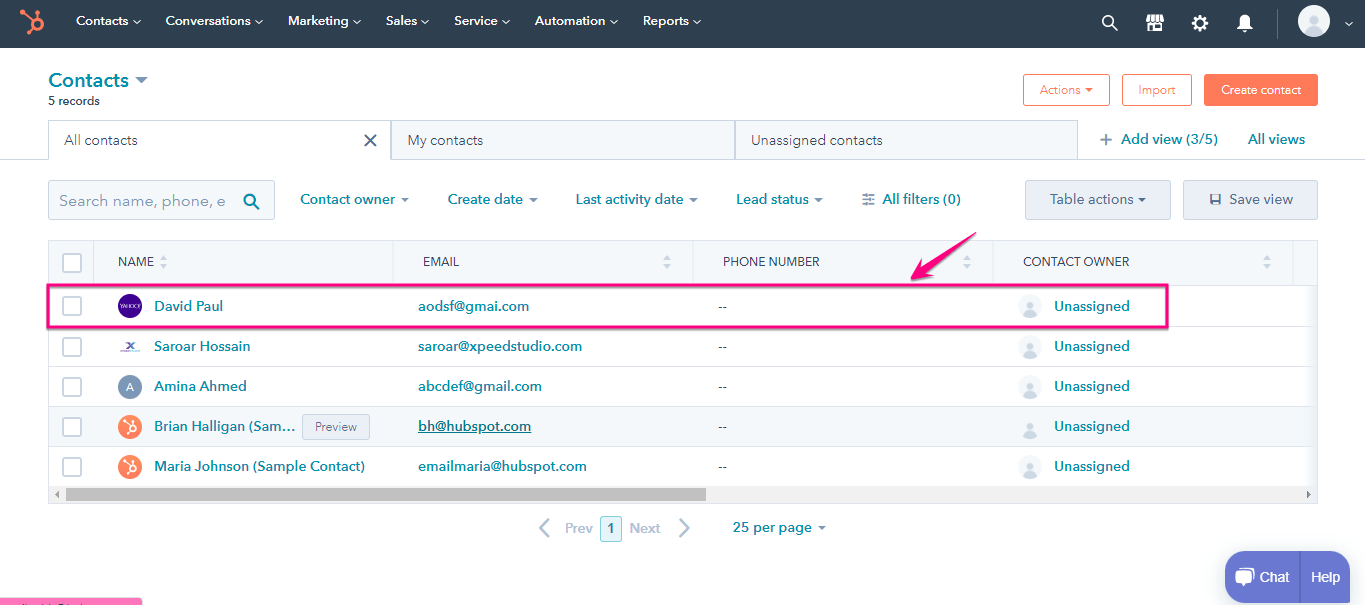
3. に移動します ハブスポット=> 連絡先をクリック
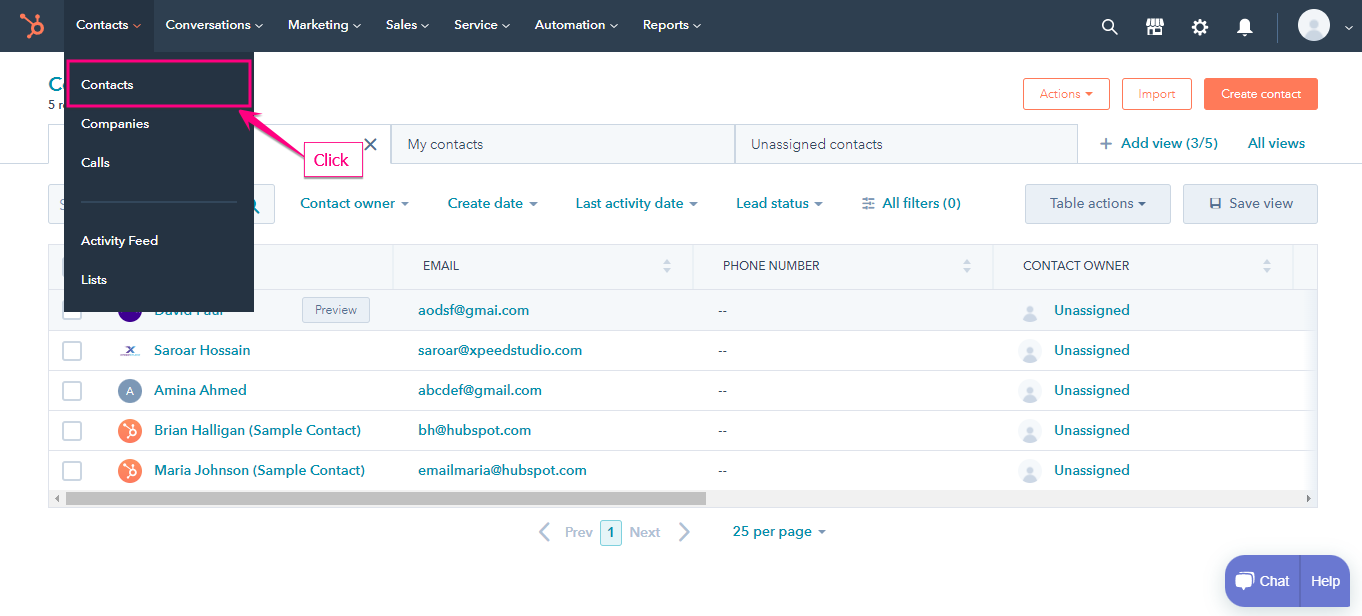
- ご覧いただけます。 送信されたお問い合わせフォームはこちら.