

 Japanese
  English
  German
  Spanish
  Italian
  French
  Danish
  Portuguese
  Swedish
  Polish
  Korean
 はじめる #
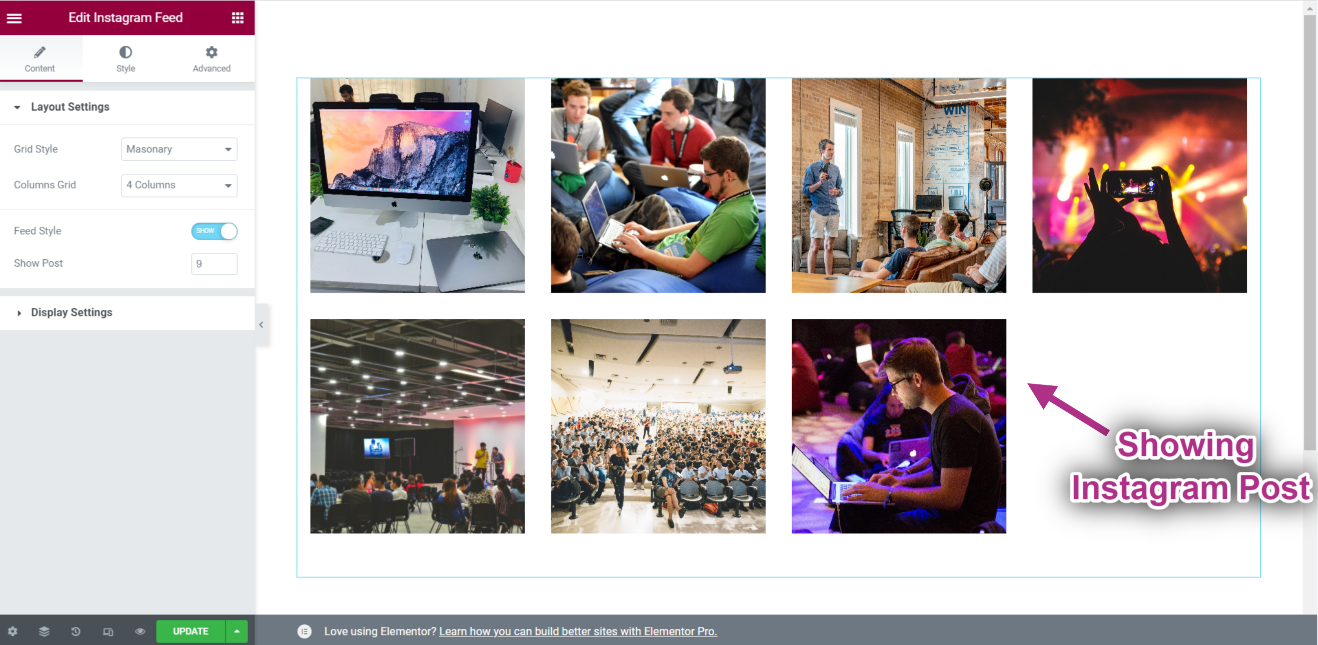
の インスタグラムウィジェット 最新の情報を表示できます インスタグラム WordPress サイトに投稿します。すべての方法を詳細に説明する包括的な記事は次のとおりです。段階的なプロセスに従って Instagram フィードに接続します。
インスタグラムを生成する ユーザーIDと アクセストークン #
InstagramのユーザーIDとアクセストークンを生成する方法は次のとおりです。
First browse to this link: developers.facebook.com/apps. Note that you need to be logged in here with your Facebook credential. Or, it will automatically synch with your Facebook account, if you stay logged in.
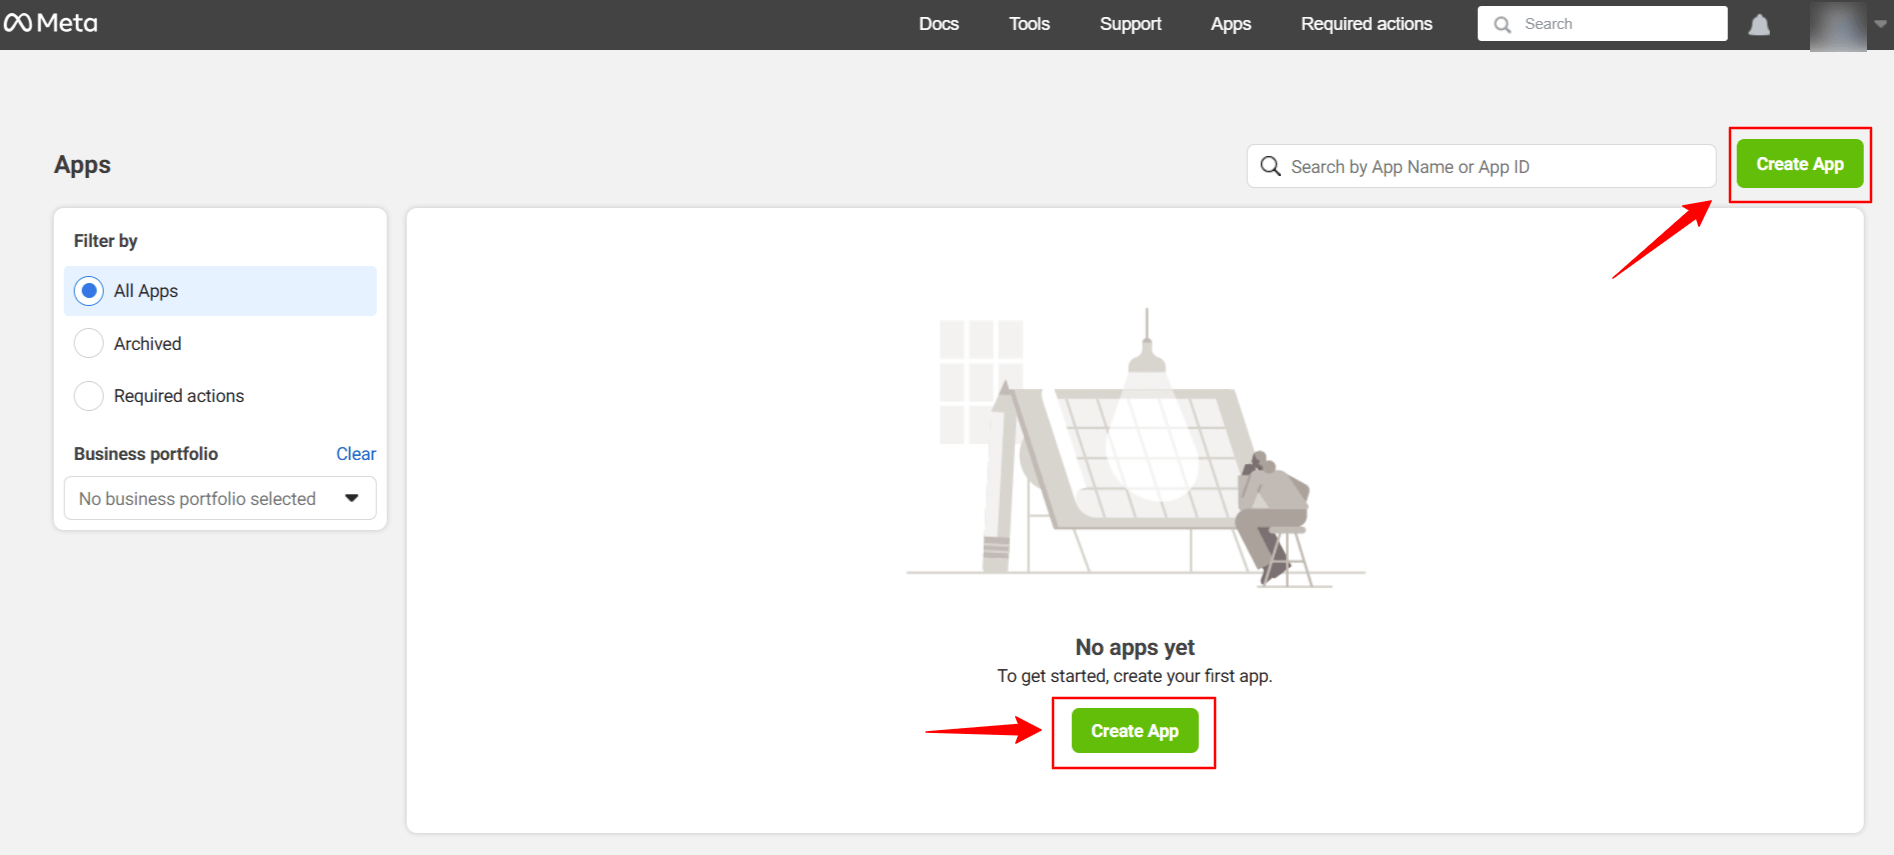
クリック Create App. Doing this, a page will load an interface with different tabs.
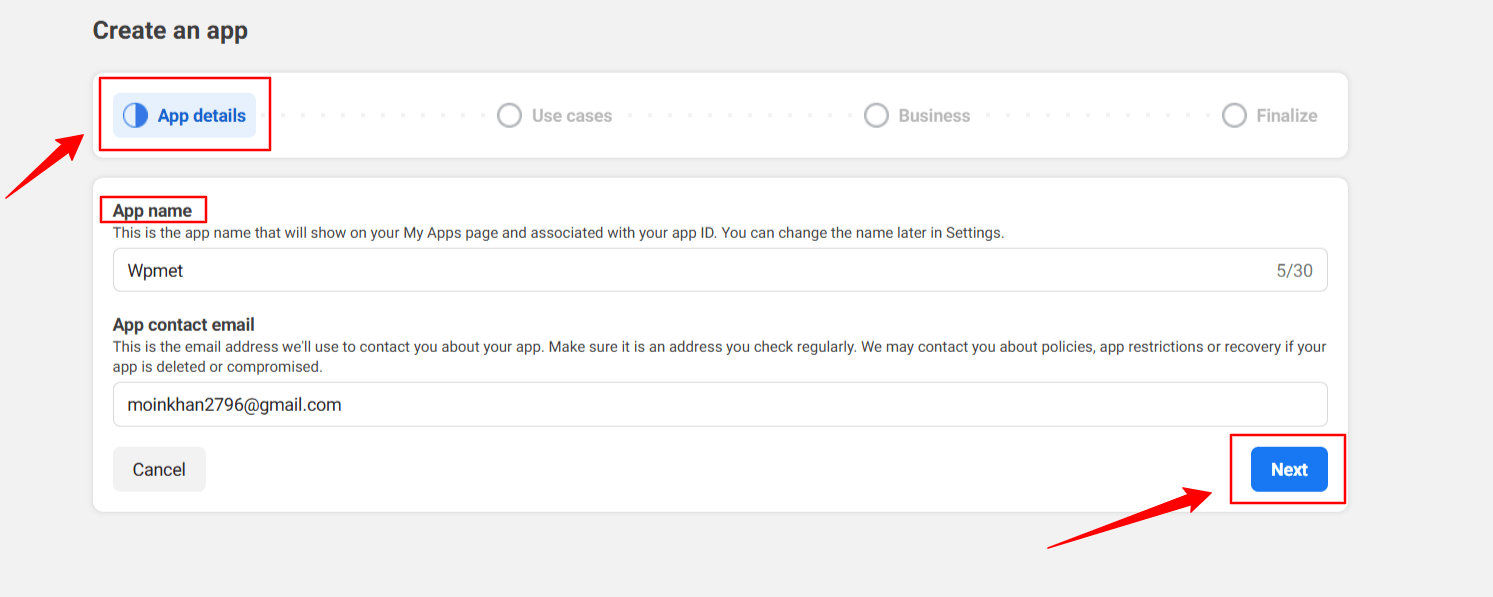
Give a name to the app, for this demo tutorial, I enter the app name as うpメット。 次に、 次 タブ。
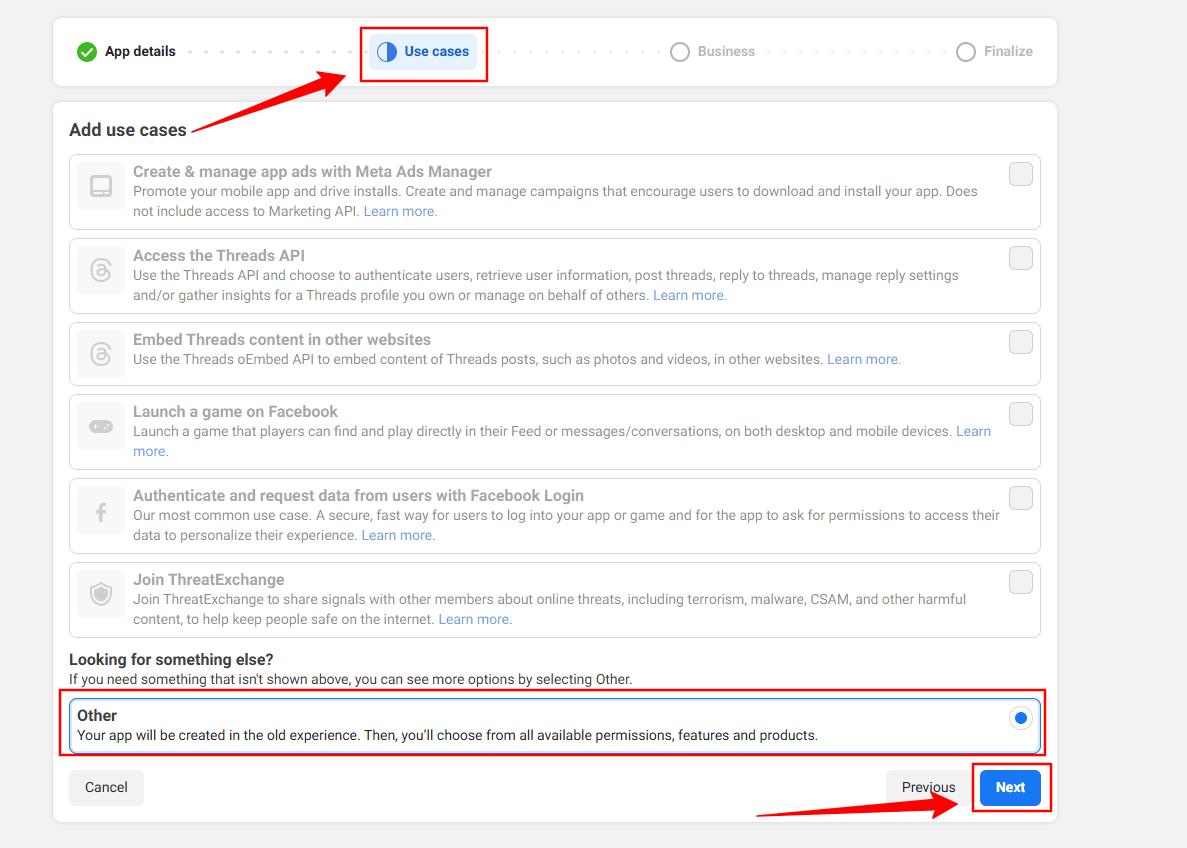
Then, select the “Other” option from the Use Cases tab. And, hit the 次 ボタン。
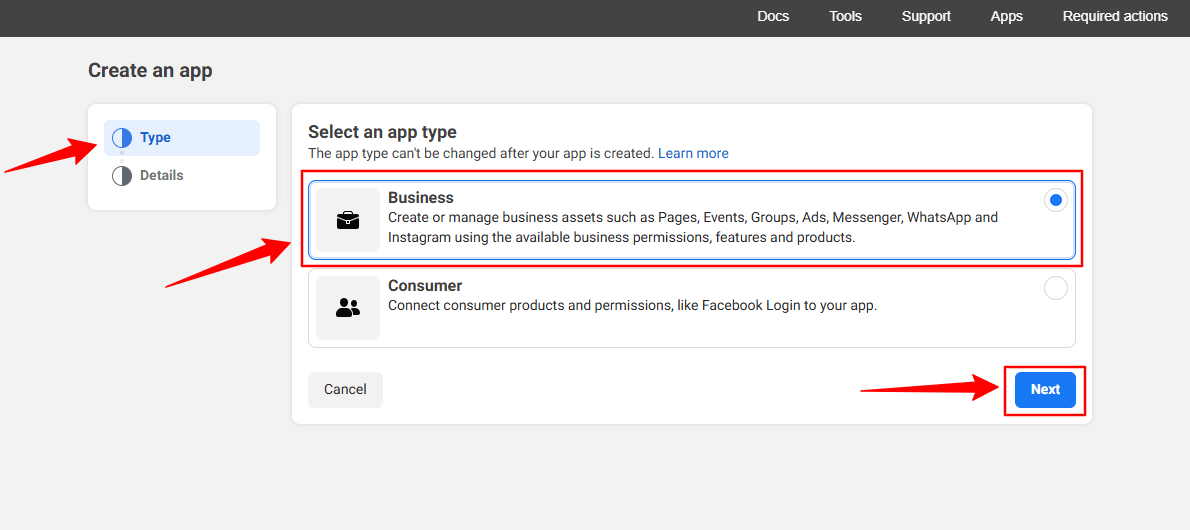
In the next screen, you’ll see two options. First, select 仕事 から タイプ タブ。
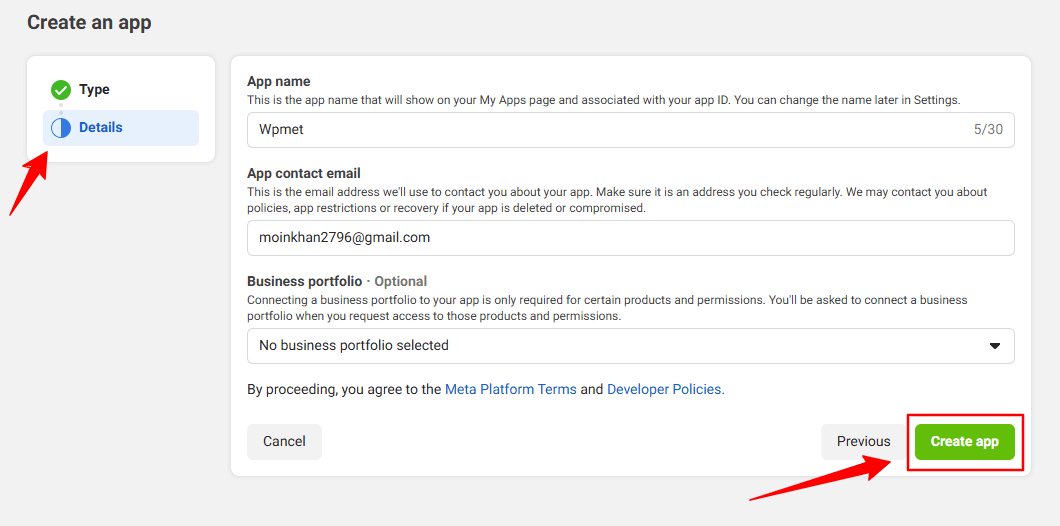
However, you don’t have to put any information in the 詳細 option, just click the アプリの作成 ボタン。
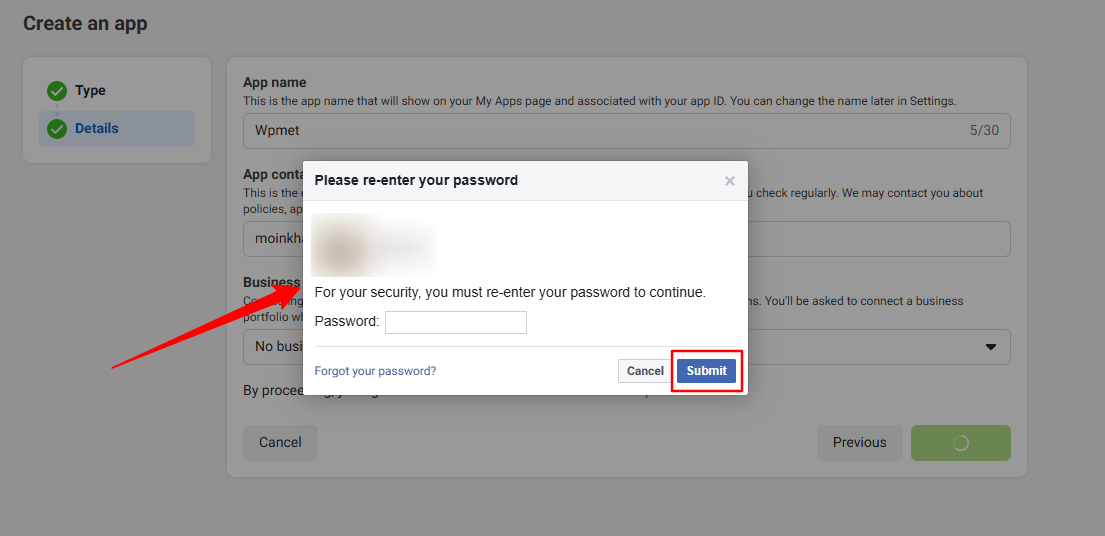
You may need to re-login with your Facebook credentials. Once, you’ve successfully login with your Facebook details, you’ll see all the apps.
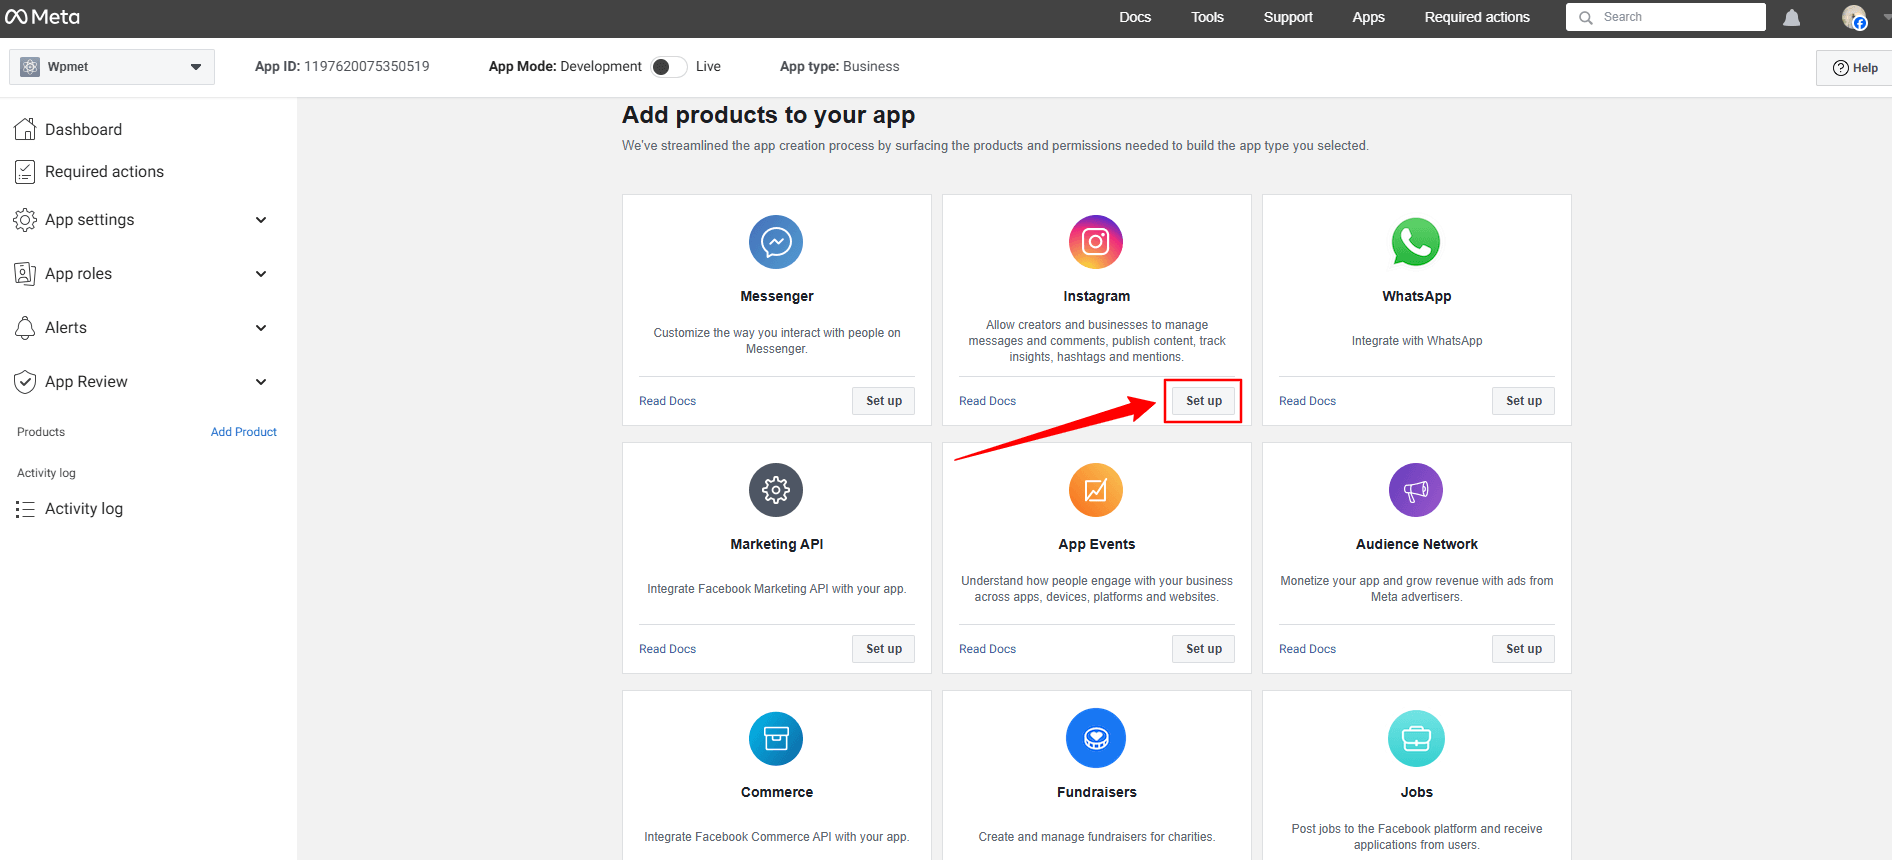
Look for the インスタグラム app, click the Set up option. Now, a page will load before you, where you can add Instagram account from the Generate Access Token option by clicking the Add account button. However, when you’ll click this button a popup will appear saying only a professional account can be used.
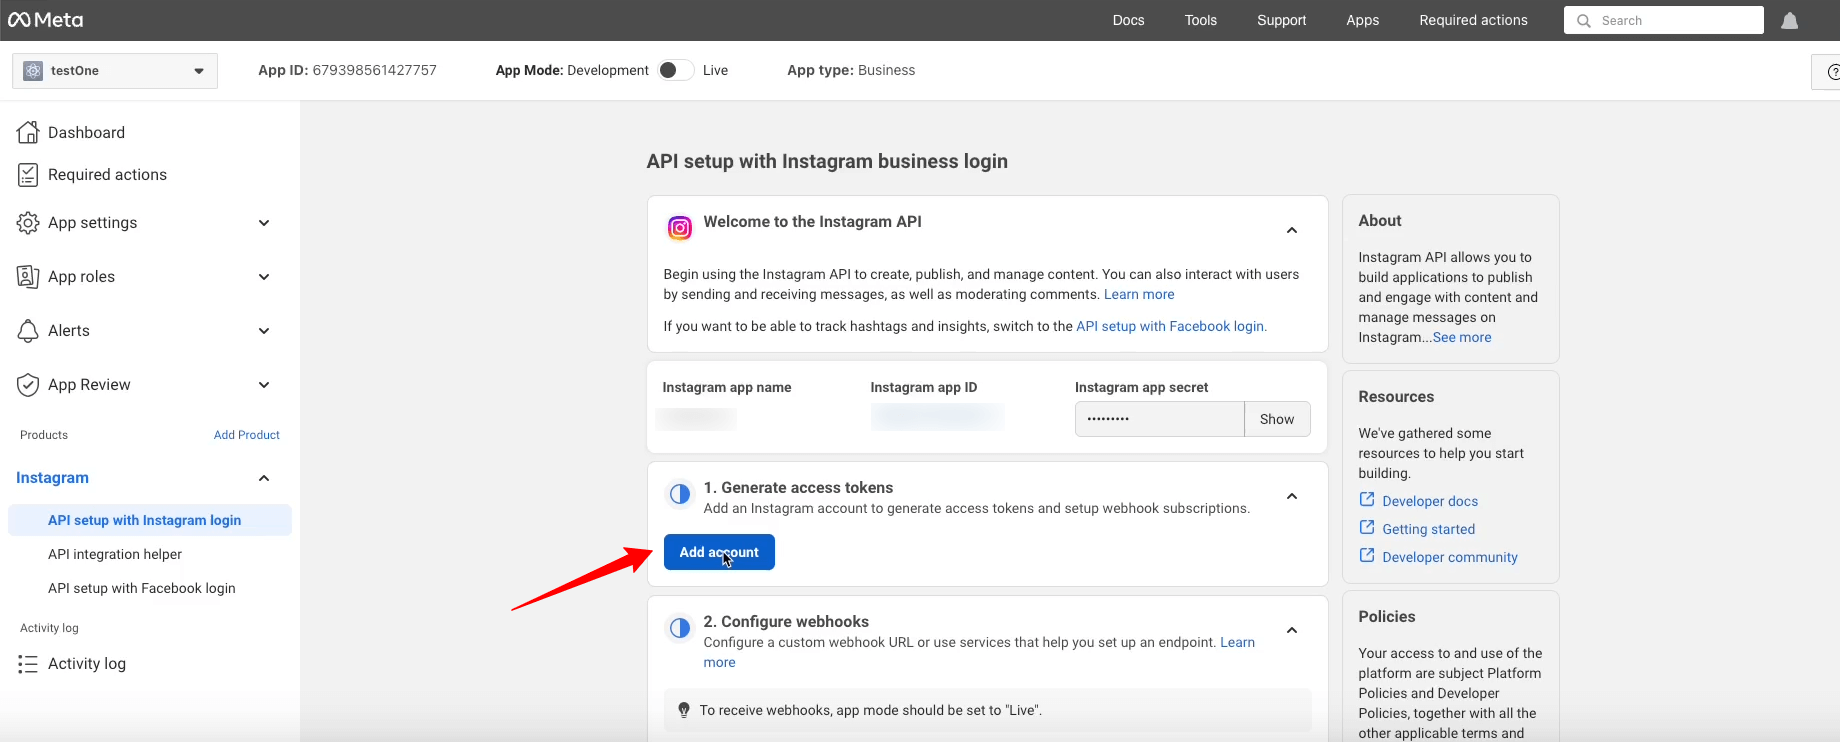
Here’s the professional account requirement popup.
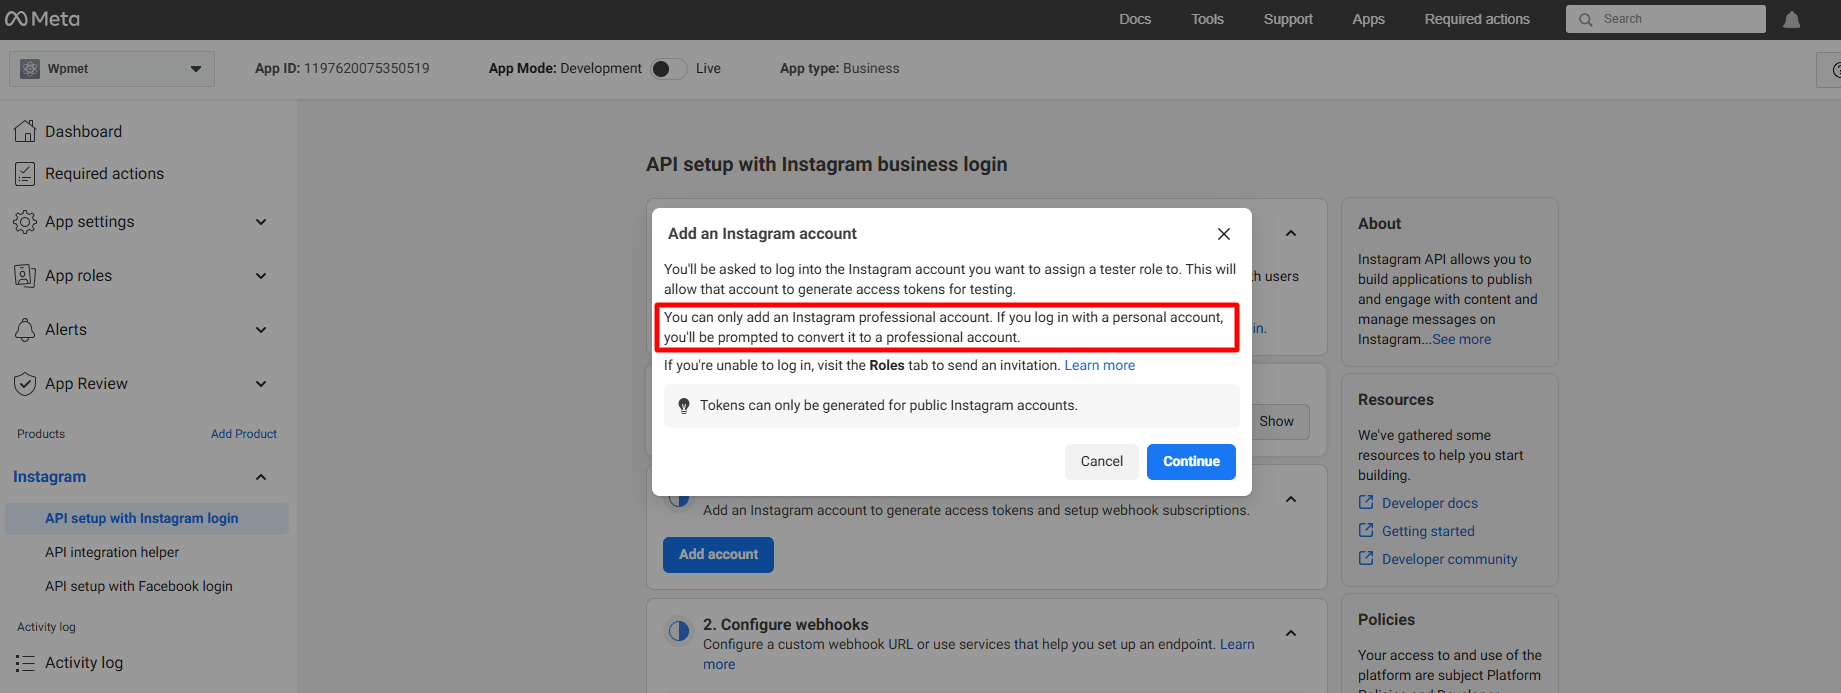
But, here we won’t proceed with this. Rather, we’ll add a regular account. To do this, go under the App Roles 落ちる。
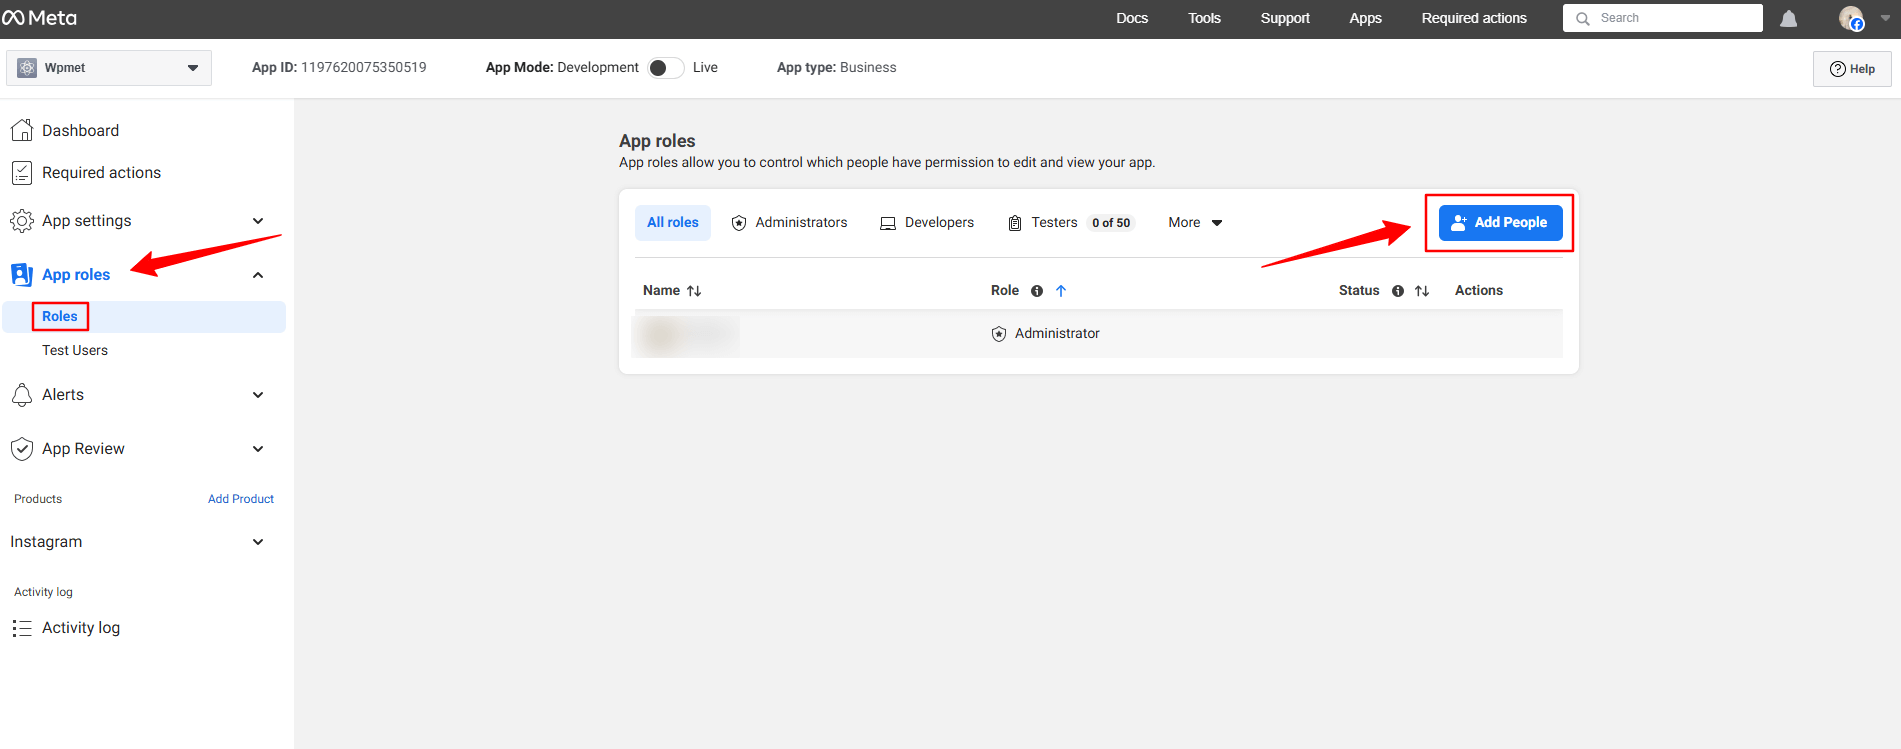
クリック Roles オプション App roles dropdown. In the next page, you’ll see an Add People button. Clicking here will reveal a popup like image below.
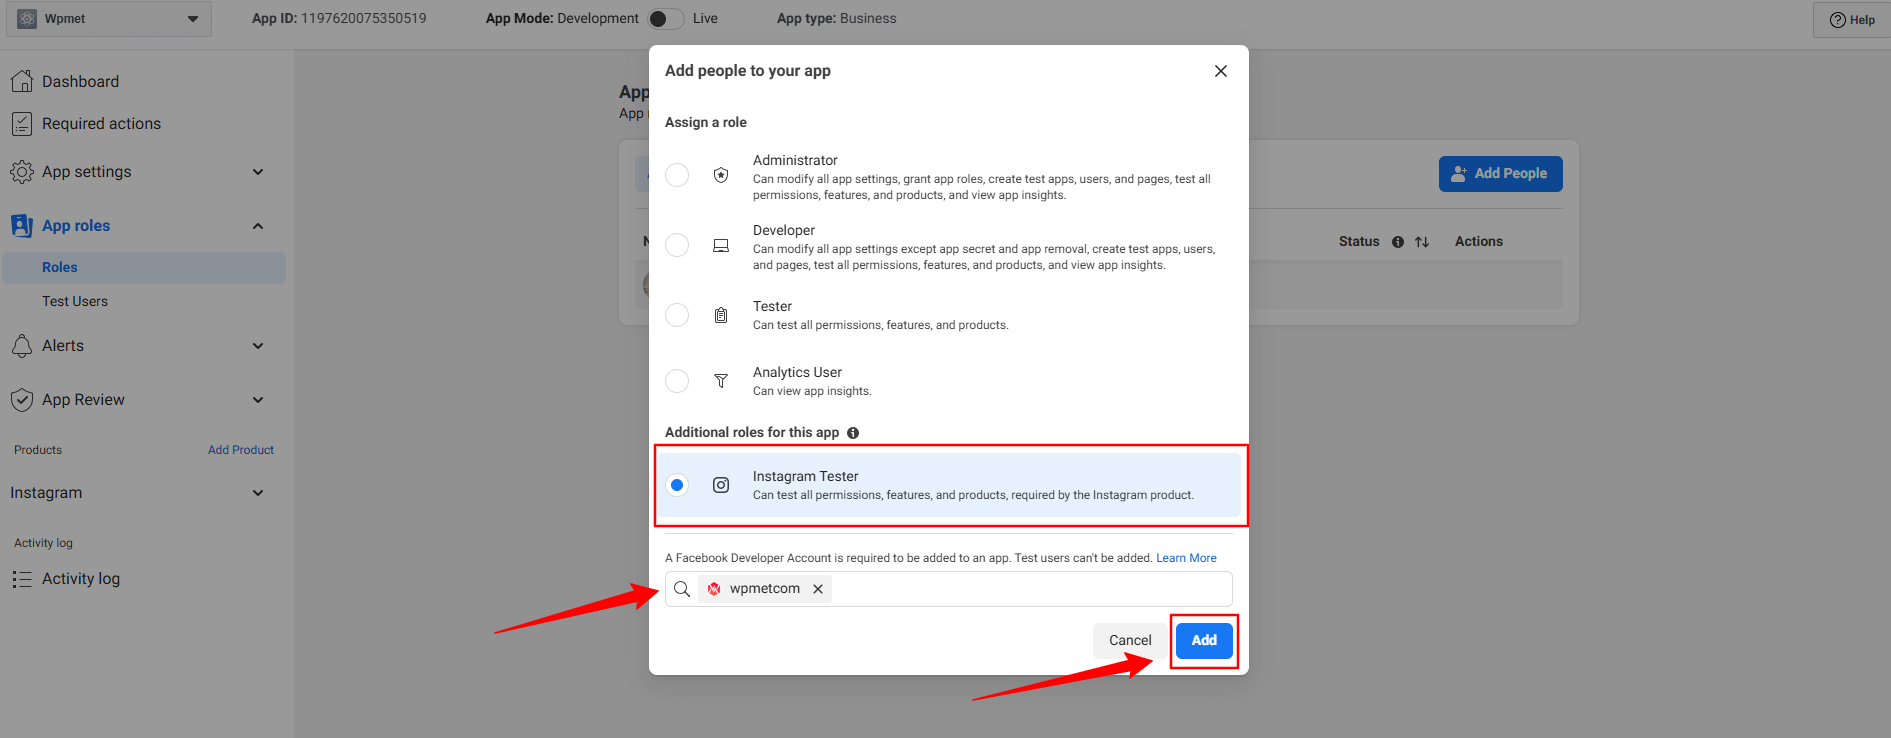
ここで、 Instagram Tester option. When you’ll check this option, a search box will reveal. Search for the Instagram account that you want to integrate with your Elementor website. For example, in our case, we’ve searched for the Wpmetcom Instagram profile and click it from the search result to add in the box.
次に、 追加 button. You will see the pending status with the newly added profile. To resolve that, you need to verify your Instagram account.
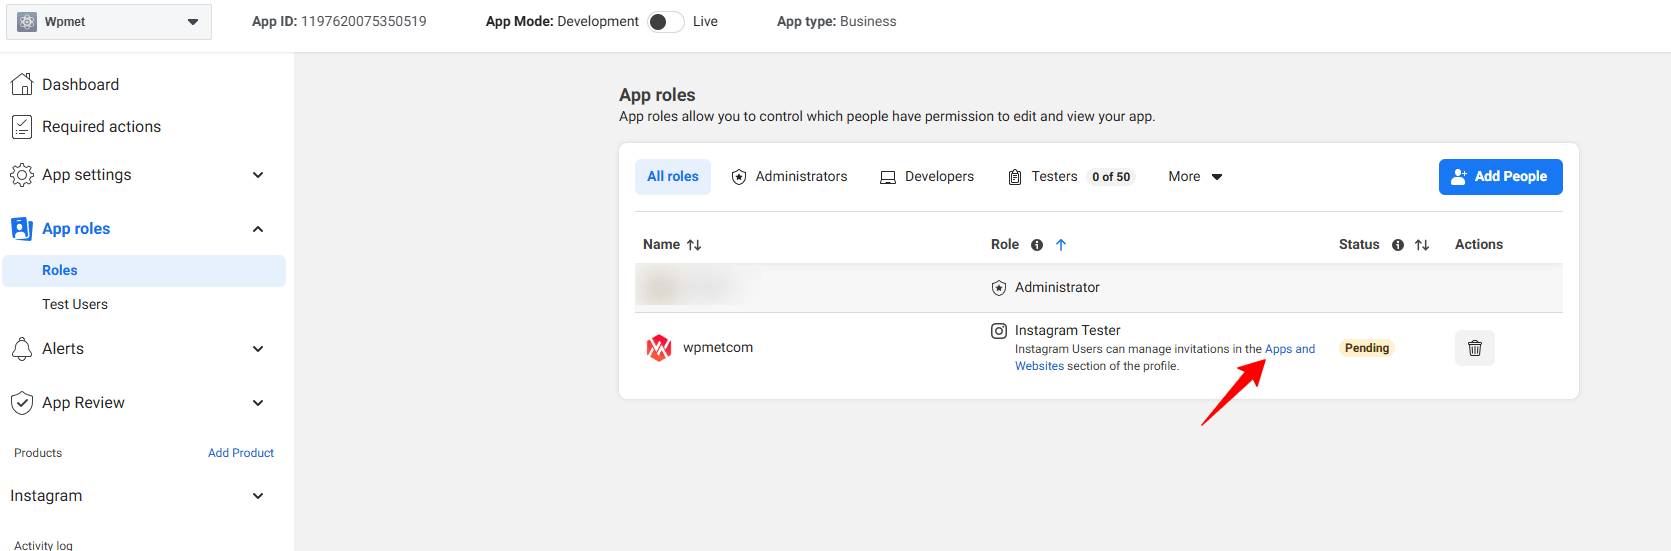
Click in the Apps and Websites, marked in the above image. Doing this will open up the Facebook profile in a new tab.
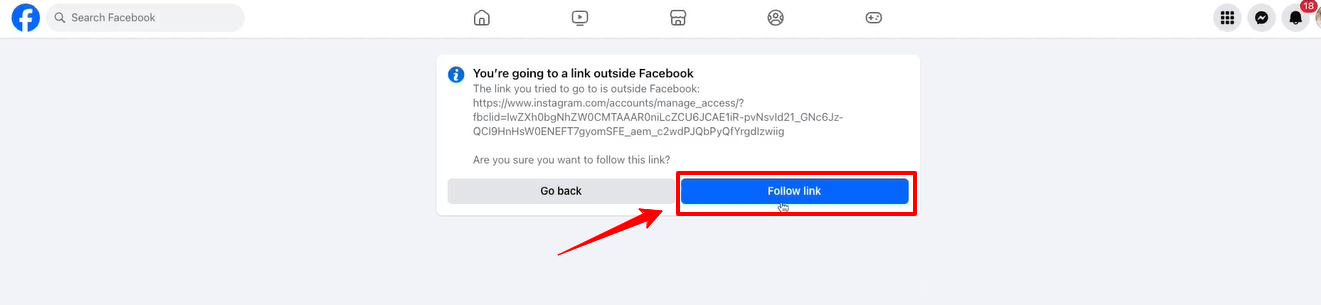
クリック Follow link option and it will take you to your Instagram profile web page.
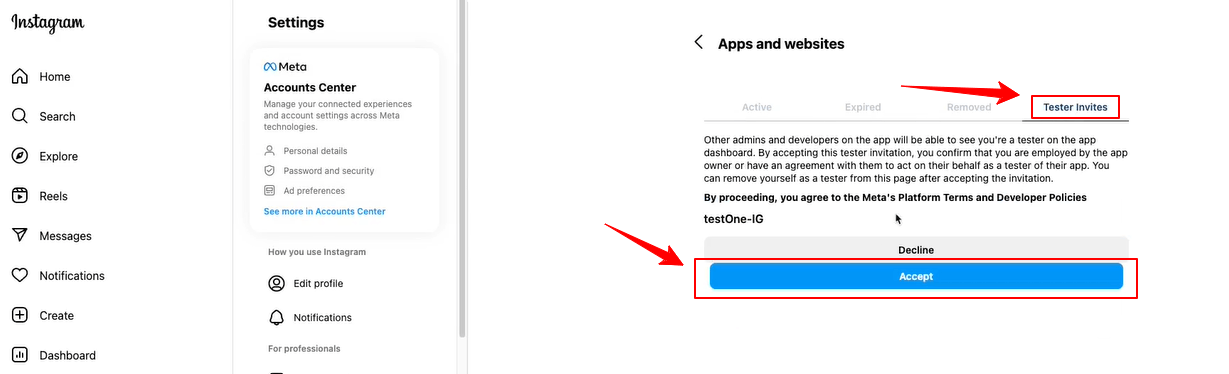
When the Instagram page will load on your screen, navigate to the Tester Invites tab and click the Accept button. Then, return to the Facebook developer dashboard and refresh the page. Now, there will be no pending status anymore with the newly added profile.
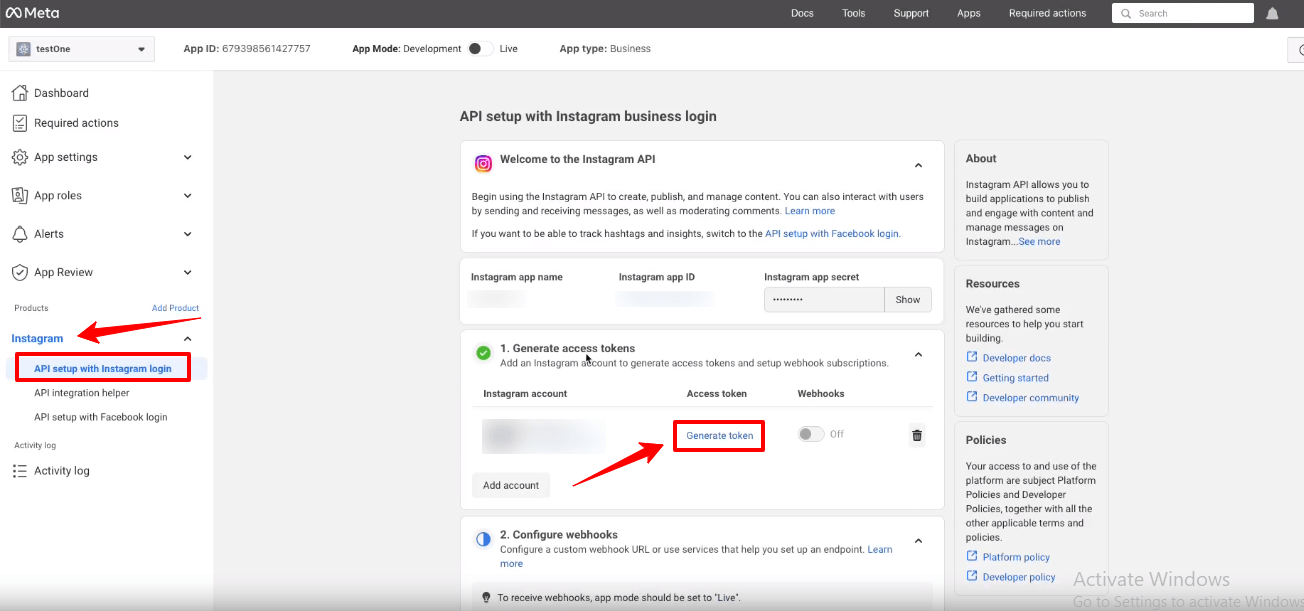
Now, you will see the green check mark with the Generate access tokens option. Click the Generate token option next to your instagram account and you’ll see a popup to re-login with your Instagram account.
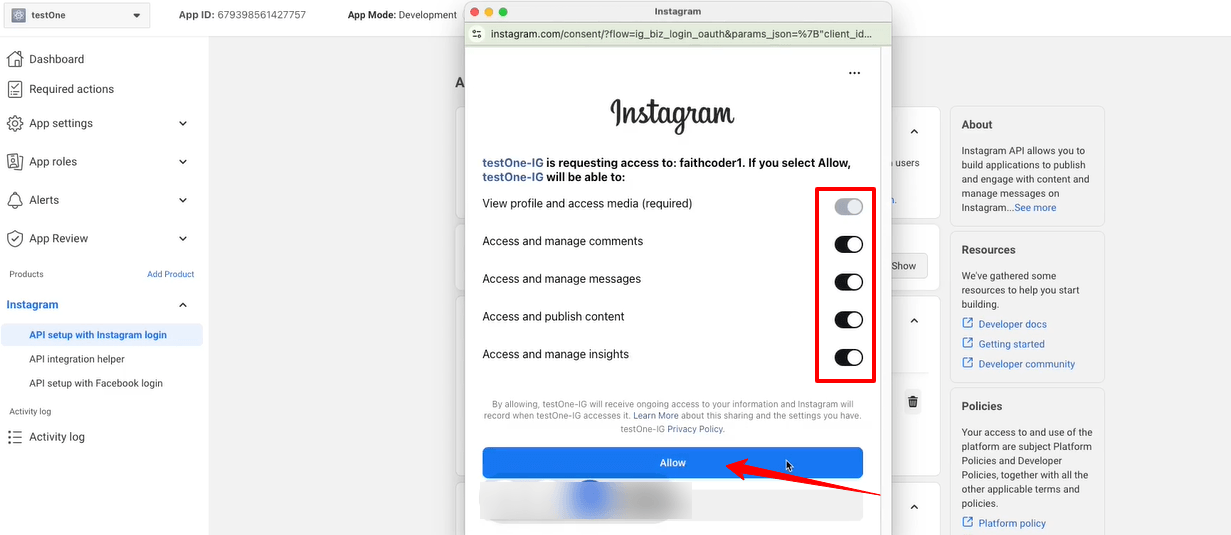
You also need to allow all the access and actions. Toggle all the options to permit like the image above and click the 許可する ボタン。
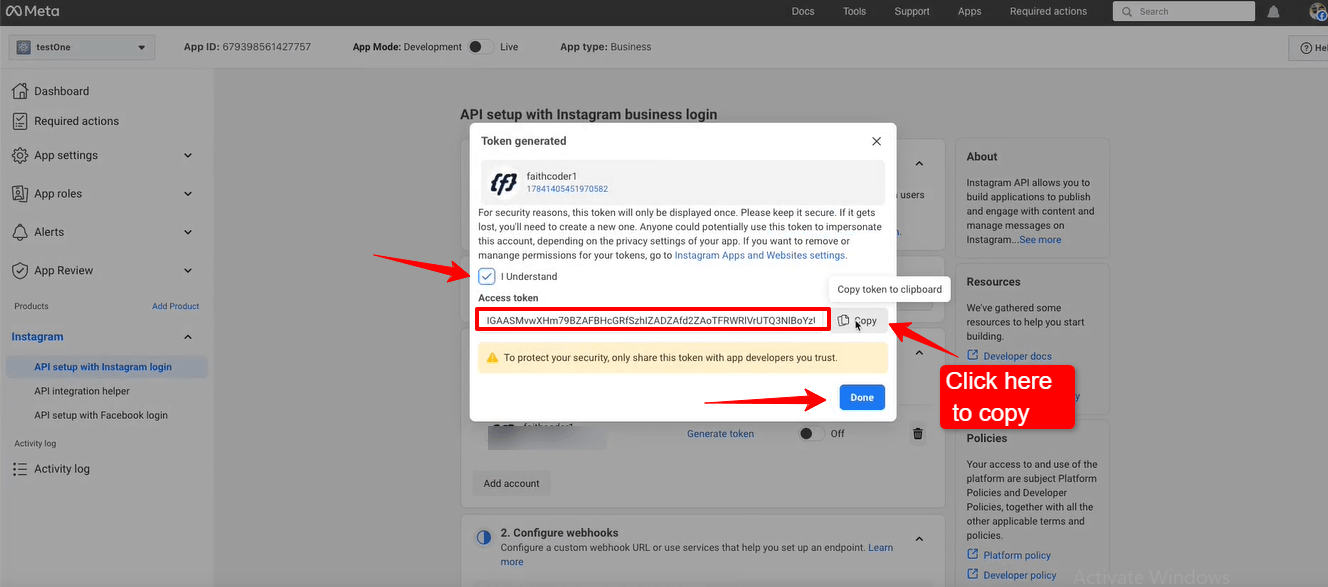
Up next, you’ll see the access token. Check the box with I Understand and select the コピー button to copy your Instagram access token. You need to paste it within the ElementsKit settings. We’re going to show the process in the next phase.
ヒット 終わり button to clear the popup.
Adding Instagram Access Tokens to ElementsKit #
必要になります。 ユーザーIDと アクセストークン Instagram に接続します。
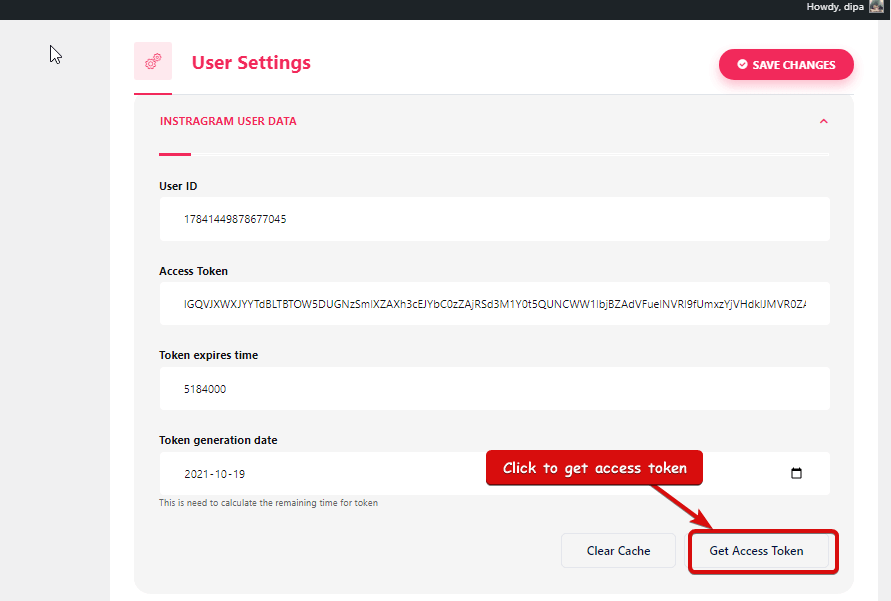
- ステップ=>1: に行く エレメントキット=> ユーザーデータ=> をクリックしてください。 Instagramユーザーデータ 展開するには -> をクリックします アクセストークンの取得.
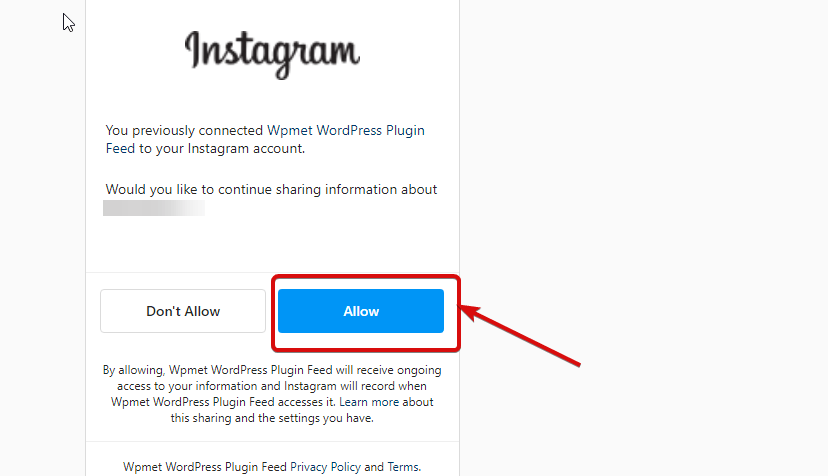
- ステップ=>2: Instagramアカウントを入力してください 資格 そしてクリックしてください ログイン。または、次の方法でログインできます。 Facebookのアカウント。 許可を求められたら、「許可」をクリックします。
- ステップ=>3: あなたのインスタグラムはこちらです ユーザーID, 長寿命トークン、トークンの有効期限が切れ、トークンが生成される. コピー 彼ら。
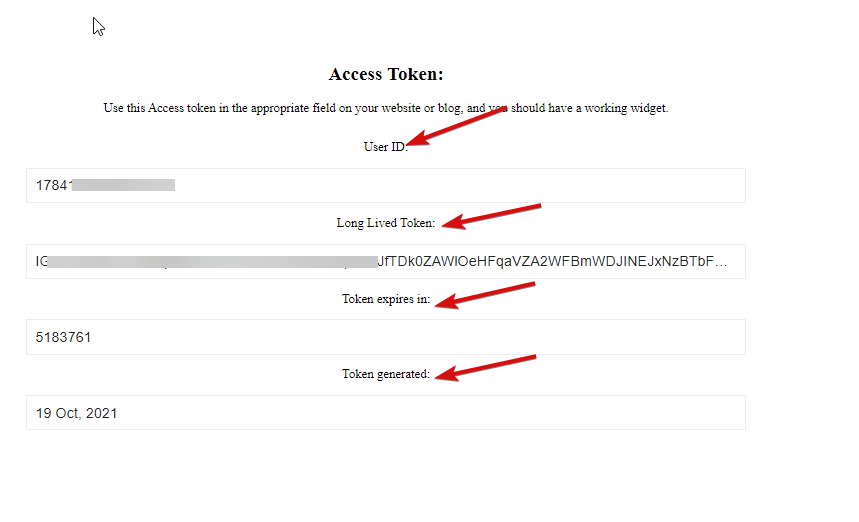
- ステップ=>4: 次に、に行きます Instagramユーザーデータ そして ペースト の ユーザーID、Lo有効なトークン、トークンの有効期限、およびトークン生成された値。
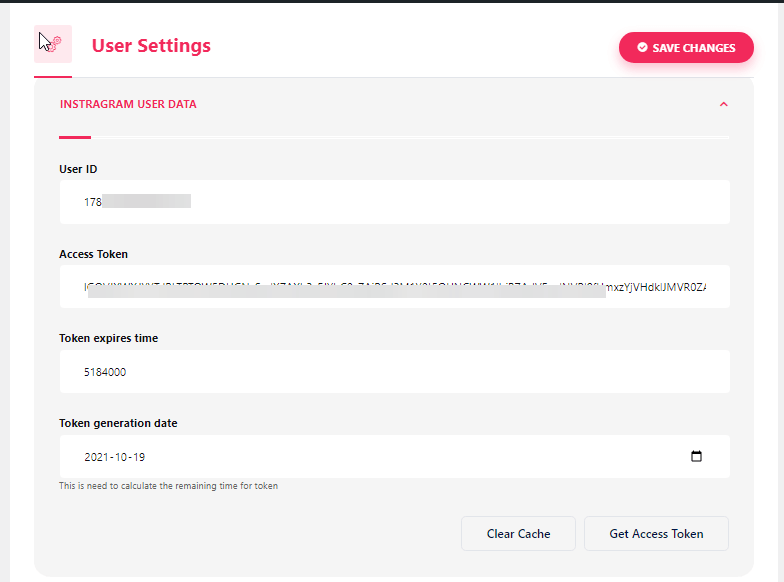
注: トークンの有効期限が切れる前にデータを同期する必要があります。
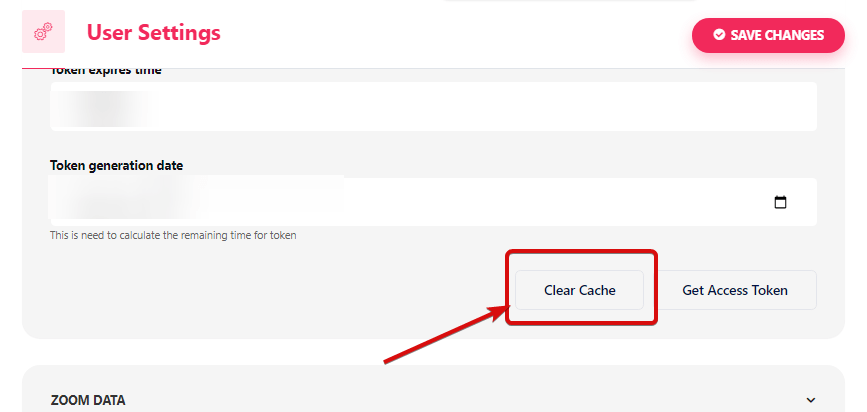
- データの同期に関して問題が発生した場合は、[キャッシュのクリア] をクリックしてください。
- ステップ=>5: に行く エレメンター=> 検索 インスタグラムフィード=> ただ フィールドをドラッグ アンド ドロップします.
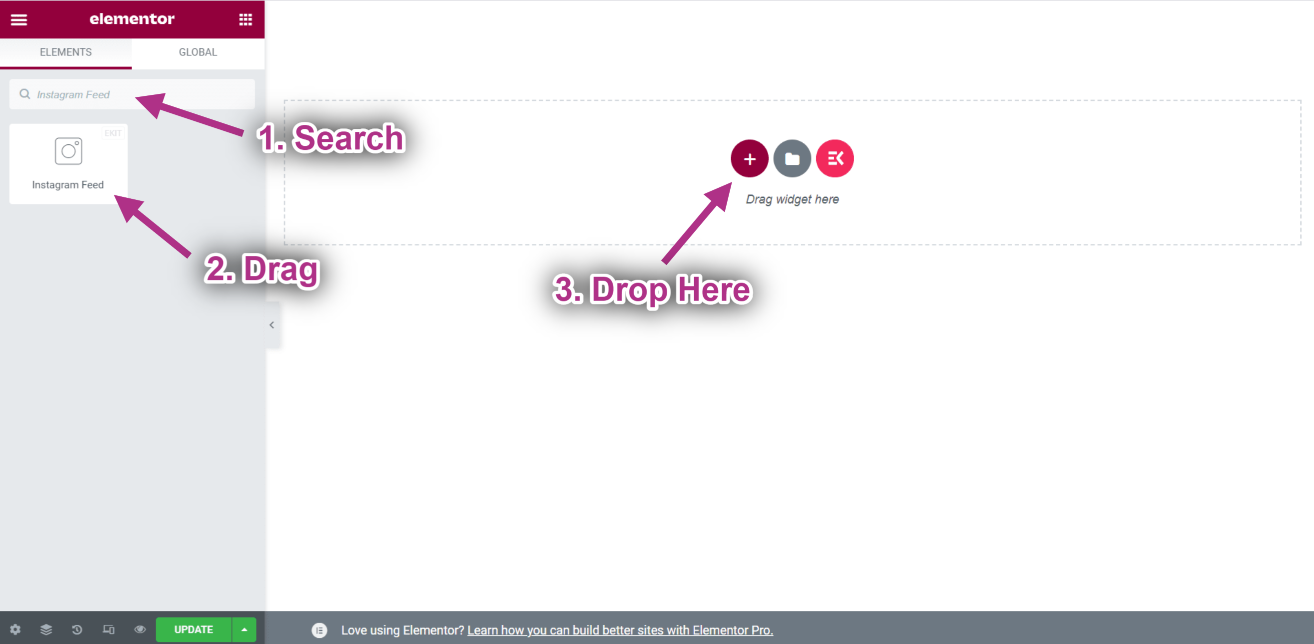
- Instagram フィード ウィジェットで Instagram の投稿を確認できるようになりました.