ShopEngine Pro viene fornito con il modulo WooCommerce Avatar in cui puoi configurare il modo in cui apparirà l'avatar dell'utente nella dashboard dell'account.
Quick Overview
This documentation will guide you to the process of adding Avatar with ShopEngine. This WooCommerce Avatar plugin includes a dedicated module to set up avatar to your WP site.
For this Documentation, you will need the following tools to add Avatar:
Tools Used: Elementor (free), WooCommerce (free), ShopEngine (free & pro)
After download and activation of the above plugins, navigate Modules under ShopEngine and:
✅ Activate Avatar module
✅ Configure Avatar module
Abilita il modulo avatar WooCommerce #
To enable the ShopEngine WooCommerce Avatar module,
- Accedi al tuo sito WordPress.
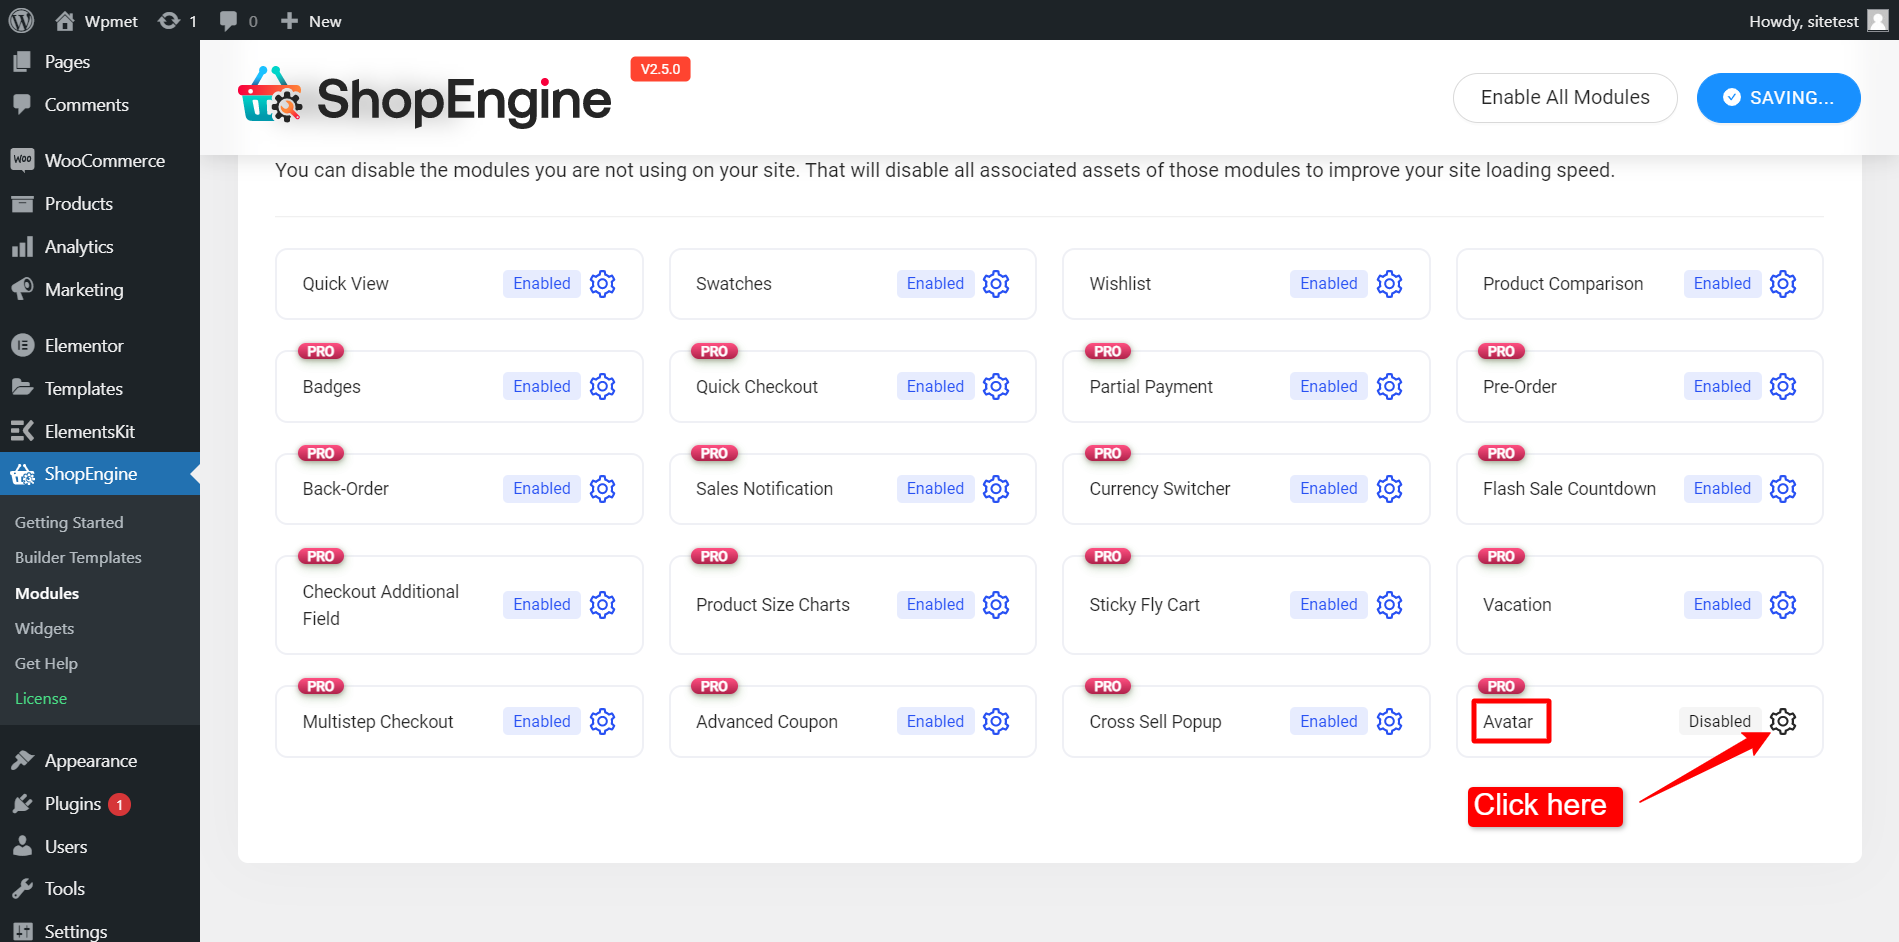
- Navigare verso ShopEngine > Moduli dalla dashboard di WordPress.
- Trovare il Avatar modulo dall'elenco.
- Fare clic su ⚙️ (icona delle impostazioni).


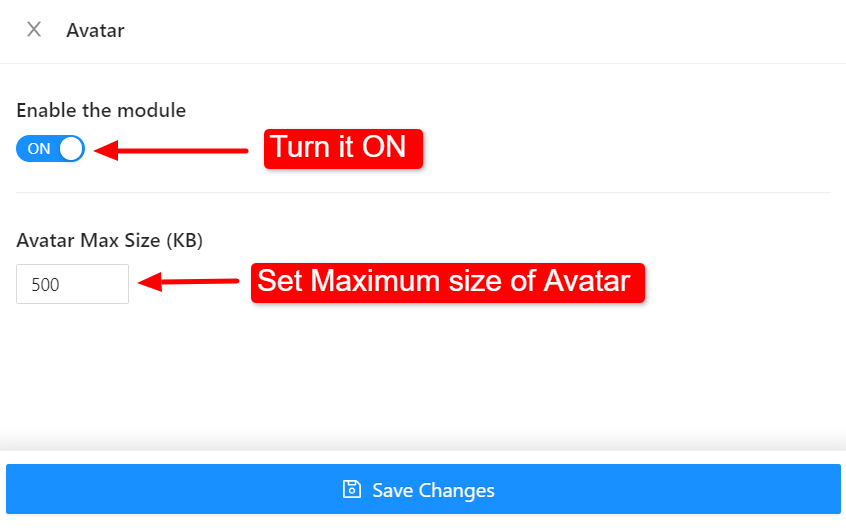
After that, an off-canvas window will show up for WooCommerce Avatar template settings. In the Template Settings,
- Primo, Abilita il modulo.
- Impostare il Dimensione massima dell'avatar (KB).
- Clicca sul Salvare le modifiche pulsante nella parte inferiore dello schermo.


Ora potrai aggiungere un avatar utente nella pagina della dashboard dell'account sul tuo sito web. Leggi la documentazione per Dispositivo dell'Avatar per imparare come utilizzare il widget e aggiungere un avatar utente sulle pagine web.


