


Paiement Stripe est une méthode simple pour effectuer vos paiements en temps réel et bien plus encore. MetForm a apporté cette fameuse méthode pour cibler facilement tous vos clients. Donc, ajouter une bande à WordPress et profitez de plus de conversion.
Maintenant, consultez la documentation et ajoutez le demandé passerelle de paiement Stripe en quelques étapes seulement.
Get Started—Add Stripe to WordPress Form #
Choisissez votre passerelle de paiement comme Bande avec le champ de saisie du mode de paiement et facilite la politique de paiement des utilisateurs.
Prérequis: #
You must have the Stripe account to integrate the AWeber services into MetForm.
Plugins requis : #
- Élémentor : Télécharger le plugin
- MetForm Pro : Obtenez le plugin
👑 You need to have the MetForm Professional Plan to use this feature.
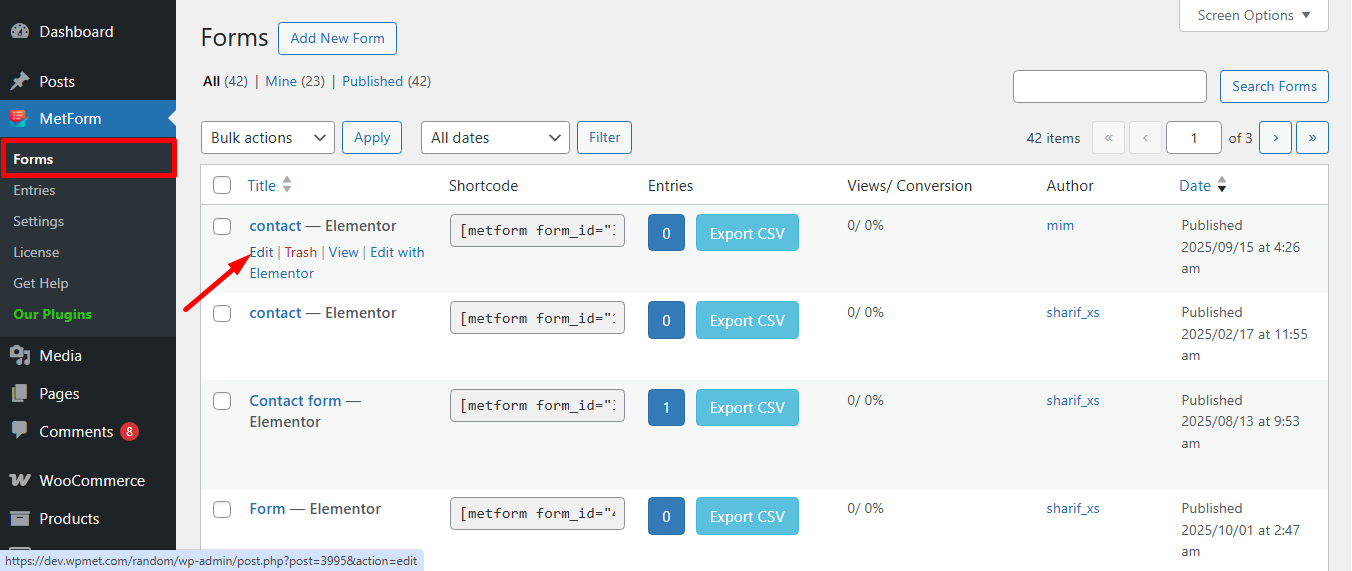
Step 1: Navigation to your Dashboard #
- Create new form or choose any form from the list
- lick on the edit option
Go to the Payment tab. There are Devise dynamique choix. La fonctionnalité de devise dynamique permet aux gens d'effectuer des paiements sur votre site via Stripe.

Maintenant, enable the Stripe option et cliquez sur Configurer le paiement Stripe
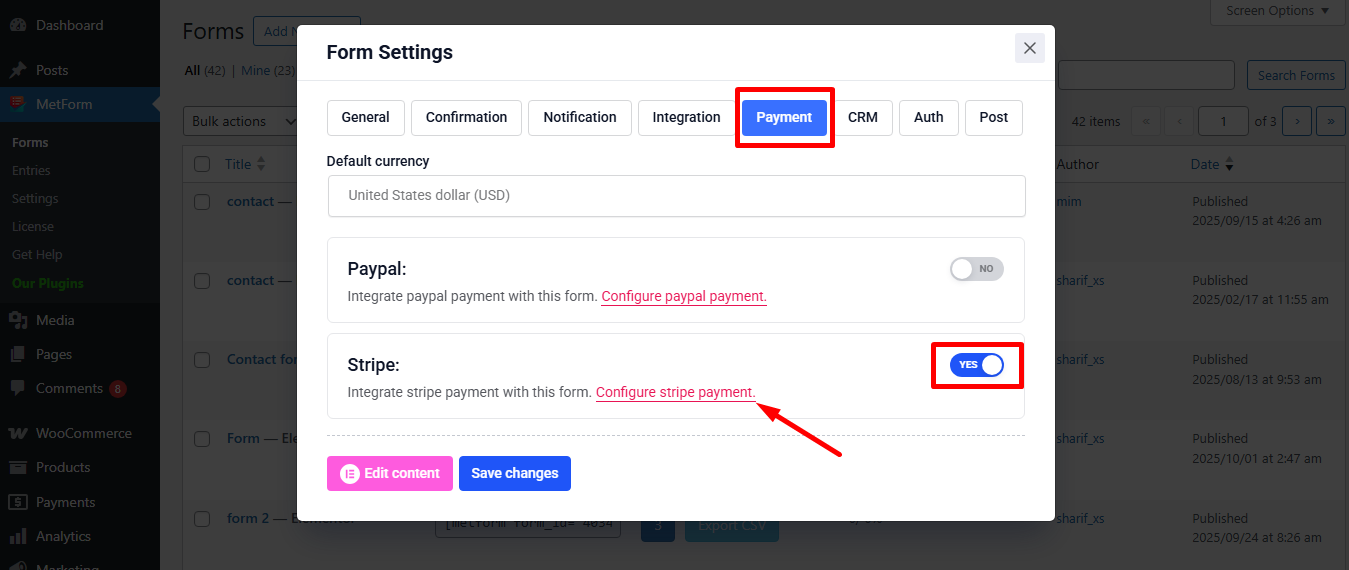
It’ll take you to the MetForm’s Settings page
- Cliquer sur Payment: Stripe
- Activer Bande bac à sable
- Cliquez sur la sélection Lien fournir Tester la clé publiable et Tester la clé secrète
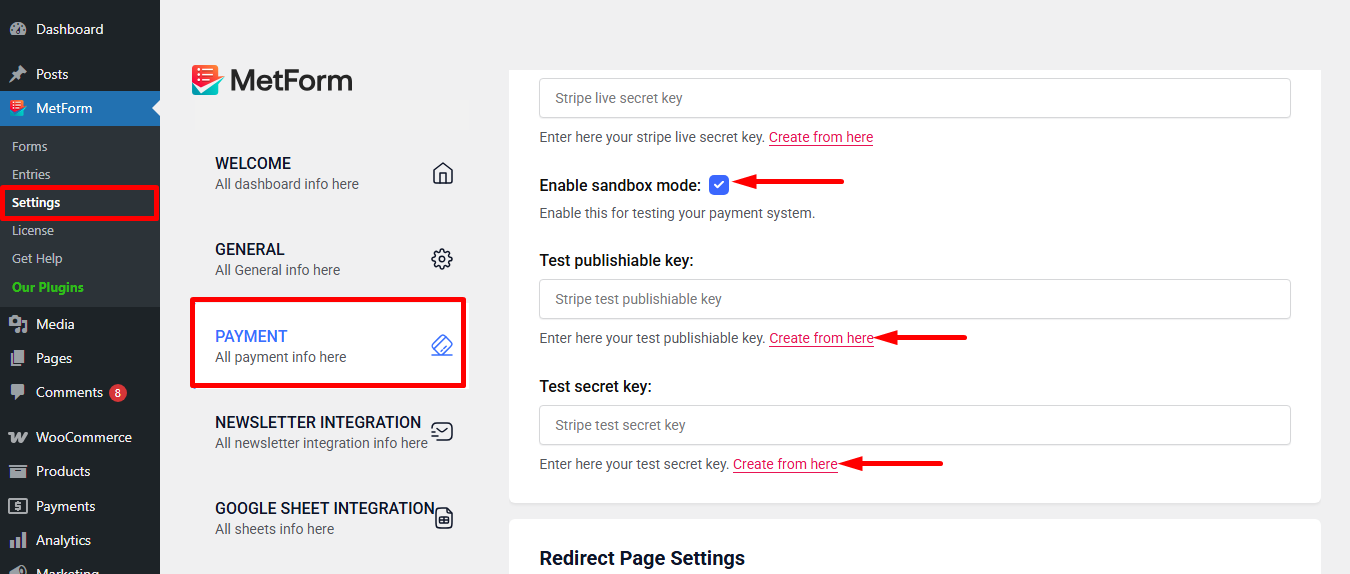
Step 2: Get the Test secret key and Test publishable key #
Obtenir Tester la clé secrète et Tester la clé publiable Accédez à l'URL : https://dashboard.stripe.com/login
Create a Stripe Business account and log in with your created Stripe E-mail et mot de passe

Next, access your Stripe dashboard, then navigate to Développeurs-> Clés API

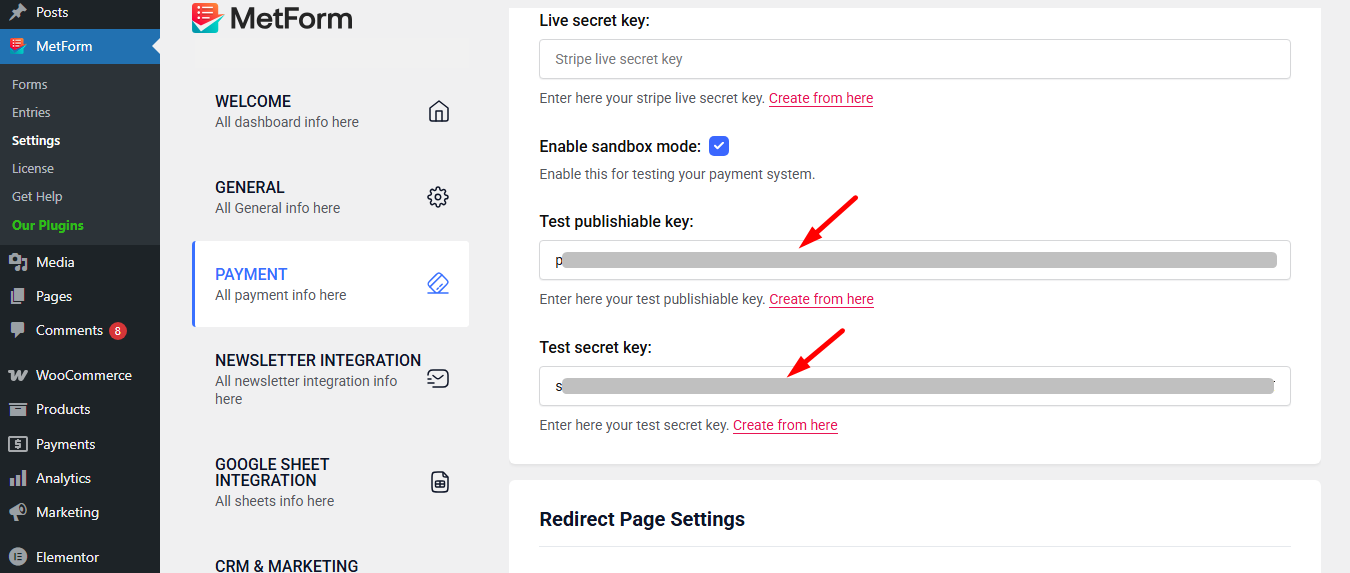
Now go back to Step 1, insert your copied Test publishable Key et Test secret Key
Don’t forget to scroll drown and click on the Sauvegarder les modifications bouton.
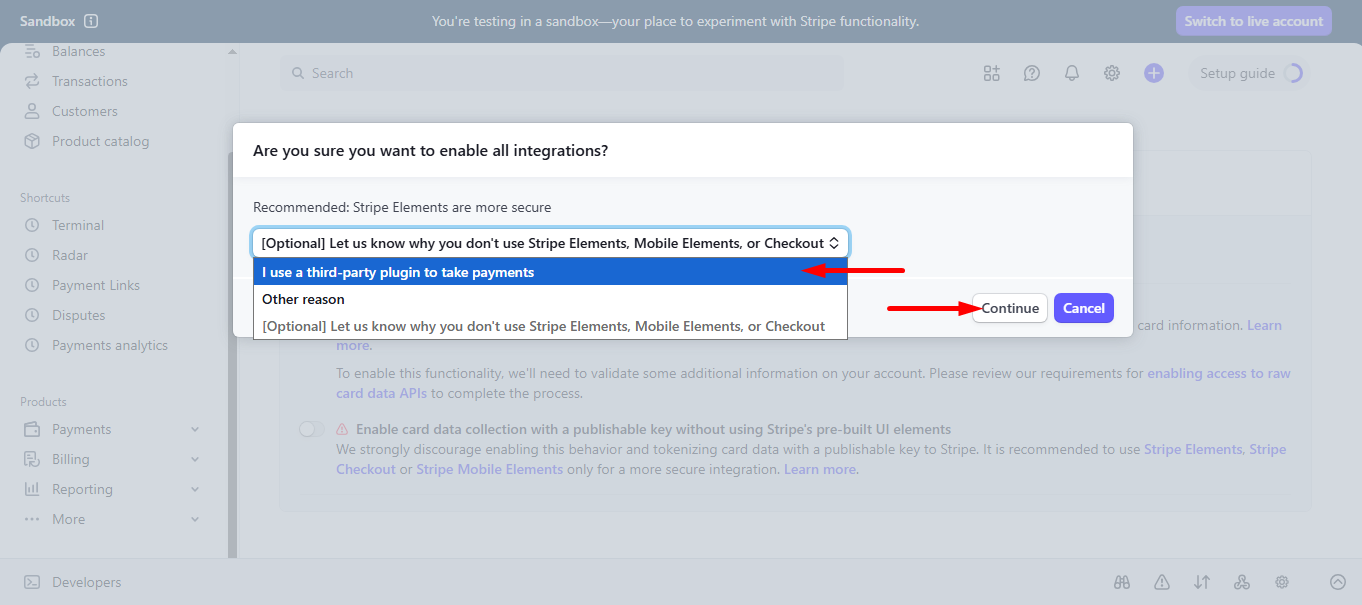
Maintenant, allez à integrations from stripe’s dashboard.
Here, you have to Enable card data collection with a publishable key without using Stripe’s pre-built UI elements.
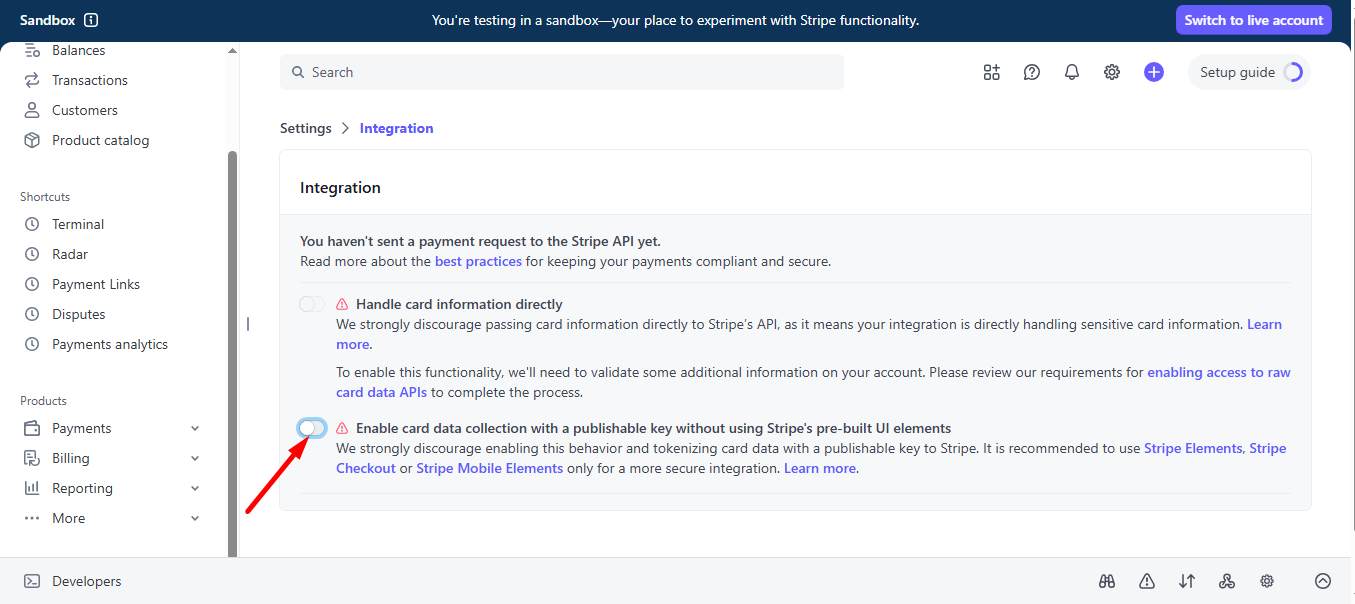
Select I use a third-party plugin to take payments and continue.
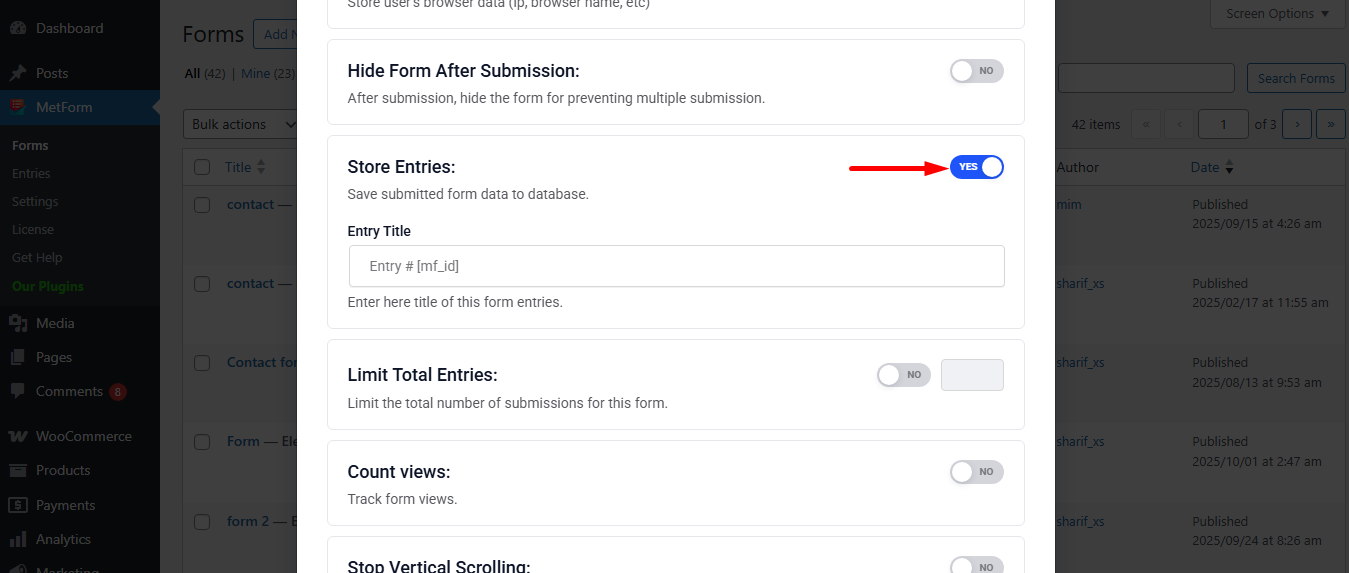
Step 3: Go to form settings #
click on the edit option of your form to access Form Settings. Activer les entrées du magasin option and save the changes.
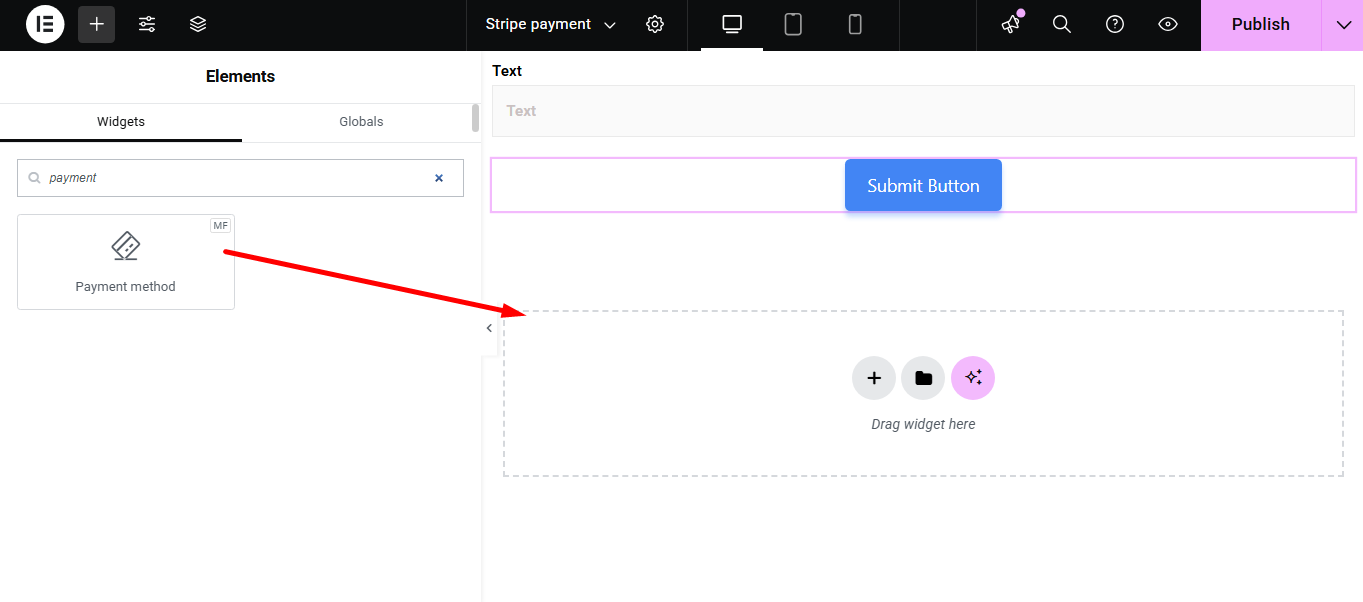
Search and drag and drop Metform payment method widget.
However, you’ll need a Champ de texte et bouton Soumettre in the form.
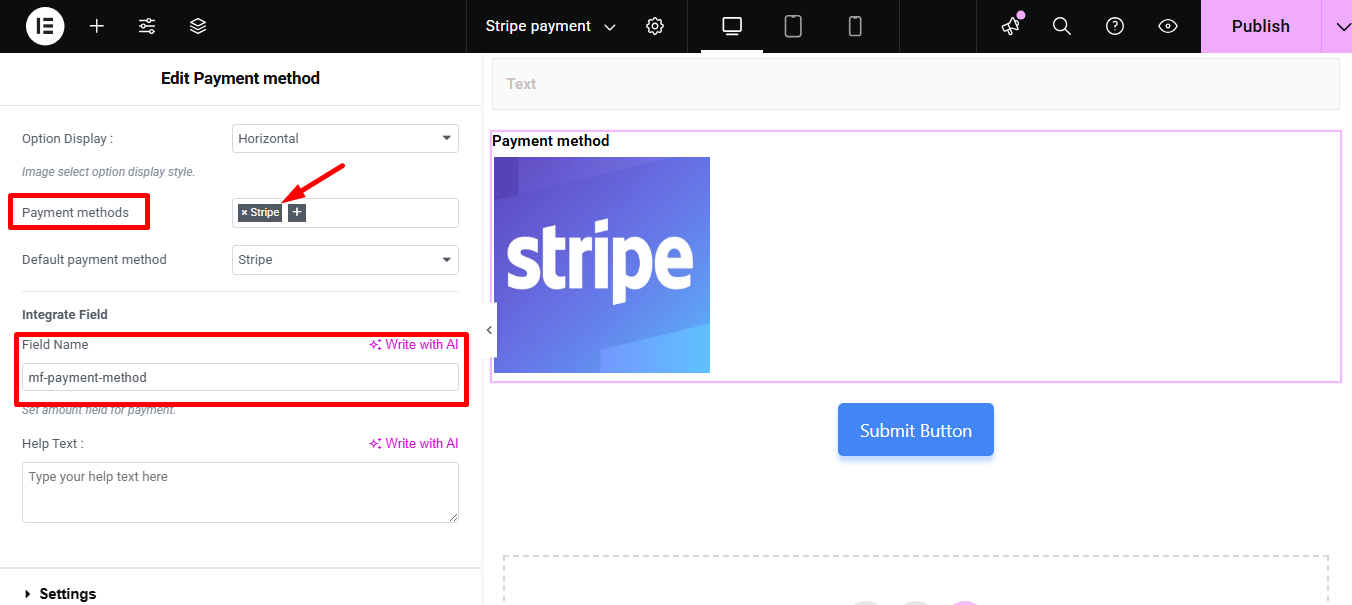
Now copy the selected Name: mf-payment-method
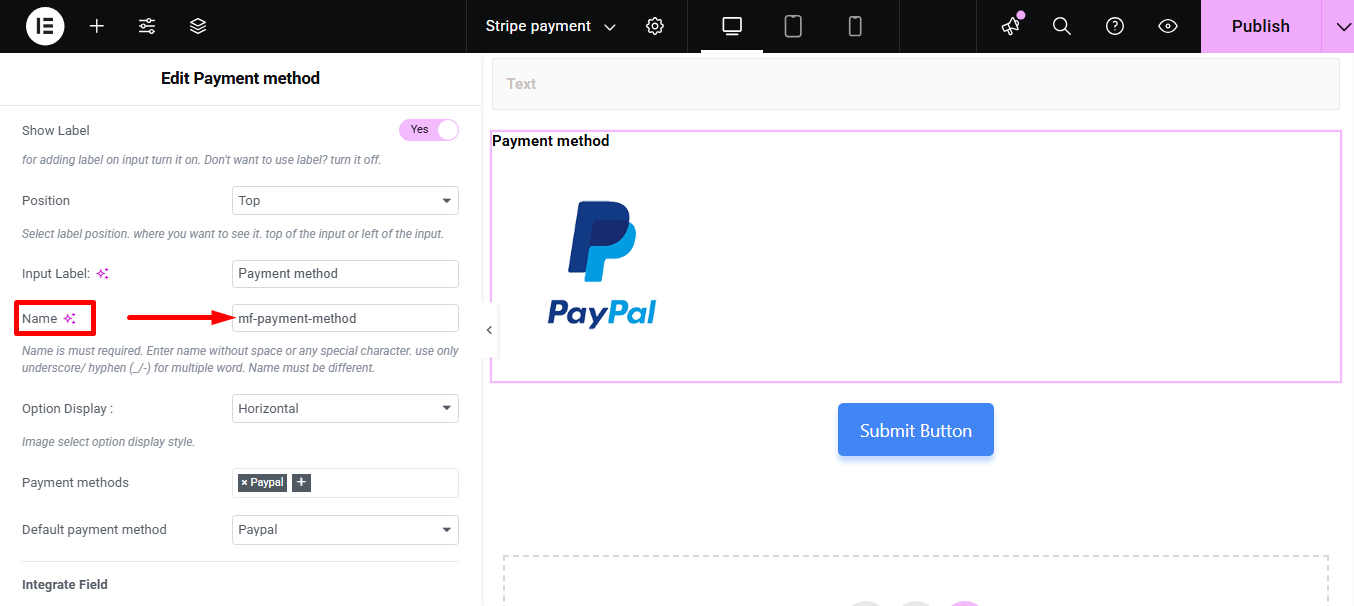
- Select your Payment Method Bande
- Paste the copied name in the Intégrer le champ
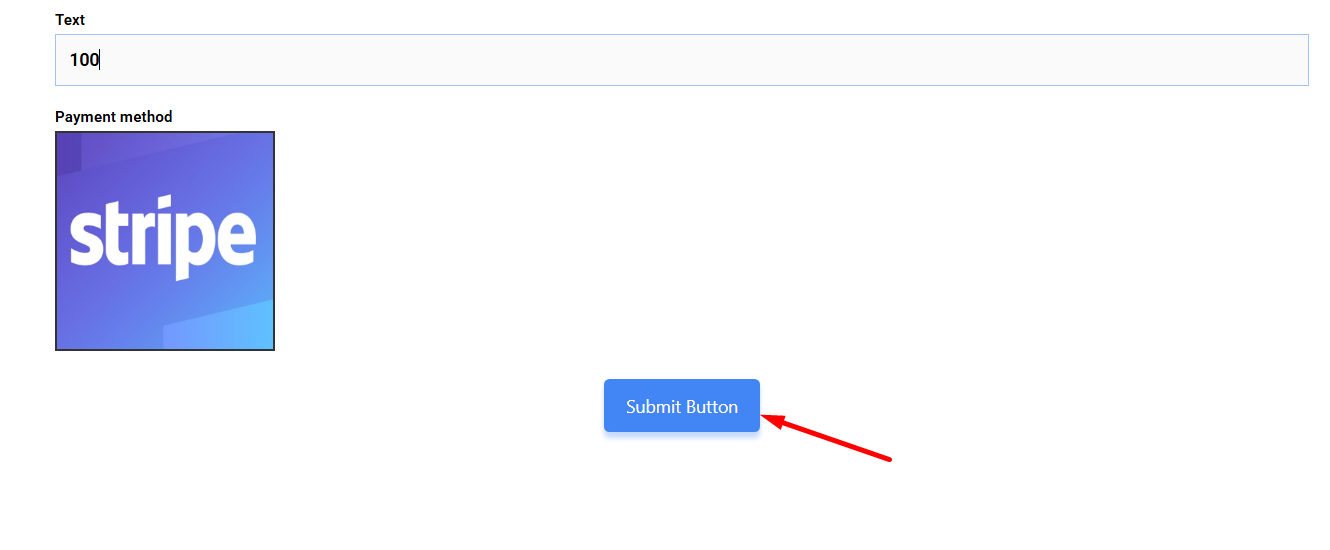
Fournir Montant et cliquez sur le Bouton de soumission
Next, you have to fill the stripe payment form. So,provide stripe email, card no., date, and CVC.
Cliquez sur le bouton Payer. Ici, vous verrez le montant en fonction de la devise vous avez défini plus tôt.

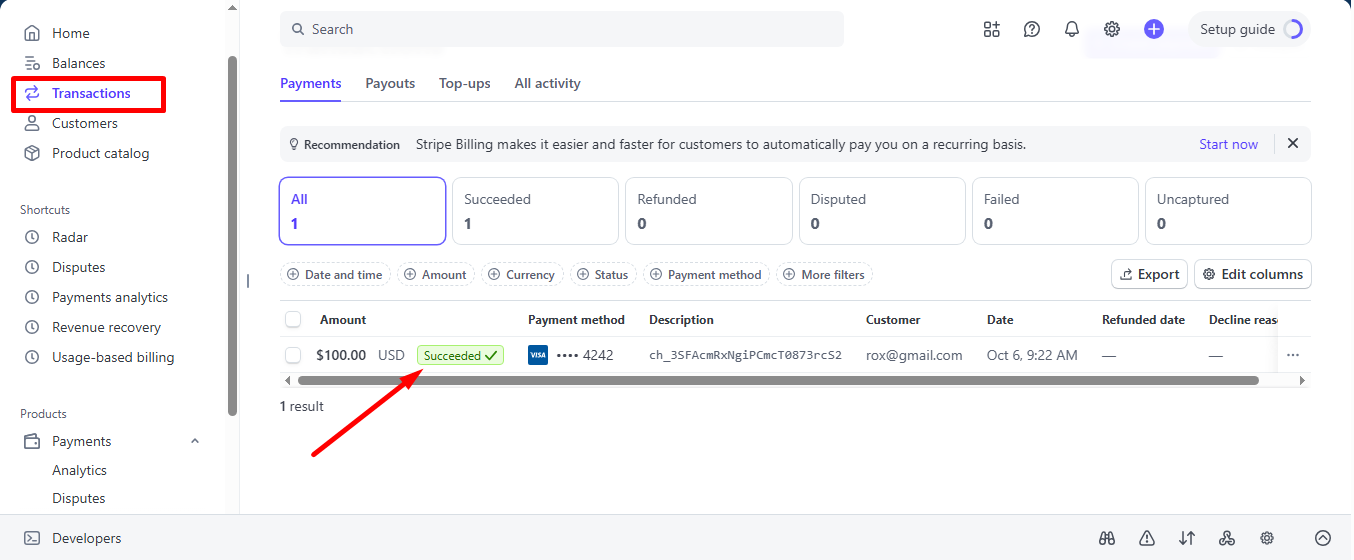
Vous pouvez voir la transaction apparaître dans le Paiement du tableau de bord Stripe Section
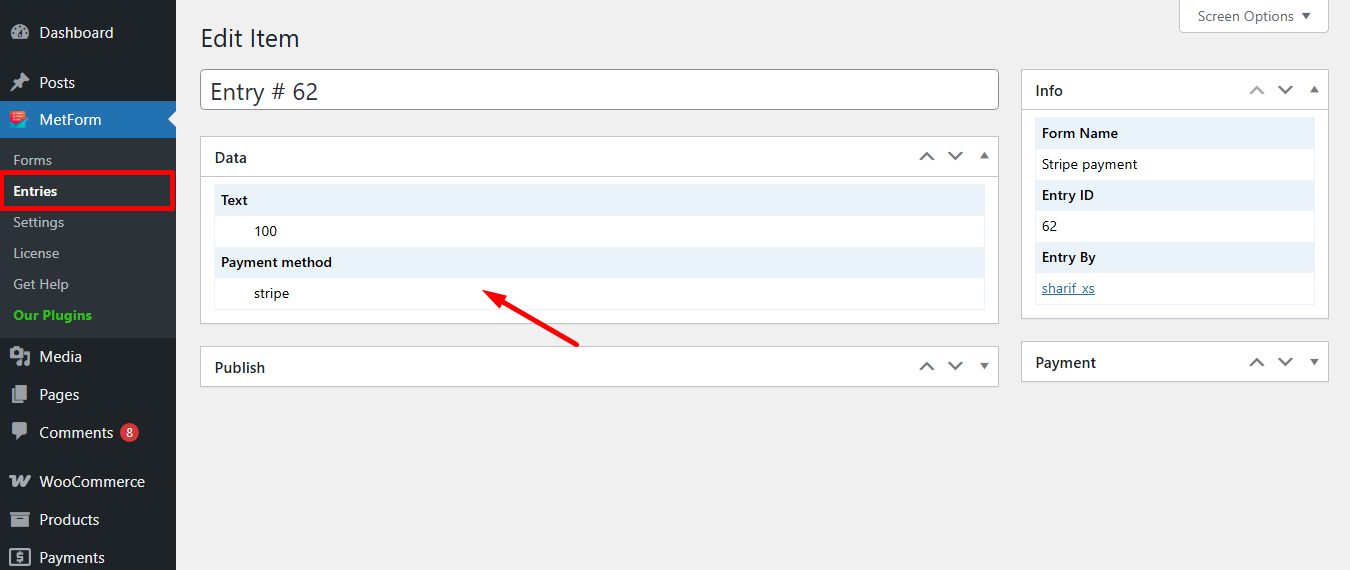
Vous pouvez également le visualiser depuis le panneau d'administration : Metform=> Entrées
Stripe crée un client avec un mode de paiement that is simple to follow. And, you have learned how effortless it is to add with MetForm. So, start designing your Stripe payment gateway now.


