ShopEngine Pro wird mit dem WooCommerce-Avatar-Modul geliefert, mit dem Sie konfigurieren können, wie der Benutzer-Avatar im Konto-Dashboard angezeigt wird.
Quick Overview
This documentation will guide you to the process of adding Avatar with ShopEngine. This WooCommerce Avatar plugin includes a dedicated module to set up avatar to your WP site.
For this Documentation, you will need the following tools to add Avatar:
Tools Used: Elementor (free), WooCommerce (free), ShopEngine (free & pro)
After download and activation of the above plugins, navigate Modules under ShopEngine and:
✅ Activate Avatar module
✅ Configure Avatar module
Aktivieren Sie das WooCommerce-Avatar-Modul #
To enable the ShopEngine WooCommerce Avatar module,
- Melden Sie sich bei Ihrer WordPress-Site an.
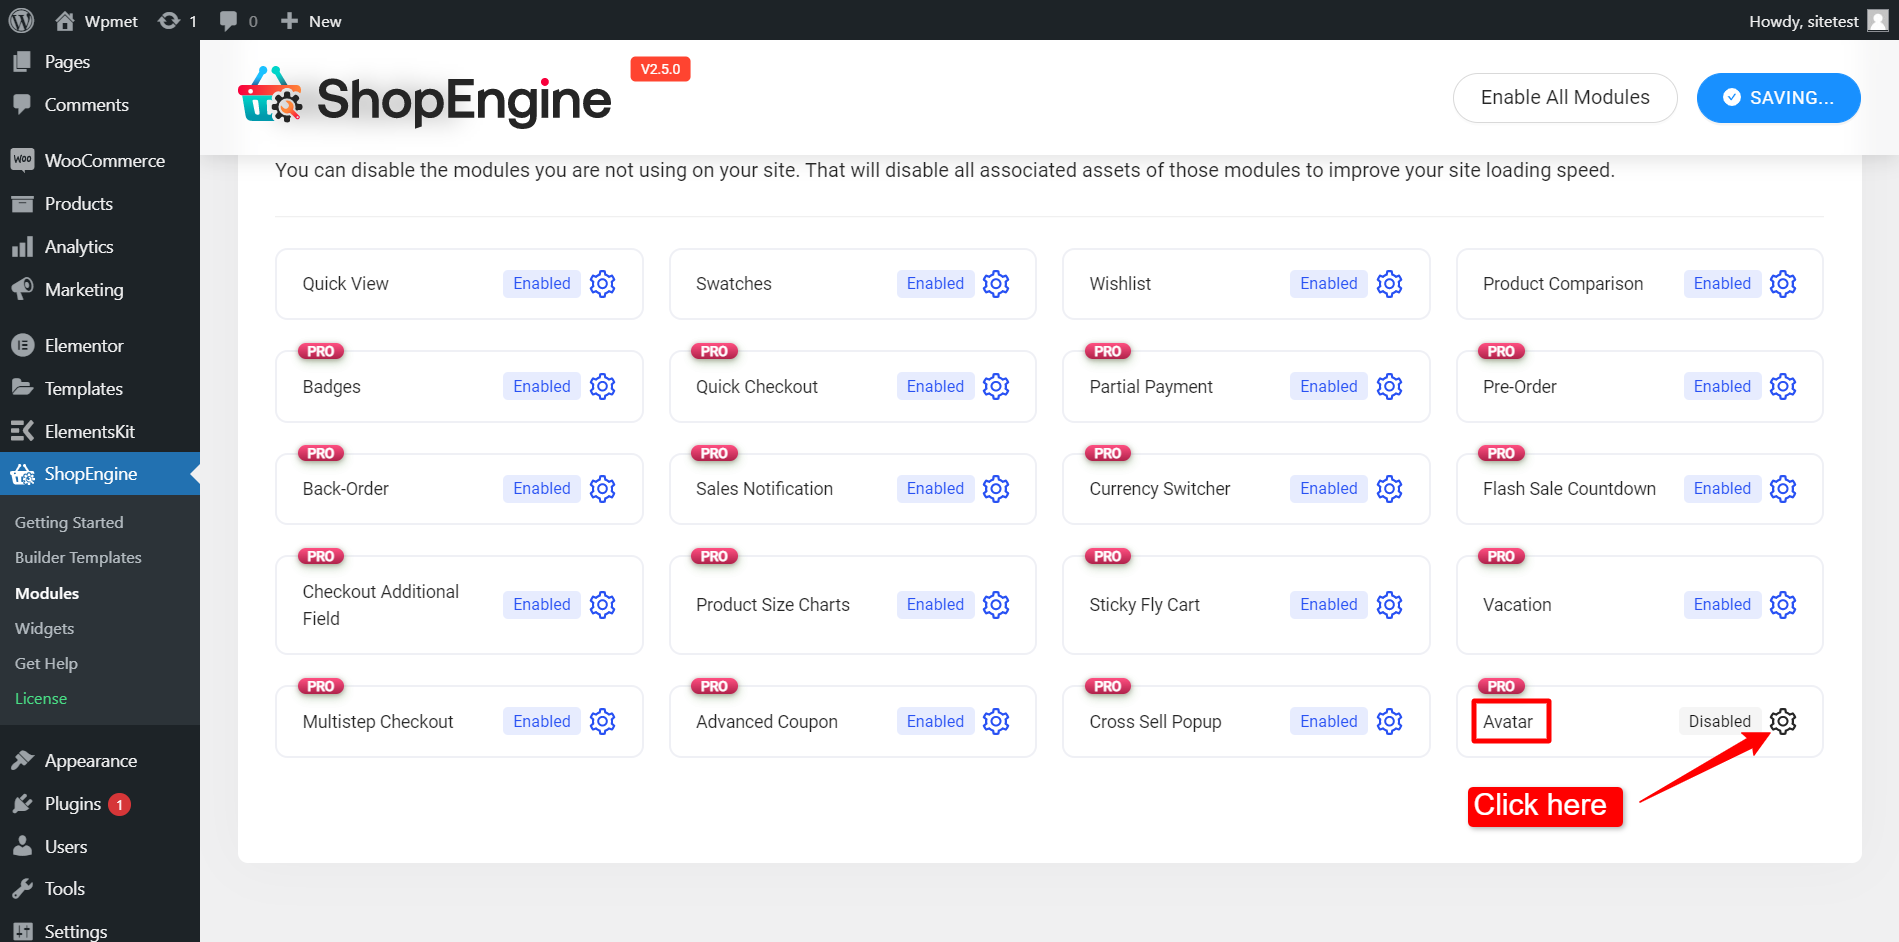
- Navigieren Sie zu ShopEngine > Module aus dem WordPress-Dashboard.
- Finden Sie die Benutzerbild Modul aus der Liste.
- Klicken Sie auf das ⚙️ (Einstellungssymbol).


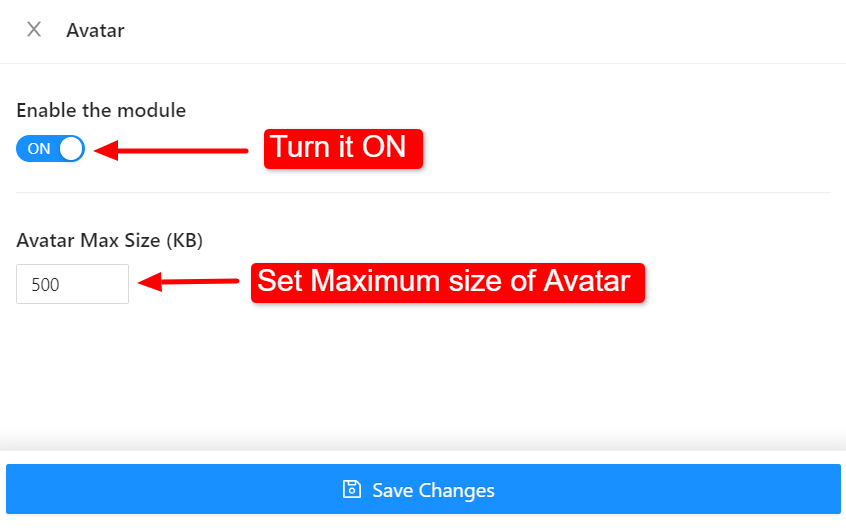
After that, an off-canvas window will show up for WooCommerce Avatar template settings. In the Template Settings,
- Erste, Aktivieren Sie das Modul.
- Stellen Sie die ein Maximale Avatar-Größe (KB).
- Klick auf das Änderungen speichern Schaltfläche am unteren Bildschirmrand.


Jetzt können Sie auf der Konto-Dashboard-Seite Ihrer Website einen Benutzer-Avatar hinzufügen. Lesen Sie die Dokumentation für Avatar-Widget Erfahren Sie, wie Sie das Widget verwenden und einen Benutzer-Avatar auf Webseiten hinzufügen.


