An Avanceret fane-widget is equipped with essential and modern elements. With an advanced tab widget, you can create tabs and put different contents. And, there are facilities to design contents with nested tab elements. You can also design the elements you wish to keep in each tab. So, for a well-organized tabs layout, you can simply use ElementsKit’s Advanced widget.
But how to style tabs in WordPress? well, this is exactly what we have discussed with all the necessary details here. Check the process below.
How to Style Tabs in WordPress #
Naviger til: Your Dashboard -> Choose or create a New page -> Edit with ELementsKit -> Search Advanced tab widget
At first, drag and drop the widget, and you can edit the options.
Stil #
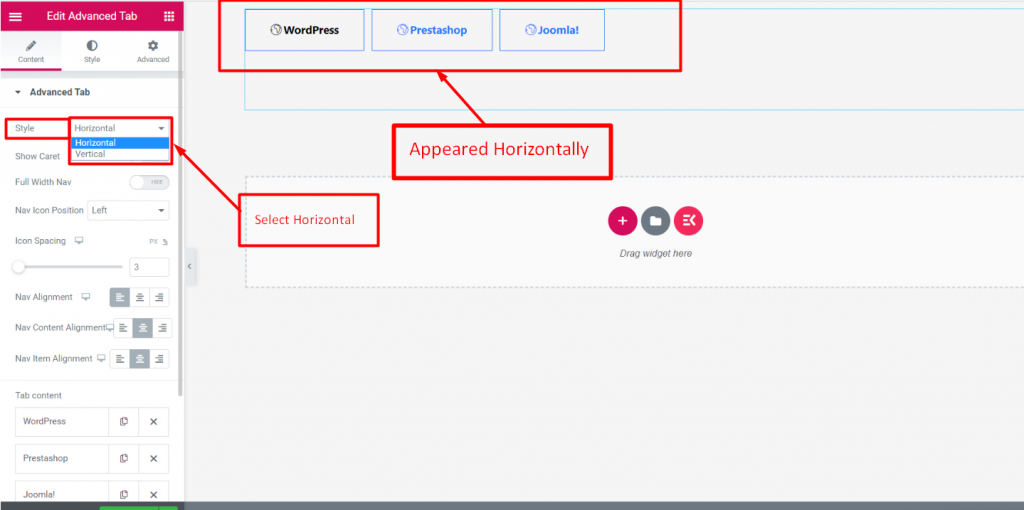
I den Indholdssektion, you will find the Style option under Advanced Tab. Select Style Horizontally or Vertically.

Show Caret #
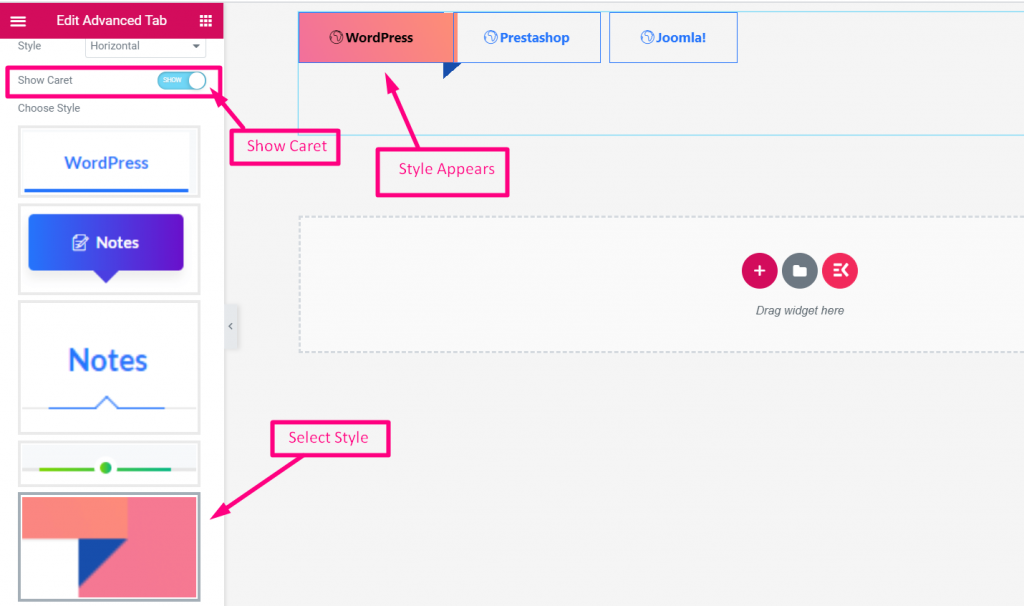
- Enable Show Caret
- Vælg Stil

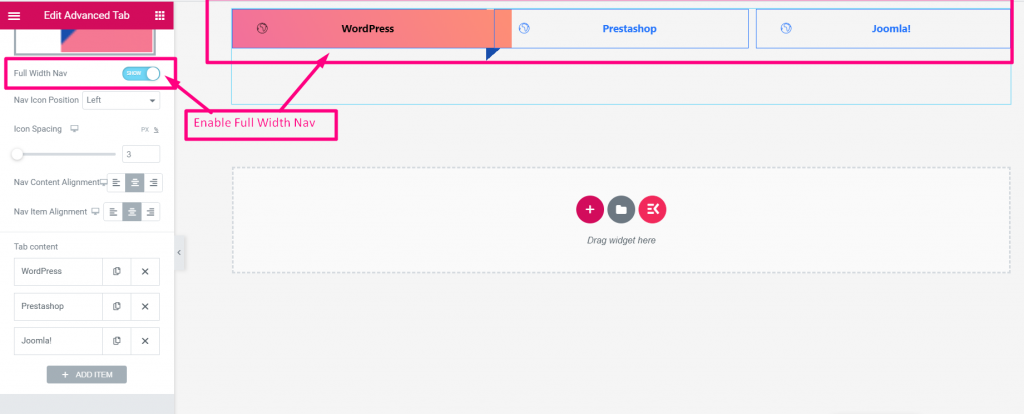
Full Width Nav #
Enable (SHOW)

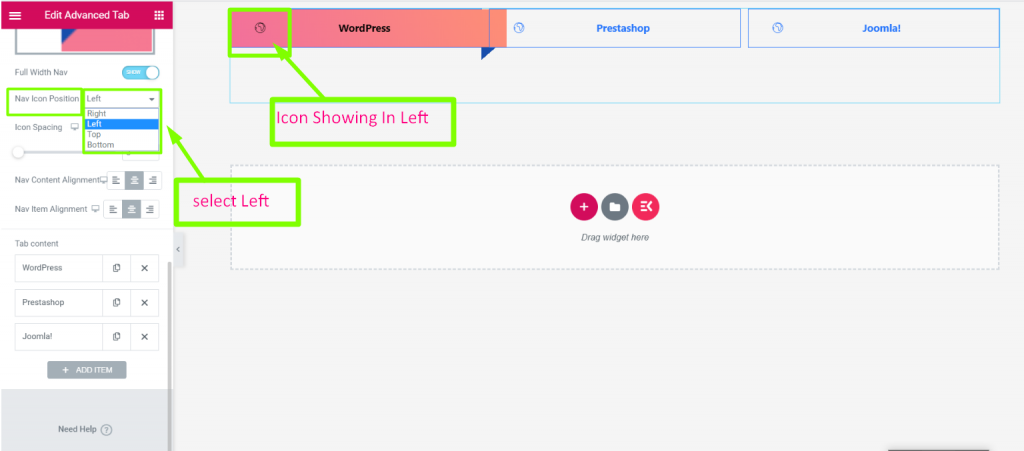
Nav Icon Position #
Select Position: Right, Left, Top or Bottom

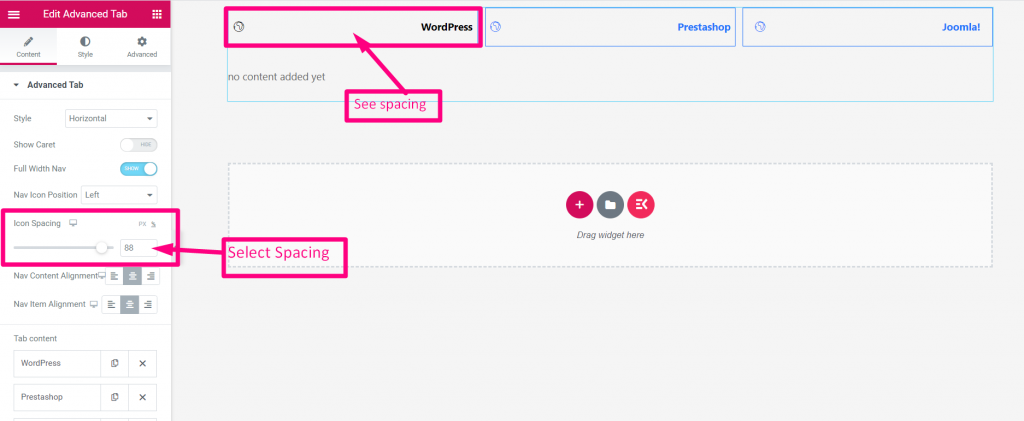
Icon Spacing #
Give Mellemrum

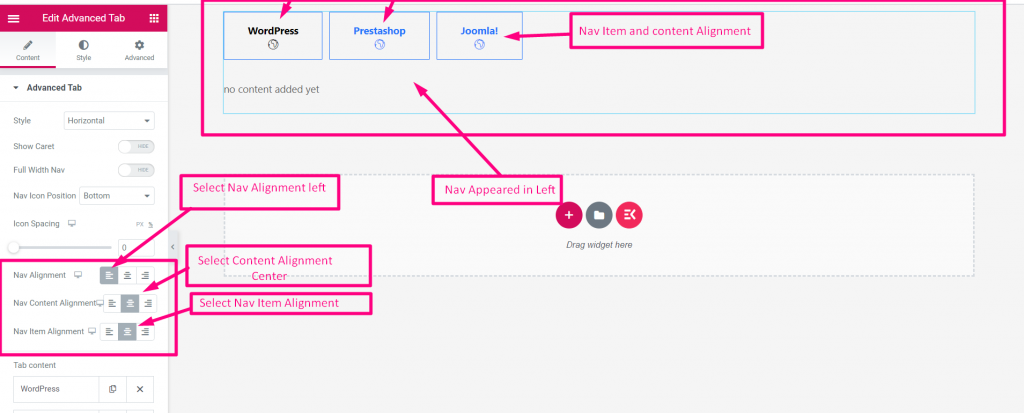
Select Alignment #
Select Alignment: Left, Right or Center

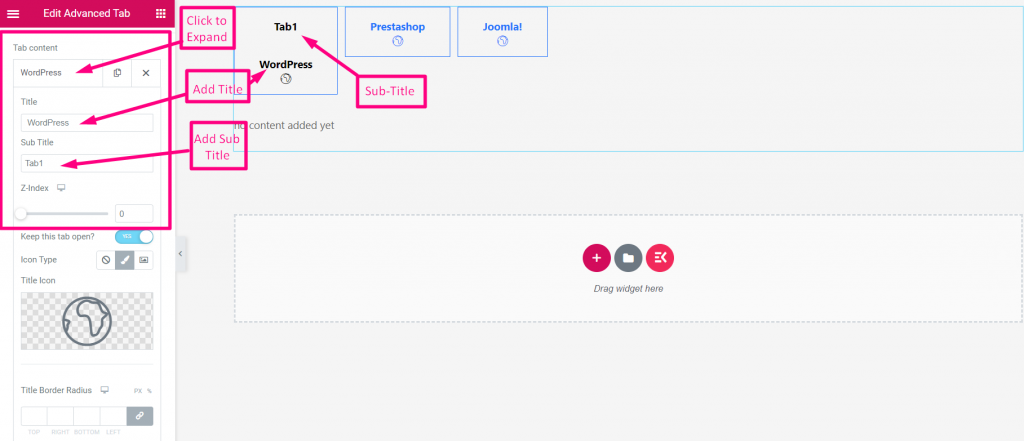
Tab Content #
- Klik på indholdet for at udvide
- Tilføj eller rediger titel
- Add Sub-Title

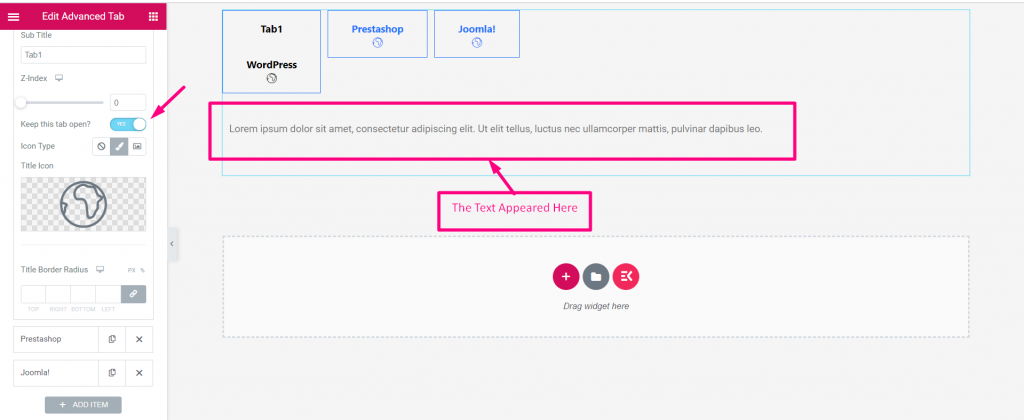
Keep this tab open? #
Tilføj enhver widget som billedtekst hvad som helst efter titlen
- Aktiver "Keep this tab open” toggle
- Klik på Ikon for at tilføje enhver widget
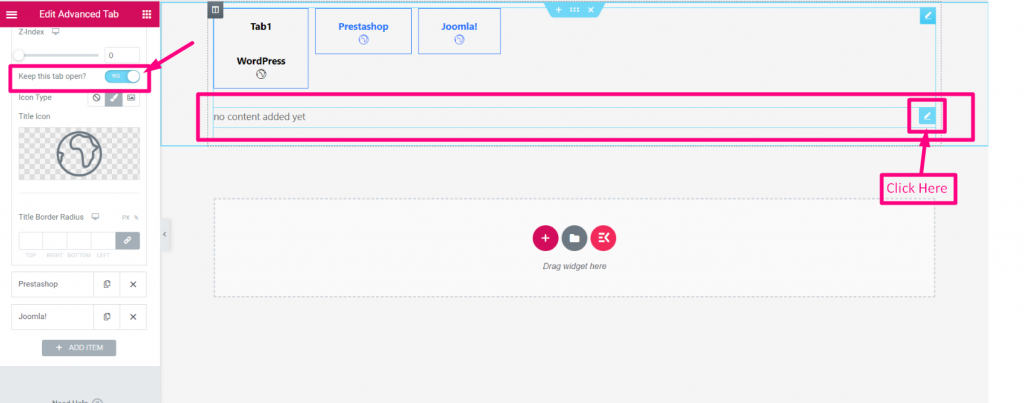

Now, search your desired widget and drop
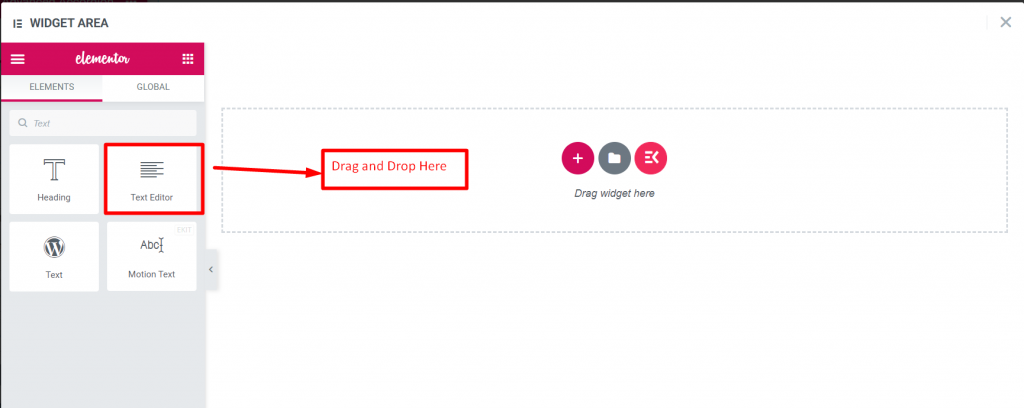

Rediger teksten, og klik på opdater
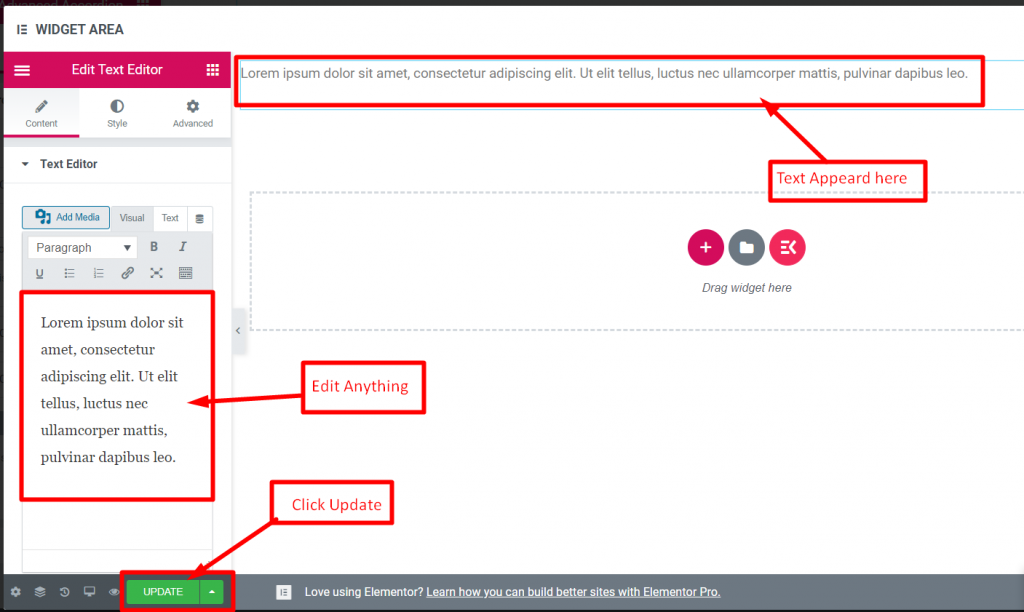

Luk vinduet, og teksten vises tilsvarende

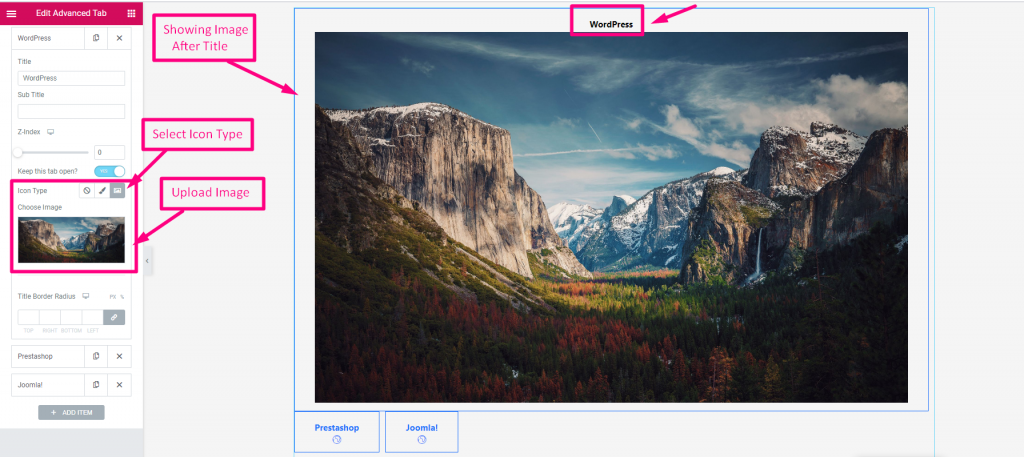
Ikontype #
- Select Icon type: None, Icon or Image
- Upload billede

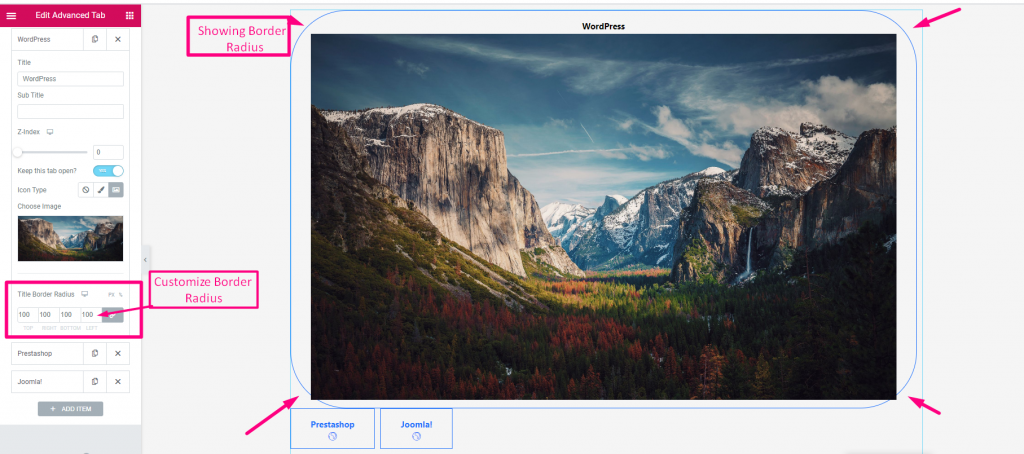
Title Border Radius #
Customize Border Radius

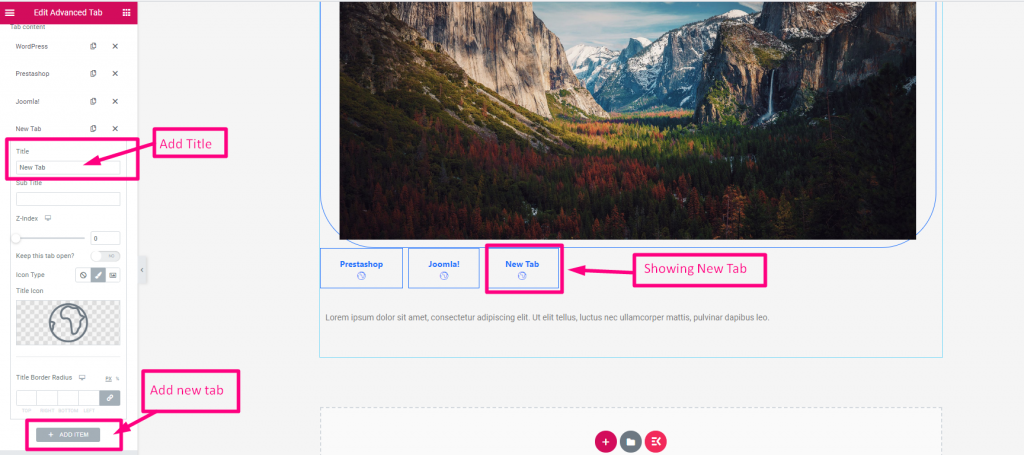
Add New Tab #

Using this advanced widget your tab customization will be more easy, fast & effective. And, flexibility will increase your sales in different ways. So, get perfect tabs using the Advanced tab widget today.


