


Website visitors like collapsible sections to check quick information and collapse them based on their interests. So, nicely customized advanced accordions help to keep your WordPress site clean and smoothen the user experience.
In this guide, we’ll walk you through the step-by-step process of how to create advanced accordion with Elementor.
What is an Accordion?
An accordion is a collapsible element that allows you to hide and reveal content on a WordPress web page.
You can use the accordion to organize information into sections. The sections can be expanded or collapsed as needed, saving space and improving the user experience.
Benefits of using Advanced Accordions in WordPress Site Design
⭕ Advanced accordion Elementor provides a clean and organized way to present information.
⭕ You can reduce page load times by hiding less important content in accordions. It can also improve your website’s search engine rankings.
⭕ Accessing additional information with advanced accordions is easy. So, it can encourage users to explore your website further. Also, accordions are adaptable to different design styles and layouts.
⭕ You can design WordPress advanced accordion to allow users with disabilities to access information.
Introducing the Modules and Widgets of ElementsKit 😍😍😍
How to create an Advanced Accordion in Elementor
While the accordion widget is included in Elementor, you may find limited styling options. If you’re seeking more advanced customization, consider using an Elementor add-on.
Here, we’ve selected ElementsKit. The plugin offers an Advanced Accordion widget that allows you to create a more visually appealing and functional website.
How to create Accordion with ElementsKit
An accordion widget is a type of widget that allows you to create collapsible sections on your WordPress website. It provides a way to organize content into multiple sections, each of which can be expanded or collapsed to reveal its contents. This is often used to display information in a compact and user-friendly manner.
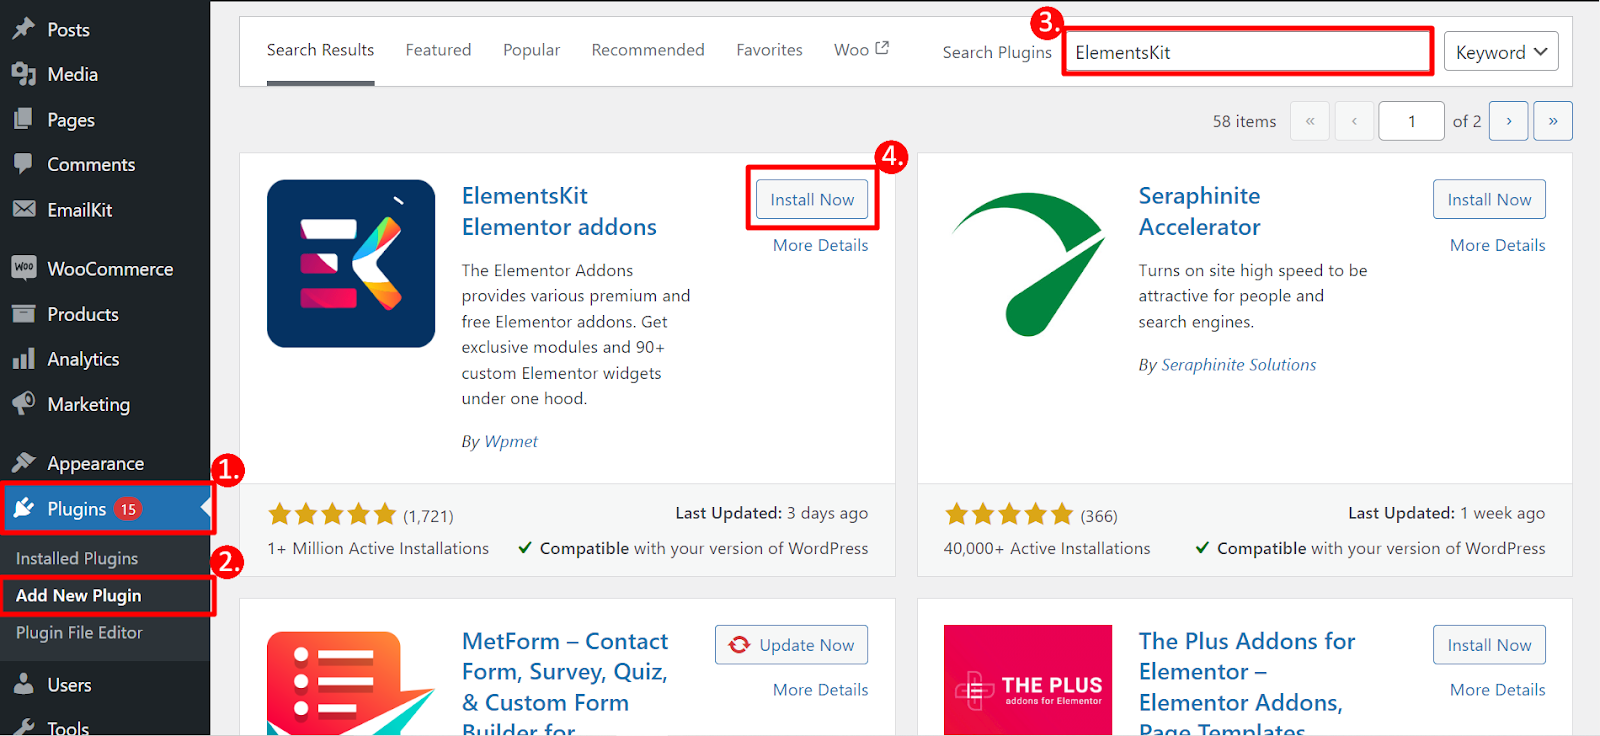
Step 1: Get ElementsKit plugin
Access to the WordPress dashboard :
1. Go to Plugins
2. Click on the Add New Plugin
3. Search ElementsKit
4. Once you find it, click on the Install Now button
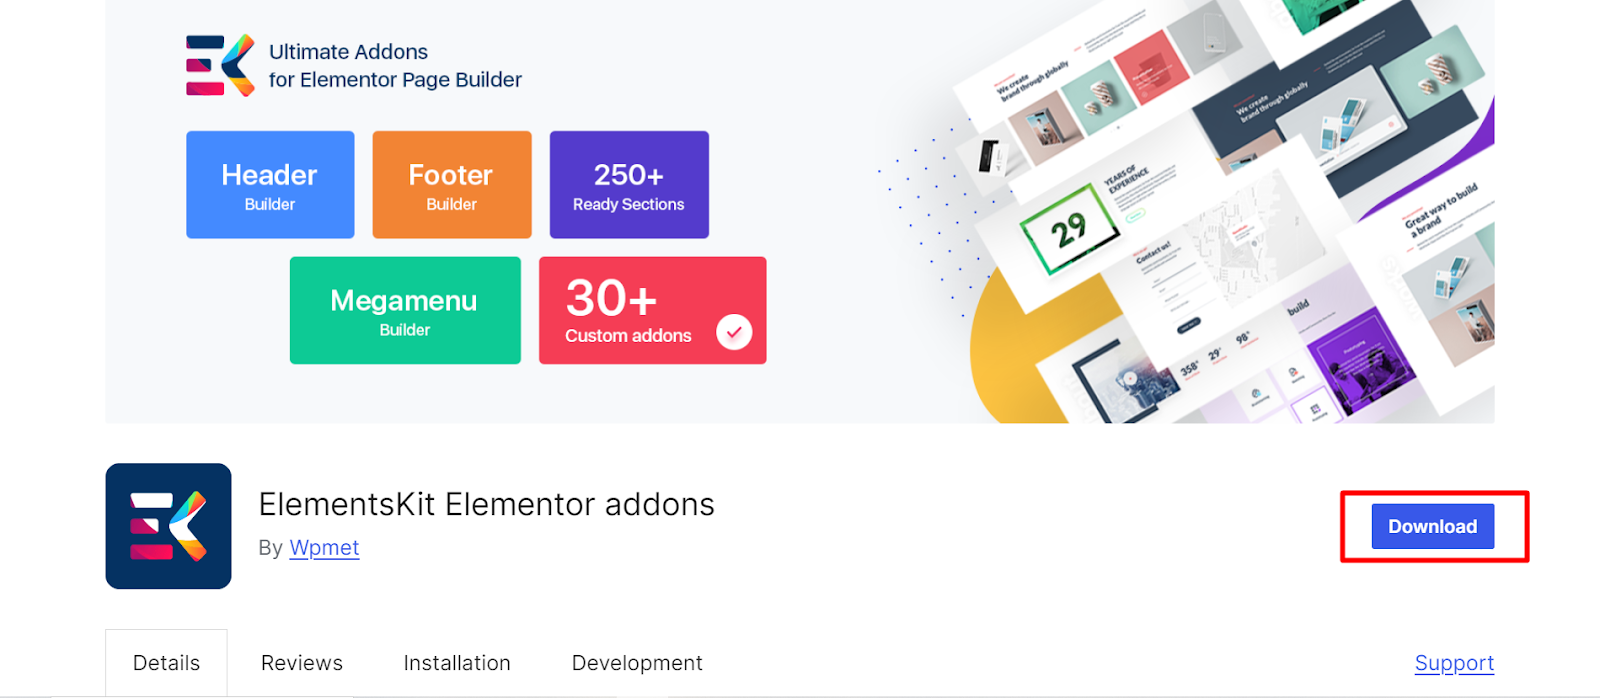
You can also download the ElementsKit plugin from WordPress. org quickly. After that, you just have to upload it to the plugins section of your dashboard.
However, Advanced Accordion is a Pro widget of ElementsKit. Don’t be late! Choose a flexible plan and enjoy creating advanced accordions with ease.
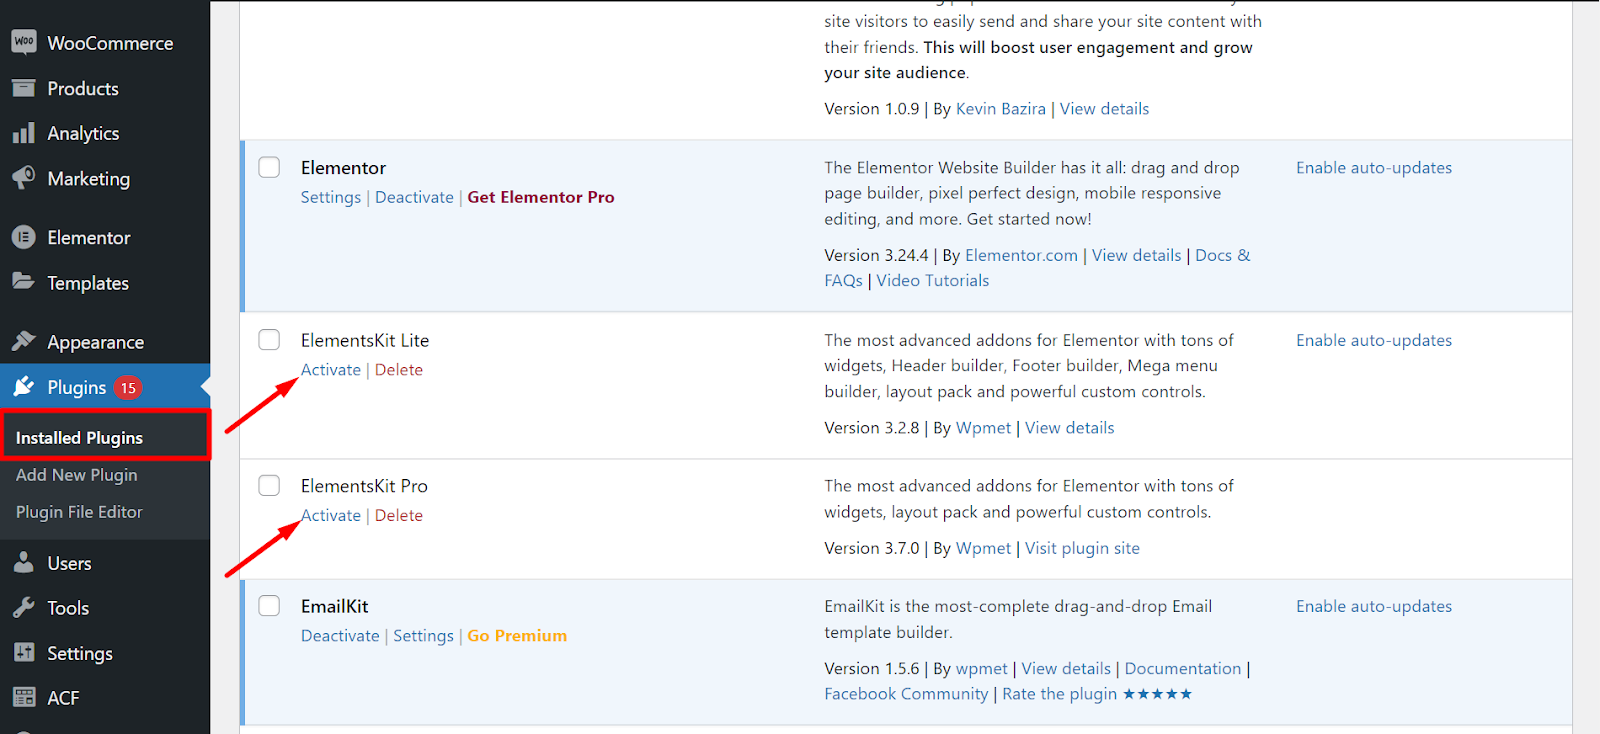
Step 2: Activate the plugin
After installing the plugin, you’ve to activate it.
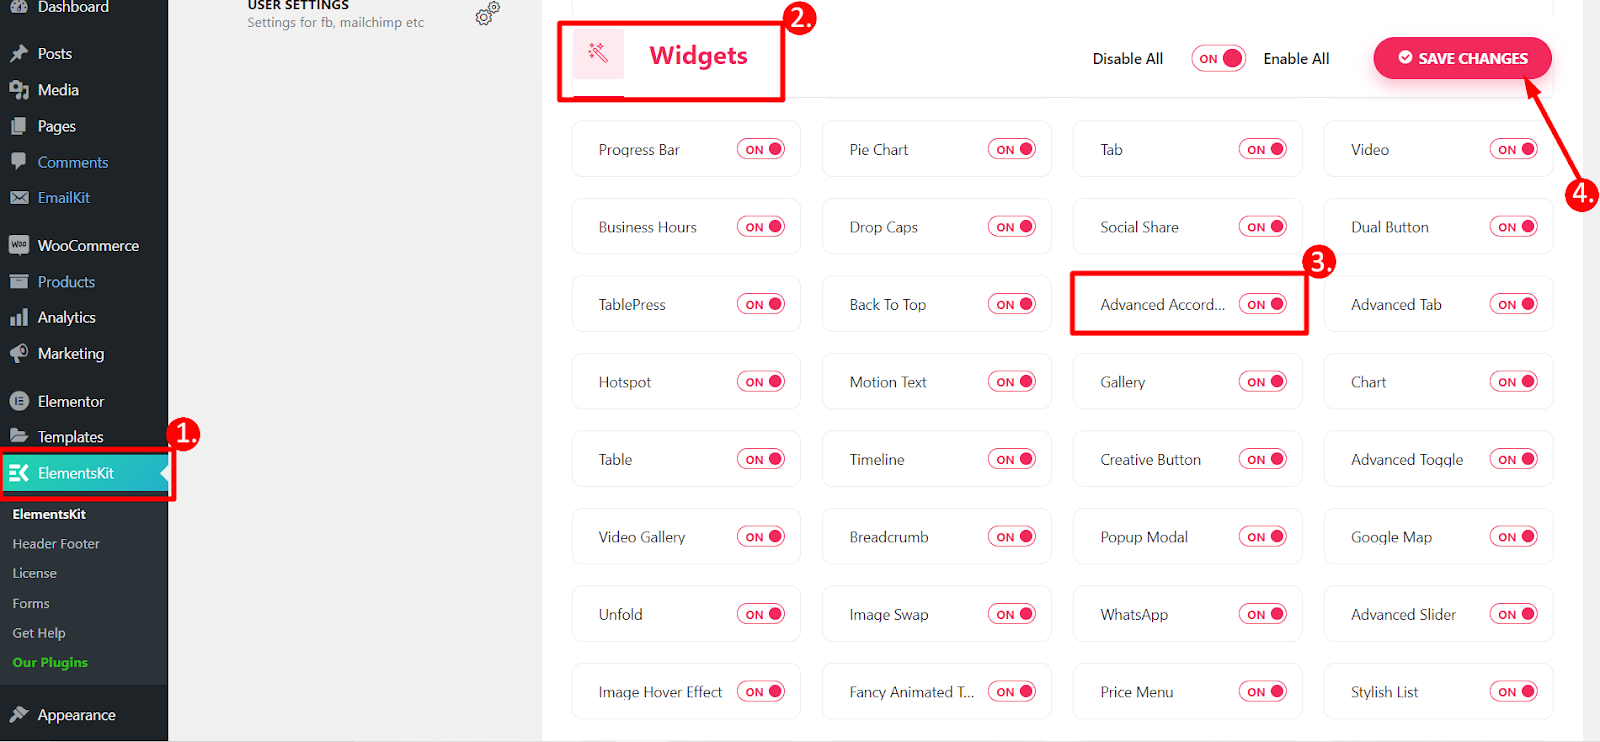
Step 3: Turn ON the Advanced Accordion widget
- Go to ElementsKit
- Find Widgets
- Find Advanced Accordion and turn ON the toggle button
- Click on SAVE CHANGES
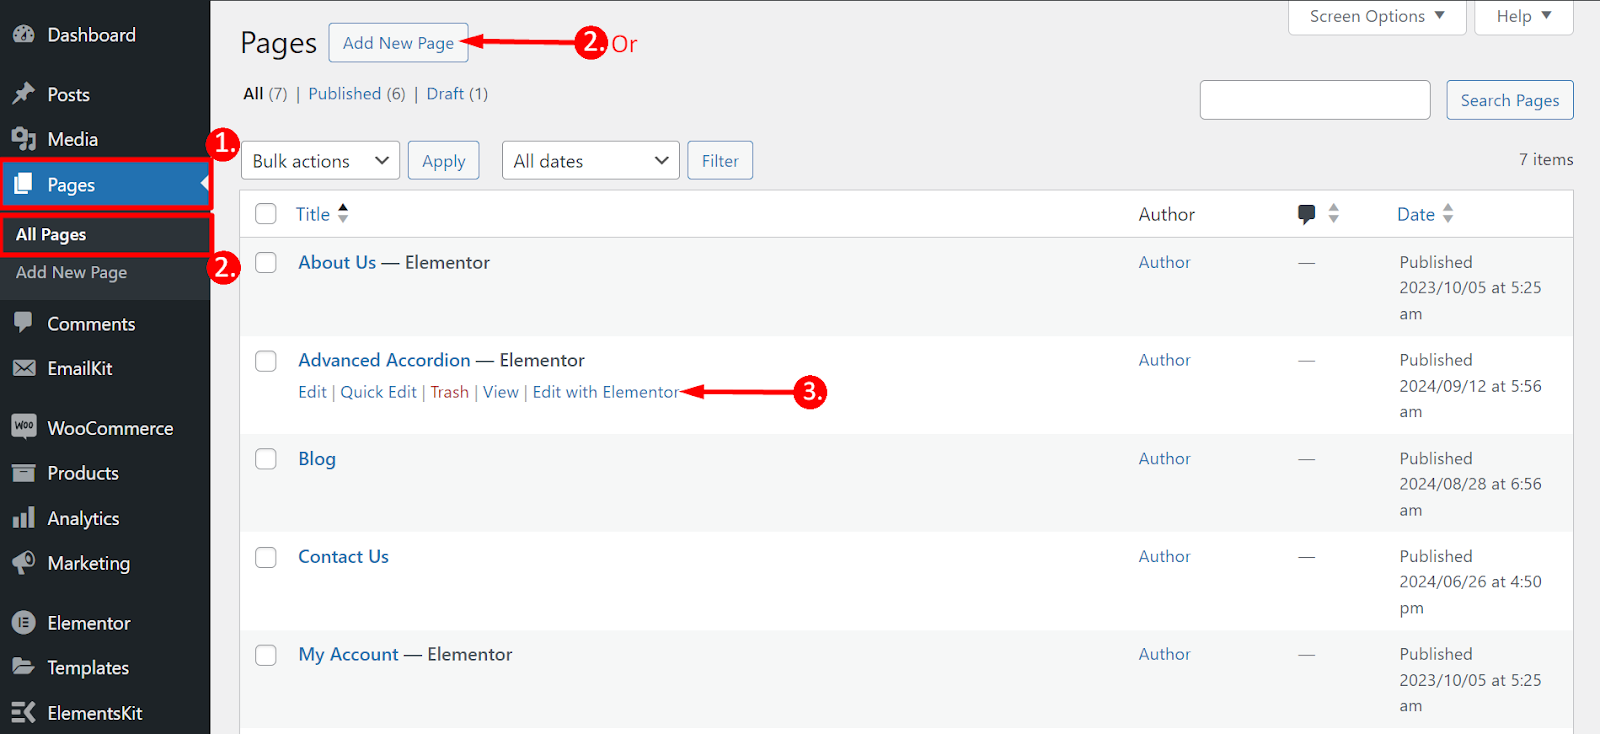
Step 4: Open a page from your dashboard
- Navigate to Pages
- Open any existing page or add a new page
- Click on the Edit with Elementor (For the new page, you can find this option after opening the page)
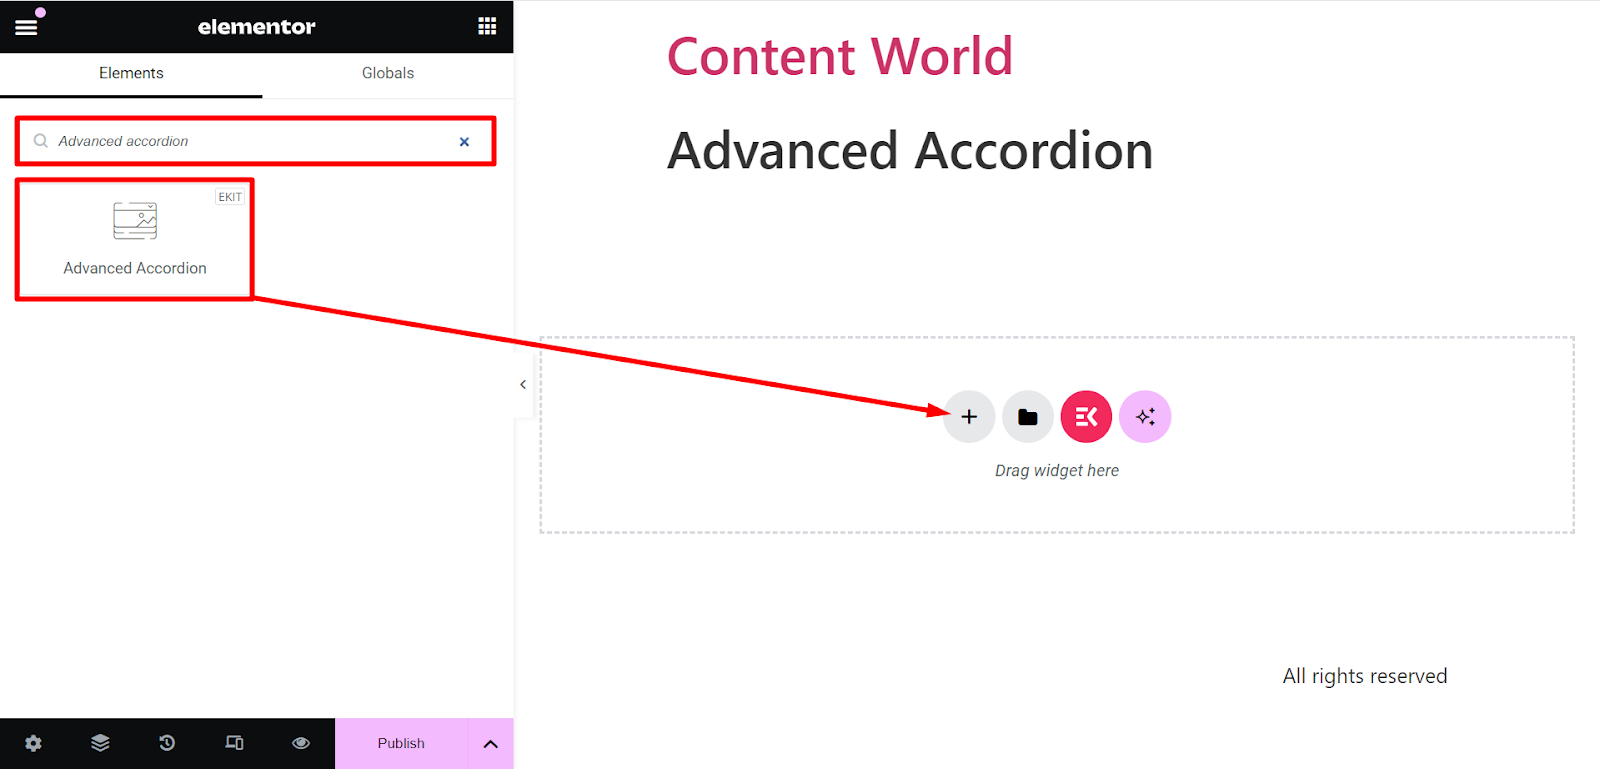
Step 5: Add Advanced Accordion to the editor
Search by the name of the widget, click on it, or drag and drop it to the editor.
Step 6: Explore customizing options
In the content part, you’ll see –
- Accordion:
- Content: Here, you can add content, edit the title, toggle the button ‘keep this open’
- Keep first slide auto open: If you want to keep the first slide open, you can turn On this button.
- Ajax: If you enable this option, it’ll update only the relevant content on the accordion, providing a smoother user experience. This can be particularly useful when dealing with a large number of accordion items.
- Style: There are several accordion styles to choose from.
- Icon:
- Icon Position: Set the icon position from here.
- Show Loop Count: You can show the loop count or keep it hidden.
- Right Icon: Choose the symbol that points to the right. It indicates the expansion of the accordion item.
- Right Icon Active: Select an icon to indicate the state of a right icon when it’s clicked or tapped.
In the style part, you can customize the accordion utilizing these options –
- Title: Here, you can change the typography, color, background type, box shadow, margin-bottom, etc. for the titles.
- Content: To style the accordion’s content, you can use different colors, typography, border radius, padding, and so on.
- Border: To change each tab’s or the accordion’s border type, width, color, box shadow, etc. you can utilize this option.
- Icon: It lets you adjust the margin, color, and size of the icon.
That’s the long and short of how to create accordion with Elementor! ✌️
Why will you choose ElementsKit Advanced Accordion widget over Elementor Accordion widget?
Let’s know some differences between the ElementsKit Advanced Accordion and Elementor Accordion.
| Feature | Elementor Accordion | ElementsKit Advanced Accordion |
|---|---|---|
| Customization | Limited styling options | Customizable appearance, styles, icons |
| Functionality | Basic expansion and collapse | Multiple open items, conditional logic |
| User experience | Simple and functional | Enhanced with smooth and custom collapsible elements |
| Versatility | Limited to basic use cases | Suitable for various design styles and complex scenarios |
Besides creating advanced accordions, you can create image accordions with ElementsKit to captivate your audience effectively. 👌
It’s your turn now
Now, try it yourself! With ElementsKit you can effectively incorporate exceptional advanced accordions into your website’s design.
Tips for you –
⭐ Experiment with different customization options to achieve the desired look and functionality you want.
⭐ Consider your website’s overall design.
⭐ Test the final output on different devices and browsers.
⭐ Update your accordions regularly.

Leave a Reply