You can easily build a feature-descriptive and stunning pricing table with various styling options.
Let’s know how to create a pricing table in the Gutenberg editor on your WordPress website.
Your WordPress site needs to have the GutenKit plugin installed. Then, follow the below steps:
How to Use GutenKit Pricing Table #
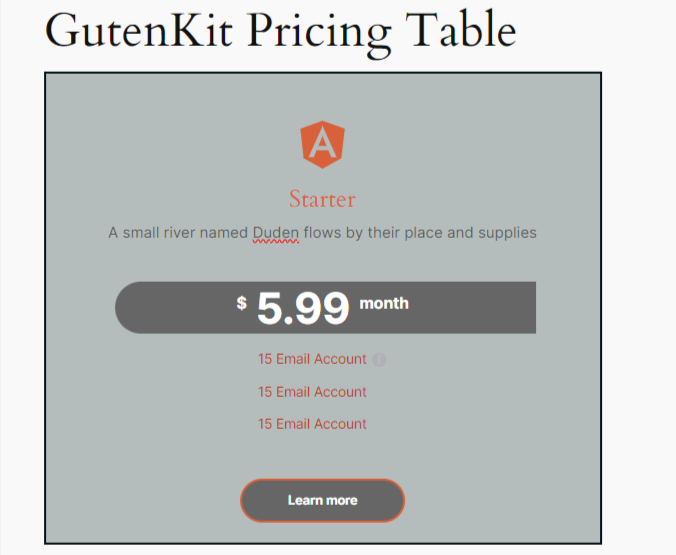
Step 1: Add the Pricing Table Block #
Start to edit an existing page or add a new page and click the “+” icon > Search for the Pristabell in the block library > Drag & drop the block to the editor screen.
Step 2: Add Pricing Table Content #
Open the block settings and go to the content tab. At first, we’ll enter the pricing table name and additional information.
Rubrik: #
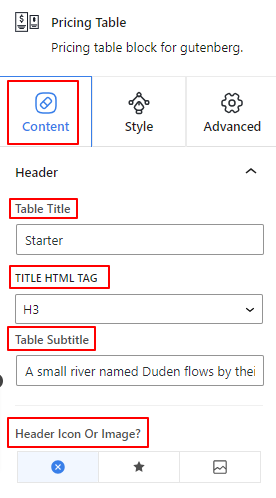
- Table Title: Enter the text of your table header title.
- Titel HTML-tagg: Select the heading’s HTML tag to H1- H6, Div, Span, or Paragraph.
- Table Subtitle: Use this box to write the subtitle for the pricing table.
- Header Icon or Image: Add an icon or image for the table header. You can also choose to display none.
Step 3: Enter Pricing Info #
Price Tag: #
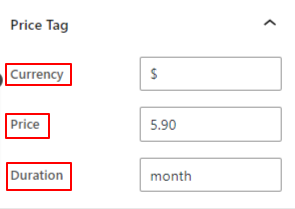
- Valuta: Add a sign or word to show the monetary standard.
- Pris: Enter a value for the price.
- Varaktighet: Enter the text to show the package duration.
Step 4: Add Package Details #
From the feature settings area, you will add the details of your package.
Funktioner: #
- Features Style: Select a style from the dropdown to display the feature between a paragraph or list.
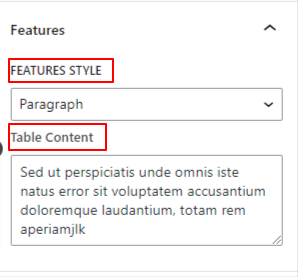
- Table Content: If you choose the paragraph style this option shows up. Enter the package details in the box.
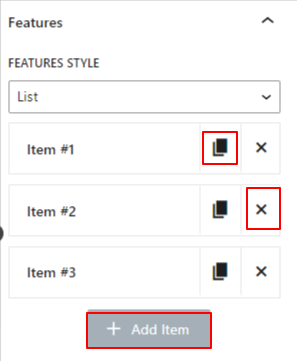
- Lista: Selecting the List option will open up settings for adding a feature list. To add an item, hit the + Lägg till objekt button. You can also copy an item by clicking the “Klona objekt” icon and delete one with the “X” icon. Now, click any of the items and there will be the following options.
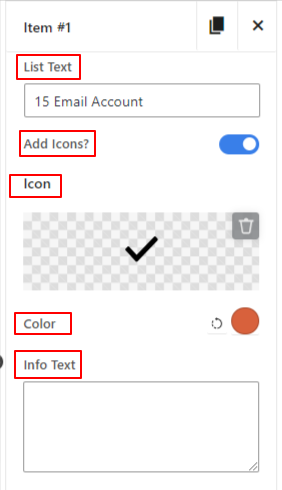
- List Text: Enter text for the feature or package.
- Add Icons: Enable this toggle button to show an icon with the feature.
- Ikon: Select an icon from the library or upload it from your device.
- Färg: Select a color for your icon.
- Info Text: Add any special info about the feature in this box. It will enable an info icon.
Step 5: Add Pricing Table Button #
Using this settings area, you can add a button within the pricing table
Knapp: #
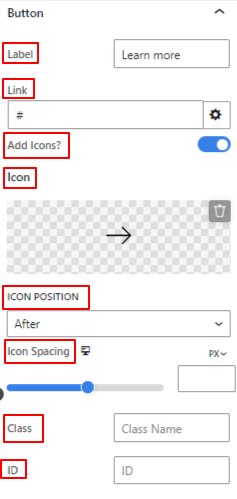
- Märka: Skriv in texten för din knapp.
- Länk: Enter the link address of the webpage you want the visitor to go to.
- Lägg till ikon: Show an icon with the button text.
- Ikon: Choose an icon from the library or upload your own one.
- Placera: Place the icon before or after the text.
- Ikonavstånd: Use the slider to define the gap between the button text and the icon.
- Class & ID: Add a specific Class & ID in these boxes to target the custom CSS from the Stylesheet.
Step 6: Configure Element Ordering #
Custom Ordering: #
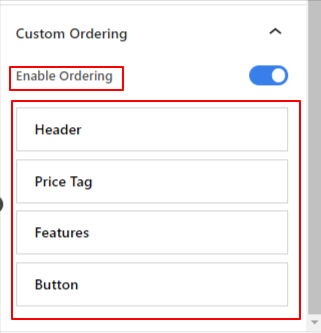
- Enable Ordering: Activate this toggle button to set the ordering of items. Drag an item up or down to place it in your preferred position.
Step 7: Style Content Area #
Now, we’ll focus on styling the text content of the pricing tale. You need to enter the “Style Tab”.
Pricing Body: #
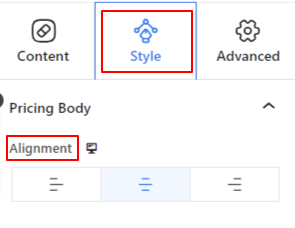
- Inriktning: Set the horizontal position of the pricing table to left, center, or right.
Up next, there will be Table Title and Subtitle options. Both settings have similar settings.
Table Title: #
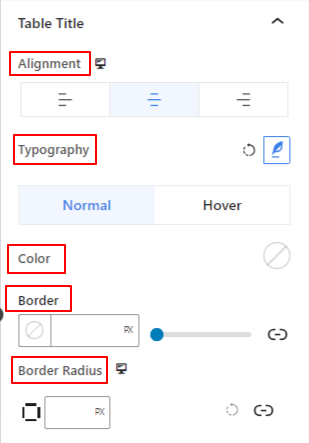
- Inriktning: Align the table title to left, center, or right.
- Typografi: Open this setting area to get all the typography customization for the table title.
The following options are applicable for both normal and hover options.
- Färg: Use the color picker to choose a color for the title.
- Gräns: Get all the border customizations like color, style, and thickness.
- Gränsradie: Define the roundness of the border roundness.
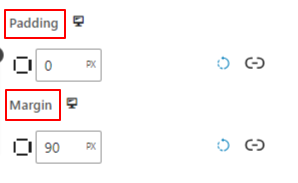
- Stoppning: Add spaces around the title.
- Marginal: Define the distance of the title with other elements.
Step 8: Customize Pricing Info #
Price Tag: #
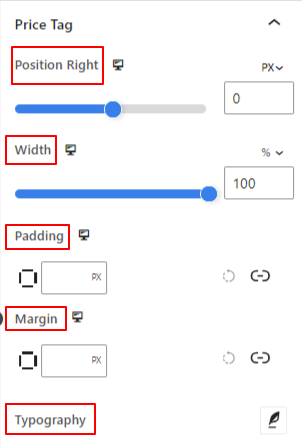
- Position Right: Adjust the left/ right position of the price tag background.
- Bredd: Use the slider to extend or shrink the background width.
- Stoppning: Add inner space to the pricing tag.
- Marginal: Adjust the distance of the pricing tag with other elements.
- Typografi: Open this setting to style the typography of the price tag.
Varaktighet:
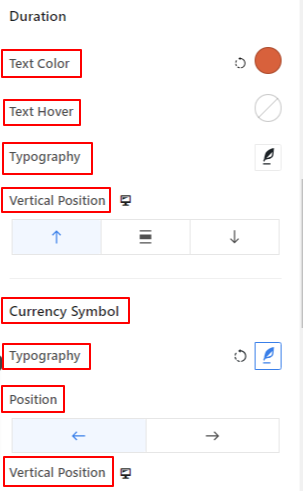
- Text färg: Choose a color for the duration text for the normal state.
- Text Hover: Set the text color on hover as in the previous option.
- Typography: Get all the typography options for the duration text.
- Vertikal position: Define the vertical position of the duration text within the pricing tag. (Top, Middle, Bottom)
Valutasymbol:
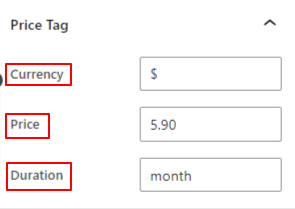
- Typografi: Style the currency text.
- Placera: Place the currency symbol before or after the pricing number.
- Vertikal position: Set the vertical positioning of the currency symbol.
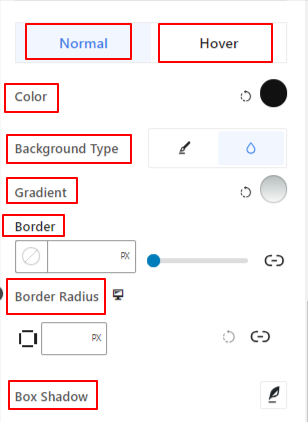
- Färg: Select a color for displaying your currency.
- Bakgrundstyp: Lägg till en bakgrundstyp mellan enfärgad och övertoning.
- Gräns: Set the thickness, color, and style of the border.
- Gränsradie: Enter a value to measure the roundness of the border.
- Box Shadow: Beautify this portion with a box shadow animation effect.
Step 9: Customize Package Details #
Funktioner #
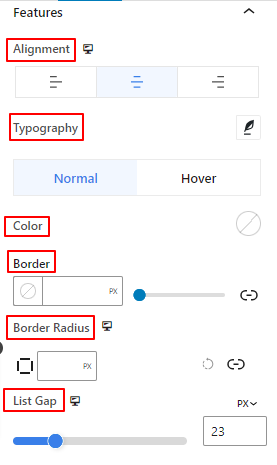
- Inriktning: Align the feature paragraph text or list to left, center, or right.
- Typografi: Change the feature text style, font family, weight, transform, spacing, etc.
The following styling features can apply to both normal and hover options.
- Färg: Pick a color for the feature text.
- Gräns: Customize the border style, color, and thickness.
- Kantradie: Justera kantens rundhet.
- List Gap: This option only appears when you select the list option in the features setting in the content tab. Use this slider to define the gap between all the list items.
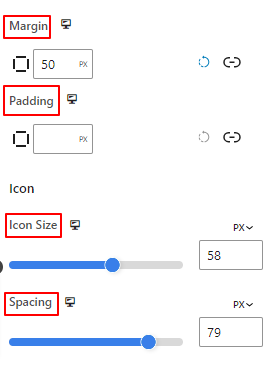
- Marginal: Add spaces surrounding the feature text area.
- Stoppning: Expand the space around the feature text area by entering a value in this box.
Ikon:
- Icon Size: Use this slider to measure the icon size of the list.
- Spacing: Define the gap between the icon and the text of the list.
Step 10: Customize Pricing Table Button #
Knapp: #
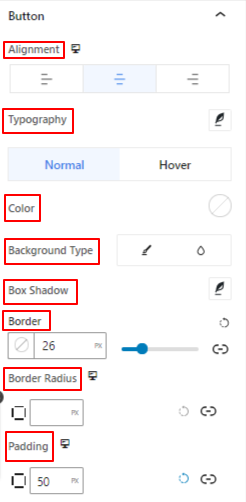
- Inriktning: Place the button to the left, center, or right.
- Typografi: Get various styling options for button text.
- Färg: Give a color to the button text.
- Bakgrundstyp: Choose a classic or gradient background type.
- Box Shadow: Give a shadow effect to your border.
- Gräns: Define the border thickness, style, and color.
- Gränsradie: Justera kantens rundhet.
- Stoppning: Increase space inside the button border.
Step 11: Configure Advanced Settings #
Från fliken Avancerade inställningar kan du konfigurera dragspelsblockets layout, bakgrund, kantstilar och kontrollera dess synlighet.
Layout: #
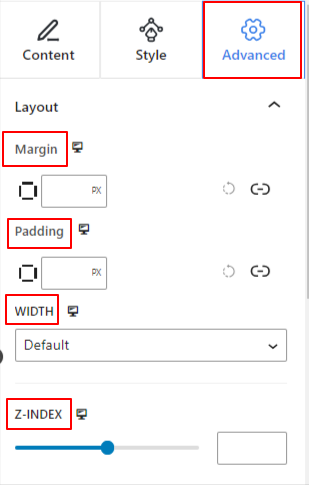
- Marginal: Definiera utrymmet runt blocklayouten. Det hjälper till att ställa in gapet mellan ett annat block.
- Stoppning: Ange ett värde för att ställa in utrymmet runt blocket i dess layout.
- Bredd: Förutom att behålla standardlayoutbredden.
- Full bredd: Om du väljer detta kommer layouten att sträcka sig över hela skärmens bredd.
- Inline (Auto): Att applicera det kommer att ha samma bredd som blockelementet.
- Beställnings: Om du väljer det här alternativet visas ett skjutreglage för att definiera det horisontella utrymmet för blocklayouten.
- Z-index: Använd skjutreglaget för att specificera stapelordningen för blocket med andra block.
Placera: #
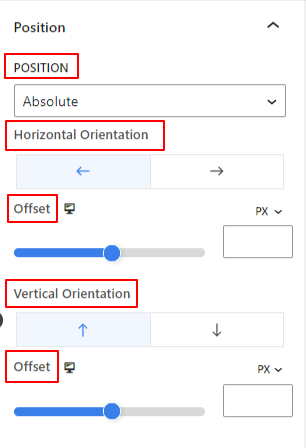
Under rullgardinsmenyn ser du tre alternativ: Standard, Absolut, och Fast.
- Absolut: Om du väljer det här alternativet får du en absolut position för blocket, vilket betyder att element passar in i sin behållare.
- Fast: Alternativet Fixed position låter elementet passa in i hela visningsporten eller skärmen.
Båda, Absoluta och Fixade alternativen har liknande inställningar som nedan:
- Horisontell orientering: Välj positioneringsriktning mellan vänster och höger.
- Offset: Använd skjutreglaget eller ställ in ett värde manuellt för att justera den horisontella placeringen av blocket.
- Vertikal orientering: Välj positioneringsriktning mellan uppåt eller nedåt.
- Offset: Använd skjutreglaget eller ställ in ett värde manuellt för att justera den vertikala placeringen av blocket.
Bakgrund: #
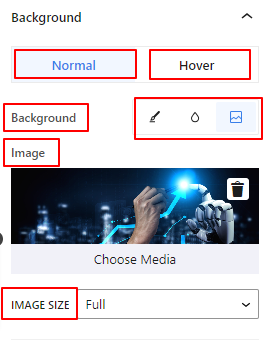
- Bakgrund: Välj ett bakgrundsalternativ mellan enfärgad, övertoning eller bild.
Under alternativet Hover:
- Bild: Om du väljer bildalternativet öppnas följande alternativ:
- Bild: Välj en bild från mediebiblioteket eller ladda upp din egen.
- Bildstorleke: Välj bildstorlek mellan Thumbnail, Medium, Large eller Full.
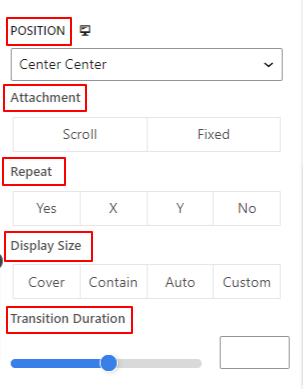
- Placera: Välj positionen för de 10 olika alternativen.
- Anknytning: Ange den fasta eller rullande bakgrundsbildens relation med resten av webbläsarskärmen.
- Upprepa: Välj ett alternativ för att ställa in hur bakgrundsbilder ska upprepas.
- skärmstorlek: Välj en skärmstorlek från fyra olika alternativ.
- Övergångsperiod: Använd skjutreglaget för att justera bakgrundsövergången från Normal till hovringsläge.
Gräns: #
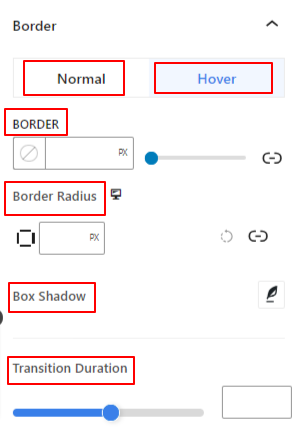
- Gräns: Under det här inställningsalternativet får du gränsinställningar som bredd, stil och färg.
- Gränsradie: Ställ in gränsens rundhet genom att ange ett värde.
- Box Shadow: Få alla inställningar som färg, horisontell/vertikal, oskärpa, spridning och mer för att ge skuggeffekter till kanten.
Under svävningsalternativet:
- Övergångsperiod: Du kan lägga till ett värde manuellt eller använda skjutreglaget för att ställa in tiden för att ändra kantdesignen i hovringsläget.
Synlighet: #
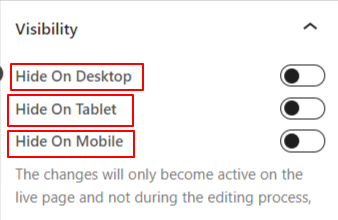
Synlighetsmodulen låter dig styra visningen av blockdesigner beroende på enhetstyp. Det kommer att finnas tre enhetsalternativ (dator, surfplatta, mobil) med en växlingsknapp. Slå på växlingsknappen för att dölja blockdesignen för den enheten.
Du kan dock fortfarande se det i redigeringsvyn.
Avancerad: #
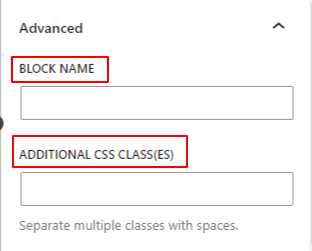
- Blocknamn: Ge ett namn för att identifiera detta block unikt medan du länkar eller skriptar för att stila blocket.
- HTML-ankare: Lägg till en URL för att länka en webbsida.
- Ytterligare CSS-klasser: Tilldela ytterligare CSS-klasser till blocket som låter dig stila blocket som du vill med anpassad CSS.
OBS!: Du kan lägga till flera klasser separat med mellanslag.
That’s it! Now, it’s your turn. Create an amazing pricing table from the block editor on your WordPress website.


