MetForm has Auth integration that allow you to connect your WordPress forms with third-party apps. This lets you safely transfer information between multiple platforms with proper authentication and conditional access.
Quick Overview
This documentation will guide you to integrate MetForm with Auth for data security and authentication. The free version of MetForm comes with this feature. But, you will need Elementor free as MetForm supports its drag-and-drop interface.
Tools needed: Elementor (free) & MetForm (free).
Now, you have to add a login form and enable Auth login with necessary settings. Similarly, add a registration form and enable Auth registration by providing required info. Finally, submit data and your all entries will be stored All Users tab under Users.
How to integrate MetForm with Auth #
Here is the four step tutorial to integrate MetForm with Auth:
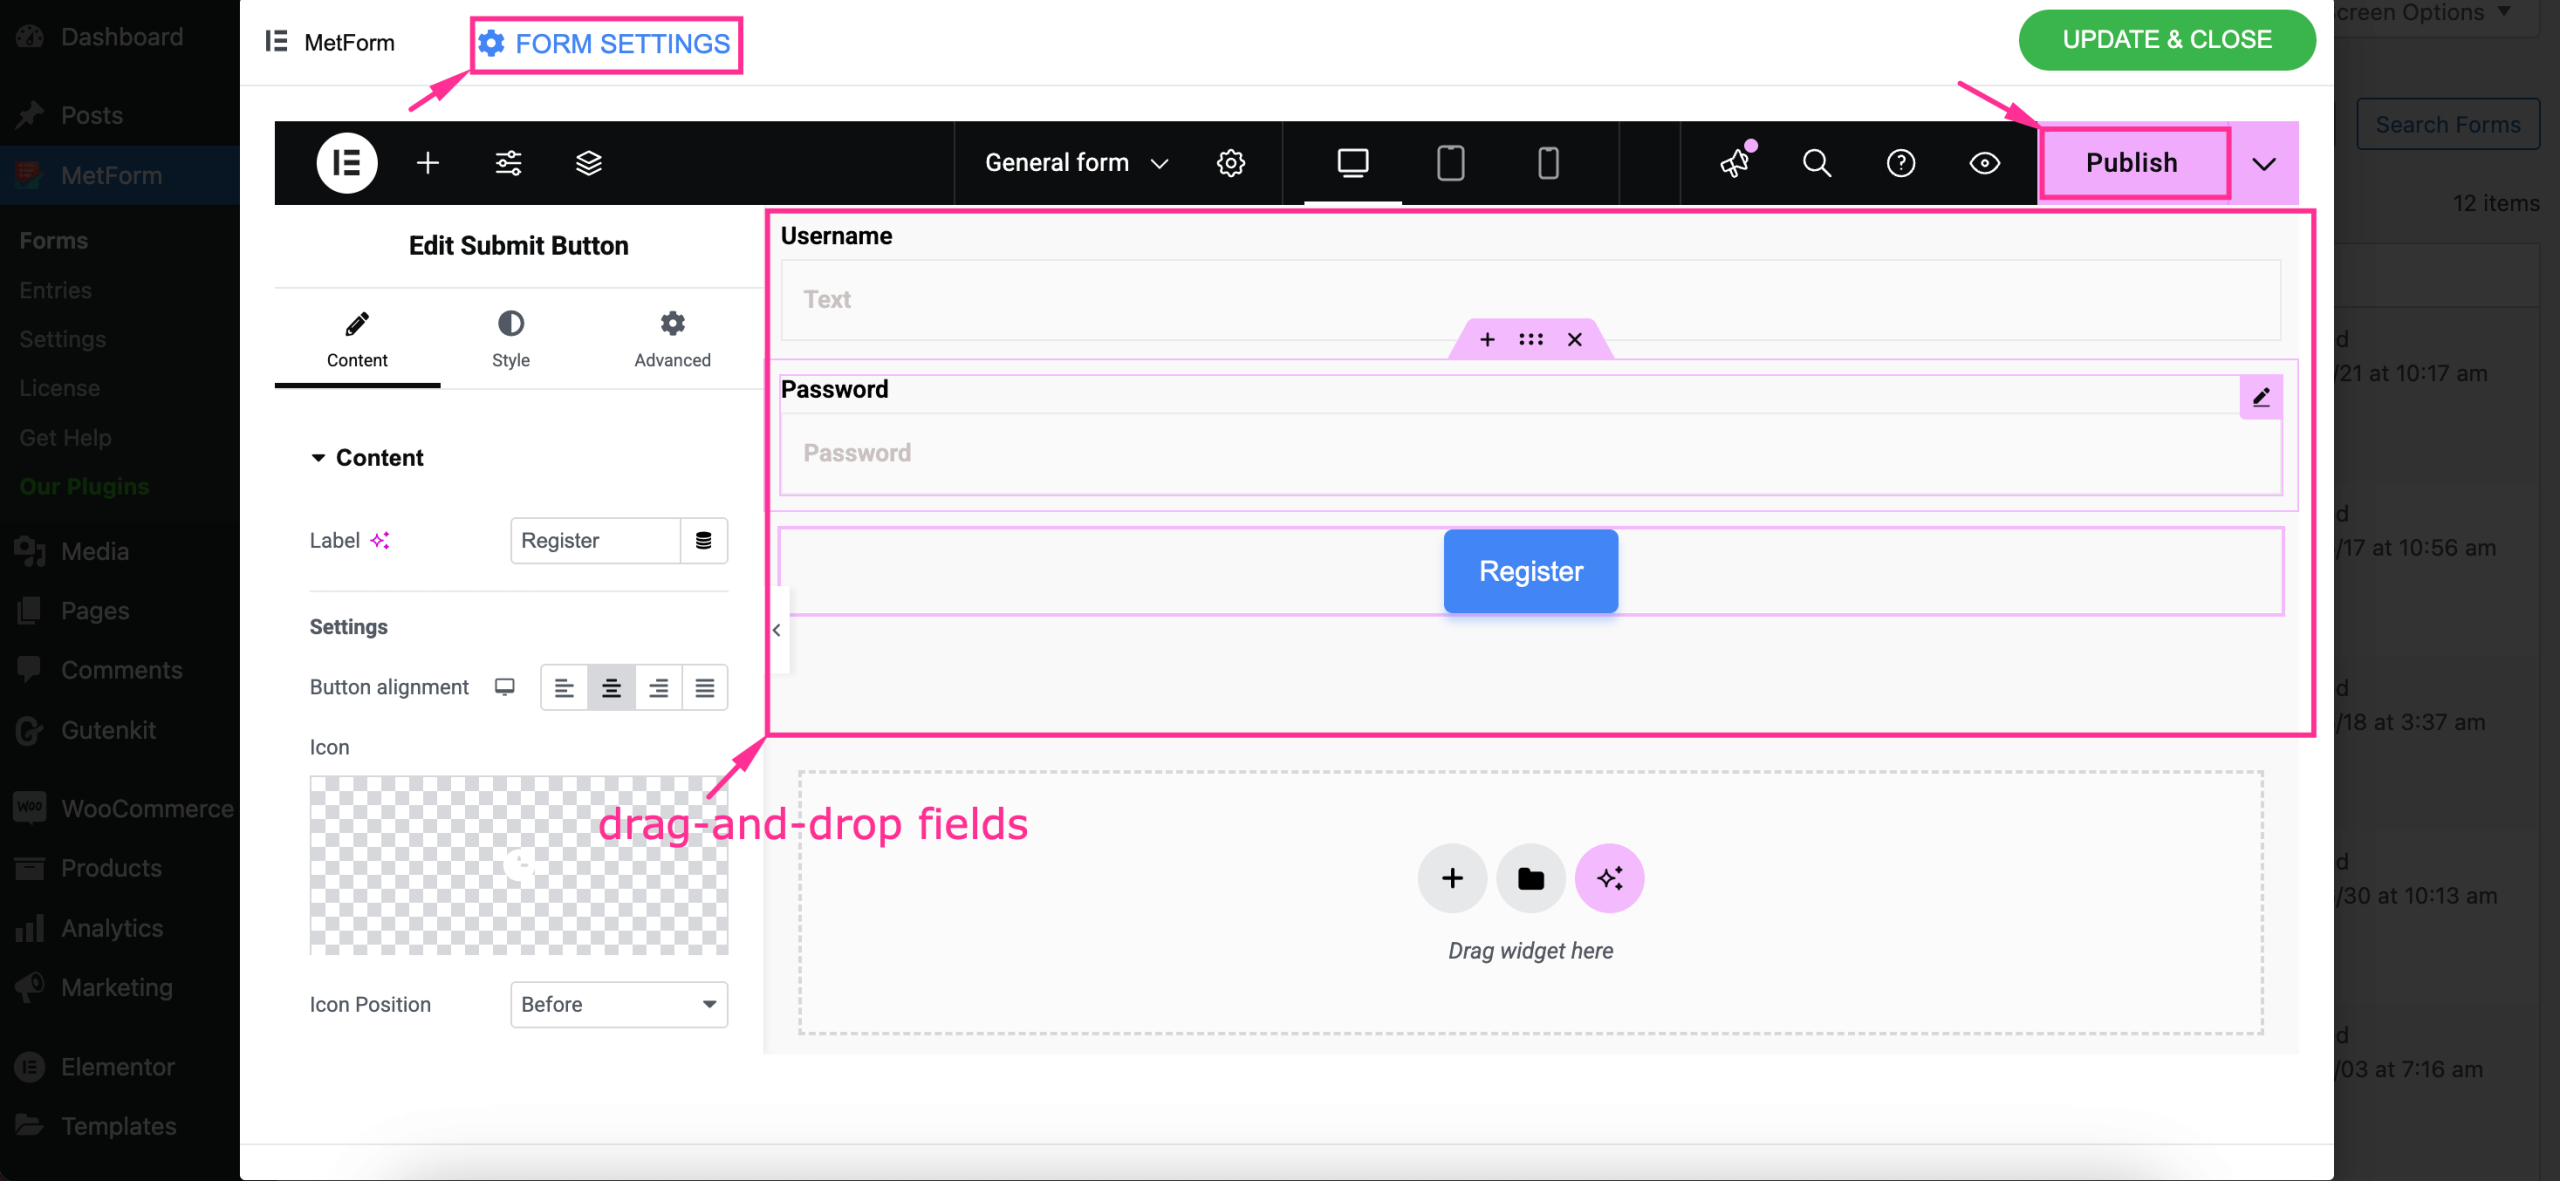
Step 1: Create a Login form. #
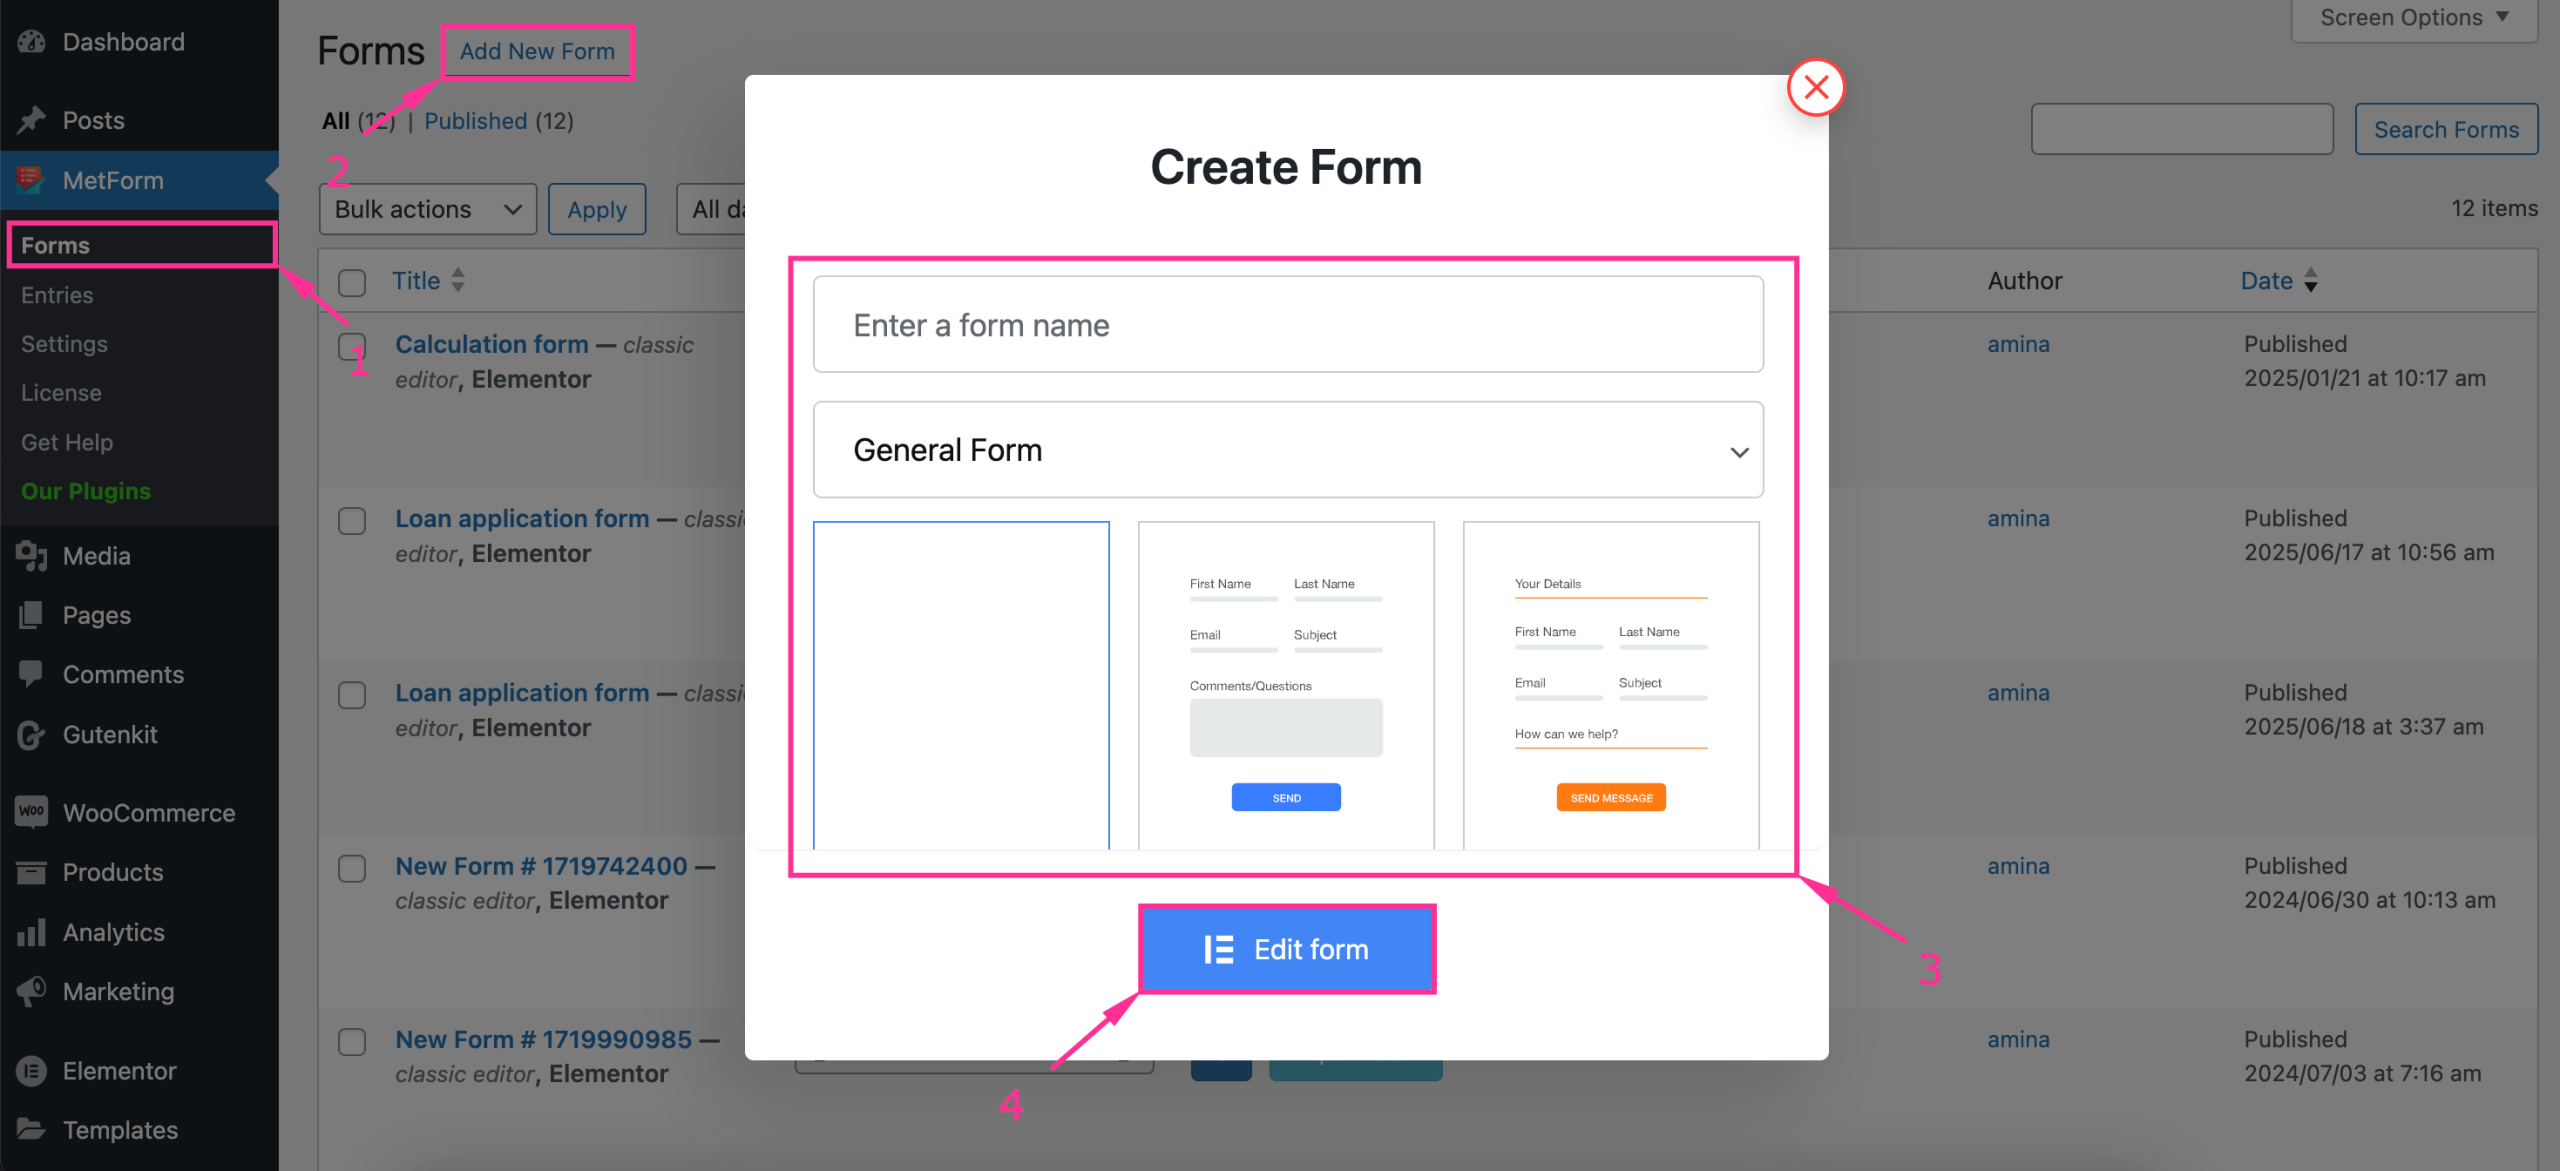
First, you need to add a login form with MetForm. For that, visit your WordPress dashboard and navigate to MetForm >> Forms. Then, press the “Add New Form” button and a form creation tab will popup.
You need to enter form name and form type from there and select a blank template. Then, press the “Edit form” button.
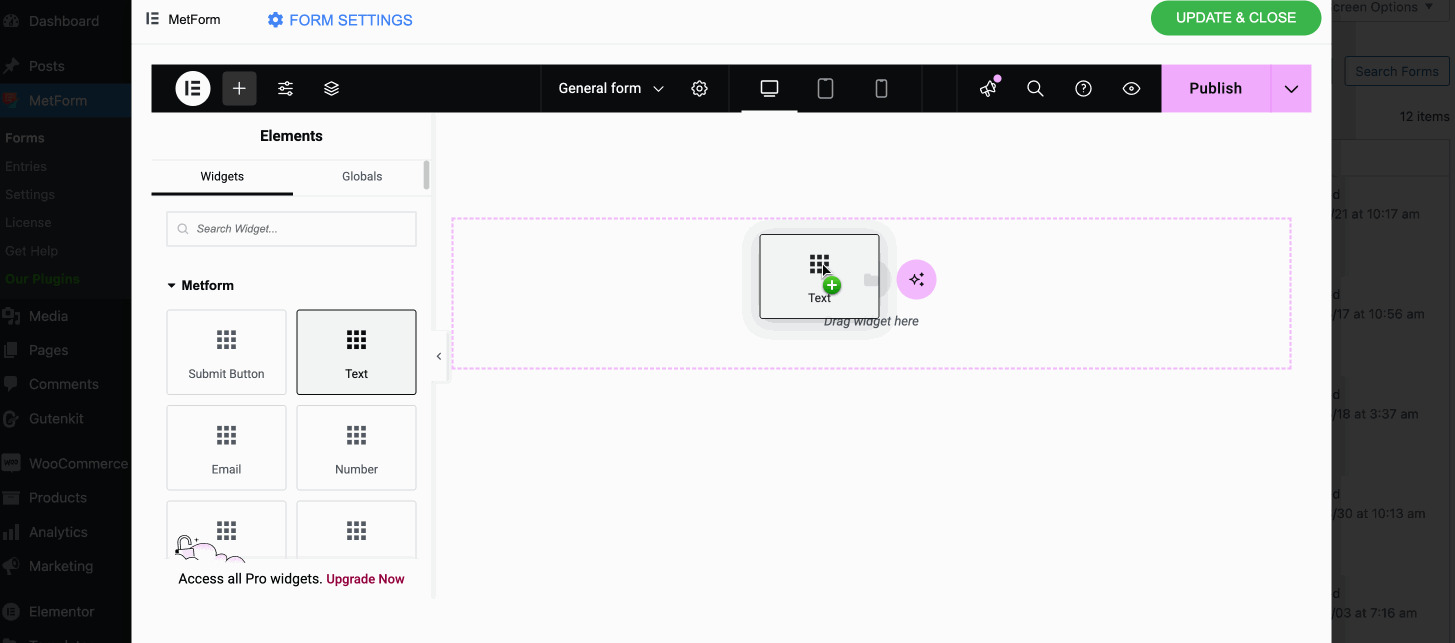
Thus, you will be taken to the Elementor editor, from there you need to drag-and-drop the text, password, and Submit button fields and press the “Publish” button after completing customization.
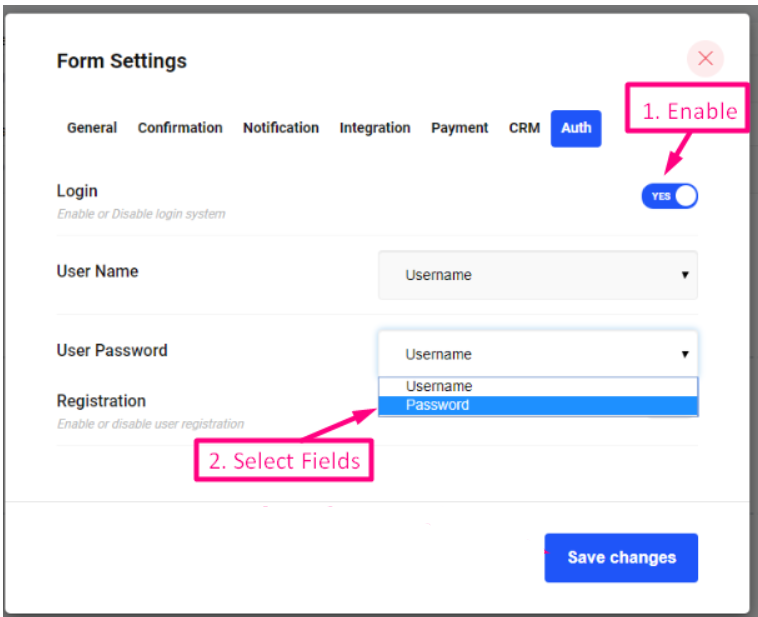
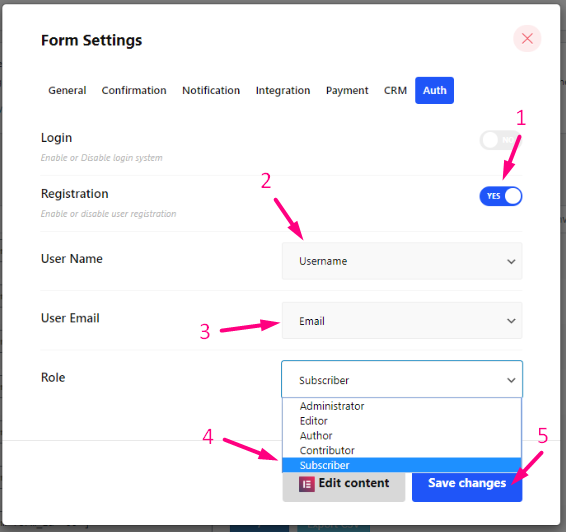
Step 2: Enable Auth Login. #
Now, press the “Form Settings” after publishing login form.
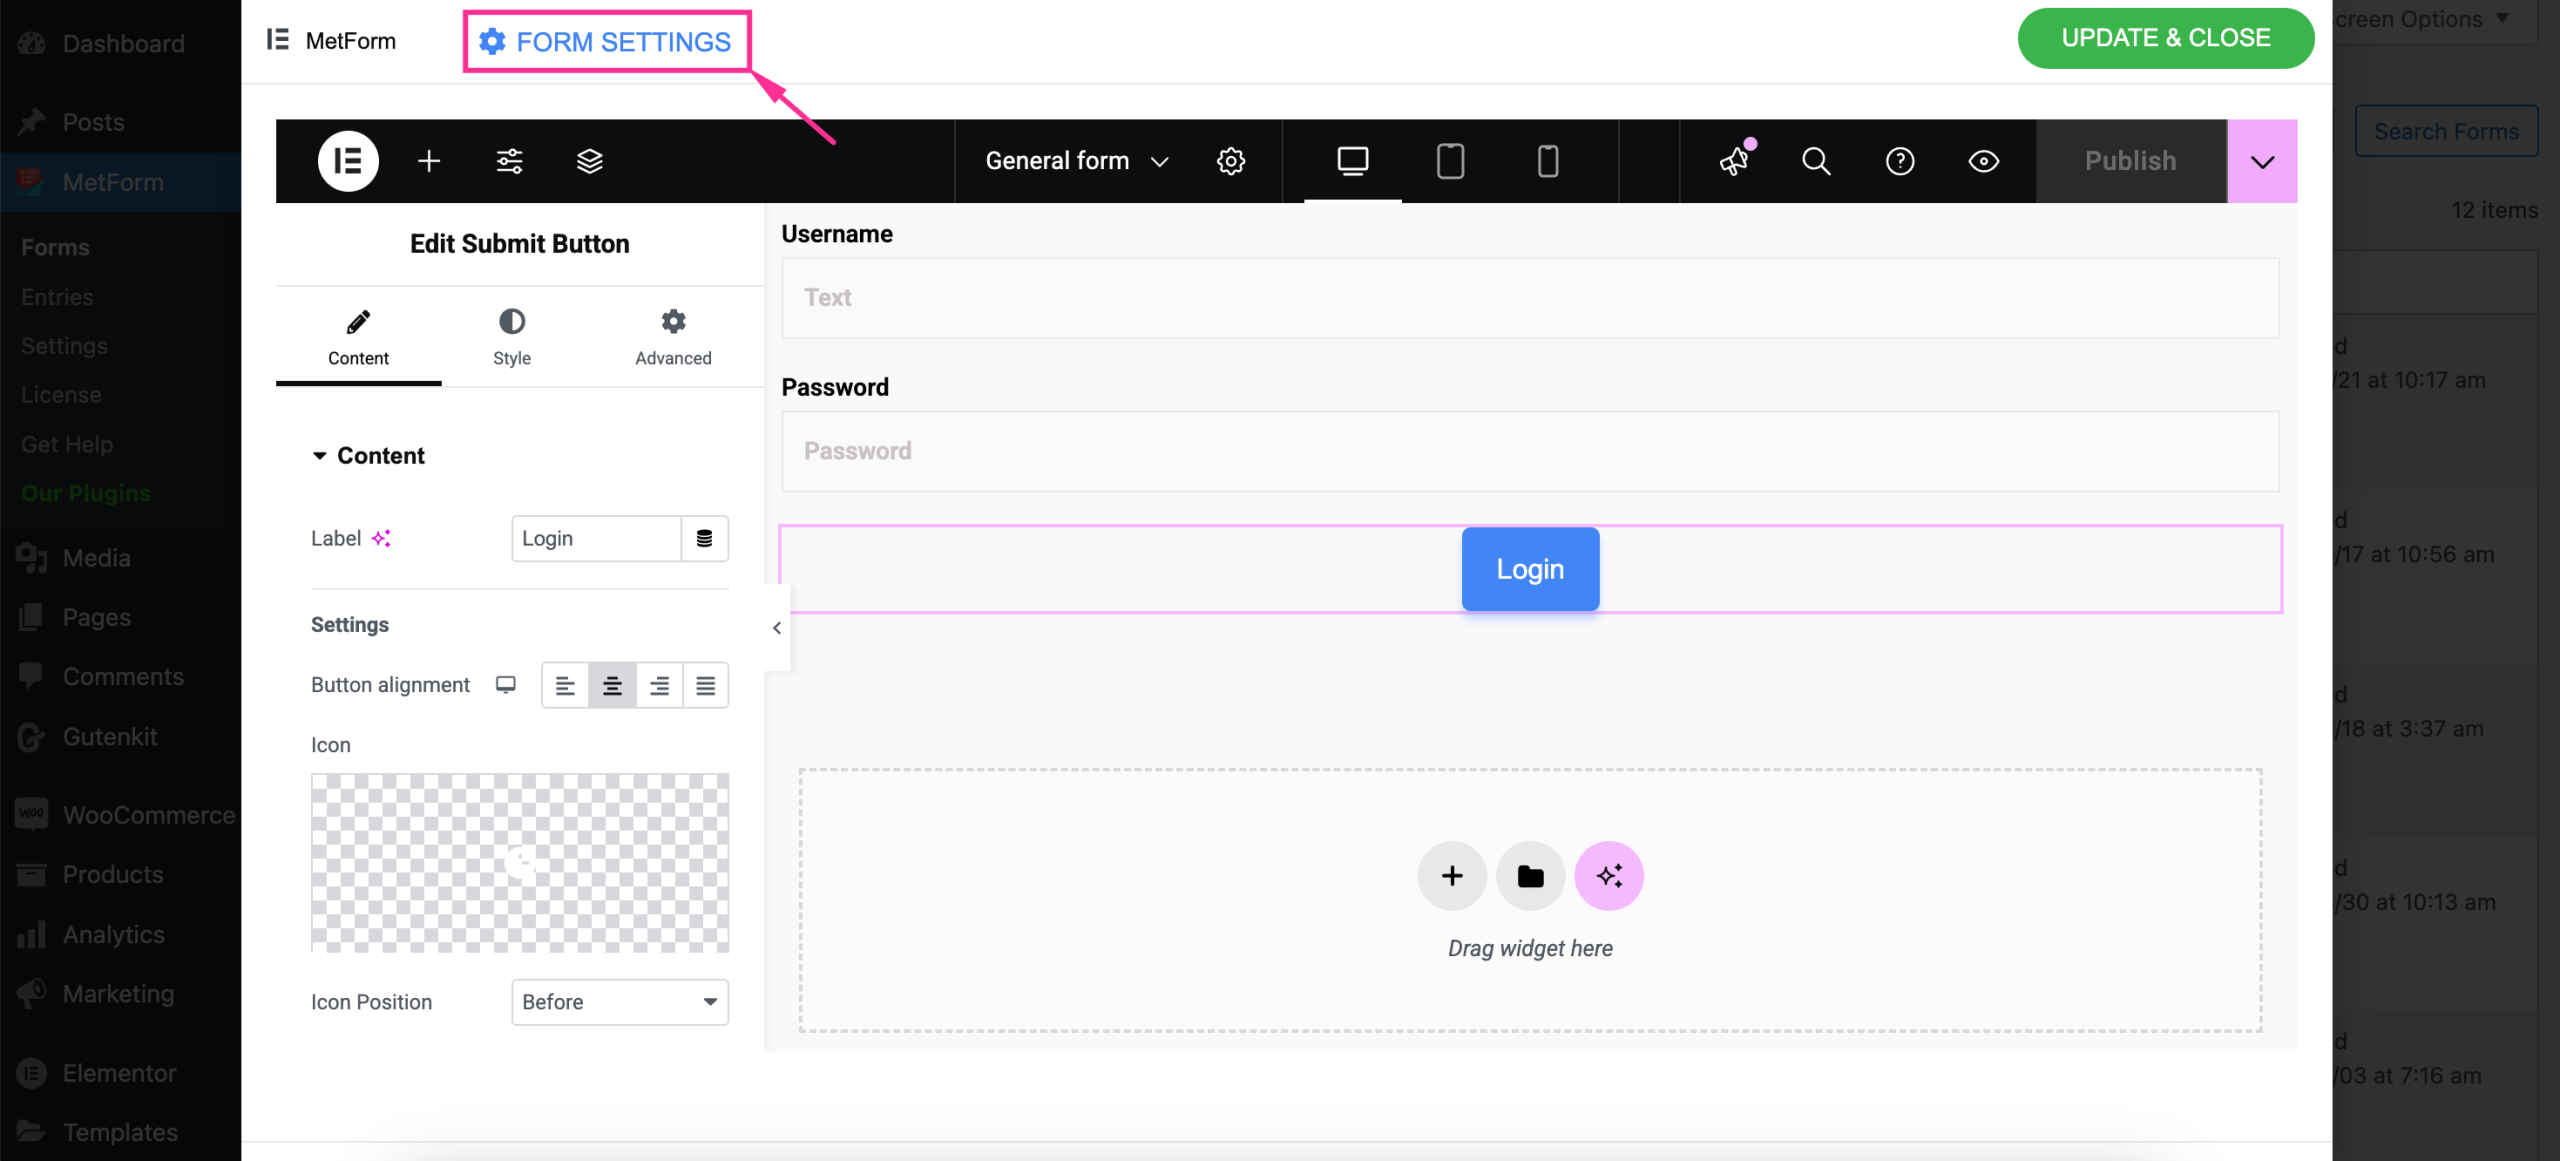
Then, navigate to the Auth tab from the popup window and take the following attempts:
- Aktivera inloggning för att visa inloggningssystem
- Välj Användarnamnsformulärfält
- Välj formulärfält för användarlösenord
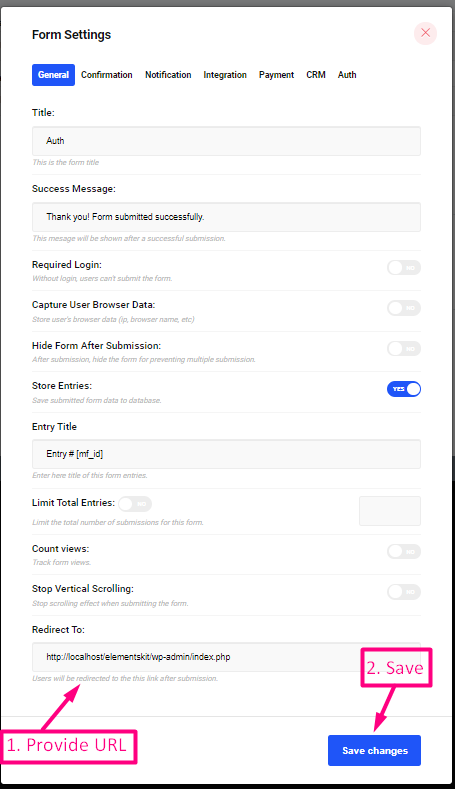
- Gå till Fliken Allmänt=> Provide Omdirigera URL där du vill logga in
- De klara, Spara ändringar
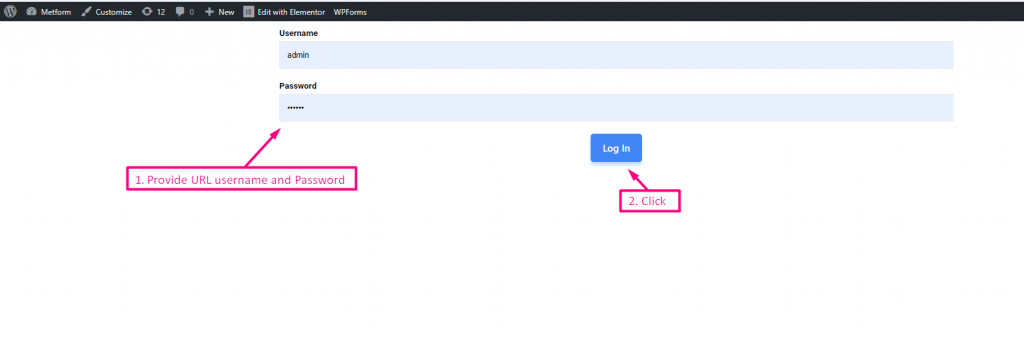
Now Log In with your Username and Password on the frontend.
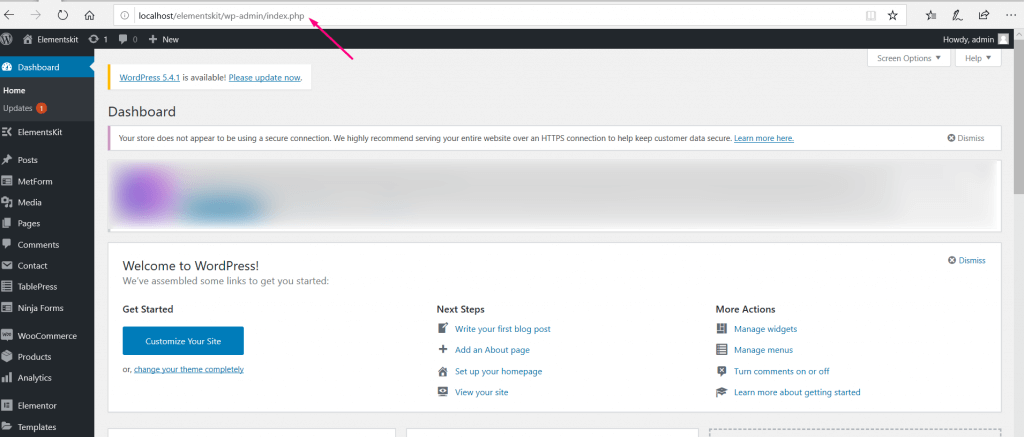
Then, logged in to Tillhandahåller adminpanel för omdirigering av URL.
Step 3: Create a register form. #
Similar to the login form, add registration form by taking the following attempts:
- Dra och släpp fält för registrering
- Click on Publish
- Gå till Formulärinställningar
Now, navigate to the Auth tab from the popup window and:
- Aktivera registrering för att visa User Registration System
- Välj Användarnamnsformulärfält
- Välj E-postformulärfält
- Välj Roll som betyder du kan välja användartyp för registrering
- De klara, Spara ändringar
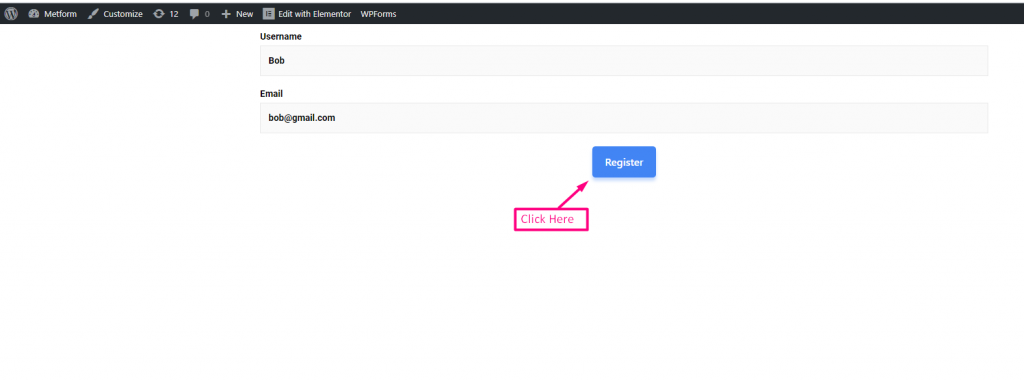
Fyll upp din Anmälningsblankett=> Click on Registrera and your data will be stored in WordPress.
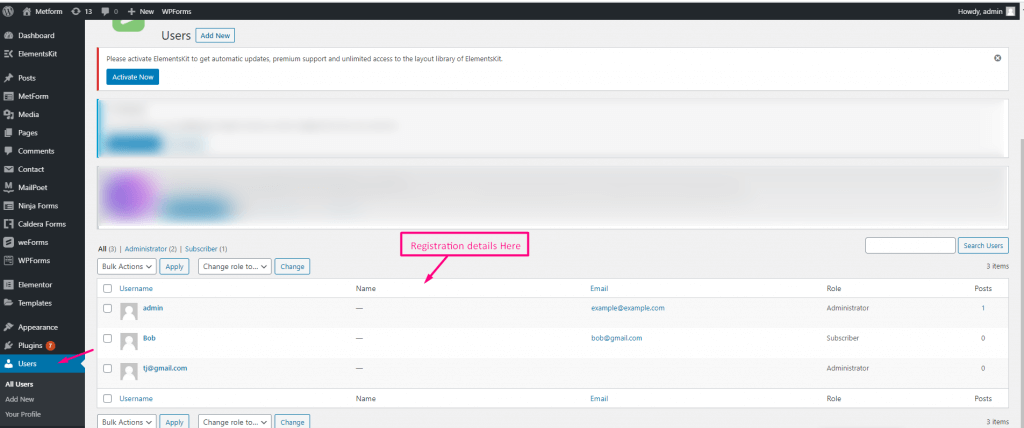
Step 4: Check submitted entries. #
Now to check submitted entries on the backend, go to Användare=> Alla användare=> Du kan se listan med registrerade konton med en roll.