


With MetForm, you can configure WordPress forms with dozens of settings available.
To open the Form Settings of an existing form,
- Vá para MetForm → Forms do seu painel do WordPress.
- Clique no Editar option for an individual form.
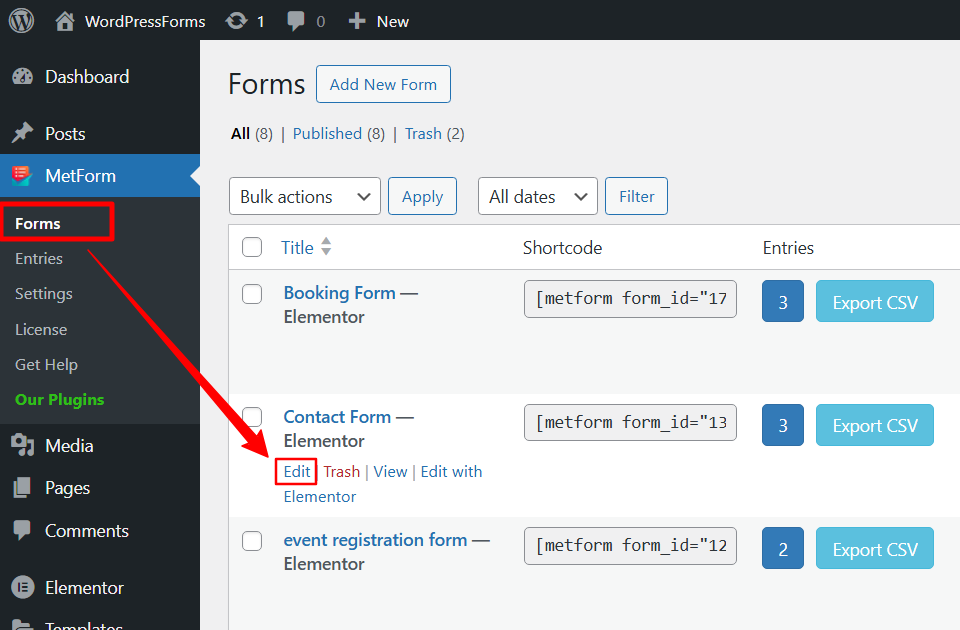
Now, a pop-up will appear where you can configure all the available settings for that form.
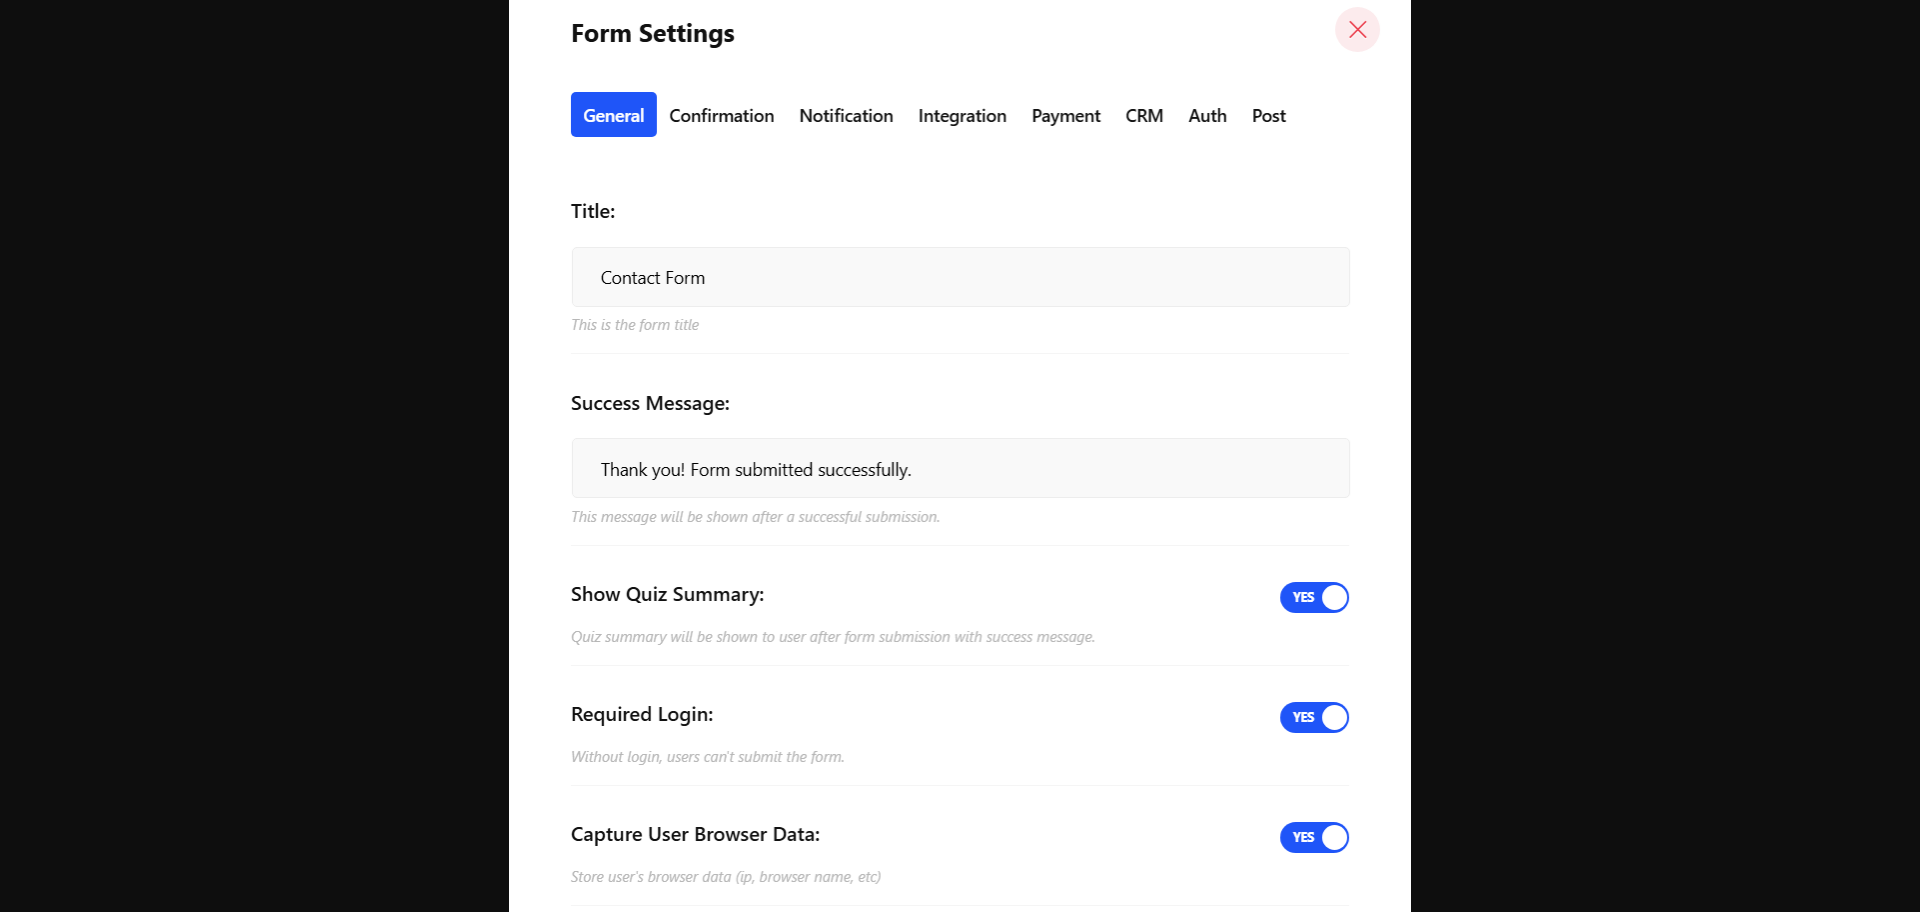
This settings pop-up has several tabs: General settings, Confirmation email, Notification email, Integrations, Payment gateways, CRM, etc.
In this guide, we’ll focus on the General Settings. Here’s a breakdown of what you can manage under the General settings tab.
Título #
You can enter the form title or change the title of an existing form. If you forget to enter a title while creating a form, a title will be automatically generated. You can rename the form title afterward from here.
Mensagem de sucesso #
Add your custom message in this field. Once the form is successfully submitted, this message will be displayed to the user as confirmation. You can use this space to thank the user or share any relevant follow-up information.
Mostrar resumo do questionário #
For the quiz forms, you can show the summary of their answer to the user after the form submission. Turn on the toggle button to enable this option.
Login obrigatório #
When this option is enabled, users have to mandatorily log in to their account before submitting the form.
Enable this for sensitive or member-only forms to maintain the authenticity and integrity of submissions.
Capturar dados do navegador do usuário #
By enabling this option, collect the user’s browser information like Web browser, Visited URL, Title, Visit Time, Visit Count, and User Profile, etc.
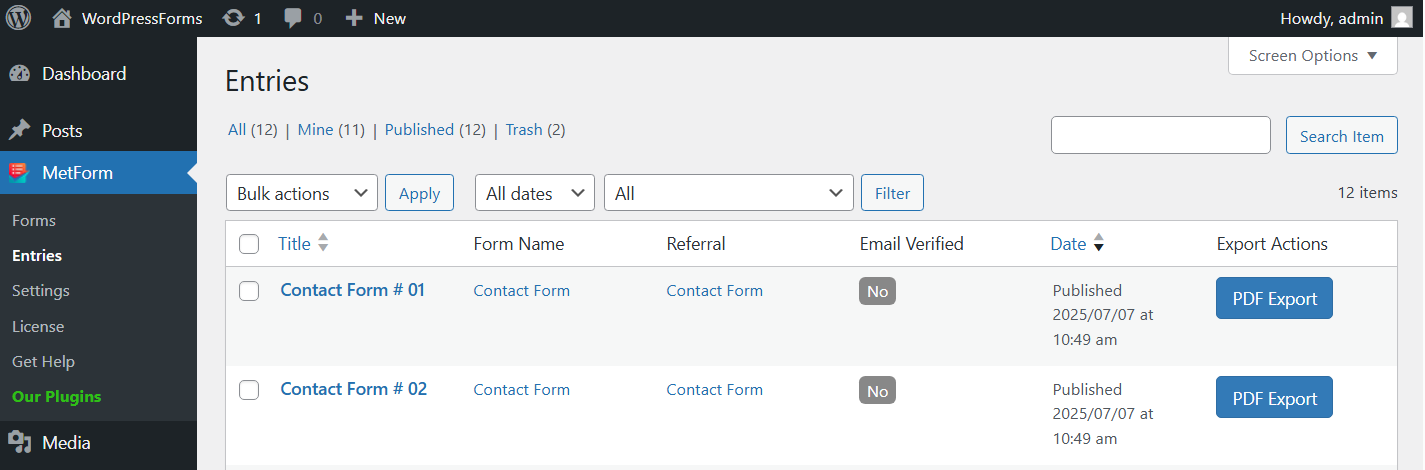
Entradas da loja #
Enable this option to save the submitted form data as entries within your WordPress dashboard. You can view these entries anytime by navigating to MetForm → Entries.
Once enabled, you’ll need to define a title for each entry. To automatically generate a unique title for every submission, use the dynamic placeholder # [mf_id] in the title.
For example, setting the entry title as “Contact Form # [mf_id]” will save the first submission as “Contact Form 1”, the second as “Contact Form 2”, e assim por diante.

Access to the saved entries from MetForm → Entries in your WordPress dashboard:
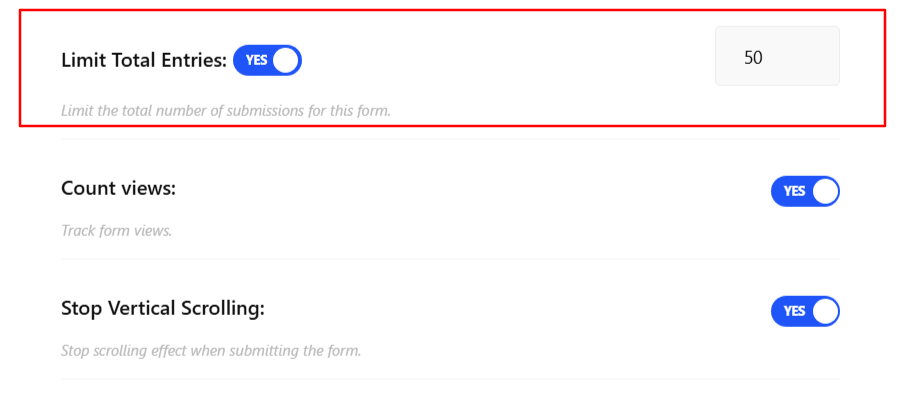
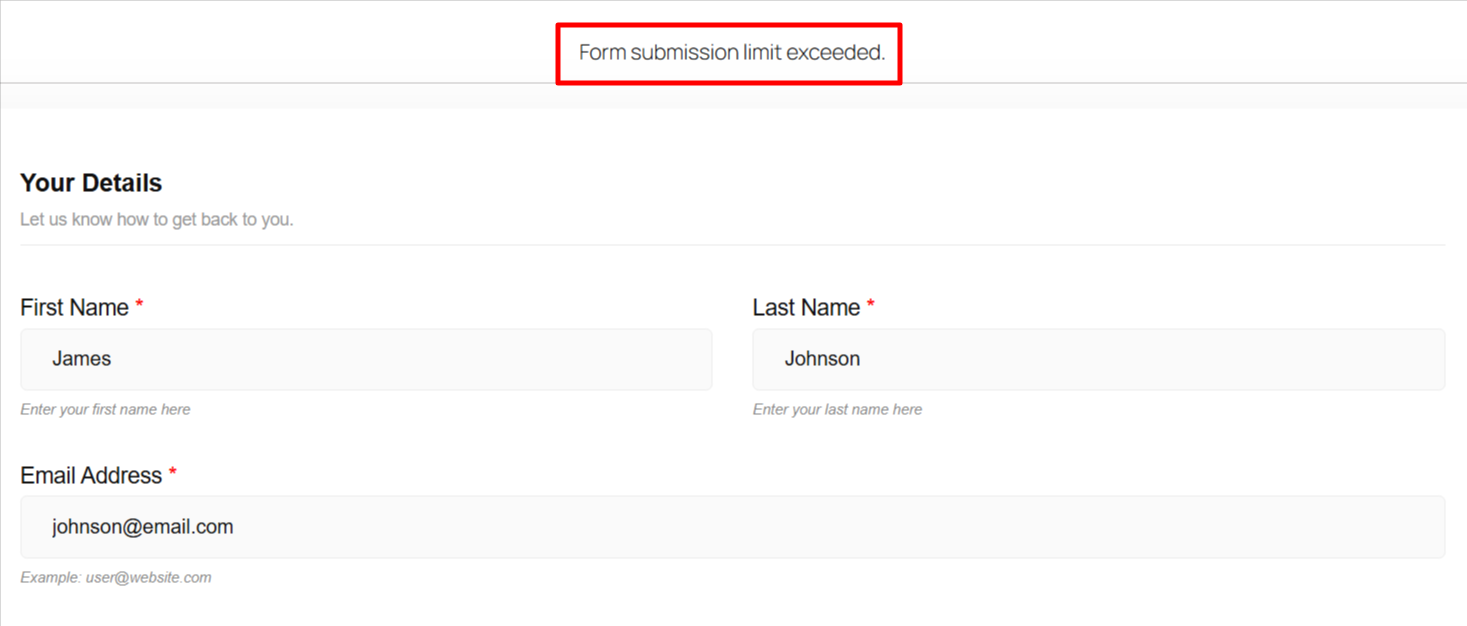
Limitar total de entradas #
Enable the option to limit and restrict the number of submissions a form can receive. When enabled, enter the maximum number of entries allowed.
Once that limit is reached, the form will no longer accept new submissions.
When the submission reaches the limit, users will be prevented from submitting the form and will see the following message:
Stop Vertical Scrolling #
Turn on this setting to disable vertical scrolling during form submission. This helps maintain a fixed viewport, preventing users from accidentally moving the page while the form is processing. It ensures a smoother and more stable experience, particularly for longer forms.
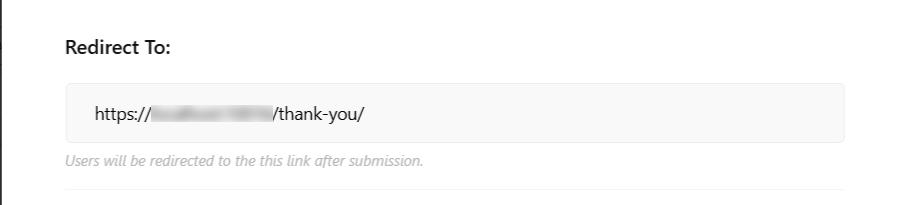
Redirect To #
For a better user experience, you can redirect the user to a page, like a custom thank you page or any relevant page on your website, to display additional information.
Just enter the URL of the page where you’d like users to be redirected in the field.
That’s it! You’re all set to use your WordPress form to its full potential with most advanced features.
MetForm makes building forms in WordPress incredibly easy and highly customizable. It is the most flexible Elementor contact form builder that lets you build faster, smoother, and better.


