Obtenha a ajuda do GutenKit Fun Facts Gutenberg Blocks para uma exibição intuitiva e impressionante de fatos importantes com números e ícones. Ele fornece todos os controles de personalização e estilos de animação para destacar números no seu site WordPress.
Leia esta documentação para aprender como criar um contador de fatos divertidos incrível no editor de blocos Gutenberg do seu site.
Como adicionar um contador de fatos interessantes no editor de blocos do WordPress? #
Antes de passar para o primeiro passo, você precisa ter o plugin GutenKit instalado no seu site WordPress.
Etapa 1: adicione o bloco de fatos divertidos GutenKit #
No seu painel do WordPress:
- Adicione uma página ou publicação e vá para o editor de blocos.
- Clique no "+” ícone na parte superior da tela do editor.
- Você verá uma biblioteca de blocos ser revelada.
- Use a barra de pesquisa para encontrar o “Fato engraçado" bloquear.
- Quando ele aparecer, clique ou arraste e solte-o na tela do editor.
Etapa 2: Adicionar ícone e conteúdo #
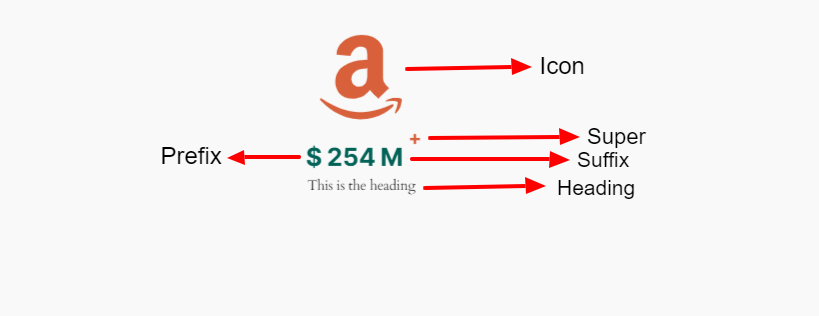
Agora, a primeira área de configuração do bloco com a qual você trabalhará é a aba Content. A partir daqui, você adicionará ícones e outros conteúdos como números, prefixos, sufixos, etc.
Ícone: #
- Adicionar ícone: Por padrão, este botão de alternância está ativado. Desative-o se não quiser mostrar um ícone. Você pode alterar o ícone da biblioteca ou carregar seu próprio arquivo de ícone SVG.
Contente: #
- Número: Coloque o número que você deseja mostrar neste campo.
- Habilitar prefixo: Use este botão de alternância se quiser adicionar algo antes do número. Você pode simplesmente digitar qualquer coisa na tela do editor de blocos.
- Habilitar Sufixo: Ative isso para adicionar e digitar algo depois do número.
- Habilitar Super: Super funciona como outro elemento de suporte para suas informações de fatos divertidos. Habilite-o e adicione um texto ou símbolo.
- Habilitar Cabeçalho: Habilite este botão de alternância para mostrar o título ou texto. Além disso, defina a tag HTML do cabeçalho no menu suspenso.
Configurações: #
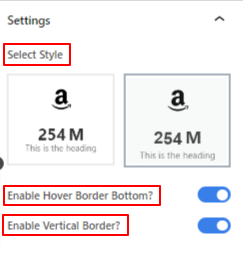
- Selecione o estilo: Escolha um estilo revelador para o número do fato no lado do visitante.
- Duração: Defina a duração da contagem numérica enquanto ela é exibida em milissegundos.
- Habilitar Hover Bottom: Alterne este botão para mostrar uma linha inferior ao passar o mouse.
- Habilitar Borda Vertical: Ative para mostrar uma borda vertical.
Etapa 2: estilize o ícone #
Nesta parte, vamos nos concentrar no estilo do ícone e de outros elementos de conteúdo.
Vá para a aba de estilo:
Ícone, #
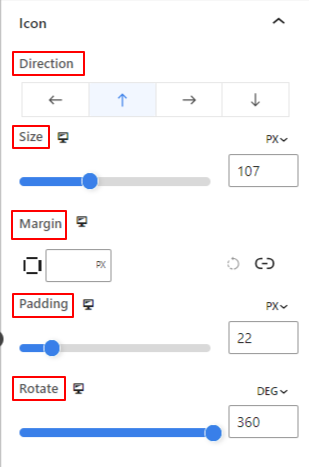
- Direção: Defina o posicionamento do ícone (Esquerda/ Superior/ Direita/ Inferior)
- Tamanho: Use o controle deslizante para determinar o tamanho do ícone.
- Margem: Insira o valor personalizado de marting para ajustar o espaço ao redor do ícone.
- Preenchimento: Defina o preenchimento do ícone usando o controle deslizante ou inserindo um valor personalizado no campo.
- Girar: Dê um valor específico ou aplique o controle deslizante para determinar o grau de rotação do ícone.
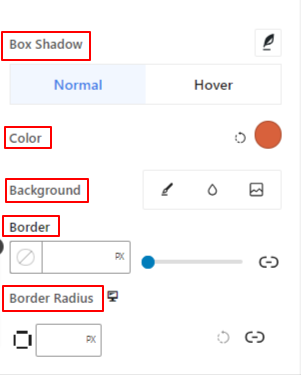
- Sombra da caixa: Usando esses controles, você pode adicionar efeitos de sombra ao redor do ícone.
- Cor: Use o seletor de cores para definir uma cor para o ícone.
- Fundo: Adicione um tipo de fundo entre cor sólida e gradiente.
- Fronteira e Raio de Borda: Defina a espessura, a cor e a redondeza da borda do ícone.
Etapa 3: estilize o conteúdo do texto #
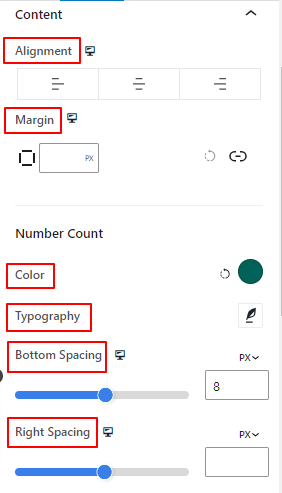
- Alinhamento: Coloque o conteúdo do texto à esquerda, ao centro ou à direita.
- Margem: Ajuste a margem do conteúdo do texto.
Contagem de números:
- Cor: Selecione uma cor para o número.
- Tipografia: Controle todas as configurações de tipografia, como família de fontes, tamanho, espessura, estilo, espaçamento entre letras e muito mais.
- Espaçamento inferior: Defina o espaço inferior entre o número e o conteúdo do título usando o controle deslizante ou colocando um valor personalizado.
- Espaçamento correto: Defina o espaço ou lacuna entre o número e o conteúdo do sufixo.
Título:
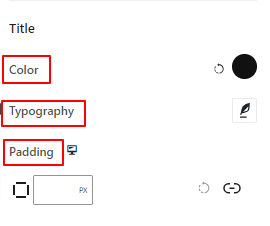
- Cor: Dê uma cor ao texto do título.
- Tipografia: Obtenha todos os controles de tipografia, como família de fonte, tamanho, estilo, espaçamento entre linhas, etc.
- Preenchimento: Insira o valor personalizado desejado para adicionar preenchimento ao redor do título.
Etapa 4: estilize outros elementos #
Super: #
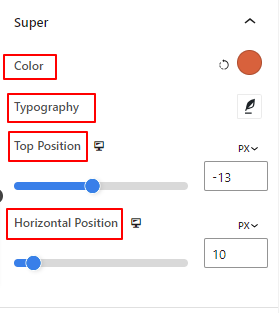
- Cor: Selecione uma cor para o super texto ou símbolo.
- Tipografia: Obtenha todas as configurações de tipografia para supertexto.
- Posição superior: Ajuste o posicionamento vertical do super conteúdo.
- Posição horizontal: Use este controle deslizante para definir a posição horizontal do super conteúdo.
As próximas duas opções só ficarão visíveis na aba Estilo quando forem habilitadas na aba Conteúdo.
Borda de foco: #
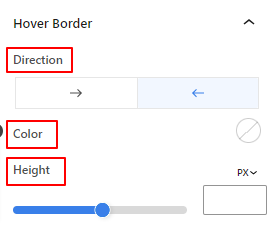
- Direção: Defina a direção de revelação da borda do cursor.
- Cor: Dê uma cor à borda do hover.
- Altura: Defina a altura da borda do hover usando o controle deslizante ou inserindo um valor personalizado.
Borda vertical: #
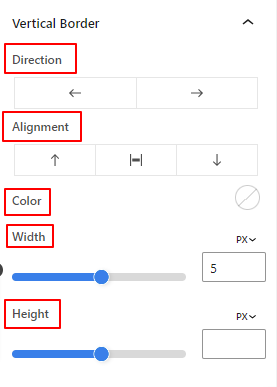
- Direção: Selecione a direção esquerda ou direita da borda vertical.
- Alinhamento: A partir daí, você definirá o posicionamento vertical da borda vertical.
- Cor: Use o seletor de cores para dar uma cor à borda vertical.
- Largura e altura: Ajuste a espessura e a altura da borda vertical.
Pronto. Terminamos todas as configurações. Agora, é sua vez de experimentar todos esses recursos para criar seu contador de fatos divertidos em seu site.
Etapa 5: Configurações avançadas #
Na aba Configurações avançadas, você pode configurar o layout do bloco Curiosidade, o plano de fundo, os estilos de borda e controlar sua visibilidade.
Disposição, #
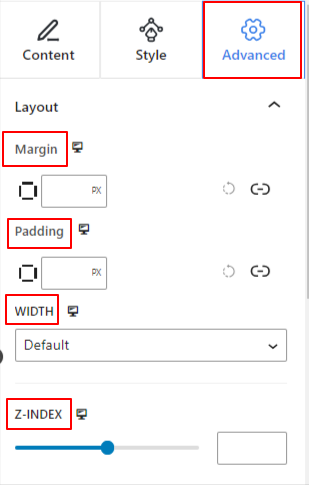
- Margem: Defina o espaço ao redor do layout do bloco. Ajuda a definir a lacuna entre outro bloco.
- Preenchimento: insira um valor para definir o espaço ao redor do bloco dentro de seu layout.
- Largura: Além de manter a largura padrão do layout.
- Largura completa: selecionar esta opção fará com que o layout ocupe toda a largura da tela.
- Em linha (automático): Aplicá-lo terá a mesma largura do elemento do bloco.
- Personalizado: Escolher esta opção revelará um controle deslizante para definir o espaço horizontal do layout do bloco.
- Índice Z: Use o controle deslizante para especificar a ordem da pilha do bloco com outros blocos.
Posição: #
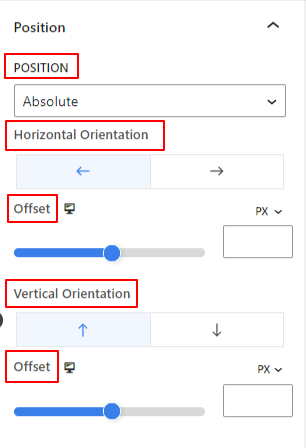
No menu suspenso, você verá três opções: Padrão, Absoluto, e Fixo.
- Absoluto: Selecionar esta opção lhe dará uma posição absoluta do bloco, o que significa que os elementos caberão em seu contêiner.
- Fixo: a opção Posição fixa permitirá que o elemento caiba em toda a viewport ou tela.
Ambas as opções Absoluta e Fixa têm configurações semelhantes às abaixo:
- Orientação horizontal: Escolha a direção de posicionamento entre esquerda e direita.
- Desvio: Use o controle deslizante ou coloque um valor manualmente para ajustar o posicionamento horizontal do bloco.
- Orientação Vertical: Selecione a direção de posicionamento entre para cima ou para baixo.
- Desvio: Use o controle deslizante ou coloque um valor manualmente para ajustar o posicionamento vertical do bloco.
Fundo: #
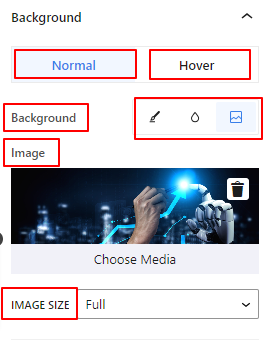
- Fundo: escolha uma opção de plano de fundo entre cor sólida, gradiente ou imagem.
Na opção Hover:
- Imagem: Se você escolher a opção de imagem, serão abertas as seguintes opções:
- Imagem: escolha uma imagem da biblioteca de mídia ou carregue a sua própria.
- Tamanho da imageme: Selecione o tamanho da imagem entre Miniatura, Médio, Grande ou Completo.
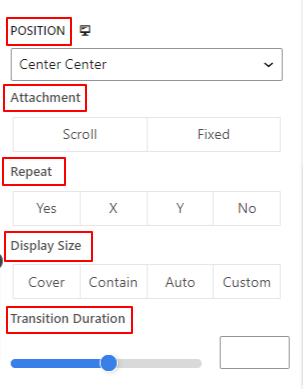
- Posição: Selecione a posição das 10 opções diferentes.
- Anexo: Especifique a relação da imagem de fundo fixa ou de rolagem com o resto da tela do navegador.
- Repita: selecione uma opção para definir como as imagens de fundo serão repetidas.
- Tamanho de exibição: selecione um tamanho de exibição entre quatro opções diferentes.
- Duração da transição: use o controle deslizante para ajustar a transição do plano de fundo do estado Normal para o estado flutuante.
Fronteira: #
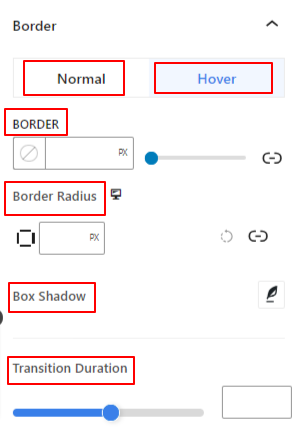
- Fronteira: Nesta opção de configuração, você obterá opções de configuração de borda como largura, estilo e cor.
- Raio da Fronteira: defina o arredondamento da borda inserindo um valor.
- Sombra da caixa: Obtenha todas as configurações como cor, horizontal/vertical, desfoque, propagação e muito mais para dar efeitos de sombra à borda.
Na opção Hover:
- Duração da transição: você pode adicionar um valor manualmente ou usar o controle deslizante para definir o tempo para alterar o design da borda no estado de foco.
Visibilidade: #
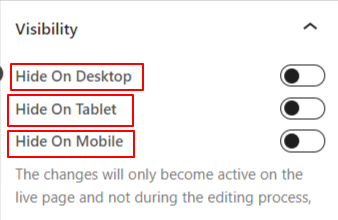
O módulo de visibilidade permite controlar a exibição de designs de blocos dependendo do tipo de dispositivo. Haverá três opções de dispositivos (Desktop, Tablet, Mobile) com um botão de alternância. Ative o botão de alternância para ocultar o design do bloco desse dispositivo.
No entanto, você ainda pode vê-lo na visualização do editor.
Avançado: #
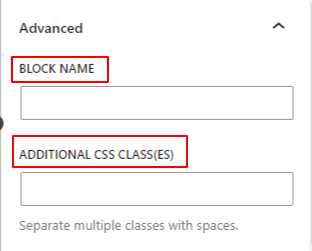
- Nome do bloco: forneça um nome para identificar este bloco exclusivamente ao vincular ou criar scripts para definir o estilo do bloco.
- Âncora HTML: adicione um URL para vincular uma página do site.
- Classes CSS adicionais: atribua classes CSS adicionais ao bloco, o que permitirá estilizar o bloco como desejar com CSS personalizado.
Observação: você pode adicionar várias classes separadamente com espaços.


