


Welcome to the MetForm documentation. We have created this guide to purchase, install, and activate 메트폼 프로. The setup process is quick and straightforward.
계속해 보겠습니다.
How to install MetForm WordPress form builder #
You can install the MetForm directly to your website or download it from WordPress plugin repository and upload it. Here, we will show both methods.
To install and use MetForm, you need to ensure the Elementor page builder is installed and activated on your website.
전제 조건:
- 엘리멘터: 플러그인 다운로드
Method 1: Install MetForm directly into WordPress website #
To install the plugin directly into your website, first log in to your WordPress site. Then,
- 이동 Plugins → Add Plugin.
- Enter the plugin name in the Search Plugins 필드.
- 다음을 클릭하세요. 지금 설치 button for the MetForm plugin.
- Once installed, click on the 활성화 단추.
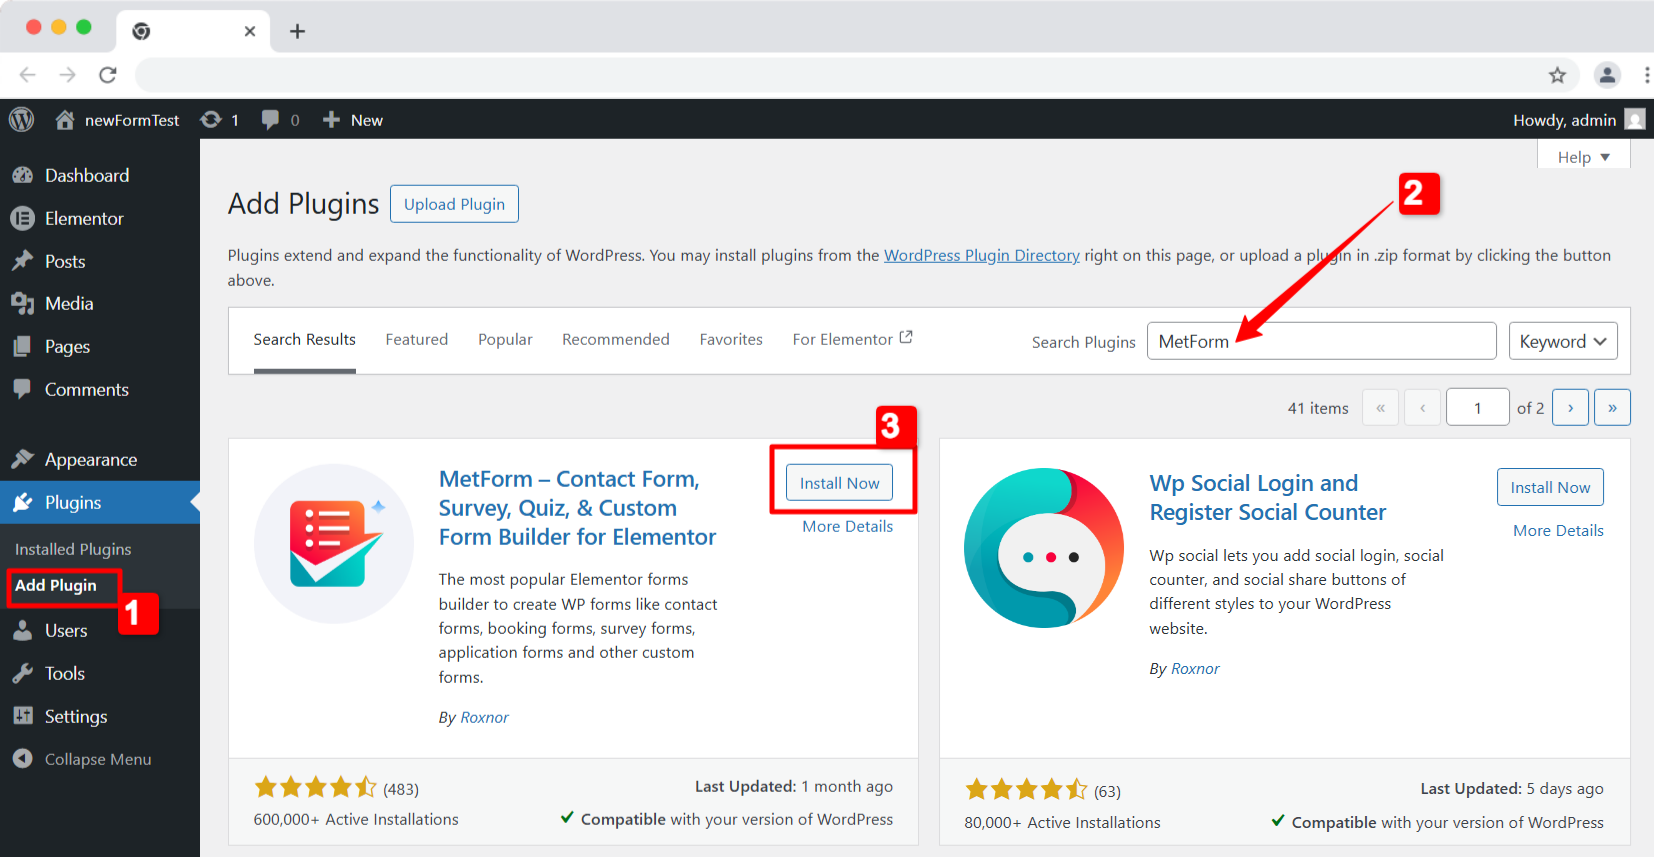
That’s it. Now you have the MetForm plugin installed and activated in your WordPress site.
Method 2: Manually install MetForm WordPress plugin #
To install the MetForm builder manually, you need to download the plugin from the WordPress plugin directory.
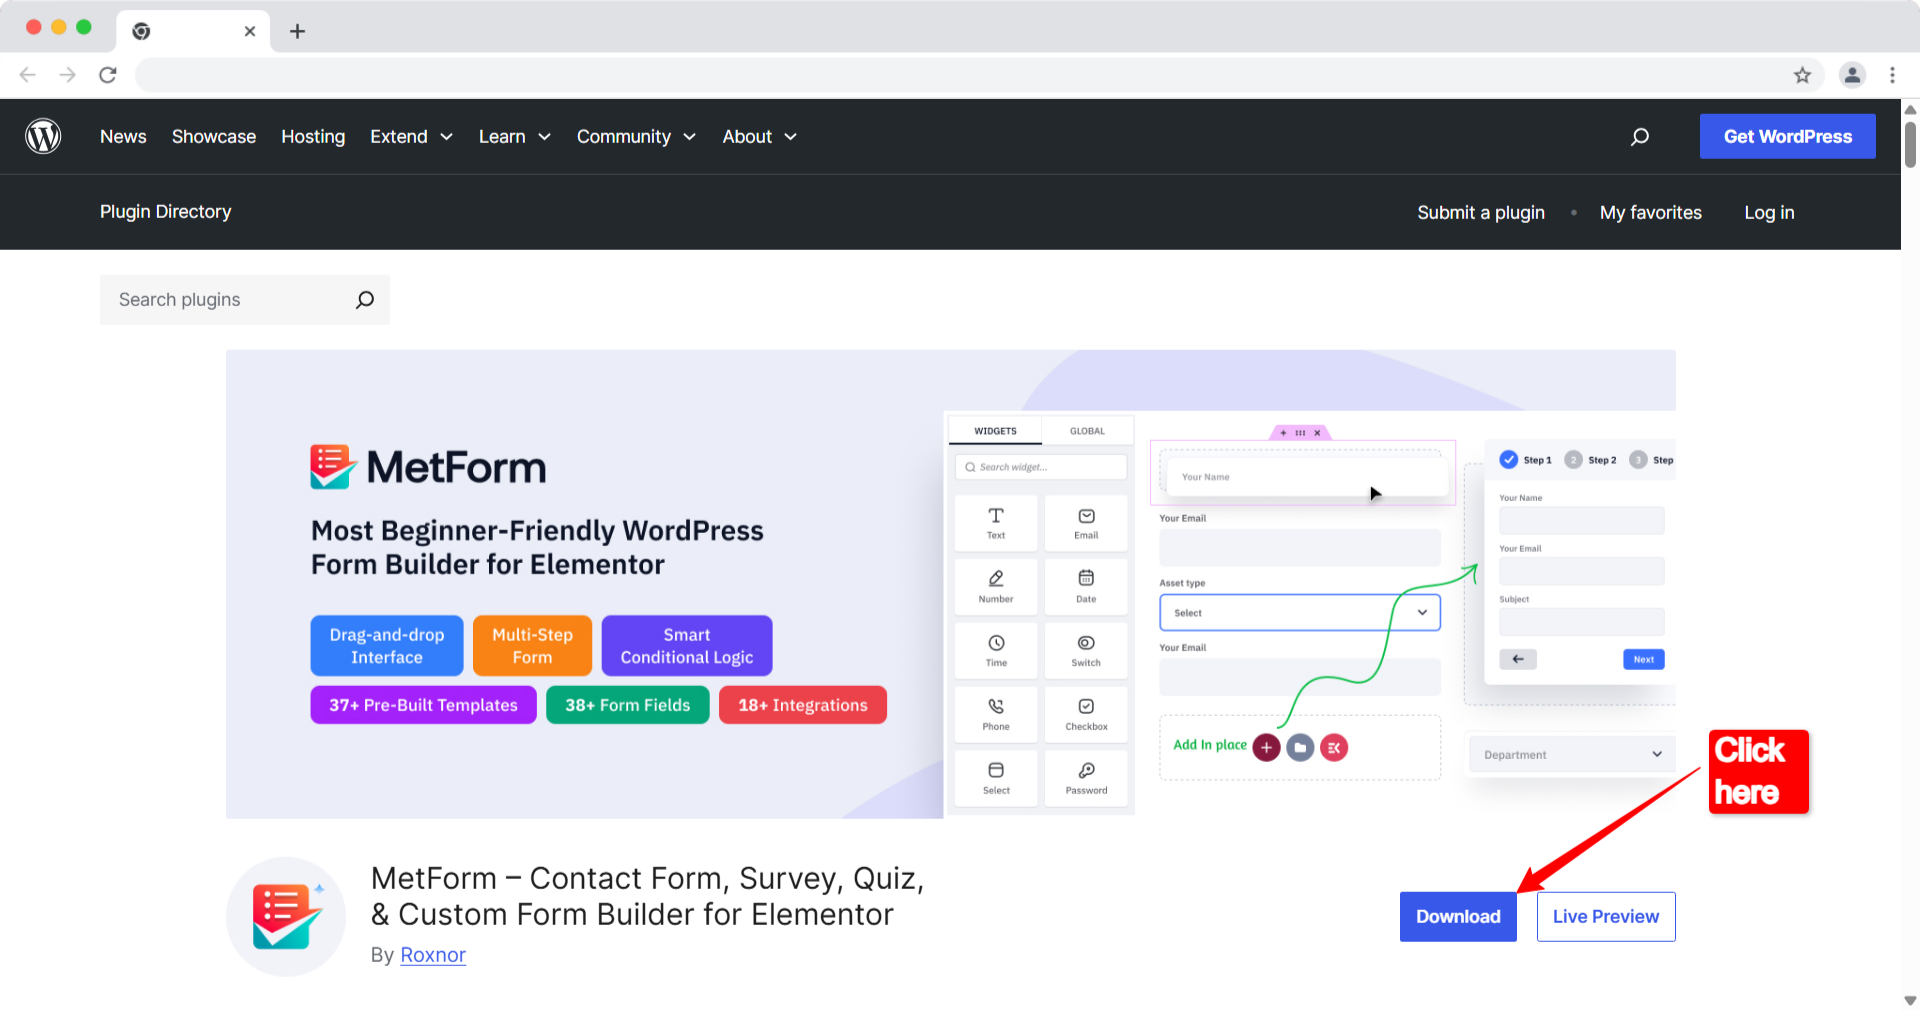
Step 1: Download the plugin #
그러려면 MetForm 플러그인 페이지 on WordPress.org and hit the Download button at the top right. Once downloaded, save the .지퍼 file to your local storage for the next step.
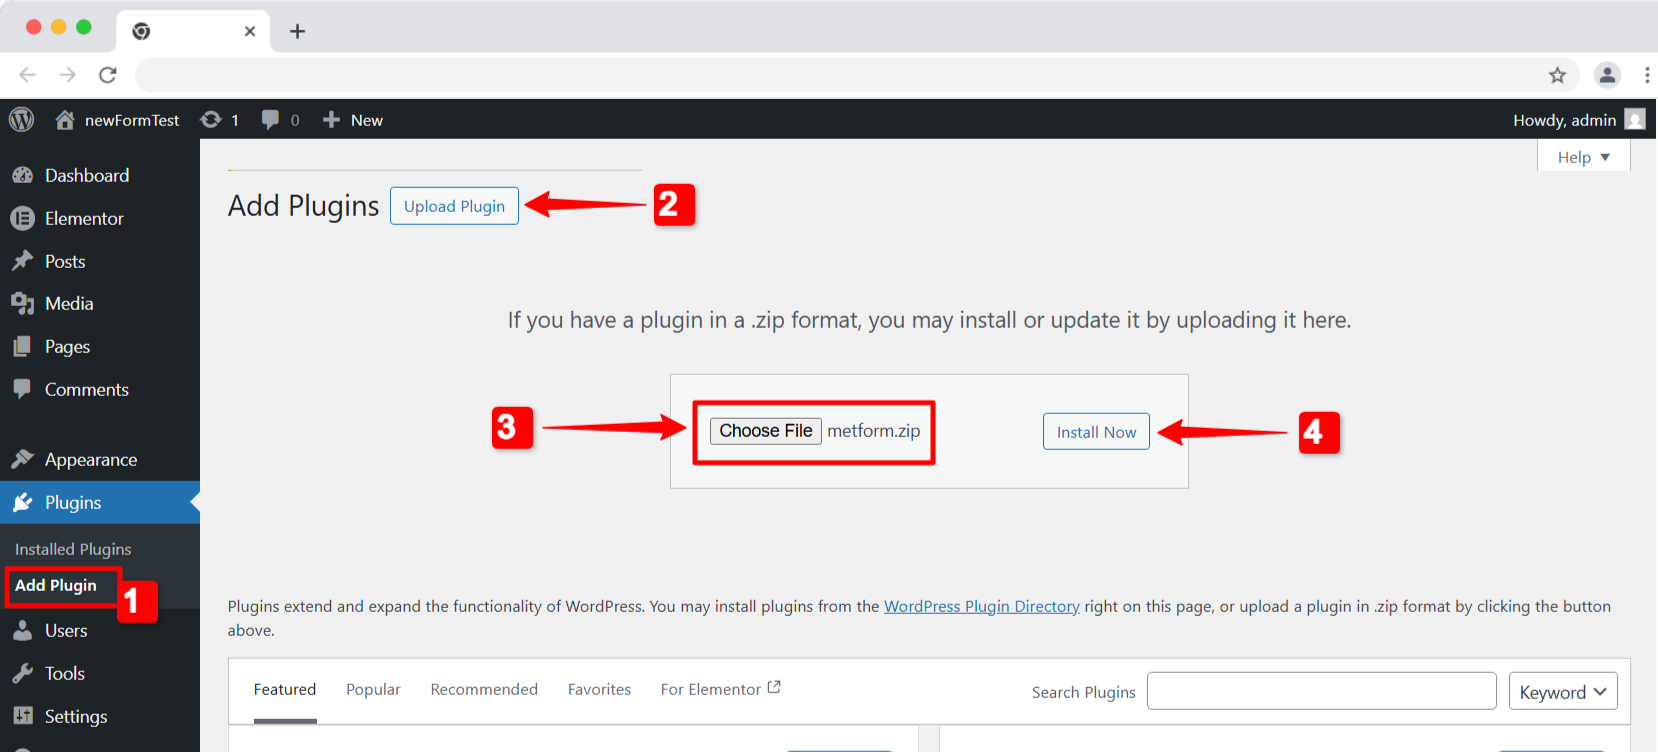
Step 2: Upload and install MetForm plugin #
- First, sign in to your WordPress dashboard and navigate to Plugins → Add New.
- 딸깍 하는 소리 플러그인 업로드 button at the top left corner.
- 을 치다 파일을 선택 button, select the MetForm.zip file you downloaded earlier.
- 다음을 클릭하세요. 지금 설치 button to upload it.
- WordPress will handle the installation for you in a few seconds. Once that’s done, click 활성화 to start using MetForm.
Once the plugin is installed, you can start building the forms in your WordPress site.


