


WooCommerce sales notification module will let you show product sales notifications through a popup to your website visitors. You can make your site social proof by this notification. Now, ShopEngine has added a new module that is sales notification. By using this module, you can easily add a sales notification in a few seconds.
Quick Overview
This documentation will walk you through a no-code method of integrating sales notification in WooCommerce. For this guide, you need to install and activate ShopEngine’s free and pro verisons along with Elementor (free) and WooCommerce (free).
Here are the steps to follow while adding sales notification:
✅ Enable sales notifcation.
✅ Configure sales notification.
✅ Live notification for WooCommerce.
Also, you will learn the signification of using sales notification on your site.
販売通知を使用する理由 #
販売通知とは何かについてはすでに学習しました。ここで、販売通知を使用する利点を理解します。販売通知を使用する必要がある理由は次のとおりです。
- それはあなたの売上を伸ばすでしょう。
- あなたのサイトを社会的証明にします。その結果、顧客からの信頼を得ることができるのです。
- 顧客に製品を試してみるように勧めることができます。
- ユーザーエンゲージメントが向上します。
ShopEngine を使用して WordPress に販売通知を追加する手順 #
Luckily, now you don’t need to use a separate plugin to add a sales notification to your WordPress site. ShopEngine provides a 販売通知 module along with 17+ modules. Here are the easy 2 easy steps of adding a sales notification. Follow the following steps:
Step 1: Enable the WooCommerce Sales notification module. #
まず、管理ダッシュボードに入り、ShopEngine>> モジュールに移動します。
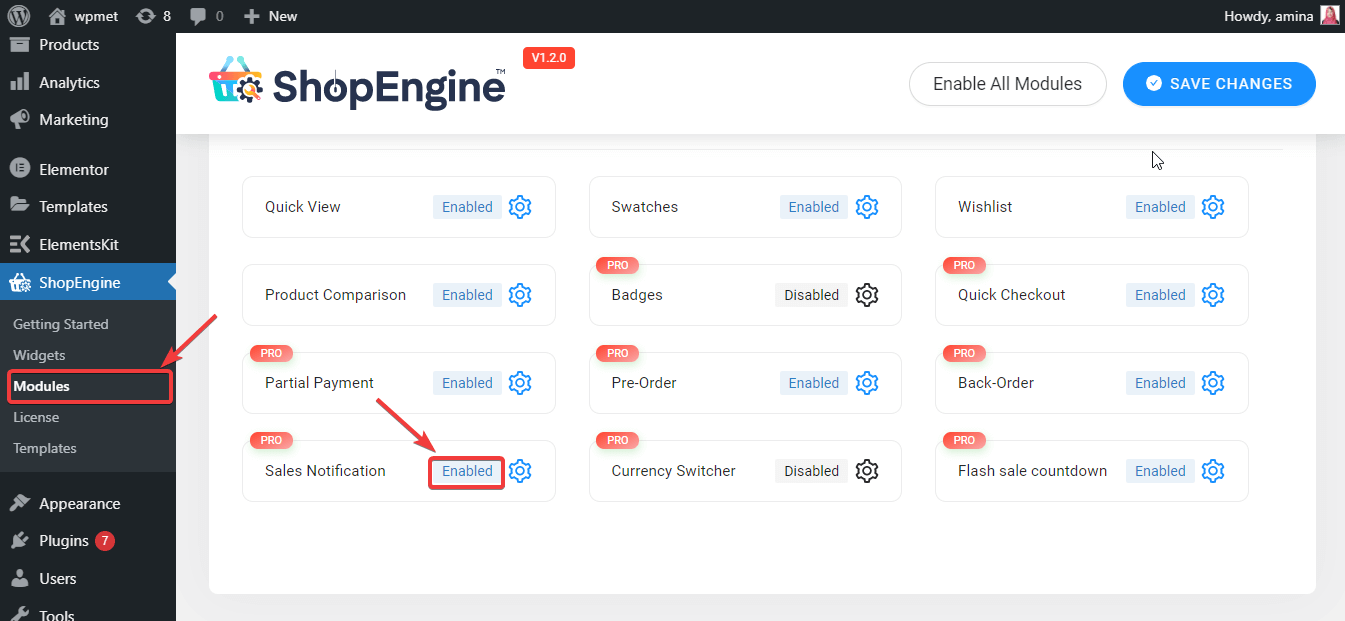
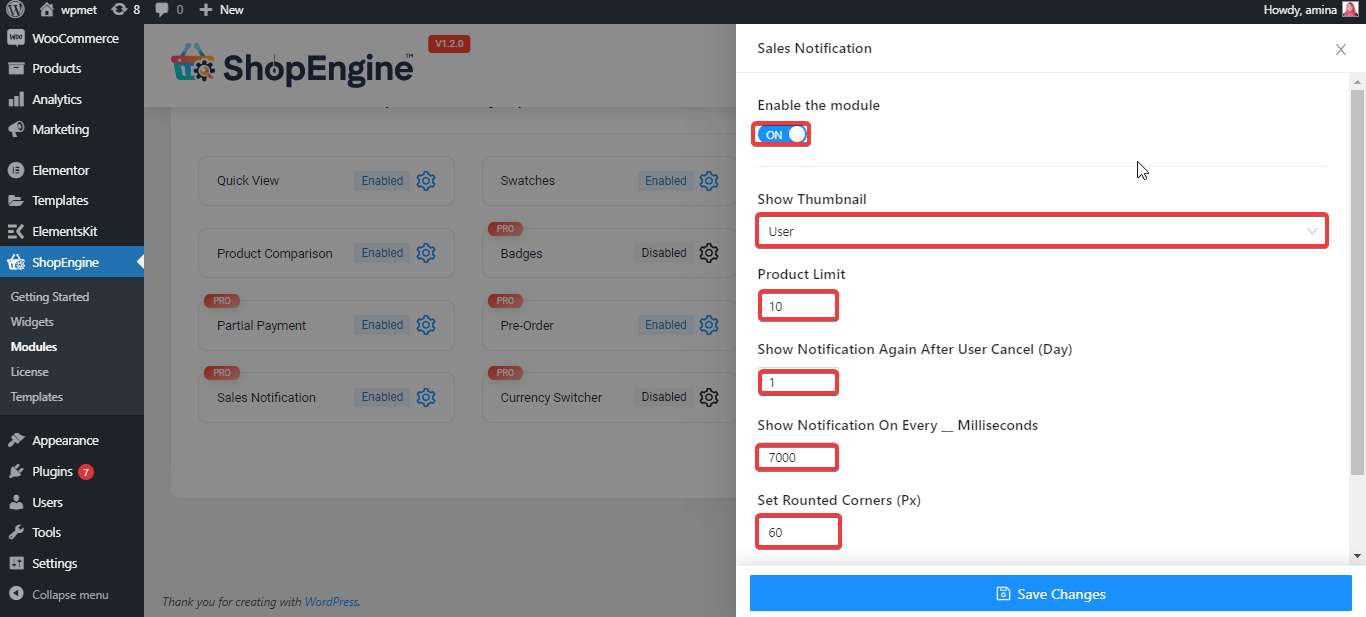
その後、モジュールを有効にして、ギャップに次の情報を挿入します。
- サムネイルを表示: ここでユーザーまたは製品を設定できます。
- ユーザー: このオプションを選択すると、訪問者は最近製品を購入した顧客の写真を見ることができます。
- 製品: 購入した商品が表示されます。
- 製品制限: 通知を表示する製品の制限を入力できます。
- ユーザーがキャンセルした後に通知を再度表示します: これは、サイト訪問者が通知をキャンセルした後に通知を表示する時間を定義します。
- ミリ秒ごとに通知を表示します。 訪問者には 7000 ミリ秒ごとに販売通知が表示されます。カスタマイズすることができます。
- 丸い角を設定します: 販売通知のピクセルを設定できます。販売通知がより丸または四角になります。
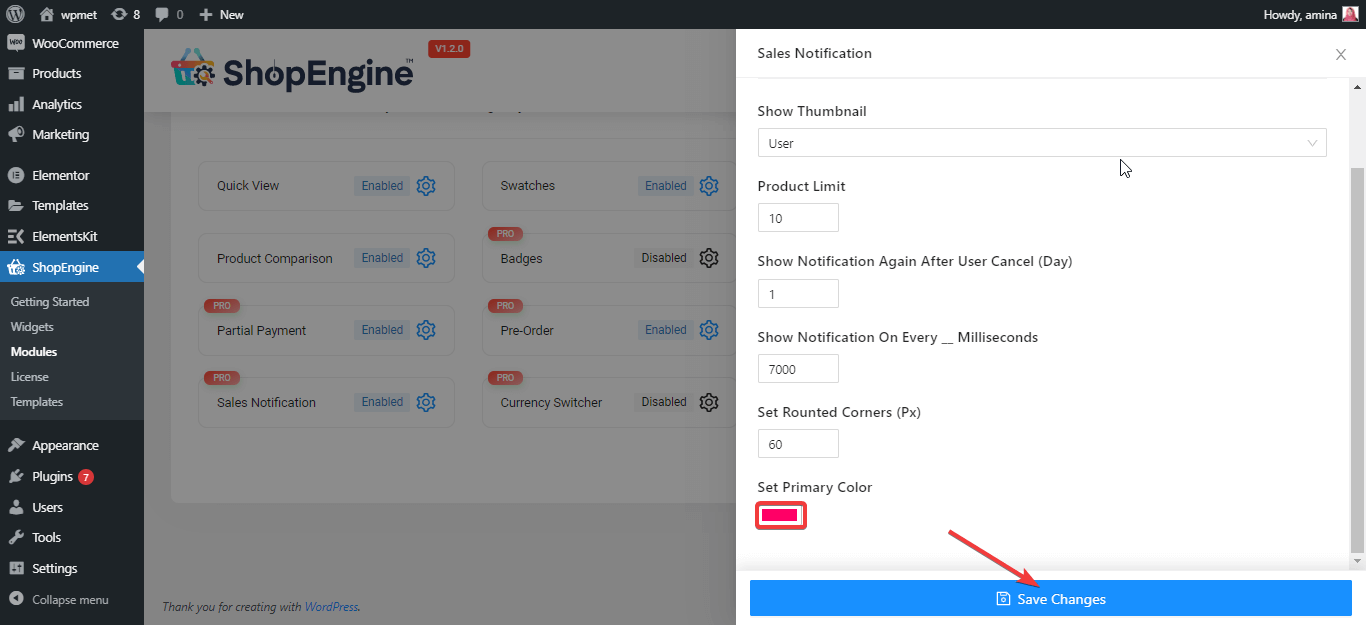
- 原色を設定します: 販売通知の色を設定します。
Finally, press the save changes button and make your notification live with ShopEngine, WooCommerce sales notification plugin.
ステップ 2: サイトにアクセスします。 #
次に、サイトにアクセスして、どのように機能するかを確認してください。 ShopEngine の販売通知モジュールを使用した結果は次のとおりです。
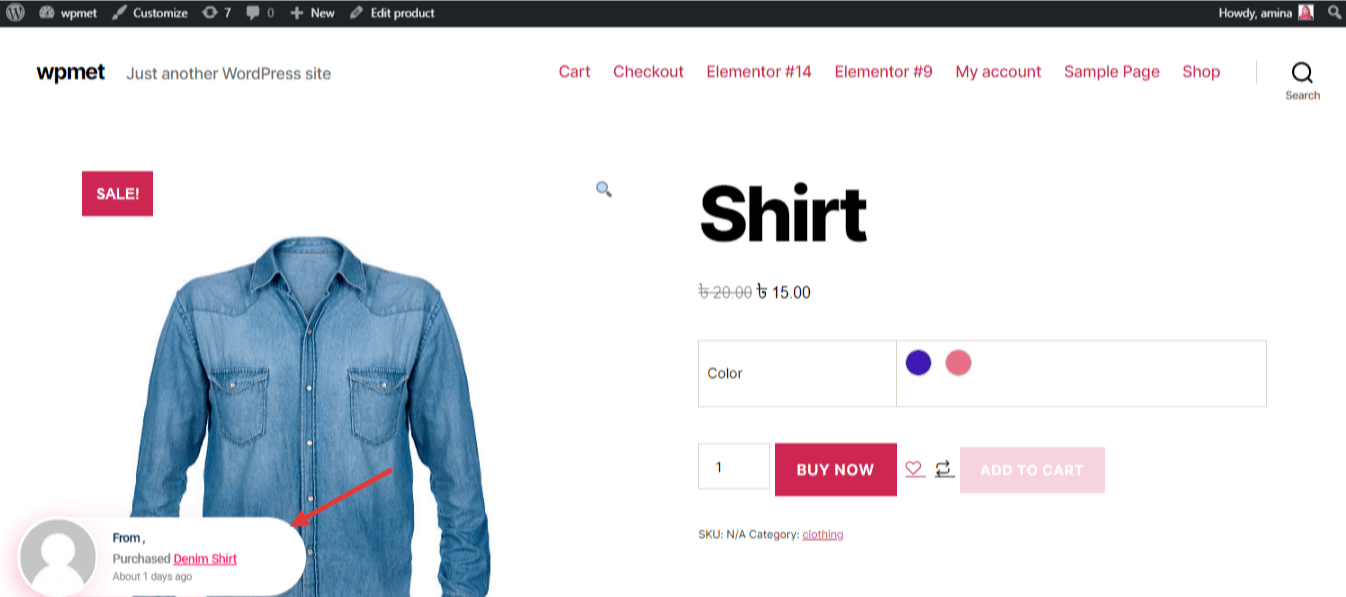
注記:
販売通知は商品購入後にのみ表示されます。購入しないと、通知を生成するためのデータを取得できません。


