


 Japanese
  English
  German
  Spanish
  Italian
  French
  Danish
  Portuguese
  Swedish
  Polish
  Korean
 近年、デザインにおけるガラスモーフィズムの使用がますます人気になっています。すりガラスのような外観を使用して、要素にインタラクティブな外観と感触を与えることができます。 ElementsKit ガラスモルフィズムモジュール Elementor ベースのページや Web サイトにガラス モーフィズム スタイルを簡単に適用できます。
この投稿では、Elementor ウィジェットに Glass morphism 効果を追加する方法を学びます。
Elementor ウィジェットに Glass Morphism 効果を追加する方法 #
以下の手順に従って、Elementor ウェブサイトにガラス風のスタイルを導入するための完全なチュートリアルを入手してください。
ステップ1: Glass Morphismモジュールを有効にする #
始めるには、Glass Morphismモジュールを手動で有効にする必要があります。そのためには、WordPressダッシュボードから、
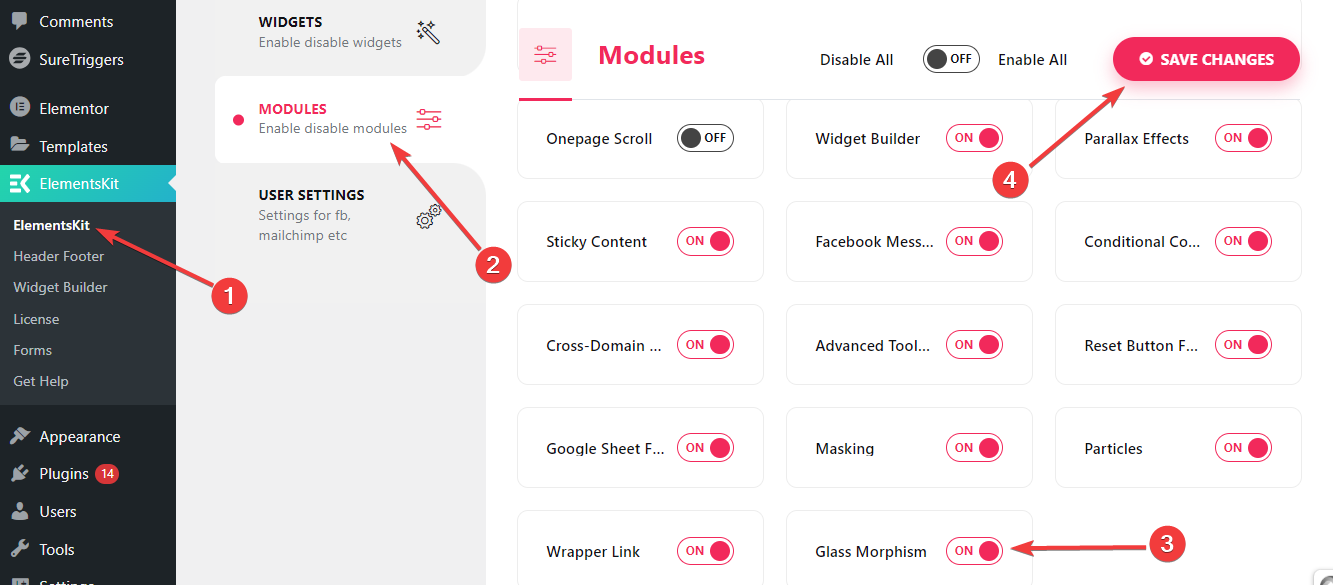
- フォローする ElementsKit > モジュール.
- を見つける ガラスの変形 モジュール。
- 横にあるトグルボタンを有効にします。
- 次に、「変更内容を保存右上隅の「」ボタンをクリックします。
これで、ウィジェットまたは列の詳細タブに Glass Morphism 機能が表示されます。
ステップ2:ガラスモーフィズム効果を追加する #
製品アイテム、画像ギャラリー、価格セクション、比較などのスタイル設定に Glass Morphism 効果を追加できます。
これをする、
- 任意のページまたは投稿を追加し、Elementor で編集します。
- 次に、列またはウィジェットを挿入します。
- 次に、「詳細設定」タブに移動します。
- そして、「ElementsKit ガラスモルフィズム" 設定。
- 編集アイコンをクリックすると、Glass Morphism スタイルのすべての機能が表示されます。
この機能がどのように動作するか見てみましょう👇
ぼかし #
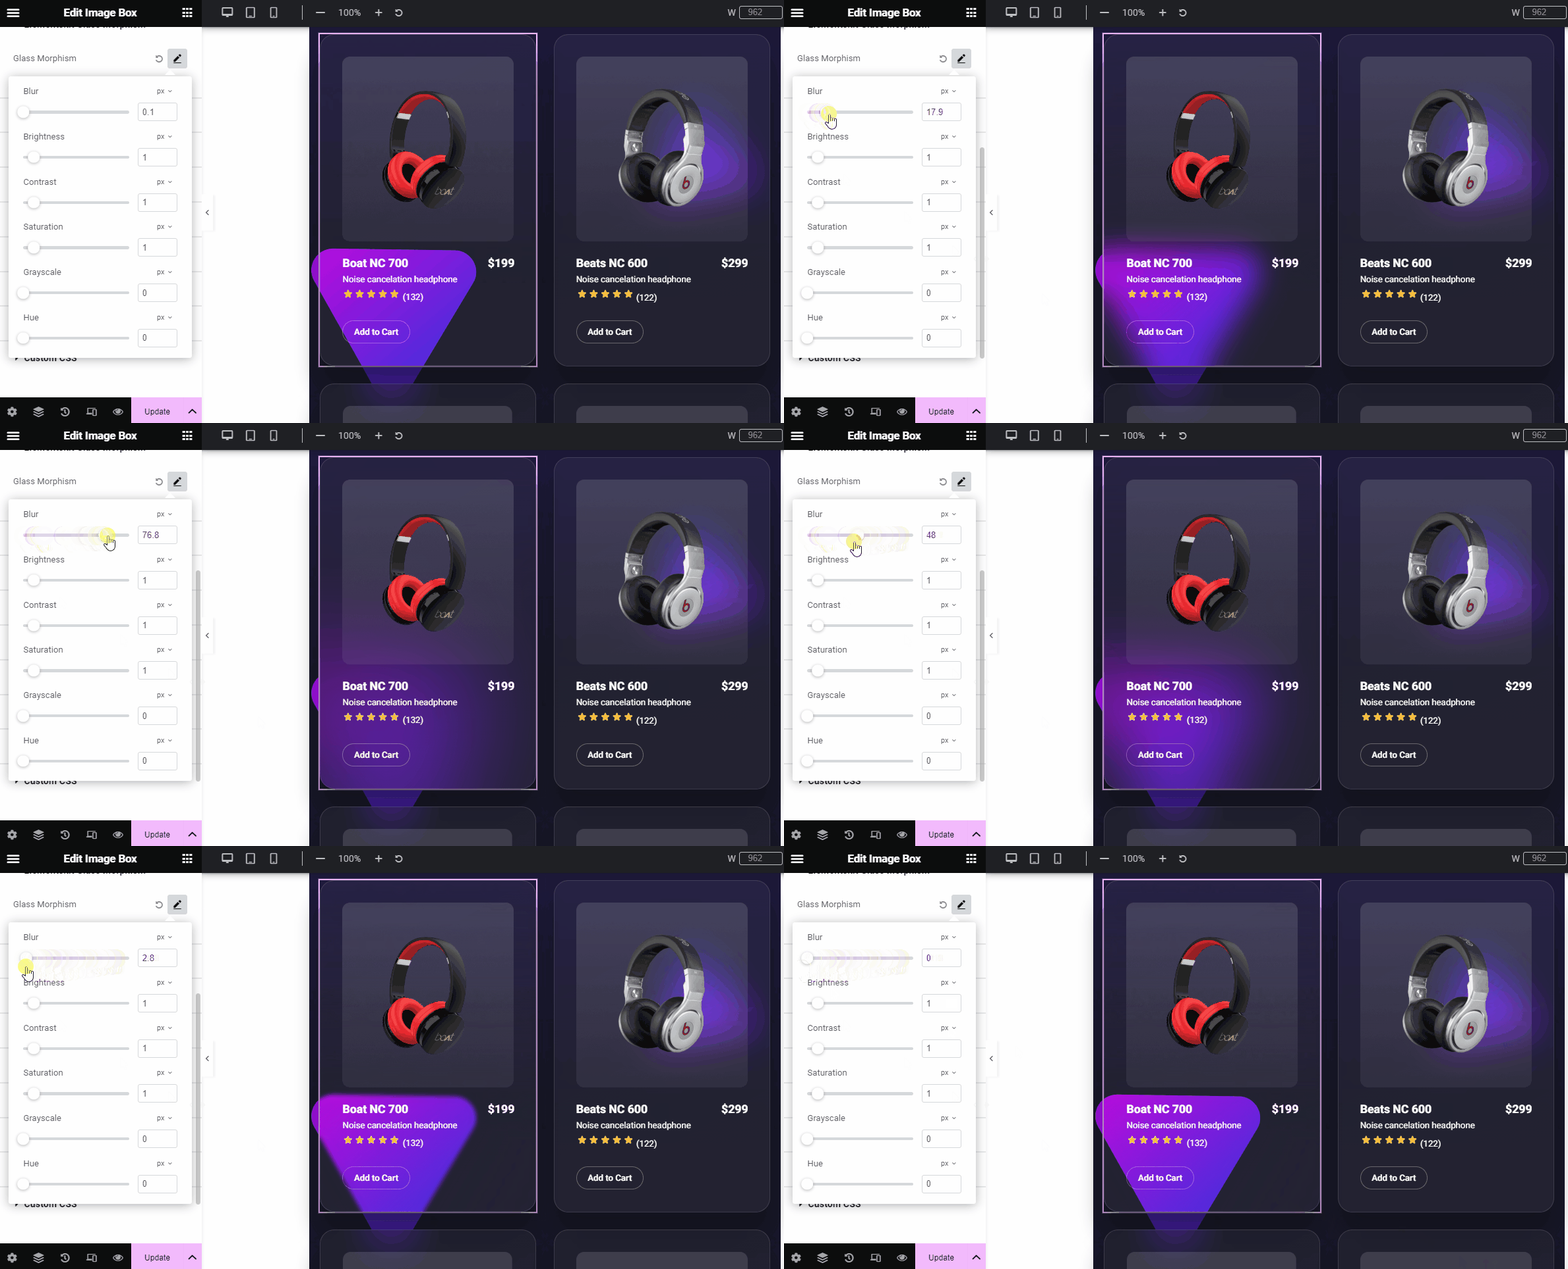
デザインにどの程度ぼかしを入れたいかに応じて、ぼかしの値を定義します。ぼかし効果は、デザイン要素の間にカラフルで透明なレイヤーを追加することで、デザインにガラスのような美しさをもたらします。そのため、デザインに多層的な外観が表現されます。
輝度 #
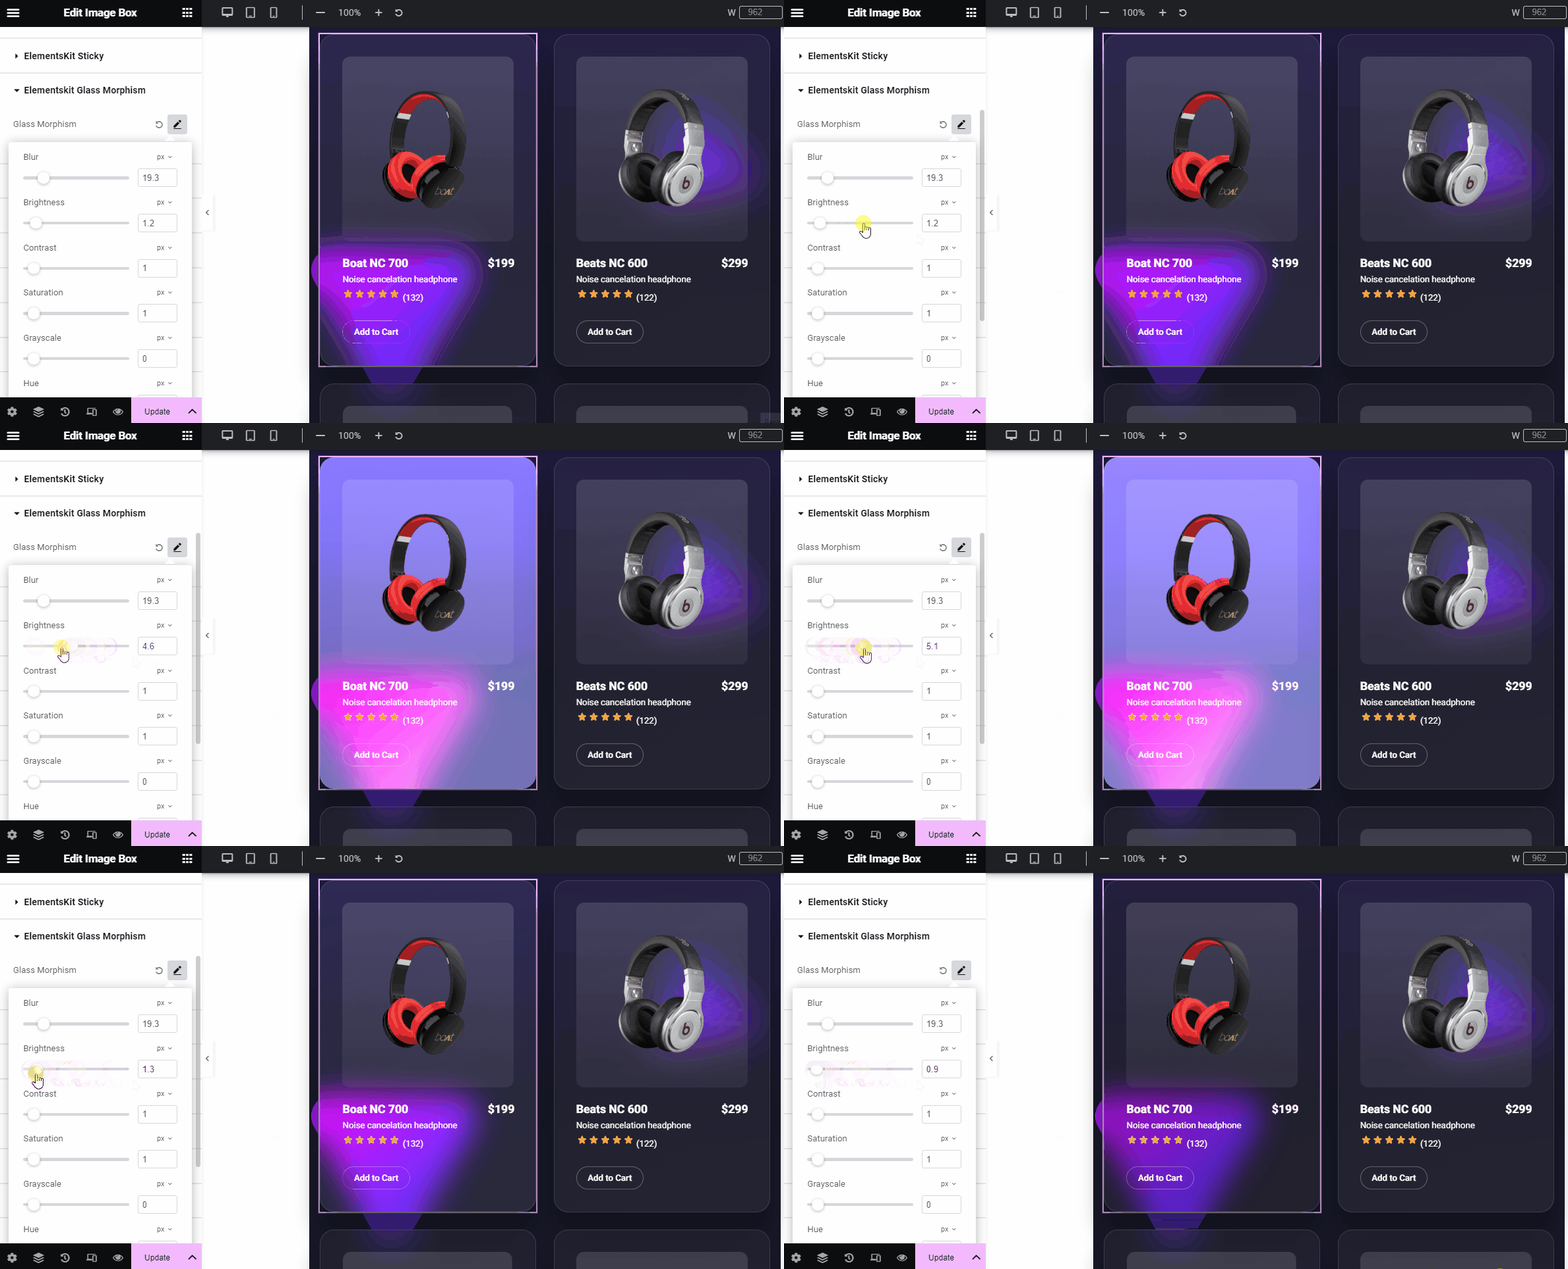
スライダーを使用するか、カスタム値を追加して、ガラスモルフィズム デザインの明るさを調整します。
対比 #
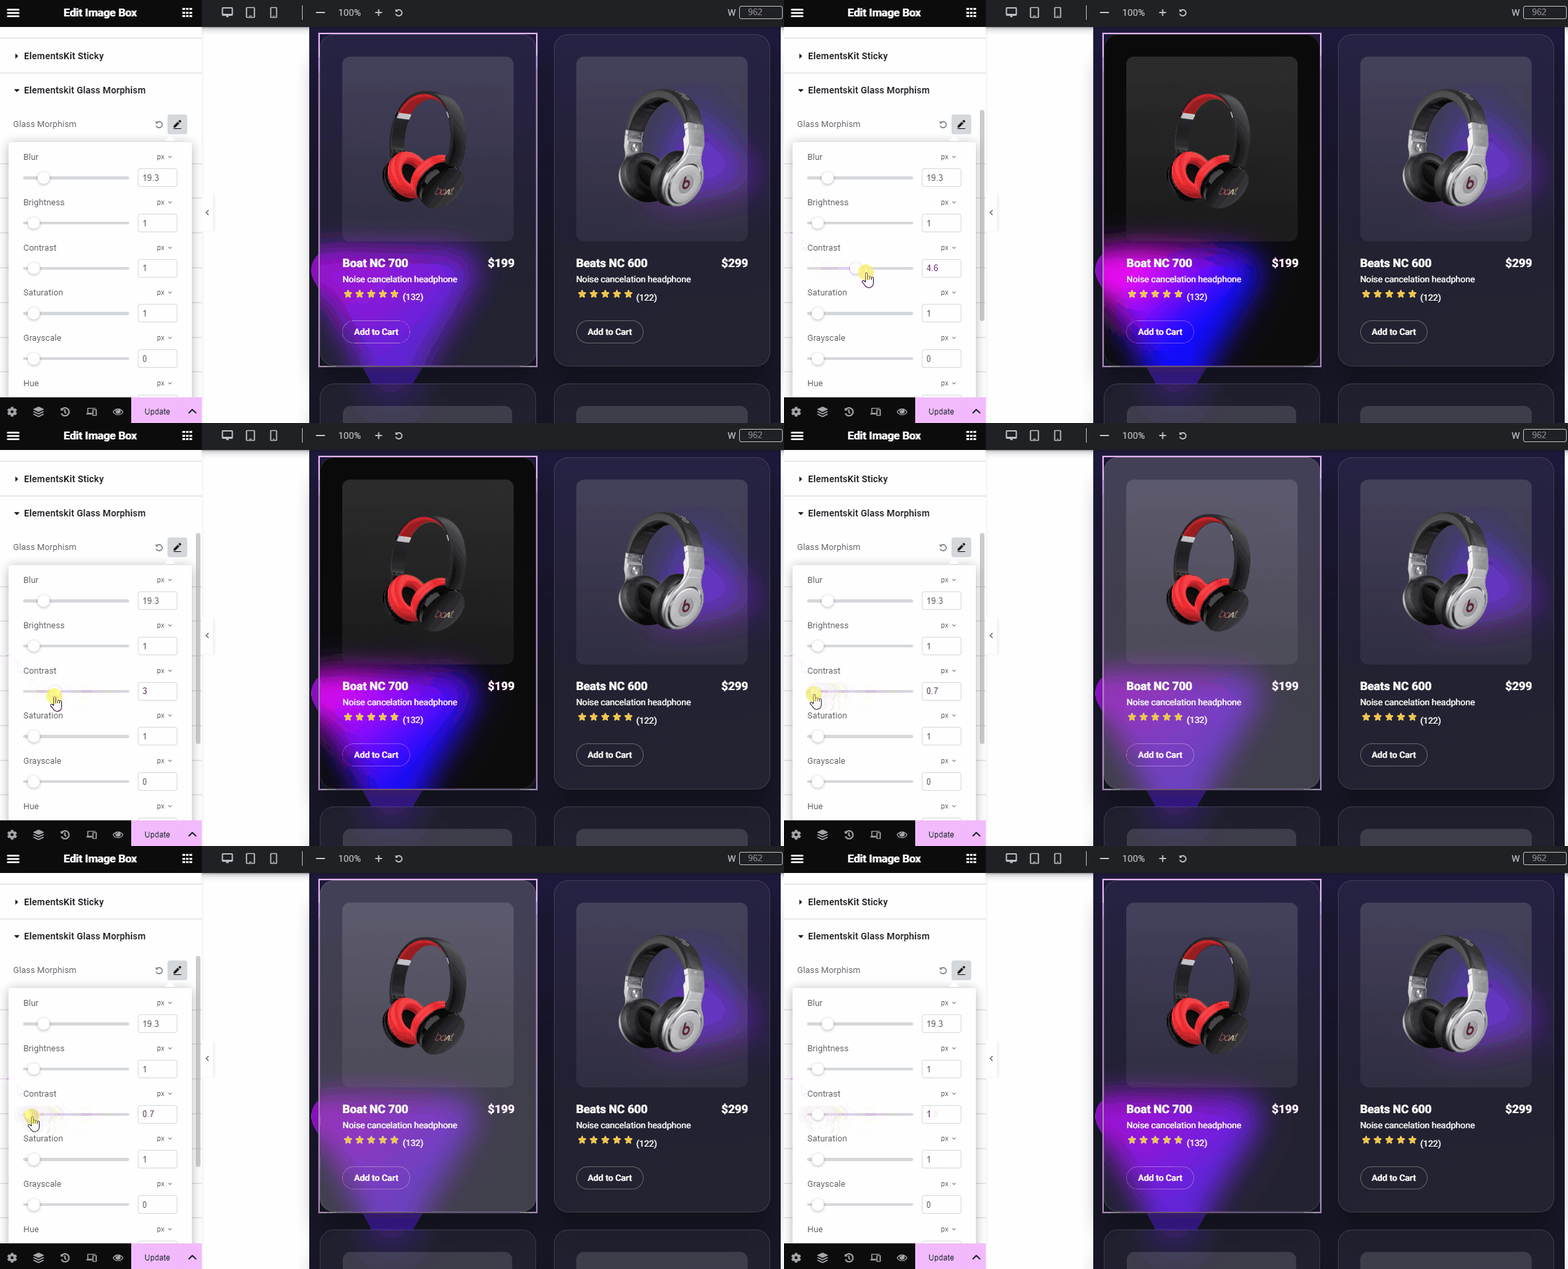
コントラストの度合いを定義します。複数のデザイン要素を同時に使用しながら視覚的な階層を維持するのに役立ちます。
飽和 #
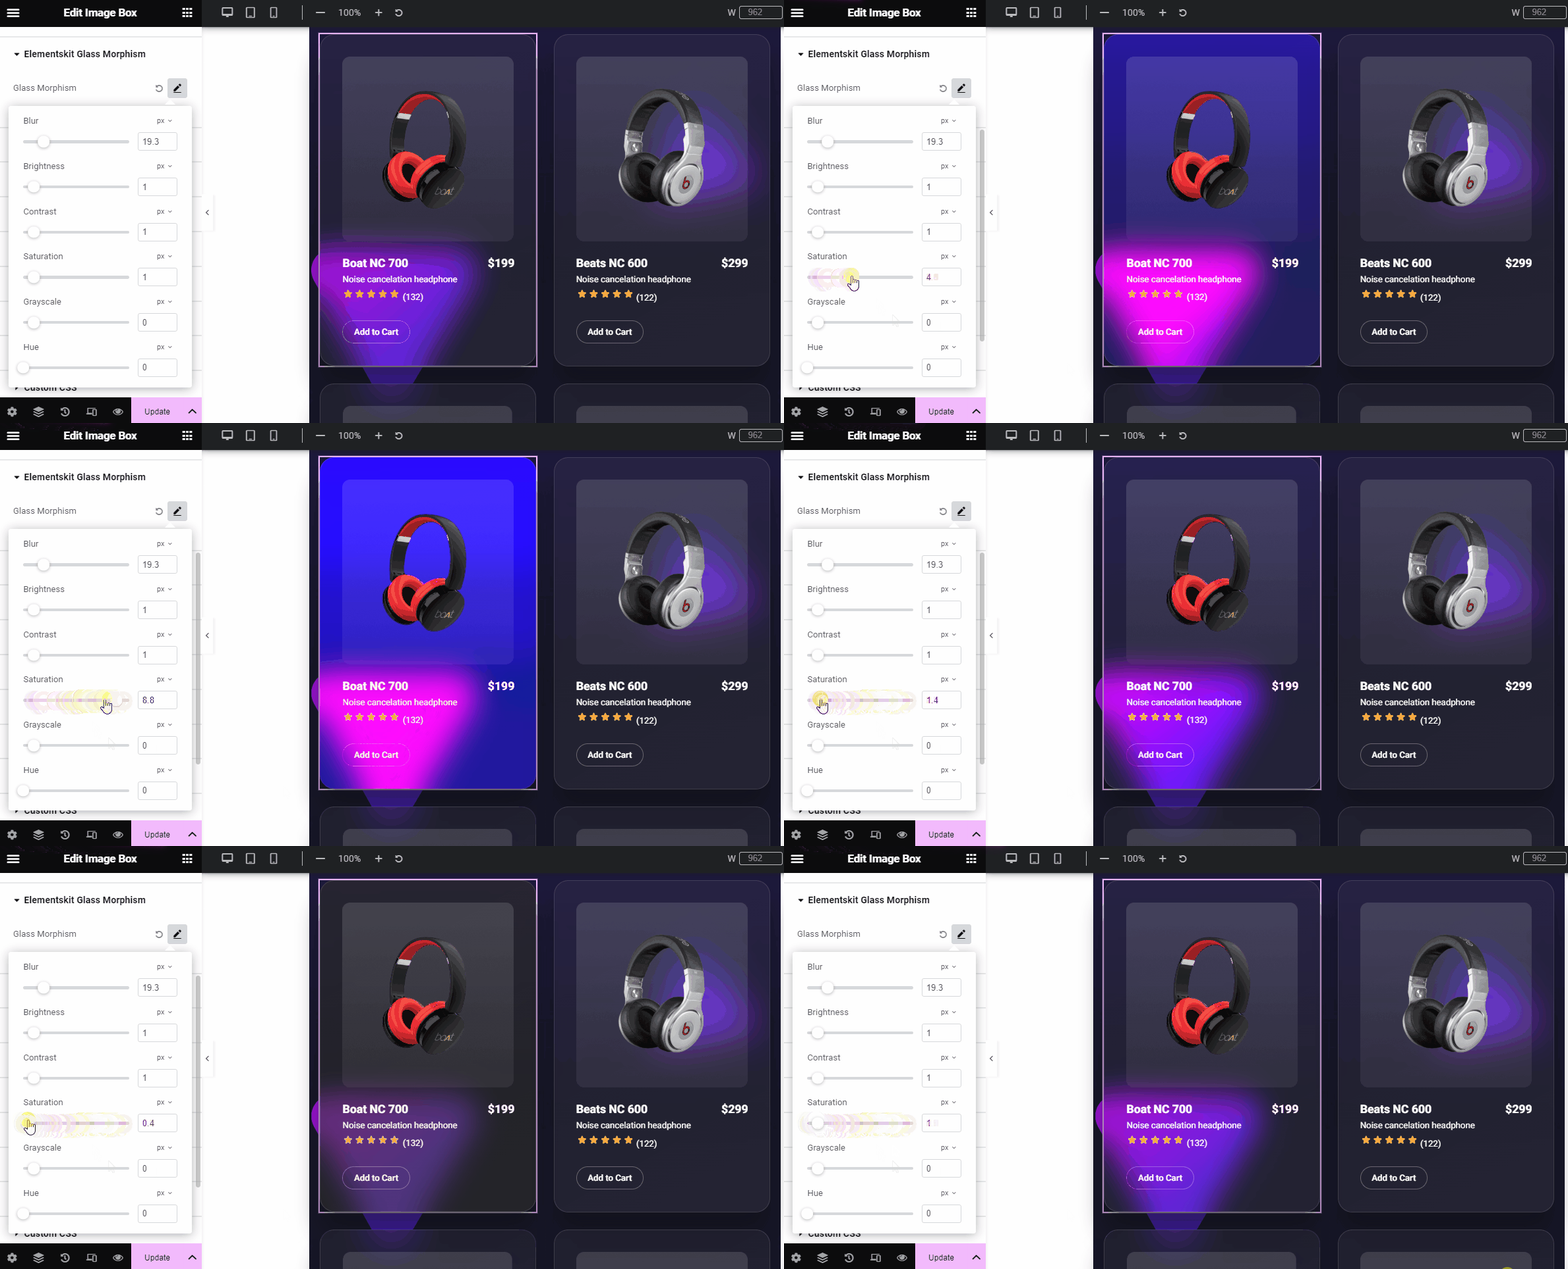
このスライダーを使用するか、カスタム値を指定して、要素の色のグレー レベルを制御します。彩度レベルを上げると、色がより鮮やかになります。逆に、彩度を下げると、色調が鈍くなります。
グレースケール #
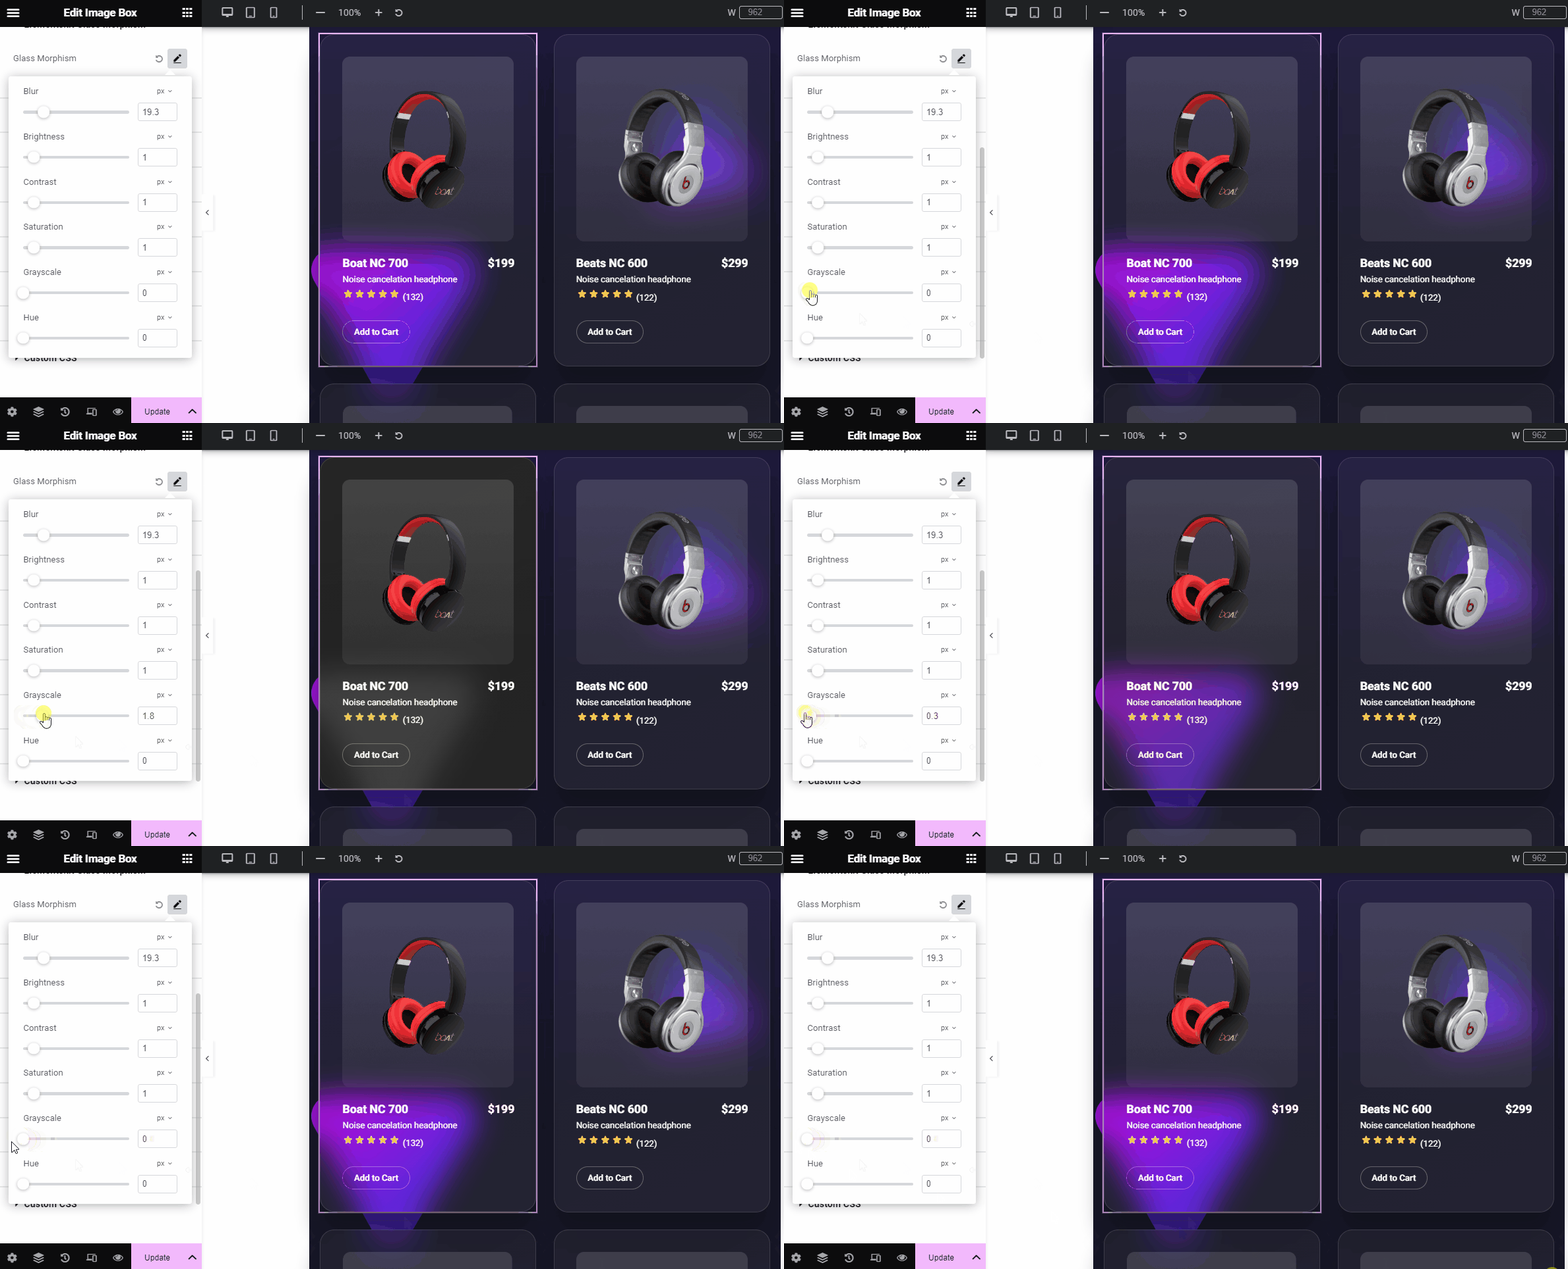
ここから、デザインにグレーの色合いを適用できます。グレーの色合いでデザインをどの程度明るくまたは暗くするかを決定します。高い範囲を選択すると、デザインは最も暗くなります。一方、低い値を入力すると、デザインは明るくなります。
色相 #
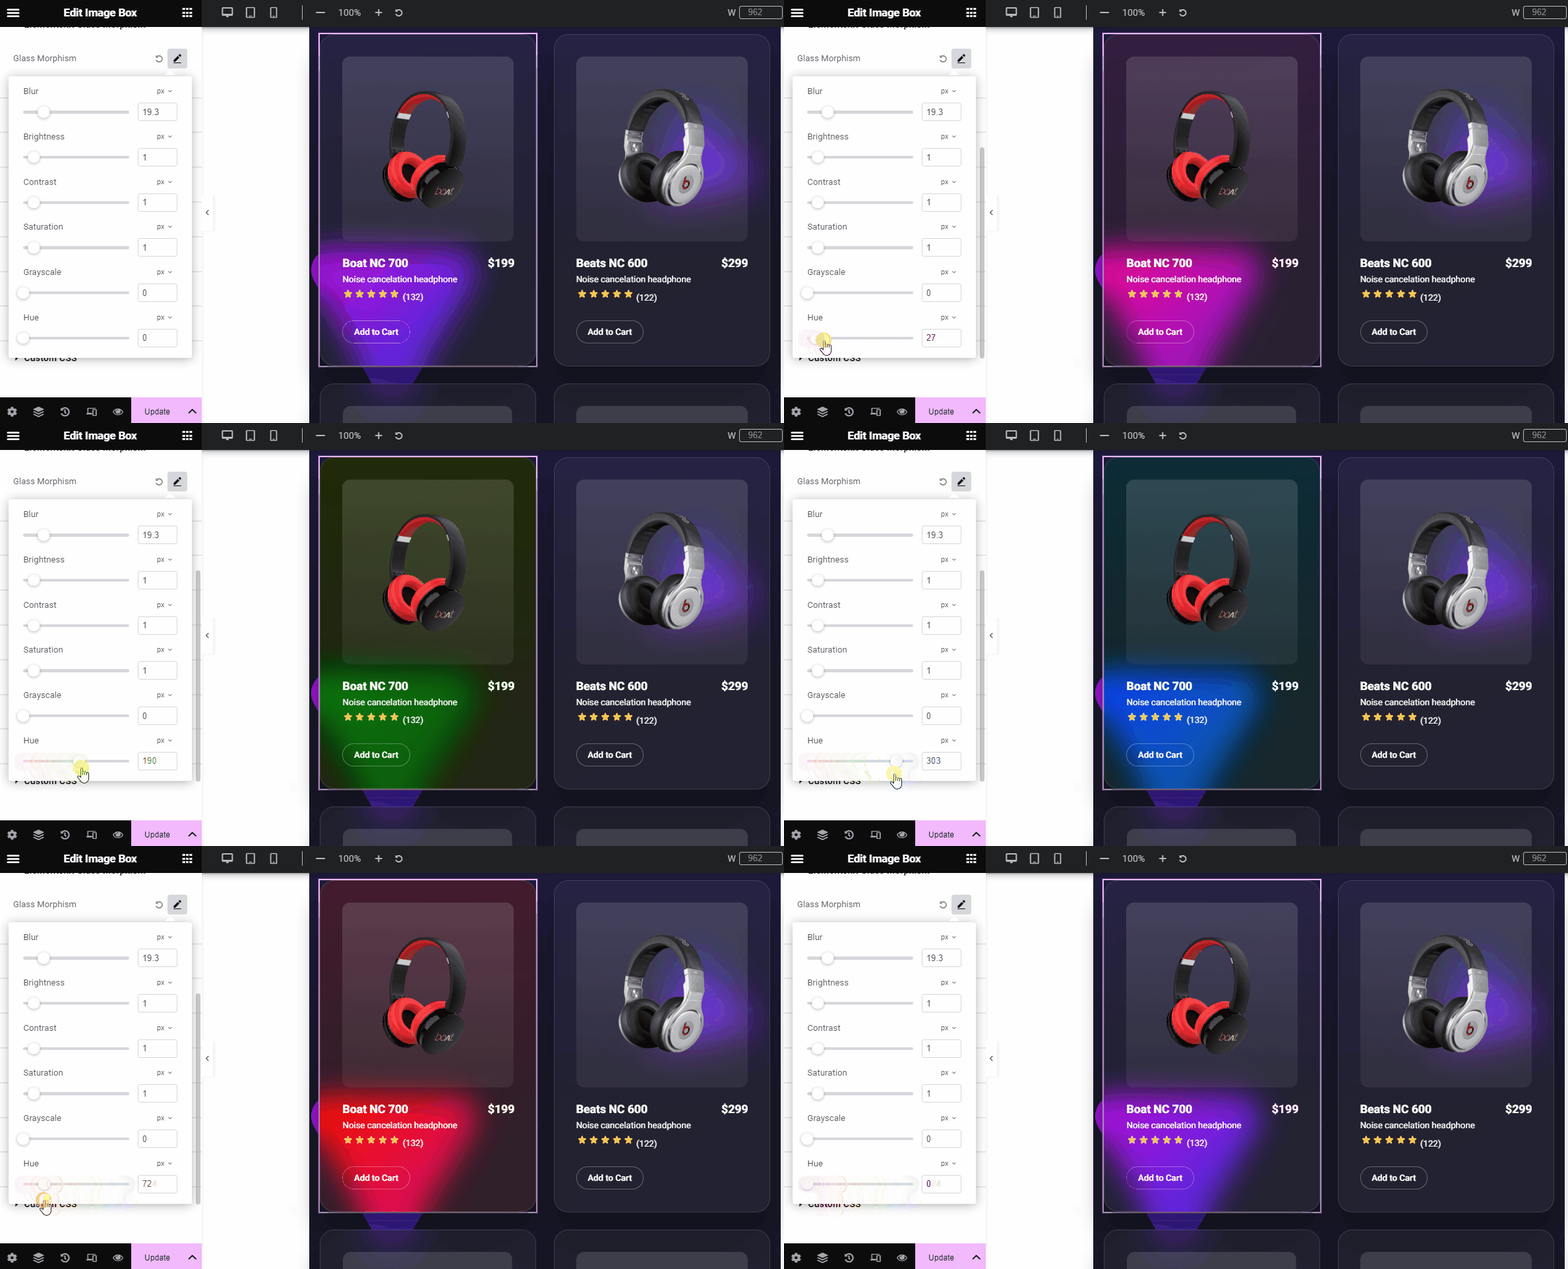
色相は、2 つの色の間の混合の強度を表すために使用される用語です。ここでは、メインの色を変更するのではなく、対応する色に対する明るさを調整するだけです。
たとえば、赤とピンクの 2 つの色を追加すると、デザインには 2 つの色相が含まれます。また、スライダーを使用して、両方の色の強度を変更できます。
この設定は0から360までのカラーホイールに基づいています。ここでは、
- 0は赤を表します。
- 120は緑を表します。
- 240は青を表します。
さあ、あなたの番です。ElelmentsKit の Glass Morphism 機能をすべて使用して、Elementor の Web サイトのどこにでも魅力的なすりガラスの外観を作成する方法を説明しました。


