

Sale icon The Biggest WordPress Deal of 2026
ENDING IN:
00 DAY
:
00 HOUR
:
00 MIN
:
00 SEC
Save up to $4,152 now Arrow Icon

Gutenberg で目次を追加する方法

Gutenberg で目次を追加する方法

コンテンツを読みやすい目次 (TOC) にすることは、ナビゲーションとユーザー エクスペリエンスを向上させる優れた方法です。Gutenberg エディターを使用すると、TOC を追加するのはシンプルで効率的なソリューションになります。
このチュートリアルのブログ投稿では、短時間で WordPress コンテンツに Gutenberg の目次を追加する方法について説明します。

Gutenberg has a built-in Table of Contents block that automatically generates a TOC from your post’s headings. It improves navigation and readability for long posts.

Quick Steps:
Step 1 Get the block
In the Gutenberg editor, click the “+” button, search for “Table of Contents,” and add it to your post. It automatically pulls in all the headings from your content.
ステップ2: Customize the block
設定: Choose heading levels and toggle current-page-only for paginated posts.
Styling: Adjust color, font size, border, spacing, and more from the sidebar.

Just add the Gutenberg TOC block, pick your heading levels, and style it; it’s quick.

The Advantages of Implementing a Table of Contents

目次は、WordPress コンテンツ、特に長いコンテンツを整理します。 読者は目次を通じてコンテンツ全体をスキャンできる.
目次を実装することの詳細な利点を見てみましょう。

🔰 読みやすさの向上: 素早いナビゲーションと構造の理解を深めるために、コンテンツに目次を実装する必要があります。

🔰 ユーザーエクスペリエンスの向上: わかりやすい目次があれば、ユーザーは情報に素早くアクセスできます。

🔰 SEOの改善: 組織化された 目次 検索エンジンのクロールとキーワードの最適化の改善に役立ちます。

🔰 アクセシビリティの向上: 目次があるとスクリーン リーダーが読みやすくなり、障害のある人にとってもアクセシビリティが向上します。

🔰 プロフェッショナリズム: さらに、目次によりコンテンツの見た目が洗練され、信頼性が向上します。

Gutenberg で目次を追加する方法

Gutenberg エディタを使用して WordPress コンテンツに目次を追加するプロセスを詳しく見ていきましょう。

Gutenberg offers a handy block to add a table of contents to your WordPress content quickly.

STEP 1: Get the Block

あなたのコンテンツでは、 「/」と入力すると、Gutenbergの目次ブロックが表示されます. You can simply click on the block and add TOC in the Gutenberg editor.

Add Gutenberg Table of Contents block by typing slash

繰り返しますが、 名前を入力してGutenbergの目次ブロックを検索しますその後、それをクリックするか、エディターにドラッグアンドドロップすることができます。

Search for GutenbergTable of Contents blog

ブロックはこのようになります。

Gutenberg Table of Contents

STEP 2: Customize the Block

しかし、Gutenbergで見出しを使ってコンテンツを構造化すると、 目次ブロックは動的に更新されます、投稿の階層を反映します。サブ見出しがきちんとインデントされ、読者にとって明確で直感的なロードマップが作成されます。デフォルト設定はシームレスに機能するように設計されており、追加の作業は必要ありません。見出しを変更すると、目次が自動的に調整されます。
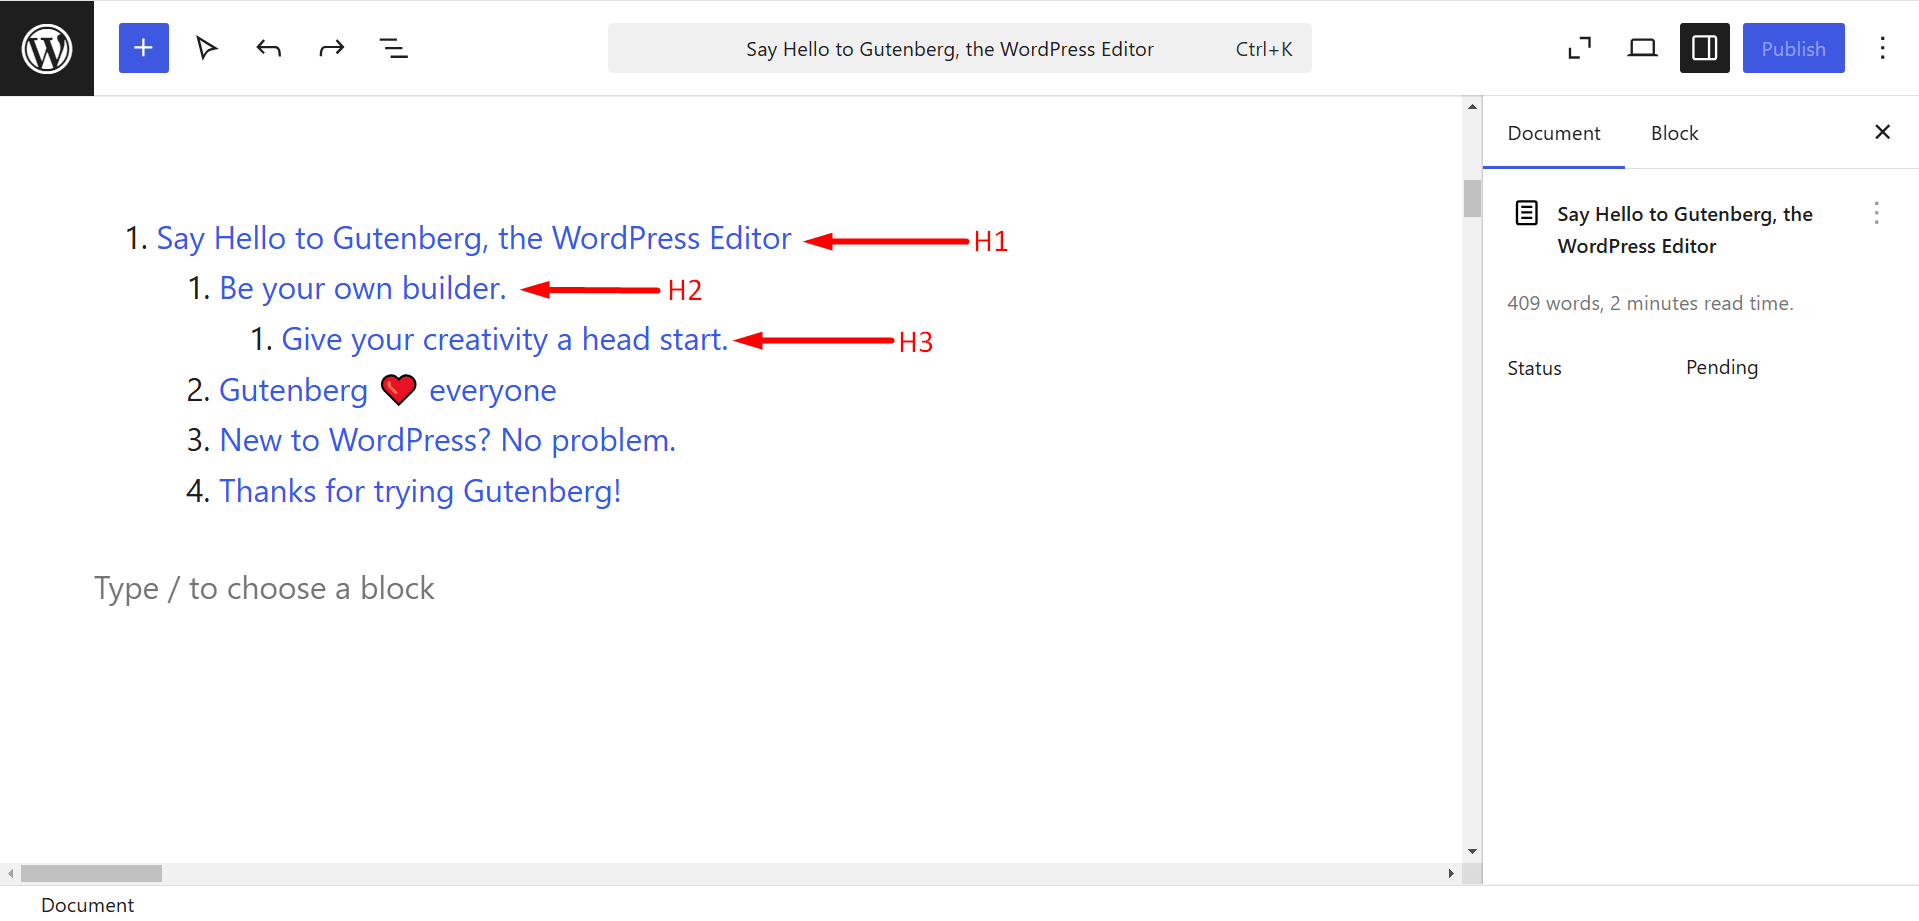
Settings of Gutenberg Table of Contents

  • Only include current page: When your post is split into multiple pages, this toggle allows you to decide what the Table of Contents shows. Off (default) → headings from all pages. On → only headings from the current page. If your post isn’t paginated, this setting does nothing.
  • Include headings down to level: It lets you control how deep the Table of Contents goes. For example, set to H2 → only top-level headings appear, set to H4 → it also picks up H3s and H4s underneath them.

Style the Gutenberg Table of Contents Block

You can tweak a few basic styles of the block. You can change text color, font size, padding, margin, border, radius, and typography, etc.

Style Gutenberg Table of Contents

Gutenberg 目次ブロックの制限

🤔 There is a lack of the latest features in the block. For example, automatic numbering, collapsible sections, or the ability to exclude specific headings from the TOC are currently unavailable.
🤔 目次は、適切に構造化された見出しの階層に大きく依存しています。見出しを変更すると、目次の正確性が損なわれる可能性があります。
🤔 見出しが多数ある長い投稿の場合、Gutenberg TOC ブロックがページの読み込み速度に若干影響する可能性があります。


👉 ボーナスガイド: How to add custom fields to Gutenberg.

Gutenbergで目次を作成する

したがって、長文のコンテンツをよりアクセスしやすく魅力的にするには、目次の実装を検討する必要があります。また、WordPress Web サイトの全体的な品質を向上させ、訪問者を引き付けるのにも役立ちます。

Gutenberg で目次を追加する方法がわかったので、自分で簡単に追加できます。 


Priyankaのアバター

プリヤンカ

WordPress Plugin Specialist, Product Documentation Expert, Gutenberg Editor Specialist

コメント

コメントを残す

メールアドレスが公開されることはありません。 が付いている欄は必須項目です

目次