In an increasingly connected world, having a physical location doesn’t just mean putting an address on your website. It means creating a seamless bridge between your online presence and the real world. Whether you’re running a local business, hosting events, or simply want to make it easier for people to find you, embedding Google Maps on your website is an essential step.
With the Gutenberg Block Editor, adding Google Maps on WordPress used to be challenging. However, in this guide, we will show the easiest way to add Google Maps with Gutenberg Block Editor on WordPress.
Why add Google Maps to your website?
Integrating Google Maps into your WordPress site can significantly enhance user experience. Maps on the website provide interactive and real-time location information. Whether you’re running a business website, a travel blog, or an event page, having an embedded map can offer immense value to your visitors.
Here’s why integrating Google Maps is a smart move:
- Enhance user experience by providing location-based information and easy navigation.
- Improve accessibility and make it easier for visitors to find physical locations.
- Build credibility and trust among the customers.
- Boost local SEO by embedding your business location on the website.
How you can add WordPress Google Maps with Gutenberg block editor
When it comes to the Gutenberg block editor, adding Google Maps on WordPress used to be challenging and required complex coding. However, with GutenKit you have the easiest way to embed Google Maps into the WordPress block editor.
Adding Google Maps to your WordPress site using the GutenKit block editor is straightforward. All you need is to get a Google Map API key for the website and use a WordPress map block to show Google Maps with the Gutenberg block editor. Let’s get into the details now:
Required plugin:
- GutenKit Free: Download Plugin
- GutenKit Pro: Get the Plugin
Note: Google Maps block is a premium feature of GutenKit. So you need to have both the Free version and the Pro version of the GutenKit plugin.
Step 1: Generate a Google Map API key for your website
To embed Google Maps into your website, you have to generate a Google Map API.
➡️ 1.1 Create a new project
- Go to the Keys & Credentials page of the Google Maps Platform of your Google Cloud Console.
- Click on the Create Project to open a new project.

- For the new project enter the Project Name and file Location of the parent organization or folder.
- Then click on the Create Button.
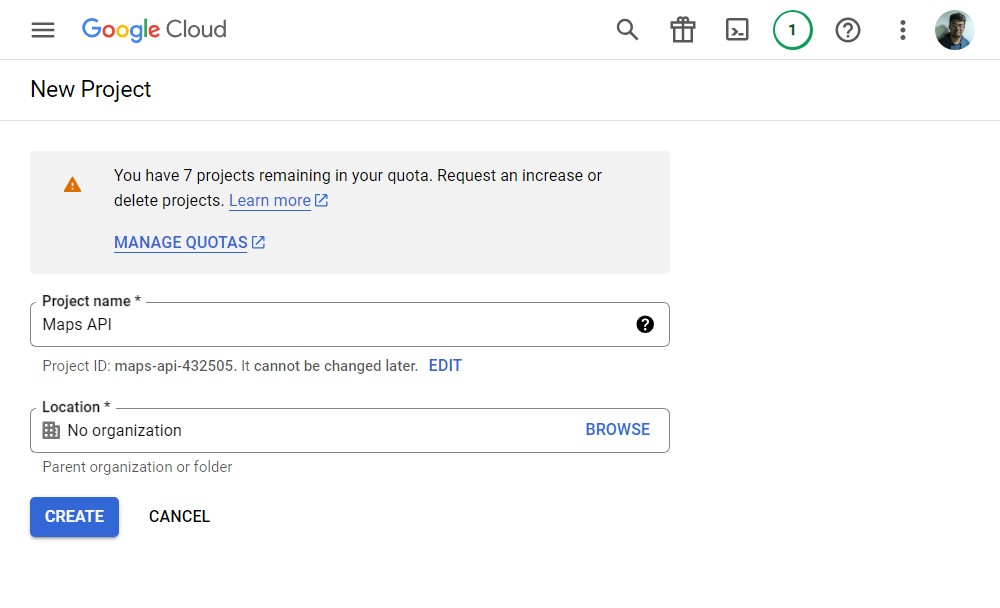
➡️ 1.2 Enable API services for Google Maps
After creating the project, navigate to APIs & Services > Enable APIs & services. On the next screen, click “+ Enable APIs and Services” to go to the API Library page.
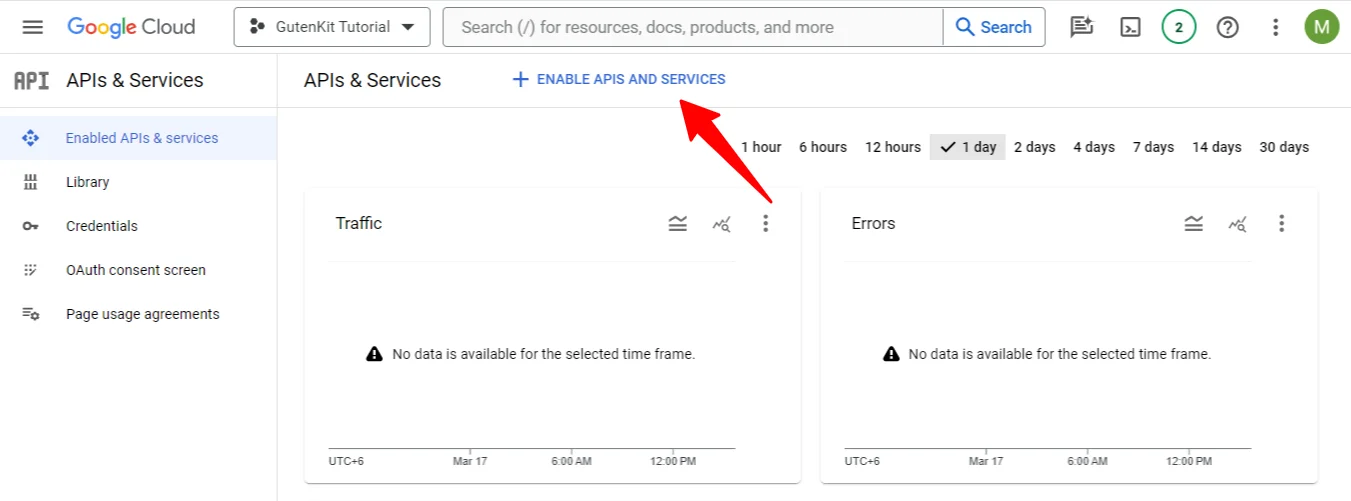
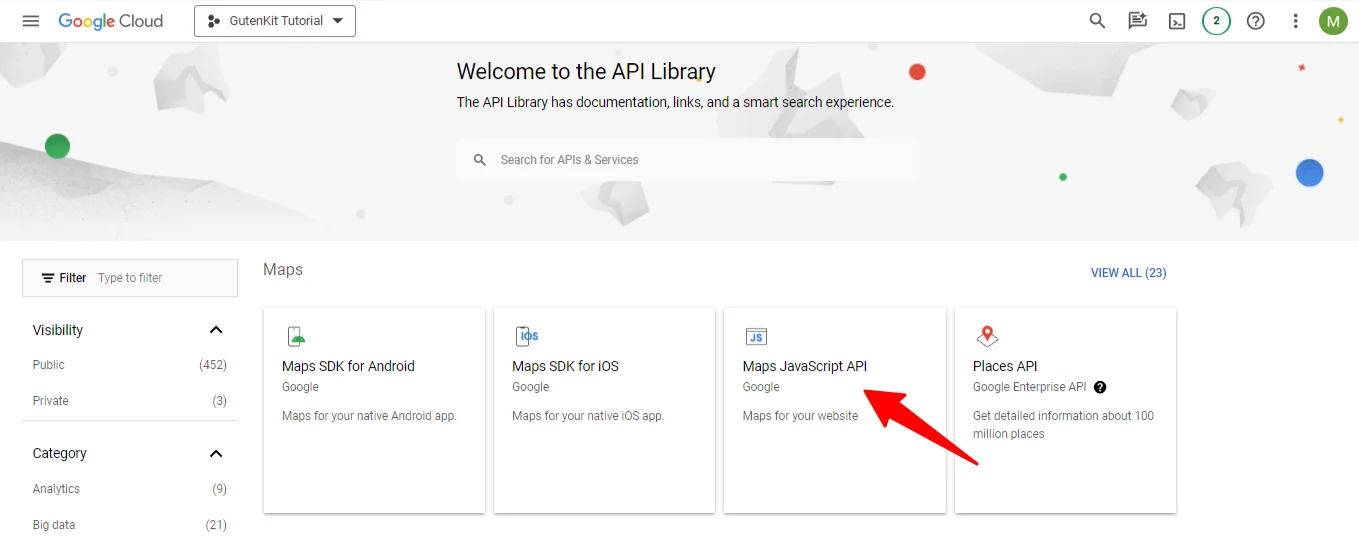
On the API Library page, locate the Maps JavaScript API, or use the search bar to find it. Once you’ve found it, click on it and Enable the API.
➡️ 1.3 Generate an API key
After that, go to the dashboard again and navigate to APIs & Services > Credentials. In the Credentials sections,
- Click on the + Create Credentials
- Select API key
A popup will show your API key. Save and Copy the API key for later.

Step 2: Add Google Maps to your WordPress site
In this step, you have to embed the Google Maps API key to your website and enable the Google Maps block.
➡️ 2.1 Enable WordPress Google Maps blocks from GutenKit
After you get a Google Map API key for your website, login to your WordPress Dashboard and navigate to GutenKit > Settings > API integration, and enter your Google Maps API key. Then click on the Save Changes button.
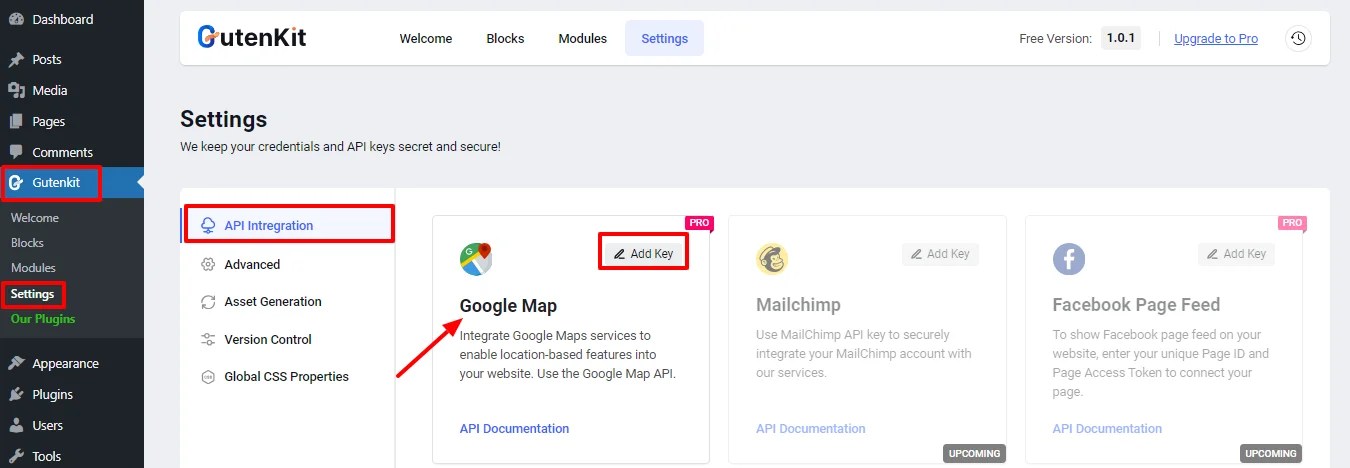
➡️ 2.2 Enable WordPress Google Maps blocks from GutenKit
Once you enter the API key, you will be able to add Google Maps blocks in WordPress. Follow the below steps to show Google Maps with the Gutenberg block editor.
To activate the Google Maps for Gutenberg:
- Navigate to GutenKit > Blocks
- Find Google Maps block.
- Turn the toggle button on.
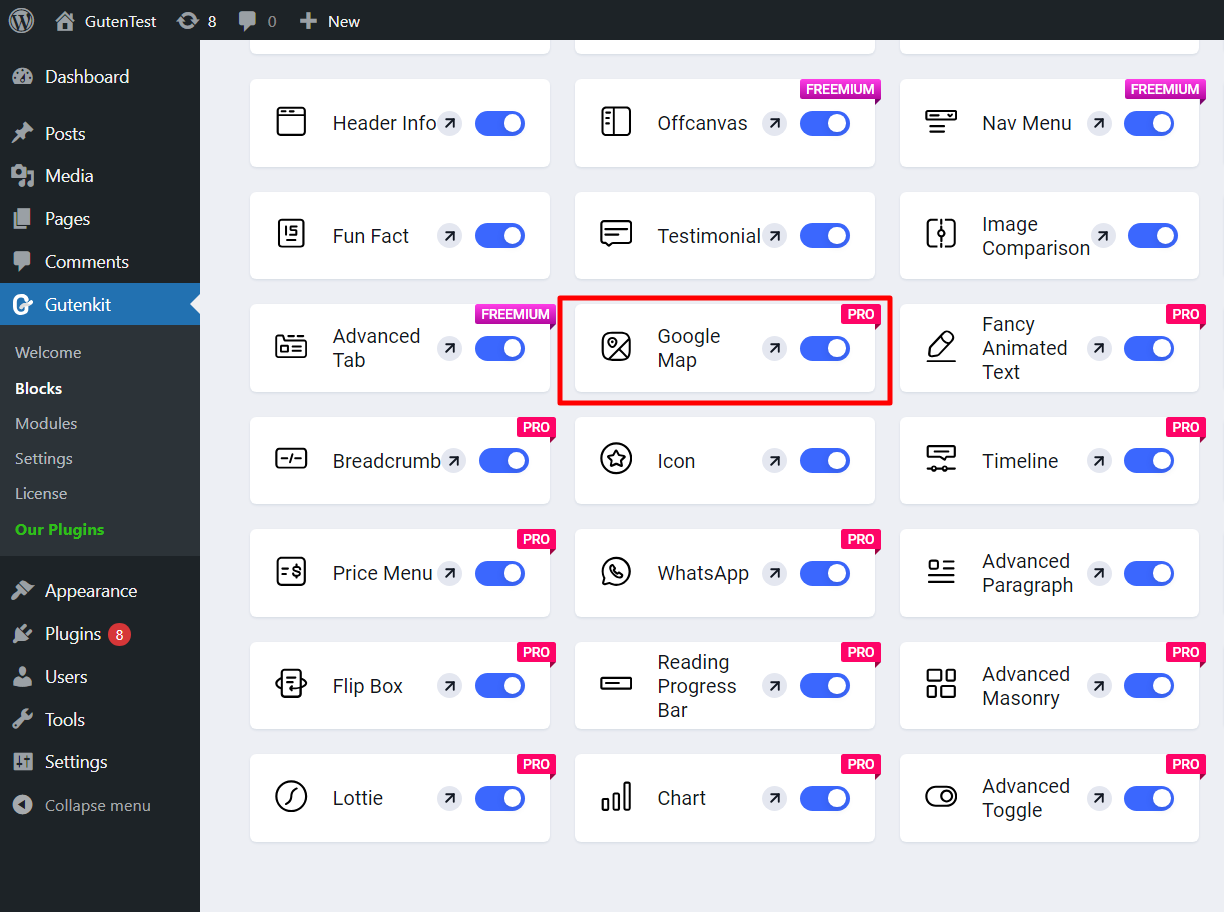
That’s it. You can now use the WordPress Google Maps block in the Gutenberg editor.
Step-3: Use WordPress maps block to embed Google map into your website
Now you can add the Google Maps block to your webpage and customize its appearance effortlessly. Enhance your site’s interactivity and provide precise location details with ease.
Open any web page of your website in the Editor mode. After that,
- On the blocks sidebar, search for Google Maps.
- Select the block and add it to your web.
Step-4: Customize the WordPress Google Maps appearance in the Gutenberg block editor
Once you add the WordPress Google Maps block, you can customize and decide how it will appear on your web page.
Under the content tab, you have the following options:
Settings:
- Map Type: Basic, Multiple Marker, Polyline, Polygons, Overlay, With Routes, Panorama.
- Address Type: You can enter your address with text address or use map coordinates (Latitude & Longitude).
Marker:
- Title: Enter a title that will be shown on the Maps view on your website.
- Add Custom Marker Icon: You can show a custom Marker Icon with a custom Marker Height, and Marker Width.
- Controls: Set the Zoom Level and enable Street View Controls, Map Type Control, Scroll Wheel Zoom, Zoom Control, and Fullscreen Control.
Theme:
You can use the default Google Themes, and Snazzy Theme to show maps on your website.
Under the Style tab, you can customize the Map Container’s Width, Height, and Alignment for Google Maps in the Gutenberg block editor.
FAQs
➡️ How do I embed Google Maps in WordPress Gutenberg?
➡️ How do I add a map block in WordPress?
Takeaways
Incorporating Google Maps into your WordPress website has never been easier with the Gutenberg block editor, especially when using the GutenKit plugin. By simplifying the process of embedding interactive maps, GutenKit not only enhances user experience but also boosts your site’s local SEO and credibility.
Whether you’re managing a business, organizing events, or simply want to make your location more accessible, this integration bridges the gap between your digital and physical presence. With just a few simple steps, you can now customize and display Google Maps seamlessly, adding immense value to your WordPress site.


Leave a Reply