


You can integrate Google services like Google Sheets and Drives to your WordPress forms. For that you need to connect the MetForm with your Google Cloud Console.
Here is how to integrate Google services with MetForm:
Pre-requirements: #
- You will need a Google Cloud Console account, either you have to open a new account or log in to your exisiting account.
- Since MetForm is an Elementor form builder, you need to have Elementor plugin installed and activated on your website.
- Élémentor : Télécharger le plugin
- MetForm Pro : Obtenir le plugin
👑 Google integration in only available with MetForm Premium version.
Step 1: Set up a project in the Google Cloud Console #
You will need APIs to connect the Google Sheet with WordPress form. For that, login to your Google Cloud console acoount. After that,
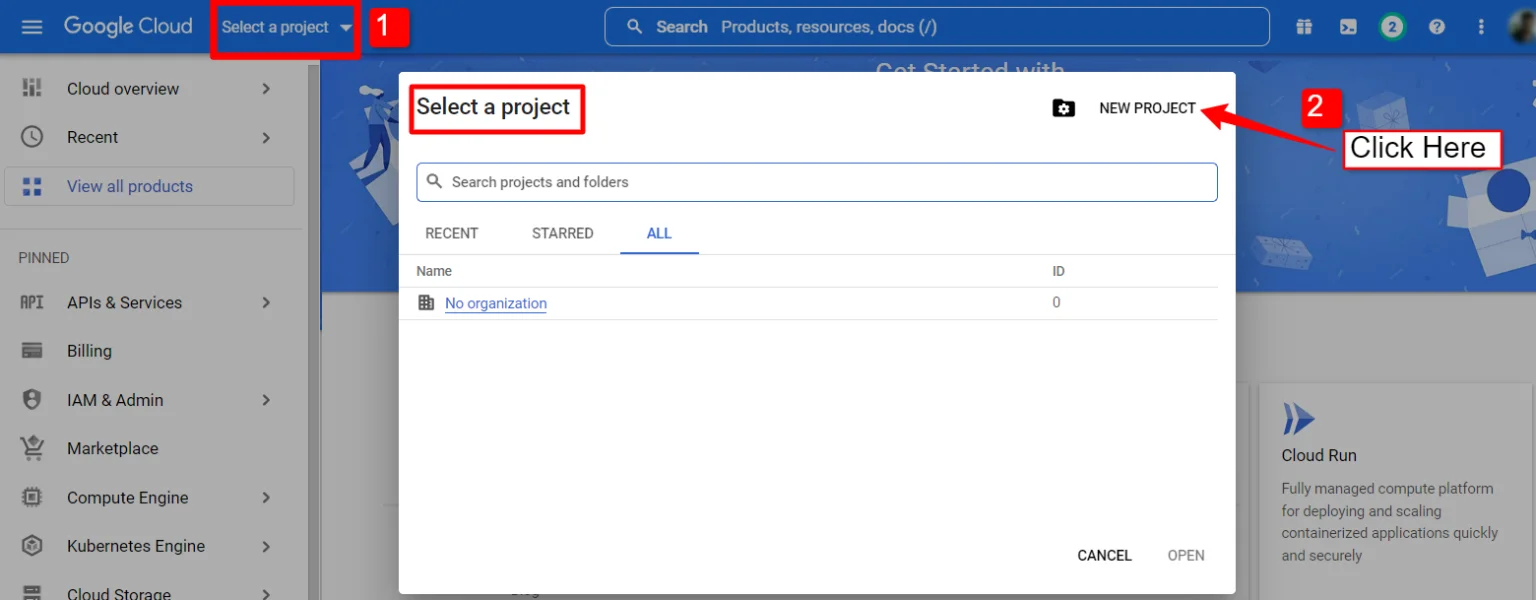
1. Click on the Select a project dérouler.
2. A popup will appear, there click on the Nouveau projet option.
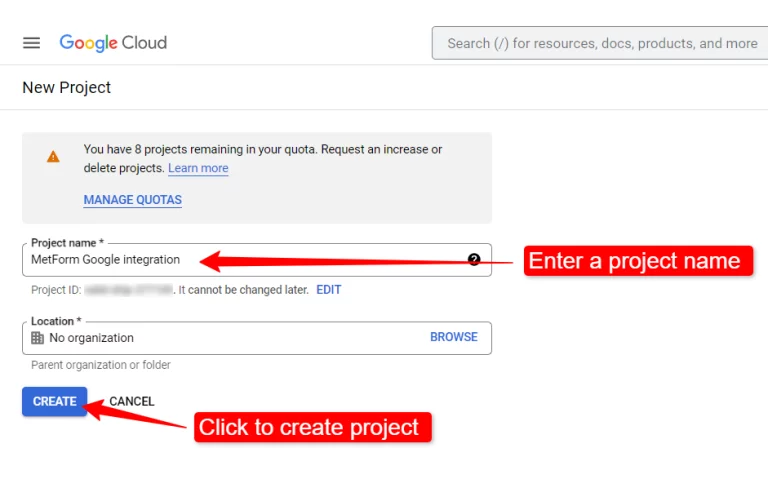
Pour créer un nouveau projet, entrez un Nom du projet et emplacement (le cas échéant), et cliquez sur le Bouton Créer.
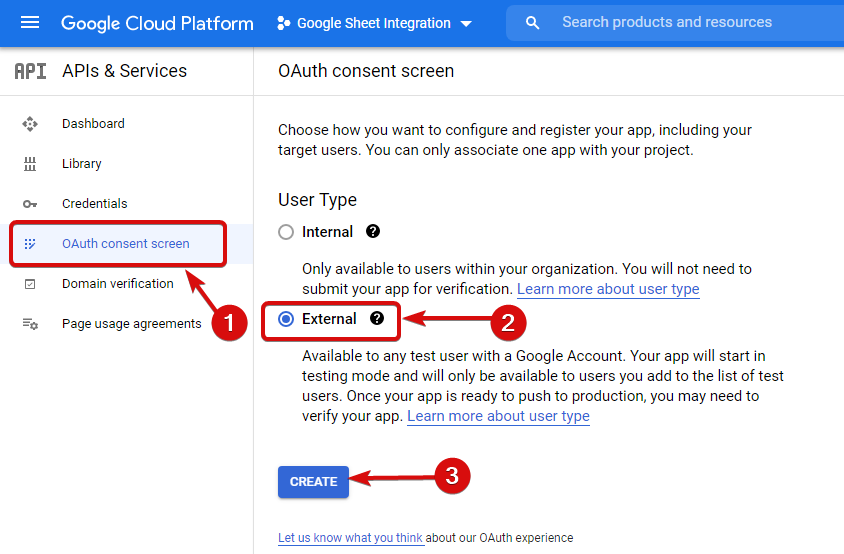
Then go to your project dashboard, and navigate to APIs overview >> OAuth consent screen.
On the OAuth consent screen select the Type d'utilisateur sur Externe et continuez en cliquant sur le bouton « Créer ».
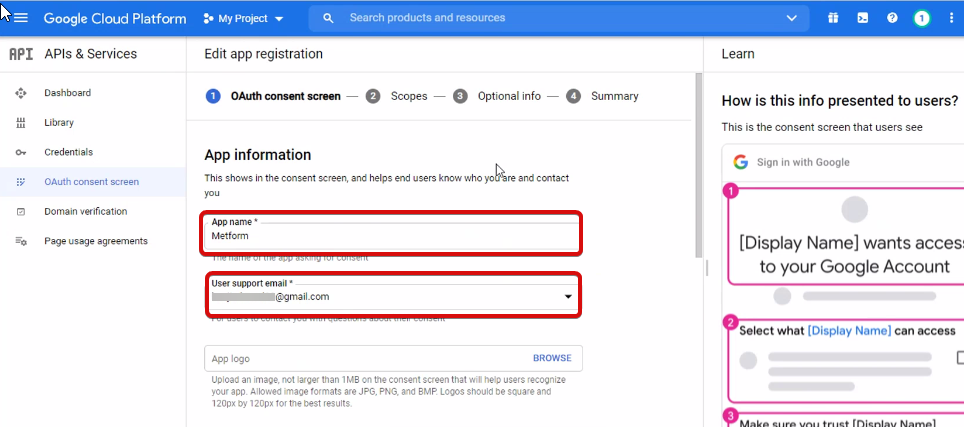
On the next screen, enter your App information including:
- Nom de l'application
- E-mail d'assistance utilisateur
- Domaines autorisés
- Developer contact
Enfin, cliquez sur Sauvegarder et continuer
Accédez à la présentation des API
- Accédez à la page d'écran de consentement OAuth
- Sélectionnez le type d'utilisateur externe
- Appuyez sur le bouton Créer
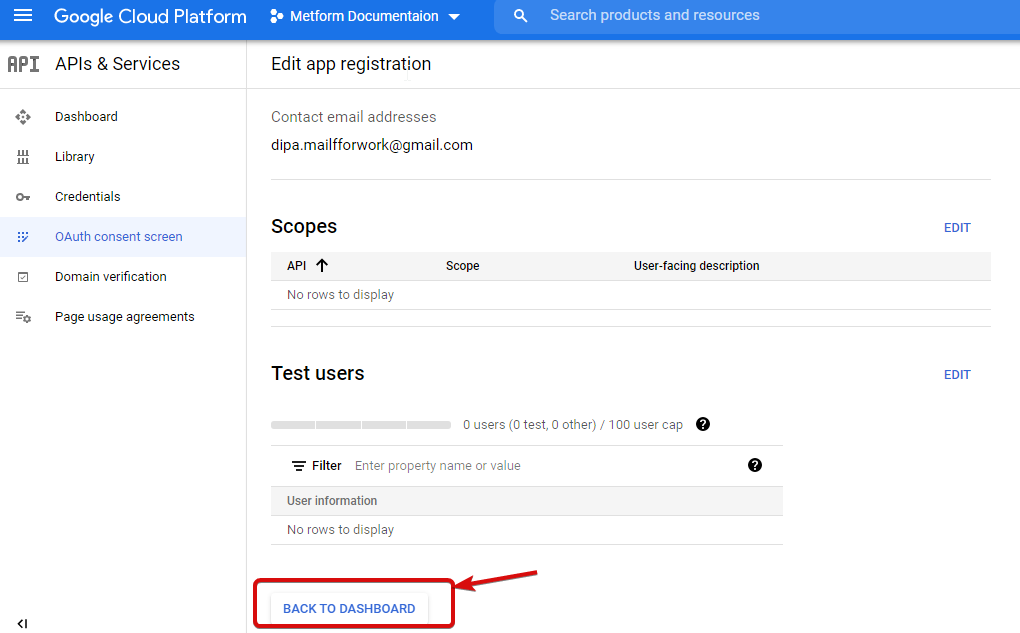
Fournissez les informations de votre application, voir l'image ci-dessous -
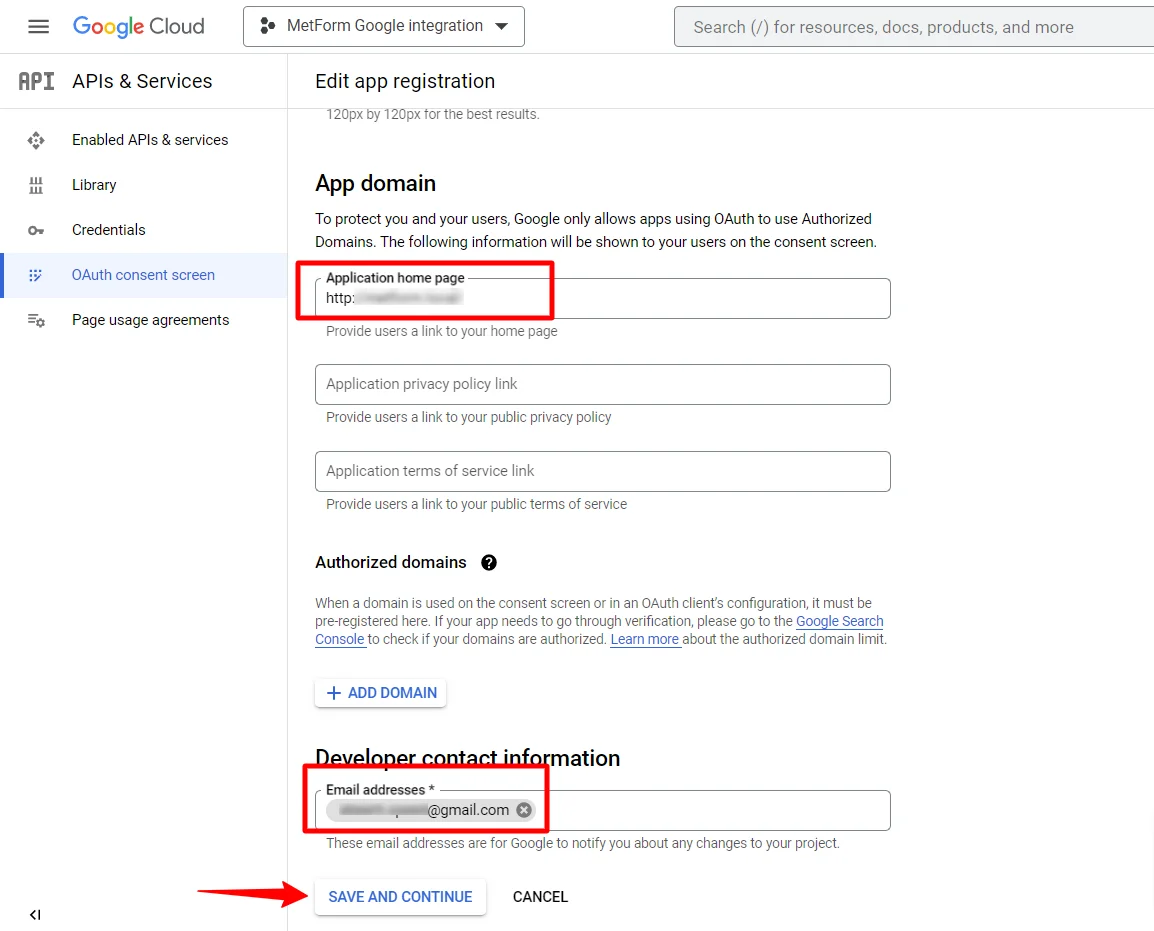
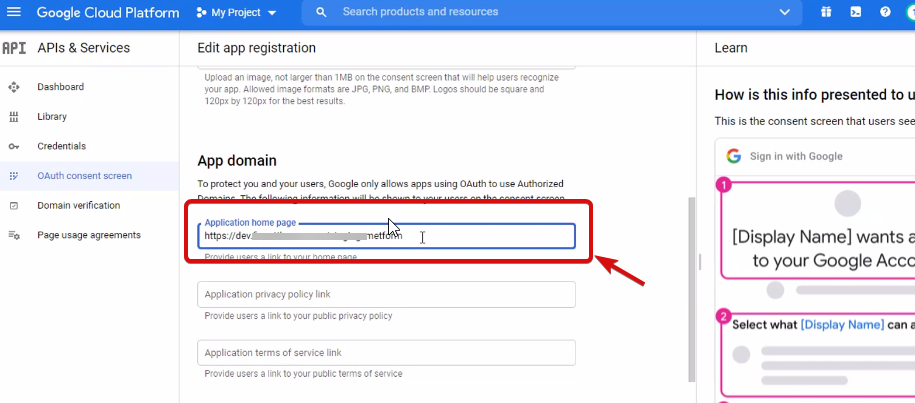
Maintenant, tu dois add App domain. If your site is on the live server then you need to authorize the domain. An authorized domain does not allow subdomain names and any protocol. However, you can use this Google project for websites created with your subdomain. For localhost, you do not need to authorize the domain.
Ensuite, enregistrez et continuez.
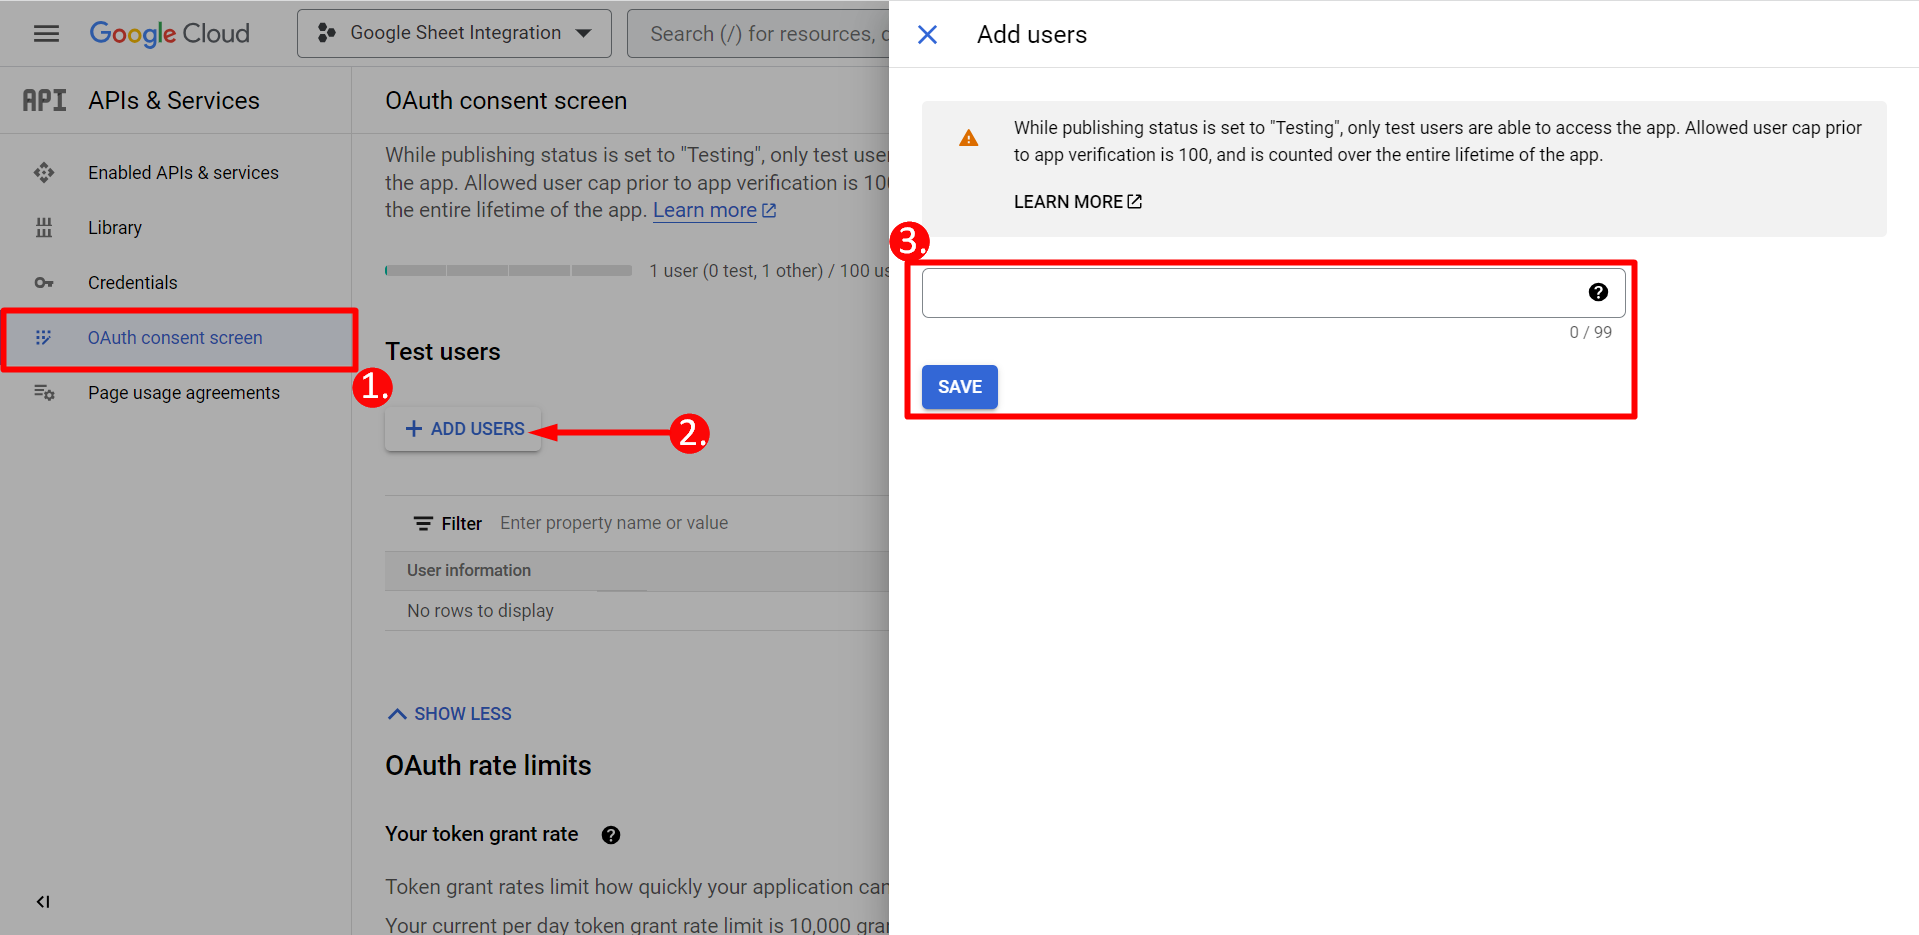
- Depuis l'écran de consentement OAuth
- Cliquez sur Ajouter des utilisateurs
- Add your email address and save it
Cliquez sur le bouton Retour au tableau de bord
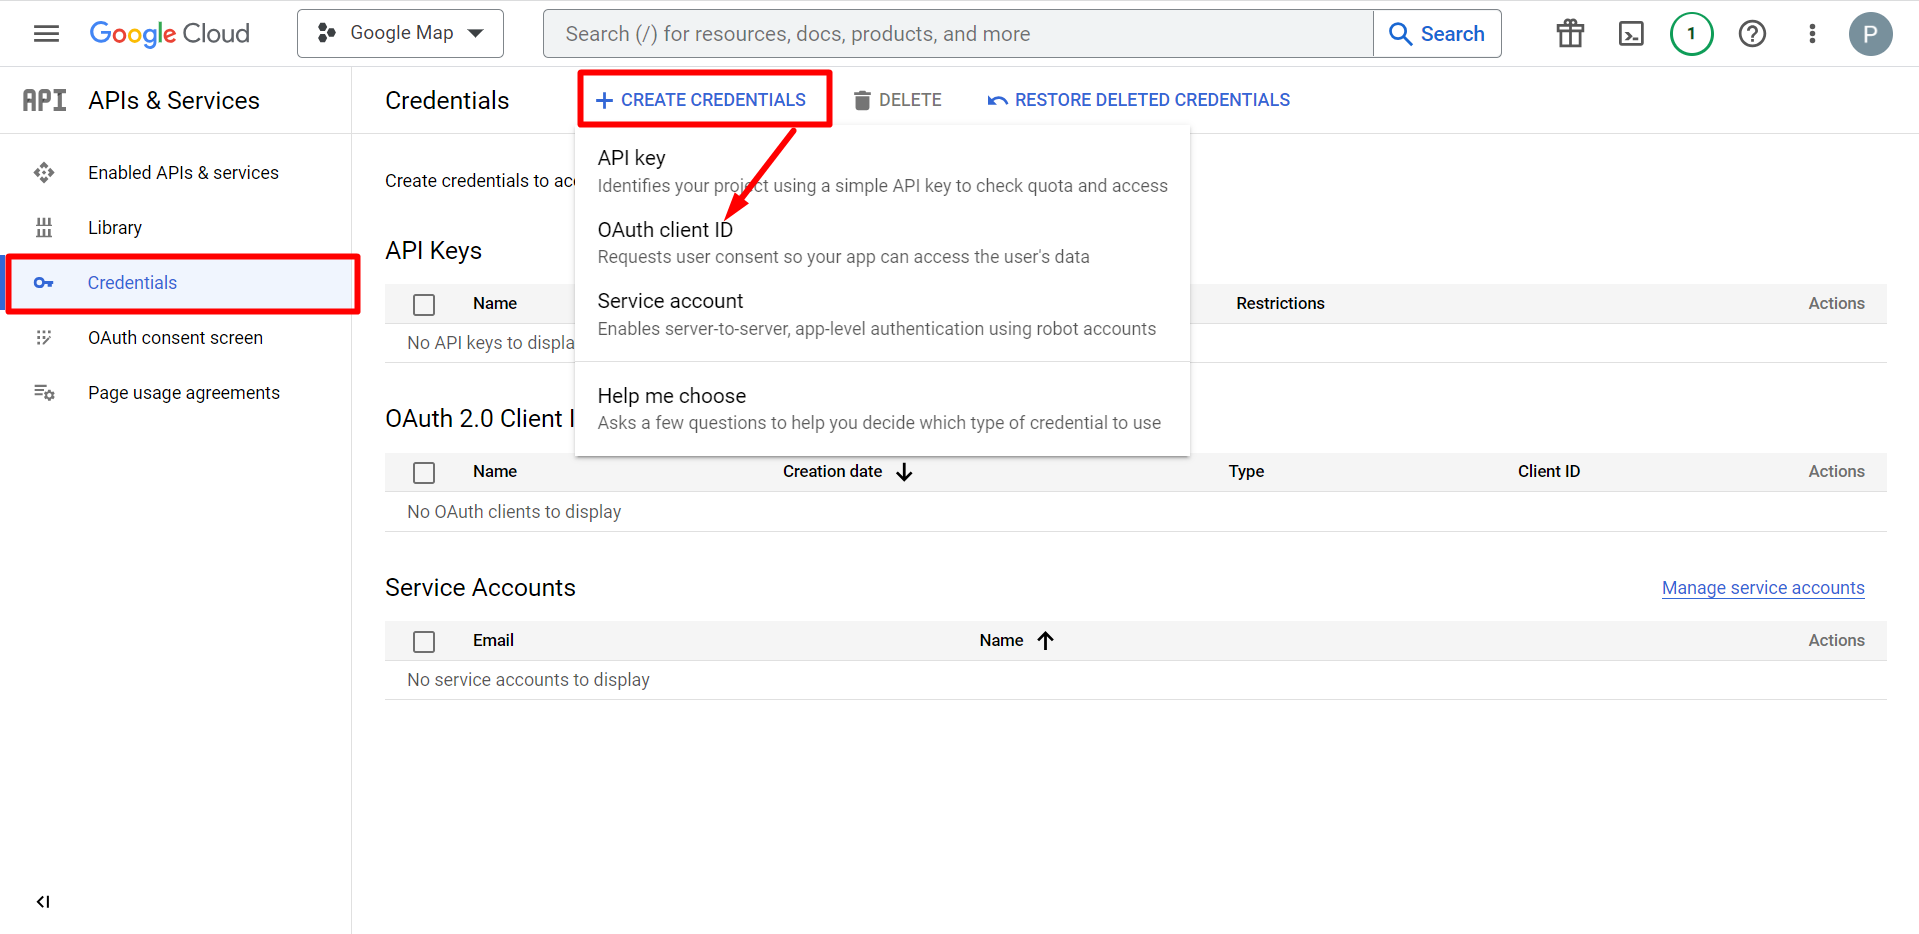
Cliquez sur le bouton Publier l’application et accédez à la page des informations d’identification. Si votre site Web est sur localhost, vous n'avez pas besoin de cliquer sur le bouton de publication de l'application. Accédez simplement à la page des informations d’identification.
- Accédez aux informations d'identification
- Créer des identifiants
- Sélectionnez l'ID client OAuth
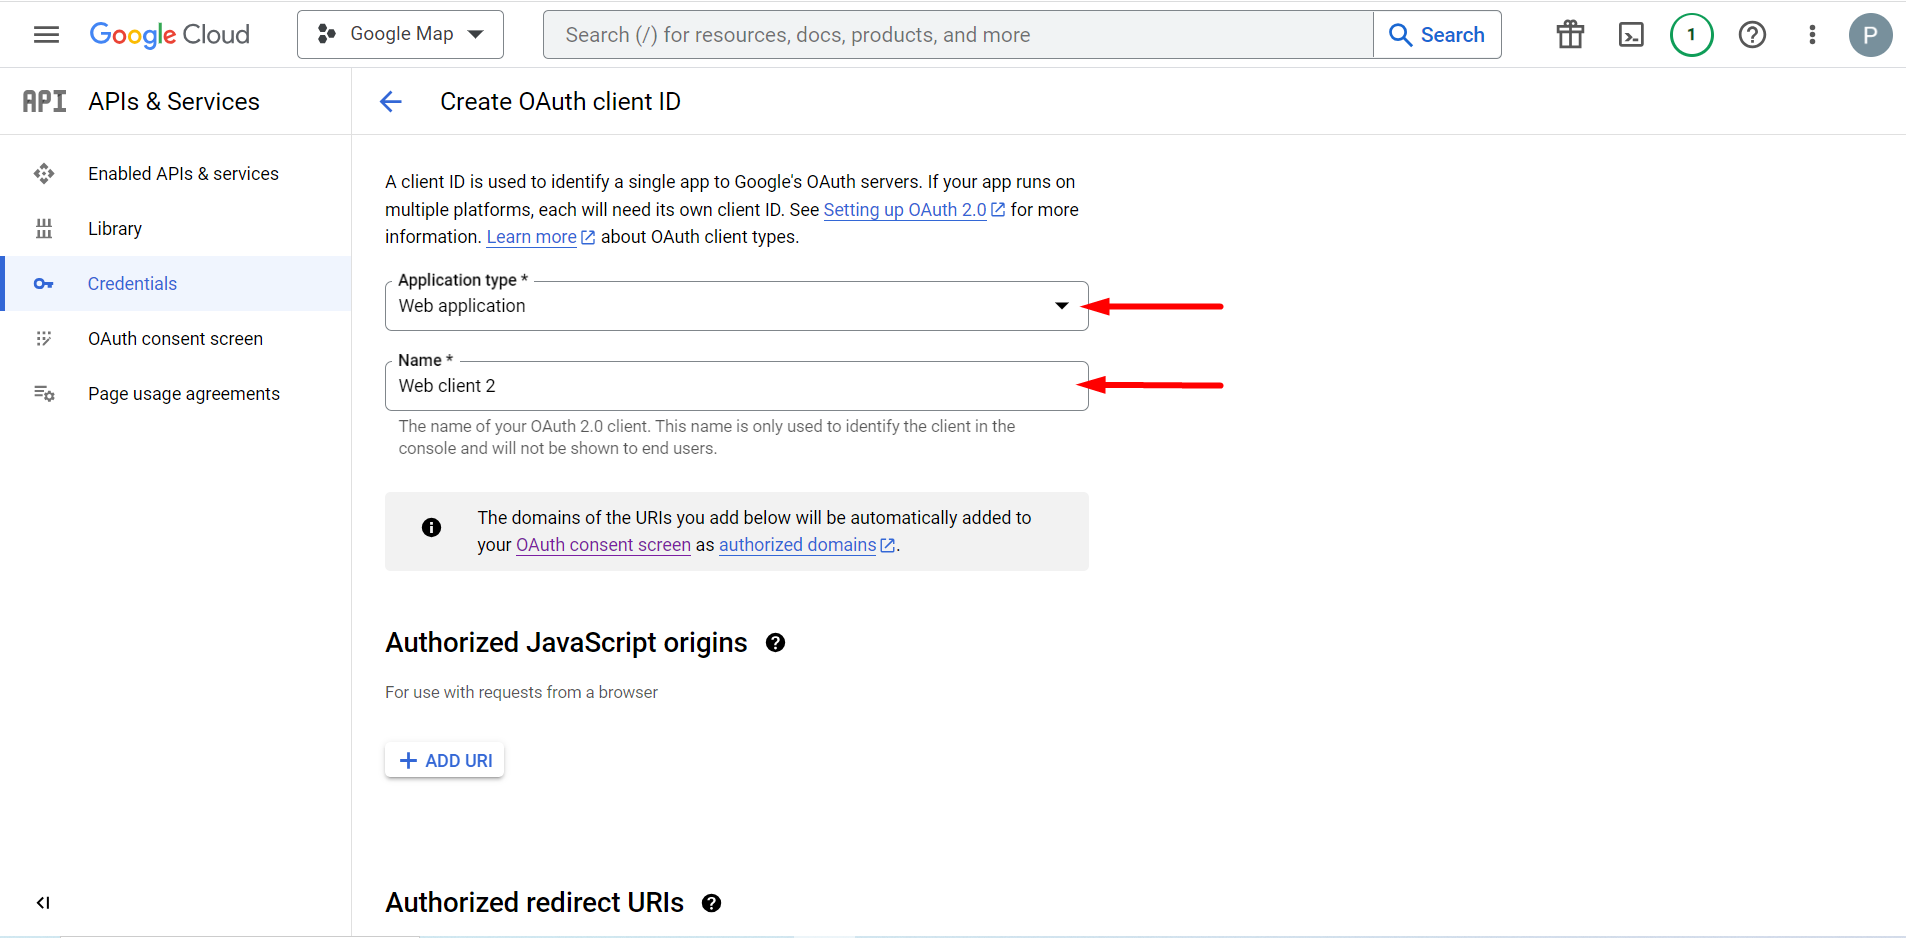
Le type d'application sélectionné est une application Web, remplissez le champ de saisie du nom
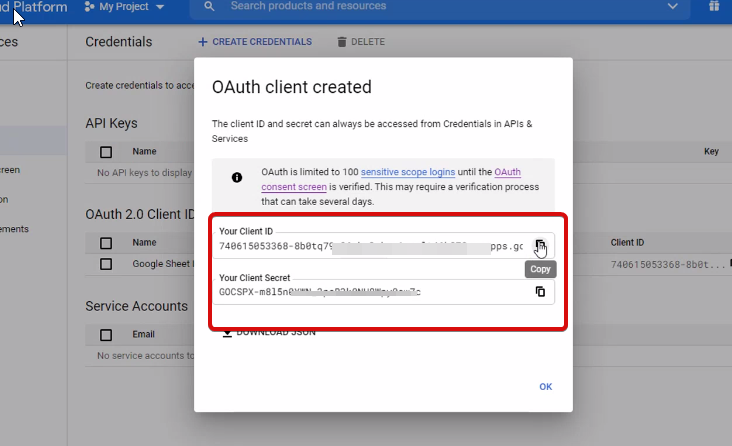
Vous pouvez maintenant vérifier l'identifiant de votre client, il est ajouté aux informations d'identification
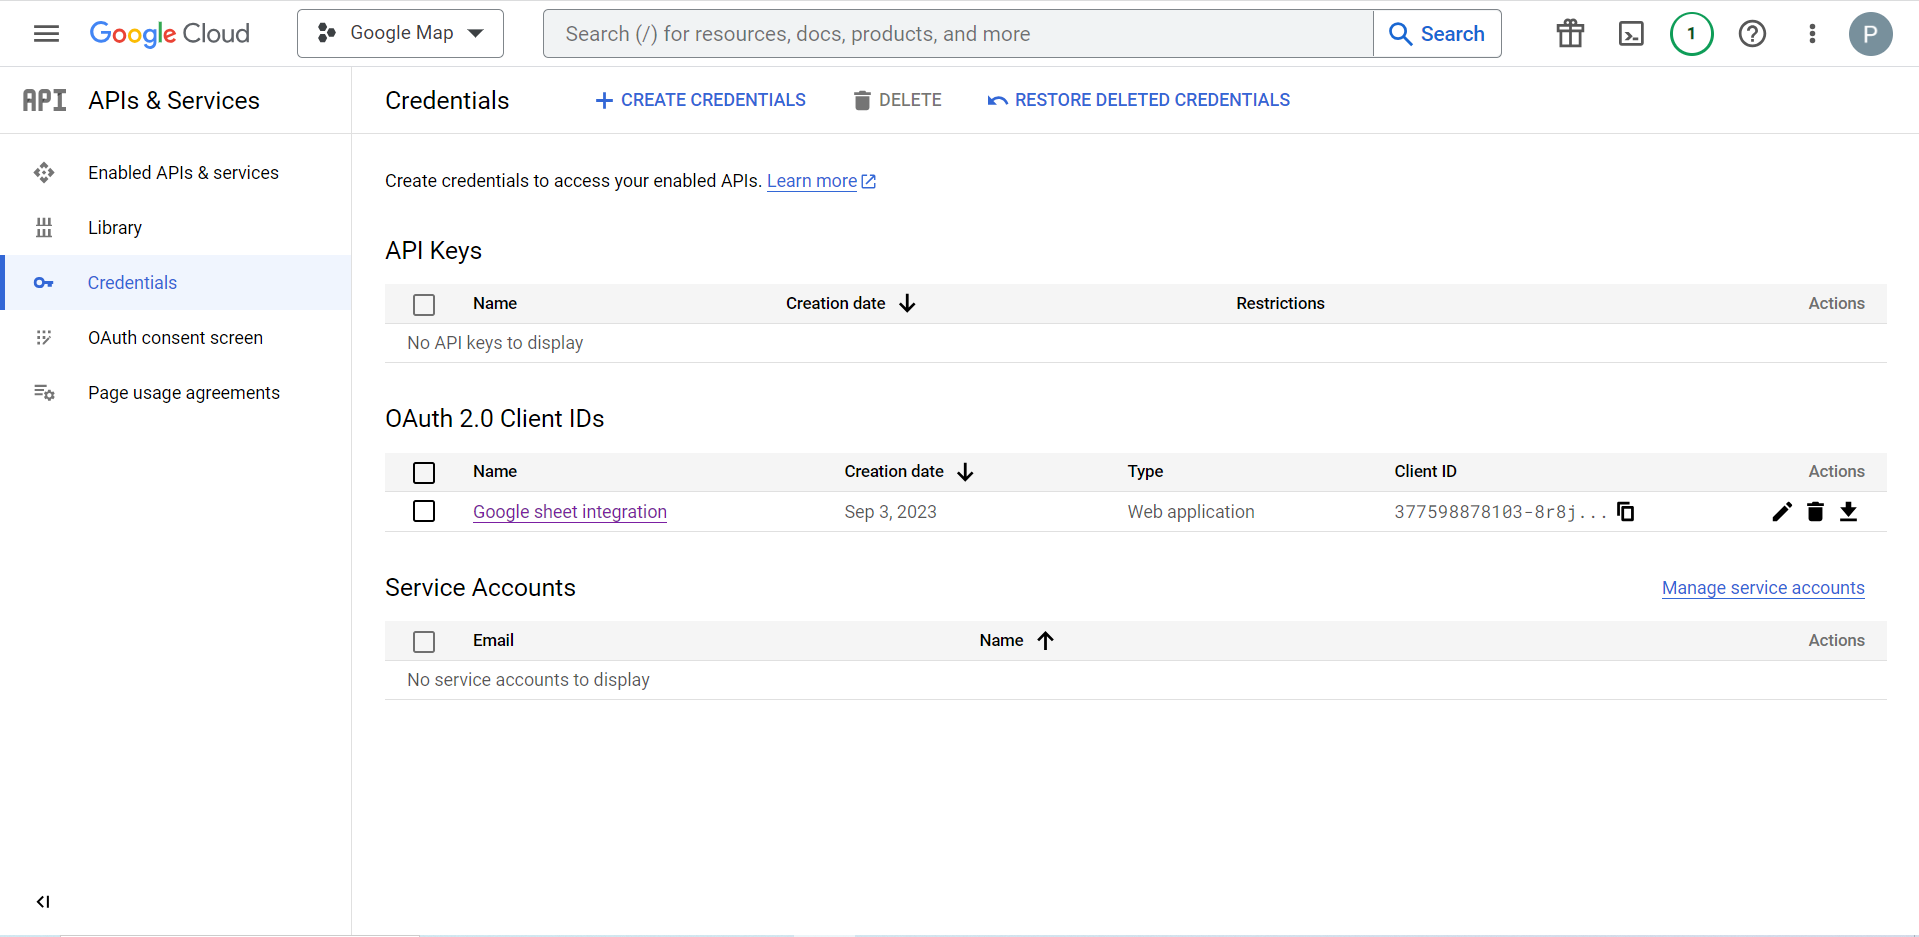
Now you will get the client ID and client secret, just copy them from here.
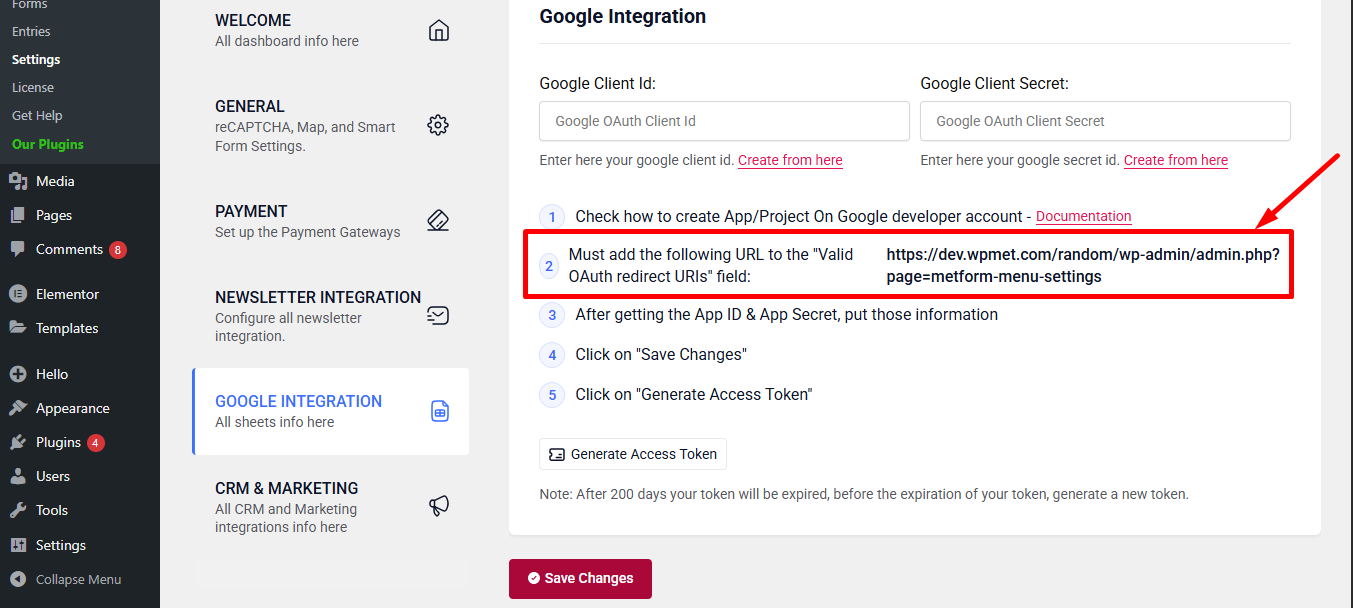
Step 2: Copy the URL From Metform’s Google Integration Tab #
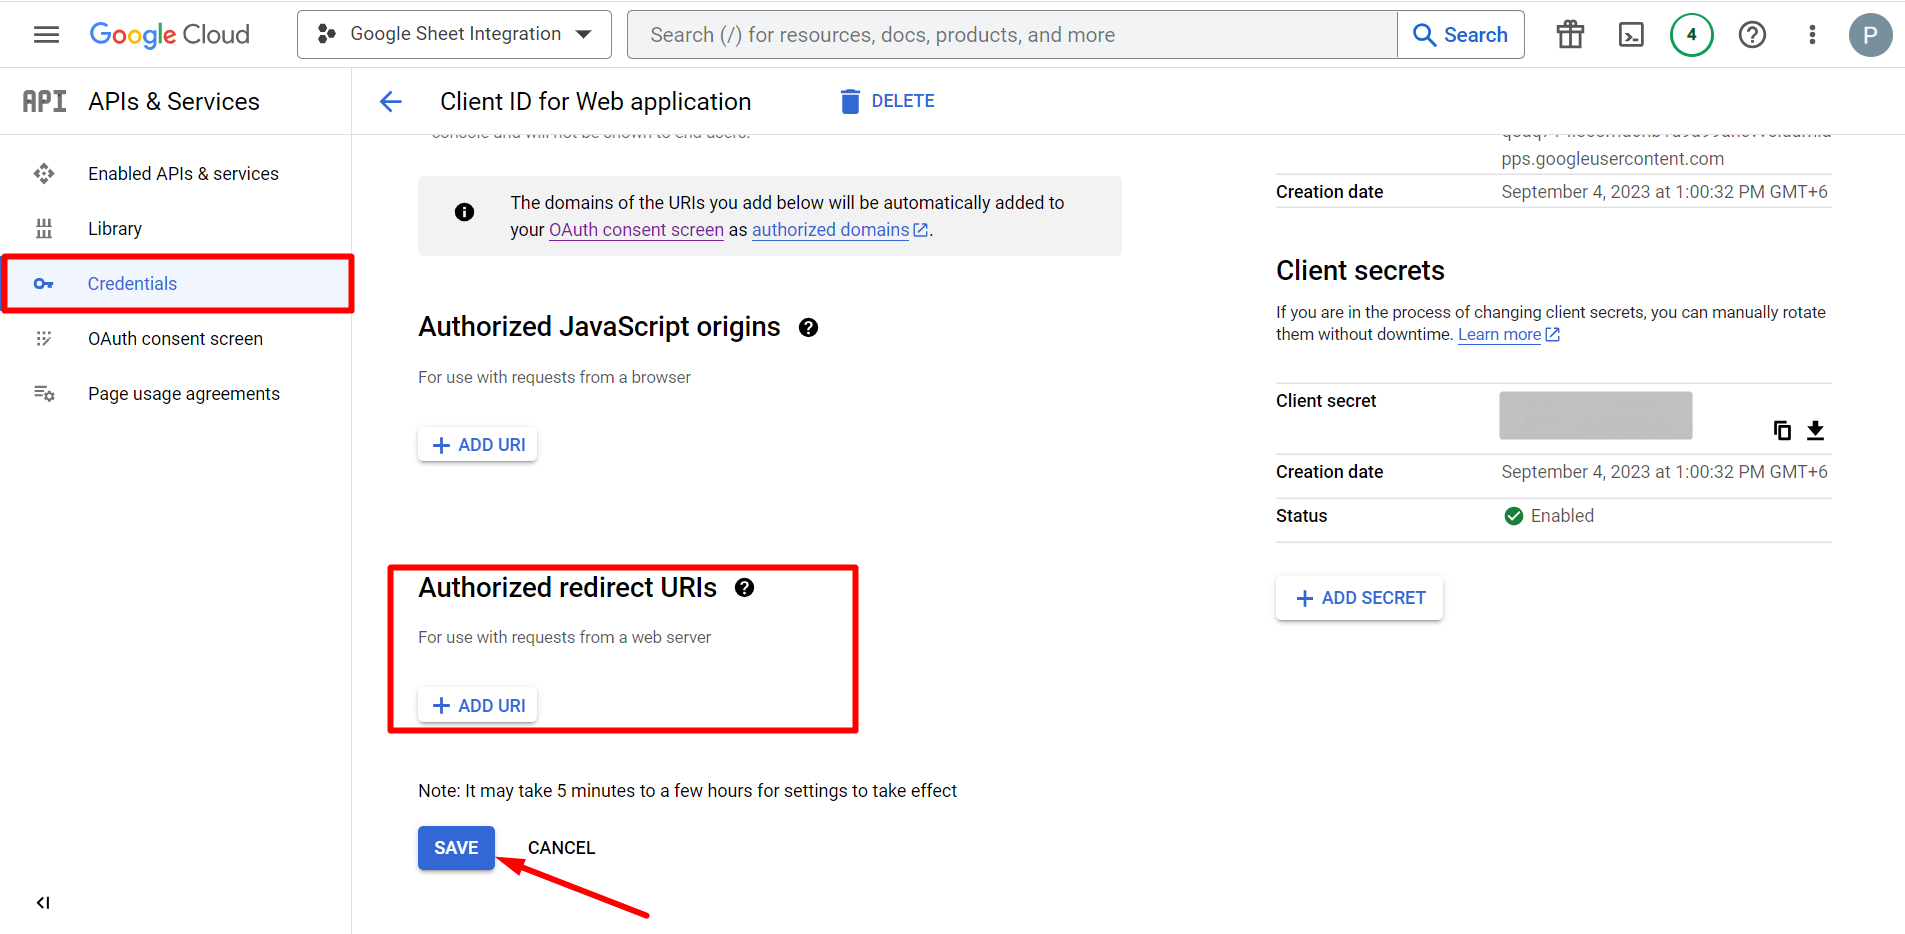
Dans cette étape, vous devez ajouter un URI de redirection autorisé. Vous obtiendrez l'URI de redirection dans les paramètres d'intégration Google Sheet de votre MetForm.
Ensuite, passez à Credentials again > find Authorized redirect URIs > Add URI that you have just copied from Metform’s Google Sheet Integration settings
Step 2: Insert the Copied Ids #
Now, return back to Metform’s Google Integration tab from your dashboard.
Here, you have to paste the copied Client ID and Client Secret in the fields and save changes.
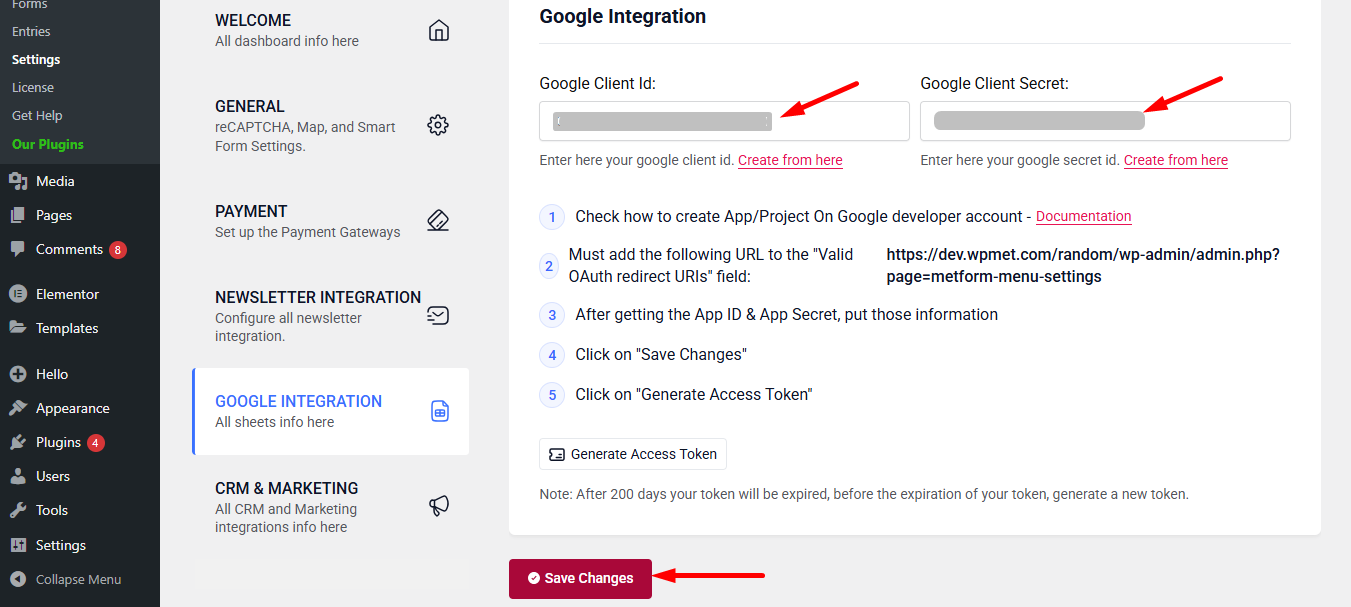
Finally you can connet Google services with your WordPress form.
A lire aussi :


