Utilice los bloques Gutenberg de datos divertidos de GutenKit para mostrar de forma intuitiva e impresionante datos importantes con números e íconos. Le ofrece todos los controles de personalización y estilos de animación para resaltar números en su sitio web de WordPress.
Lea esta documentación para aprender cómo crear un sorprendente contador de datos curiosos en el editor de bloques Gutenberg de su sitio web.
¿Cómo agregar un contador de datos curiosos en el editor de bloques de WordPress? #
Antes de pasar al primer paso, debes tener el complemento GutenKit instalado en tu sitio web de WordPress.
Paso 1: Agrega el bloque de datos curiosos GutenKit #
Desde el panel de control de WordPress:
- Agrega una página o publicación y dirígete al editor de bloques.
- Haga clic en el "+” icono en la parte superior de la pantalla del editor.
- Verá que se revelará una biblioteca de bloques.
- Utilice la barra de búsqueda para encontrar el “Hecho de la diversión" bloquear.
- Cuando aparezca, haz clic o arrástralo y suéltalo en la pantalla del editor.
Paso 2: Agregar ícono y contenido #
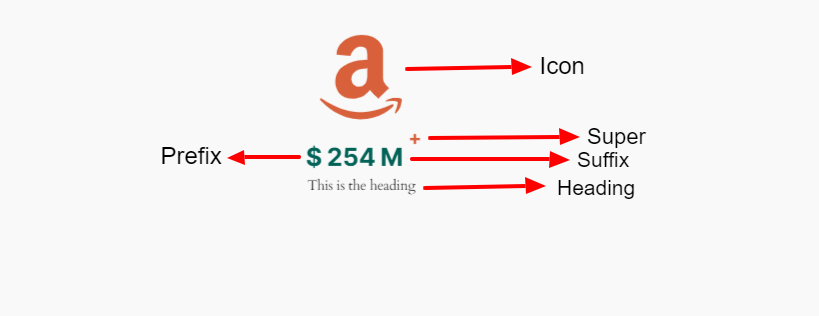
Ahora, la primera área de configuración del bloque con la que trabajarás es la pestaña Contenido. Desde aquí, agregarás íconos y otros contenidos como números, prefijos, sufijos, etc.

Icono: #
- Agregar icono:De forma predeterminada, este botón de alternancia está activado. Deshabilítelo si no desea mostrar un ícono. Puede cambiar el ícono desde la biblioteca o cargar su propio archivo de ícono SVG.
Contenido: #
- Número:Ponga en este campo el número que desea mostrar.
- Habilitar prefijo:Utilice este botón de alternancia si desea agregar algo antes del número. Puede escribir cualquier cosa en la pantalla del editor de bloques.
- Habilitar sufijo:Active esto para agregar y escribir algo después del número.
- Habilitar Super:Super funciona como otro elemento de apoyo para la información curiosa. Habilítelo y agregue un texto o un símbolo.
- Habilitar encabezado: Habilite este botón para mostrar el encabezado o el texto. Además, defina la etiqueta HTML del encabezado en el menú desplegable.
Ajustes: #
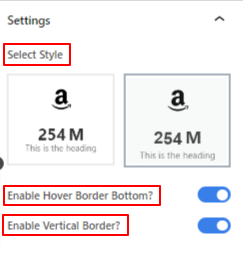

- Seleccionar estilo:Elija un estilo revelador para el número de hecho en el lado del visitante.
- Duración:Establezca la duración del conteo de números mientras se muestra en milisegundos.
- Habilitar desplazamiento hacia abajo:Alterna este botón para mostrar una línea inferior al pasar el mouse sobre él.
- Habilitar borde vertical: Actívalo para mostrar un borde vertical.
Paso 2: Dale estilo al ícono #
En esta parte, nos centraremos en diseñar el icono y otros elementos de contenido.
Vaya a la pestaña de estilo:
Icono, #
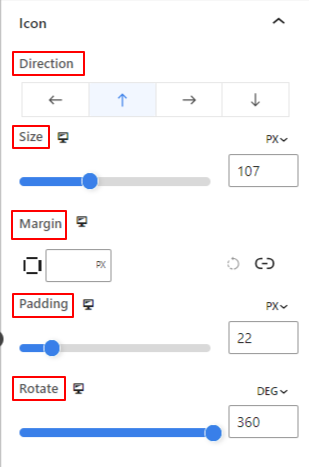

- Dirección:Define la ubicación del ícono (Izquierda/Arriba/Derecha/Abajo)
- Tamaño:Utilice el control deslizante para determinar el tamaño del icono.
- Margen:Ingrese el valor personalizado de marting para ajustar el espacio alrededor del ícono.
- Relleno:Defina el relleno del ícono utilizando el control deslizante o ingresando un valor personalizado en el campo.
- Girar:Proporcione un valor específico o aplique el control deslizante para determinar el grado de rotación del ícono.
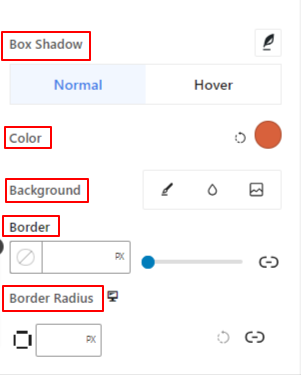

- Sombra de la caja:Usando estos controles, puedes agregar efectos de sombra alrededor del ícono.
- Color:Utilice el selector de color para establecer un color para el ícono.
- Fondo:Agrega un tipo de fondo entre color sólido y degradado.
- Borde y radio del borde:Establezca el grosor, el color y la redondez del borde del ícono.
Paso 3: Dar estilo al contenido del texto #
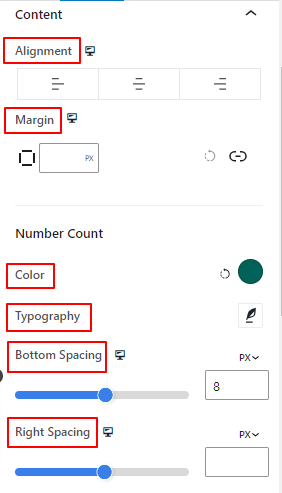

- Alineación:Coloca el contenido del texto a la izquierda, al centro o a la derecha.
- Margen:Ajusta el margen para el contenido del texto.
Conteo de números:
- Color:Seleccione un color para el número.
- Tipografía:Controle todas las configuraciones tipográficas como la familia de fuentes, el tamaño, el peso, el estilo, el espaciado entre letras y mucho más.
- Espaciado inferior:Defina el espacio inferior entre el número y el contenido del título utilizando el control deslizante o colocando un valor personalizado.
- Espaciado correcto:Define el espacio o brecha entre el número y el contenido del sufijo.
Título:
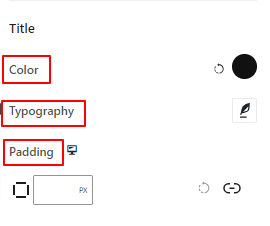

- Color:Dale un color al texto del título.
- Tipografía:Obtenga todos los controles de tipografía como familia de fuentes, tamaño, estilo, interlineado, etc.
- Relleno:Ingrese el valor personalizado que desee para agregar relleno alrededor del título.
Paso 4: Dar estilo a otros elementos #
Súper: #
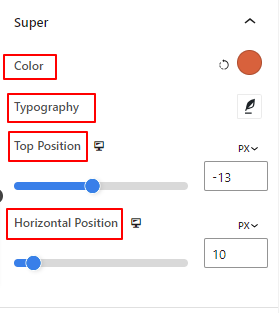

- Color:Seleccione un color para el supertexto o símbolo.
- Tipografía:Obtenga todas las configuraciones tipográficas para supertexto.
- Posición superior:Ajusta la posición vertical del súper contenido.
- Posicion horizontal:Utilice este control deslizante para definir la posición horizontal del súper contenido.
Las siguientes dos opciones solo serán visibles en la pestaña Estilo cuando se habiliten desde la pestaña Contenido.
Borde flotante: #
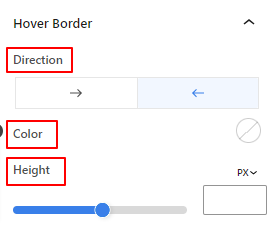

- Dirección:Establezca la dirección de revelación del borde flotante.
- Color:Dale un color al borde al pasar el mouse.
- Altura:Defina la altura del borde flotante utilizando el control deslizante o ingresando un valor personalizado.
Borde vertical: #
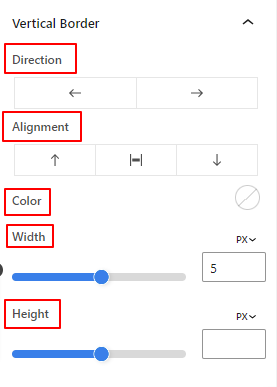

- Dirección: Seleccione la dirección izquierda o derecha del borde vertical.
- Alineación:Desde allí, establecerá la ubicación vertical del borde vertical.
- Color:Utilice el selector de color para darle un color al borde vertical.
- Ancho y altura:Ajusta el grosor y la altura del borde vertical.
Eso es todo. Hemos terminado con todas las configuraciones. Ahora, es tu turno de probar todas estas funciones para crear tu contador de datos curiosos en tu sitio web.
Paso 5: Configuración avanzada #
Desde la pestaña Configuración avanzada, puedes configurar el diseño del bloque Dato curioso, el fondo, los estilos de borde y controlar su visibilidad.
Disposición, #
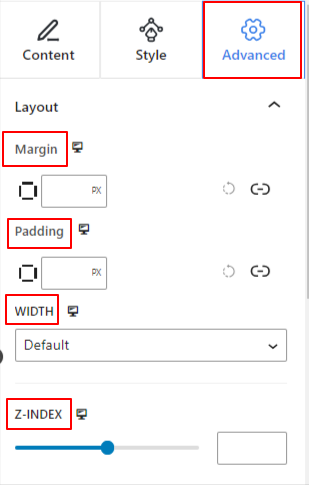

- Margen: define el espacio alrededor del diseño del bloque. Ayuda a establecer un espacio entre otro bloque.
- Relleno: ingrese un valor para establecer el espacio alrededor del bloque dentro de su diseño.
- Ancho: Además de mantener el ancho de diseño predeterminado.
- Ancho completo: Al seleccionar esto, el diseño abarcará todo el ancho de la pantalla.
- En línea (automático): Al aplicarlo tendrá el mismo ancho que el elemento del bloque.
- Costumbre: Al elegir esta opción, se mostrará un control deslizante para definir el espacio horizontal del diseño del bloque.
- Índice Z: utilice el control deslizante para especificar el orden de pila del bloque con otros bloques.
Posición: #
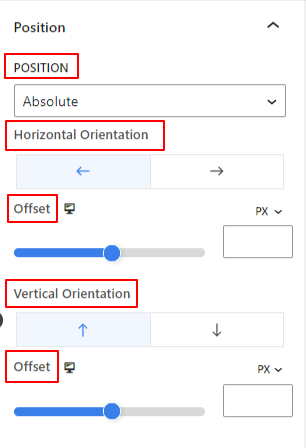

Debajo del menú desplegable, verá tres opciones: Por defecto, Absoluto, y Fijado.
- Absoluto: Al seleccionar esta opción, obtendrá una posición absoluta del bloque, lo que significa que los elementos encajarán en su contenedor.
- Fijado: La opción Posición fija permitirá que el elemento encaje en toda la ventana gráfica o pantalla.
Tanto la opción Absoluta como la Fija tienen configuraciones similares a las siguientes:
- Orientación horizontal: Elija la dirección de posicionamiento entre izquierda y derecha.
- Compensar: Utilice el control deslizante o introduzca un valor manualmente para ajustar la posición horizontal del bloque.
- Orientación vertical: Seleccione la dirección de posicionamiento entre arriba o abajo.
- Compensar: Utilice el control deslizante o introduzca un valor manualmente para ajustar la posición vertical del bloque.
Fondo: #
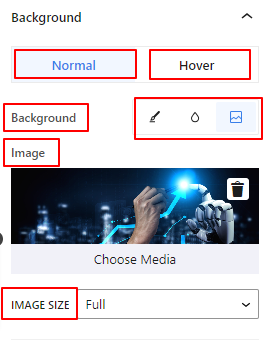

- Fondo: elija una opción de fondo entre color sólido, degradado o imagen.
En la opción Pasar el cursor:
- Imagen: Si elige la opción de imagen, se abrirán las siguientes opciones:
- Imagen: elija una imagen de la biblioteca multimedia o cargue la suya propia.
- Tamaño de la imagene: Seleccione el tamaño de la imagen entre Miniatura, Mediano, Grande o Completo.
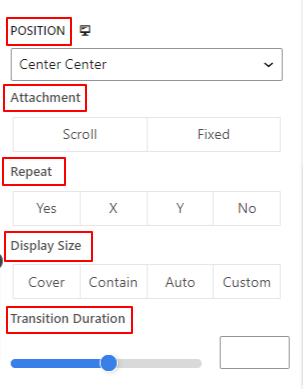

- Posición: Selecciona la posición de las 10 opciones diferentes.
- Adjunto: Especifique la relación de la imagen de fondo fija o de desplazamiento con el resto de la pantalla del navegador.
- Repetir: seleccione una opción para configurar cómo se repiten las imágenes de fondo.
- tamaño de la pantalla: seleccione un tamaño de visualización entre cuatro opciones diferentes.
- Duración de la transición: utilice el control deslizante para ajustar la transición del fondo de Normal al estado de desplazamiento.
Borde: #
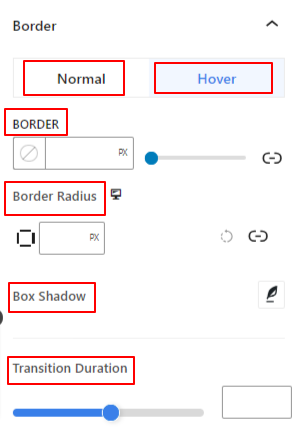

- Borde: En esta opción de configuración, obtendrá opciones de configuración de bordes como ancho, estilo y color.
- Radio del borde: establezca la redondez del borde ingresando un valor.
- Sombra de la caja: Obtenga todas las configuraciones como color, horizontal/vertical, desenfoque, extensión y más para darle efectos de sombra al borde.
En la opción de desplazamiento:
- Duración de la transición: Puede agregar un valor manualmente o usar el control deslizante para establecer el tiempo para cambiar el diseño del borde en el estado de desplazamiento.
Visibilidad: #
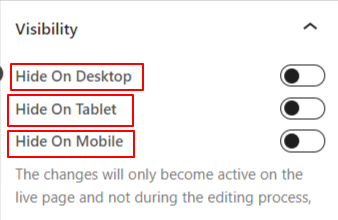

El módulo de visibilidad le permite controlar la visualización de diseños de bloques según el tipo de dispositivo. Habrá tres opciones de dispositivo (escritorio, tableta, móvil) con un botón de alternancia. Active el botón de alternancia para ocultar el diseño de bloque de ese dispositivo.
Sin embargo, aún puedes verlo en la vista del editor.
Avanzado: #
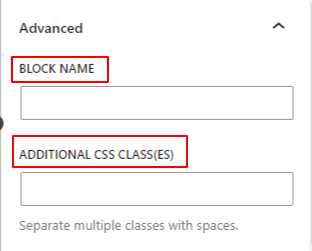

- Nombre del bloque: proporcione un nombre para identificar este bloque de forma única mientras lo vincula o crea una secuencia de comandos para darle estilo al bloque.
- Ancla HTML: agregue una URL para vincular una página de sitio web.
- Clases CSS adicionales: Asigne clases CSS adicionales al bloque, lo que le permitirá diseñar el bloque como desee con CSS personalizado.
NÓTESE BIEN: Puede agregar varias clases por separado con espacios.


