


Installing and activating PopupKit Pro for the ultimate collection of popup templates and features in WordPress is quite easy and smooth. After purchasing the PopupKit Pro, you’ll get your license key.
We’ll show the simple steps here.
Purchase, Install, Activate PopupKit Pro #
Prerequisites:
Install and activate the lite plugin 👉 PopupKit
STEP 1: Installing PopupKit from WordPress Dashboard #
Go to the PopupKit Pricing page.
Select the plan that fits your needs and click the Purchase Now button.
You’ll be taken to the Checkout page. Fill in the required details and click Purchase to continue.
Choose your preferred payment method and complete the payment process.
After a successful purchase, you’ll receive a confirmation email containing your order details and a download link for the plugin.
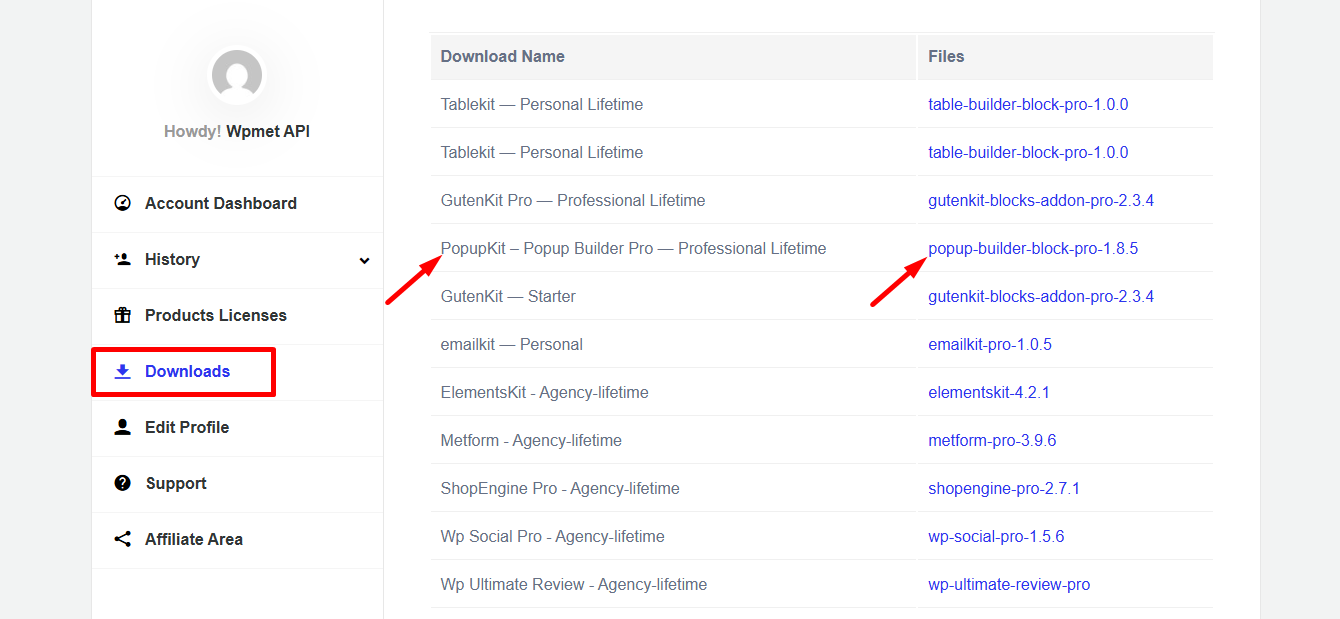
Step 2: How to download the plugin #
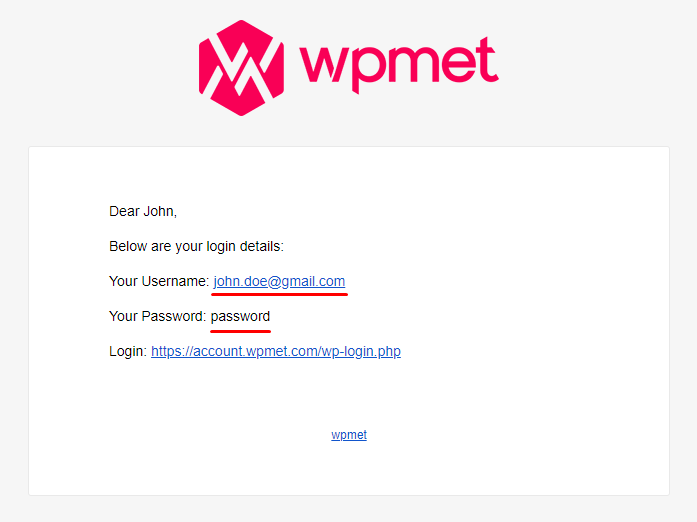
Sign in via the email link or directly through our website.
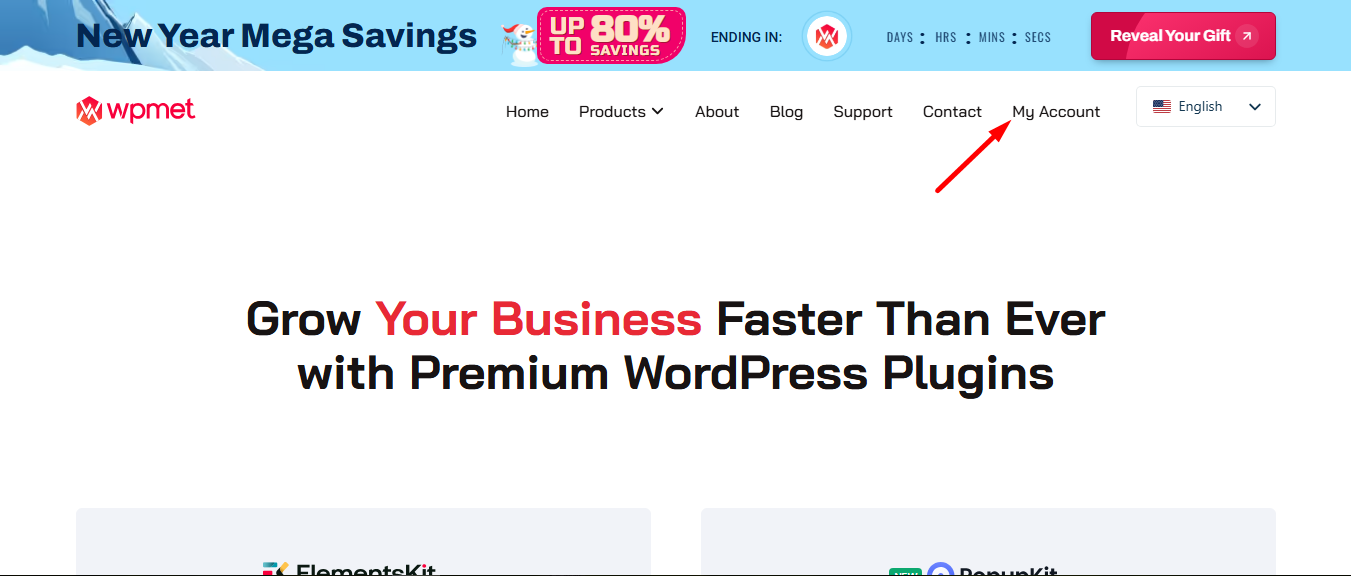
Returning you to your account dashboard now.
To download, go to ‘Downloads’ and click the file name.
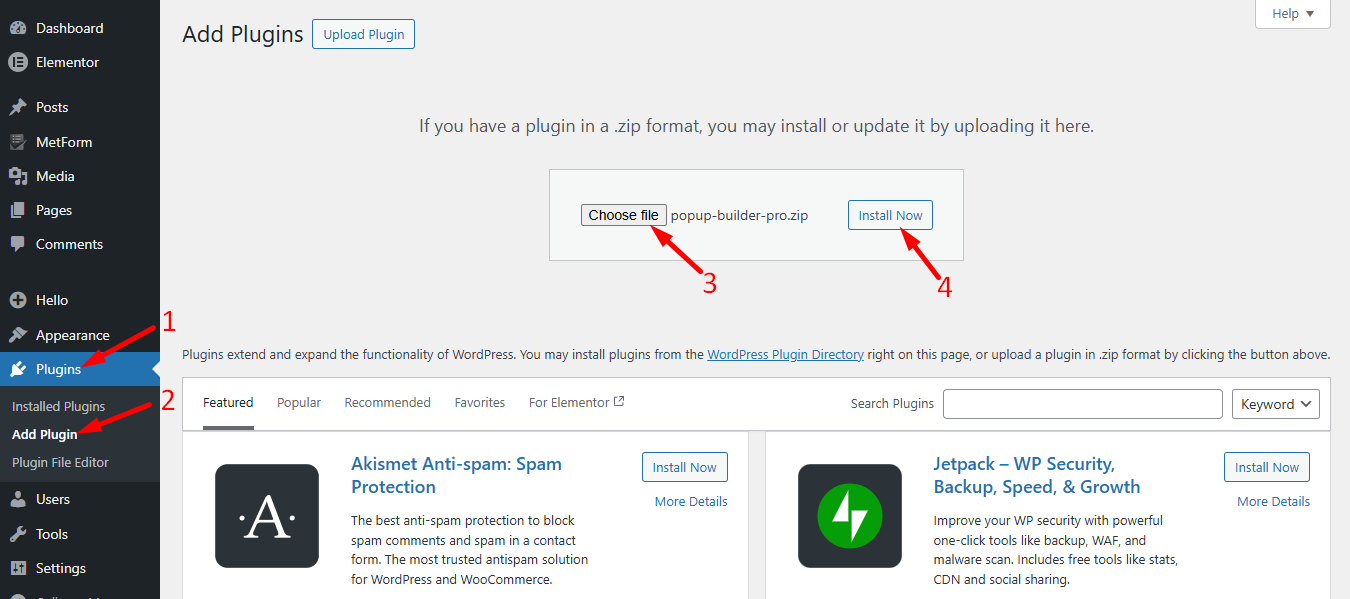
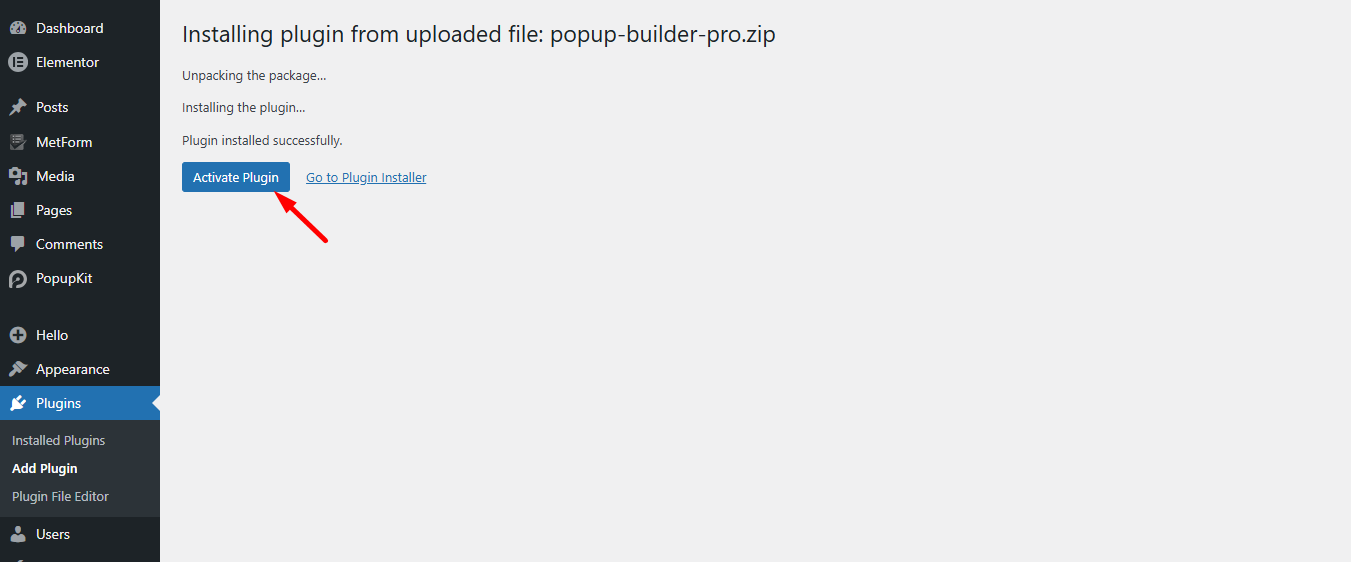
STEP 3: How to Install PopupKit Pro #
Once you have downloaded the .zip file, go to the WordPress dashboard –
- Proceed to Plugins
- Click Add Plugins
- Upload Plugin > Choose File
- Then, click on Install Now to complete the process
Pro needs the Lite version to work. Please install PopupKit Lite first if you haven’t already.
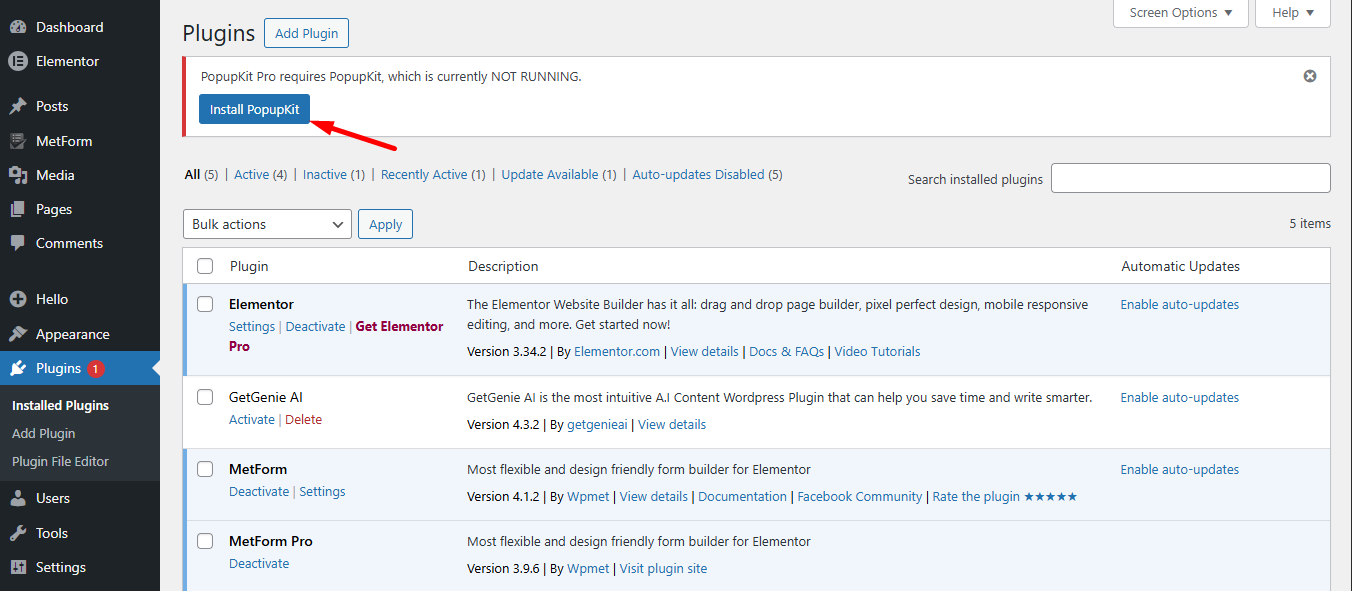
Now, activate PopupKit pro plugin.
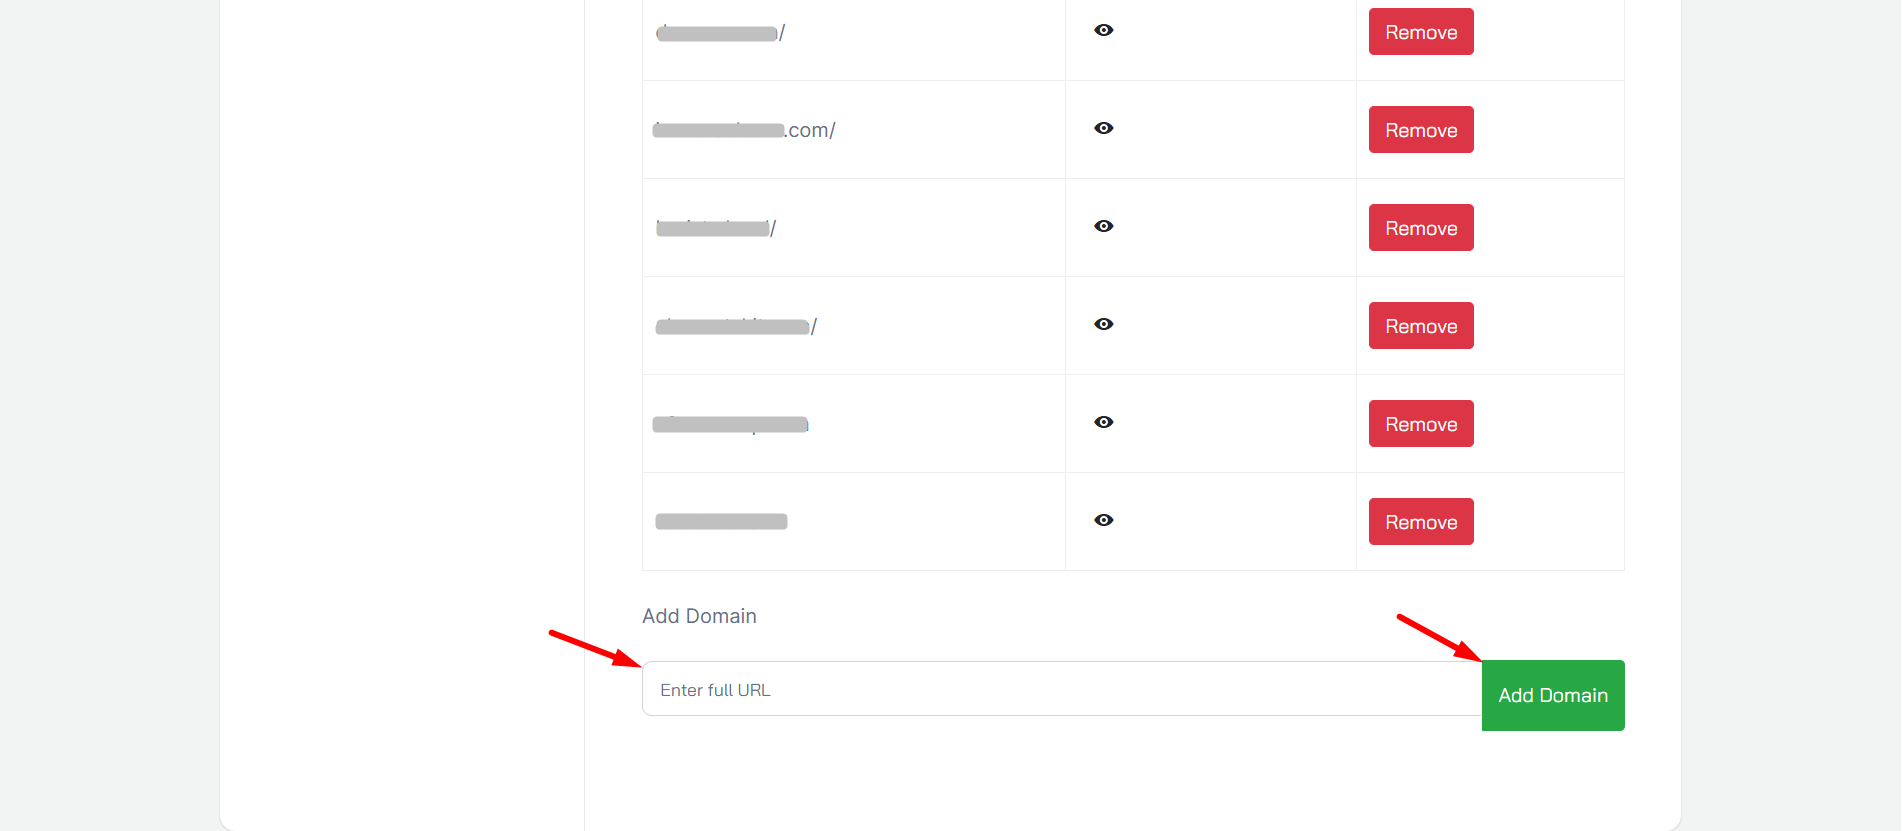
Step 4: License Activation Process #
Return to your Wpmet account, navigate to Product Licenses, select PopupKit Pro, and insert your site’s domain.
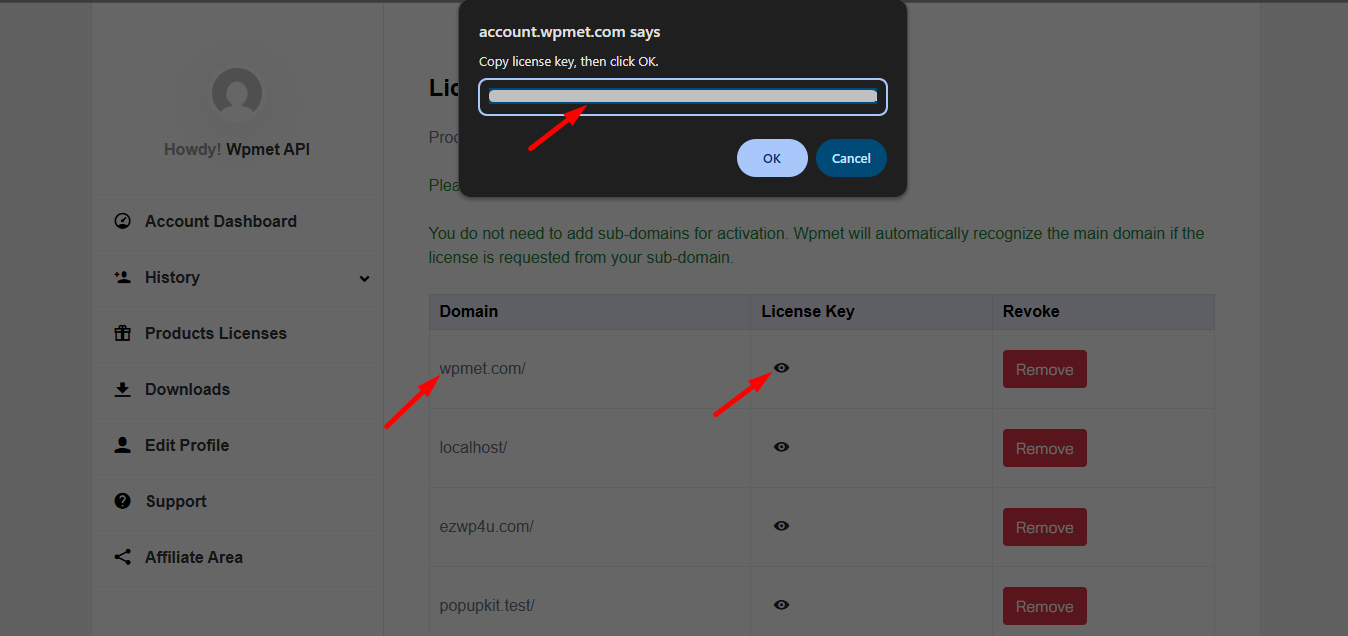
Next, follow the steps –
- Locate your domain.
- Click License Key for PopupKit.
- Copy the key and hit OK.
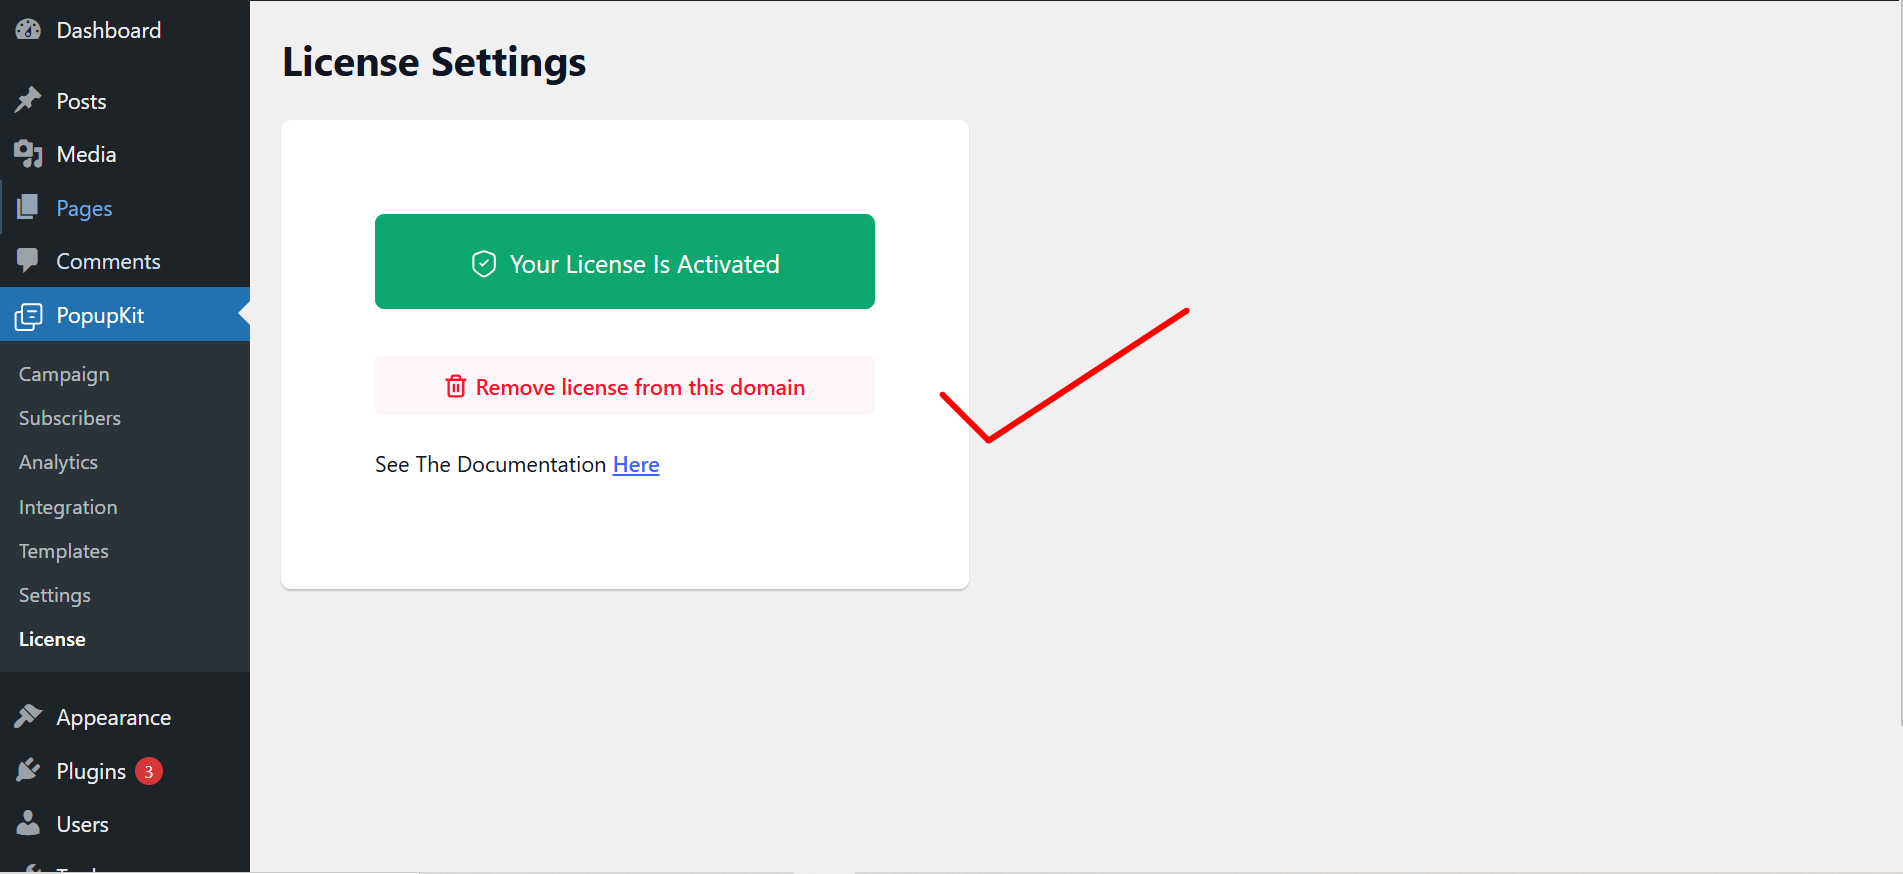
Step 5: Activate the license key on your WordPress #
Now, log in to your WordPress Dashboard.
- Go to MetForm > License
- Paste the license key in the input box
- Click ACTIVATE

However, you can remove the license whenever you want by clicking on the “Remove license from this domain” button.
That was it about getting the Pro License for PopupKit. Enjoy quality, effective and catchy popups using PopupKit.


