


Klaviyo is a popular email and SMS marketing platform for growing and engaging audiences. With PopupKit’s Klaviyo integration, the data collected from your website popups is sent directly to your Klaviyo lists. It helps you start targeted and personalized campaigns instantly.
Let’s see how to integrate Klaviyo with PopupKit.
Klaviyo Integration with PopupKit #
Prerequisite: To use the Klaviyo integration, you must be on the PopupKit Pro plan. Select the plan that fits your needs.
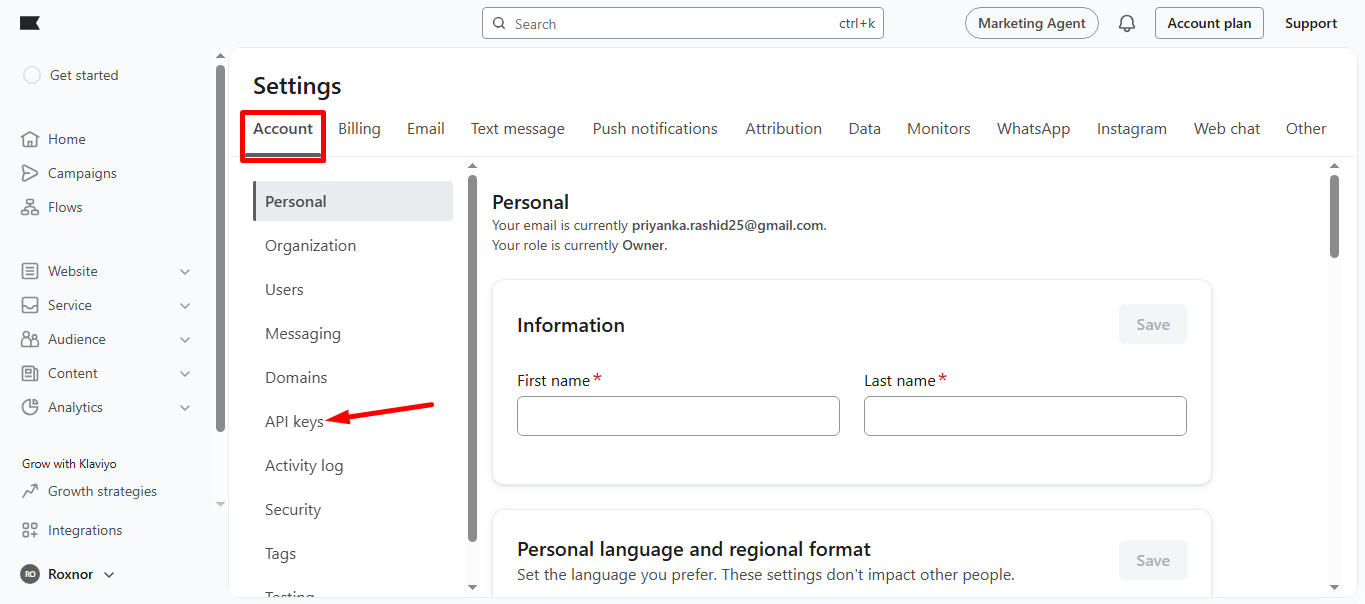
STEP 1: Log in to the Klaviyo #
Log in to the Klaviyo account. Afterward, from your profile, select the Settings option.

In the Account tab click on the API keys.
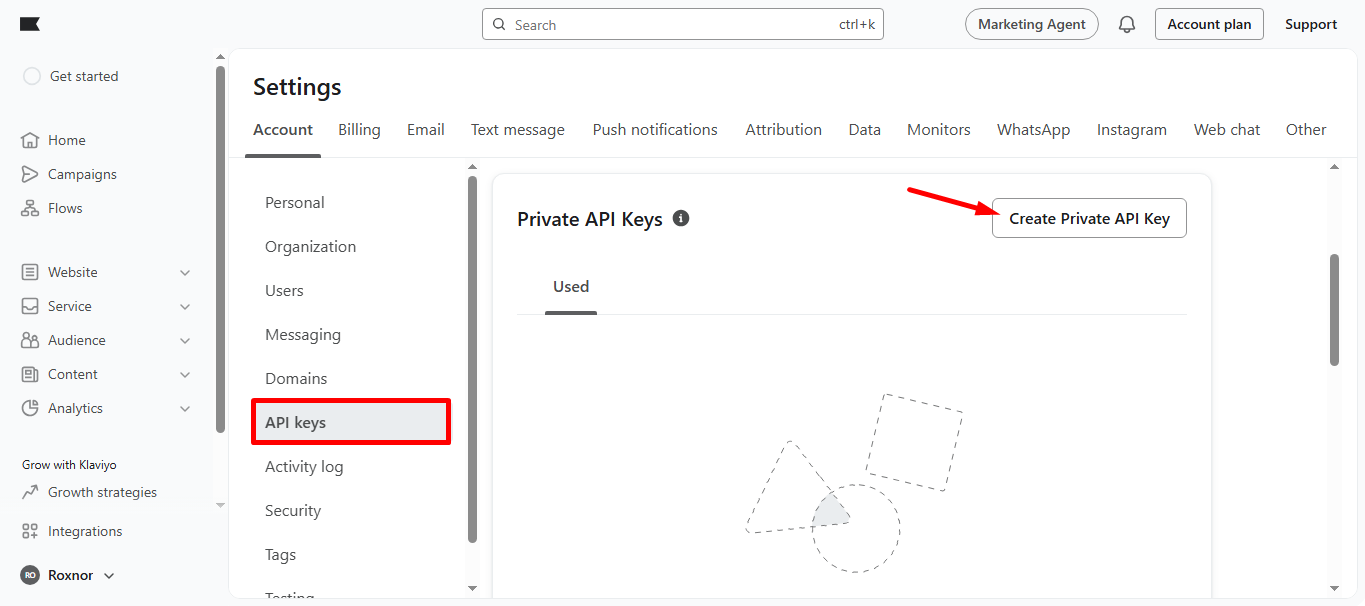
In the API keys section, you’ll find Create private API key, click on it.
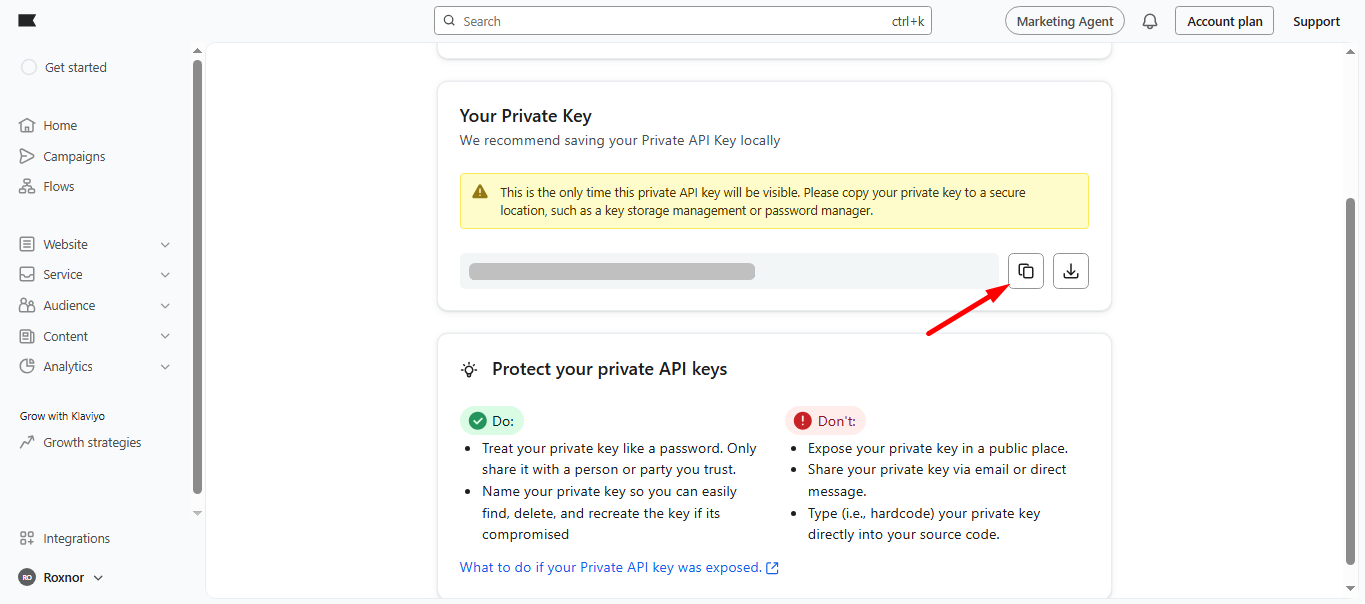
Here you go, the private key is ready, copy it.
STEP 2: Access your WordPress dashboard #
Open your WordPress dashboard, navigate to PopupKit and click on the Integrations tab.
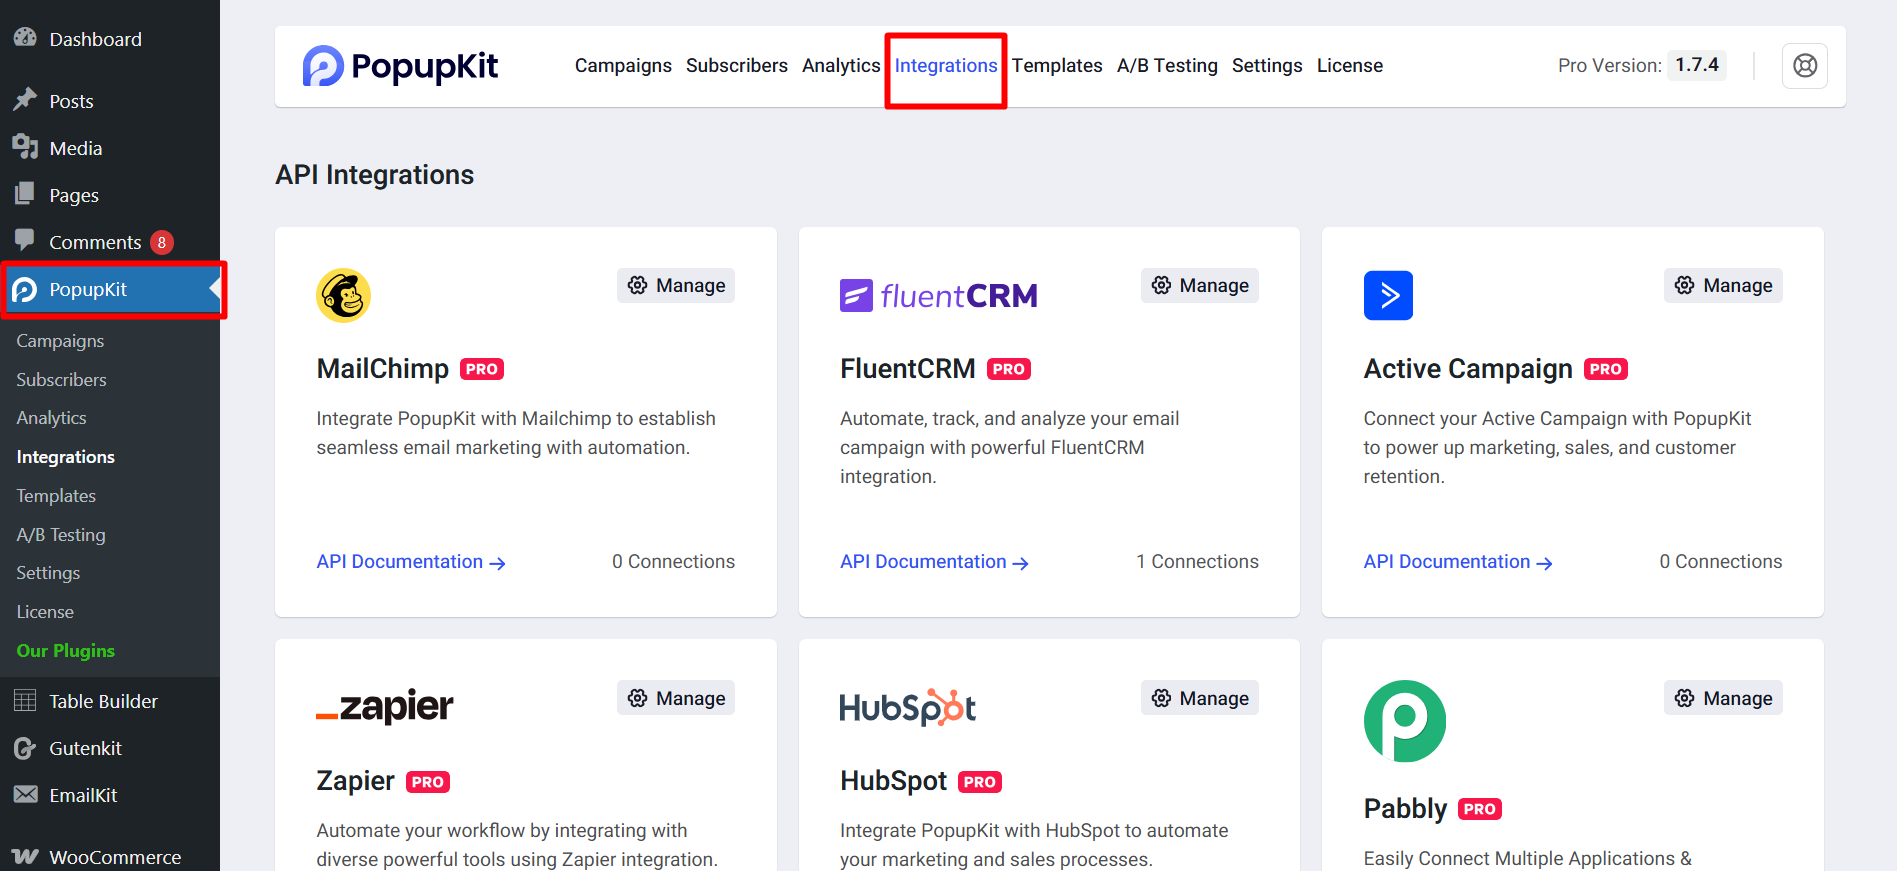
Find Klaviyo and click on the Manage Settings icon.
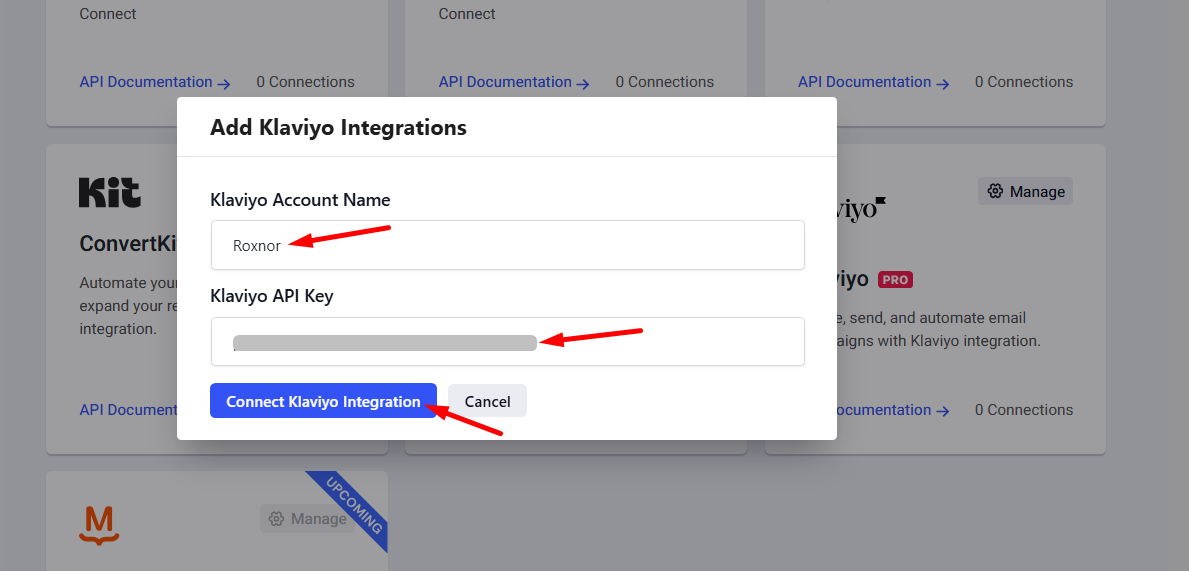
Next,
- Insert Klaviyo Account Name
- Insert your copied Klaviyo API Key
- Press the Connect Klaviyo Integration button
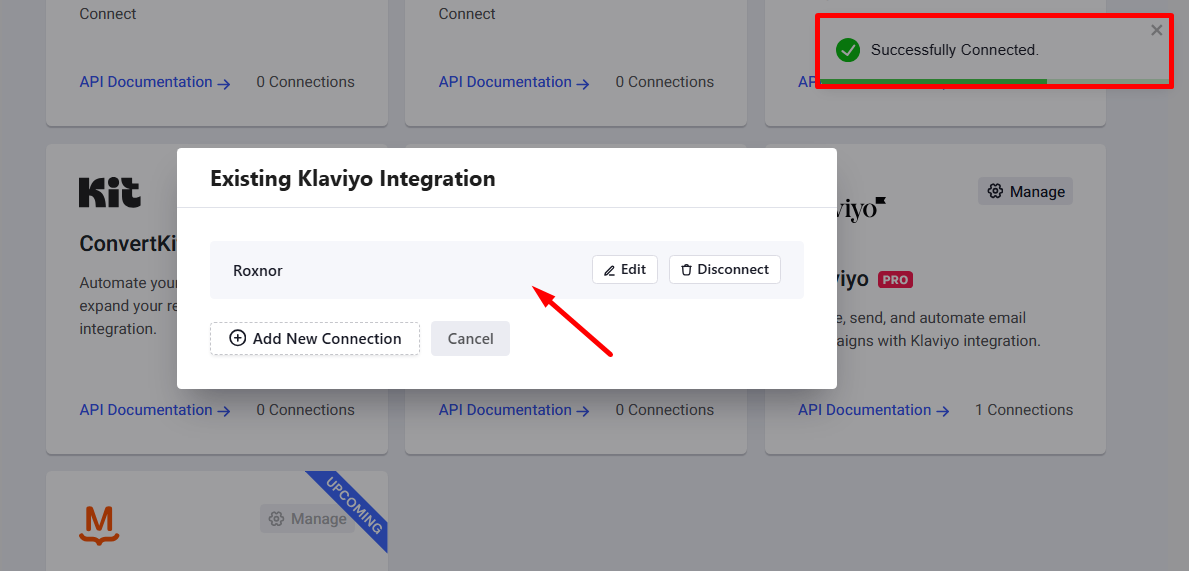
See, Klaviyo is connected successfully.
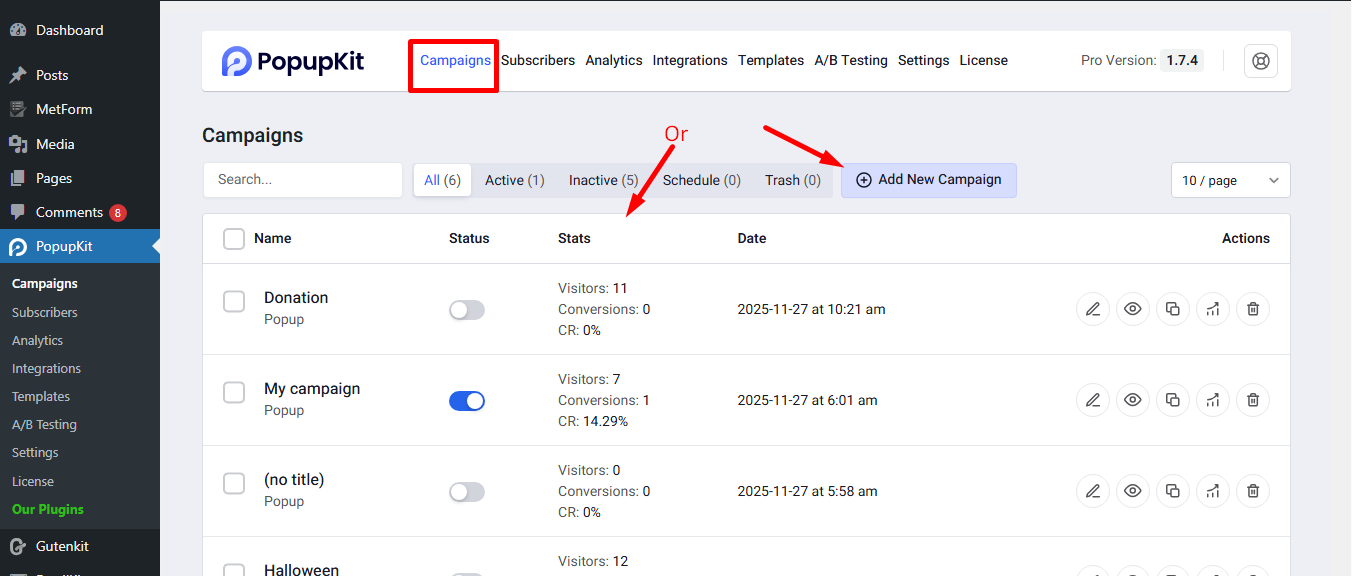
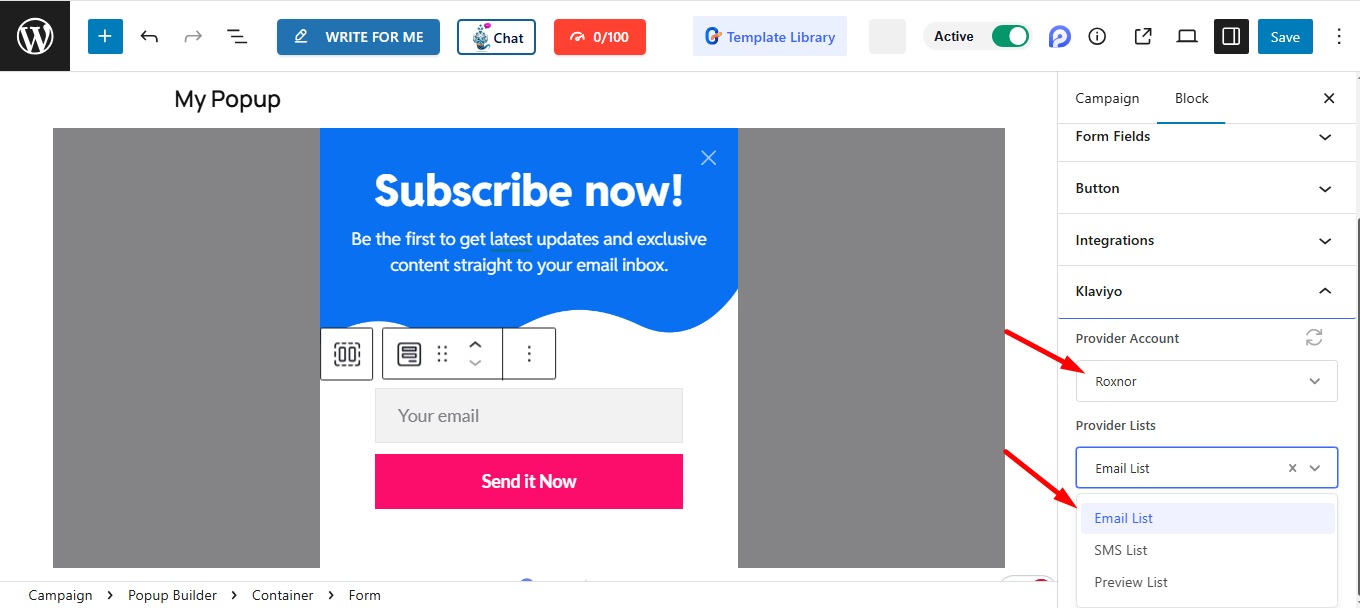
STEP 3: Connect Klaviyo to a Campaign #
Begin a new campaign or select an active one.
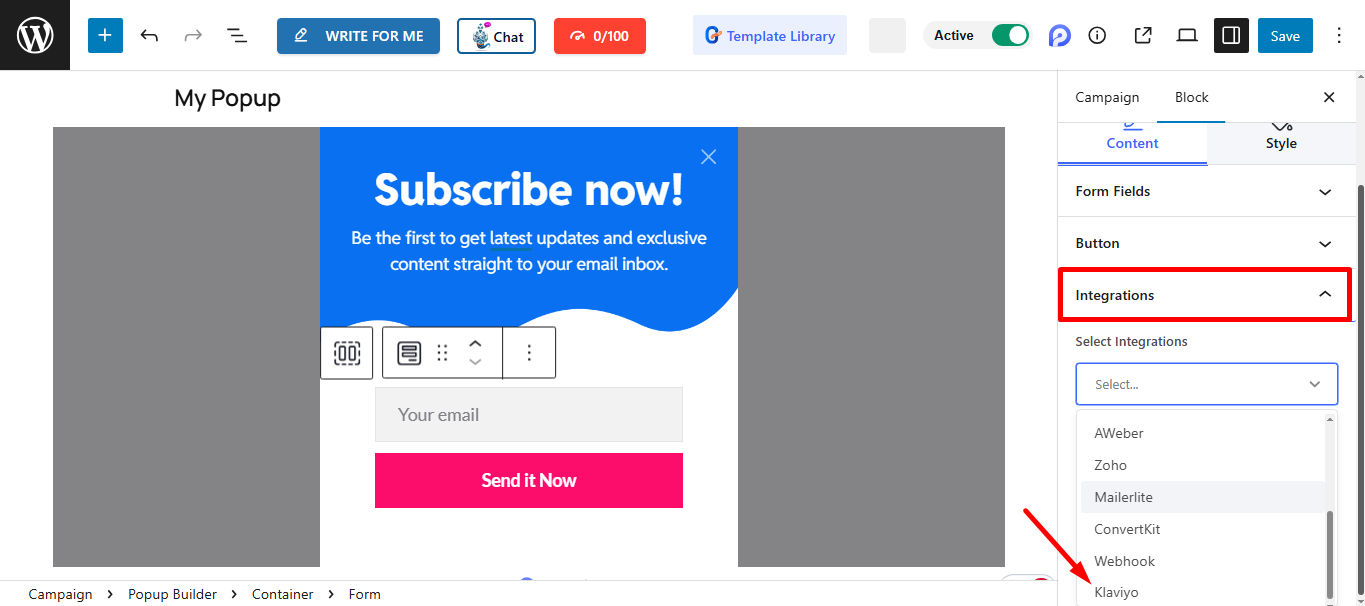
Find Integrations and select Klaviyo from the list of integrations.
To proceed, you can just enter your account name and choose your service provider from the list.
Don’t forget to click Save to apply the changes.
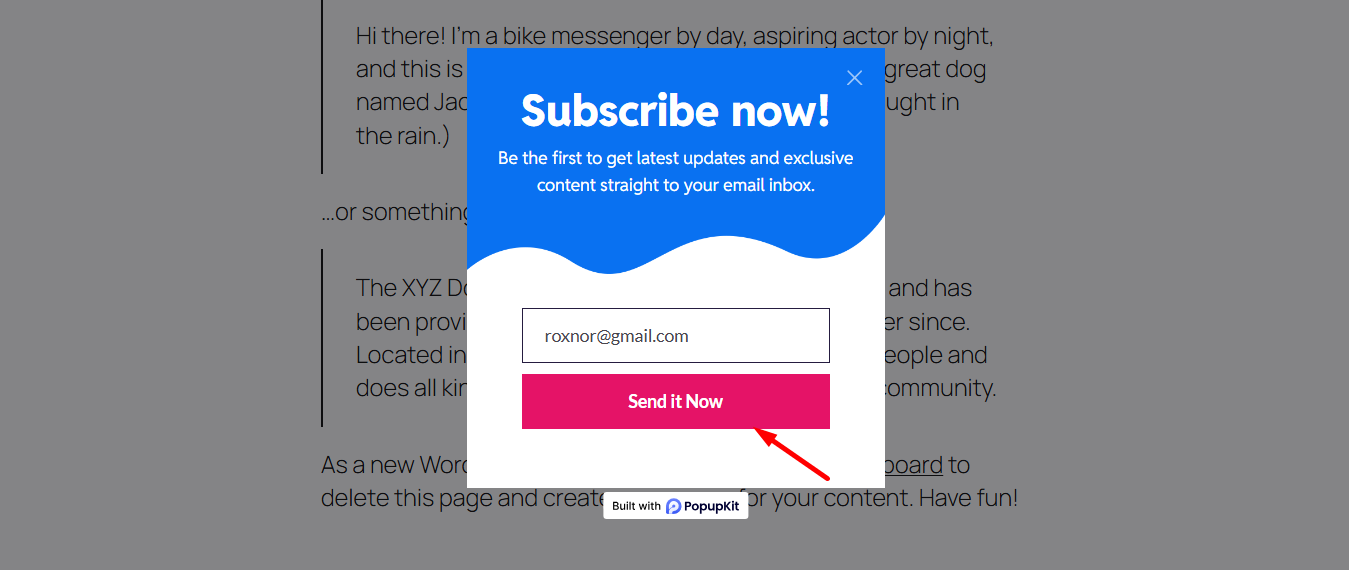
Preview the popup and submit the form to complete the process.
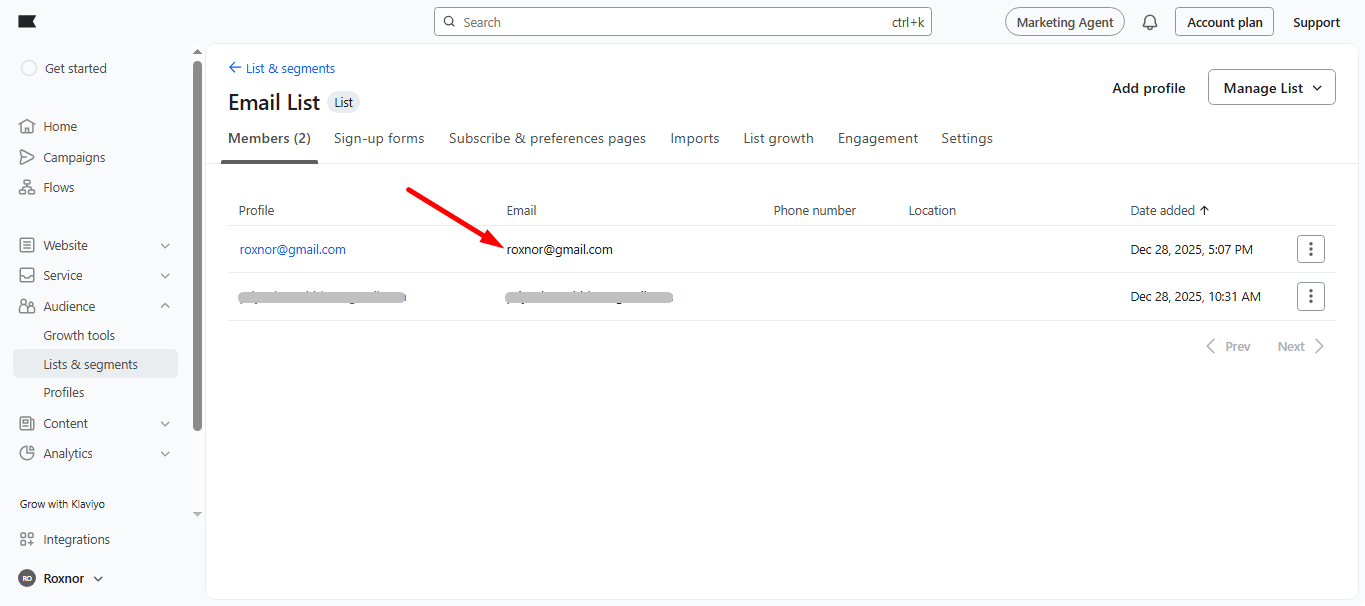
Finally, go back to the Klaviyo account. In the List & Segments tab, you can check that your submitted email ID has been listed in the Email List.
Your PopupKit data is now successfully synced with Klaviyo. You’re all set to turn new subscribers into engaged customers with smart, automated, and personalized marketing workflows.


