Currency Switcher widget lets customers switch to different Currencies while shopping on an eCommerce website. They can also check out in their preferred currency. This is a general widget so you can add it in any ShopEngine Template and it will be visible throughout the whole website.
Note: This widget is used in the front end to show people the functionality of the Currency Switcher Module. So, make sure you check out the documentation of the Currency Switcher Module Erste.
Let’s check out the steps of how to use this WooCommerce Currency Switcher Widget:
Quick Overview
This documentation will guide you to adding WooCommerce currency swither with ShopEngine’s widget. For that, first you need to install a few plugins and configure the Currency Switcher module.
Needed tools: Elementor (free), WooCommerce (free), ShopEngine (free & pro)
Now, enable the Currency Switcher widget and add this widget to a page. After that, style according to your brand and preference. Remember before the widget configuration, you have to setup it’s module.
How to use Currency Switcher in WooCommerce using ShopEngine Widget #
Follow these 3 steps to add Currency Switcher in WooCommerce without any hassle with a WordPress currency switcher plugin, ShopEngine:
Step 1: Enable the Currency Switcher Widget #
Um das Widget zu aktivieren,
- Gehe zu ShopEngine > Widgets > Currency Switcher
- Anmachen Währungsumschalter under General section
- Änderungen speichern
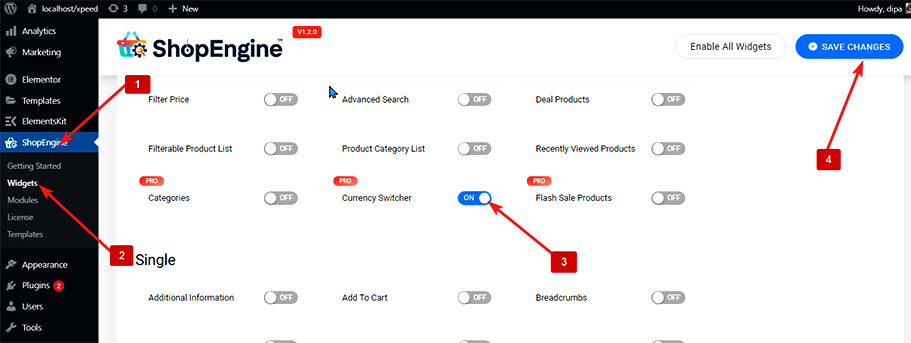
Notiz: You can also turn on Currency Switcher with a global setting which aktiviert alle Widgets von ShopEngine.
Step 2: Add Currency Switcher to WooCommerce #
Before you can add the widget you need to create a Shop Page Template first. If you need help, you can check out the documentation on wie man eine Vorlage erstellt.
To add Currency Switcher:
- Gehe zu ShopEngine > Templates > Shop Page Template
- Klicke auf Bearbeiten mit Elementor
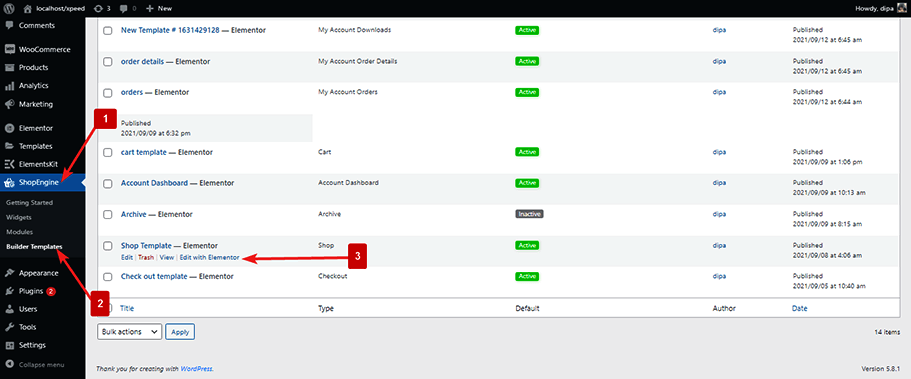
- Suchen for Currency Switcher on Elements Search option
- Ziehen und ablegen das Widget
- Klicke auf Aktualisieren to display and save WooCommerce multi currency.
Step 3: Style Settings of WooCommerce Currency Switcher Widget #
Go to Style > General and expand to customize the following styles:
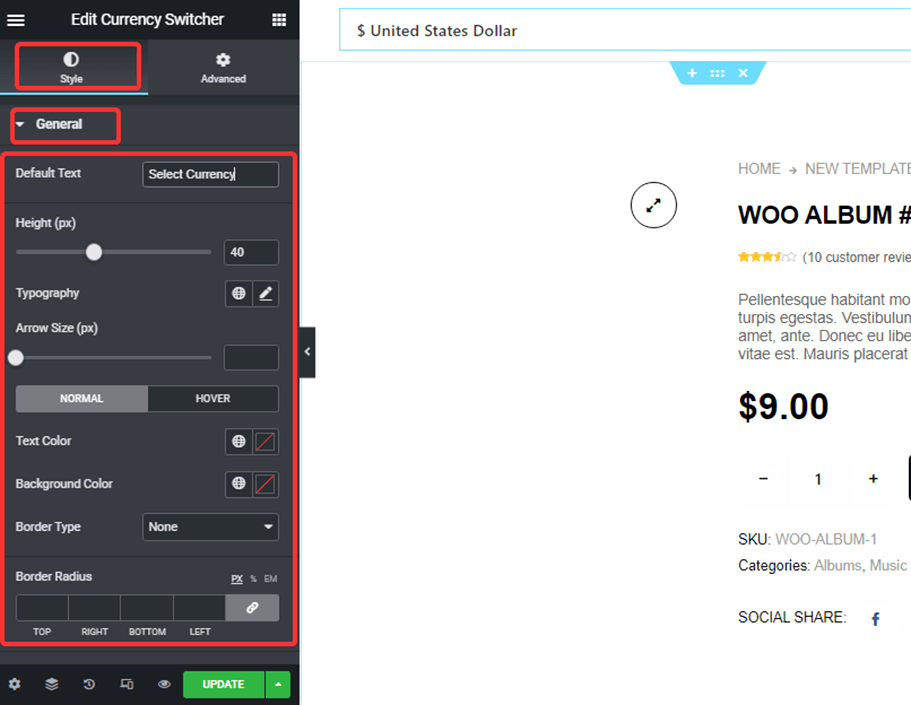
- Default Text: Set the text that will appear on the top of the dropdown.
- Höhe (px): Set the height of the widget using pixel value.
- Typografie: You can change the font family, weight, transform, style, decoration, line-height
- Bearbeiten
- Pfeilgröße (px): Set the size of the drop-down arrow in pixel.
- Normal/Hover: Choose the Text color, background color, and border type for both normal and on hover view.
- Randradius: Customize the top, right, bottom, and left values for border radius if you want.
- Polsterung: Customize the top, right, bottom, and left values for padding accordingly.
Nachdem Sie alle Änderungen vorgenommen haben, klicken Sie auf Aktualisieren to save WooCommerce multi currency.
Now currency switchers should be activated on every page of the website and your customer can choose the currency from the dropdown, shop, and check out in their preferred currency.
Hier ist das Vorschau of the WooCommerce Currency Switcher Currency Switcher Widget: