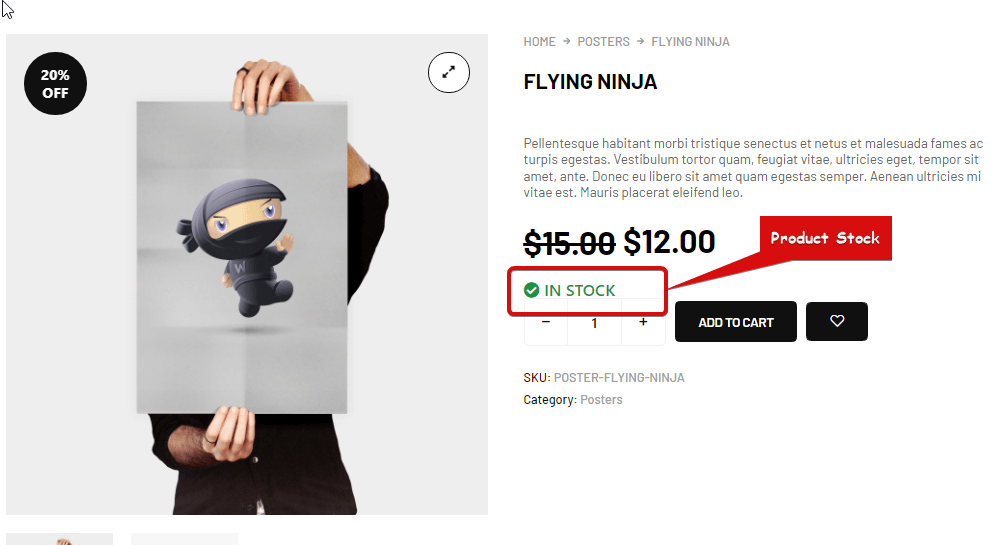
Product Stock widget is a Single Product Template widget. You can use this widget to show the product stock status.
Let’s learn how you can use Product Stock Widgets on your wooCommerce site:
Step 1: Enable the Product Stock Widget #
Um das Widget zu aktivieren,
- Gehe zu ShopEngine > Widgets > Product Stock
- Anmachen
- Änderungen speichern
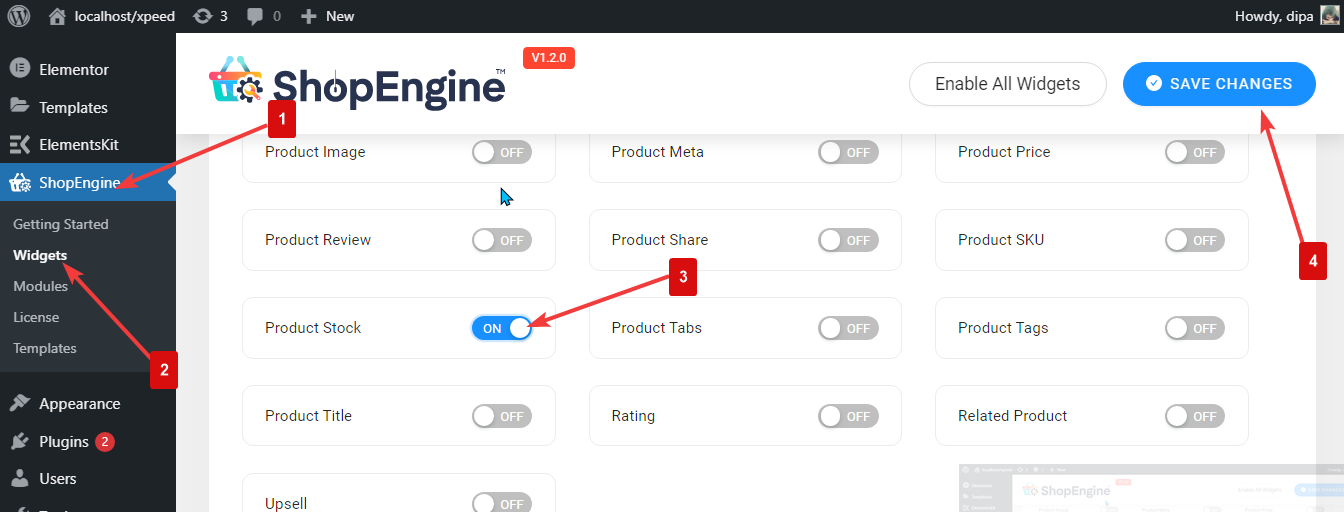

Notiz: Sie können den Produktbestand auch mit einer globalen Einstellung aktivieren aktiviert alle Widgets von ShopEngine gleichzeitig.
Step 2: Add Product Stock #
Bevor Sie das Widget hinzufügen können, müssen Sie zunächst eine Einzelproduktvorlage erstellen. Schauen Sie sich die Dokumentation an So erstellen Sie eine einzelne Produktvorlage.
Hinzufügen Product Stock:
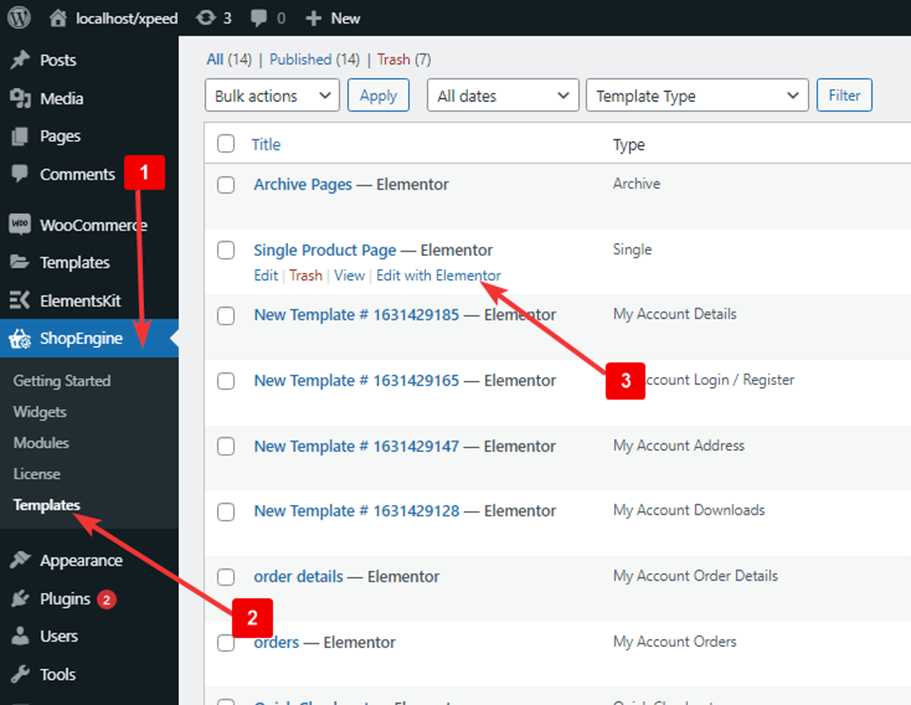
- Gehe zu ShopEngine > Templates > Single Page Template
- Klicke auf Bearbeiten mit Elementor

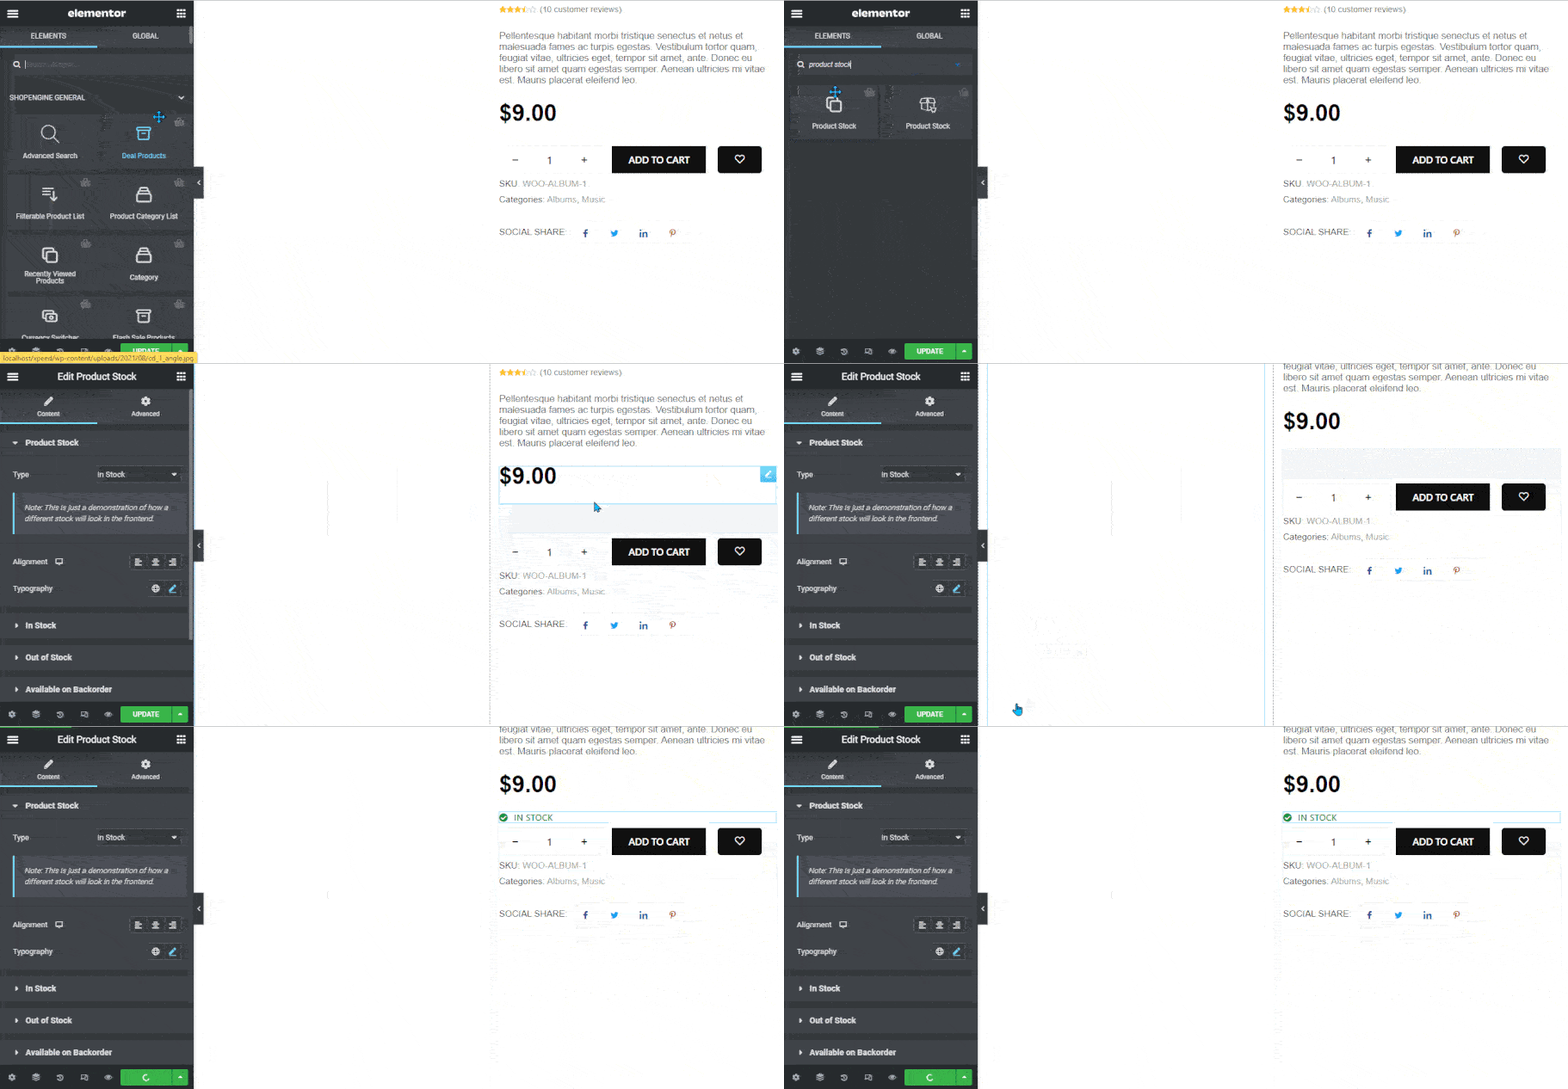
- Suchen für Produktbestand auf die Option „Elementsuche“.
- Ziehen und ablegen das Widget
- Klicke auf Aktualisieren um Änderungen zu speichern.

Step 3: Settings of Product Stock #
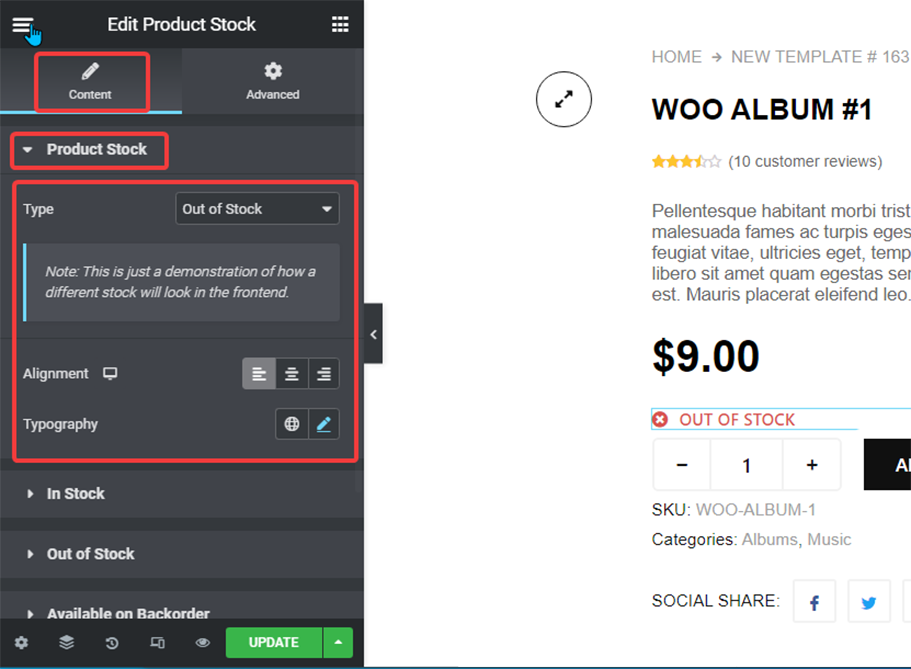

Sie können die folgenden Einstellungen anpassen:
- Product Stock:
- Typ: This is a preview option. You can choose from the dropdown and see how it will show up in the front end.
- Ausrichtung: You can set the alignment as left, right or center.
- Typografie: You can change the font family, font size, font weight, transform, style, and line-height here.
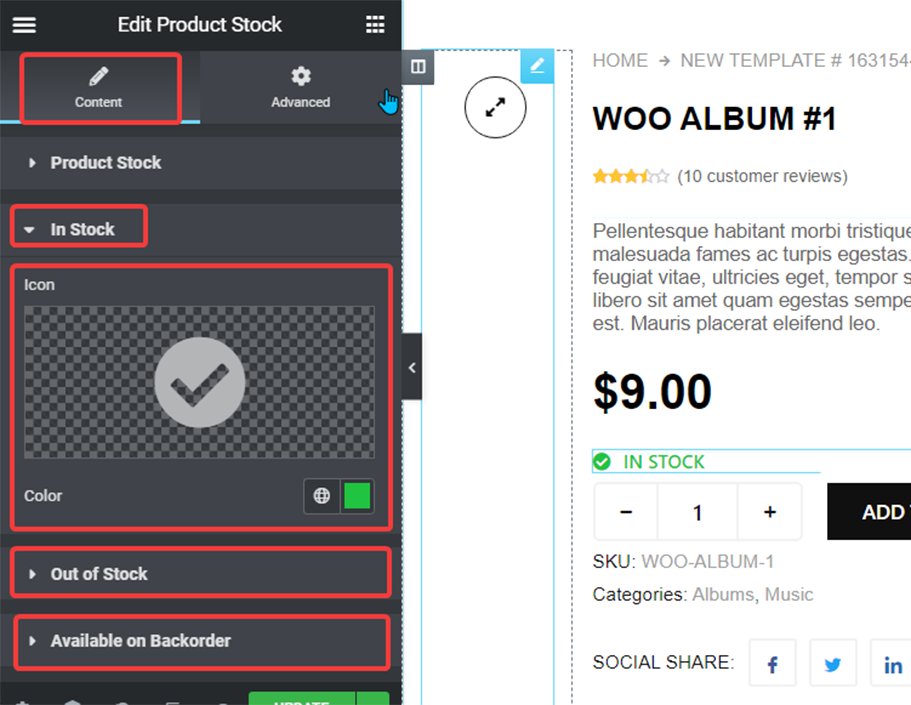

- In Stock: Expand this option to choose an icon for the In-Stock status and also pick a color.
- Out of Stock: Here you can choose an icon for the out of Stock status and also pick a color.
- Available On Backorder: Expand this option to choose an icon for the Available on Backorder status and also pick a color.
Klick auf das Aktualisieren option to speichern all the changes.
Here is how Product Stock looks like :
