Take the help of GutenKit Fun Facts Gutenberg Blocks for an intuitive and impressive display of important facts with numbers and icons. It gives you all the customization controls and animation styles to highlight numbers on your WordPress website.
Read this documentation to learn how to create an amazing fun fact counter on the Gutenberg block editor of your website.
How to Add Fun Fact Counter on WordPress Block Editor? #
Before moving to the first step, you need to have the GutenKit plugin installed on your WordPress website.
Step 1: Add GutenKit Fun Fact Block #
From your WordPress dashboard:
- Add a page or post and head to the block editor.
- Drücke den "+” icon at the top of the editor screen.
- You will see a block library will reveal.
- Use the search bar to find the “Lustige Tatsache” block.
- When it appears, click or drag & drop it to the editor screen.
Step 2: Add Icon and Content #
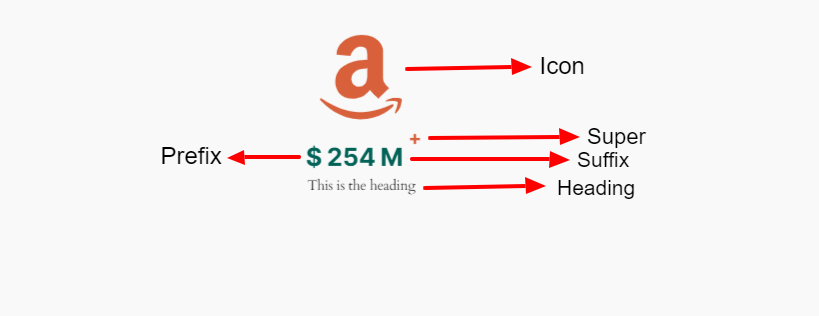
Now, the first setting area of the block that you will work with is the Content tab. From here, you will add icons and other content like numbers, prefixes, suffixes, etc.

Symbol: #
- Symbol hinzufügen: By default, this toggle button is activated. Disable this, if you don’t want to show an icon. You can change the icon from the library or upload your own SVG icon file.
Inhalt: #
- Nummer: Put the number you want to show in this field.
- Enable Prefix: Use this toggle button if you want to add something before the number. You can simply type anything on the block editor screen.
- Enable Suffix: Activate this to add and type something after the number.
- Enable Super: Super works as another supporting element of your fun fact info. Enable it and add a text or symbol.
- Enable Heading: Enable this toggle button to show heading or text. Also, define the header HTML tag from the dropdown.
Einstellungen: #
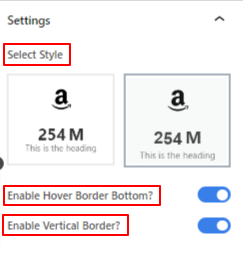

- Wählen Sie Stil aus: Choose a revealing style for the fact number on the visitor end.
- Dauer: Set the duration of the number counting while showing in milliseconds.
- Enable Hover Bottom: Toggle this button to show a bottom line on hover.
- Enable Vertical Border: Activate it to show a vertical border.
Step 2: Style the Icon #
In this part, we will focus on styling the icon and other content elements.
Go to the style tab:
Symbol, #
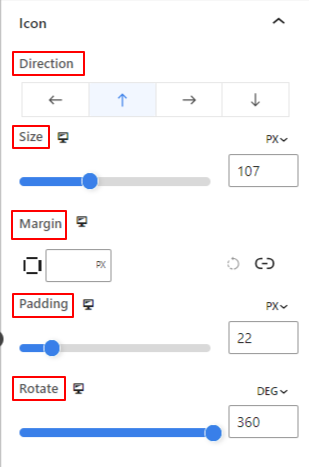

- Richtung: Define the placement of the icon (Left/ Top/ Right/ Bottom)
- Größe: Use the slider to determine the size of the icon.
- Marge: Enter the custom value of marting to adjust the space around the icon.
- Polsterung: Define the padding of the icon by using the slider or entering a custom value in the field.
- Drehen: Give a specific value or apply the slider to determine the degree of icon rotation.
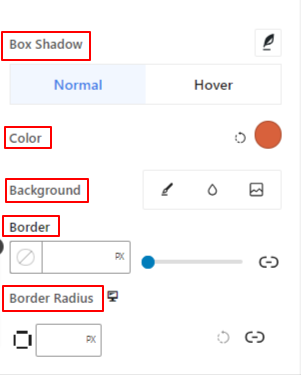

- Box Schatten: Using these controls, you can add shadow effects around the icon.
- Farbe: Use the color picker to set a color for the icon.
- Hintergrund: Add a background type between solid color and gradient.
- Grenze and Border Radius: Set the thickness, color, and roundness of the icon border.
Step 3: Style the Text Content #
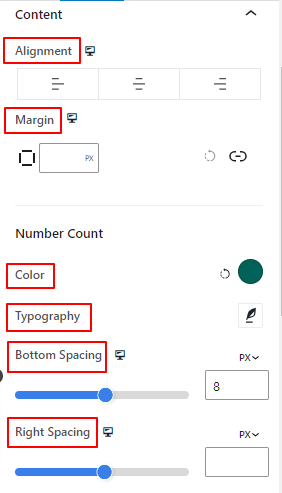

- Ausrichtung: Place the text content to the left, center, or right.
- Marge: Adjust the margin for the text content.
Anzahl:
- Farbe: Select a color for the number.
- Typografie: Control all the typography settings like font family, size, weight, style, letter spacing, and many more.
- Bottom Spacing: Define the bottom gap between the number and title content by using the slider or putting a custom value.
- Right Spacing: Define the space or gap between number and suffix content.
Titel:
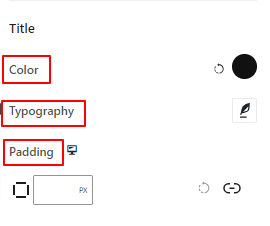

- Farbe: Give a color to the title text.
- Typografie: Get all the typography controls like font family, size, style, line spacing, etc.
- Polsterung: Enter your desired custom value to add padding around the title.
Step 4: Style Other Elements #
Super: #
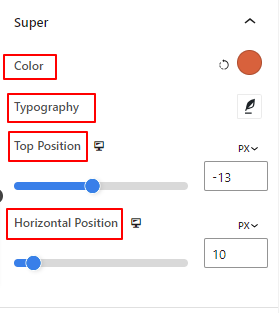

- Farbe: Select a color for the super text or symbol.
- Typografie: Get all the typography settings for super text.
- Top Position: Adjust the vertical positioning of the super content.
- Horizontale Position: Use this slider to define the horizontal position of super content.
The next two options will only be visible in the Style tab when they are enabled from the Content tab.
Hover Border: #
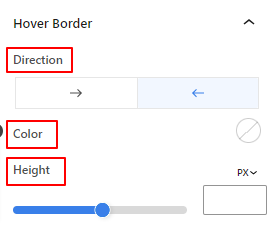

- Richtung: Set the revealing direction of the hover border.
- Farbe: Give a color to the hover border.
- Höhe: Define the height of the hover border by using the slider or entering a custom value.
Vertical Border: #
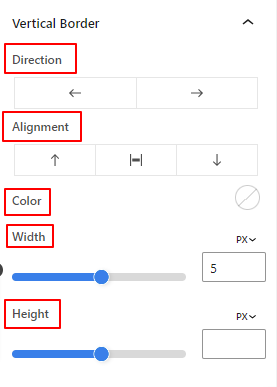

- Richtung: Select the left or right direction of the vertical border.
- Ausrichtung: From there, you will set the vertical placement of the vertical border.
- Farbe: Use the color picker to give a color to the vertical border.
- Width and Height: Adjust the thickness and height of the vertical border.
That’s it. We are done with all the settings. Now, it’s your turn to try all these features to create your fun fact counter on your website.
Step 5: Advanced Settings #
From the Advanced Settings tab, you can configure the Fun Fact block layout, background, border styles, and control its visibility.
Layout, #
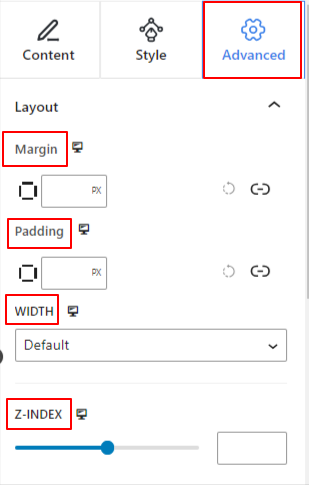

- Marge: Definieren Sie den Raum um das Blocklayout. Dies hilft, Lücken zwischen anderen Blöcken festzulegen.
- Polsterung: Geben Sie einen Wert ein, um den Abstand um den Block innerhalb seines Layouts festzulegen.
- Breite: Abgesehen von der Beibehaltung der Standardlayoutbreite.
- Gesamtbreite: Wenn Sie diese Option auswählen, wird das Layout über die gesamte Bildschirmbreite ausgerichtet.
- Inline (Auto): Beim Anwenden hat es die gleiche Breite wie das Blockelement.
- Brauch: Wenn Sie diese Option wählen, wird ein Schieberegler angezeigt, mit dem Sie den horizontalen Bereich des Blocklayouts definieren können.
- Z-Index: Verwenden Sie den Schieberegler, um die Stapelreihenfolge des Blocks mit anderen Blöcken festzulegen.
Position: #
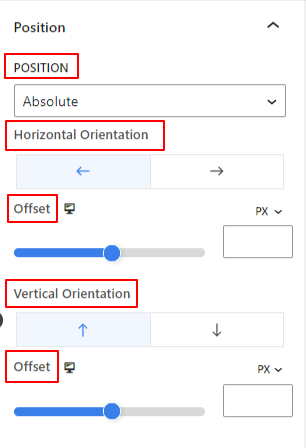

Unter der Dropdown-Liste sehen Sie drei Optionen: Standard, Absolut, Und Fest.
- Absolut: Wenn Sie diese Option auswählen, erhalten Sie eine absolute Position des Blocks, d. h. die Elemente passen in ihren Container.
- Fest: Mit der Option „Feste Position“ passt das Element das gesamte Ansichtsfenster oder den gesamten Bildschirm an.
Sowohl die Option „Absolut“ als auch die Option „Fest“ haben ähnliche Einstellungen wie die folgenden:
- Horizontale Ausrichtung: Wählen Sie die Positionierungsrichtung zwischen links und rechts.
- Versatz: Verwenden Sie den Schieberegler oder geben Sie manuell einen Wert ein, um die horizontale Positionierung des Blocks anzupassen.
- Vertikale Ausrichtung: Wählen Sie die Positionierungsrichtung zwischen nach oben oder nach unten.
- Versatz: Verwenden Sie den Schieberegler oder geben Sie manuell einen Wert ein, um die vertikale Positionierung des Blocks anzupassen.
Hintergrund: #
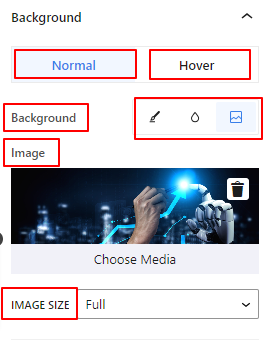

- Hintergrund: Wählen Sie eine Hintergrundoption zwischen Volltonfarbe, Farbverlauf oder Bild.
Unter der Hover-Option:
- Bild: Wenn Sie die Bildoption wählen, werden die folgenden Optionen geöffnet:
- Bild: Wählen Sie ein Bild aus der Medienbibliothek oder laden Sie Ihr eigenes hoch.
- Bildgrößee: Wählen Sie die Bildgröße zwischen Miniaturansicht, Mittel, Groß oder Vollbild.
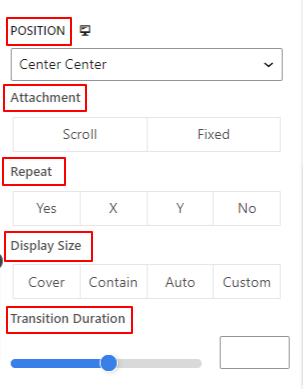

- Position: Wählen Sie die Position der 10 verschiedenen Optionen aus.
- Anhang: Geben Sie die Beziehung des festen oder scrollbaren Hintergrundbilds zum Rest des Browserbildschirms an.
- Wiederholen: Wählen Sie eine Option, um festzulegen, wie Hintergrundbilder wiederholt werden.
- Bildschirmgröße: Wählen Sie eine Anzeigegröße aus vier verschiedenen Optionen.
- Übergangszeit: Verwenden Sie den Schieberegler, um den Hintergrundübergang vom Normal- zum Schwebezustand anzupassen.
Grenze: #
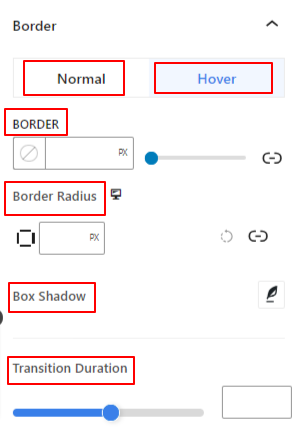

- Grenze: Unter dieser Einstellungsoption erhalten Sie Rahmeneinstellungsoptionen wie Breite, Stil und Farbe.
- Grenzradius: Legen Sie die Rundung des Rahmens durch Eingabe eines Wertes fest.
- Box Schatten: Holen Sie sich alle Einstellungen wie Farbe, horizontal/vertikal, Unschärfe, Ausbreitung und mehr, um dem Rand Schatteneffekte zu verleihen.
Unter der Hover-Option:
- Übergangszeit: Sie können manuell einen Wert hinzufügen oder mit dem Schieberegler die Zeit für die Änderung des Rahmendesigns im Schwebezustand festlegen.
Sichtweite: #
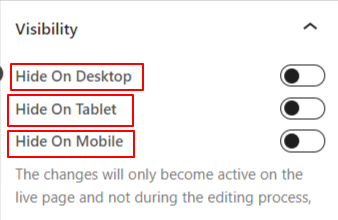

Mit dem Sichtbarkeitsmodul können Sie die Anzeige von Blockdesigns je nach Gerätetyp steuern. Es gibt drei Geräteoptionen (Desktop, Tablet, Mobil) mit einem Umschaltknopf. Aktivieren Sie den Umschaltknopf, um das Blockdesign dieses Geräts auszublenden.
Sie können es jedoch weiterhin in der Editoransicht sehen.
Fortschrittlich: #
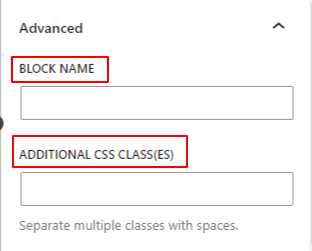

- Blockname: Geben Sie einen Namen ein, um diesen Block beim Verknüpfen oder beim Erstellen eines Skripts zum Stylen des Blocks eindeutig zu identifizieren.
- HTML-Anker: Fügen Sie eine URL hinzu, um auf eine Website-Seite zu verlinken.
- Zusätzliche CSS-Klassen: Weisen Sie dem Block zusätzliche CSS-Klassen zu, mit denen Sie den Block mit benutzerdefiniertem CSS nach Wunsch gestalten können.
Achtung: Sie können mehrere Klassen separat mit Leerzeichen hinzufügen.


