Welcome to the ShopEngine documentation! Throughout all the documentation, you’ll learn how the plugin works, explore its key features, and find step-by-step guides to help you use the ShopEngine WooCommerce builder. To get started, the first documentation covers installing the ShopEngine plugin and activating the license key for the Pro version.
How to Install ShopEngine WooCommerce Builder for Elementor #
Since ShopEngine is a WooCommerce builder, so you need to have the WooCommerce plugin installed in your WordPress.
Before getting started make sure, Elementor plugin is installed & activated on your website.
Wenn Sie ShopEngine mit Gutenberg nutzen möchten, Befolgen Sie diese Dokumentation stattdessen.
Pre-requisite:
- WooCommerce: Plugin herunterladen
- Elementor: Plugin herunterladen
Befolgen Sie einfach die Schritt-für-Schritt-Anleitung zur Installation von ShopEngine Elementor Woocommerce Builder:
Install and activate ShopEngine plugin #
To install the the ShopEngine WooCommerce plugin:
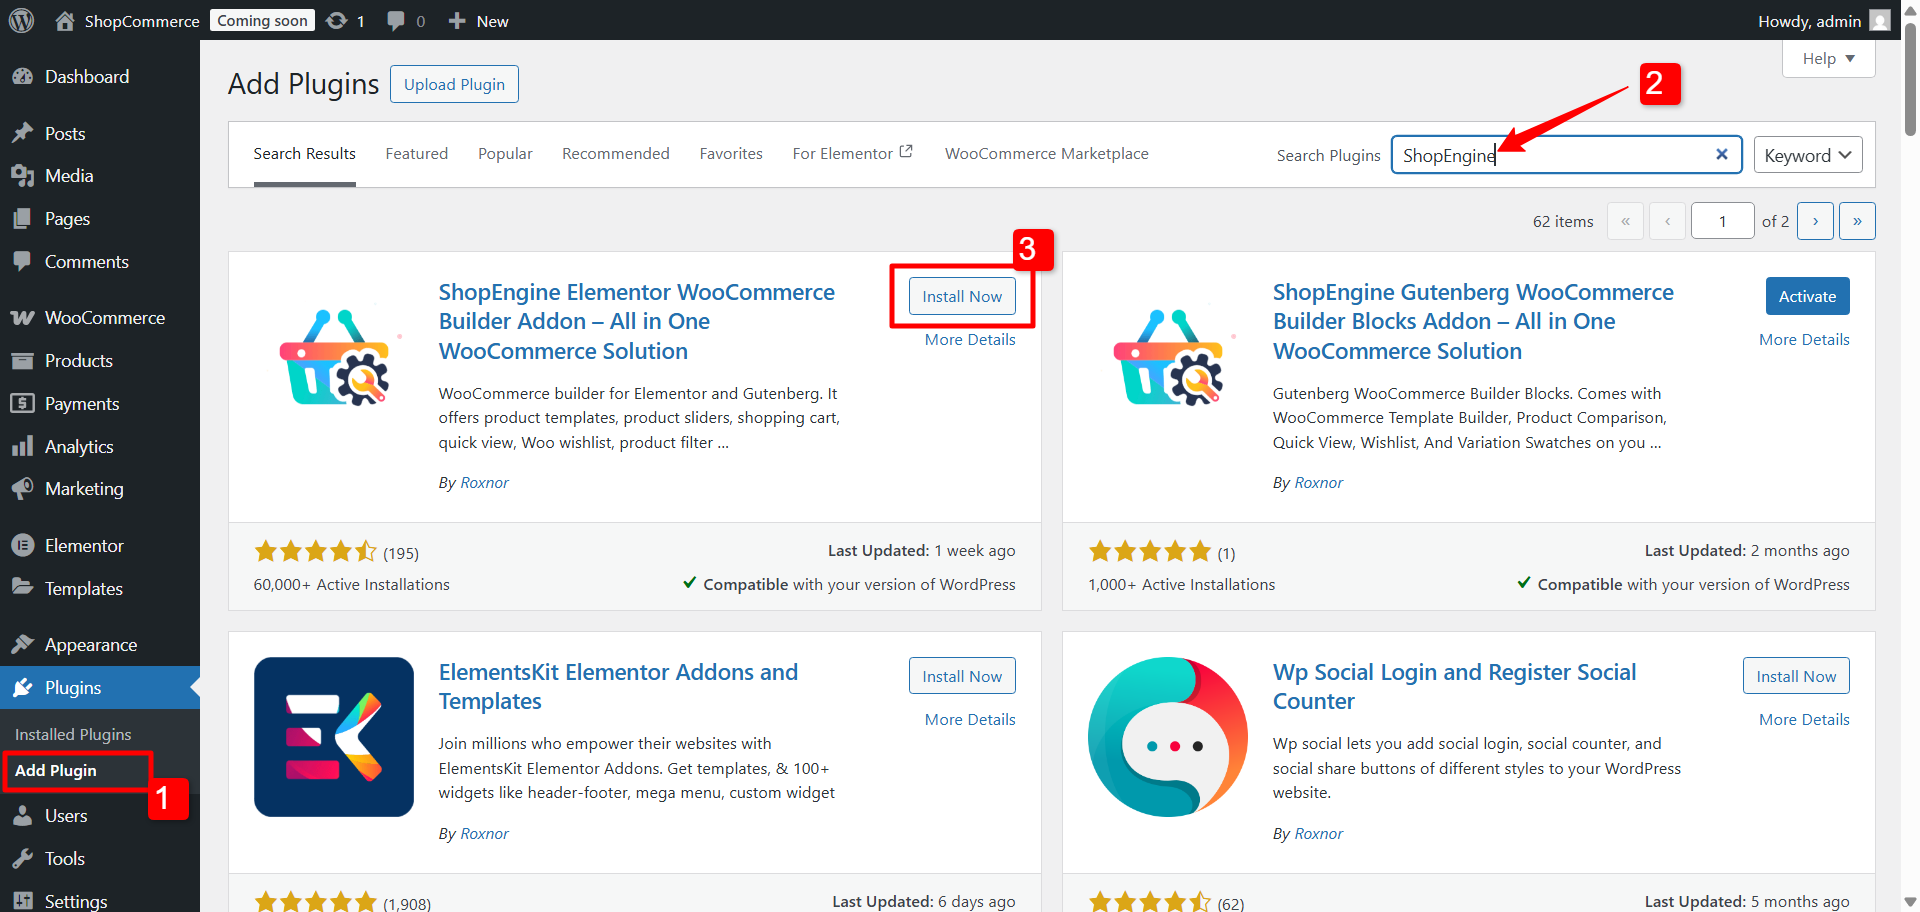
- Gehe zum WordPress-Dashboard➔ Plugins➔ Add Plugin.
- Suchen for ShopEngine there.
- Once you find the plugin, click on the install button.

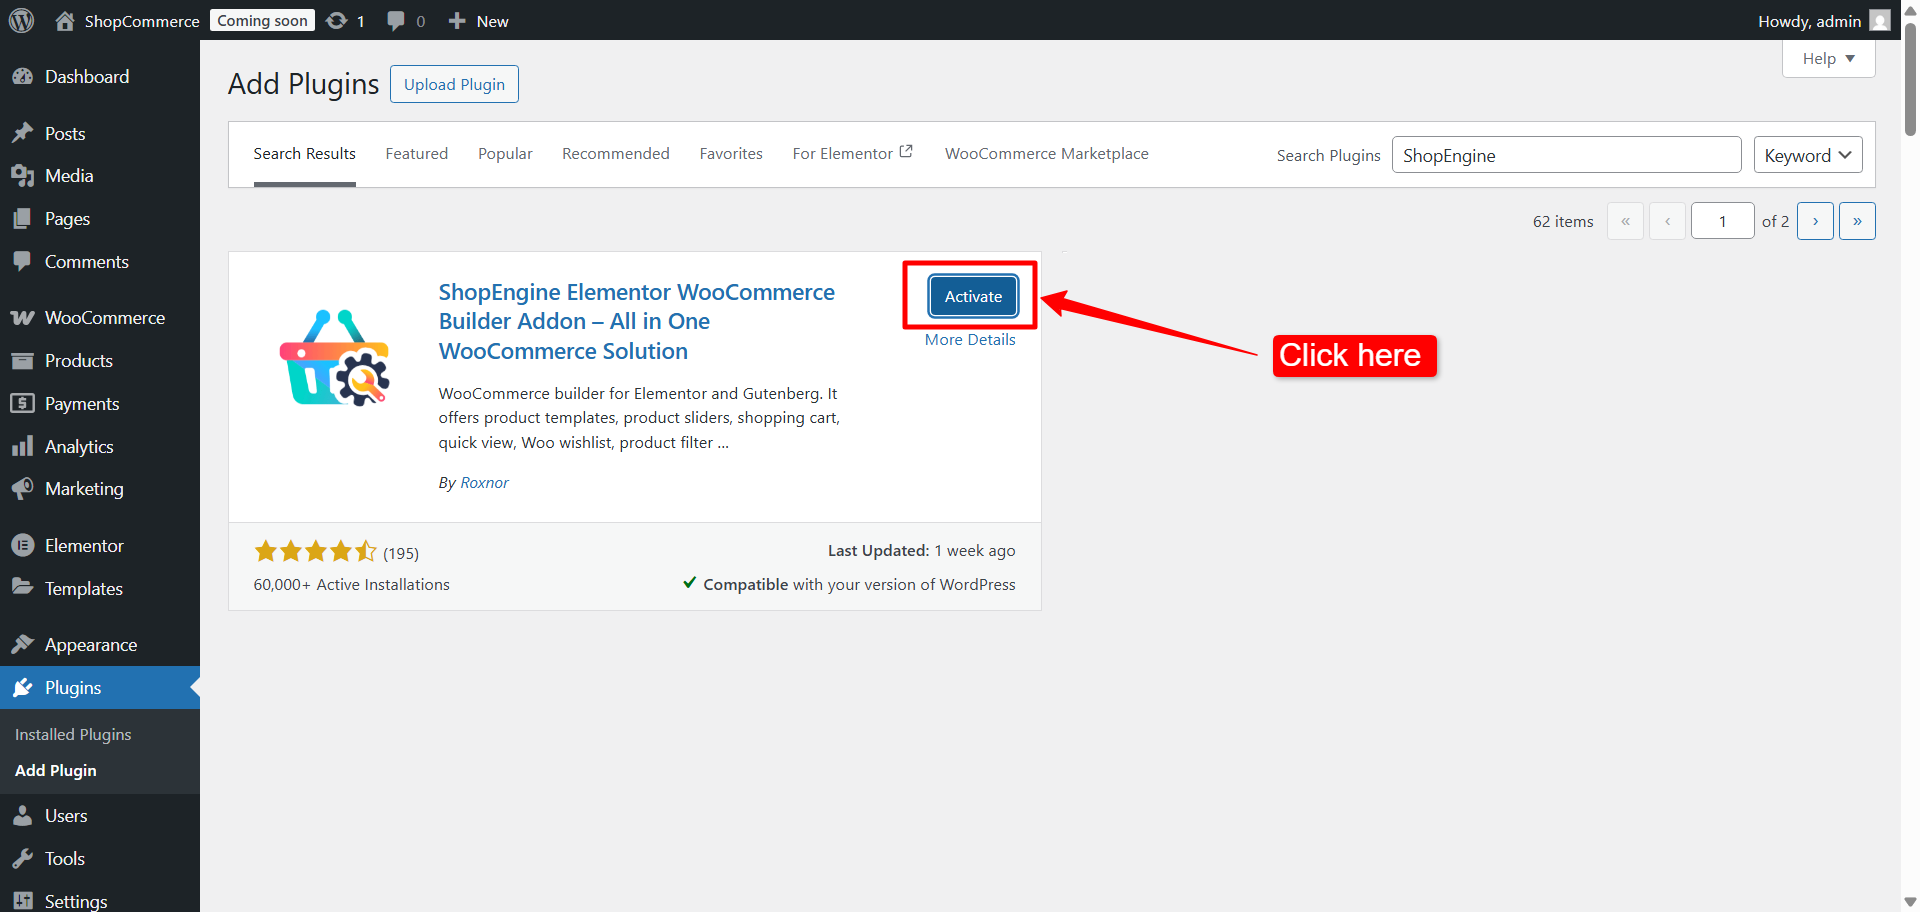
Klicken Sie nach erfolgreicher Installation einfach auf „aktivieren Sie”-Button, um ShopEngine zu aktivieren.

Nach der Aktivierung des Plugins ShopEngine-Menü will appear in the WordPress Dashboard. Get used to with the ShopEngine dashboard in WordPress

So installieren Sie ShopEngine Pro und aktivieren die Lizenz #
Upgrading to ShopEngine Pro gives you access to dozens of features, including Quick Checkout, Partial Payment, Flash Sale, Multi-step checkout, and a larger set of pre-designed templates.
Step 1: Purchase ShopEngine Pro Plugin for WooCommerce #
You can check the pricing plans for ShopEngine Pro on its website.
- Durchsuchen Sie die ShopEngine Pro pricing page and choose the pricing plan you prefer.
- Klick auf das JETZT KAUFEN button for the plan you have chosen.

As soon as you click on the purchase button, you will be redirected to the Kasse page. There, you need to enter your personal information necessary for the purchase, including your email Und Namen (first name and last name).
Then select the payment method between Kreditkarte oder Paddle.
For the card payment,
- Select Billing Country
- Enter Zip / Postal Code

Then enter the following payment information:
- Card number
- Expiration date
- Security code (CVC)
- Check the box to agree to privacy policy
- Finally, click Kaufen Taste.

Once you complete this step, you can see your payment information including the order details.

Meanwhile you will receive an email with your account credentials. Please check your email inbox to get the account details.
Step 2: Get ShopEngine Pro Plugin and Licesne Key #
Once your payment is completed, you’ll receive a confirmation email. Inside the email, you’ll find:
- Your Username for Wpmet account
- Link to set new password
- The login URL

Go to the given links to access your Wpmet account.
Once logged in, navigate to the Downloads tab from your Wpmet dashboard. There you will find a downloadable file for ShopEngine Pro.
Click on the file, and the plugin will be downloaded in .Reißverschluss format.
Step 3: Install and Activate ShopEngine Pro Plugin #
Jetzt geh zu Dashboard > Plugins > Neu hinzufügen. Klick auf das Upload-Plugin und wählen Sie die heruntergeladene ShopEngine Pro-Plugin-Datei aus. Klicken Sie auf „Plugin installieren“ und aktivieren Sie es.

Step 4: Activate ShopEngine Pro License #
Gehen Sie zu Produktlizenzen und Klicken Sie auf „Lizenzen verwalten“. Option für ShopEngine Pro

Fügen Sie auf der Lizenzverwaltungsseite Ihre Website im Feld „Domäne hinzufügen“ hinzu. Klick auf das Klicken Sie zum Speichern auf die Schaltfläche „Domäne hinzufügen“.. Danach Kopieren Sie den Lizenzschlüssel

Gehen Sie zu Ihrem WordPress-Admin-Dashboard. Navigieren Sie zu ShopEngine > Lizenz

Geben Sie abschließend den kopierten Lizenzschlüssel in das Feld „Ihr Lizenzschlüssel“ ein und Klicken Sie auf Jetzt aktivieren

Jetzt sollten Sie über alle Premium-Funktionen von ShopEngine verfügen.
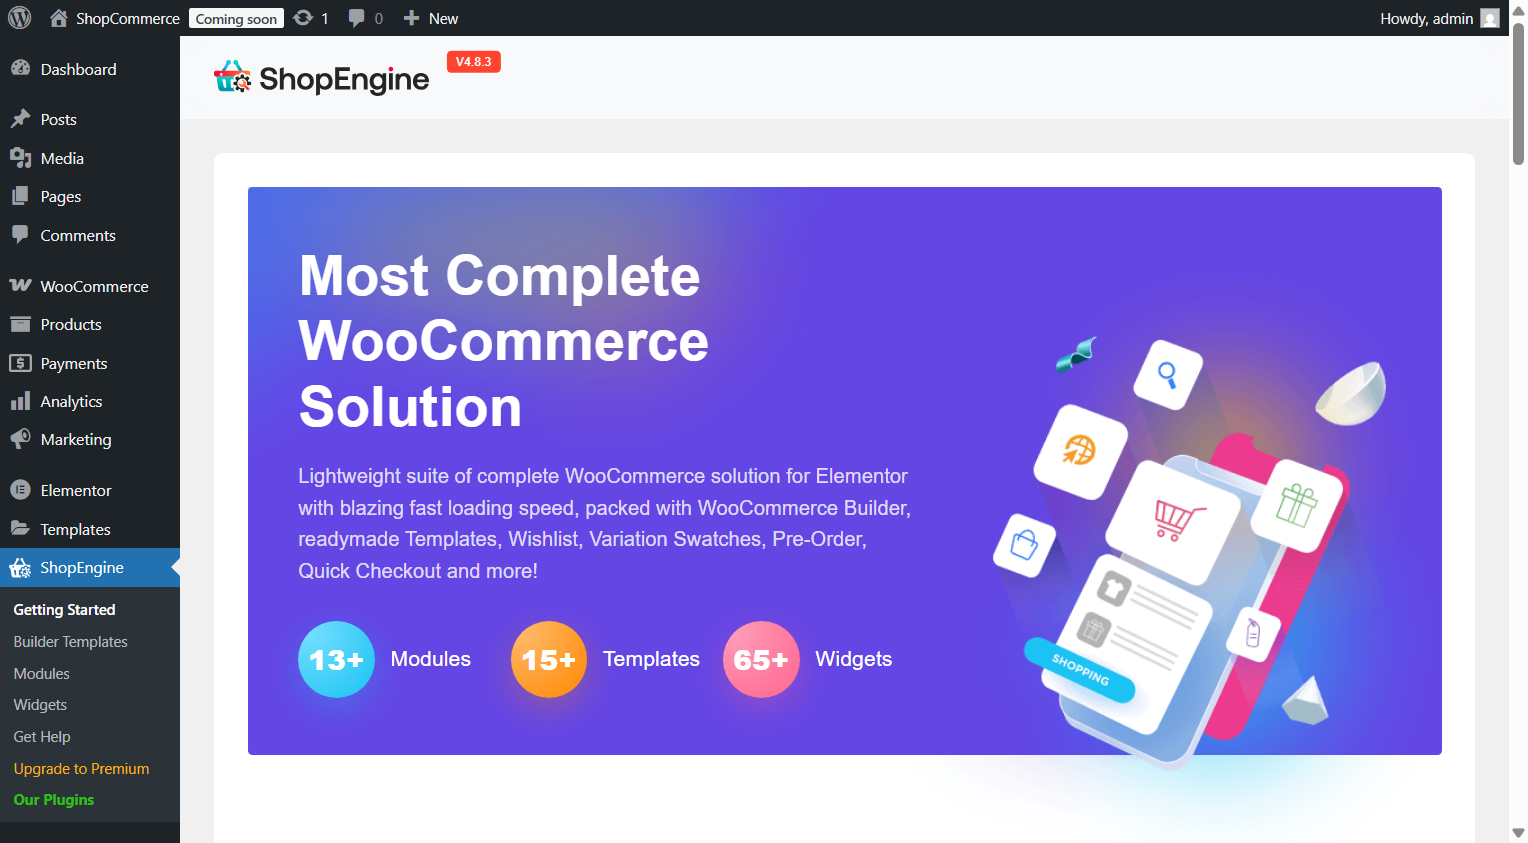
Wenn Sie eine WooCommerce-Website starten möchten, aber Schwierigkeiten haben, einen guten Hosting-Service zu finden, können Sie sich zuverlässig entscheiden Kinsta. Sie verfügen über alle wichtigen Hosting-Funktionen, die Sie normalerweise von einem Hosting-Dienstleister erwarten würden.