


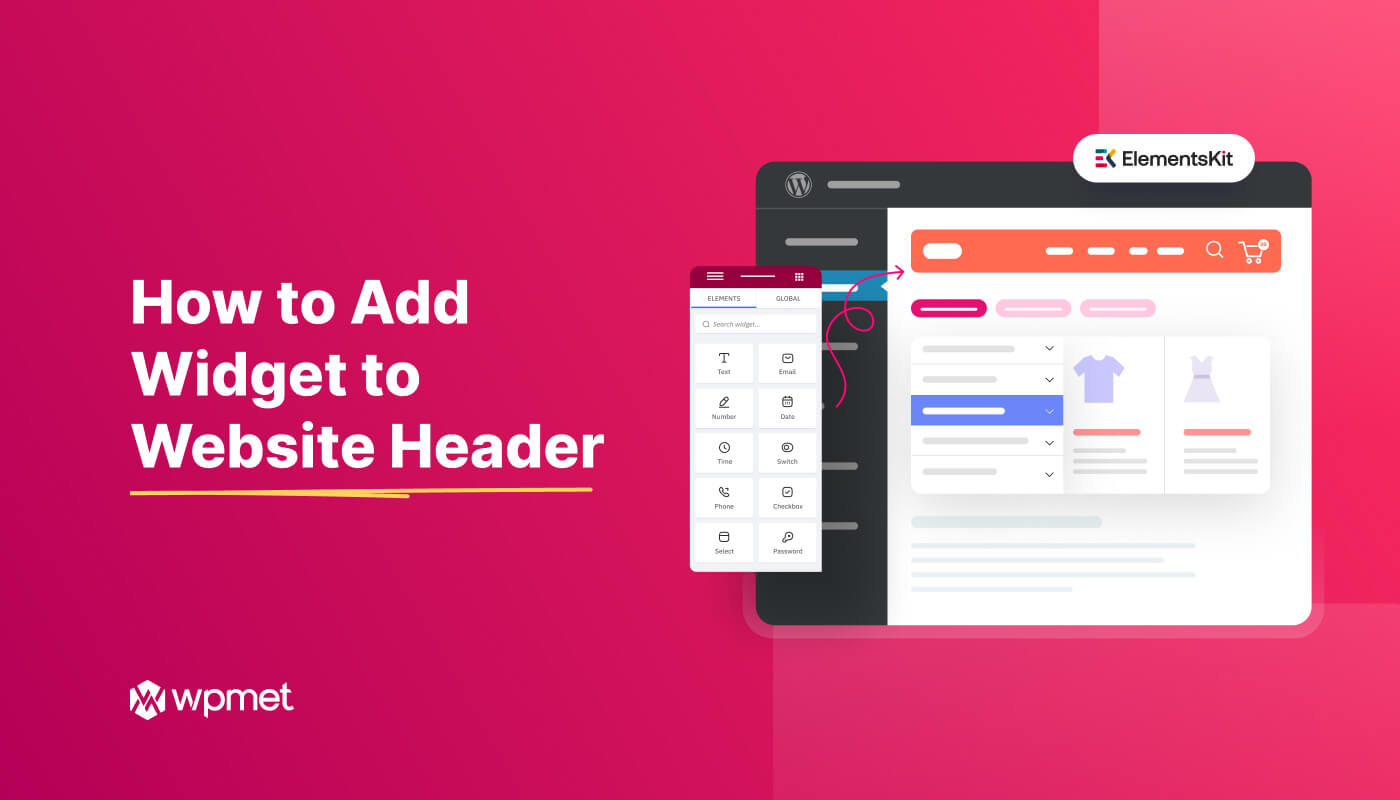
Are you looking for a no-code way of adding widgets to the website header? This tutorial blog is dedicated to WordPress users who want to insert widgets into header navigation area without any technical difficulties and coding.
After a visitor lands on your website, they mostly use the header area to navigate other pages of your website. So, you should showcase your key content in that area for utmost interactivity.
And, this is what you’re going to learn in this how to add widgets to website header tutorial. We’ll show you the plugin method, so that you can easily learn to add any type of design element and multimedia content to the header area.
Quick Overview
This tutorial will show you the easiest way to insert a widget to websit header.
Tools Used: WordPress, Elementor, & ElementsKit
Key steps of adding widget to website header:
✅ Install & activate the ElementsKit Elementor addon.
✅ Add a header layout to with ElementsKit Header & Footer builder module.
✅ Drag & drop any widget to header area.
✅ Alternatively use a pre-made tempalte and add an extra widget to the header template.
✅ Make customization to the header area, save your changes, & publish.
This is how you can easily add a widget to WordPress header without any coding efforts.
Why One Needs to Insert Widgets into Website Header?
Your website header is a prime spot to capture visitor attention. So, you want to add the most important content here. Like, showing sign-up forms, my account login, or social icons. For e-commerce and Saas product websites, inserting a cart icon and a CTA button in the header area is an effective web design standard. Occasionally, one may need to add discount banners or affiliate sign-up forms in the website header.
And, most importantly, you need to add an advanced search bar to give the best results against your visitors’ search queries. Displaying such content helps you to make the best use of your website’s valuable space.
Now, if you are looking for how to add such content to your website header, there are default WordPress header widgets to help you. But using them requires coding knowledge. For a beginner, this process wouldn’t be easy.
But, good luck to you! Page builder like ElementsKit Elementor Addon comes with a code-free header and footer builder solution. Using this plugin, you can insert any Elementor widgets or other third-party Elementor widgets into your WordPress header area. And, the best thing is that there will be no technical difficulties.
From a drag-and-drop visual builder interface, you can customize your header area and instantly preview what changes you are making. Then, talking of Elementor widgets, they are versatile design elements that help you to add anything you think of to your dream website.
Plus, you have the support of Elementor addons like ElementsKit, which ships with a collection of modern and advanced widgets to make a highly functional WordPress website.
How to Add an Elementor Widget to Website Header?
Now, come to the main part of how to add a widget to the WordPress header. You need to have both Elementor and ElementsKit installed and activated. Elementor is a popular page builder. And, ElementsKit is a go-to header footer builder addon, allowing you to create almost any type of header navigation.
Header customization and styling with ElementsKit is effortless with a no-code builder interface. After installing and activating the prerequisite plugins, proceed with the steps below:
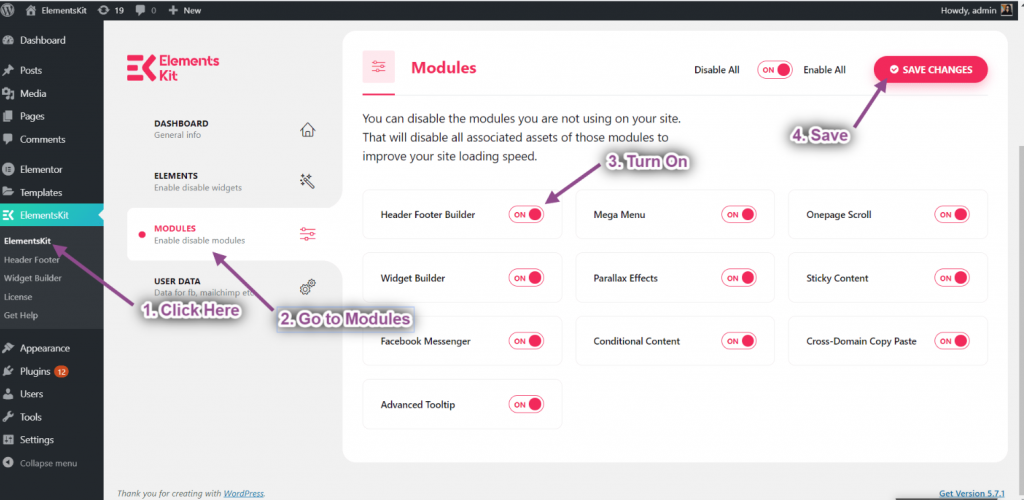
From the WordPress dashboard, navigate to ElementsKit > Modules and look for the Header Footer module. Once you see it, toggle it on and hit the Save Changes button in the top right of your screen.
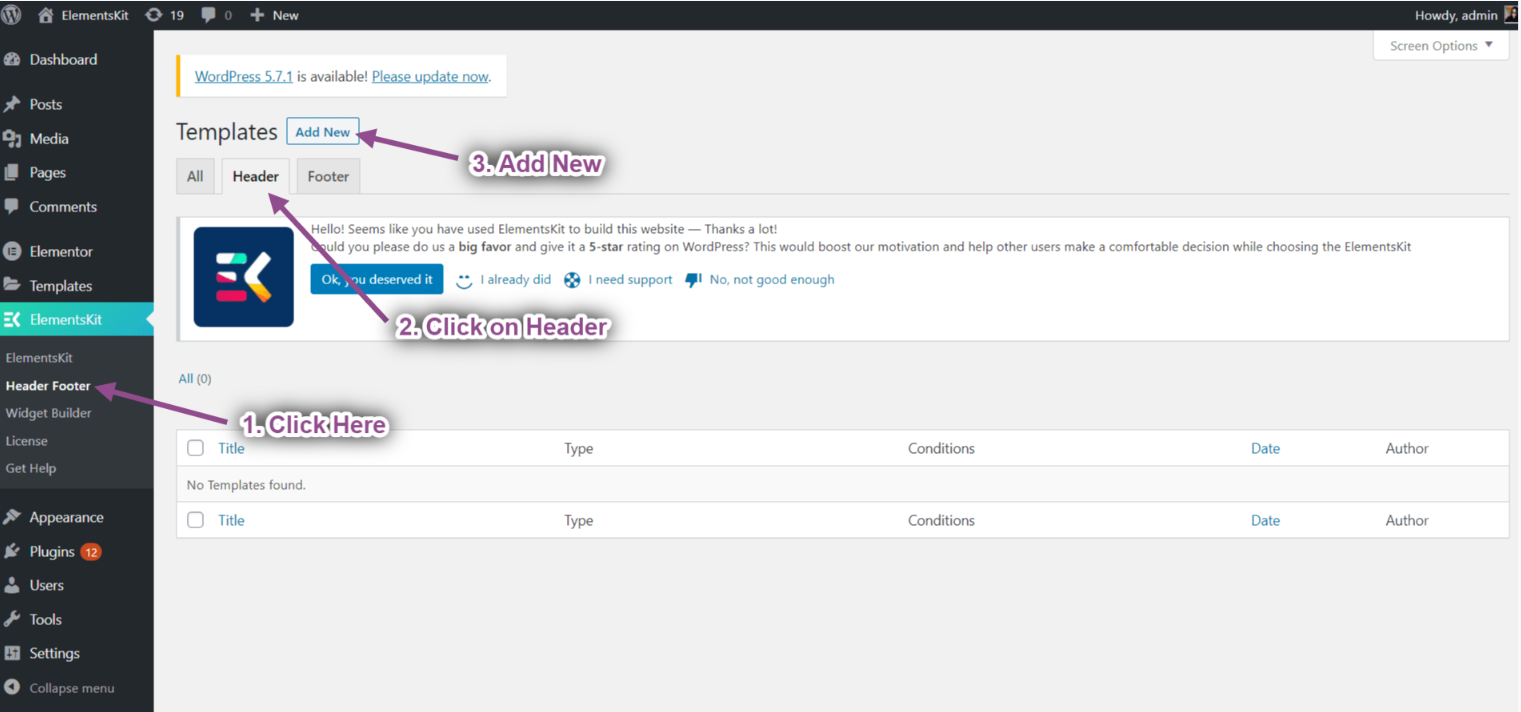
Then go back to the WP dashboard and follow ElementsKit > Header Footer. On the next page, click the Add New button, and a new screen will popup. Here, type a header title and set the following things:
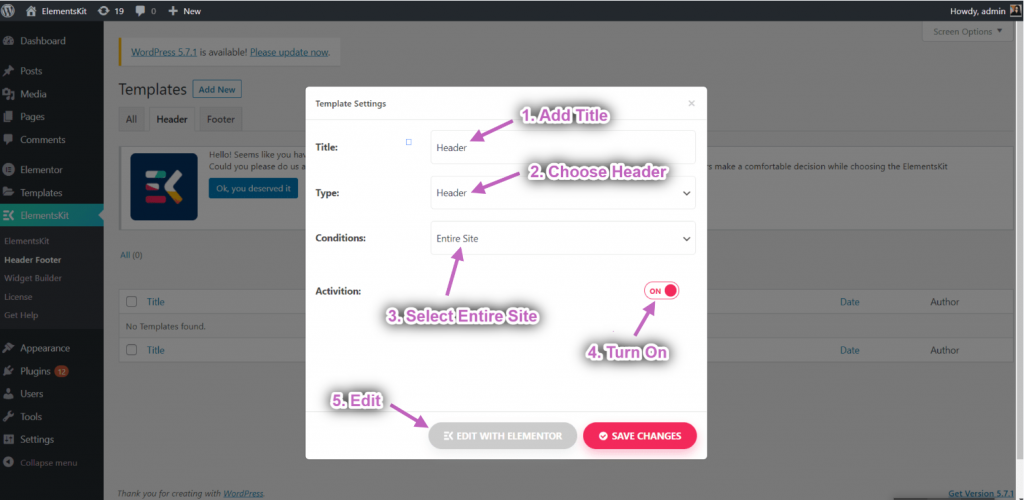
- Type: Select the Header option.
- Condition: From here, you can define on which pages you want to show this header. For our tutorial, we’re selecting Entire Site.
- Next, toggle the Activation button.
Lastly, click the EDIT WITH ELEMENTOR button, and the exact Elementor-like builder interface will open on your screen.
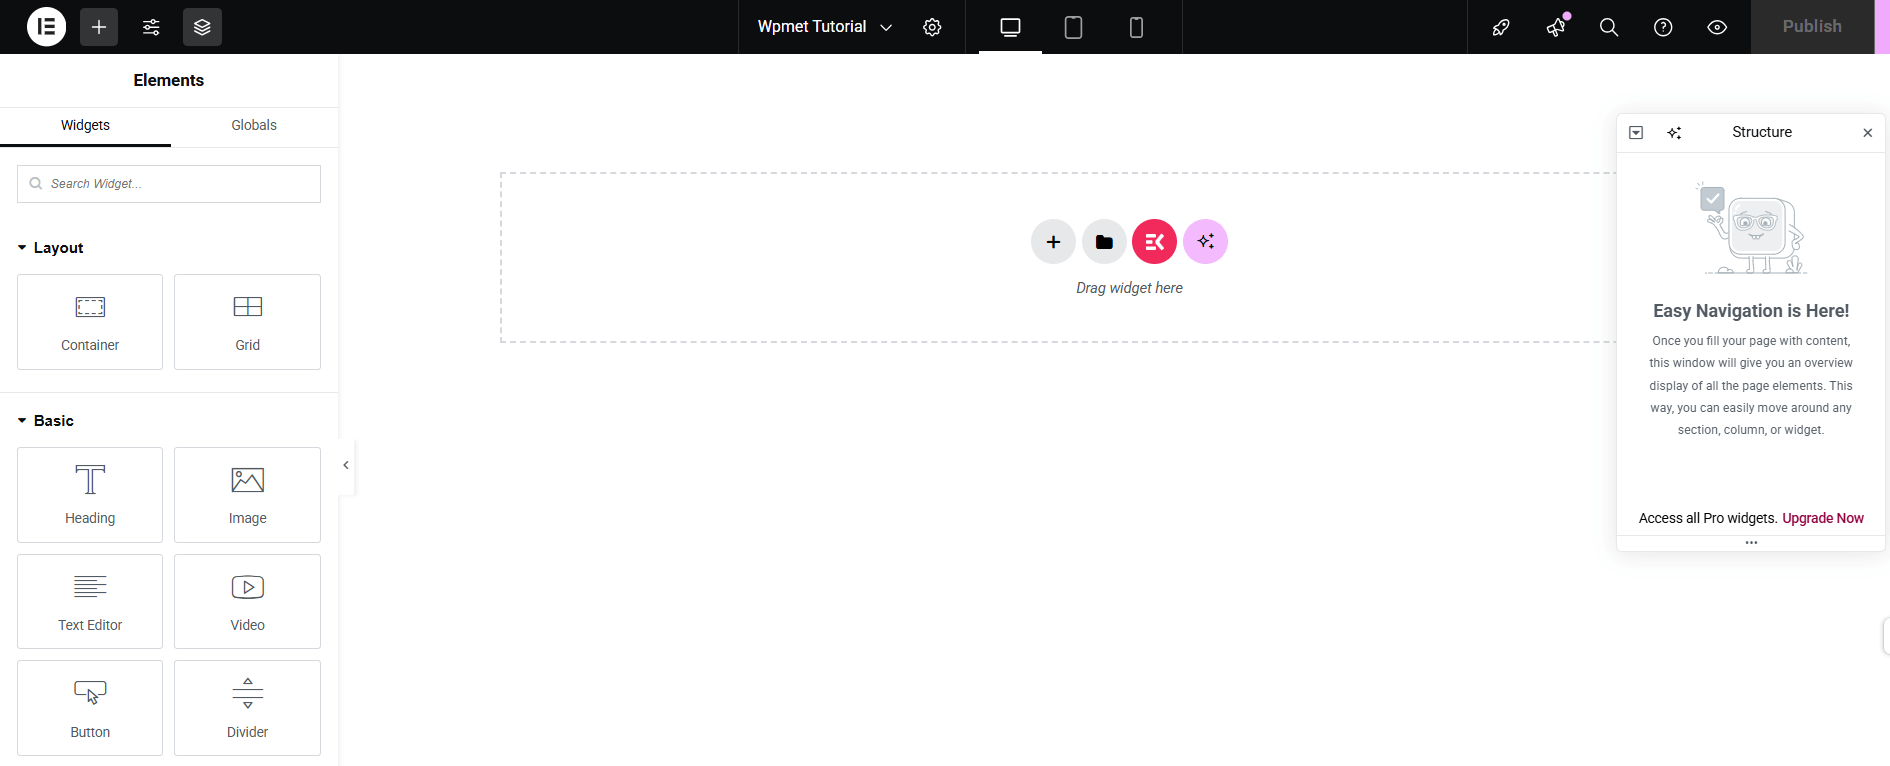
Step 2: Insert Widgets in the Header Area
Within the ElementsKit Header Builder interface, you can create your WordPress header using any kind of widget. Just configure your aspired layout types. It could be one row, two or more columns, depending on how many items you want.
Then drag and drop whatever widget(s) you want into that structure. For example:
- An image widget for your logo,
- A Nav Menu widget for site navigation,
- A Search Bar, Button, or Text widget to display special content like offers.

For a better understanding, take an example of an e-commerce website. For an interactive navigation, you can add widgets like logo, nav menu, advanced search, Woo Mini Cart, Wish List, My Account, etc.
Even if you’re using a pre-made header template, you can easily insert widgets with the ElementsKit Header Builder.
Step 3: Customize Header Layout
After adding all the necessary widgets to the WordPress header area, you will focus on the customization. You can individually style the container and also access the Style tab of all the added widgets.
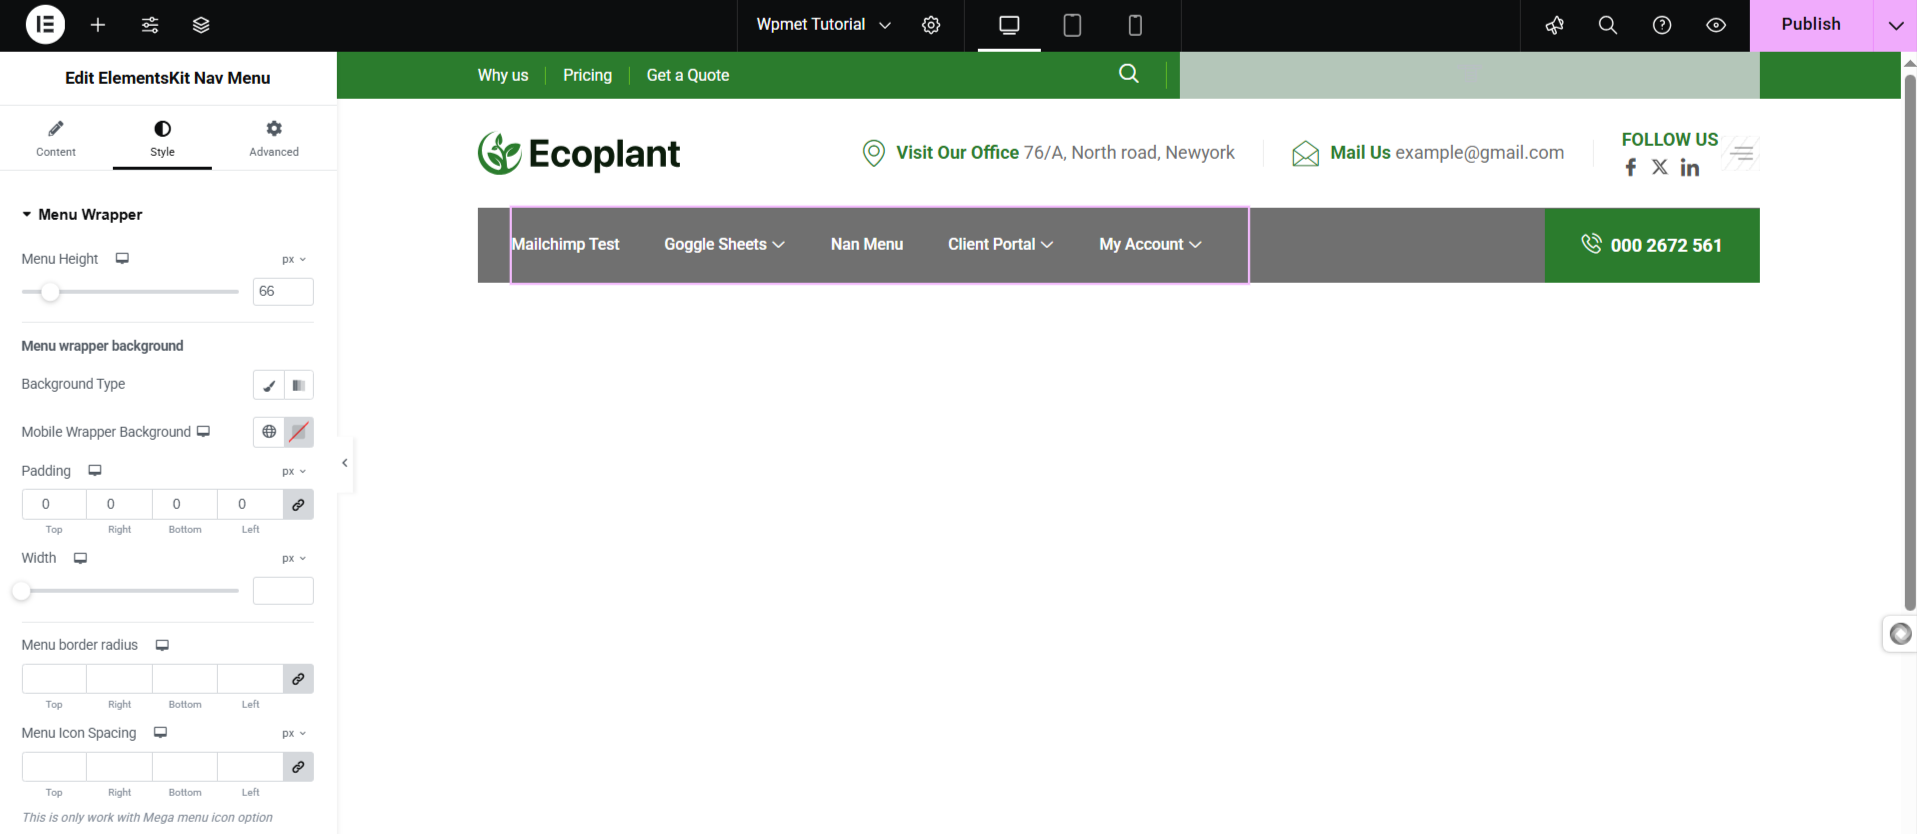
From changing the header background color to cart icon styling, everything is possible through the visual builder interface. So, there will be no hurdles in aligning the widgets with your brand theme.
Step 4: Save and Publish the Header
After adding your desired widgets to the WordPress header and customizing them to your liking, simply save and preview your changes. Once you’re satisfied, click the Publish button to make your new navigation header live across your entire site.
Tips & Best Practices for Adding Widget to Website Header
While it’s great to enhance your header with multiple widgets, adding too many can hurt performance and disrupt a clean, user-friendly design. Let’s discuss some tips and best practices for adding a WordPress widget to the website header.
Make it responsive: Ensure the header layout adjusts well on mobile devices. ElementsKit/Elementor allows previewing mobile views so you can tweak and instantly preview how mobile navigation looks after adding a widget.
Use specific widgets for header control: Although the WordPress Header builder plugin, like ElementsKit, allows adding any type of widget to the header area but it’s recommended to use a widget that can align perfectly into the header column. For example, button search bar, contact info, logo, icon, cart, and CTA are the best widget types to add in the website header area.
Consistent branding: After adding a widget, make sure to customize it to match the overall brand style of your website.
Utilize conditions: Condition settings help you add dynamic header navigation to your WordPress website. With the help of condition settings, you can show different widgets based on specific pages of your website.
Serve a Purpose: Make sure your added widget is serving a purpose for your navigation. Don’t just randomly put a header within the header to avoid a bad user experience.
FAQs
What is the easiest method to insert a widget in WordPress header?
What types of content you can add with widgets in website header?
Wrap Up!
So this was our beginner-friendly tutorial on how to add a widget to the Website header. And using the ElementsKit Header & Footer Builder is a powerful way to add any widget and improve visibility, increase engagement, and enhance usability.
And, the best part is, you can add a widget to the website header without any coding hassle.

Leave a Reply